

Another "first timer" thread. Just want some input.

Thread Starter
Honda-Tech Member
Joined: Jan 2005
Posts: 5,641
Likes: 0
From: Lower Right Hand Corner, PA
Hey guys. Well I just picked up my first ever TIG welder, Miller Diversion 165 with the foot pedal.
These are my first EVER passes with a TIG welder. The only thing I have done is read about what to do, watch videos, blah blah blah. I decided to start on aluminum. I figured learning on the hardest material would make learning on steel much easier. I'm using a 1/8" plate of 6061, tungsten is whatever comes with the Diversion (I believe it Ceriated? can't tell if it's orange or red). Filler is 3/32nd 4043 rod. Amperage is around 115 on the flat passes and around 85 on the edges (can't tell exactly on this machine).


Things I know I need to work on.
-Consistency, although most of my consistency issues are me losing focus on the heat because I'm terrible on moving the filler through my fingers.
-Steadiness... that's kinda obvious lol.
Questions I have?
1) What consistency should the pool be? Like molasses or lighter?
2) How can I tell if my heat is ok? Should the aluminum be shiny when I'm done or is that an indication of not enough heat?
3) Are there any other suggestions that you guys can give me?
Things I've noticed.
1) Seems like I need to start off hard with amperage first and "clean" it, then begin to add filler when the pool becomes clear of the specks of oxidation and back off with amperage.
2) Definitely learned the importance and different of both clean metal to weld AND clean workspace to weld ON.
I'm gonna try to keep this thread updated with my progress as I go through all the steps of learning.
These are my first EVER passes with a TIG welder. The only thing I have done is read about what to do, watch videos, blah blah blah. I decided to start on aluminum. I figured learning on the hardest material would make learning on steel much easier. I'm using a 1/8" plate of 6061, tungsten is whatever comes with the Diversion (I believe it Ceriated? can't tell if it's orange or red). Filler is 3/32nd 4043 rod. Amperage is around 115 on the flat passes and around 85 on the edges (can't tell exactly on this machine).
Things I know I need to work on.
-Consistency, although most of my consistency issues are me losing focus on the heat because I'm terrible on moving the filler through my fingers.
-Steadiness... that's kinda obvious lol.
Questions I have?
1) What consistency should the pool be? Like molasses or lighter?
2) How can I tell if my heat is ok? Should the aluminum be shiny when I'm done or is that an indication of not enough heat?
3) Are there any other suggestions that you guys can give me?
Things I've noticed.
1) Seems like I need to start off hard with amperage first and "clean" it, then begin to add filler when the pool becomes clear of the specks of oxidation and back off with amperage.
2) Definitely learned the importance and different of both clean metal to weld AND clean workspace to weld ON.
I'm gonna try to keep this thread updated with my progress as I go through all the steps of learning.
Honda-Tech Member
Joined: Apr 2005
Posts: 1,895
Likes: 0
From: Lincoln, Ne, USA
1) Hard to say exactly, you'll kinda get a feel for it as you get more experience
2) Shiny for sure, if its grainy and dull it's either to hot or poor gas coverage (among other things)
3) Practice feeding filler through your hand without welding....watching tv, etc
How are you prepping your tungsten? Looks good for first time ever though, I've seen a LOT worse.
2) Shiny for sure, if its grainy and dull it's either to hot or poor gas coverage (among other things)
3) Practice feeding filler through your hand without welding....watching tv, etc
How are you prepping your tungsten? Looks good for first time ever though, I've seen a LOT worse.
Thread Starter
Honda-Tech Member
Joined: Jan 2005
Posts: 5,641
Likes: 0
From: Lower Right Hand Corner, PA
To prep the tungsten I have a dedicated wheel on my bench grinder. For aluminum I grind it into a dull point and then try to round it a bit. That's really about it, should I be doing more?
Thanks for the clarification about what it should look like visually. I'm beginning to understand where I was too cold and too hot.
Thanks for the clarification about what it should look like visually. I'm beginning to understand where I was too cold and too hot.
Honda-Tech Member
Joined: Apr 2005
Posts: 1,895
Likes: 0
From: Lincoln, Ne, USA
On the inverters you should grind the tungsten to a point with a flat spot on the end for essentially everything.
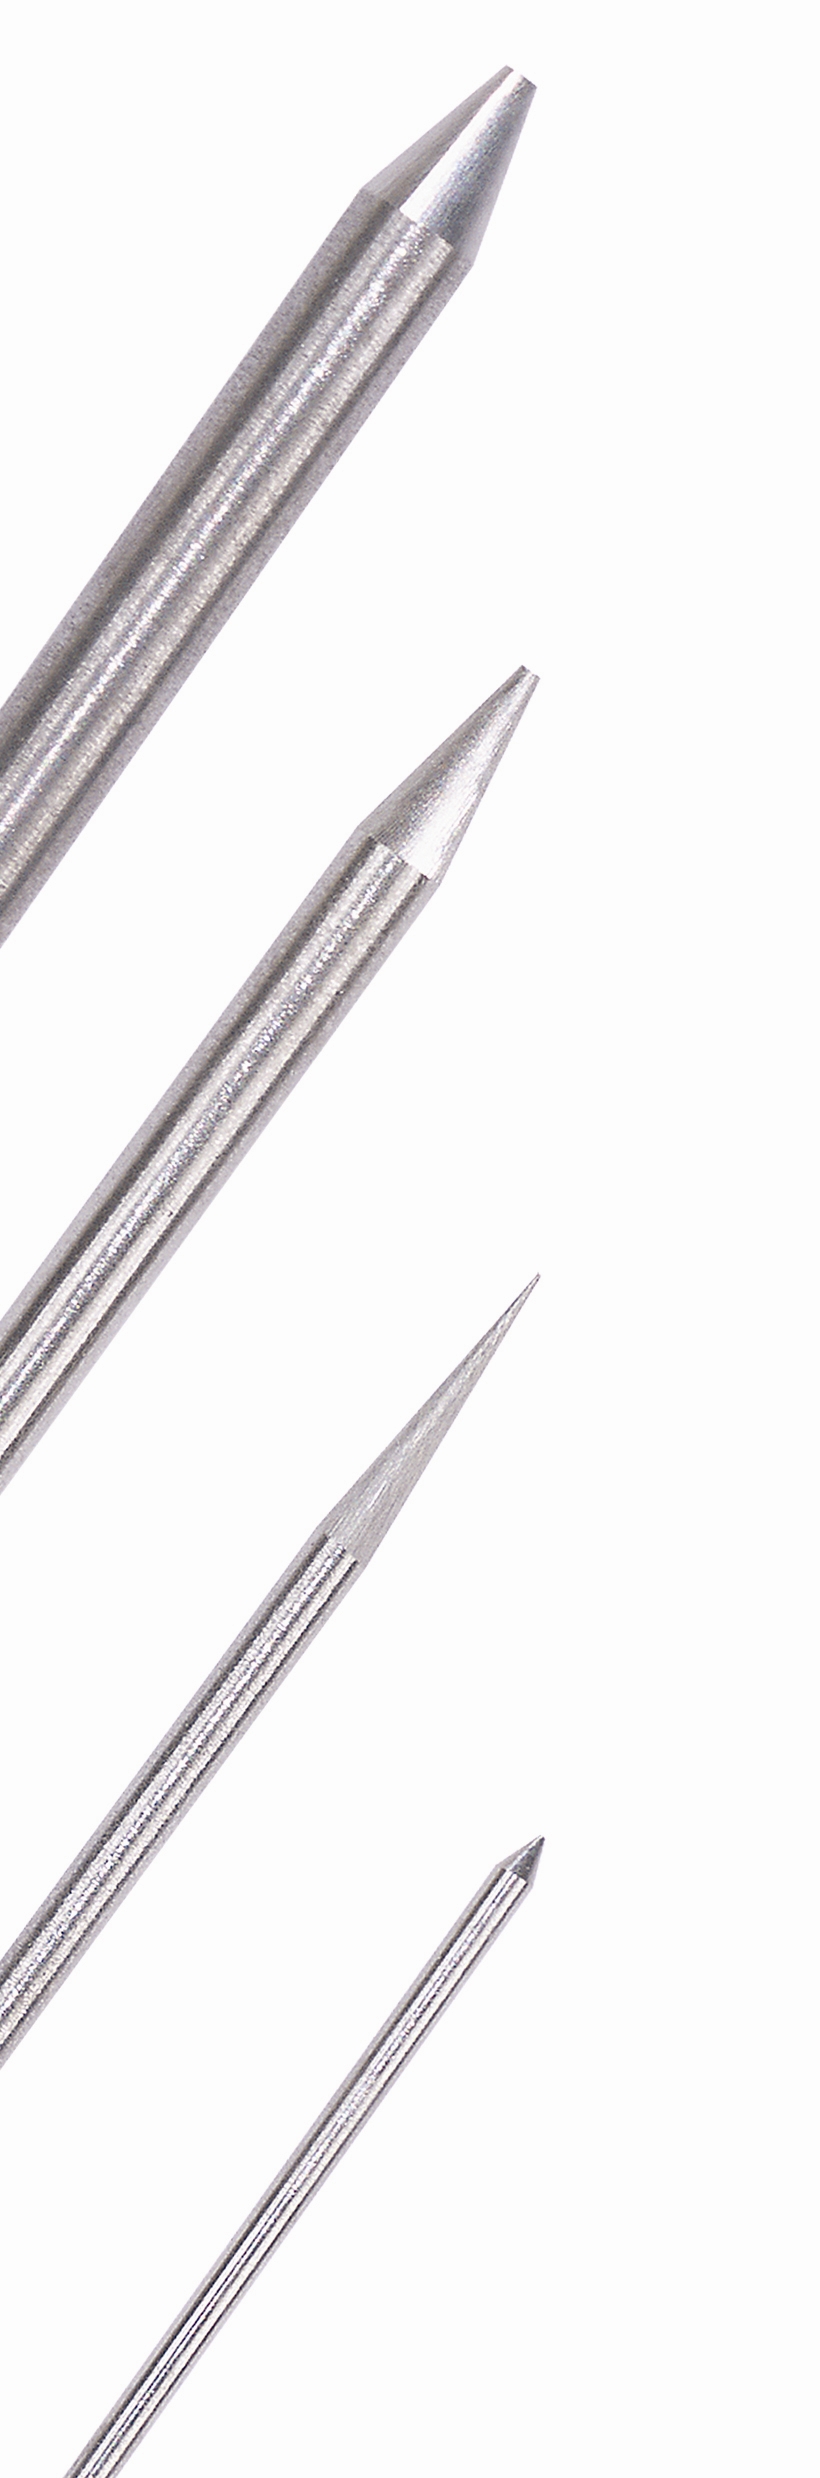
like the second one down
like the second one down

Honda-Tech Member
Joined: Jul 2009
Posts: 169
Likes: 0
From: boiling springs
Definitely looks good just remember picture perfect welds come in time and how much u really take pride in have a uniform appearance its not easy and takes alot of practice, but u are on the right track  just remember when doing two peices u try to keep peices like in this image (ignore the pic comments)
just remember when doing two peices u try to keep peices like in this image (ignore the pic comments)
Trending Topics
Thread Starter
Honda-Tech Member
Joined: Jan 2005
Posts: 5,641
Likes: 0
From: Lower Right Hand Corner, PA
Thanks Derek. I love the 165 so far, I'm really glad I chose it. It really allows me to focus more on learning how to TIG weld, rather than how to set up the machine.
Swapshop, yep I'm aware of how to do those kinds of corners! Honest question though, I have tried practicing a few of them and well... not all that successfully lol. So I do have a few questions reguarding that and butt joints in general.
- What's the best way to tack weld with a TIG? So far I have been completely unsuccessful, without filler just melts the two pieces apart, and will filler I usually end up with a "blob" that I have to run over later to smooth out. Suggestions?
- When doing corners like posted above, turn the amperage down? I have been leaving it about the same (around 110) to do 1/8" corners and I am having a tough time starting, as I seem to be melting the corners off, and it also seems like I have to REALLY watch how much heat I put into it as it tends to seperate the corners rather than weld them together.
One more quick question, will all of the things that I'm learning on aluminum transfer over to steel? Or is that another entity all together?
Honda-Tech Member
Joined: Apr 2005
Posts: 1,895
Likes: 0
From: Lincoln, Ne, USA
Tacking with TIG on aluminum is tricky because you nearly always have to add filler....steel is easier. When doing any aluminum I typically crank the amp **** to max and then just use the pedal. Better pedal control will give you better results on the corners. Make sure you are using properly sized filler too.
Honda-Tech Member
Joined: Jul 2004
Posts: 5,463
Likes: 2
From: I'm everywhere Focker
Steel is much different as things tend to move much slower with steel. Aluminum can go all to hell real quick...lol.
Tacking aluminum is definitely a technique that is developed over time, as it's one of the most difficult parts of TIG IMO. With aluminum tacking you have to get the pool quickly to the right molten state...creeping into it either begins to half melt and turn to crap, or you blow the piece apart. You have to get that feel getting to the molten state quickly, adding filler quickly, then getting out of it. This is something I think that is just difficult to put into words.
I don't know that I'm with K24 above maxing out the pedal. With full amperage available your touch on the pedal has to be much more precise. Only set the pedal to allow the maximum that you need to get started...as an aluminum piece heats up you'll be backing off more and more in order to maintain a proper weld...especially near corners and ends. Also, setting to your max needed allows you to jump into the pedal comfortably and get to that molten state you want quickly, in order to tack nicely.
Goin good so far though it seems. Keep it goin.
Thread Starter
Honda-Tech Member
Joined: Jan 2005
Posts: 5,641
Likes: 0
From: Lower Right Hand Corner, PA
Thanks for all of the input guys, it's much appreciated.
RC - I used your method for tacking today, worked awesome! My problem was exactly that, pussyfootin it. Need some more practice, but I get about 75% of them correct.
So this is my "best" from practicing today.

I tried breaking it in a vice and I couldn't so I guess I did pretty well, but any kind of input you guys can give me is great!
I'm waiting for my welding table to get here so I can stop welding on a little ghetto rig, but if there's any ideas you guys can suggest for things to try I'm all ears for the practice.
PS. I'm sorry about all of the questions, I would take a welding class but I go to school full time as it is so, at least for now, this will all be me learning on my own.
RC - I used your method for tacking today, worked awesome! My problem was exactly that, pussyfootin it.
Need some more practice, but I get about 75% of them correct. So this is my "best" from practicing today.
I tried breaking it in a vice and I couldn't so I guess I did pretty well, but any kind of input you guys can give me is great!
I'm waiting for my welding table to get here so I can stop welding on a little ghetto rig, but if there's any ideas you guys can suggest for things to try I'm all ears for the practice.
PS. I'm sorry about all of the questions, I would take a welding class but I go to school full time as it is so, at least for now, this will all be me learning on my own.

Honda-Tech Member
Joined: Feb 2010
Posts: 62
Likes: 0
I just started as well.
Decided to make my own welding table following this plan though:
http://www.lincolnelectric.com/en-us...le-detail.aspx
I actually just finished it and it just needs some paint. It was really good practice.
Decided to make my own welding table following this plan though:
http://www.lincolnelectric.com/en-us...le-detail.aspx
I actually just finished it and it just needs some paint. It was really good practice.
Honda-Tech Member
Joined: Jan 2011
Posts: 25
Likes: 0
From: DuBcity
Nice job man. Practice makes perfect. Take your time with fitment and make sure you get your gapping just right! Weld toward your tacks to keep your pieces from separating!

Thread
Thread Starter
Forum
Replies
Last Post