

RSX seats into EJ8 (with pics)

Thread Starter
Junior Member
Joined: Aug 2009
Posts: 131
Likes: 0
From: Alabama
I know this has been covered in a "how-to" but I want to add a couple of observations and ideas for anyone doing this swap. The factory seats in my 2000 civic are about as sporty as a doctor's office chair. I found a pair of these at a local salvage yard for $150.

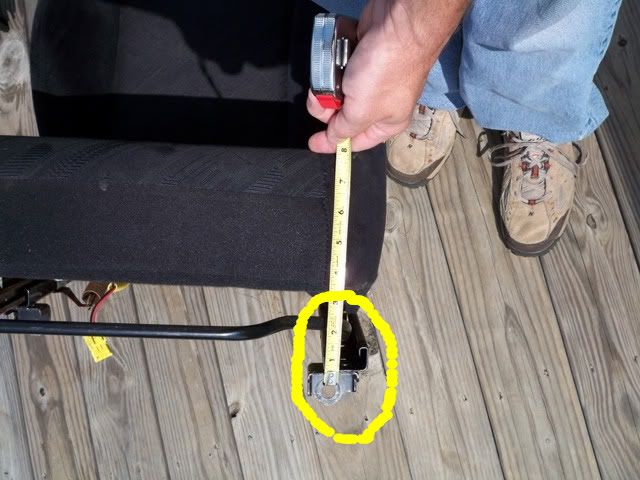
I had been looking online for some decent seats but anything worth the effort of installing carried at least a $500 price tag for the pair. I've read on the forum here that RSX seats sit high but if you measure from the bottom of the seat rail to the top of the seating surface of the civic seat and the rsx seat they are almost identical.


So I went with it. I started by taking the back and the bottom cushion off leaving me a bare seat pan/track to work with. Civic seat rails are 18" apart but the RSX rails are 16" like many aftermarket seats so I drilled the rivets and removed all the mounting brackets leaving me two nice clean sliders to work with.

I'll get more pics as I make progress over the next couple of days. I'll be reusing the mounting brackets, they'll just be rewelded in a different position to fit the civic body.
I had been looking online for some decent seats but anything worth the effort of installing carried at least a $500 price tag for the pair. I've read on the forum here that RSX seats sit high but if you measure from the bottom of the seat rail to the top of the seating surface of the civic seat and the rsx seat they are almost identical.
So I went with it. I started by taking the back and the bottom cushion off leaving me a bare seat pan/track to work with. Civic seat rails are 18" apart but the RSX rails are 16" like many aftermarket seats so I drilled the rivets and removed all the mounting brackets leaving me two nice clean sliders to work with.
I'll get more pics as I make progress over the next couple of days. I'll be reusing the mounting brackets, they'll just be rewelded in a different position to fit the civic body.
Thread Starter
Junior Member
Joined: Aug 2009
Posts: 131
Likes: 0
From: Alabama
Got the brackets welded on and seats ready to go in. My wife is away for a couple of days and she took the camera, when I get it back I'll get pics of the progress and finished product.
One warning for those doing this swap and rewelding the brackets like I have. The front mounting holes in the EK body are offset slightly to the outside of the car so you have to keep this in mind when you are positioning the brackets before welding. If you just evenly space the the tabs to get the 17" bolt hole spread your seats will sit too close to the doors. I'll have pics of this in a couple of days.
One warning for those doing this swap and rewelding the brackets like I have. The front mounting holes in the EK body are offset slightly to the outside of the car so you have to keep this in mind when you are positioning the brackets before welding. If you just evenly space the the tabs to get the 17" bolt hole spread your seats will sit too close to the doors. I'll have pics of this in a couple of days.
Trending Topics

Honda-Tech Member
Joined: Oct 2006
Posts: 992
Likes: 0
When I put my leather RSX seats in my EJ8, all I did was remove the mounting tabs from the RSX seat rails, turn them around, bolt/JBw weld/weld them back into place. Then I bolted them into the mounting holes on the floor board. By turning the mounting tabs around like that it made the mounting holes wider, and they lined up just fine, no need to cut off the whole pan and things like you did. Though I am interested to see how it comes out for you.
Honda-Tech Member
Joined: Feb 2004
Posts: 2,378
Likes: 0
From: West, TN, USA
When I put my leather RSX seats in my EJ8, all I did was remove the mounting tabs from the RSX seat rails, turn them around, bolt/JBw weld/weld them back into place. Then I bolted them into the mounting holes on the floor board. By turning the mounting tabs around like that it made the mounting holes wider, and they lined up just fine, no need to cut off the whole pan and things like you did. Though I am interested to see how it comes out for you.
PICS?

Honda-Tech Member
Joined: Aug 2009
Posts: 32
Likes: 0
From: Port Hueneme, CA
When I put my leather RSX seats in my EJ8, all I did was remove the mounting tabs from the RSX seat rails, turn them around, bolt/JBw weld/weld them back into place. Then I bolted them into the mounting holes on the floor board. By turning the mounting tabs around like that it made the mounting holes wider, and they lined up just fine, no need to cut off the whole pan and things like you did. Though I am interested to see how it comes out for you.
Honda-Tech Member
Joined: Oct 2006
Posts: 992
Likes: 0
 ) and using a dremel and a drill cut off the weld/tab that holds it on. Turn it around so it faces the other direction, then bolt it together with some JB weld between the rail and mounting tab, then have it welded together, then install. There are three mounting tabs you have to do this with, and the fourth will line up just fine. I will get some pictures when I get home tonight and get to my computer.
EDIT - sorry OP, not trying to thread jack. This is just the way I found to do it. Still very interested in seeing how yours came out!
Last edited by eskimo10; Sep 7, 2009 at 06:14 AM. Reason: Don't mean to thread jack.
Honda-Tech Member
Joined: Aug 2009
Posts: 32
Likes: 0
From: Port Hueneme, CA
Interesting... what did you use with your dremel tool to grind or dill off those rivets?
Do you find the seat sits any higher than stock seats from using the RSX brackets?
Do you find the seat sits any higher than stock seats from using the RSX brackets?
Honda-Tech Member
Joined: Oct 2006
Posts: 992
Likes: 0
I used a re-inforced cutting wheel and a steel drill bit (forget which size). Honestly I'm not too sure, I'm only 5'7" so if it does make a difference its not a whole lot to me haha.
Honda-Tech Member
Joined: Aug 2009
Posts: 32
Likes: 0
From: Port Hueneme, CA
I'm the same height, so if it's not noticeable for you it won't be for me either.. good to know!

Thread Starter
Junior Member
Joined: Aug 2009
Posts: 131
Likes: 0
From: Alabama
They are the same height as my stock 00 ex seats. I see what you're saying about turning the brackets around but since I was having to drill rivets and grind welds anyway I took the opportunity to put the brackets exactly where I wanted them. If you use your seatbelt you really need to make sure the brackets are well attached to the seat sliders and the seat is well anchored to the body.
Honda-Tech Member
Joined: Oct 2006
Posts: 992
Likes: 0
Ok here's the promised pics. I apologize it took so long, I've been wicked busy this week with school and work and crap.
As you can tell in the pictures I simply dremeled/drilled out the rivets on the mounting tabs, turned them around bolted them back in and JB weld/welded them together. (Although these pictures were taken before I had them welded.)
Drivers Center (F)
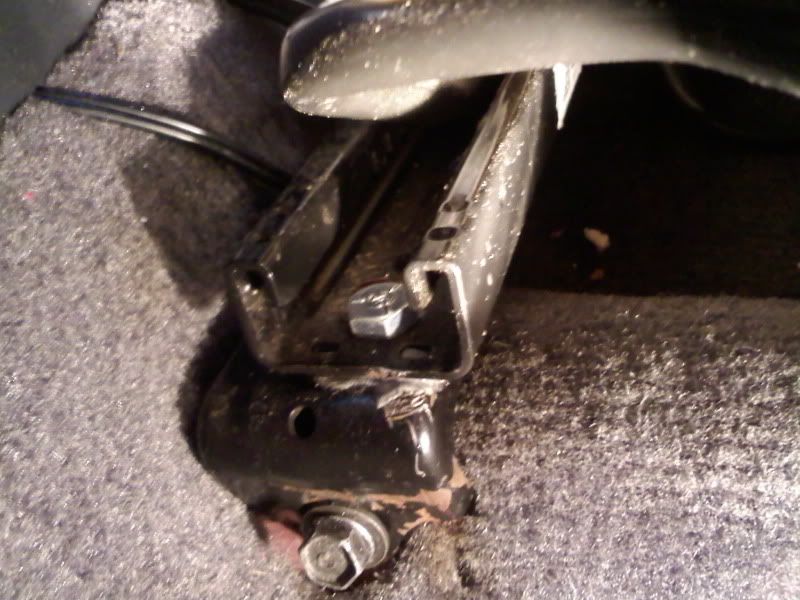
Drivers Outside (F) - On this side I used the second hole to bolt it up to as you will notice so that the rails could reach in the rear because using the first hole made it too long (since I didn't take out the rear outside mounting tab as you will see in the next picture)
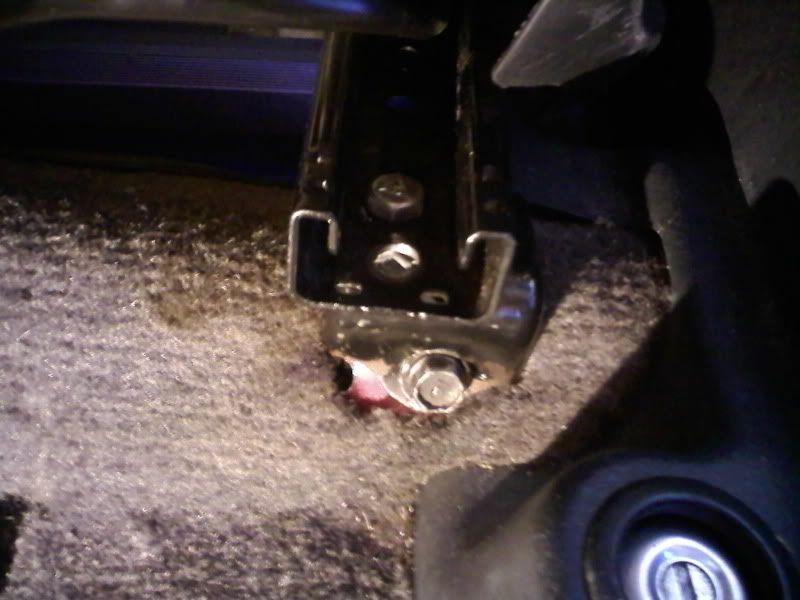
Drivers Outside (R) - as you can see I did not dremel this one as explained in the above picture
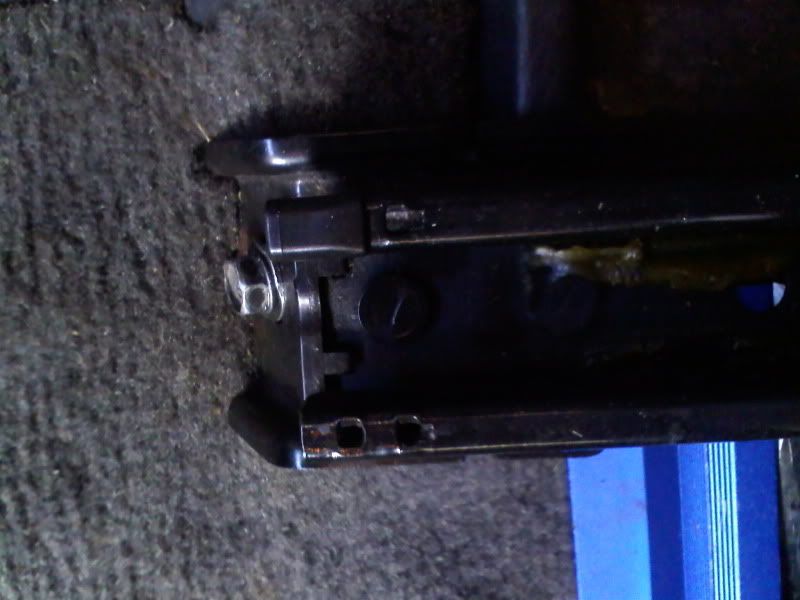
Drivers Center (R) - This one required a new hole to be drilled as I misjudged the front side, but it works and is solid as crap.
Here is a shot across the front two so that you can tell what I meant when I said the RSX mounts were "backwards"
Sorry for the crappy pictures, I was in the process of moving and had to use my cell phone.
Hope this helps, shoot me a PM or post if you got questions.
-PS still super interested in seeing how yours comes out, and I apologize for thread jacking.
As you can tell in the pictures I simply dremeled/drilled out the rivets on the mounting tabs, turned them around bolted them back in and JB weld/welded them together. (Although these pictures were taken before I had them welded.)
Drivers Center (F)
Drivers Outside (F) - On this side I used the second hole to bolt it up to as you will notice so that the rails could reach in the rear because using the first hole made it too long (since I didn't take out the rear outside mounting tab as you will see in the next picture)
Drivers Outside (R) - as you can see I did not dremel this one as explained in the above picture
Drivers Center (R) - This one required a new hole to be drilled as I misjudged the front side, but it works and is solid as crap.
Here is a shot across the front two so that you can tell what I meant when I said the RSX mounts were "backwards"
Sorry for the crappy pictures, I was in the process of moving and had to use my cell phone.
Hope this helps, shoot me a PM or post if you got questions.
-PS still super interested in seeing how yours comes out, and I apologize for thread jacking.
Thread Starter
Junior Member
Joined: Aug 2009
Posts: 131
Likes: 0
From: Alabama
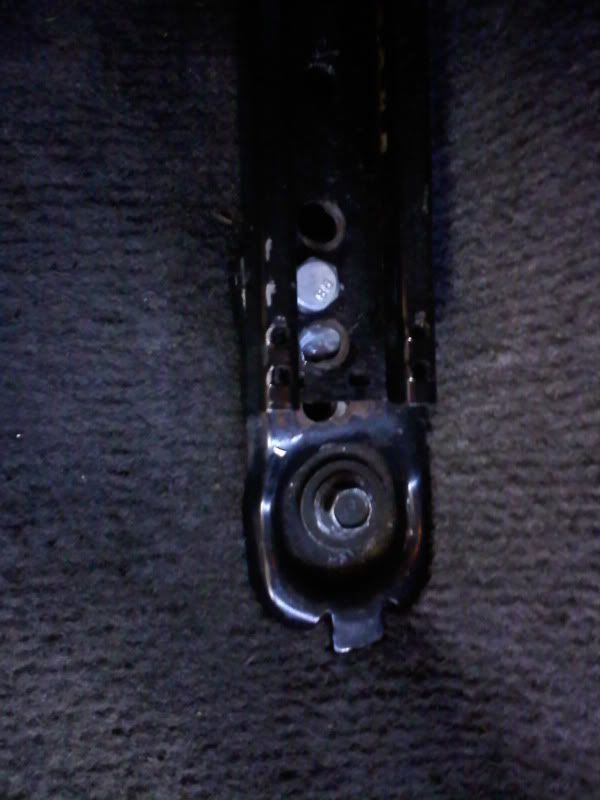
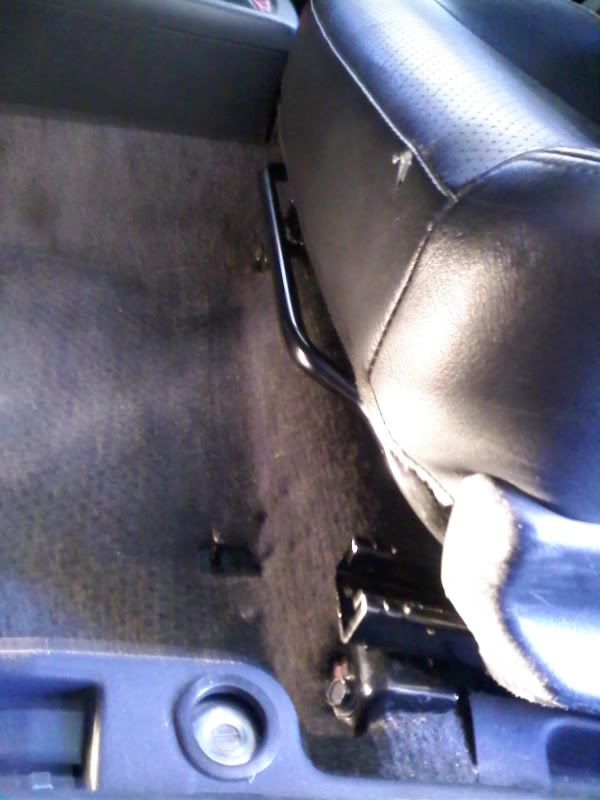
That turned out nice, if I ever have to do it again I may try your method of spinning the brackets around. Here's a few pics of how I did mine:


Here's the finished product:


Since the side airbags can't be utilized I carefully removed them, removed the plastic cover then removed the bag/explosive. I reassembled the cover to the metal housing and reinstalled them into the seat empty. Of course I exploded the bags for fun. I wouldn't recommend anyone doing this though unless you have training and experience working around SRS systems.
Here's the finished product:
Since the side airbags can't be utilized I carefully removed them, removed the plastic cover then removed the bag/explosive. I reassembled the cover to the metal housing and reinstalled them into the seat empty. Of course I exploded the bags for fun. I wouldn't recommend anyone doing this though unless you have training and experience working around SRS systems.
Thread Starter
Junior Member
Joined: Aug 2009
Posts: 131
Likes: 0
From: Alabama
Give them a call, they'll make you what ever you want for a very reasonable price and ship it to you. I had them stitch in the red "H" for me and it turned out pretty nice.