

ETD Traction Bar install and review.

Thread Starter
Honda-Tech Member

Joined: Mar 2004
Posts: 1,035
Likes: 1
From: Canada
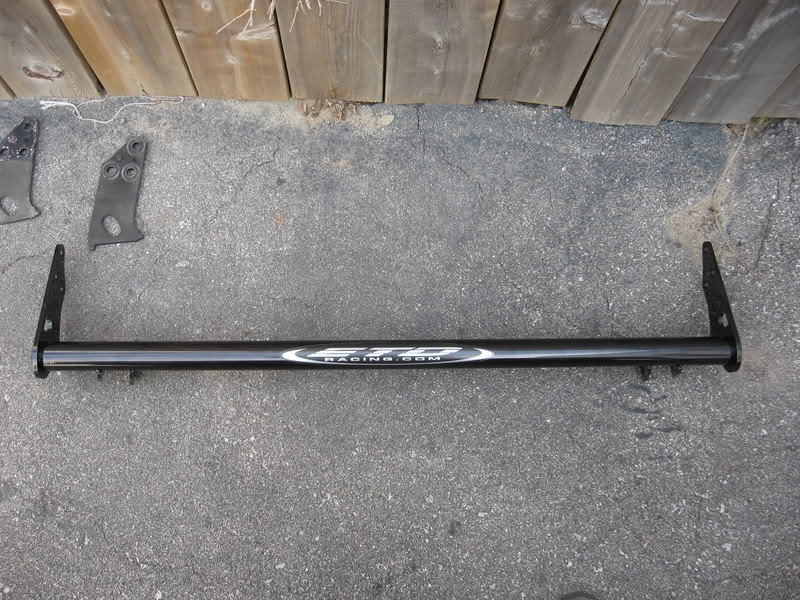
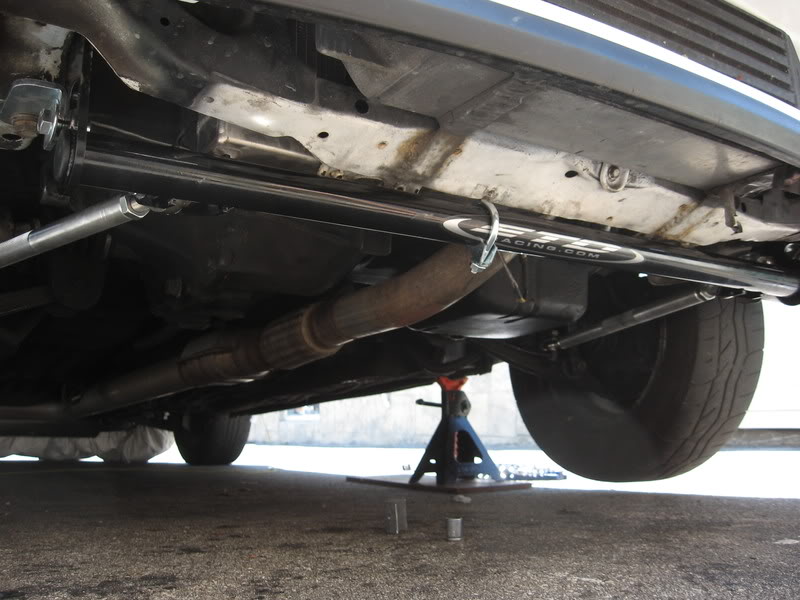
Well I decided to upgrade my traction bar from the ETD 1st gen model to their latest offering. My first impression when I laid eyes upon the new design was how beefy it is compared to their first design. The welds look excellent and the quality of hardware and radius rods are 2nd to none. Heres some pics of the bar.
Installation of the bar was easy so anyone with any common sense could do this install in a couple of hours, its as easy as following the carefully laid out instructions. On to the install.....
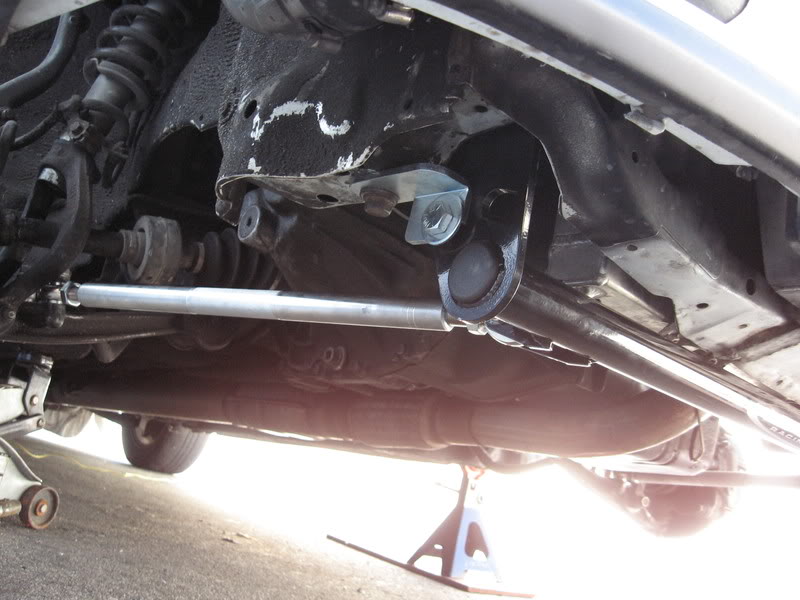
First remove the tow hooks and old traction bar or crossmember depending on which you have.

Next raise the bar up to the old tow hook location and tighten finger tight. You will need some play when lining up the all of the holes so leave slack. Remember to use anti sieze.
Once the bar is in place and the bolts lined up tighten to the specs in the instructions.
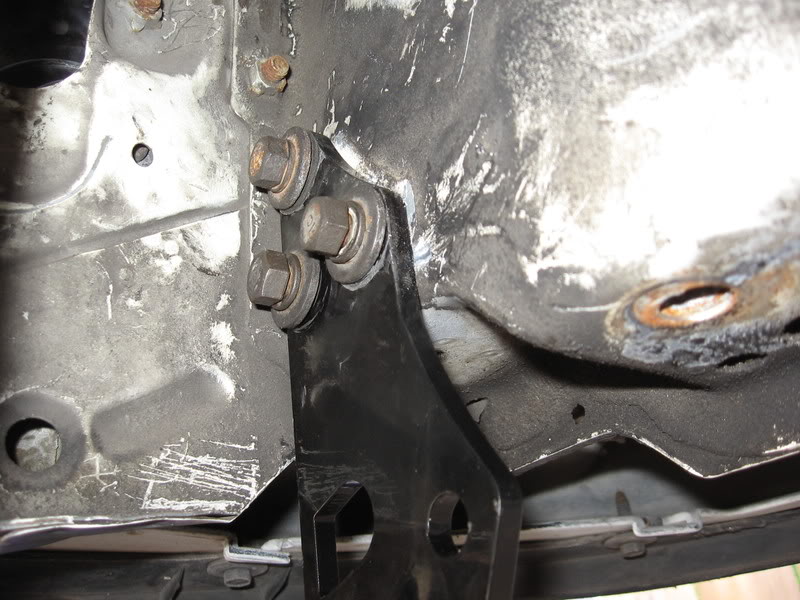
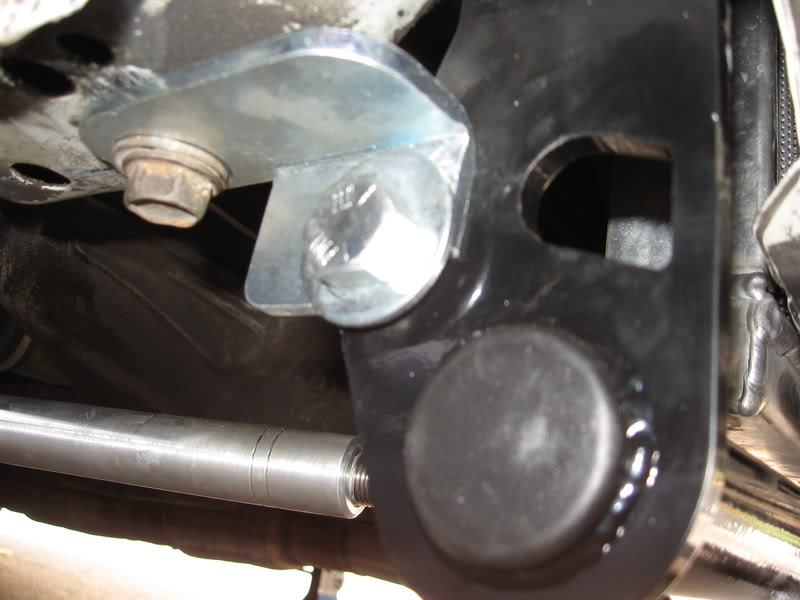
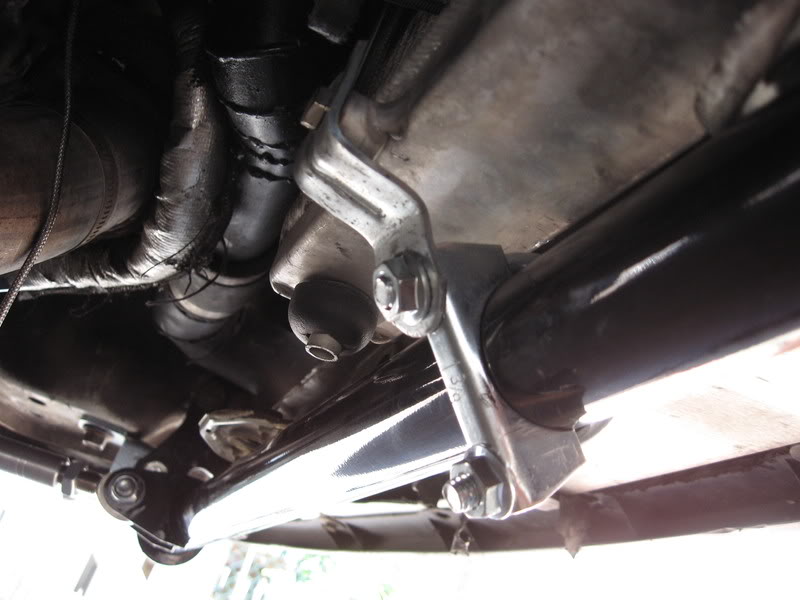
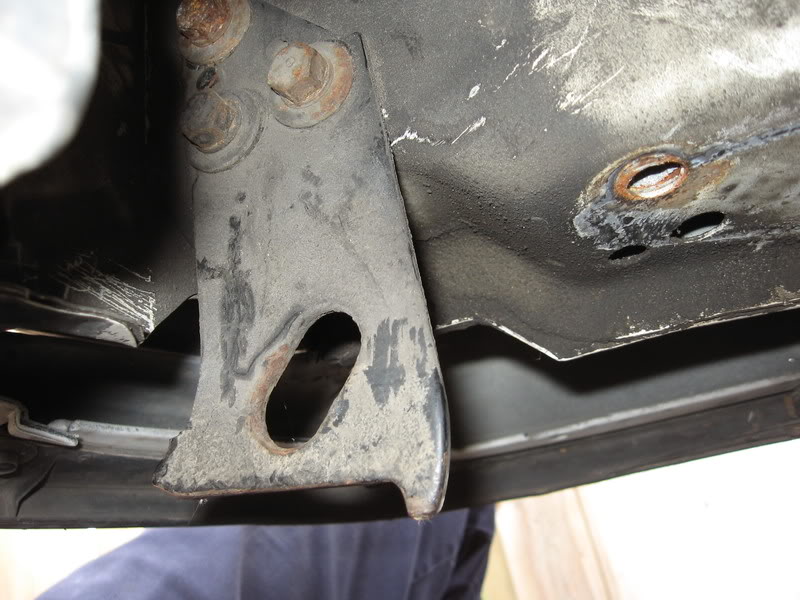
Use the supplied brackets to join the traction bar to the stock crossmember mouning spot. Now your bar is attached using 8 points on the chssis.
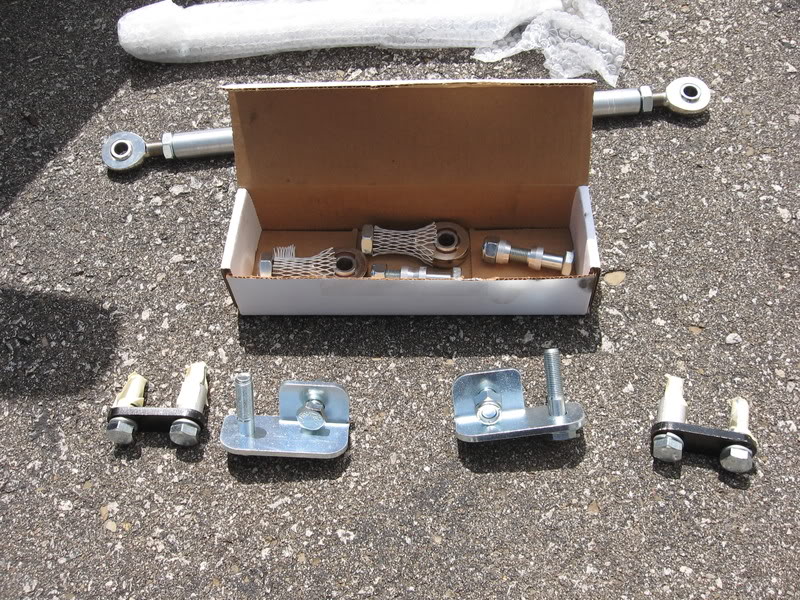
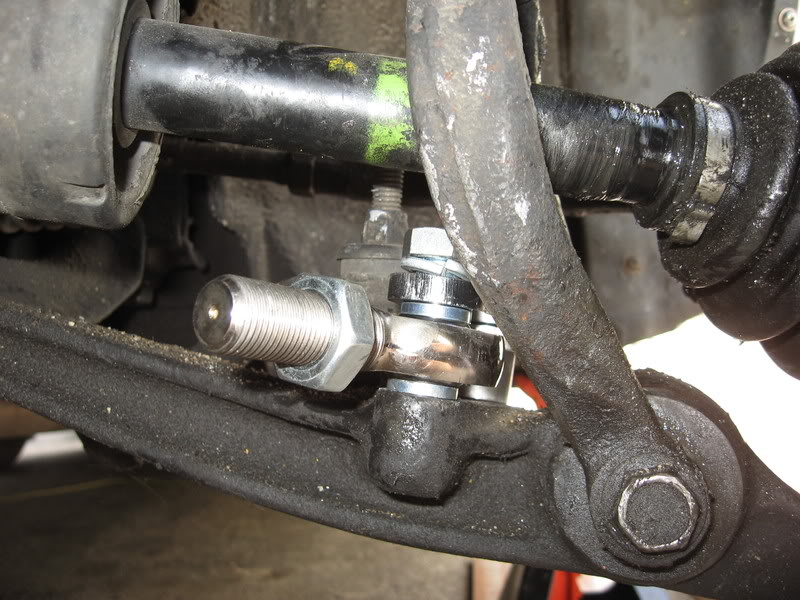
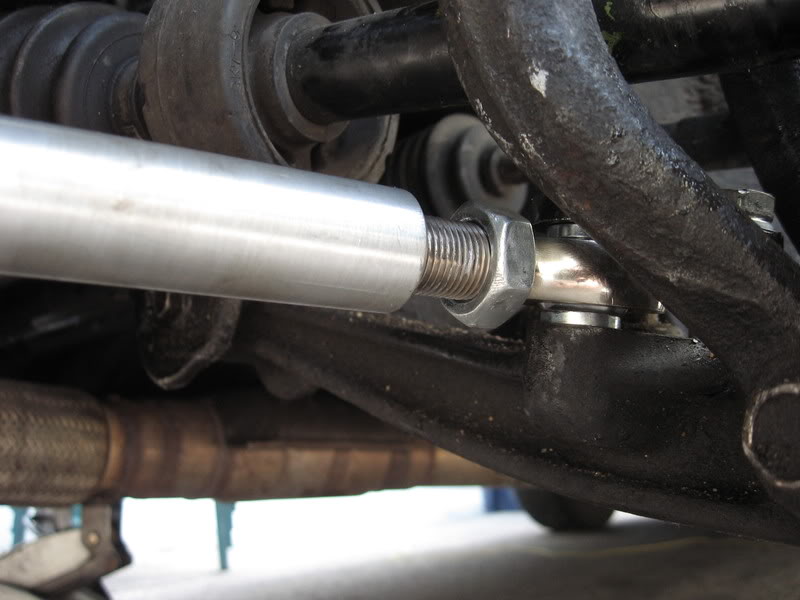
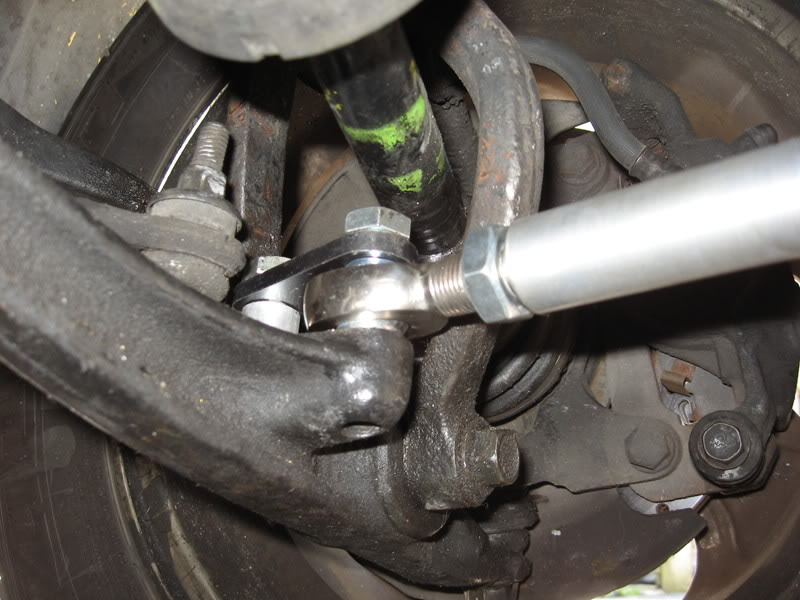
Next lay out the hardware which is used to connect the radius rods to the LCA as per instructions.
Attach to LCA finger tight.
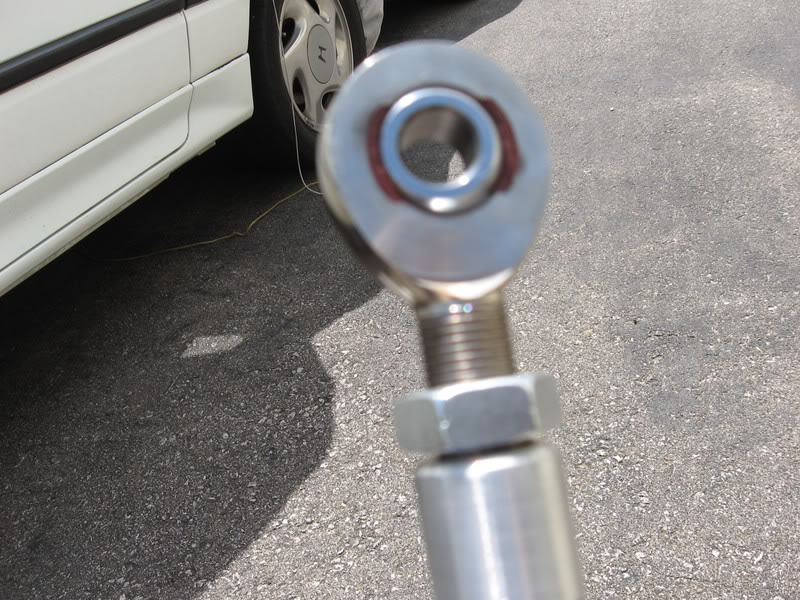
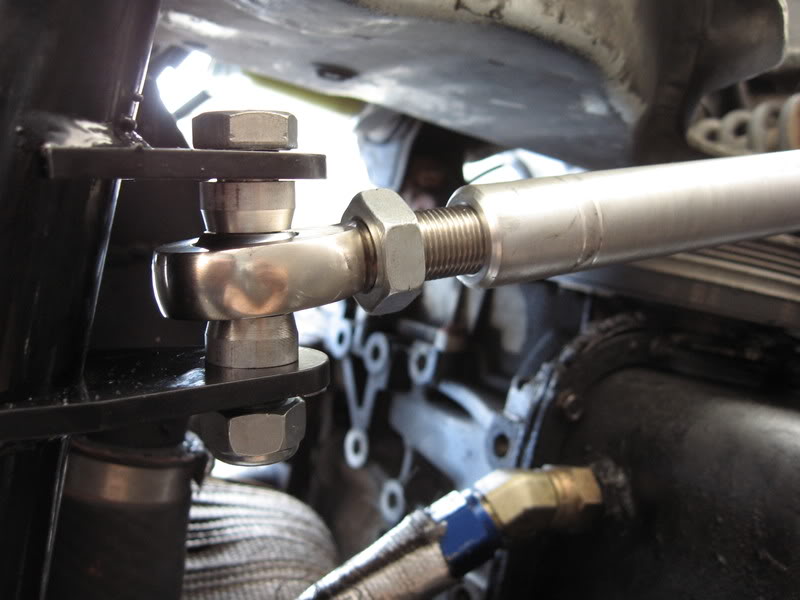
Next attach rod ends to radius rods with jam nuts in place.
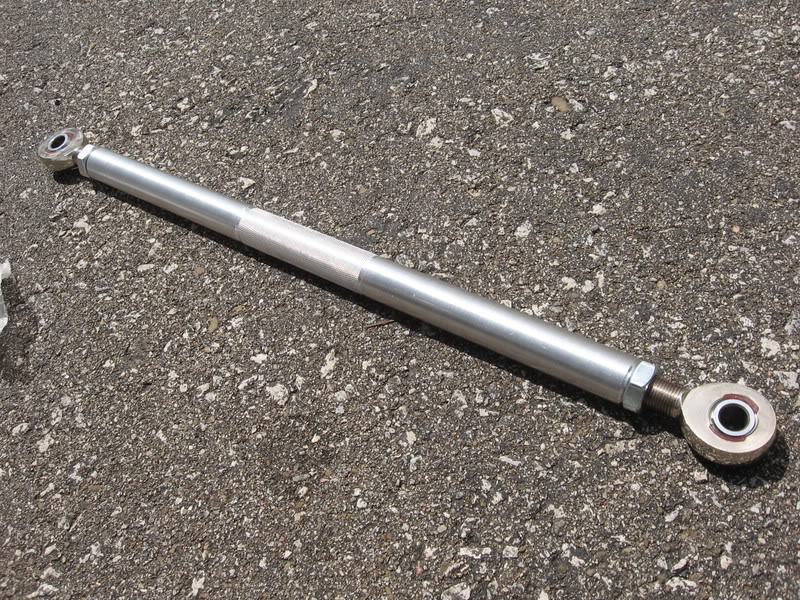
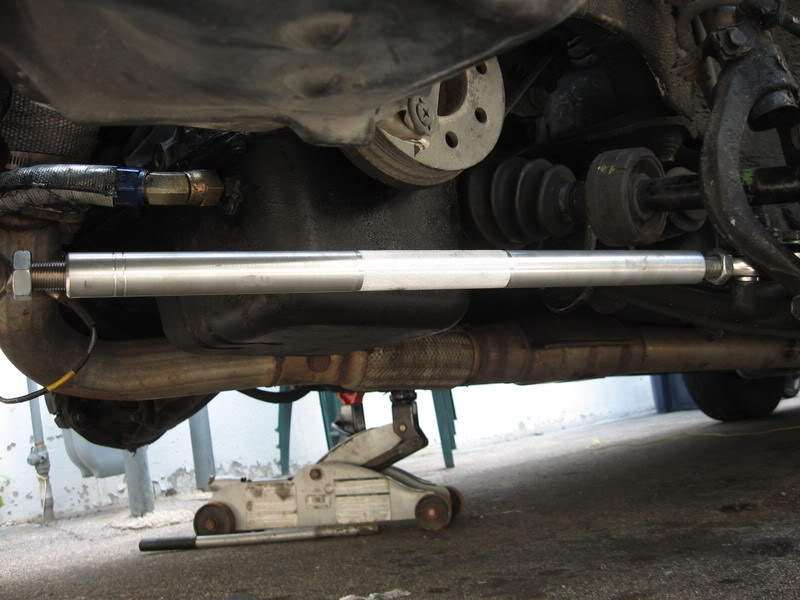
Monster radius rods! About as thick as the drive shaft.
Attach radius rods to the LCA and traction bar, make sure to leave the same amount of thread on each side for adjustability.
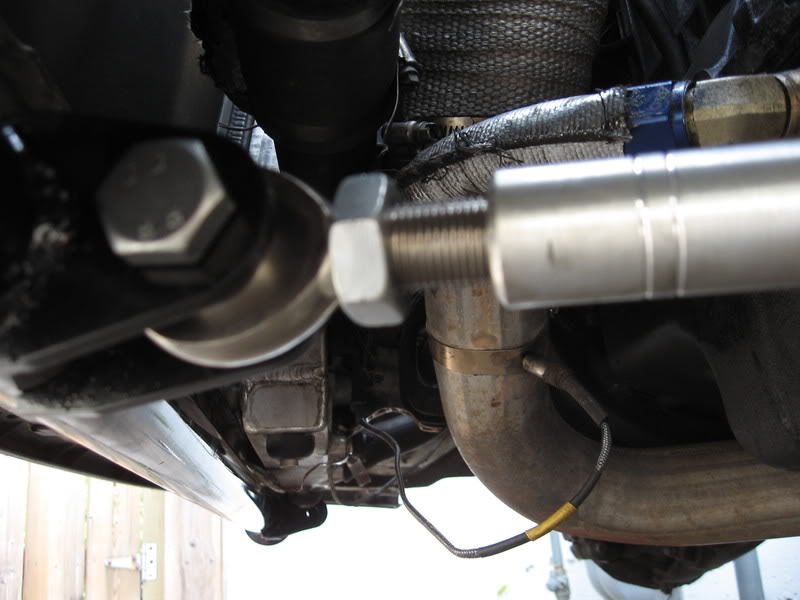
Leave enough room between the jam nut and rod for adjustment.
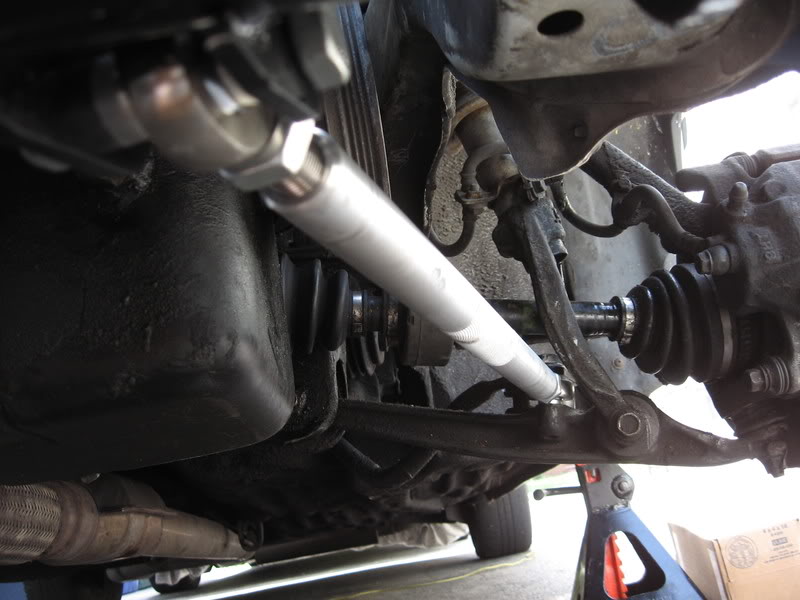
Next I made radiator brackets to keep thins in place, you could buy the brackets avaialble @ ETD by I decided to fab my own.
Lower car off of jack stands and turn radius rods with hand until slight tension is achieved, tighten jam nuts. Its reccomended to have an alignment done after installation as you caster and toe might be a little off. In my case the car tracked straight after installation.
Thats it, all done.

I'd like to give a big shout out to John and Mike @ ETD racing for their legendary customer service and for being down to earth guys who go the extra mile for their customers.
Good job.
Installation of the bar was easy so anyone with any common sense could do this install in a couple of hours, its as easy as following the carefully laid out instructions. On to the install.....
First remove the tow hooks and old traction bar or crossmember depending on which you have.
Next raise the bar up to the old tow hook location and tighten finger tight. You will need some play when lining up the all of the holes so leave slack. Remember to use anti sieze.
Once the bar is in place and the bolts lined up tighten to the specs in the instructions.
Use the supplied brackets to join the traction bar to the stock crossmember mouning spot. Now your bar is attached using 8 points on the chssis.
Next lay out the hardware which is used to connect the radius rods to the LCA as per instructions.
Attach to LCA finger tight.
Next attach rod ends to radius rods with jam nuts in place.
Monster radius rods! About as thick as the drive shaft.
Attach radius rods to the LCA and traction bar, make sure to leave the same amount of thread on each side for adjustability.
Leave enough room between the jam nut and rod for adjustment.
Next I made radiator brackets to keep thins in place, you could buy the brackets avaialble @ ETD by I decided to fab my own.
Lower car off of jack stands and turn radius rods with hand until slight tension is achieved, tighten jam nuts. Its reccomended to have an alignment done after installation as you caster and toe might be a little off. In my case the car tracked straight after installation.
Thats it, all done.
I'd like to give a big shout out to John and Mike @ ETD racing for their legendary customer service and for being down to earth guys who go the extra mile for their customers.
Good job.
i have this same setup on my 89 dx hatch with the b16 swap & the radius arms seem to make a lot of noise on dirt roads and going over big bumps  i checked all my hardware to ensure everything was nice and tight (and no nuts and bolts were loose or missing! LOL!!!), and everything was in order. i was just wondering if you've experienced a similar problem with yours? also, do you know an aftermarket company (besides ETD) that makes those radius arms?
i checked all my hardware to ensure everything was nice and tight (and no nuts and bolts were loose or missing! LOL!!!), and everything was in order. i was just wondering if you've experienced a similar problem with yours? also, do you know an aftermarket company (besides ETD) that makes those radius arms?
Trending Topics
Honda-Tech Member
Joined: Feb 2006
Posts: 1,943
Likes: 4
From: NY
<TABLE WIDTH="90%" CELLSPACING=0 CELLPADDING=0 ALIGN=CENTER><TR><TD>Quote, originally posted by bird00420 »</TD></TR><TR><TD CLASS="quote">i have this same setup on my 89 dx hatch with the b16 swap & the radius arms seem to make a lot of noise on dirt roads and going over big bumps i checked all my hardware to ensure everything was nice and tight (and no nuts and bolts were loose or missing! LOL!!!), and everything was in order. i was just wondering if you've experienced a similar problem with yours? also, do you know an aftermarket company (besides ETD) that makes those radius arms?</TD></TR></TABLE>
Since the bar used HEIM joints they tend to be quit noisey during daily driven use. Even under heaving braking mine would make noise! No noise=crossmember from innovative or stock
i checked all my hardware to ensure everything was nice and tight (and no nuts and bolts were loose or missing! LOL!!!), and everything was in order. i was just wondering if you've experienced a similar problem with yours? also, do you know an aftermarket company (besides ETD) that makes those radius arms?</TD></TR></TABLE>Since the bar used HEIM joints they tend to be quit noisey during daily driven use. Even under heaving braking mine would make noise! No noise=crossmember from innovative or stock
Honda-Tech Member
Joined: Jul 2004
Posts: 3,807
Likes: 0
From: Dottie's house
<TABLE WIDTH="90%" CELLSPACING=0 CELLPADDING=0 ALIGN=CENTER><TR><TD>Quote, originally posted by SETI20 »</TD></TR><TR><TD CLASS="quote">Awesome. I want one.
But what I miss on all the after market crossmembers, is a flat jack-point.</TD></TR></TABLE>
time for a new floor jack
But what I miss on all the after market crossmembers, is a flat jack-point.</TD></TR></TABLE>
time for a new floor jack
Honda-Tech Member
Joined: Jan 2003
Posts: 3,159
Likes: 1
From: GTA Canada
<TABLE WIDTH="90%" CELLSPACING=0 CELLPADDING=0 ALIGN=CENTER><TR><TD>Quote, originally posted by Pee Wee »</TD></TR><TR><TD CLASS="quote">
time for a new floor jack </TD></TR></TABLE>Still makes me want a flat jack point.
time for a new floor jack
</TD></TR></TABLE>Still makes me want a flat jack point.
Honda-Tech Member
Joined: Jun 2005
Posts: 2,326
Likes: 0
From: WA
<TABLE WIDTH="90%" CELLSPACING=0 CELLPADDING=0 ALIGN=CENTER><TR><TD>Quote, originally posted by SETI20 »</TD></TR><TR><TD CLASS="quote">Still makes me want a flat jack point.</TD></TR></TABLE>
Flat jack point or not, the traction bar isn't made to be a lift point.
Flat jack point or not, the traction bar isn't made to be a lift point.
Honda-Tech Member
Joined: Nov 2001
Posts: 8,651
Likes: 3
From: Dallas, Tejas
<TABLE WIDTH="90%" CELLSPACING=0 CELLPADDING=0 ALIGN=CENTER><TR><TD>Quote, originally posted by FatalCrixer »</TD></TR><TR><TD CLASS="quote">how did you get those small silver brackets to line up where the stock cross member was? Mine are off and wont line up  </TD></TR></TABLE>
Has your car ever been in a wreck?
Has your car ever been in a wreck?
from what i've read, there is a known issue with those brackets. there is a slight difference between 88-89 and 90-91 cars
Honda-Tech Member
Joined: Jan 2003
Posts: 3,159
Likes: 1
From: GTA Canada
<TABLE WIDTH="90%" CELLSPACING=0 CELLPADDING=0 ALIGN=CENTER><TR><TD>Quote, originally posted by 90sedan »</TD></TR><TR><TD CLASS="quote">
Flat jack point or not, the traction bar isn't made to be a lift point. </TD></TR></TABLE>I don't see why not. The material is thicker than the original subframe, sufficiently supported. And the original subframe has a jack point as well.
It will need to cope with a hell of a lot more force under acceleration. So if you're worried that your alignment will go out of whack, or you'd damage your parts...the build quality is not what you paid for.
Honda-Tech Member
Joined: Aug 2004
Posts: 569
Likes: 0
From: IA, US
[QUOTE=Mr.Death]
 QUOTE]
Are you not concerned that your radiator mount bracket is the low point, and if it hits, its going to spin and rip a hole in the aluminum radiator where it is mounted to?
I like the innovative mounting approach, but if were mine, i'd redesign with something a little safer.
QUOTE]Are you not concerned that your radiator mount bracket is the low point, and if it hits, its going to spin and rip a hole in the aluminum radiator where it is mounted to?
I like the innovative mounting approach, but if were mine, i'd redesign with something a little safer.
Honda-Tech Member
Joined: Mar 2008
Posts: 272
Likes: 0
Why did you leave out the part about having to modify your "Silver Brackets".
Obviously didnt line up.

and this doesnt seem like the safest way to mount a traction bar.

This just seems more like an advertisement for etd then tech If your going to do a write up dont leave out important steps like cutting mounting brackets.
https://honda-tech.com/zerothread?id=2354559
Obviously didnt line up.
and this doesnt seem like the safest way to mount a traction bar.
This just seems more like an advertisement for etd then tech If your going to do a write up dont leave out important steps like cutting mounting brackets.
https://honda-tech.com/zerothread?id=2354559
that's my big beef with this design...those brackets aren't a good replacement for the crossmember mounting points. the whole thing is really relying on the tow hook holes
Honda-Tech Member
Joined: May 2007
Posts: 297
Likes: 0
From: Bombay
First remove the tow hooks and old traction bar or crossmember depending on which you have.
What size are the bolts that connect to the old traction bar?
Thanks.
What size are the bolts that connect to the old traction bar?
Thanks.
Last edited by ek_bape; Apr 22, 2009 at 07:10 PM.
Honda-Tech Member
Joined: Apr 2004
Posts: 47
Likes: 0
From: Fairfield, CA, United States
Originally Posted by ;35421513
<TABLE WIDTH="90%" CELLSPACING=0 CELLPADDING=0 ALIGN=CENTER><TR><TD>Quote, originally posted by FatalCrixer »</TD></TR><TR><TD CLASS="quote">how did you get those small silver brackets to line up where the stock cross member was? Mine are off and wont line up </TD></TR></TABLE>
Has your car ever been in a wreck?
Has your car ever been in a wreck?
Honda-Tech Member
iTrader: (1)
Joined: Jan 2006
Posts: 2,654
Likes: 0
From: "That one guy with that one car" Kennewick WA
Had one of these and the squeeking was intollerable. And had that fitment issue like the poster above.