

FAQ: Ground Control + Koni install

Thread Starter
Honda-Tech Member
Joined: Jan 2002
Posts: 15,334
Likes: 1
From: Raleigh, NC
The old RS*R springs + stock shocks were finally beat and dead. It was time to
replace them (which will basically be the same as stock shocks/springs) with a
nicer setup.
What do we have here?
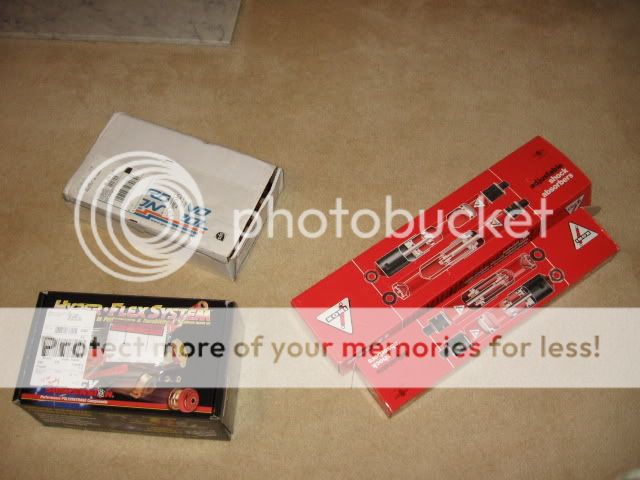
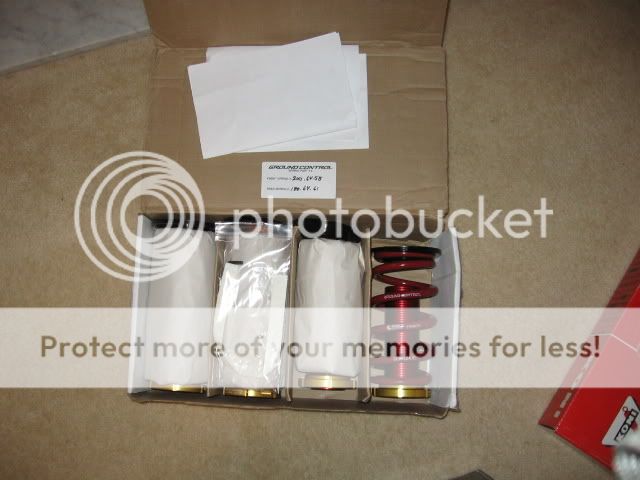
GCs
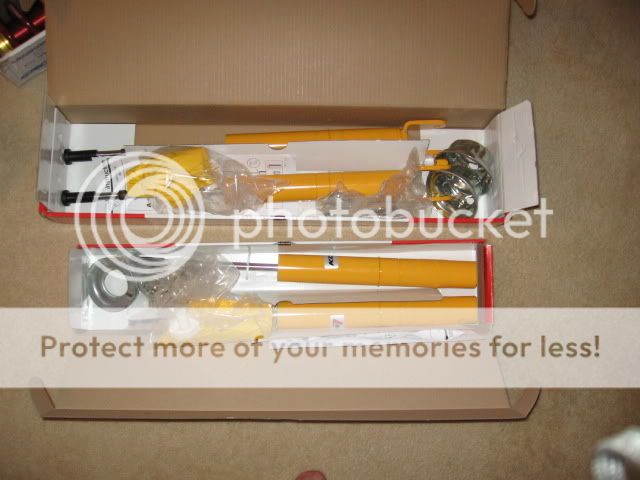
Koni Sports
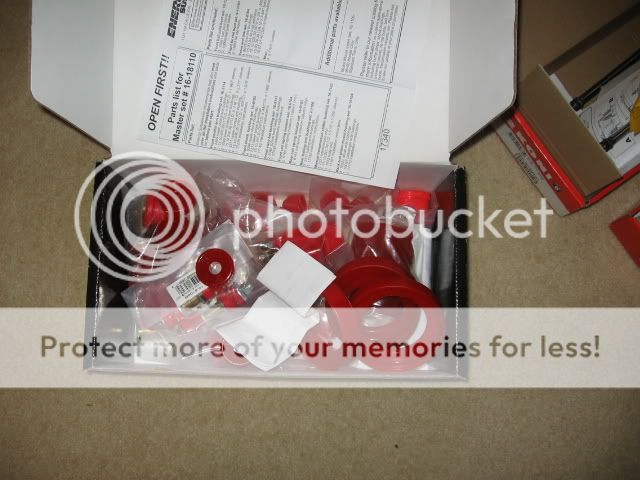
ES bushing kit (which I'm not going to be installing in this how-to)
Tools you'll need
A few jacks
Jackstands
14mm wrench/socket
17mm wrench/socket
dremel tool with a cutoff wheel or a grinder
something to bore out a small hole (drill press/dremel)
penetrating oil
oil to lube all the new bolts going in
various allen wrenches
Here are all the directions that came with the ground controls and konis. I'm
not sure what all of it means or why you need some of it, but I've scanned it and
it's going in the writeup.
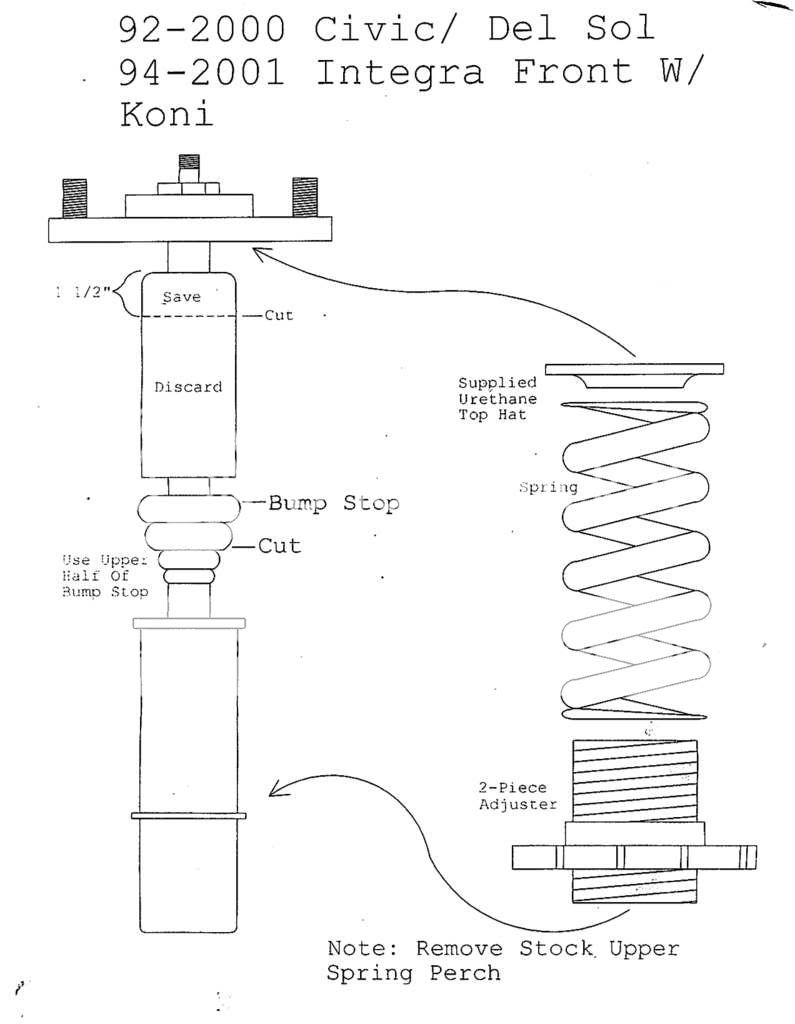
Ground control assembly (this was one of the more useful documents once I figured
out that it meant to cut the hat at 1.5 inches and to cut the bump stop):
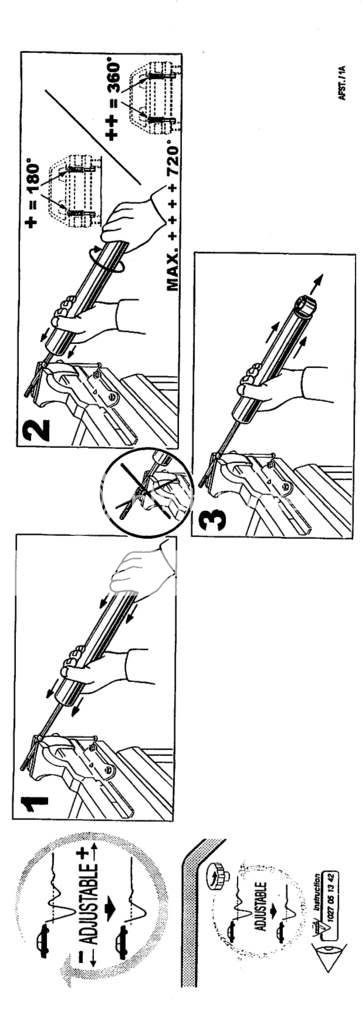
Document showing how to adjust the konis:
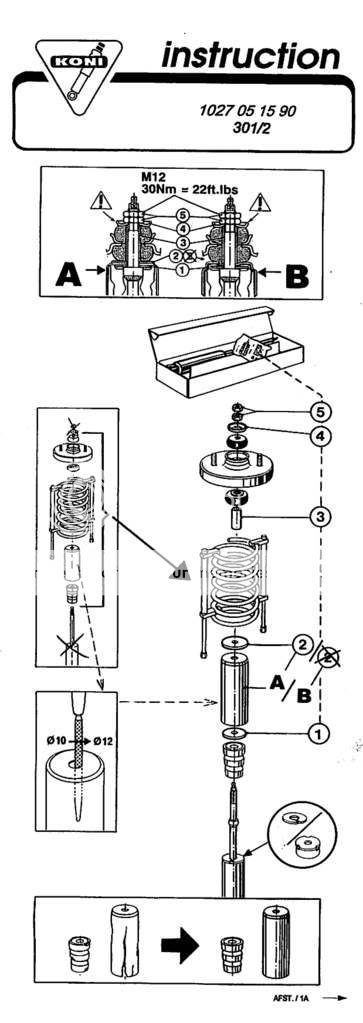
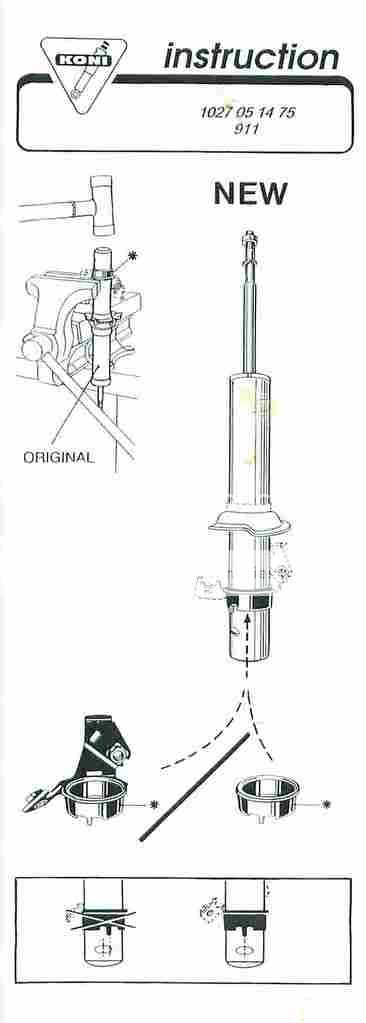
Document showing the Koni aseembly (the other useful document):
This one kind of seemed like common sense:
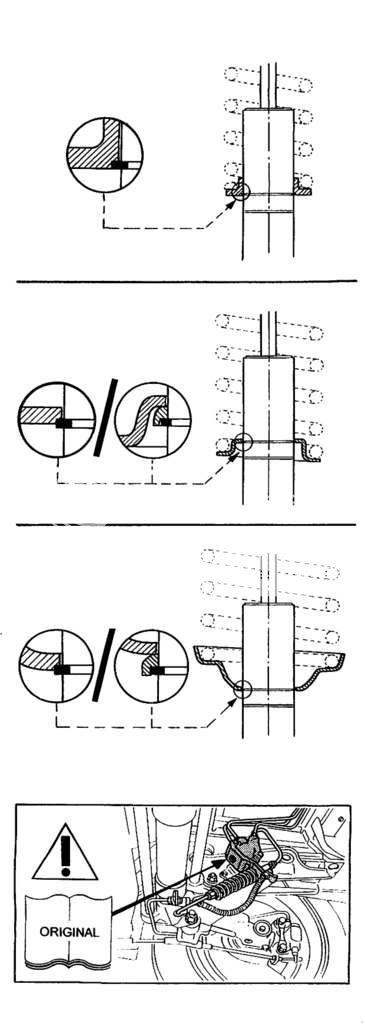
Honestly I'm not even really sure what this one's for. I didn't have a bracket
to knock off of mine:
Anyways, on to the work:
Knock the lugs loose on the rear tires. I'll go over the rears first. Once the
cars in the air you've got no resistance to get them removed.
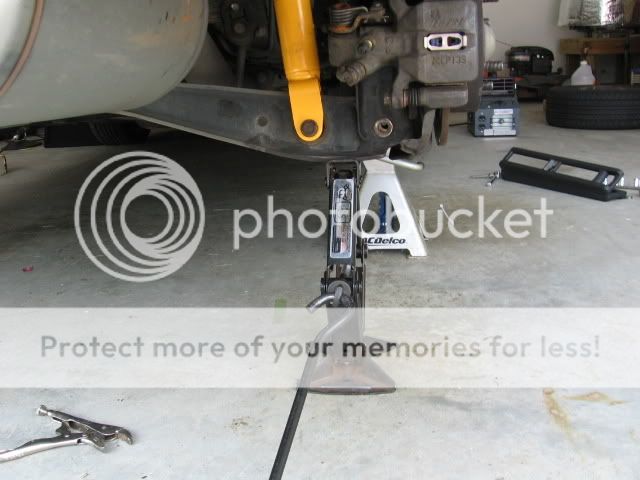
Jack the car up using the center tow hook and then put jack stands under each
side of the car in front of the rear wheels. This means that the car is a lot
less likely to fall and smash your legs/hands/whatever may be under the car. I
like to set the car all the way back down on the jackstands.
*IMPORTANT* I STRONGLY SUGGEST GOING AHEAD AND PUTTING SOME KIND OF PENETRATING
OIL ON EVERY BOLT YOU'RE GOING TO REMOVE. IT WILL SAVE YOU HEADACHES DOWN THE
ROAD *IMPORTANT*
Remove the lugs and the wheels.
Remove the rear deck and speakers. For my hatch this means that I need to fold
the seats down, remove the 3 screws holding the speaker bezels in place, then
remove the 4 screws holding the actual speakers into the plastic. Take them and
set them aside somewhere safe.
You'll see 2 14mm bolts if you look down in the cavity where the speakers used to
sit. Get a bunch of extensions or a breaker bar and knock those loose. Leave
them threaded, just bust them lose for now.
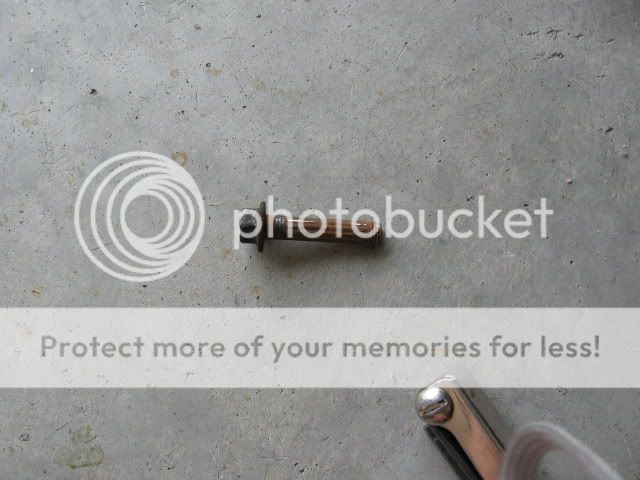
Get down under the car and remove the 14mm bolt out of the bottom of the brake
that holds the LCA on, as well as the 14mm bolt holding the shock to the LCA.
Don't be a gorilla like myself and do this first thing. These LCA bolts are
notorious for breaking and are about 11 dollars a peice from Honda.

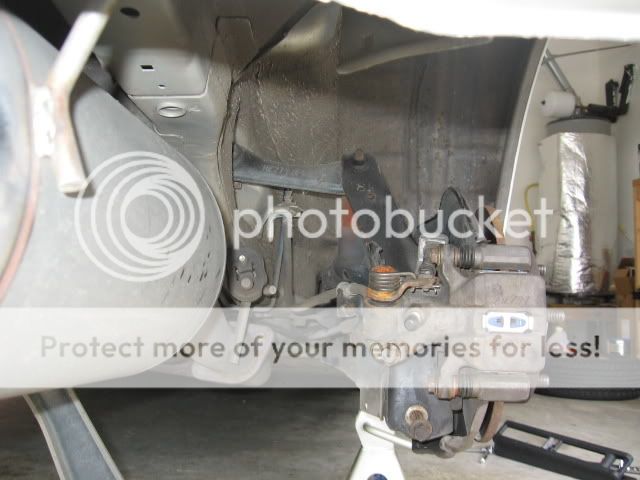
Once these are all out, remove the upper 2 14mm bolts in the speaker housing and
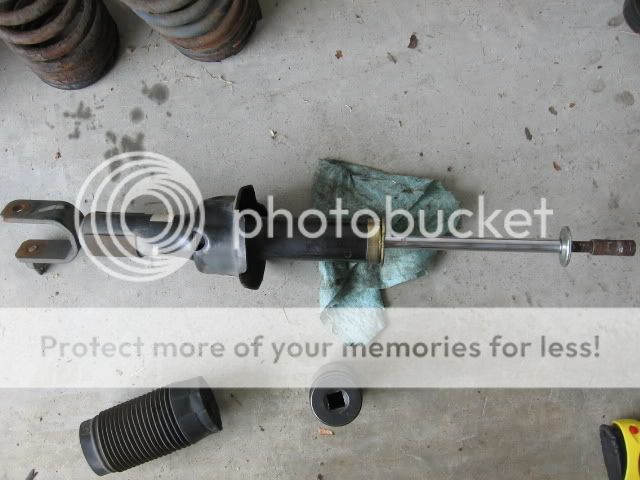
watch the shock fall out. This is what you should be left with:
Now the real fun starts. The first shock I took out was very rusted, but all of
this stuff SHOULD slide right apart once you remove the top bolt on the shock.
Get an allen wrench and a 14mm wrench and remove the top bolt on the shock. You
can use spring compressors, but when I put the shorter springs on it last time I
just shot the top bolt into a trash can. It's not that bad.
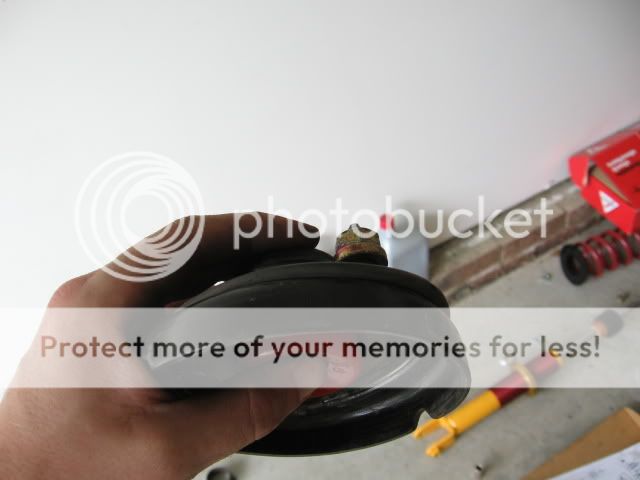
Once you pop the top hat off, everything should come off until you're left with
this:
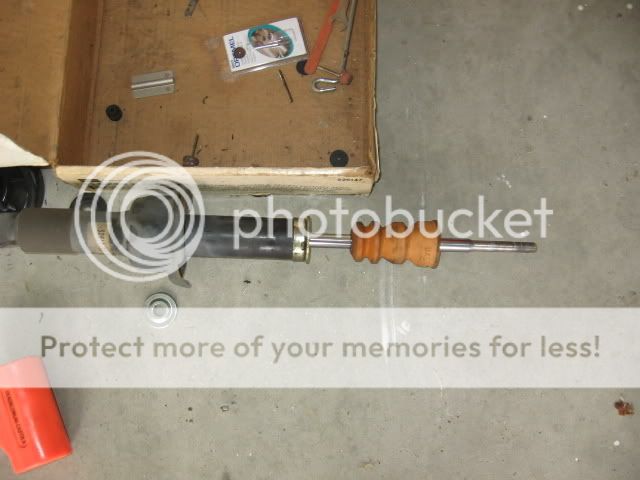
The top metal sleeve in this peice was rusted to hell on the first one and caused
me a bunch of issues getting it removed.
Anyway, disassemble the old shock. There isn't really any big trick to it. Just
keep pulling stuff apart. None of it is threaded, and all of it will come apart.
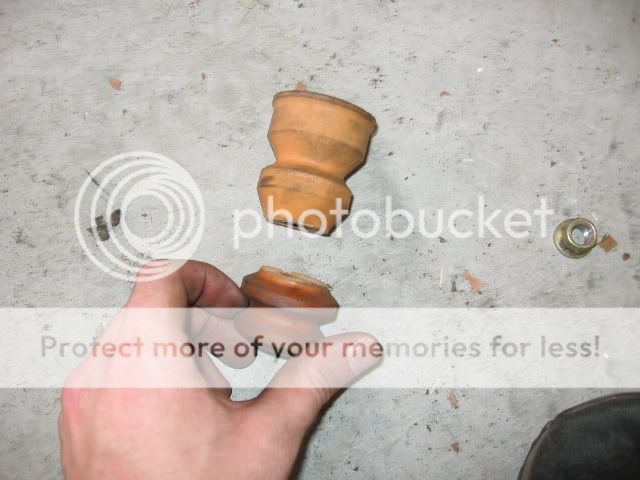
Once it's all apart, you'll need to cut the bump stop, per the GC instructions.
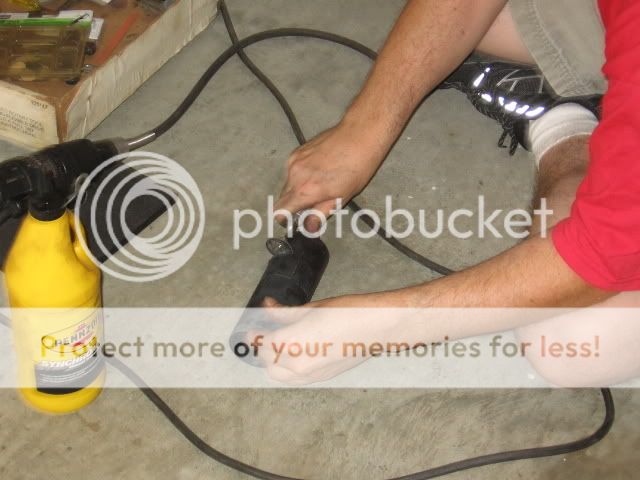
Next you'll need to cut the dust boot covers to 1.5 inches, agian, per the GC
instructions. My dad was over helping out and we did this with a dremel instead
of a grinder (god knows why).
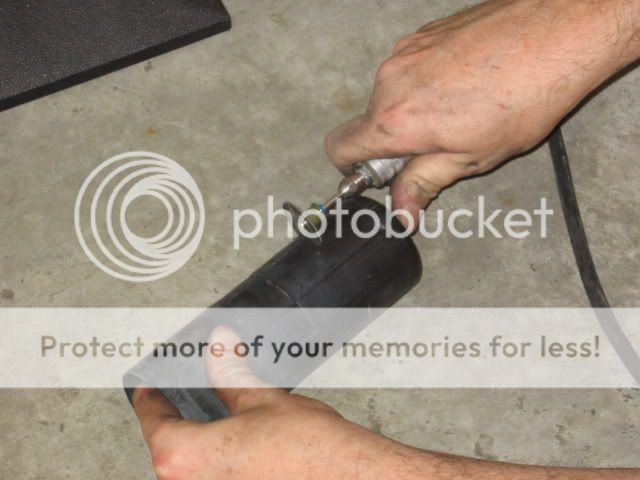
Once you've got it cut down to length, you'll need to bore out the center hole so
that the hat will fit down over the thicker shaft of the koni shock. I went
ahead and rattle canned all the hats for the bump stops so that they wouldn't
rust over time.
This is what you should end up with (and my dad with the short finger in the
shot):

On to shock reassembly:
Grab a Koni shock, a GC and the bushing with the number 8096 on it if you're
planning to replace them (like I was with the ES kit).
(blurry shot, but trust me, it says 8096)
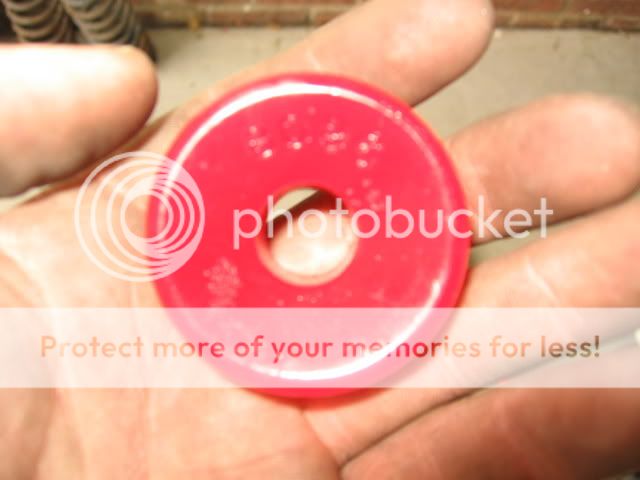
Take the top hats from the old strut (that the top of the spring will be touching once assembled) and pop out the bottom bushing. The red one will sit in it's place like this:
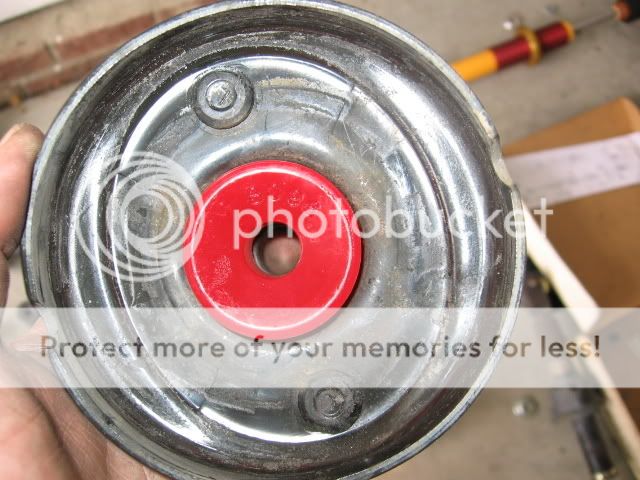
Notice that I also pulled out the old rubber spring isolator from within this cup. They'll be replaced by the ground control rubber spring isolators.
This picture shows the old rubber isolator in there that needs to come out:
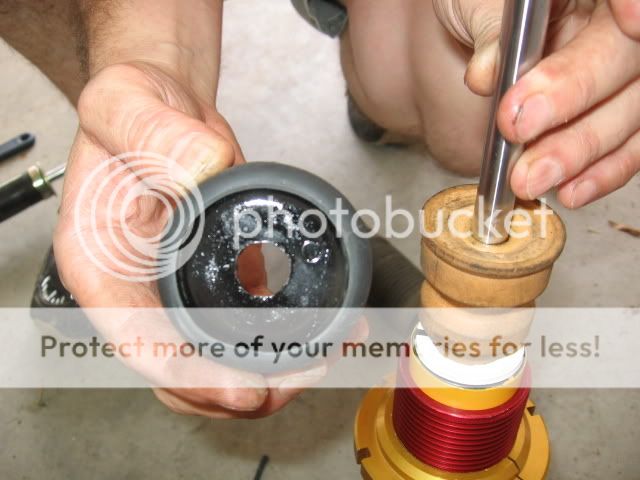
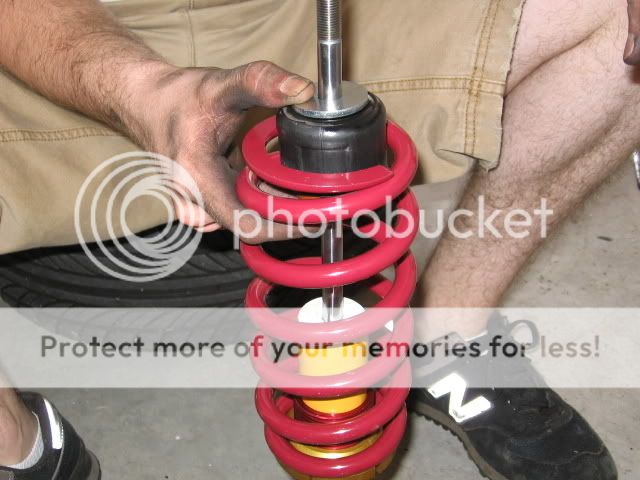
Go ahead and put the coilover sleeve down onto the shock. Keep in mind wherever your ring is on the shock is how high the sleeves will adjust up to. I did the rears on the middle clip. Put the white clip around the base of the shock (like you can see on the left of the picture here) then slide the cut bump stop onto the shock. After that you'll need to put the smaller of the 2 supplied washers on top of the bump stop and slide the bump stop cover that you cut off over the washer.
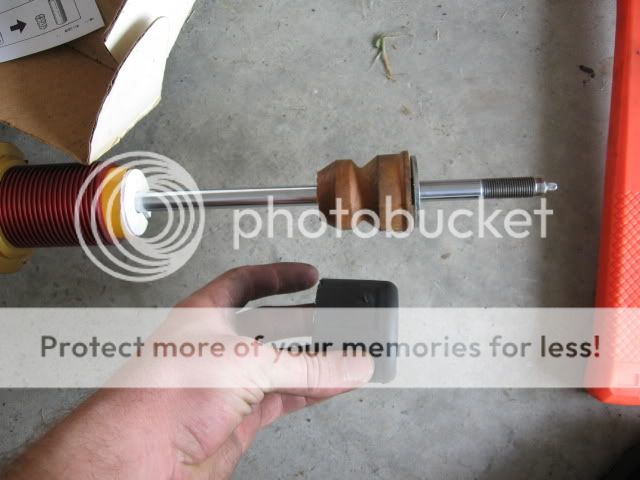
In this picture you can see the clip and what it should look like at this point. The sleeve is slid up to show the clip.
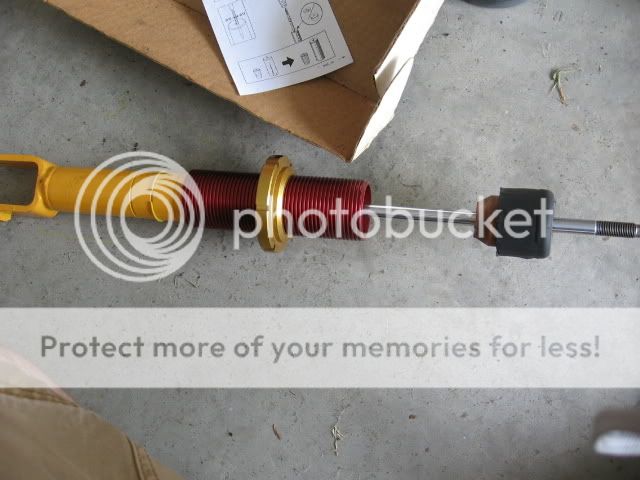
At this point, you need to use the larger of the supplied washers and set it on top of the bump stop cover. Go ahead and put the spring on:
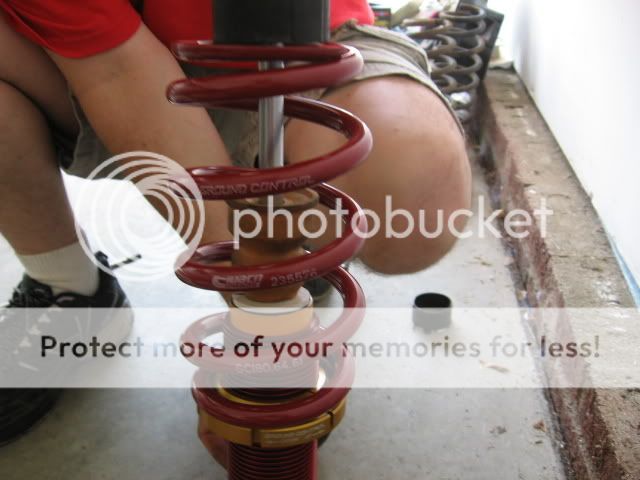
Next slide the top of the shock (with the new red bushing in it) down over the top of the shock and use the cupped washer and two supplied nuts to snug everything down. I adjusted my collars about halfway up on the coilover and ended up lowering them about 3/4 of an inch to get the fronts to the same height as the rears. Unless I did something wrong, the rears could go way higher than the fronts.
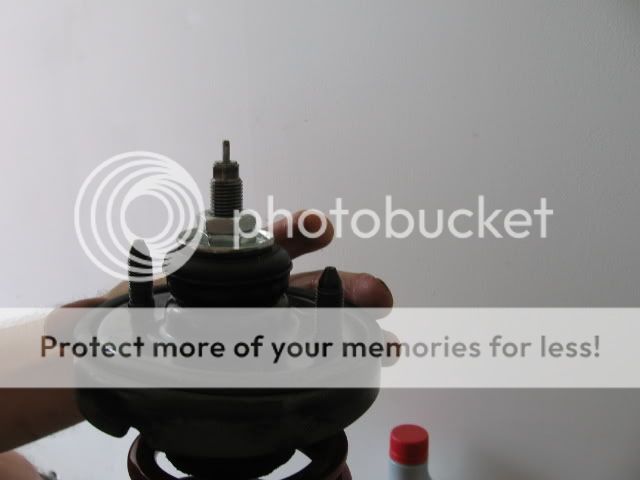
At this point you should have a complete shock to put back in the car. This is what the tops should look like (and agian with my dads short finger):
Jump back up in the hole left by the old shock, and get it seated in the top of the cavity. Put the two 14mm bolts that mount the top hat of the shock to the car in. From there, try to get the lower LCA bolts mated up and aligned. I found it easiest to do this with a jack on the bottom of the LCA.
From there, throw the wheels and lugs back on, lower the car back down, and do the fronts. The fronts are very similar except you need to remove the 17mm bolts (i think they're 17mm) that hold the front shock mount onto the shock and re-attach them to the Konis.
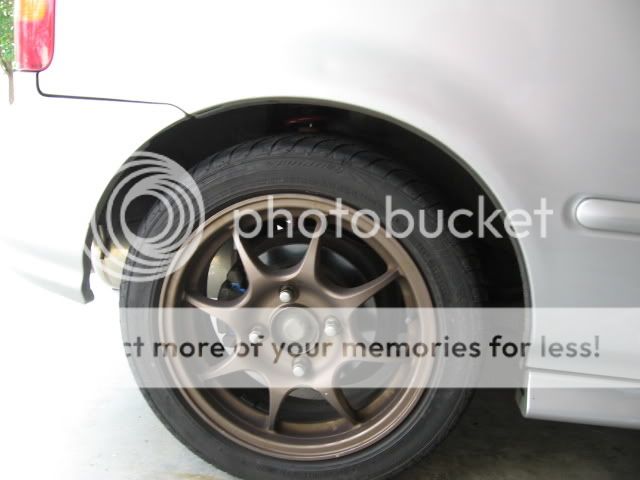
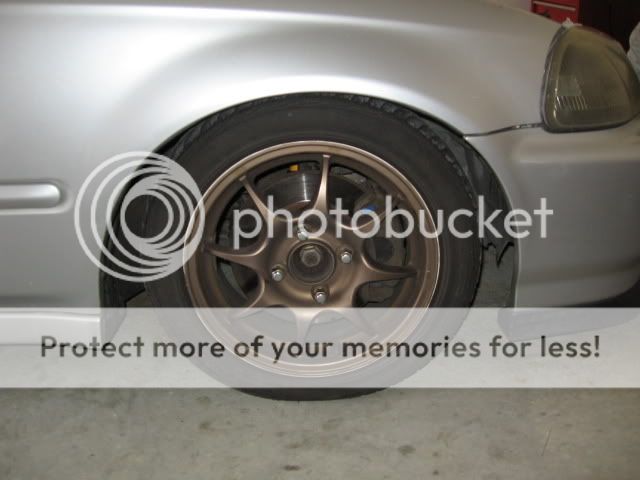
This is the rears at their original height after I put them down the first time (they're about 3/4 inch lower now). It's not slammed, it's not going to be slammed. I drive this thing back and forth to work.
The fronts adjusted half way up (what I thought would be a similar height to the fronts):
SLIZZAMED. These went up this high once I re-adjusted them all the way up:
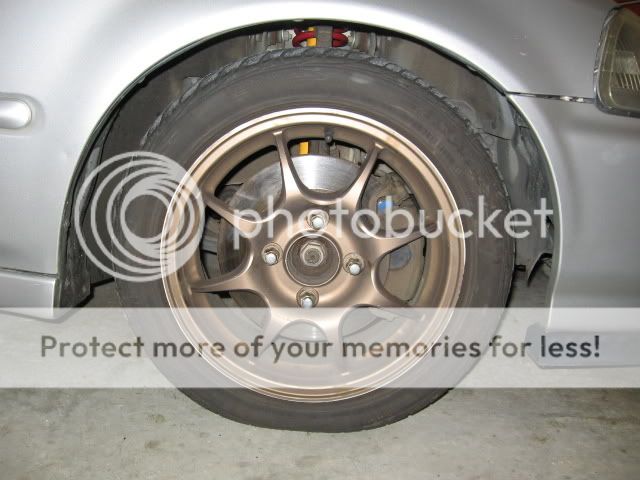
I know I need some air in these bad boys, but it's been sitting a little while.
After this is all done you NEED TO GO GET AN ALIGNMENT.
replace them (which will basically be the same as stock shocks/springs) with a
nicer setup.
What do we have here?
GCs
Koni Sports
ES bushing kit (which I'm not going to be installing in this how-to)
Tools you'll need
A few jacks
Jackstands
14mm wrench/socket
17mm wrench/socket
dremel tool with a cutoff wheel or a grinder
something to bore out a small hole (drill press/dremel)
penetrating oil
oil to lube all the new bolts going in
various allen wrenches
Here are all the directions that came with the ground controls and konis. I'm
not sure what all of it means or why you need some of it, but I've scanned it and
it's going in the writeup.
Ground control assembly (this was one of the more useful documents once I figured
out that it meant to cut the hat at 1.5 inches and to cut the bump stop):
Document showing how to adjust the konis:
Document showing the Koni aseembly (the other useful document):
This one kind of seemed like common sense:
Honestly I'm not even really sure what this one's for. I didn't have a bracket
to knock off of mine:
Anyways, on to the work:
Knock the lugs loose on the rear tires. I'll go over the rears first. Once the
cars in the air you've got no resistance to get them removed.
Jack the car up using the center tow hook and then put jack stands under each
side of the car in front of the rear wheels. This means that the car is a lot
less likely to fall and smash your legs/hands/whatever may be under the car. I
like to set the car all the way back down on the jackstands.
*IMPORTANT* I STRONGLY SUGGEST GOING AHEAD AND PUTTING SOME KIND OF PENETRATING
OIL ON EVERY BOLT YOU'RE GOING TO REMOVE. IT WILL SAVE YOU HEADACHES DOWN THE
ROAD *IMPORTANT*
Remove the lugs and the wheels.
Remove the rear deck and speakers. For my hatch this means that I need to fold
the seats down, remove the 3 screws holding the speaker bezels in place, then
remove the 4 screws holding the actual speakers into the plastic. Take them and
set them aside somewhere safe.
You'll see 2 14mm bolts if you look down in the cavity where the speakers used to
sit. Get a bunch of extensions or a breaker bar and knock those loose. Leave
them threaded, just bust them lose for now.
Get down under the car and remove the 14mm bolt out of the bottom of the brake
that holds the LCA on, as well as the 14mm bolt holding the shock to the LCA.
Don't be a gorilla like myself and do this first thing. These LCA bolts are
notorious for breaking and are about 11 dollars a peice from Honda.
Once these are all out, remove the upper 2 14mm bolts in the speaker housing and
watch the shock fall out. This is what you should be left with:
Now the real fun starts. The first shock I took out was very rusted, but all of
this stuff SHOULD slide right apart once you remove the top bolt on the shock.
Get an allen wrench and a 14mm wrench and remove the top bolt on the shock. You
can use spring compressors, but when I put the shorter springs on it last time I
just shot the top bolt into a trash can. It's not that bad.
Once you pop the top hat off, everything should come off until you're left with
this:
The top metal sleeve in this peice was rusted to hell on the first one and caused
me a bunch of issues getting it removed.
Anyway, disassemble the old shock. There isn't really any big trick to it. Just
keep pulling stuff apart. None of it is threaded, and all of it will come apart.
Once it's all apart, you'll need to cut the bump stop, per the GC instructions.
Next you'll need to cut the dust boot covers to 1.5 inches, agian, per the GC
instructions. My dad was over helping out and we did this with a dremel instead
of a grinder (god knows why).
Once you've got it cut down to length, you'll need to bore out the center hole so
that the hat will fit down over the thicker shaft of the koni shock. I went
ahead and rattle canned all the hats for the bump stops so that they wouldn't
rust over time.
This is what you should end up with (and my dad with the short finger in the
shot):
On to shock reassembly:
Grab a Koni shock, a GC and the bushing with the number 8096 on it if you're
planning to replace them (like I was with the ES kit).
(blurry shot, but trust me, it says 8096)
Take the top hats from the old strut (that the top of the spring will be touching once assembled) and pop out the bottom bushing. The red one will sit in it's place like this:
Notice that I also pulled out the old rubber spring isolator from within this cup. They'll be replaced by the ground control rubber spring isolators.
This picture shows the old rubber isolator in there that needs to come out:
Go ahead and put the coilover sleeve down onto the shock. Keep in mind wherever your ring is on the shock is how high the sleeves will adjust up to. I did the rears on the middle clip. Put the white clip around the base of the shock (like you can see on the left of the picture here) then slide the cut bump stop onto the shock. After that you'll need to put the smaller of the 2 supplied washers on top of the bump stop and slide the bump stop cover that you cut off over the washer.
In this picture you can see the clip and what it should look like at this point. The sleeve is slid up to show the clip.
At this point, you need to use the larger of the supplied washers and set it on top of the bump stop cover. Go ahead and put the spring on:
Next slide the top of the shock (with the new red bushing in it) down over the top of the shock and use the cupped washer and two supplied nuts to snug everything down. I adjusted my collars about halfway up on the coilover and ended up lowering them about 3/4 of an inch to get the fronts to the same height as the rears. Unless I did something wrong, the rears could go way higher than the fronts.
At this point you should have a complete shock to put back in the car. This is what the tops should look like (and agian with my dads short finger):
Jump back up in the hole left by the old shock, and get it seated in the top of the cavity. Put the two 14mm bolts that mount the top hat of the shock to the car in. From there, try to get the lower LCA bolts mated up and aligned. I found it easiest to do this with a jack on the bottom of the LCA.
From there, throw the wheels and lugs back on, lower the car back down, and do the fronts. The fronts are very similar except you need to remove the 17mm bolts (i think they're 17mm) that hold the front shock mount onto the shock and re-attach them to the Konis.
This is the rears at their original height after I put them down the first time (they're about 3/4 inch lower now). It's not slammed, it's not going to be slammed. I drive this thing back and forth to work.
The fronts adjusted half way up (what I thought would be a similar height to the fronts):
SLIZZAMED. These went up this high once I re-adjusted them all the way up:
I know I need some air in these bad boys, but it's been sitting a little while.
After this is all done you NEED TO GO GET AN ALIGNMENT.

Thread Starter
Honda-Tech Member
Joined: Jan 2002
Posts: 15,334
Likes: 1
From: Raleigh, NC
<TABLE WIDTH="90%" CELLSPACING=0 CELLPADDING=0 ALIGN=CENTER><TR><TD>Quote, originally posted by Luserkid »</TD></TR><TR><TD CLASS="quote">Passenger front tire is a little low </TD></TR></TABLE>
I know man I made sure to say so.
</TD></TR></TABLE>I know man
I made sure to say so.
Trending Topics
<TABLE WIDTH="90%" CELLSPACING=0 CELLPADDING=0 ALIGN=CENTER><TR><TD>Quote, originally posted by ejprimo »</TD></TR><TR><TD CLASS="quote">nice write-up! 
what spring rates did you get?</TD></TR></TABLE>
x2
what spring rates did you get?</TD></TR></TABLE>
x2


Thread Starter
Honda-Tech Member
Joined: Jan 2002
Posts: 15,334
Likes: 1
From: Raleigh, NC
<TABLE WIDTH="90%" CELLSPACING=0 CELLPADDING=0 ALIGN=CENTER><TR><TD>Quote, originally posted by ejprimo »</TD></TR><TR><TD CLASS="quote">nice write-up!
what spring rates did you get?</TD></TR></TABLE>
I got the 350/380lb setup from this sponsor: https://honda-tech.com/zero...73976 . Overall it was a good purchase and I'd recommend them to anyone in the market for Koni's/GCs. The shocks are adjusted halfway stiff and it rides quite well.
what spring rates did you get?</TD></TR></TABLE>
I got the 350/380lb setup from this sponsor: https://honda-tech.com/zero...73976 . Overall it was a good purchase and I'd recommend them to anyone in the market for Koni's/GCs. The shocks are adjusted halfway stiff and it rides quite well.
Thread Starter
Honda-Tech Member
Joined: Jan 2002
Posts: 15,334
Likes: 1
From: Raleigh, NC
<TABLE WIDTH="90%" CELLSPACING=0 CELLPADDING=0 ALIGN=CENTER><TR><TD>Quote, originally posted by elektronsi »</TD></TR><TR><TD CLASS="quote">good write-up , saving up for the same set-up as we speak</TD></TR></TABLE>
I hope it helps.
Maybe I'll add some shots of what bolts to remove, but we'll see.
, saving up for the same set-up as we speak</TD></TR></TABLE> I hope it helps.Maybe I'll add some shots of what bolts to remove, but we'll see.
Thread Starter
Honda-Tech Member
Joined: Jan 2002
Posts: 15,334
Likes: 1
From: Raleigh, NC
<TABLE WIDTH="90%" CELLSPACING=0 CELLPADDING=0 ALIGN=CENTER><TR><TD>Quote, originally posted by JeffBro »</TD></TR><TR><TD CLASS="quote">Hmm Nice install but where are the camber kits??</TD></TR></TABLE>
Don't really need them. Toe kills tires, not camber. I was lower on the RS*R springs for almost 4 years without a camber kit and was just fine.
Don't really need them. Toe kills tires, not camber. I was lower on the RS*R springs for almost 4 years without a camber kit and was just fine.
Thread Starter
Honda-Tech Member
Joined: Jan 2002
Posts: 15,334
Likes: 1
From: Raleigh, NC
<TABLE WIDTH="90%" CELLSPACING=0 CELLPADDING=0 ALIGN=CENTER><TR><TD>Quote, originally posted by shadhman »</TD></TR><TR><TD CLASS="quote">
Post up your ES install when you do it!</TD></TR></TABLE>
That's the one I'm really worried about. I've done some bushings on our 240s when we were racing, and they were a bitch every last time. Also, some of the studd doesn't have real great directions, so we'll see how it goes.
Post up your ES install when you do it!</TD></TR></TABLE>
That's the one I'm really worried about. I've done some bushings on our 240s when we were racing, and they were a bitch every last time. Also, some of the studd doesn't have real great directions, so we'll see how it goes.
Junior Member
Joined: Sep 2007
Posts: 409
Likes: 0
From: st joe, mi, usa
i know alot of people run this set up but i thought i heard that koni does not reccomend it? due to the lower ring on the strut breaking off with the coil overs on it? my friend ran the setup on his 02 and the lower ring broke off.
Thread Starter
Honda-Tech Member
Joined: Jan 2002
Posts: 15,334
Likes: 1
From: Raleigh, NC
<TABLE WIDTH="90%" CELLSPACING=0 CELLPADDING=0 ALIGN=CENTER><TR><TD>Quote, originally posted by skcivic4life »</TD></TR><TR><TD CLASS="quote">i know alot of people run this set up but i thought i heard that koni does not reccomend it? due to the lower ring on the strut breaking off with the coil overs on it? my friend ran the setup on his 02 and the lower ring broke off.
</TD></TR></TABLE>
I have never heard of this before. What would make you think that there's more pressure on that ring with a coilover setup than with a standard cup/spring. The cup that the spring would sit in just sits on top of that ring.
</TD></TR></TABLE>
I have never heard of this before. What would make you think that there's more pressure on that ring with a coilover setup than with a standard cup/spring. The cup that the spring would sit in just sits on top of that ring.


Joined: Jan 2002
Posts: 30,005
Likes: 59
From: Nowhere and Everywhere
Back from the dead.
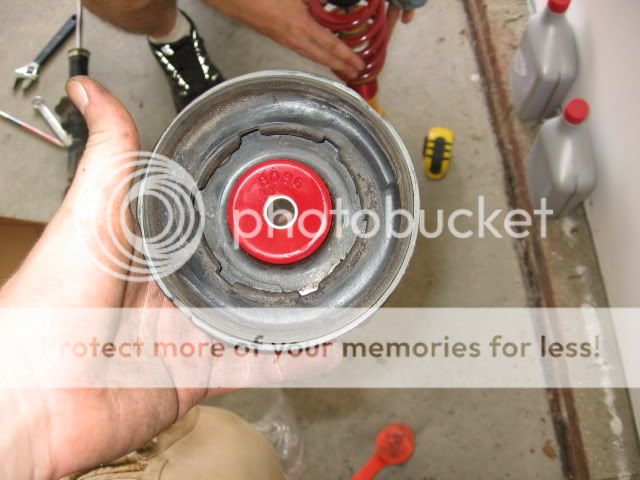
I'm pretty sure Koni (at least what I've heard from Lee Grimes "CRX Lee" on here) does not recommend using normal crappy sleeve coilovers, for the fact that they do not capture the circlip on the shock correctly. Koni-specific GC sleeves have a notch machined into the bottom of the sleeve that perfectly capture the circlip. There is no chance of them breaking or coming off, because the clip is fully captured by the sleeve, which means there is no room for the circlip to expand and come off.
Pic of the notch I'm talking about:
Honda-Tech Member

Joined: Apr 2002
Posts: 18,961
Likes: 76
From: I am Tyson
another note, with GC, dont try to reuse the dust boots and covers. the instructions do say to cut them down, but as you can see, you have to cut them down to a ridiculous short length its pointless. just toss em and you wont have problems.

Thread
Thread Starter
Forum
Replies
Last Post
Dartanian
Suspension & Brakes
45
Sep 9, 2006 07:21 PM
BoosterSH
Honda Prelude
1
Oct 13, 2003 09:34 AM