
Koni Ground Control install
 04-13-2005, 07:09 PM
#1
Honda-Tech Member
Thread Starter
iTrader: (1)
Join Date: Jan 2002
Location: Nowhere and Everywhere
Posts: 29,530
Likes: 0
Received 52 Likes
on
46 Posts
Update: ignore the part about the rack and pinion dust boots. They DID NOT work very well, due to rubbing on the 2.5" ID springs.
Update 2: See below note about putting electrical tape around the shock body.
From this thread: Write-up: Installing Koni Ground Controls and custom dust boots - Honda-Tech
I thought I would make a write-up on how to install these new Ground Control sleeves for Koni shocks. These new sleeves differ from the previous ones in that no adapter is needed. The inner diameter of the sleeve matches the Koni shock outer diamter exactly, and has a machined lip that sits directly on the snap ring.
For more info on installing the Konis themselves, check out .RJ's write-up here: Koni Shock Install (56K :burn - Honda-Tech
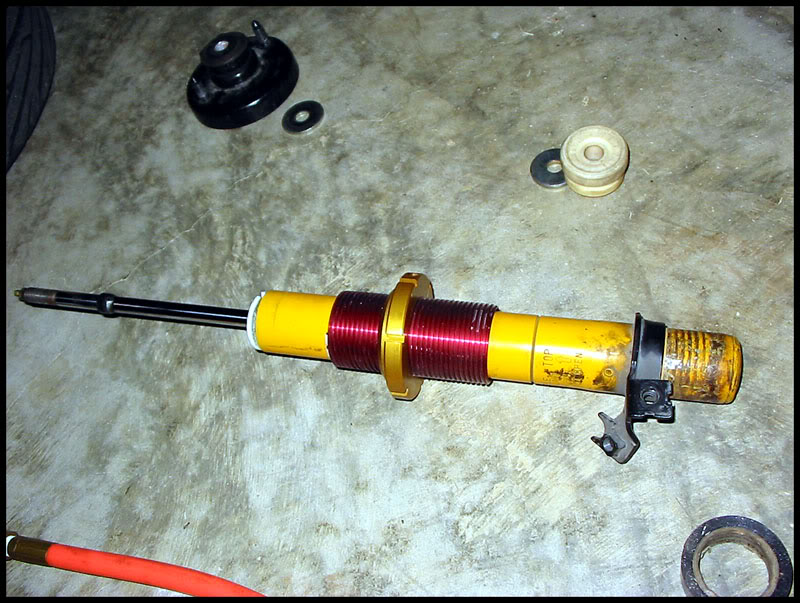
Here are normal spring and shock parts, I just used a stock spring to illustrate the assembly order.
Shock, spring perch, spring, bumpstop, smaller washer, dust cover, larger washer, top mount, dished washer, lock nut or 2 jam nuts on Konis:

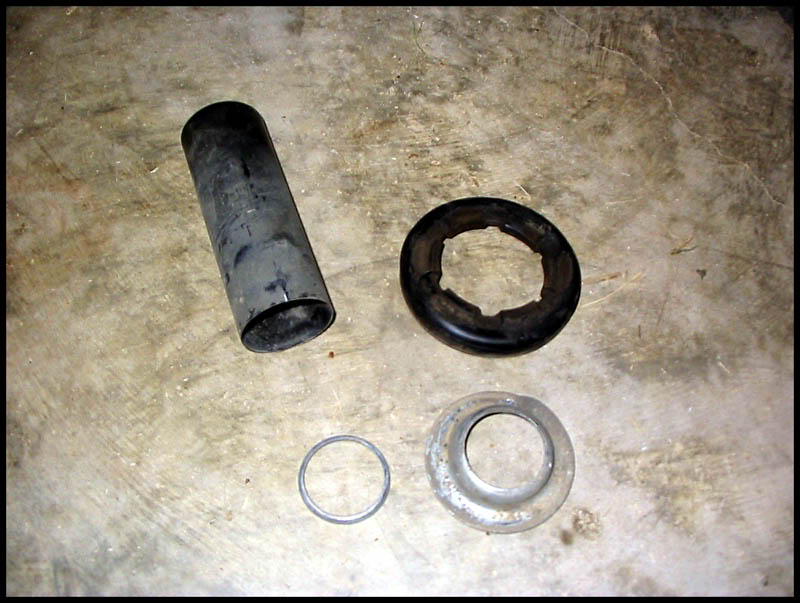
When you install Ground Controls on Koni shocks, this is what you DON'T use:
spring perch and ring, OEM dust cover, OEM upper spring insulator
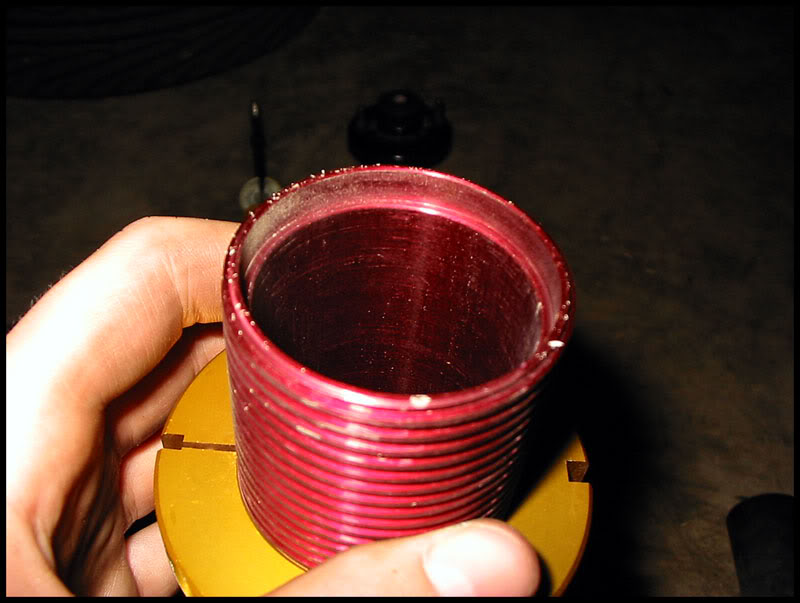
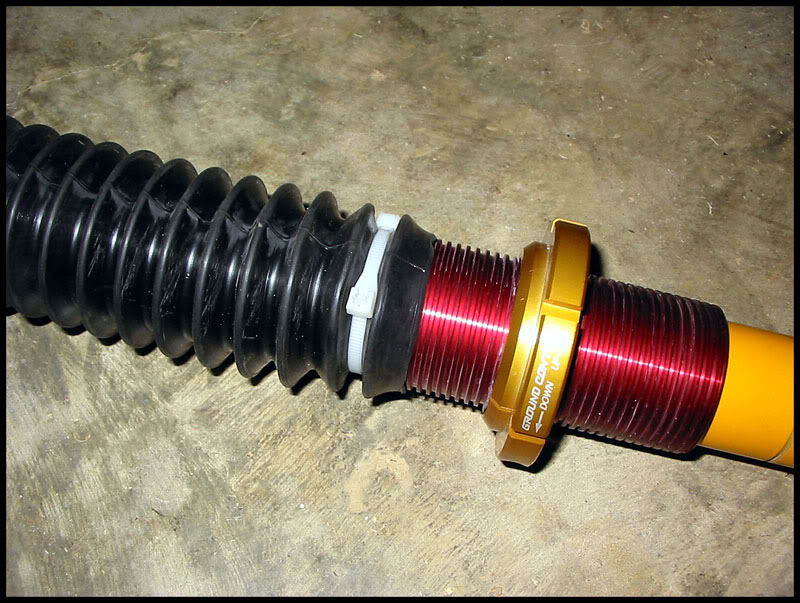
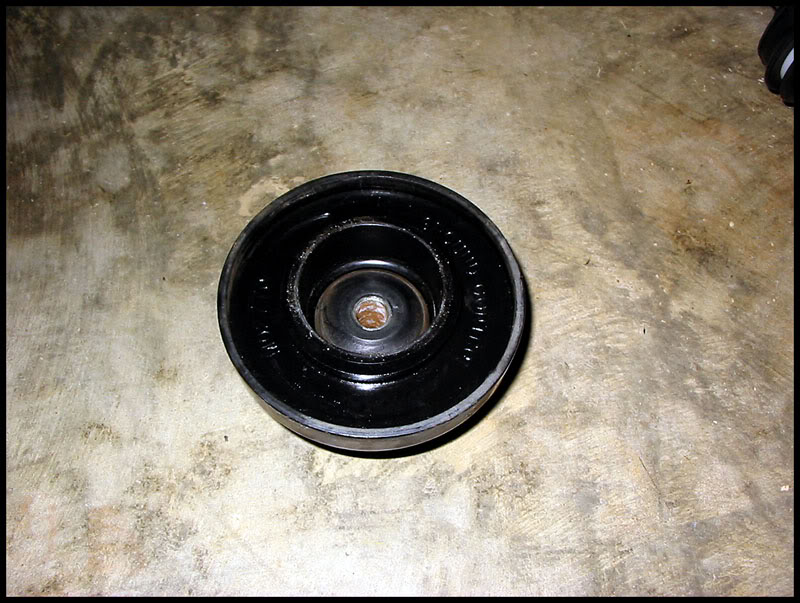
close-up of new Ground Control sleeve for Konis showing the machined lip that sits on the snap ring:
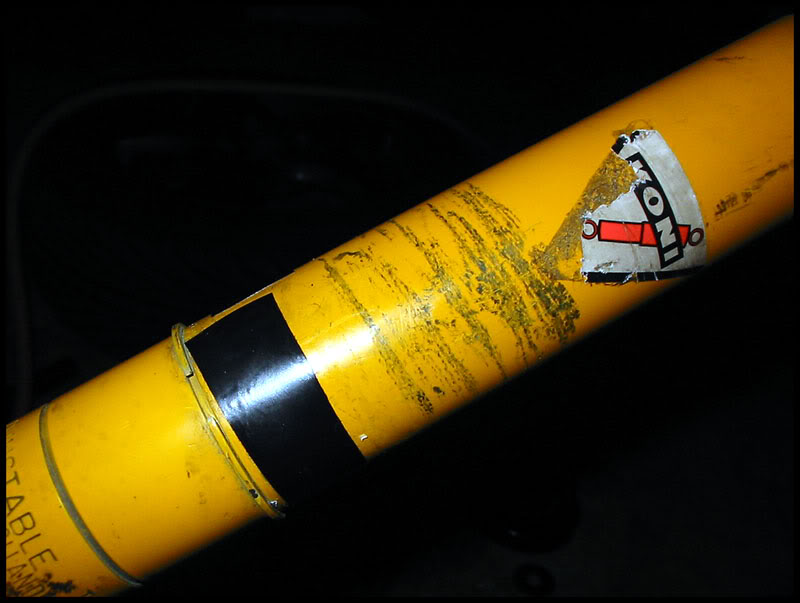
To keep the sleeve from spinning around on the shock, wrap some electrical tape around the shock body. Once around will do.
If the sleeve starts pushing the tape down, DO NOT use the tape. Remove it and go without, otherwise you risk failure of the circlip if it's not fully seated and captured by the notch in the sleeve.
Make sure the tape does not overlap itself at any point.
Slide the sleeve over the shock body, rotating it around when it hits the tape to help it fully seat on the snap ring
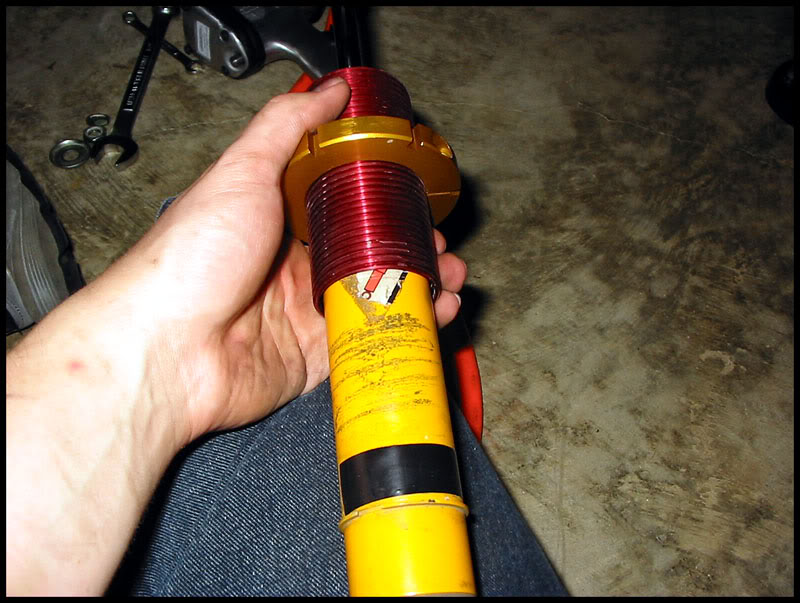
Shock w/ sleeve installed
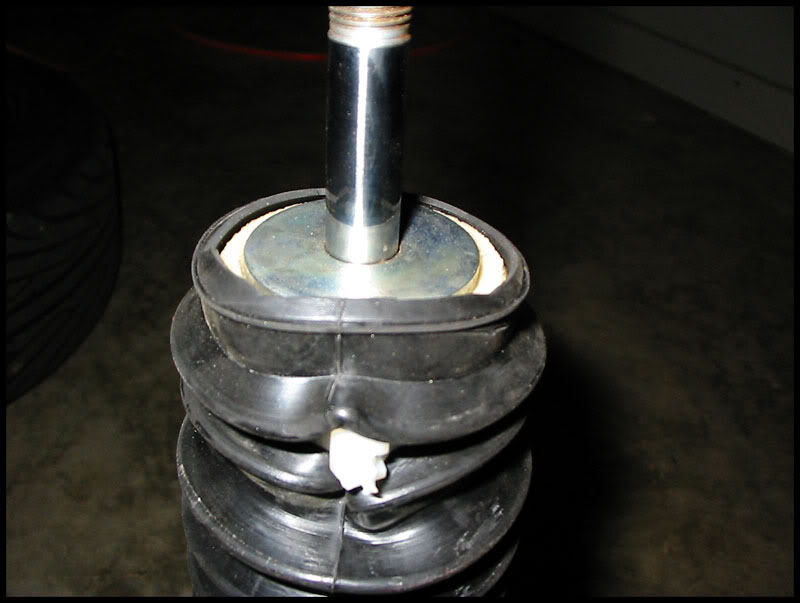
Put the rack and pinion boot over the shock, the end that was previously very small (see first pics) should go over the shock body. Then install the bumpstop, and zip tie everything in place. Put the zipties in the valleys of the boot's folds, and position the ziptie around the bumpstop such that it tightens into one of the grooves on the bumpstop
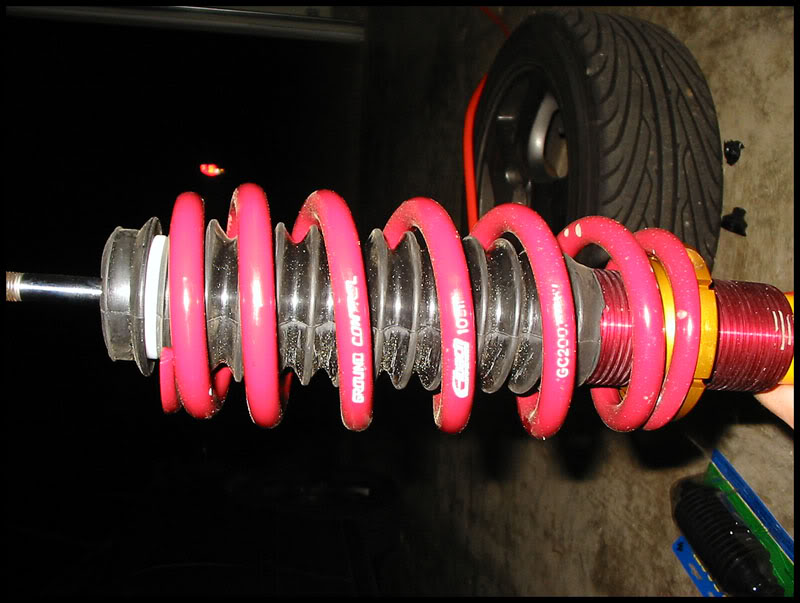
Shock w/ new dust boot

I slid the lower zip tie down as far as it would go, with the cut end of the boot overlapping the GC sleeve:
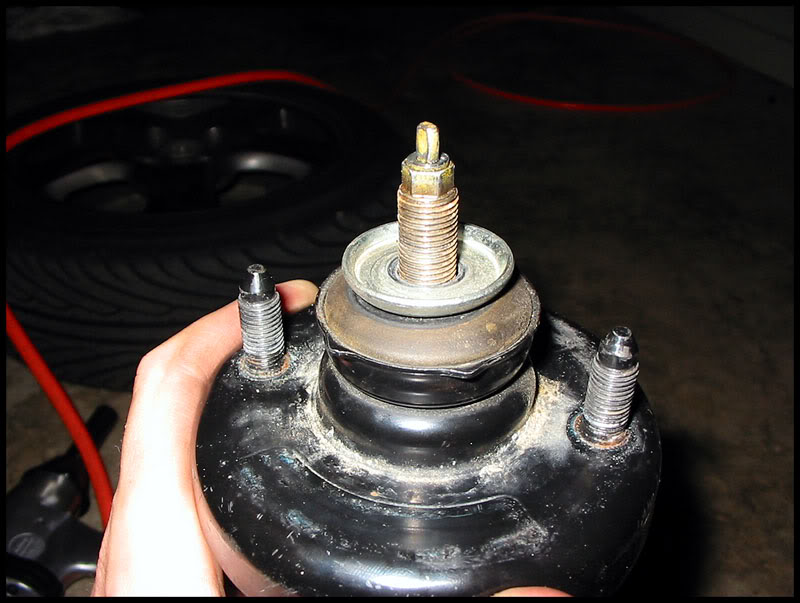
Top end of the boot over the bumpstop
Cut off a strip from the top shown in the pic so that the upper mount will be able to fit over the bumpstop:
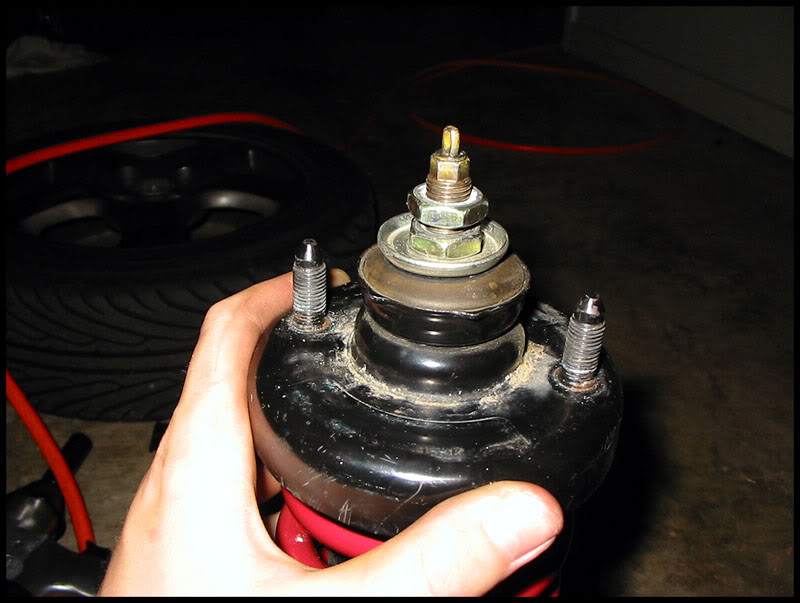
Top mount w/ new GC upper insulator (remove original rubber insulator):
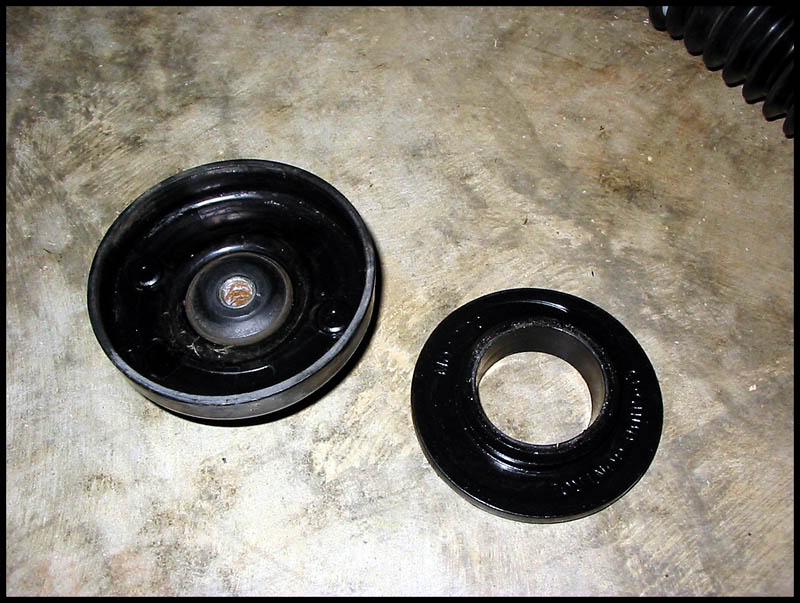
Top mount assembled:
Place spring onto shock:
Install top mount and dished washer (make sure dish faces up):
Install jam nuts:
Completed assembly

When you are done you should have 4 dust covers, 4 spring perches, 4 perch rings (maybe not depending on the vintage of your Koni shocks, you might only have 2 rings from the front), and 4 original spring isolators left over

Here is the car after the original install and initial adjustment:
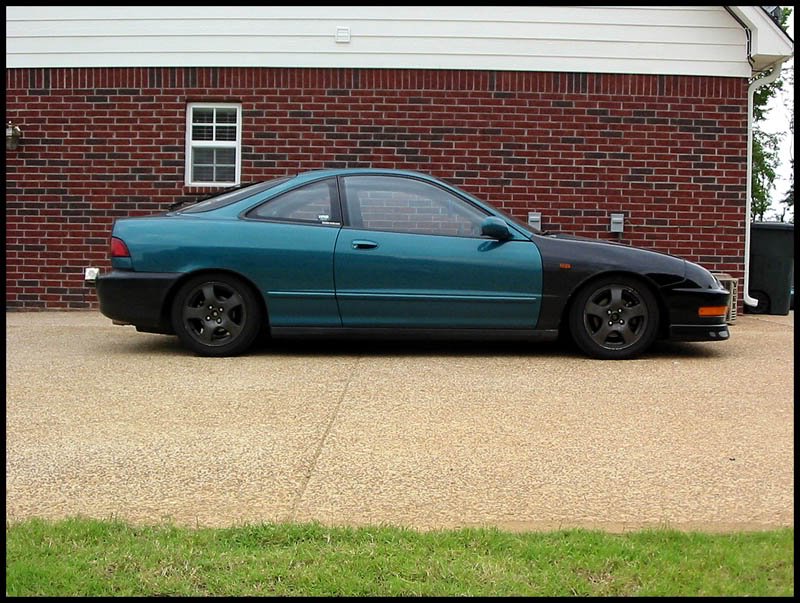
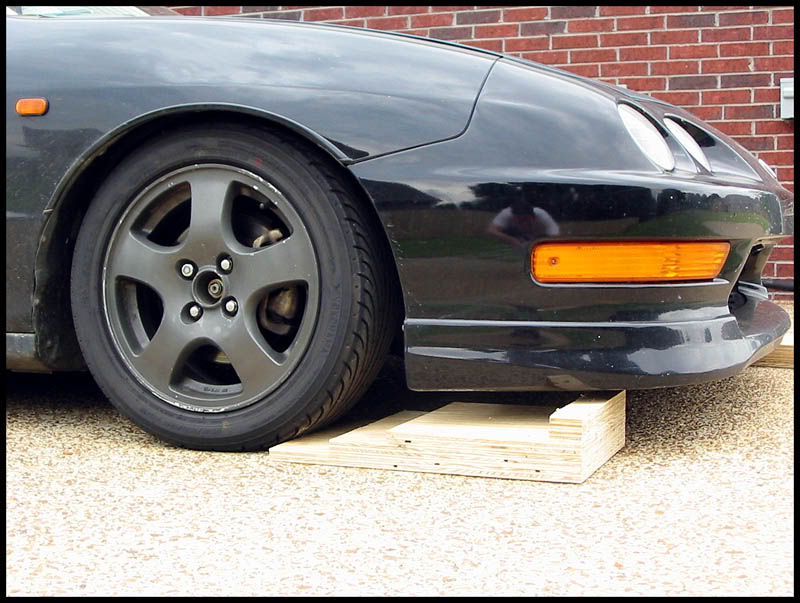
Showing off my m4d carpentry skillz y0 with these plywood ramps I made so I can get the jack under my car

After adjusting it to get it to sit level, and then raising it about 1 to 1.5 turns all around:

Update 2: See below note about putting electrical tape around the shock body.
From this thread: Write-up: Installing Koni Ground Controls and custom dust boots - Honda-Tech
I thought I would make a write-up on how to install these new Ground Control sleeves for Koni shocks. These new sleeves differ from the previous ones in that no adapter is needed. The inner diameter of the sleeve matches the Koni shock outer diamter exactly, and has a machined lip that sits directly on the snap ring.
For more info on installing the Konis themselves, check out .RJ's write-up here: Koni Shock Install (56K :burn
- Honda-TechHere are normal spring and shock parts, I just used a stock spring to illustrate the assembly order.
Shock, spring perch, spring, bumpstop, smaller washer, dust cover, larger washer, top mount, dished washer, lock nut or 2 jam nuts on Konis:
When you install Ground Controls on Koni shocks, this is what you DON'T use:
spring perch and ring, OEM dust cover, OEM upper spring insulator
close-up of new Ground Control sleeve for Konis showing the machined lip that sits on the snap ring:
To keep the sleeve from spinning around on the shock, wrap some electrical tape around the shock body. Once around will do.
If the sleeve starts pushing the tape down, DO NOT use the tape. Remove it and go without, otherwise you risk failure of the circlip if it's not fully seated and captured by the notch in the sleeve.
Make sure the tape does not overlap itself at any point.
Slide the sleeve over the shock body, rotating it around when it hits the tape to help it fully seat on the snap ring
Shock w/ sleeve installed
Put the rack and pinion boot over the shock, the end that was previously very small (see first pics) should go over the shock body. Then install the bumpstop, and zip tie everything in place. Put the zipties in the valleys of the boot's folds, and position the ziptie around the bumpstop such that it tightens into one of the grooves on the bumpstop
Shock w/ new dust boot
I slid the lower zip tie down as far as it would go, with the cut end of the boot overlapping the GC sleeve:
Top end of the boot over the bumpstop
Cut off a strip from the top shown in the pic so that the upper mount will be able to fit over the bumpstop:
Top mount w/ new GC upper insulator (remove original rubber insulator):
Top mount assembled:
Place spring onto shock:
Install top mount and dished washer (make sure dish faces up):
Install jam nuts:
Completed assembly
When you are done you should have 4 dust covers, 4 spring perches, 4 perch rings (maybe not depending on the vintage of your Koni shocks, you might only have 2 rings from the front), and 4 original spring isolators left over
Here is the car after the original install and initial adjustment:
Showing off my m4d carpentry skillz y0 with these plywood ramps I made so I can get the jack under my car
After adjusting it to get it to sit level, and then raising it about 1 to 1.5 turns all around:
Last edited by PatrickGSR94; 09-04-2015 at 05:00 AM. Reason: updating
 04-13-2005, 11:10 PM
#2
Honda-Tech Member
uh, whyd you zip tie the top of the boot to the bump stop?? your bumpstop is going to get pushed down and not cover the shock rod anymore. kinda makes it pointless.
 04-14-2005, 08:06 PM
#6
Honda-Tech Member
Join Date: Aug 2003
Location: Reno, NV, USA
Posts: 2,156
Likes: 0
Received 0 Likes
on
0 Posts
<TABLE WIDTH="90%" CELLSPACING=0 CELLPADDING=0 ALIGN=CENTER><TR><TD>Quote, originally posted by PatrickGSR94 »</TD></TR><TR><TD CLASS="quote">From this thread: https://honda-tech.com/zerothread?id=917766
Modified by PatrickGSR94 at 10:20 PM 4/13/2005</TD></TR></TABLE>
Damm thats a great idea I always have to roll up on a brick....
Modified by PatrickGSR94 at 10:20 PM 4/13/2005</TD></TR></TABLE>
Damm thats a great idea I always have to roll up on a brick....

Trending Topics
04-16-2005, 04:14 AM
#9
Honda-Tech Member
Thread Starter
iTrader: (1)
Join Date: Jan 2002
Location: Nowhere and Everywhere
Posts: 29,530
Likes: 0
Received 52 Likes
on
46 Posts
<TABLE WIDTH="90%" CELLSPACING=0 CELLPADDING=0 ALIGN=CENTER><TR><TD>Quote, originally posted by mikehawkBUiLT »</TD></TR><TR><TD CLASS="quote">how low did you set the coilovers? halfway down? all the way down?</TD></TR></TABLE>
They are all set differently in order to acheive a level ride height.
They are all set differently in order to acheive a level ride height.
 10-15-2005, 11:44 AM
#12
Member
Join Date: Feb 2004
Location: San Diego, CA, Untied States
Posts: 2,268
Likes: 0
Received 0 Likes
on
0 Posts
clean car man, how does it ride? Ive been thinking about a new suspension setup, and the Koni/GC is almost sold for me (had my mind set on ksports for a while), but anyway great write up
 10-15-2005, 07:29 PM
#14
Honda-Tech Member
iTrader: (1)
Join Date: Feb 2004
Location: Land of the SkanKz Cali 562, Ca, USA
Posts: 10,587
Likes: 0
Received 1 Like
on
1 Post
<TABLE WIDTH="90%" CELLSPACING=0 CELLPADDING=0 ALIGN=CENTER><TR><TD>Quote, originally posted by KOALA YUMMIES »</TD></TR><TR><TD CLASS="quote">Wow you guys are stupid. Look at the original post date. PatrickGSR94 has long since sold these. </TD></TR></TABLE>
haha....yeah, it was from a OLD thread
haha....yeah, it was from a OLD thread
10-17-2005, 04:04 PM
#16

Join Date: Sep 2004
Location: JahMekYah
Posts: 346
Likes: 0
Received 0 Likes
on
0 Posts
Can we archive this or atleast keep it up top?? I just got some components and will probably be using this as reference
EDIT: My bad, didnt see the other post was archived
EDIT: My bad, didnt see the other post was archived
08-24-2006, 09:25 AM
#17
Honda-Tech Member
Join Date: Mar 2002
Location: ATL to SAV to ORL, USA
Posts: 7,506
Likes: 0
Received 0 Likes
on
0 Posts
Awesome
I've been looking for a full pic of that boot cover
Installing my GC/Koni's this monday Can't wait
The GC extended top hats came with the bump stops
I've been looking for a full pic of that boot cover
Installing my GC/Koni's this monday
Can't wait The GC extended top hats came with the bump stops
12-18-2008, 05:12 PM
#20
Honda-Tech Member
Thread Starter
iTrader: (1)
Join Date: Jan 2002
Location: Nowhere and Everywhere
Posts: 29,530
Likes: 0
Received 52 Likes
on
46 Posts
haha dang man I sold the GC's over 3 years ago. Still riding on the Koni shocks with nearly 170K miles on them, running stock GS-R front springs and stock ITR rear springs with the Koni perch on the lowest level.
01-09-2009, 04:07 PM
#21
Junior Member
Join Date: Jun 2006
Posts: 103
Likes: 0
Received 0 Likes
on
0 Posts
Hey patrick, I'm using skunk2 adjustables for my coilovers... when I put on my koni yellows and then put on the top hat, I noticed i didn't have to use a spring compressor? Am I doing this right? my spring can wobbles around and slides up and down, but if I lower the push the damper rod, the top hat sits on the spring like it should. Is this ok?
BTW, this is the first time i'm doing this, so I'm kinda lost.
BTW, this is the first time i'm doing this, so I'm kinda lost.
01-09-2009, 04:23 PM
#22
Honda-Tech Member
Join Date: Jun 2004
Location: Sherman Oaks, CA, United States
Posts: 7,539
Likes: 0
Received 4 Likes
on
4 Posts
Hey patrick, I'm using skunk2 adjustables for my coilovers... when I put on my koni yellows and then put on the top hat, I noticed i didn't have to use a spring compressor? Am I doing this right? my spring can wobbles around and slides up and down, but if I lower the push the damper rod, the top hat sits on the spring like it should. Is this ok?
BTW, this is the first time i'm doing this, so I'm kinda lost.
BTW, this is the first time i'm doing this, so I'm kinda lost.
This is normal, and won't cause any issues. Simply check to make certain that the springs correctly seated each time you let the car down off of a jack, which is about the only time they could mis-seat (unless the car catches air, in which case you have bigger issues to worry about).
01-09-2009, 06:13 PM
#23
Junior Member
Join Date: Jun 2006
Posts: 103
Likes: 0
Received 0 Likes
on
0 Posts
With sleeves (Skunk2 or GC), the spring is short enough that the spring isn't fully captured at full droop.
This is normal, and won't cause any issues. Simply check to make certain that the springs correctly seated each time you let the car down off of a jack, which is about the only time they could mis-seat (unless the car catches air, in which case you have bigger issues to worry about).
This is normal, and won't cause any issues. Simply check to make certain that the springs correctly seated each time you let the car down off of a jack, which is about the only time they could mis-seat (unless the car catches air, in which case you have bigger issues to worry about).
Next question though. Since you said it has to seat correctly, are you talking about the spring where it cups up top with the top hat? the bottom of the spring rests on the adjuster part, so i presume that is not the part you are talking about, correct?
01-09-2009, 06:26 PM
#24
Honda-Tech Member
Join Date: Jun 2004
Location: Sherman Oaks, CA, United States
Posts: 7,539
Likes: 0
Received 4 Likes
on
4 Posts
Ok, so it looks ok then.
Next question though. Since you said it has to seat correctly, are you talking about the spring where it cups up top with the top hat? the bottom of the spring rests on the adjuster part, so i presume that is not the part you are talking about, correct?
Next question though. Since you said it has to seat correctly, are you talking about the spring where it cups up top with the top hat? the bottom of the spring rests on the adjuster part, so i presume that is not the part you are talking about, correct?
You don't need to look under the car to check either. On the very off chance that it fails to seat correctly in the tophat (not yet happened to me in 2 years), that corner of the car will be visibly higher after dropping it off a jack.
01-10-2009, 08:15 AM
#25
Honda-Tech Member
Join Date: Jan 2009
Location: Miami
Posts: 56
Likes: 0
Received 0 Likes
on
0 Posts
With sleeves (Skunk2 or GC), the spring is short enough that the spring isn't fully captured at full droop.
This is normal, and won't cause any issues. Simply check to make certain that the springs correctly seated each time you let the car down off of a jack, which is about the only time they could mis-seat (unless the car catches air, in which case you have bigger issues to worry about).
This is normal, and won't cause any issues. Simply check to make certain that the springs correctly seated each time you let the car down off of a jack, which is about the only time they could mis-seat (unless the car catches air, in which case you have bigger issues to worry about).
What length springs are leaving space at full droop? Those are 7" or 8"???

