

Handlebar Swap, '83 Honda Nighthawk 550

Thread Starter
Junior Member
Joined: Apr 2007
Posts: 35
Likes: 0
From: Buffalo, NY, United States
Hey Guys!
I searched around and didn't find a whole lot, so I thought I would ask you guys. I ride a Honda Nighthawk 550 and I find it rather difficult to turn at slow speeds (1-2mph) because my knees get in the way of the handlebars when they're rested against the gas tank. I've determined that both the Nighthawk 550 and 650 use 7/8" handlebars, but the Nighthawk 550's handlebars have more of a cruiser-like styling, which seems to get in the way. Has anyone here performed this kind of a swap and if so, how does this affect the overall handling of the bike?
Also, does anyone have the specifications (Width, Sweep, Rise, etc.) for the handlebars from the Nighthawk 550/650 or know where I could find them? The previous owner didn't have the owner's manual, just the Clymer repair/service manual which doesn't have this information.
Any help would be appreciated!
Crazy, I was about to post a similar situation...
I've got a '91 Hawk, and I wanted lower bars for a more sporting position. Someone I know told me he put 919 bars on his Hawk. They are also 7/8", and use sportbike-style bar ends (I wanted this to use some bar-end mirrors).
He said handling changes were almost nil, and he liked the new position a lot.
Sorry, I have no specific info on your bars. Why don't you just measure them yourself?
Thread Starter
Junior Member
Joined: Apr 2007
Posts: 35
Likes: 0
From: Buffalo, NY, United States
Update:
I measured my handlebars but just have to get the measurements for the handlebars from an '83 Nighthawk 650. However, I was searching on Google Images and found a link to this on BikePics.com. It's a CB550SC with the handlebars taken from a CB650SC.
Here's the link:
http://www.bikepics.com/pictures/201103/
I won't be getting started on this project until the spring since the new semester is just about to start and the bike's put away. However, I know someone with an old '83 Nighthawk 650 that no longer runs. Last summer when I just got me bike, he told me that if I needed parts (for major repairs and whatnot) to just give him a call, so I plan to contact him about the bars soon.
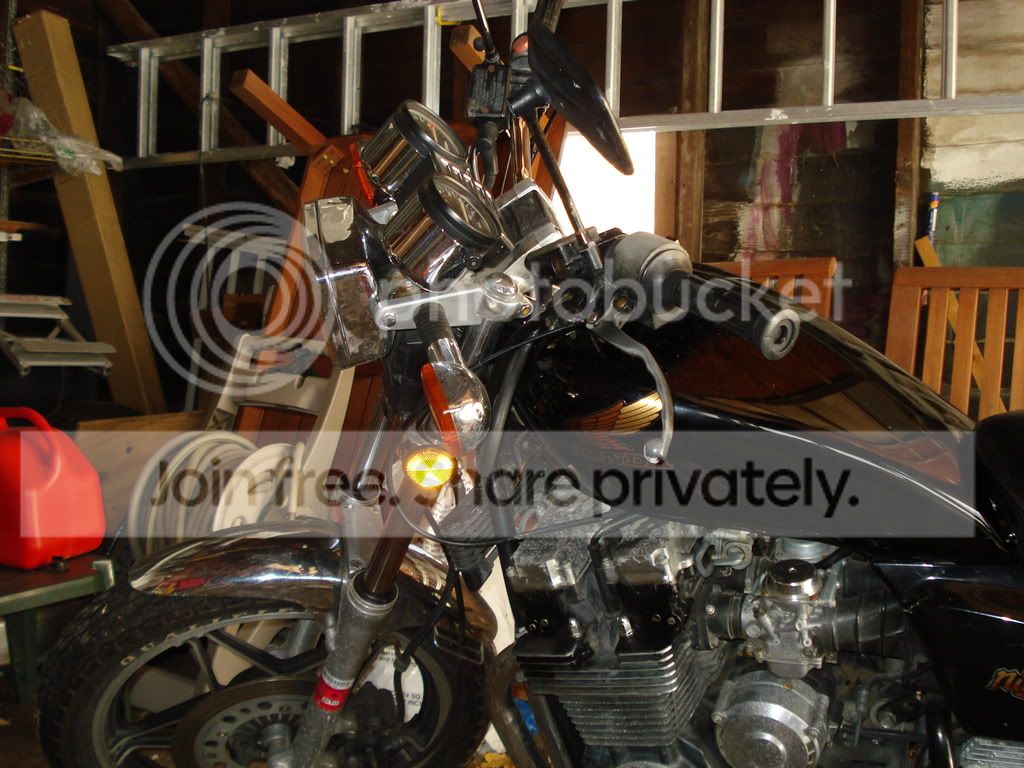
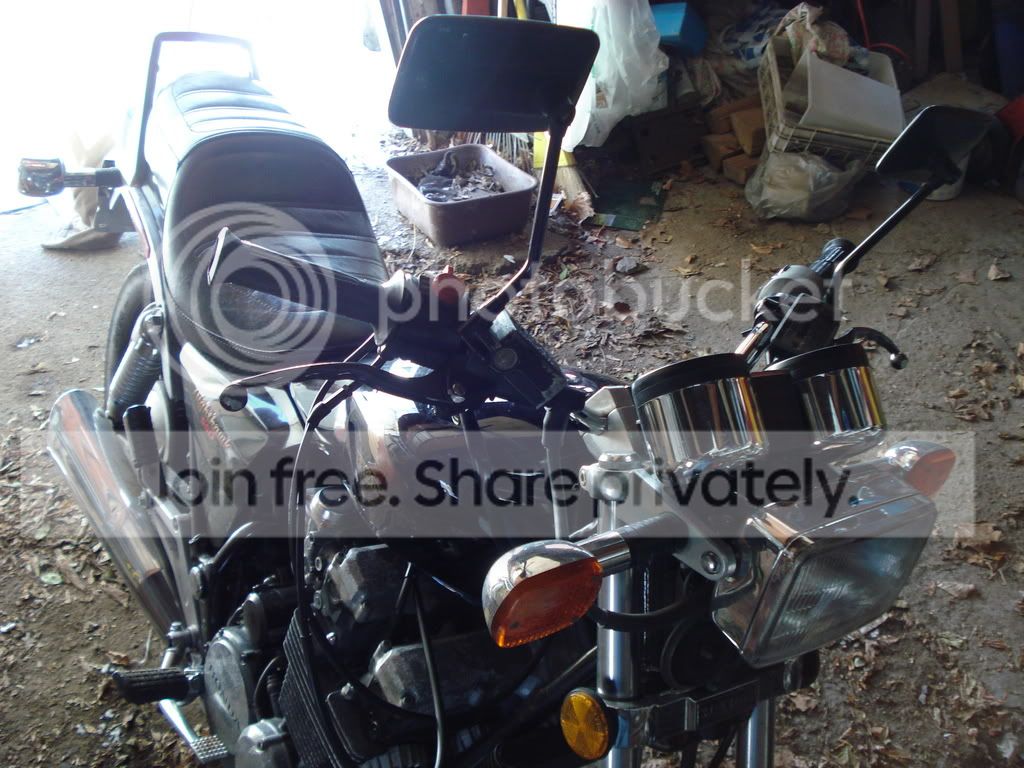
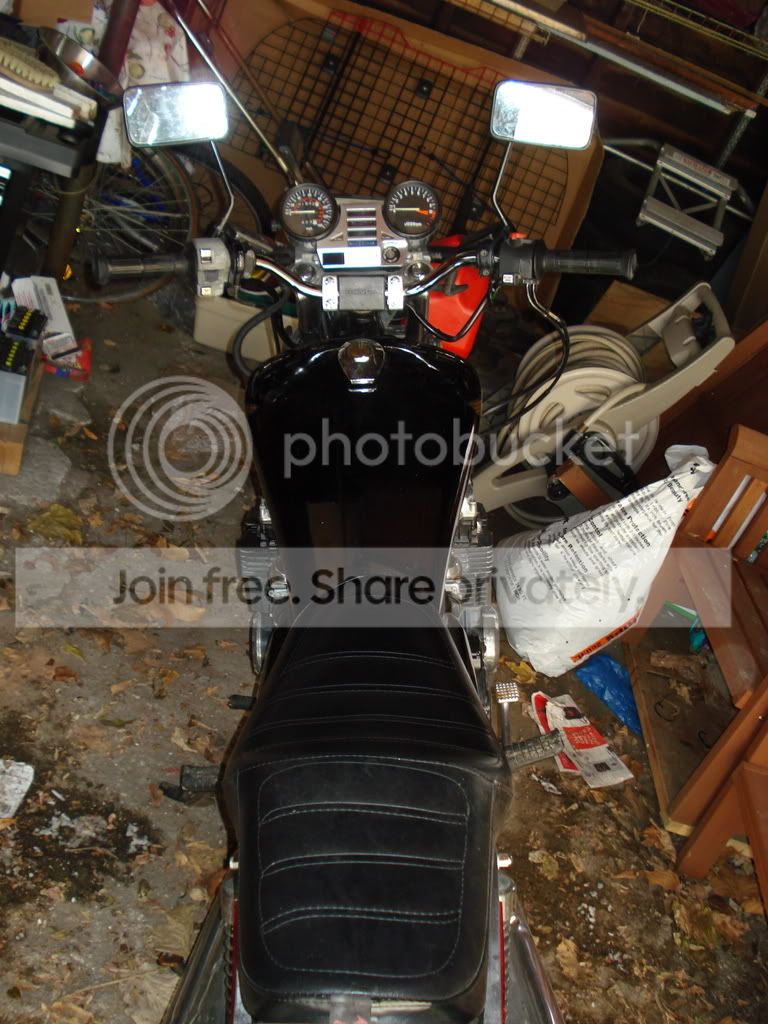
BTW, here's a picture of what my bike looks like so you can compare the handlebar configurations:

I measured my handlebars but just have to get the measurements for the handlebars from an '83 Nighthawk 650. However, I was searching on Google Images and found a link to this on BikePics.com. It's a CB550SC with the handlebars taken from a CB650SC.
Here's the link:
http://www.bikepics.com/pictures/201103/
I won't be getting started on this project until the spring since the new semester is just about to start and the bike's put away. However, I know someone with an old '83 Nighthawk 650 that no longer runs. Last summer when I just got me bike, he told me that if I needed parts (for major repairs and whatnot) to just give him a call, so I plan to contact him about the bars soon.
BTW, here's a picture of what my bike looks like so you can compare the handlebar configurations:

Joined: Jan 2008
Posts: 1
Likes: 0
From: White Hall, AR, USA
I plan to try Nighthawk 650 handlebars on my Shadow 500 for the same reason, the Shadow bars are too narrow and have too much pull back.
Still waiting to get some CB650sc bars.
I think they should work on your 550.
Good luck!
ExTex
1983 Shadow 500 1983 Nighthawk 650 2006 Ninja 500
Still waiting to get some CB650sc bars.
I think they should work on your 550.
Good luck!
ExTex
1983 Shadow 500 1983 Nighthawk 650 2006 Ninja 500
Thread Starter
Junior Member
Joined: Apr 2007
Posts: 35
Likes: 0
From: Buffalo, NY, United States
<TABLE WIDTH="90%" CELLSPACING=0 CELLPADDING=0 ALIGN=CENTER><TR><TD>Quote, originally posted by ExTex »</TD></TR><TR><TD CLASS="quote">I plan to try Nighthawk 650 handlebars on my Shadow 500 for the same reason, the Shadow bars are too narrow and have too much pull back.</TD></TR></TABLE>
Well, I actually found a pair of Bikemaster Daytona handlebars that after measuring will fit my bike rather nicely. Plus, being a rather tall person (6 foot 6) these have a slightly higher rise than the 650 handlebars. I'll let you know how the installation goes when they arrive. Hopefully I can swing home some weekend and install the bars then.
BTW, I noticed that the '80's Shadow 500s looks almost identical to the 550 Nighthawks (well, aside from the Inline four air cooled engine compared to the water cooled v-twin), so hopefully your swap shouldn't be that different from mine. I'll post an update with pics when I perform the swap, though it might take awhile for the part to arrive.
Also, here's a link on swapping your handlebars. Hope this helps the other posters in this thread: http://www.motorcyclistonline....ebars/
Modified by BlkCB550SC at 3:02 PM 1/31/2008
Thread Starter
Junior Member
Joined: Apr 2007
Posts: 35
Likes: 0
From: Buffalo, NY, United States
UPDATE:
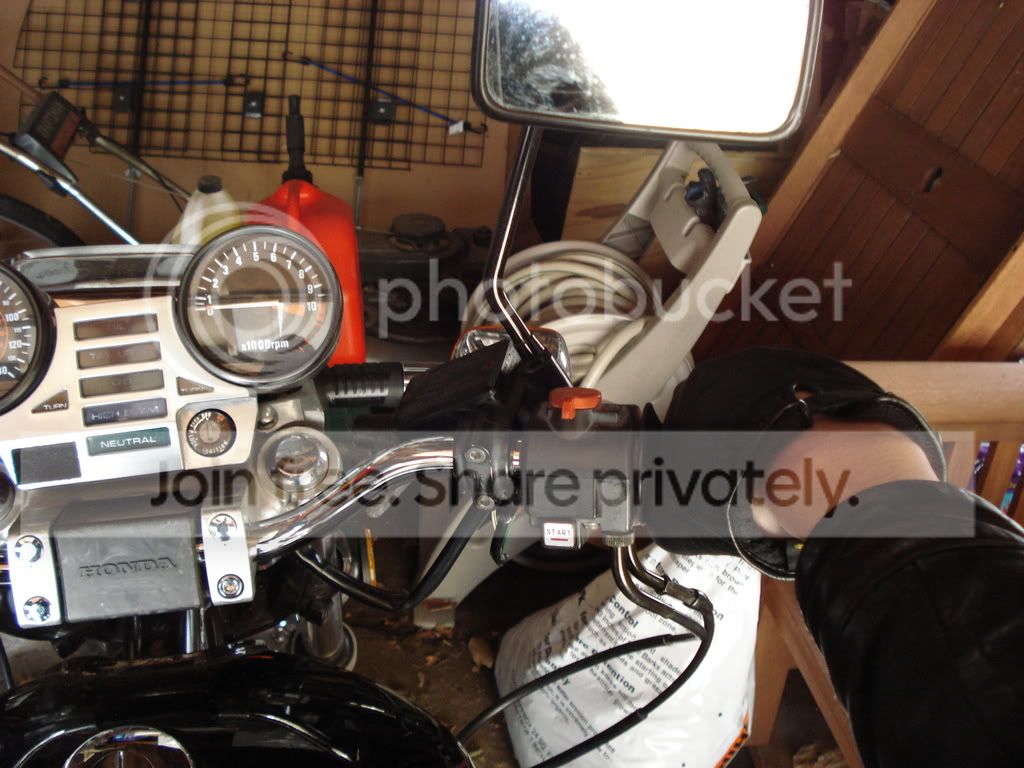
I was home this weekend and the weather improved enough to get out to work on the bike. So far I got the new handlebars on and fitted. I still need to drill a hole in the right handlebar to mount the engine cut-off switch and starter button onto. I also have to attach the hand grips.
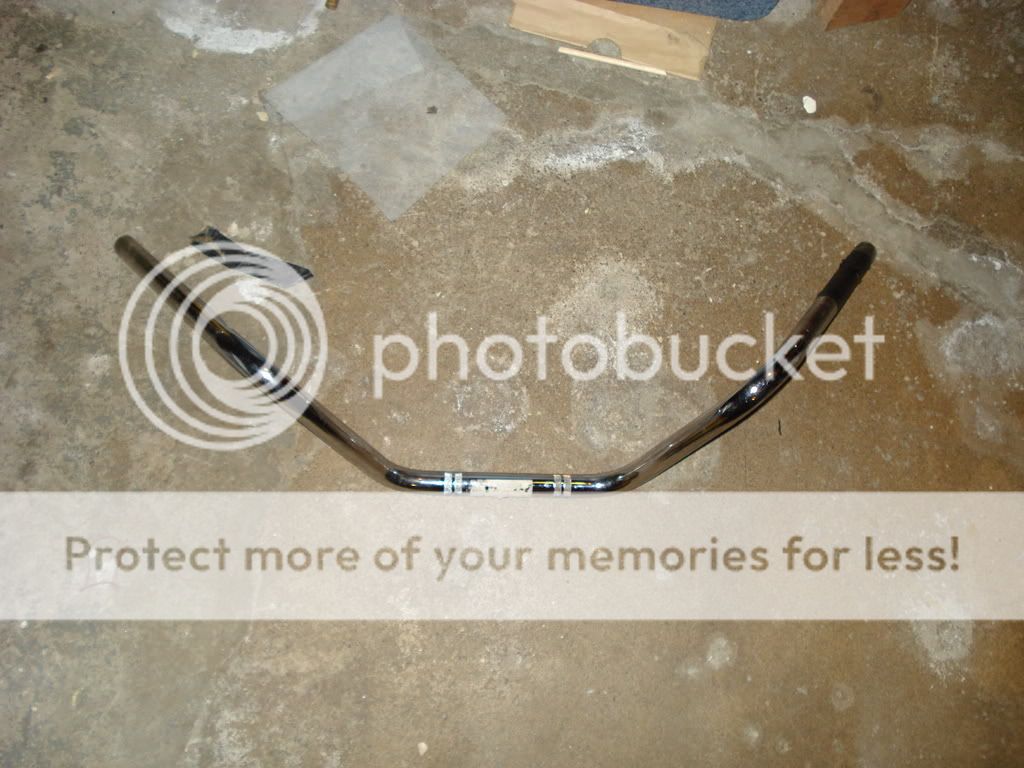
Old (Stock) Handlebars:
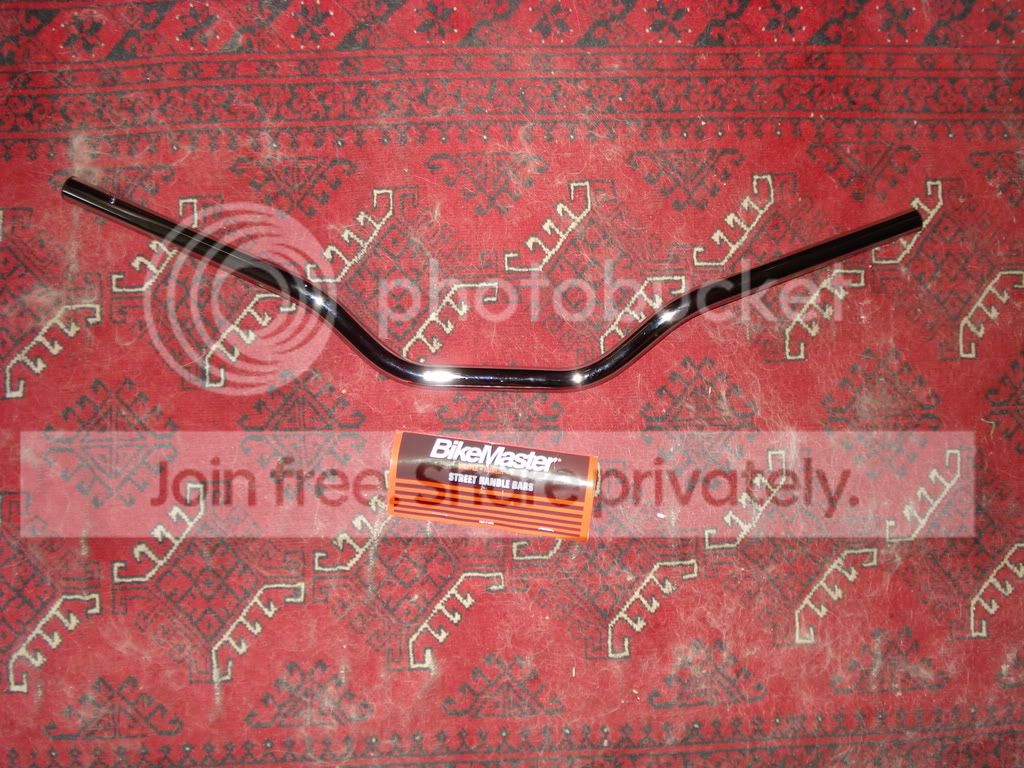
New (Aftermarket) Handlebars
Mounting Allen Bolts (6mm)
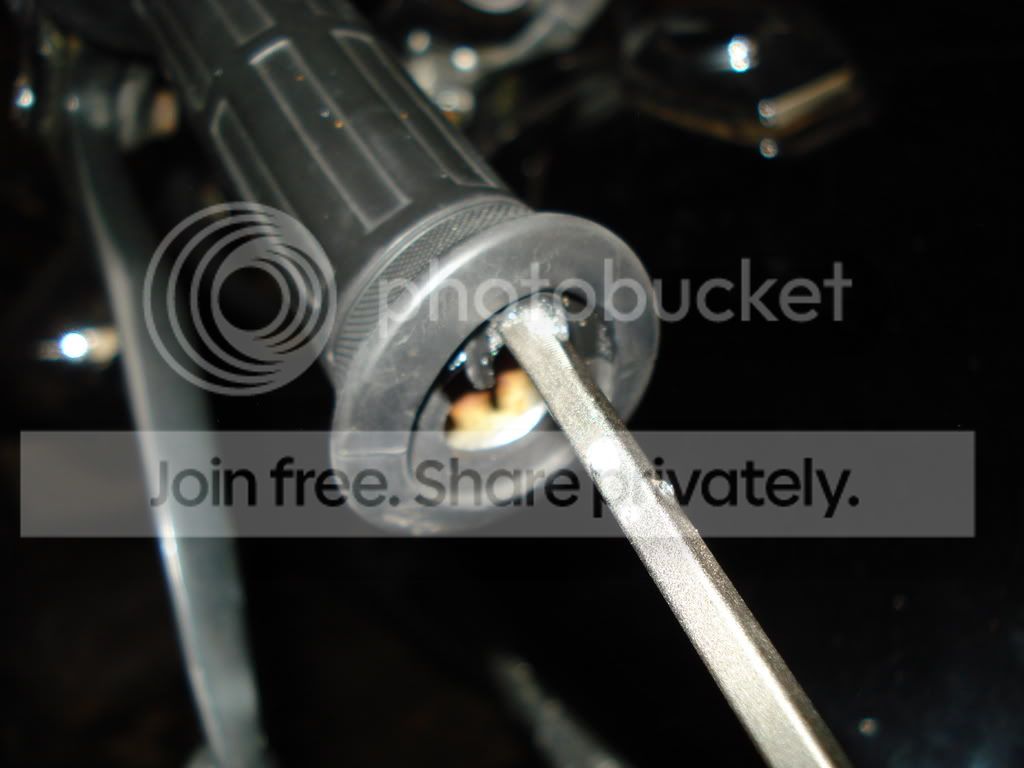
Removing The Grips (I used a screwdriver dipped in a mixture of soap and water)
Success!
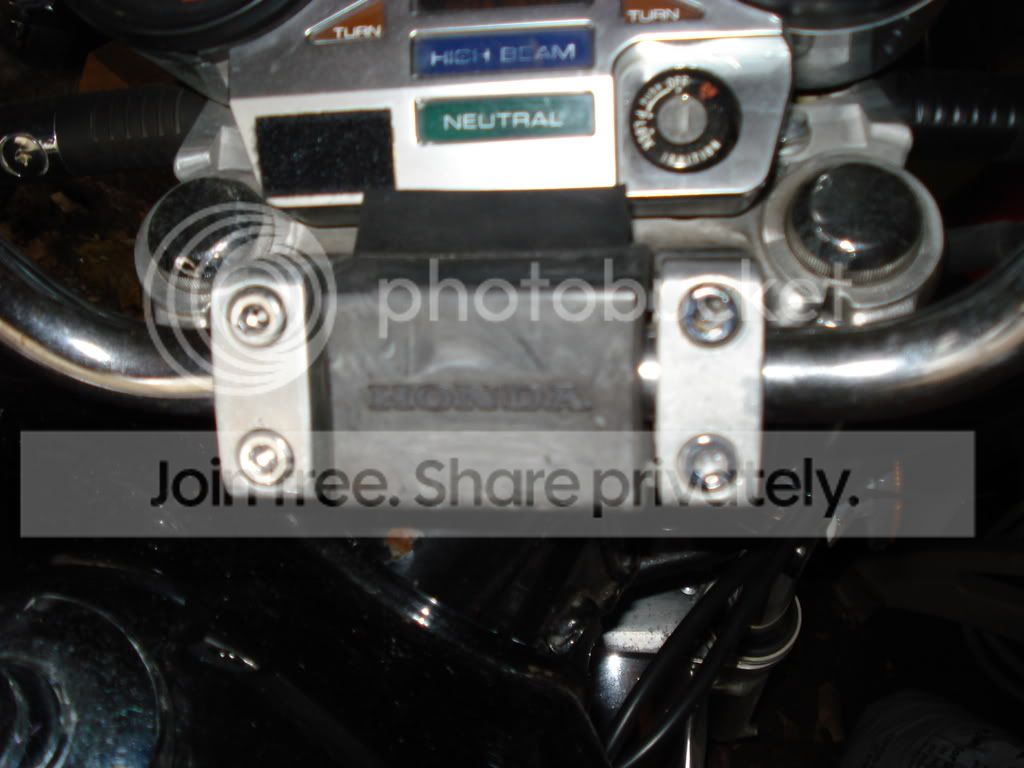
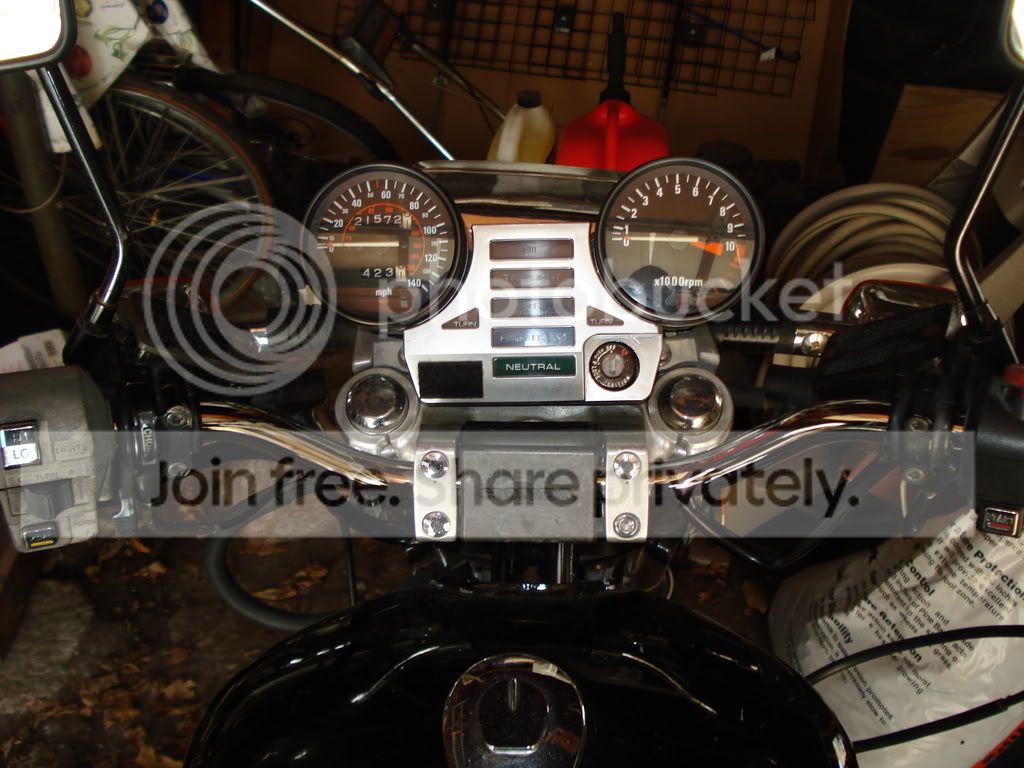
Removing the instrument clusters (there are two Phillips-head screws per cluster)
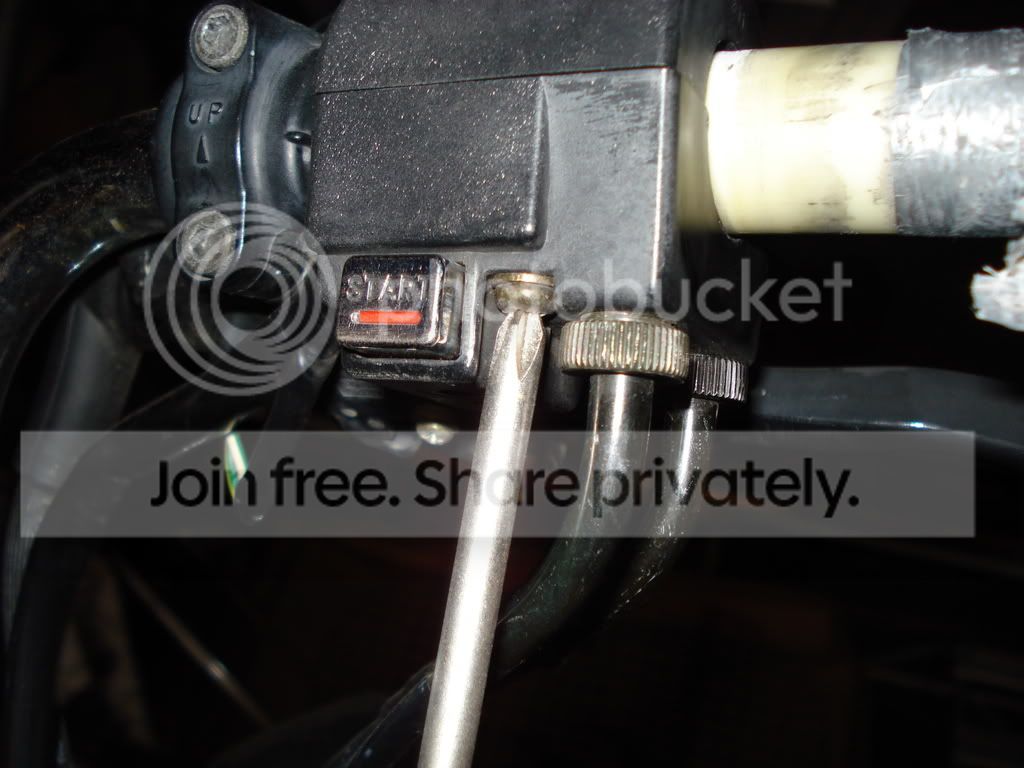
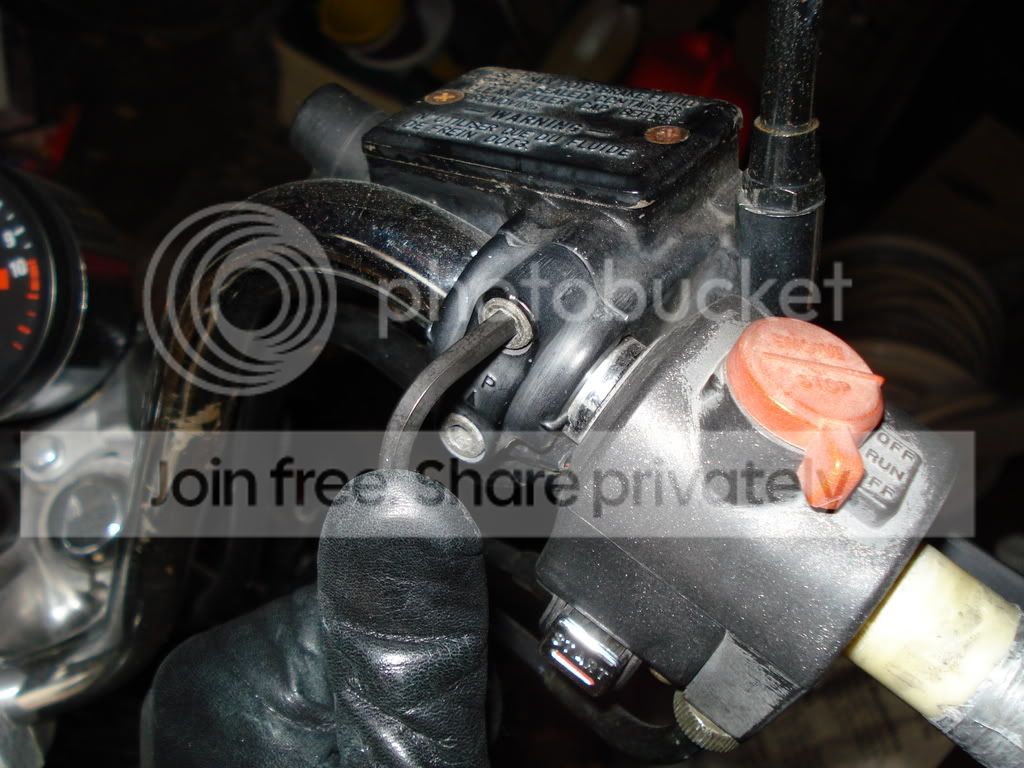
Removing the Allen Bolts (these are 5mm and a real pain to get loose)
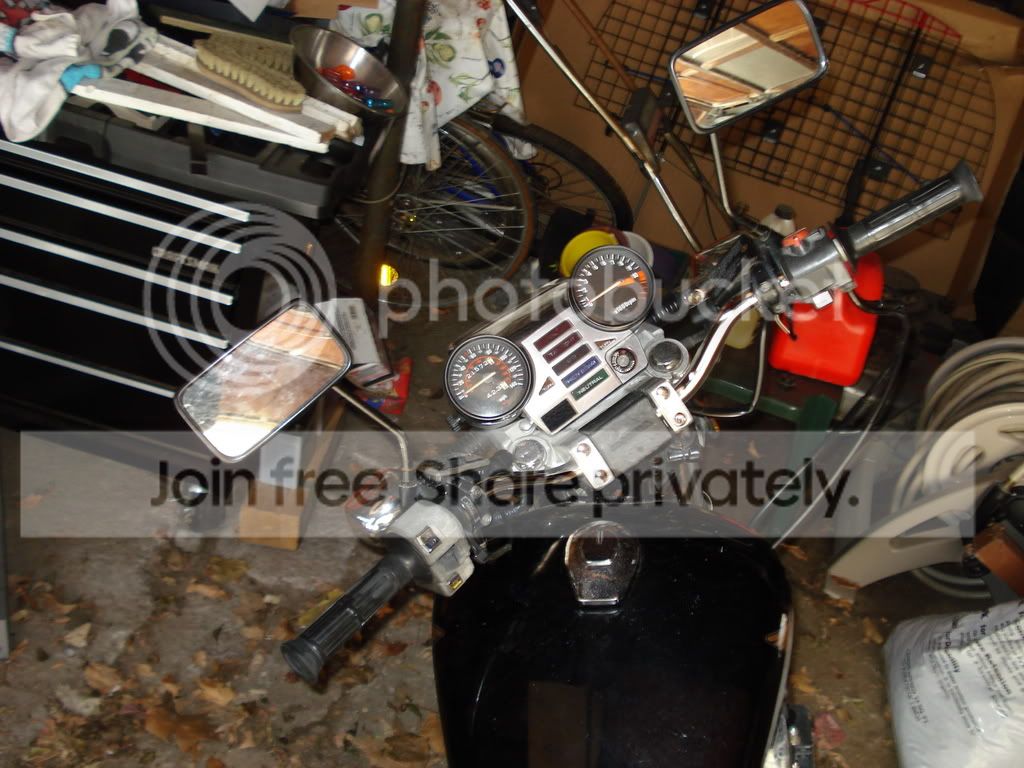
The Bike As Of Now

More to come at a later date!
I was home this weekend and the weather improved enough to get out to work on the bike. So far I got the new handlebars on and fitted. I still need to drill a hole in the right handlebar to mount the engine cut-off switch and starter button onto. I also have to attach the hand grips.
Old (Stock) Handlebars:

New (Aftermarket) Handlebars

Mounting Allen Bolts (6mm)

Removing The Grips (I used a screwdriver dipped in a mixture of soap and water)

Success!

Removing the instrument clusters (there are two Phillips-head screws per cluster)

Removing the Allen Bolts (these are 5mm and a real pain to get loose)

The Bike As Of Now

More to come at a later date!
Trending Topics
Thread Starter
Junior Member
Joined: Apr 2007
Posts: 35
Likes: 0
From: Buffalo, NY, United States
Sorry in advance that I don't have any pictures of me actually working on the bike, only pictures of the bike afterwards. However I did post a writeup.
For the drilling I used Craftsman Cobalt drill bits exclusively for drilling metal. For those that haven't drilled through metal before I would recommend that you read this thread before you start drilling: https://honda-tech.com/zerothread?id=1141619
Writeup:
For this project you'll need:
Electrical tape
Dish soap
Water
A 10mm wrench
A cup for a dish soap/water concoction
A long flathead screwdriver
A phillips head screwdriver
A standard ruler
A Sharpie
5mm and 6mm allen wrenches
A drill press
A vice that you can set on your drill press
A 1/64" and a 13/64" Cobalt drill bit
A friend to hold the handlebars as your mounting, dismounting them
Shop towels
This measurments for the tools and points at which to drill pertains only to the 1983 Honda Nighthawk 550. If you ride a different bike you might need different sized tools and will need to drill in different places.
Part I--Removing The Stock Handlebars
Start by making sure that you're working on a level surface. Bring the bike up onto its center stand and make sure the front fork is unlocked and the front wheel is blocked.
Disconnect the battery from the bike. This can be done using a 10mm wrench and a screwdriver. Always disconnect the negative battery terminal first. Then proceed to detach the positive cable.
Start by removing the four caps around the black plastic cover that reads "HONDA". These protect the bolts. Save these caps for later. You can pry these off with a flathead screwdriver.
Now you'll want to remove the left and right hand grips. Mix dish soap and water together. Dip your flathead screwdriver in this concoction and then use it to get undrneath the hand grips. This makes it easier to slide the grips off.
Once this is done, there are two small wires on each cluster. Detach these by gently pulling on the rubber clips. Remember to attach these later, as this is the switch for your brake light.
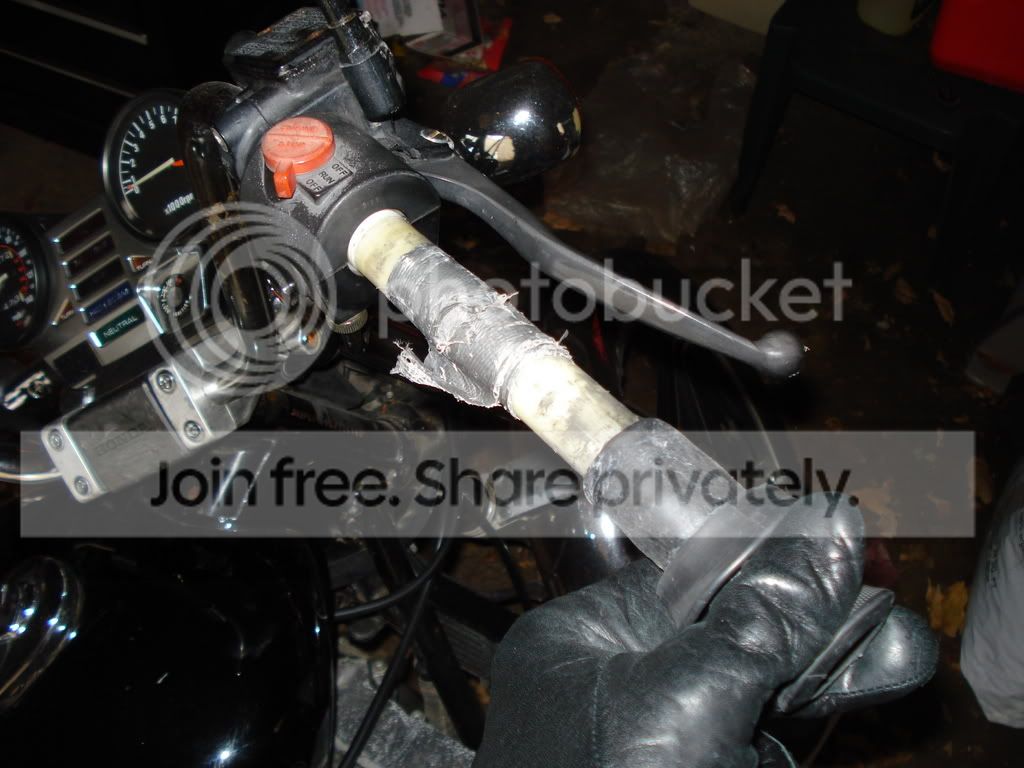
Now have your friend hold the handlebars as you detach them from the bike. Use your 6mm allen wrench to do this. The two brackets should come off in addition to the four screws and the black plastic block that reads "HONDA" on it. Now you can move the handlebars around as you remove the front brake lever/mirror unit and clutch lever/mirror unit. These are held on by 5mm allen bolts. Set these on shop towels placed over the instrument cluster. Slide the choke control off the handlebar. You'll have to use some finesse and go the other way to get it off the bar as there will be electrical tape on the left handgrip that won't come off (because it was applied a quarter century ago). Once this is done you've completed part 1 of the swap! Now onto part two!
Part II--Installing the New Handlebars
Now you'll want to drill two 13/64" holes. However, first use your 1/64" bit to start a pilot hole. For the right hand grip, drill a hole 5 7/8" from the end of the bar. For the left hand grip, drill a hole 7" from the end of the bar. Make sure that both holes are drilled on the bottom end of the bars. I would recommend that you start off by drilling a pilot hole with a smaller drill, as this makes it easier. Also, feel free to clamp the hand grip part of the bar in a vice, as this is what I did. Yes, this will mess up the chrome, but this part of the handlebar will be covered by the throttle and left hand grip anyway.
After making sure that both clusters fit onto the handlebars and that the pins fit into the holes screw the clusters down. However make sure that the choke control is mounted on the left hnadgrip prior to screwing on the left cluster. You can wait until later to install the front brake lever/mirror unit and clutch lever/mirror unit, as this can be done by completely removing both allen bolts allowing the clamp to come off and then mounting these in front of the clusters.
Prior to mounting the bars, there is a black plastic piece that has "HONDA" written in the front of it. This keeps dust from getting in a hole behind the handlebars. Make sure this is on over the handlebars before you bolt the clamps down, as the clamps hold this cover in place as well as the handlebars.
After this, wrap first the six inches of left handlebar in electrical tape. This will keep the left handgrip from slipping around. Now you're good to mount the hand grips. Use a mixture of soap and water as stated earlier and spread this over the insides of handgrips.
When the hand grips are mounted, re-attach the brake light switch. This consists of two small wires that connect the throttle cluster to the front brake lever. Make sure everything is tightened down well and put the caps back over the mounting allen bolts. Re-connect the battery making sure you connect the positive and then the negative. Now turn the FUEL to ON, turn the ignition key, put the bike in Neutral and turn the engine cut-off switch to the RUN position. Put the choke on and hit the starter! If everything's normal then grab your helmet and some gear so you can take the bike to the nearest empty parking lot and get the feel of your new handlebars!
Pics and possibly a video of me testing out the bike to come...as soon as the foot of snow on the ground disappears
And of course, what kind of thread would this be without some pics of the finished product?

Modified by BlkCB550SC at 6:05 PM 3/2/2008
Modified by BlkCB550SC at 6:09 PM 3/2/2008
For the drilling I used Craftsman Cobalt drill bits exclusively for drilling metal. For those that haven't drilled through metal before I would recommend that you read this thread before you start drilling: https://honda-tech.com/zerothread?id=1141619
Writeup:
For this project you'll need:
Electrical tape
Dish soap
Water
A 10mm wrench
A cup for a dish soap/water concoction
A long flathead screwdriver
A phillips head screwdriver
A standard ruler
A Sharpie
5mm and 6mm allen wrenches
A drill press
A vice that you can set on your drill press
A 1/64" and a 13/64" Cobalt drill bit
A friend to hold the handlebars as your mounting, dismounting them
Shop towels
This measurments for the tools and points at which to drill pertains only to the 1983 Honda Nighthawk 550. If you ride a different bike you might need different sized tools and will need to drill in different places.
Part I--Removing The Stock Handlebars
Start by making sure that you're working on a level surface. Bring the bike up onto its center stand and make sure the front fork is unlocked and the front wheel is blocked.
Disconnect the battery from the bike. This can be done using a 10mm wrench and a screwdriver. Always disconnect the negative battery terminal first. Then proceed to detach the positive cable.
Start by removing the four caps around the black plastic cover that reads "HONDA". These protect the bolts. Save these caps for later. You can pry these off with a flathead screwdriver.
Now you'll want to remove the left and right hand grips. Mix dish soap and water together. Dip your flathead screwdriver in this concoction and then use it to get undrneath the hand grips. This makes it easier to slide the grips off.
Once this is done, there are two small wires on each cluster. Detach these by gently pulling on the rubber clips. Remember to attach these later, as this is the switch for your brake light.
Now have your friend hold the handlebars as you detach them from the bike. Use your 6mm allen wrench to do this. The two brackets should come off in addition to the four screws and the black plastic block that reads "HONDA" on it. Now you can move the handlebars around as you remove the front brake lever/mirror unit and clutch lever/mirror unit. These are held on by 5mm allen bolts. Set these on shop towels placed over the instrument cluster. Slide the choke control off the handlebar. You'll have to use some finesse and go the other way to get it off the bar as there will be electrical tape on the left handgrip that won't come off (because it was applied a quarter century ago). Once this is done you've completed part 1 of the swap! Now onto part two!
Part II--Installing the New Handlebars
Now you'll want to drill two 13/64" holes. However, first use your 1/64" bit to start a pilot hole. For the right hand grip, drill a hole 5 7/8" from the end of the bar. For the left hand grip, drill a hole 7" from the end of the bar. Make sure that both holes are drilled on the bottom end of the bars. I would recommend that you start off by drilling a pilot hole with a smaller drill, as this makes it easier. Also, feel free to clamp the hand grip part of the bar in a vice, as this is what I did. Yes, this will mess up the chrome, but this part of the handlebar will be covered by the throttle and left hand grip anyway.
After making sure that both clusters fit onto the handlebars and that the pins fit into the holes screw the clusters down. However make sure that the choke control is mounted on the left hnadgrip prior to screwing on the left cluster. You can wait until later to install the front brake lever/mirror unit and clutch lever/mirror unit, as this can be done by completely removing both allen bolts allowing the clamp to come off and then mounting these in front of the clusters.
Prior to mounting the bars, there is a black plastic piece that has "HONDA" written in the front of it. This keeps dust from getting in a hole behind the handlebars. Make sure this is on over the handlebars before you bolt the clamps down, as the clamps hold this cover in place as well as the handlebars.
After this, wrap first the six inches of left handlebar in electrical tape. This will keep the left handgrip from slipping around. Now you're good to mount the hand grips. Use a mixture of soap and water as stated earlier and spread this over the insides of handgrips.
When the hand grips are mounted, re-attach the brake light switch. This consists of two small wires that connect the throttle cluster to the front brake lever. Make sure everything is tightened down well and put the caps back over the mounting allen bolts. Re-connect the battery making sure you connect the positive and then the negative. Now turn the FUEL to ON, turn the ignition key, put the bike in Neutral and turn the engine cut-off switch to the RUN position. Put the choke on and hit the starter! If everything's normal then grab your helmet and some gear so you can take the bike to the nearest empty parking lot and get the feel of your new handlebars!
Pics and possibly a video of me testing out the bike to come...as soon as the foot of snow on the ground disappears
And of course, what kind of thread would this be without some pics of the finished product?
Modified by BlkCB550SC at 6:05 PM 3/2/2008
Modified by BlkCB550SC at 6:09 PM 3/2/2008

New User
Joined: May 2009
Posts: 1
Likes: 0
Does anyone have a link to an online parts store that sells replacement 1983 cb650sc (nighthawk) handlebars that are close to stock? I've been looking all over and I can't find any. Alternately, does anyone have the actual bar sizes measured? It seems that no one has posted the actual bar measurements online.
Thanks,
Francis
Thanks,
Francis
Thread Starter
Junior Member
Joined: Apr 2007
Posts: 35
Likes: 0
From: Buffalo, NY, United States
Wow! This thread brings back memories! Since I last posted I've been riding my Nighthawk with the aftermarket handlebars and it's been handling like a dream!
I couldn't find the handlebar measurements either, so I measured them myself. I don't know about handlebars that are close to stock for the CB650SC, but the Bikemaster Daytona handlebars have allowed me to handle my Nighthawk 550 with great ease. They allow for excellent cornering and counterbalancing in parking lots, while at the same time they work wonders at 55 and 65 mph. With the older stock handlebars, the bike felt sluggish and was far more difficult to handle. From looking at the CB650SC, I would think that Bikemaster Daytona handlebars would be the next best (if not better) thing from the stock OEM replacement.
Does anyone have a link to an online parts store that sells replacement 1983 cb650sc (nighthawk) handlebars that are close to stock? I've been looking all over and I can't find any. Alternately, does anyone have the actual bar sizes measured? It seems that no one has posted the actual bar measurements online.
nice bike! i just picked up a 650 for 500$ any more pics? i like how it looks i need something to base the look of the bike off of.
beautiful, do you know if the clusters are swapable between models? ive seen those grey type clusters and another black smaller cluster with max mph of 80
Thread Starter
Junior Member
Joined: Apr 2007
Posts: 35
Likes: 0
From: Buffalo, NY, United States
I would think that it would be rather difficult to swap the clusters from a 550 with those from a 650. For one the 650 has a gear indicator while the 550 does not. Also, the needles for the speedometer and tach are encased in the same unit on the 650 while on the 550 they are encased in separate units.

Thread
Thread Starter
Forum
Replies
Last Post
BigLife221
Introduce Yourself
0
Sep 14, 2018 09:03 AM
conge08
Honda Accord (1990 - 2002)
7
Nov 26, 2008 12:35 AM