

Problems: GC Top Hats

Thread Starter
Honda-Tech Member
iTrader: (4)
Joined: Nov 2003
Posts: 21,728
Likes: 0
From: Oakland, CA
How am I suppose to mount these things properly? I can't figure it out.
Supposedly, with stock hats, you'd put:
1 - washer on the piston
2 - top hat
3 - washer on top hat
4 - locking nut(s)
I did the same with the GC top hats (cept that i had to swap the piston sleeves in the hats since the one that came in the gc hats were too small), and i didnt have any room left to put the locking nut on top (very few threads).
I can't figure this out... makes me feel really...dumb.
Honda-Tech Member
Joined: Feb 2000
Posts: 2,064
Likes: 0
From: Triangle, NC, USA
I just experienced the very same thing. Spoke with GC about it and here is your problem.
There are 2 bushings inside the top hat, one on top and one inserted from the bottom. When you install your 10/12mm sleeve into the bushings(this part slides over the shock rod), it is creating a considerable gap between the bushings because the sleeve is not inserting into the second bushing.
What I did to solve this was remove the top bushing and install the sleeve into the lower bushing. Pushing it thru the bottom and tapping it thru worked the best for me. I then pressed a slightly larger socket into the upper bushing to expand the hole in it and slid it onto the sleeve. Tap them together and you're done.
It was quit labor intensive to do and I was sort of surprised that GC makes no mention of this in their instructions as they knew right away what my problem was when I called. I would say it took me about 45 mins to do all four, with the first one taking 15-20 mins to figure it out. After that, the top hat slide right on and gave me more than enough threads for the washers/nuts.
Thread Starter
Honda-Tech Member
iTrader: (4)
Joined: Nov 2003
Posts: 21,728
Likes: 0
From: Oakland, CA
<TABLE WIDTH="90%" CELLSPACING=0 CELLPADDING=0 ALIGN=CENTER><TR><TD>Quote, originally posted by RStoR »</TD></TR><TR><TD CLASS="quote">I just experienced the very same thing. Spoke with GC about it and here is your problem.
There are 2 bushings inside the top hat, one on top and one inserted from the bottom. When you install your 10/12mm sleeve into the bushings(this part slides over the shock rod), it is creating a considerable gap between the bushings because the sleeve is not inserting into the second bushing.
What I did to solve this was remove the top bushing and install the sleeve into the lower bushing. Pushing it thru the bottom and tapping it thru worked the best for me. I then pressed a slightly larger socket into the upper bushing to expand the hole in it and slid it onto the sleeve. Tap them together and you're done.
It was quit labor intensive to do and I was sort of surprised that GC makes no mention of this in their instructions as they knew right away what my problem was when I called. I would say it took me about 45 mins to do all four, with the first one taking 15-20 mins to figure it out. After that, the top hat slide right on and gave me more than enough threads for the washers/nuts. </TD></TR></TABLE>
Thanks man, I really appreciate your tip. Your advice + Hammer + WD-40 = Success.
Worked like a charm!
Member
Joined: May 2005
Posts: 1,829
Likes: 1
From: Norcal
Be sure to tighten and loosen the nuts on the top hats with the weight of the springs pushing up, the studs are simply pressed into the top hats and are not securely put in place. I am currently experencing that the studs which mount the top hat to the shock tower are spinning in place when tightening or loosening the nuts, I will have to take them out later and jb-weld them in place.
Thread Starter
Honda-Tech Member
iTrader: (4)
Joined: Nov 2003
Posts: 21,728
Likes: 0
From: Oakland, CA
<TABLE WIDTH="90%" CELLSPACING=0 CELLPADDING=0 ALIGN=CENTER><TR><TD>Quote, originally posted by chrisw85 »</TD></TR><TR><TD CLASS="quote">Be sure to tighten and loosen the nuts on the top hats with the weight of the springs pushing up, the studs are simply pressed into the top hats and are not securely put in place. I am currently experencing that the studs which mount the top hat to the shock tower are spinning in place when tightening or loosening the nuts, I will have to take them out later and jb-weld them in place.</TD></TR></TABLE>
Mine were already loose like that out the package. All I did was pull and twist them into place, and they won't come loose again once you're tightening the nuts.
Mine were already loose like that out the package. All I did was pull and twist them into place, and they won't come loose again once you're tightening the nuts.
Trending Topics
Thread Starter
Honda-Tech Member
iTrader: (4)
Joined: Nov 2003
Posts: 21,728
Likes: 0
From: Oakland, CA
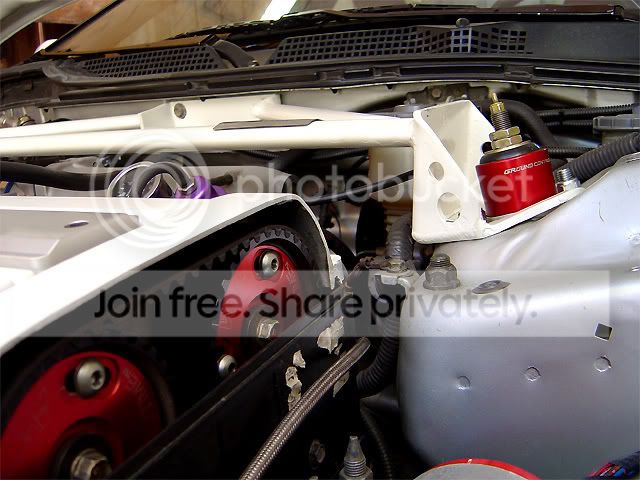
<TABLE WIDTH="90%" CELLSPACING=0 CELLPADDING=0 ALIGN=CENTER><TR><TD>Quote, originally posted by doubleshotz »</TD></TR><TR><TD CLASS="quote">How many threads did you get after locking both nuts on top?
I only got 6-8 threads left after final assembly and I've been seeing a some pictures with waaay more threads up top than mine.</TD></TR></TABLE>
Very good amount left:
I only got 6-8 threads left after final assembly and I've been seeing a some pictures with waaay more threads up top than mine.</TD></TR></TABLE>
Very good amount left:


Joined: Jan 2002
Posts: 30,024
Likes: 59
From: Nowhere and Everywhere
Looks like mine with stock top hats. The upper nut isn't threaded all the way on in this pic, but if it were it would have about the same amount of threads showing as DC4kid's:


Junior Member
Joined: May 2005
Posts: 767
Likes: 1
Now I gotta pull everything apart again 
Y'all make mine look like theres something wrong with it.
Mine looks like Patrick's picture, with both nuts locked tight
Any tips on leaving extra threads??
Y'all make mine look like theres something wrong with it.
Mine looks like Patrick's picture, with both nuts locked tight
Any tips on leaving extra threads??
Joined: Jan 2002
Posts: 30,024
Likes: 59
From: Nowhere and Everywhere
What's wrong w/ looking like mine? If the spring perch is spun down far enough for the spring to not have preload when putting the top hat on, then you just push the top hat down as far as it will go.
Besides, the amount of threads showing up top is determined by how thick the 2 bushings are inside the top hat.
Besides, the amount of threads showing up top is determined by how thick the 2 bushings are inside the top hat.
Member
Joined: May 2005
Posts: 1,829
Likes: 1
From: Norcal
So with the GC tops hats, you have:
||<---threads
=<---washer
[-]<---tophat
=<---washer
{}<---bumpstop, push this down past nub may be tight
||<---shock rod and the litte 'nub'
breakdown of tophat:
|/_\|<--- bushing on top
||=||<--- middle of top hat where collar slides over shock rod is (collar going thru top bushing, thru middle, and thru bottom bushing. Bottom of collar will rest on the washer that rests on 'nub' on rod when tightened)
|\_/|<--- bushing through bottom of top hat
When you put the whole top hat on the shock rod it may not look like a lot of threads, but you tighten the first nut down all the way until it squishes the bushings down like in the pic above posted by dc4kid, then lock it with the second nut. I believe the hex on the shock rod is 8mm, and the securing nuts are ~19mm. I used a 8mm box wrench to keep the rod from spinning while tightening the first nut down.

Junior Member
Joined: May 2005
Posts: 767
Likes: 1
<TABLE WIDTH="90%" CELLSPACING=0 CELLPADDING=0 ALIGN=CENTER><TR><TD>Quote, originally posted by PatrickGSR94 »</TD></TR><TR><TD CLASS="quote">What's wrong w/ looking like mine?</TD></TR></TABLE>
Other than having stock top hats? haha nah, I'm messing with you man.
I meant my GC top mounts with both nuts locked tight, remaining threads look exactly like that picture of yours. But yours aint locked in that picture. And DC4KiD has twice the threads than mine.
Maybe I didn't compress the bushings enough? I swear I turned until the rachet sounded like it was begging to stop while my friend was holding the top washer/bushing with a vice grip so it don't spin.
BTW DC4KiD, looks like you used the wrong washer up top. Not that it would matter but, you suppose to use the 'dished' washer on top of the mounts.
Member
Joined: May 2005
Posts: 1,829
Likes: 1
From: Norcal
The dished washer is for the oem mounts if i recall. My GC hats came with the 'flat' washer and thats what I used and have seen used on here as well. I held the shock rod using that 8/9mm hex on top, not the washer, while I was tightening the first nut.

* B A N N E D *
Joined: Jan 2006
Posts: 1,874
Likes: 0
From: Running Round At Night In Los Angeles, CALI
<TABLE WIDTH="90%" CELLSPACING=0 CELLPADDING=0 ALIGN=CENTER><TR><TD>Quote, originally posted by DC4KiD »</TD></TR><TR><TD CLASS="quote">
Very good amount left:
</TD></TR></TABLE>
kool set up
Very good amount left:
</TD></TR></TABLE>kool set up

Thread
Thread Starter
Forum
Replies
Last Post
EL-Driver
Suspension & Brakes
2
Oct 5, 2005 06:32 PM
JDMlyfestyle
Suspension & Brakes
3
Aug 15, 2005 08:17 PM