

Interior Paint Color Change

Thread Starter
Joined: Aug 2007
Posts: 47
Likes: 0
From: DALLAS, TX, USA
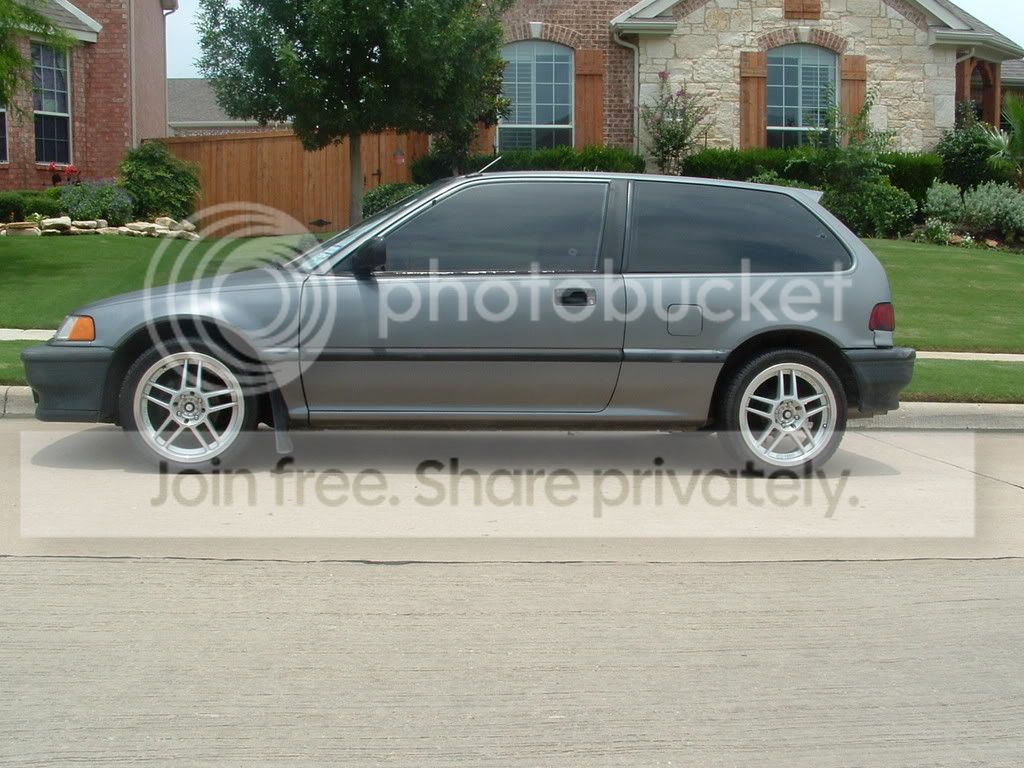
so here is my first Honda ever...i intended on getting a crx, but when i found out it was an ef hatch i knew it was meant to be....
the other side now.....

that was back when i first picked her up.........
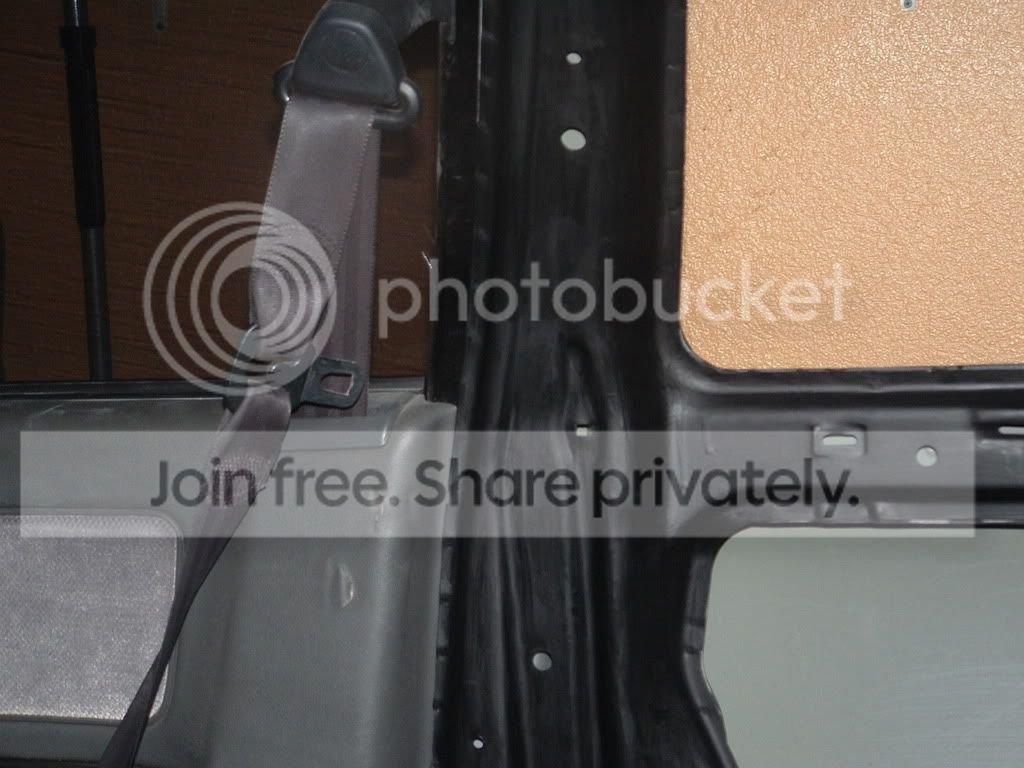
here is where my question lies.......
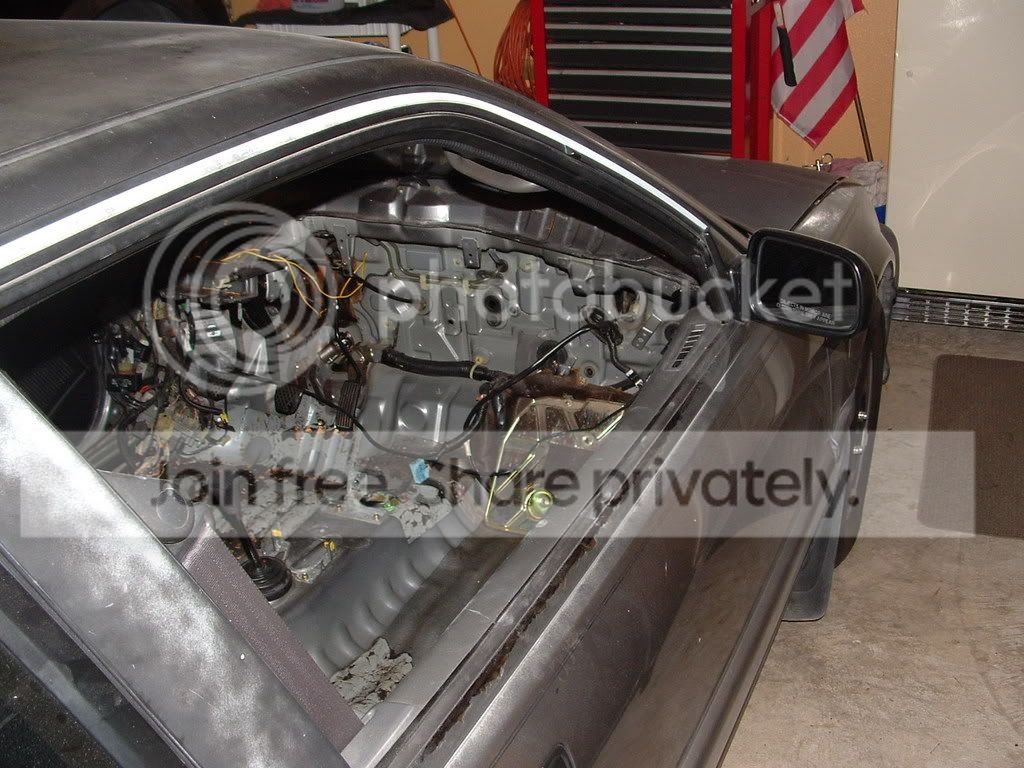
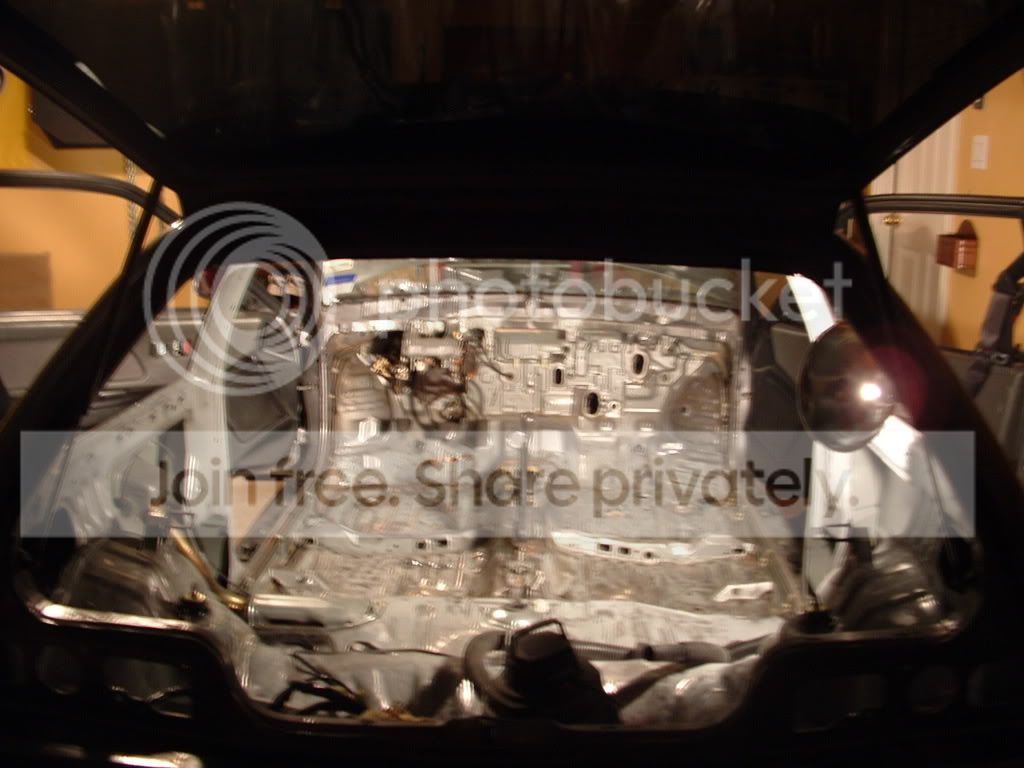
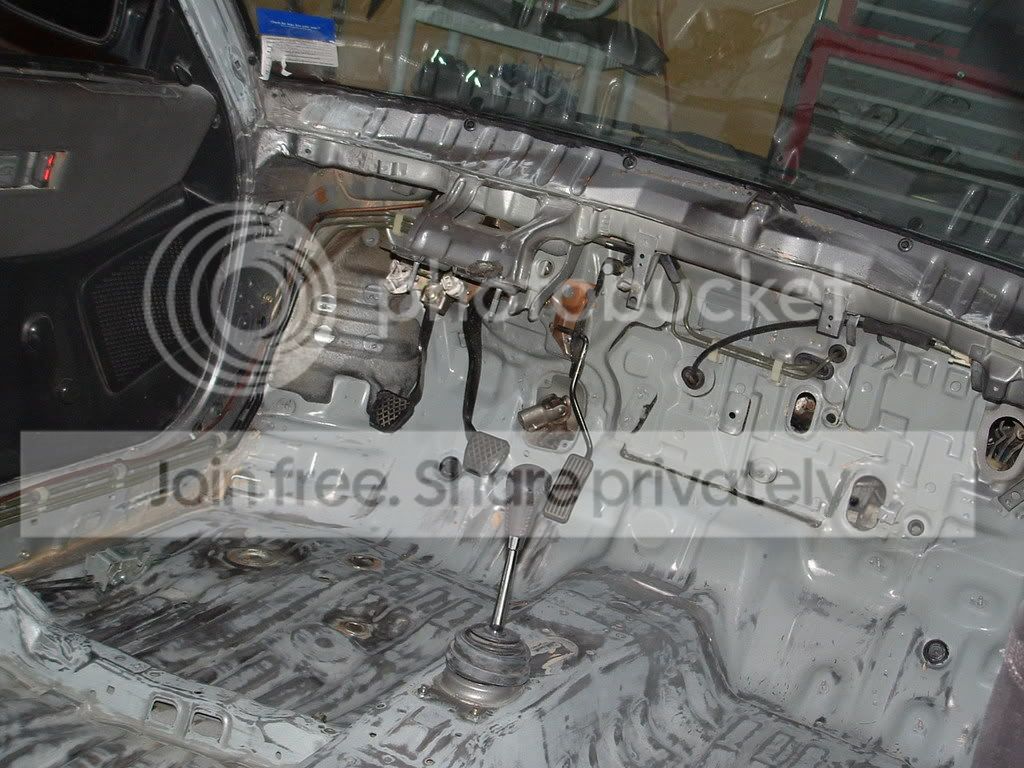
this is the most updated pic I have right now...but the ECU is removed...after figuring out it was as easy as it looked I grew some marbles and decided to take it out....wow it really was that easy....thats a first....once that was done all the sound material on the pass side is totally gone now too.....some people use map gas...i've even heard about dry ice....too much work for the newb..i decided on a chisel and a hammer to work those marbles out....more than a one day job i'll say that....go with the other methods to remove this stuff though...
just looking for some tips on how to get this interior painted another color..black most likely...ive been hand sanding and its taking literallly light years off my schedule...any suggestions or ideas would be EXCELLENT...
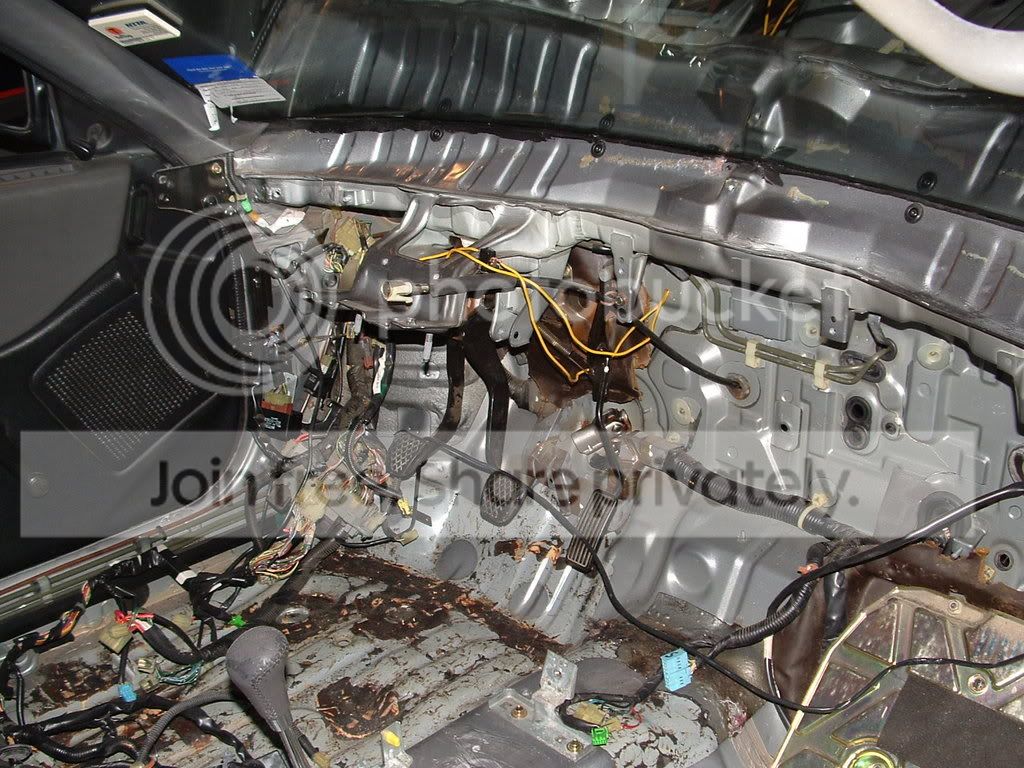
the only thing in my way is those pedals.. i don't even really want to mess with that until someone can point me in the right direction so any ideas on that would really set me in the right direction....i wouldn't even take them out if it wasn't for that rubber brown crap they put in there....
the other side now.....
that was back when i first picked her up.........
here is where my question lies.......
this is the most updated pic I have right now...but the ECU is removed...after figuring out it was as easy as it looked I grew some marbles and decided to take it out....wow it really was that easy....thats a first....once that was done all the sound material on the pass side is totally gone now too.....some people use map gas...i've even heard about dry ice....too much work for the newb..i decided on a chisel and a hammer to work those marbles out....more than a one day job i'll say that....go with the other methods to remove this stuff though...
just looking for some tips on how to get this interior painted another color..black most likely...ive been hand sanding and its taking literallly light years off my schedule...any suggestions or ideas would be EXCELLENT...
the only thing in my way is those pedals.. i don't even really want to mess with that until someone can point me in the right direction so any ideas on that would really set me in the right direction....i wouldn't even take them out if it wasn't for that rubber brown crap they put in there....
Thread Starter
Joined: Aug 2007
Posts: 47
Likes: 0
From: DALLAS, TX, USA
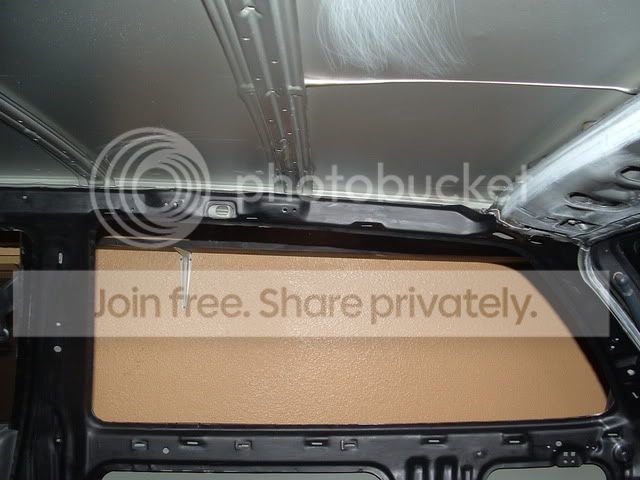
so yesterday after having posted some pictures of where I am I realized the paint and body section isn't quite as popular as the model specific forums...but oh well here is where I left off tonight..after an afternoon's worth of work...
so i'm not going into detail on how i got the wiring out of the car...its just out and i'm just gonna leave it at that...LOL....lets just say i have some soldering to look forward to...
besides that hang up....the side windows came out..once again it was much easier than I thought...and i also realized i should have tinted the windows with the glass out instead of in the car.....ehhh....im getting used to learning the hard way on this project...
im going out of town for the weekend so I won't be working on the car....hopefully the time away will give me some more inspiration...this website always helps though
so i guess whats next is getting the rest of the sound deadening material from the floorboards on the driver's side...probably need to clean up the pass. side too...and then there is some more of that stuff mounted on the fenderwells which looks like tons of fun....and then the doors gotta come off...i'll probably wait and paint those after the car is put back together..just to save a small portion of time.
and back to sanding again.... anyone know of a good tool for that which will get in those hard to sand areas...let me know...im on the lookout....
wapow
Honda-Tech Member
Joined: Feb 2004
Posts: 2,400
Likes: 0
From: Bakersfield, Ca
<TABLE WIDTH="90%" CELLSPACING=0 CELLPADDING=0 ALIGN=CENTER><TR><TD>Quote, originally posted by mellowbeam »</TD></TR><TR><TD CLASS="quote">
anyone know of a good tool for that which will get in those hard to sand areas...let me know...im on the lookout....
</TD></TR></TABLE>
Sand blaster?
Thread Starter
Joined: Aug 2007
Posts: 47
Likes: 0
From: DALLAS, TX, USA
yea that would really save tons of time, hassle, and sandpaper...lol..after looking at the portable sandblasters out there..it seems like you could definitely get some good use out of one..if you had the space for it....considering im working out of my parents garage and being new to this....i would probably be better off just having it done by someone....but damn...it looks like tons of fun....i guess i'll call around and have some qoutes thrown around before i decide on which way i want to take this....
if its in the budget though...i'll definitely consider it....until then i'll keep the thread open with new pics on the progress i'm making... probably tomm.
tonight i got some more sanding done.....i had school and when i got home my parents were sleeping so i didn't get to bust out with the power tools....so i just did some hand sanding for a couple hours....tomm i'll post some pics after i get that drivers side scraped down and hopefully i can tackle getting those pedals out...
thanks
Thread Starter
Joined: Aug 2007
Posts: 47
Likes: 0
From: DALLAS, TX, USA
ok so just to get things up to par from the pictures i first posted on this thread...i posted some exterior shots of the upgrades i chose which i thought were the most important and effective for where i wanna go with this build.....tokico blues on some tein's....skunk 2 LCA:S along with the camber kit they have on the market right now....as far as the front suspension goes, i'm putting that on hold until i get the interior done...remember one thing at a time...put your ducks in a row..then take them down the road...advice comes from anyone..so don't hate on the newb...
here is the rear shot...garage isn't quite wide enough so this is in two sections...
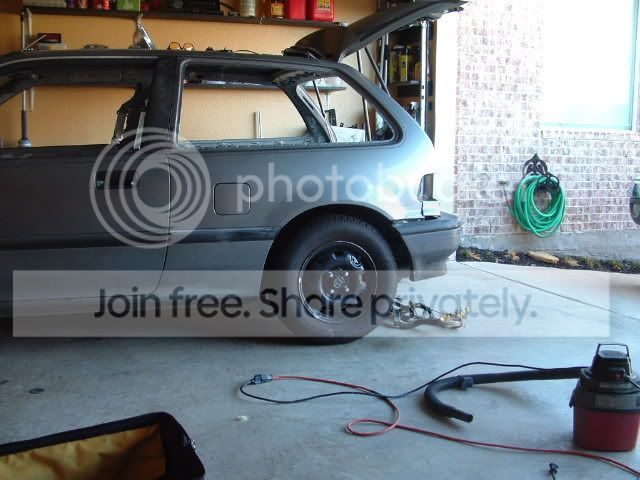
up front...
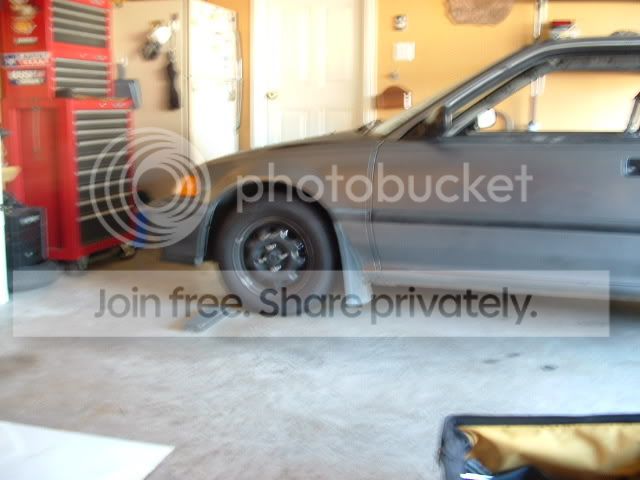
and the lower shot of the LCA's
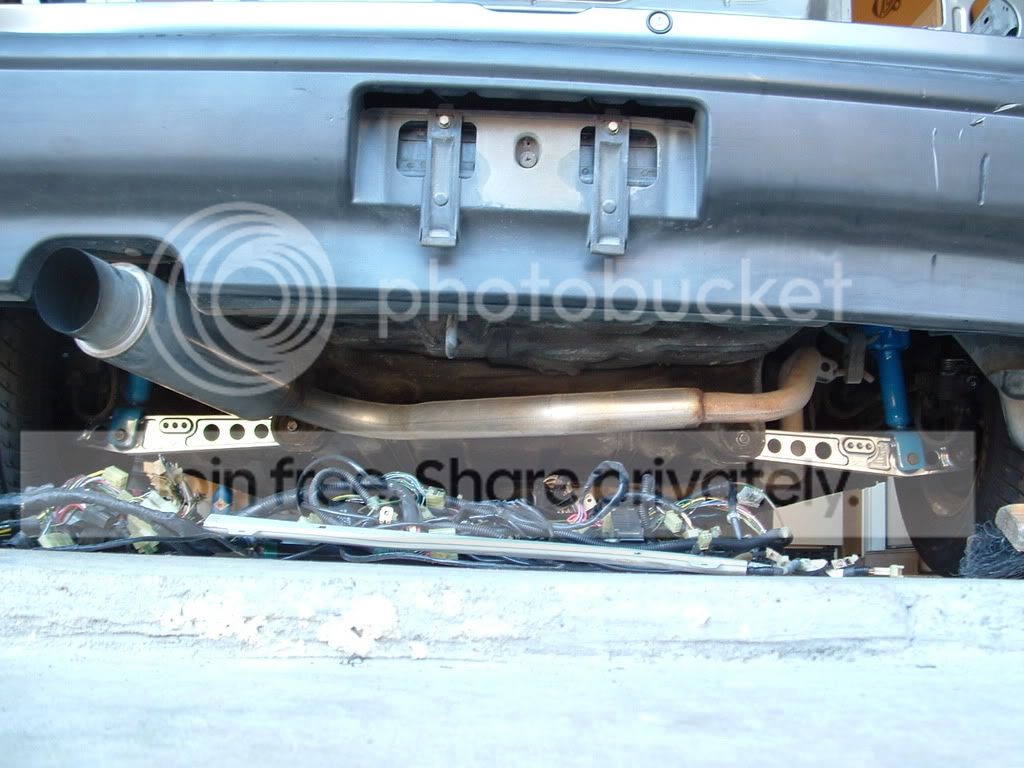
and yea i did do a rear disc swap from a 92 tegy..don't know if you can tell...but their there and worth every dolla i got from this dude's backyard/junkyard...
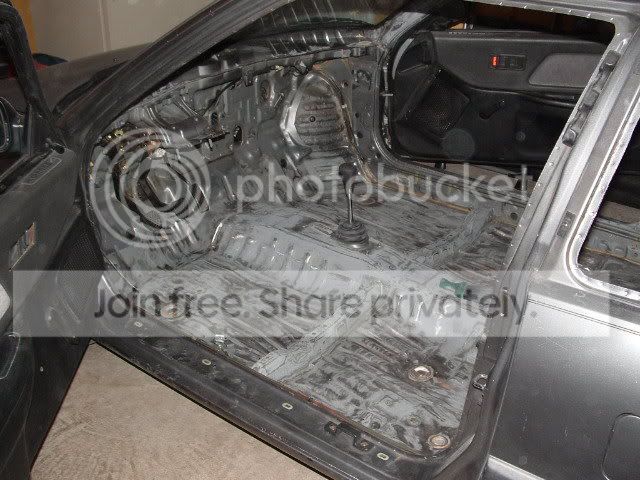
so back to the actual topic of discussion here...the interior...after getting back in the garage from a couple days off...it was tough getting out there and humpin on it...but once you jump the hurdle it seems hard to stop runnin....ya know...here is where i left off after the day..prolly after 3-4 hours...

here they come...
here is the rear shot...garage isn't quite wide enough so this is in two sections...
up front...
and the lower shot of the LCA's
and yea i did do a rear disc swap from a 92 tegy..don't know if you can tell...but their there and worth every dolla i got from this dude's backyard/junkyard...
so back to the actual topic of discussion here...the interior...after getting back in the garage from a couple days off...it was tough getting out there and humpin on it...but once you jump the hurdle it seems hard to stop runnin....ya know...here is where i left off after the day..prolly after 3-4 hours...
here they come...
Thread Starter
Joined: Aug 2007
Posts: 47
Likes: 0
From: DALLAS, TX, USA
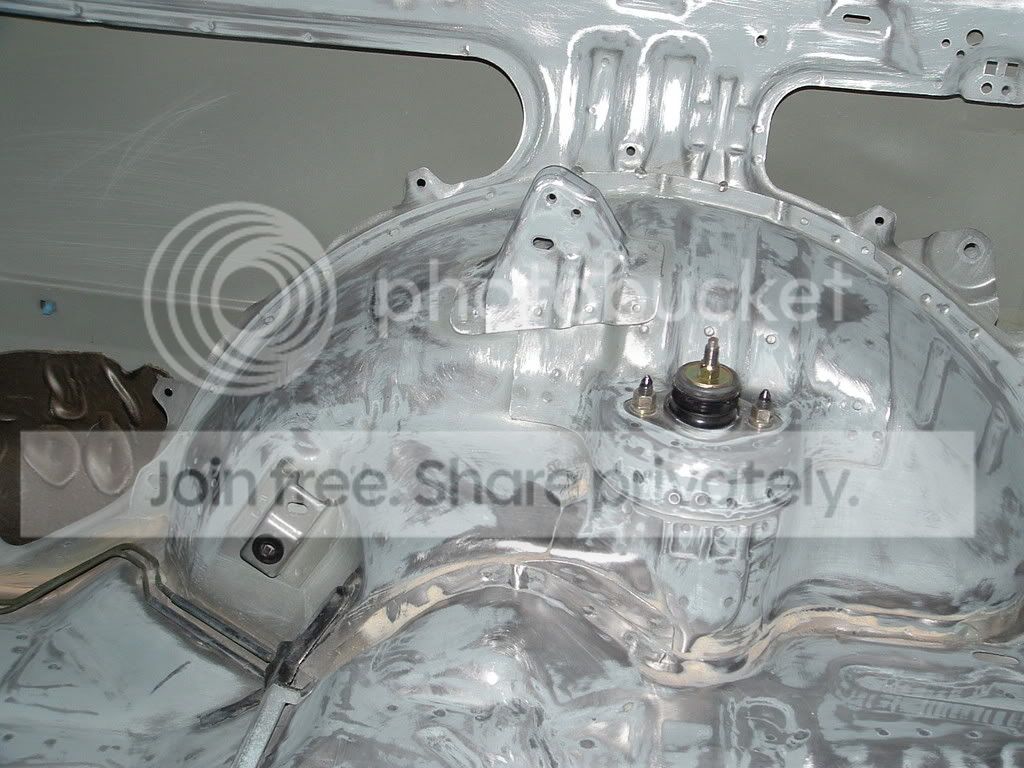
ya these pics i'm taking are huge compared to the one's i have seen from other threads...but for some reason they come out fuzzy which makes it hard to see the details where I'm at in the prep process....i'm still at the 40 grit stage so there is still some paint left on the inside..mostly in the rear where the spare tire would go.
the sound deadening material is pretty much cleaned up..and it seemed like what Honda did at the factory is...they layed the prime down...then the material...then the paint.....i could be wrong but thats what it seems...after using the wire brush on the drill to wipe up the remaining leftovers from chiseling it seems to go right down to the steel frame....which almost leads me to believe they didn't even primer under those areas of the car...but i don't wanna act like i know what i am talking about because it seems to get people in arguments on here....little gay arguments which i don't deal with...either agree or you agree to disagree...don't waste my time with petty verbal disagreements..i won't take the time to respond to them...
the sound deadening material is pretty much cleaned up..and it seemed like what Honda did at the factory is...they layed the prime down...then the material...then the paint.....i could be wrong but thats what it seems...after using the wire brush on the drill to wipe up the remaining leftovers from chiseling it seems to go right down to the steel frame....which almost leads me to believe they didn't even primer under those areas of the car...but i don't wanna act like i know what i am talking about because it seems to get people in arguments on here....little gay arguments which i don't deal with...either agree or you agree to disagree...don't waste my time with petty verbal disagreements..i won't take the time to respond to them...
Thread Starter
Joined: Aug 2007
Posts: 47
Likes: 0
From: DALLAS, TX, USA
back to topic....
after a short day i feel really confident on where I'm going with this...i'm sure the more advanced personas on here will tell you exactly the same when you finally get to that point where you feel strong about what your doing....for a newb its even more satisfying to start and see your hard work come more into focus on where you want to go with your build...basically thats where i am with this part of the build....
although im sure i'll eat my words when i start lookin for the next step to take on this build which definitely will not be on paint and body...lol.
its still a strong vibe to get when i sit back and look at the progress thats coming along....
Trending Topics
Junior Member
Joined: May 2007
Posts: 74
Likes: 0
From: Poopsville
I'm in the same boat as you, with an EF hatch as well, but not that far along yet. I need to take the dash out, but wiring scares me. How hard was the dash?
Thread Starter
Joined: Aug 2007
Posts: 47
Likes: 0
From: DALLAS, TX, USA
actually the dash was really easy...there wasn't any of those clips that they use on the moldings so it bolted right off...just make sure you get all the bolts out before you start tugging...i can take a look at the dash to see where all the bolts are located for you and give you a rough schematic of what to look forward to. If you have access to a shopkey that snap-on offers they give you a picture of where the bolts are but I think they took the photo from another model...probably like the wagon or something so...i do remember it being semi confusing on where the last couple of bolts were located so if it doesn't pull off....check again for a bolt somewhere....from what i remember though i was surprised it wasn't more complicated..
but yea the wiring is all jacked....when i first started fumbling with how to get the harness out of the car so i could sand i tried finding connections which would allow me to keep the engine harness intact without cutting anything, but i couldn't exactly figure out a way....i just cut into the harness from the inside of the car from two points where the harness comes into the car from the drivers side and the passengers side.....its a mess to look at so i would label EVERYTHING..especially if you are unfamiliar with the wiring diagram. where the harness plugs into the fuse box on the drivers side and then if your gonna cut make sure you label the two sides of the wire you are cutting because Honda ran out of colors i think and they used a couple of the same colors for diff things.....I THINK
i did it to be extra safe though......but for some reason i havea feeling when im dont with everything....she probably won't start...but then again i am expecting the worst.
good luck
Junior Member
Joined: May 2007
Posts: 74
Likes: 0
From: Poopsville
Thanks
I'm gonna be doing an engine swap so I might actually wait on this stuff as it would probably be easier to do it all at once and be able to throw a new harness in so cutting wires wouldn't be a problem. It doesn't help that I don't have a garage... plus this is all new to me.
However, your interior looks like it's ready for paint. Are you going to leave the pedals and the break lines or remove them first?
Thread Starter
Joined: Aug 2007
Posts: 47
Likes: 0
From: DALLAS, TX, USA
"howdy do its my favorite family to deliver milk to... ... ... ... " -dave chappelle-
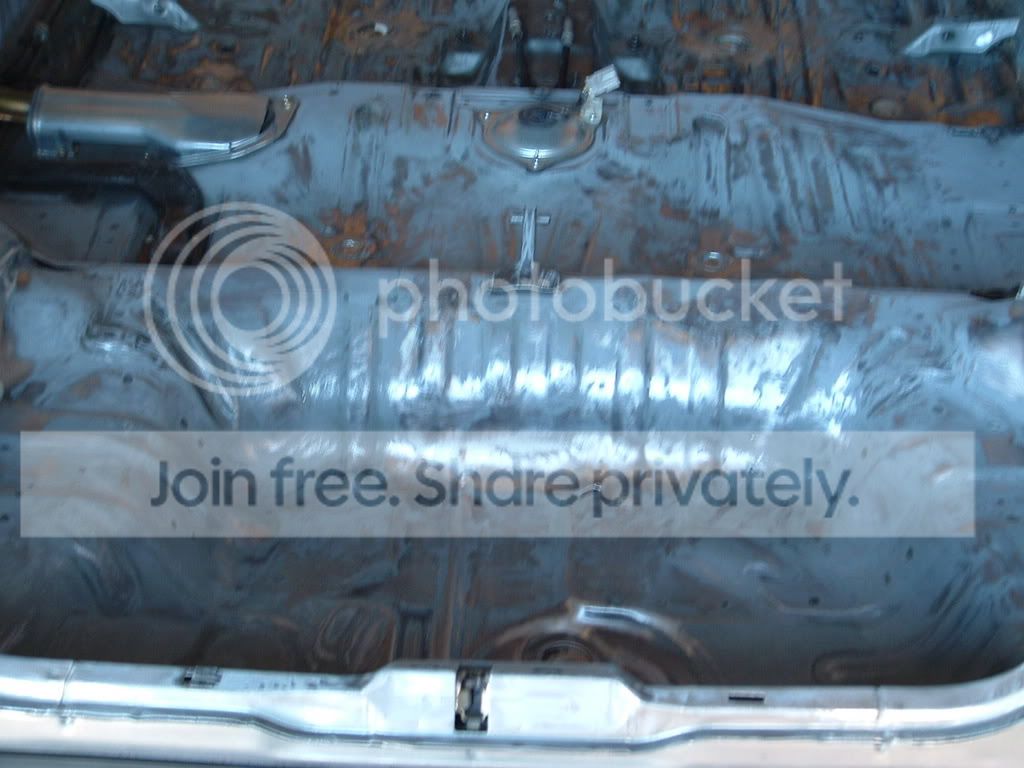
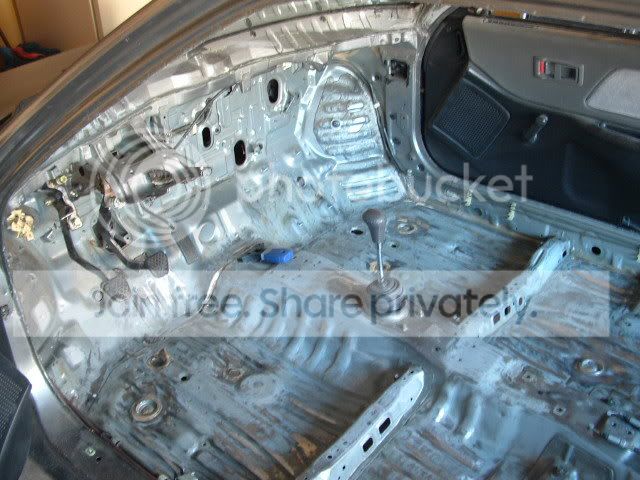
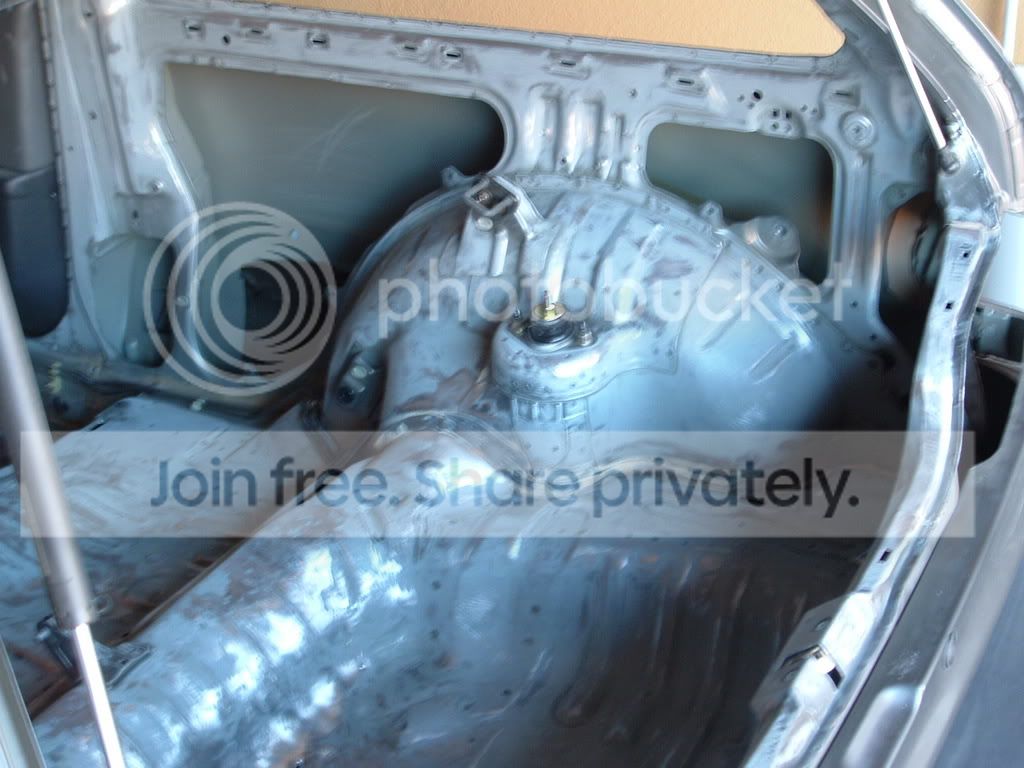
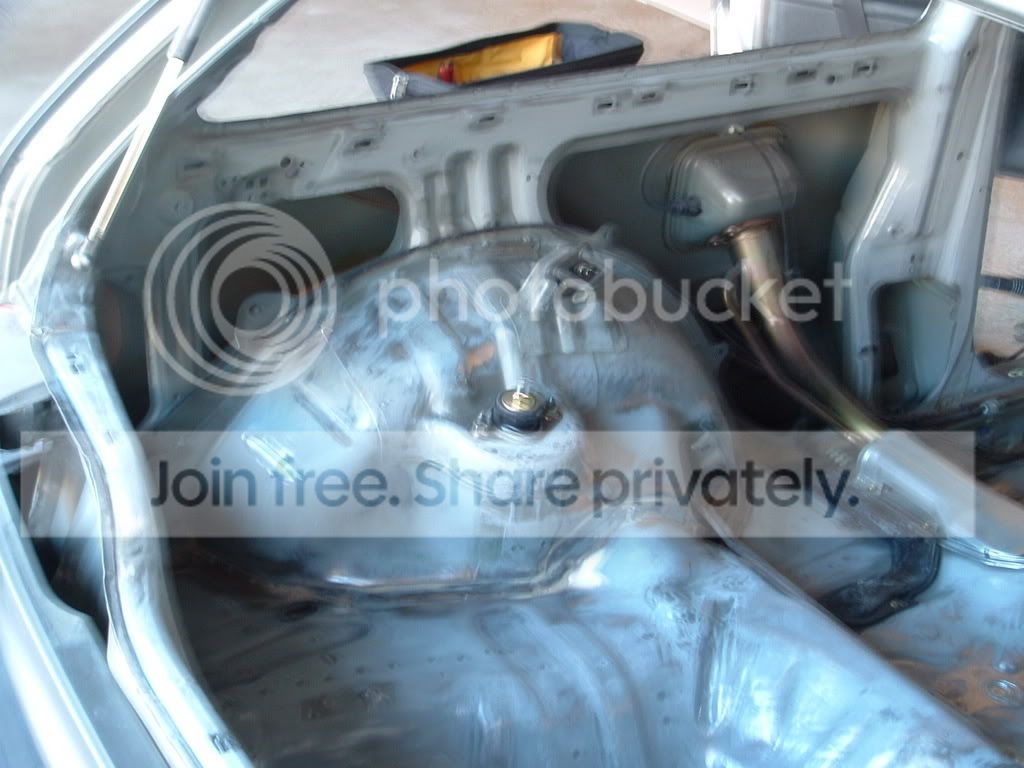
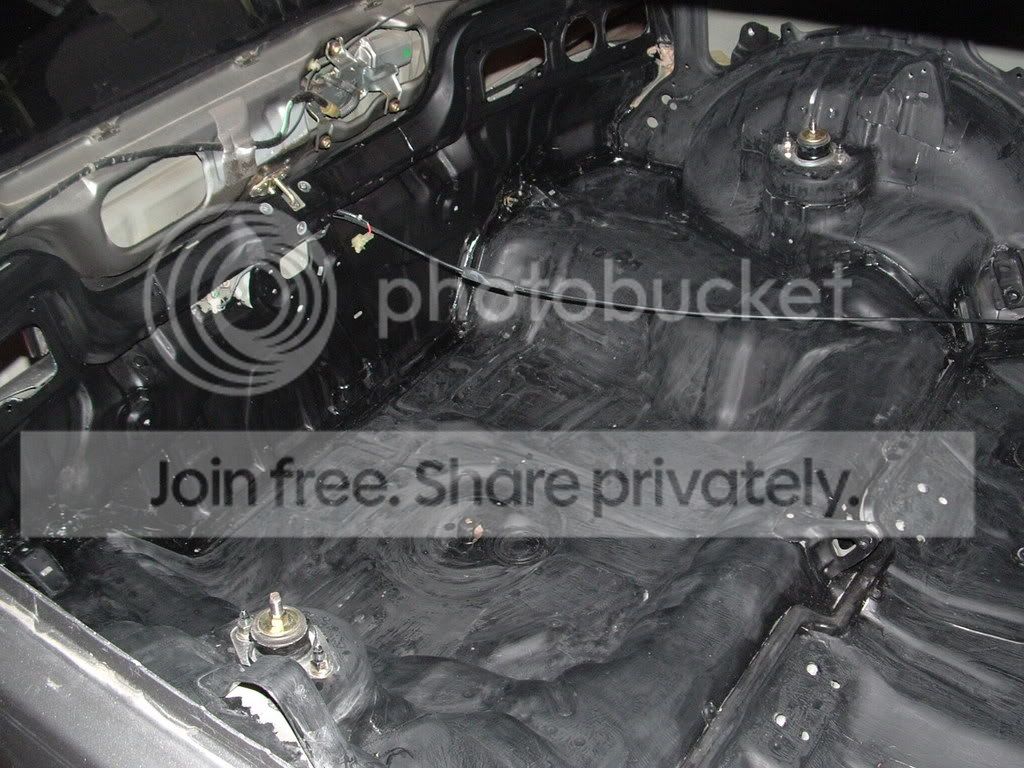
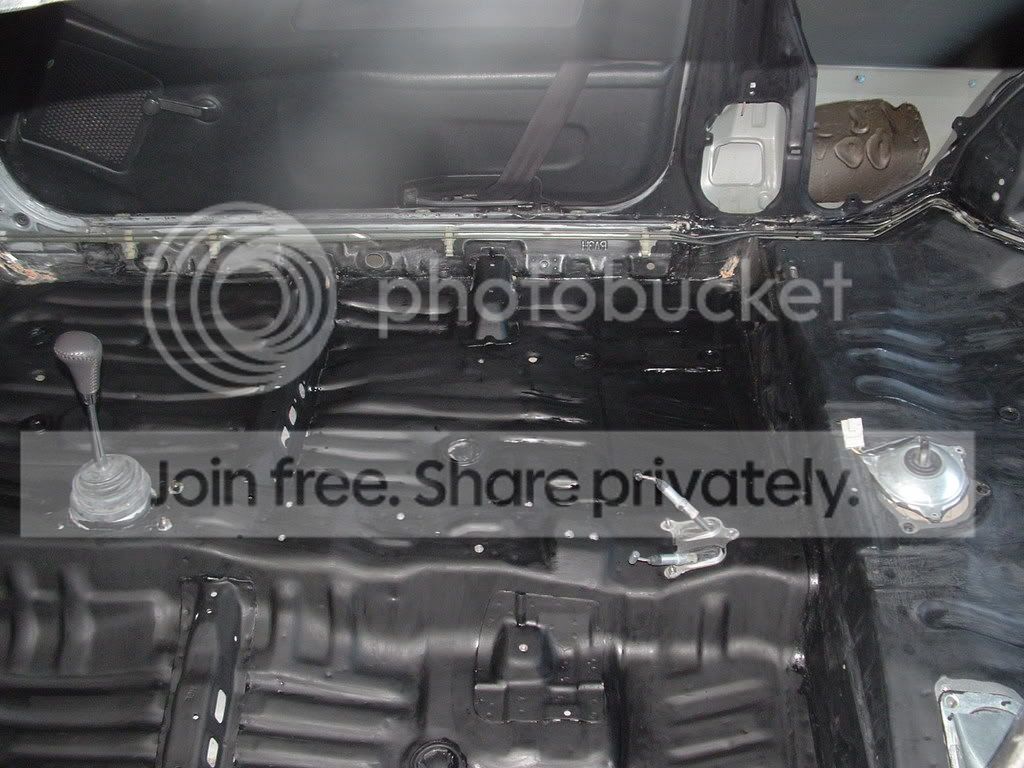
so on friday night which is now..well actually saturday morning....i am posting some updated shots of where I'm at in the process of prep... so here goes...i'lll give some captions for your humoring pleasures...hopefully if you will.... here they ***..
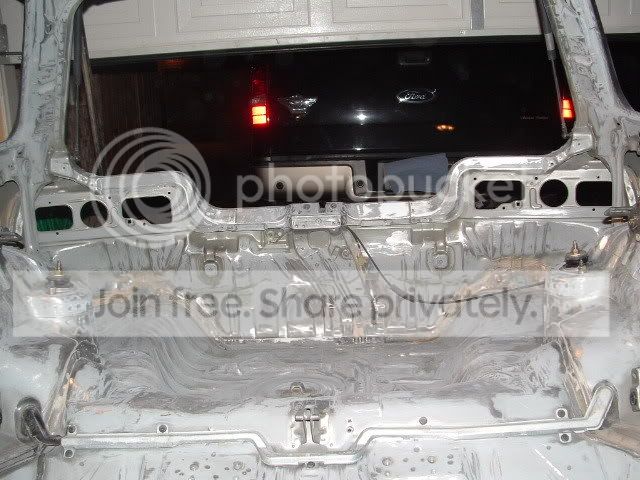
there's a shot of the rear end...now this pic can be decieving...where you think you see paint is actually steel ok....this is after 120 grit...now for all the people who have never sanding a body down..here is some advice...get all that paint off with the 40 grit paper then worry about that white light fluffy stuff you get when you start getting towards the actual steel..it might seem like less work to start off with a higher grit but trust me....it takes foreva to get down to where you wanna be with that high grit ****....maybe this might make things simpler....buy more 40 grit than say 120...because you will probably use more of it...in my case i did k...someone else will probably tell you different and thats ok....everyone has their specifics....no biggy..do some homework...and remember this is my first time doing this too...
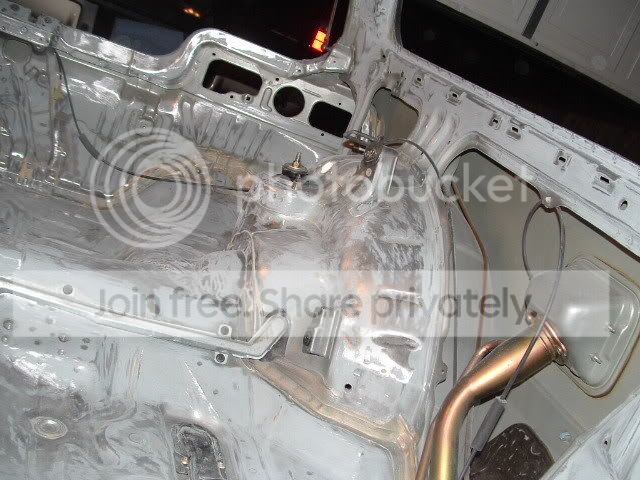
now here is where i give myself some good teacher skills and i'll tell you why....you can actually see in this pic on the fender wells or whatever the F they are called by the import scene where i have left off with the 80 grit....this is where i left off for the night and where you should always put inside your head when you finish for the night..always remember where you left off.....losing your place is like losing how long it took to get your GF off..because next time you'll forget the effort it took to get her to that point in the first place ok....so this is where i will probably start tomm during the late afternoon...and after these pics you will know why...
so the spare tire area is sanded pretty good with the 120 and the wells are down with the 80...see the difference....
and there is the front...sanded with the 120.....now remember these shots are decieving because the steel spots look like paint spots...even though they aren't paint,its still smart to keep sanding over it because you want the entire area of the car one smooth surface to get that nice glass finish when your applying paint.....
and here is my desk for the duration of this process im showing you here...it always helps to have a bottle of rum close by....for me it gets me in that pirates attitude you need when it comes down to those hard to get areas..hardy F in Har...
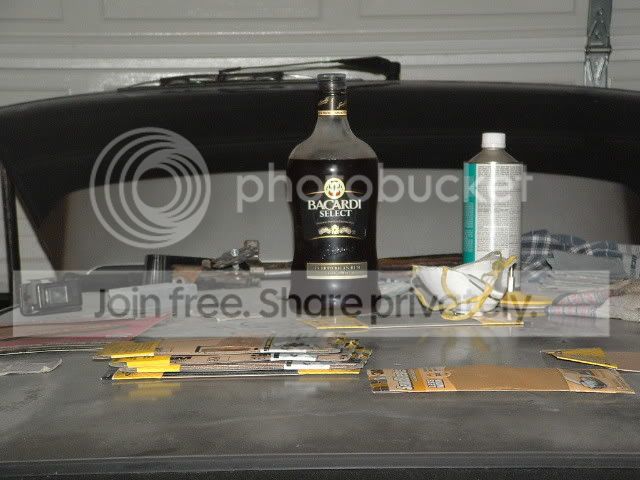
as you can see...tons of sandpaper is needed for this type of deal..because if your scattered brained like me, chances are you will sand over the same spot like a gazillion times....which results in wasted paper....but its never a bad thing to double check your work now is it...in fact i recommend it for this type of job....

and if i can give you some more advice since this is why i am doing this....get tons of tach cloths.....even though compressed air is genius in this sense..it still won't get everything completely clean..even after attempting to vacuum the dust up...there will always be residue left over.....and one thing that will cause your job double the work...is a dirty slate from the night before....so always keep the surface clean with this stuff....oh and wash your hands before you use this cloth...its like goop..everything sticks to it....so don't go over to the GFs house without washing your hands extra good after using this....in fact put some gloves on....will save some trouble later...and she won't get fussy....always a plus....
ok thats it for my speal here tonight...i am humping on it more tommorrow so i should have some more pics posted about the same time as i did tonight....
so on friday night which is now..well actually saturday morning....i am posting some updated shots of where I'm at in the process of prep... so here goes...i'lll give some captions for your humoring pleasures...hopefully if you will.... here they ***..
there's a shot of the rear end...now this pic can be decieving...where you think you see paint is actually steel ok....this is after 120 grit...now for all the people who have never sanding a body down..here is some advice...get all that paint off with the 40 grit paper then worry about that white light fluffy stuff you get when you start getting towards the actual steel..it might seem like less work to start off with a higher grit but trust me....it takes foreva to get down to where you wanna be with that high grit ****....maybe this might make things simpler....buy more 40 grit than say 120...because you will probably use more of it...in my case i did k...someone else will probably tell you different and thats ok....everyone has their specifics....no biggy..do some homework...and remember this is my first time doing this too...
now here is where i give myself some good teacher skills and i'll tell you why....you can actually see in this pic on the fender wells or whatever the F they are called by the import scene where i have left off with the 80 grit....this is where i left off for the night and where you should always put inside your head when you finish for the night..always remember where you left off.....losing your place is like losing how long it took to get your GF off..because next time you'll forget the effort it took to get her to that point in the first place ok....so this is where i will probably start tomm during the late afternoon...and after these pics you will know why...
so the spare tire area is sanded pretty good with the 120 and the wells are down with the 80...see the difference....
and there is the front...sanded with the 120.....now remember these shots are decieving because the steel spots look like paint spots...even though they aren't paint,its still smart to keep sanding over it because you want the entire area of the car one smooth surface to get that nice glass finish when your applying paint.....
and here is my desk for the duration of this process im showing you here...it always helps to have a bottle of rum close by....for me it gets me in that pirates attitude you need when it comes down to those hard to get areas..hardy F in Har...
as you can see...tons of sandpaper is needed for this type of deal..because if your scattered brained like me, chances are you will sand over the same spot like a gazillion times....which results in wasted paper....but its never a bad thing to double check your work now is it...in fact i recommend it for this type of job....
and if i can give you some more advice since this is why i am doing this....get tons of tach cloths.....even though compressed air is genius in this sense..it still won't get everything completely clean..even after attempting to vacuum the dust up...there will always be residue left over.....and one thing that will cause your job double the work...is a dirty slate from the night before....so always keep the surface clean with this stuff....oh and wash your hands before you use this cloth...its like goop..everything sticks to it....so don't go over to the GFs house without washing your hands extra good after using this....in fact put some gloves on....will save some trouble later...and she won't get fussy....always a plus....
ok thats it for my speal here tonight...i am humping on it more tommorrow so i should have some more pics posted about the same time as i did tonight....
Thread Starter
Joined: Aug 2007
Posts: 47
Likes: 0
From: DALLAS, TX, USA
today i made a stop at lowe's to get some supplies i needed to finish up with the prep...a dremel...i've never heard from anyone who has had one of these, but their pretty neat little tools which seem pretty versatile...a versatile solution to modern automobile work....lol...
i'll probably only use this little gadget for the little sharp ****** which were formed from chiseling out that sound deadening ****...it came with this nifty little grinder....and maybe sand down some areas along the pillars and such....and around the brake lines....which i prolly will leave until i get to those areas...
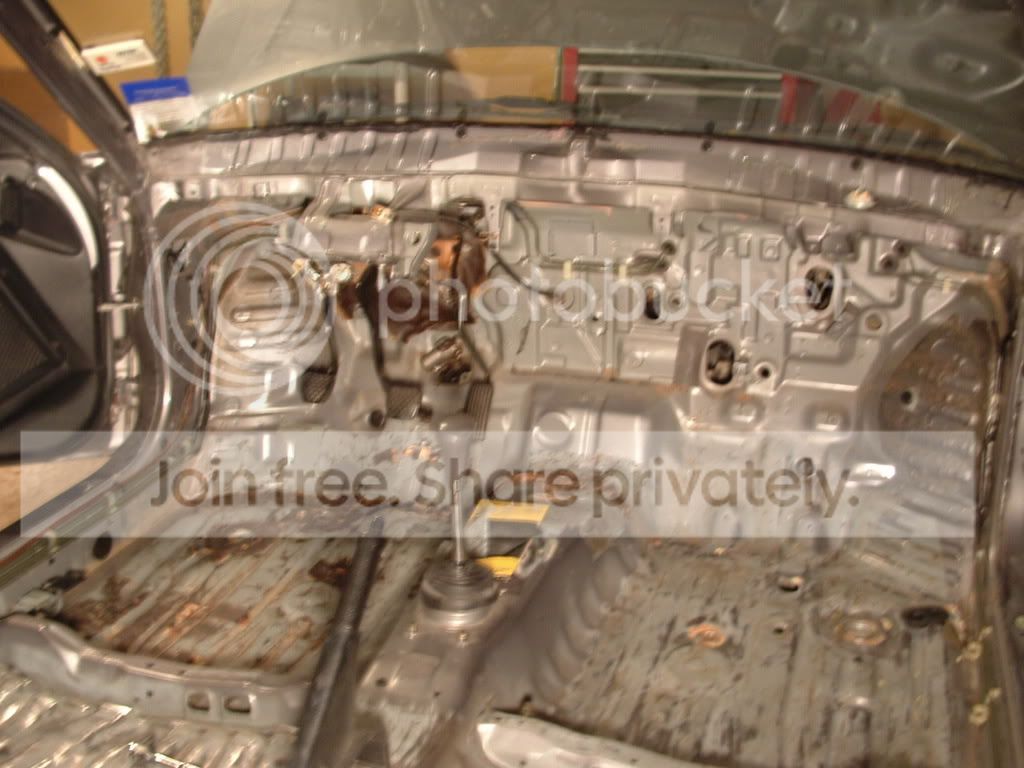
here is where i left off tonight after 320 and cleaning the entire surface with the prep clean you can get at auto zone....does magic imo.
i only sprayed the bottom to the mid upper portion of the firewall because the dash is going to be covering the remaining area so expletive it....but it really did its thing..i was happy with the results...only after a gunky coat of this **** and the paint slips right off....its just pukey messy....
here is where i will probably bust out with the dremel again tommorrow...these areas are pretty tough to get paper on....
hopefully this time tommorrow she will have a good first coat layed....of the acrylic enamel stuff....flat black...yessir. thats how its gettin done...
i'll probably only use this little gadget for the little sharp ****** which were formed from chiseling out that sound deadening ****...it came with this nifty little grinder....and maybe sand down some areas along the pillars and such....and around the brake lines....which i prolly will leave until i get to those areas...
here is where i left off tonight after 320 and cleaning the entire surface with the prep clean you can get at auto zone....does magic imo.
i only sprayed the bottom to the mid upper portion of the firewall because the dash is going to be covering the remaining area so expletive it....but it really did its thing..i was happy with the results...only after a gunky coat of this **** and the paint slips right off....its just pukey messy....
here is where i will probably bust out with the dremel again tommorrow...these areas are pretty tough to get paper on....
hopefully this time tommorrow she will have a good first coat layed....of the acrylic enamel stuff....flat black...yessir. thats how its gettin done...

Thread Starter
Joined: Aug 2007
Posts: 47
Likes: 0
From: DALLAS, TX, USA
yea I can't find that acrylic stuff around department stores so....i dunno what i'm gonna throw down....i got a dremel for those spots on the rear well i couldn't get to so in the meantime while i'm finding another route of application...ima do some more cleaning on the car...
i was going with the flat black just to make things easier on the eye...not for artistic value if thats what you mean....but since it looks like im at a standstill with things until i can get primer or paint....i'll leave the thread open here for any suggestions on what to throw down....
thanks fellas...turns those thumbs upside down....
Thread Starter
Joined: Aug 2007
Posts: 47
Likes: 0
From: DALLAS, TX, USA
here is a link to a writeup some dude did on DTM applications.....
http://www.paintstore.com/arch....html
yea changing the color of the interior never really occurred to me at first, but after taking out the carpet and getting down to the bare surface...it was basically something i had to prepare for...but the paint on the outside is going to be changed too...i was throwing around the whole smoked out look with that satin finish i have been seeing.....something dark and deep..with some evil resonating from it would be nice too.. ya ya.....flat black will suffice in this situation.
I wouldn't paint the outside of the car this way....but in some cases people have seemed to be satisfied with it....so i'll just leave that up to the owner next time the question comes up....but this is the interior...my feet are gonna be on this...not my 2 dollar hot pocket...or those delicious taquitos at 711...so yea i think for this job its a good way to go if your looking to gut all the heater/ac control assemblies...and use it to drag or whatever in....its just gonna clean things up a bit..and give you a nice platform to start over if you choose to do so....but if your prep is right and you choose this method...you can't go wrong....IMO
Honda-Tech Member
Joined: Oct 2007
Posts: 715
Likes: 0
From: Hackensack, NJ
one question why paint it if you are just going to end up covering it up with carpet and putting everthing back together? i can understand painting in the engine bay area.. anyway nice job doing all that work looks clean. i would not have the patience i'd just sandblast the hell out of it.
Thread Starter
Joined: Aug 2007
Posts: 47
Likes: 0
From: DALLAS, TX, USA
here are some pics of the results i'm getting from the first two coats..you will notice that after one...the steel still will show in certain spots on the car....so i went with two coats before i started wet sanding...the only spot i havent sanded yet are the firewall and then the backside of the hatch..
this pic is a little rough..not only from the firewall but then around those brake lines i have yet to get outta there...lol....
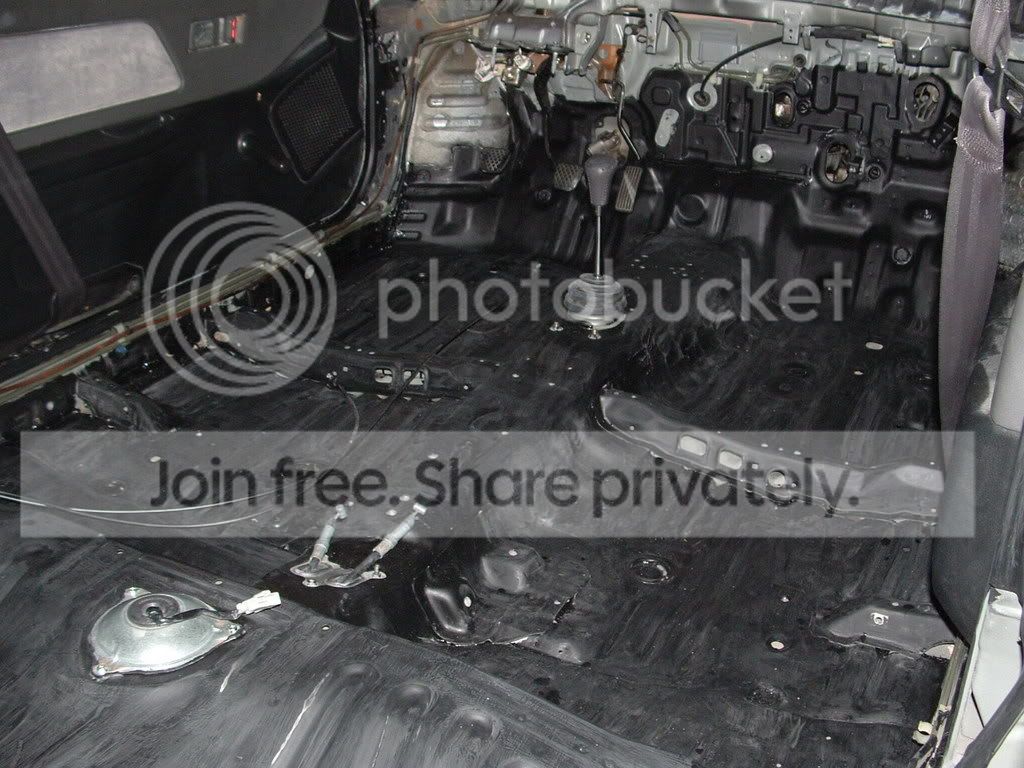
before wet sanding though...with just two coats you almost just wanna say f it and just leave it like that....but it can only look better after this stage of the process so im just going to keep on it....you should still have like 3/4 of your paint left...i found that with the thinner, it really doesn't take much to get this stuff to cover the surface...so might as well use as much as you can get out of it...
yea well...if i like the way the paint comes out ill keep it like that....but yea naturally most of it is going to get covered up.the dash,pillars, maybe some of the panel trim i decide to keep....it really just depends on the paint...most of the areas i think will turn out good are going to be out for the open so...im somewhat satisfied with these results thus far.
this pic is a little rough..not only from the firewall but then around those brake lines i have yet to get outta there...lol....
before wet sanding though...with just two coats you almost just wanna say f it and just leave it like that....but it can only look better after this stage of the process so im just going to keep on it....you should still have like 3/4 of your paint left...i found that with the thinner, it really doesn't take much to get this stuff to cover the surface...so might as well use as much as you can get out of it...
yea well...if i like the way the paint comes out ill keep it like that....but yea naturally most of it is going to get covered up.the dash,pillars, maybe some of the panel trim i decide to keep....it really just depends on the paint...most of the areas i think will turn out good are going to be out for the open so...im somewhat satisfied with these results thus far.
Thread Starter
Joined: Aug 2007
Posts: 47
Likes: 0
From: DALLAS, TX, USA
so today i went back and started pulling some more of the rubber trim under the two front doors..and then tried sanding the firewall and the back of the hatch as well...so i didn't get to the second coats except for around the trim areas of the car...so here are some pics of those......
Thread Starter
Joined: Aug 2007
Posts: 47
Likes: 0
From: DALLAS, TX, USA
now before i start posting some BS. which alot of people try to do to coat things over so they don't get any bad feedback from other people...f that..... i'm gonna tell you what you don't wanna hear basically.....don't paint your car this way...especially if its on the inside......there are too many lines on the inside of the car to paint a car effieciently with a brush...plain as day... you look at the inside of a Honda and all you see is a bunch of 3D lines which require a precision paint job....that all there is to it.....and thats OK for me to say because I'm the guinea pig on this...no one has painted there car this way on the inside on this site .....and yea Its POSSIBLE to get decent results...but the work isn't worth the money you are saving...its just not...especially if you do it the way it supposed to be done....you may spend more money by getting a compressor and a gun, but trust me its worth the time you will save and the results you will get....
Thread Starter
Joined: Aug 2007
Posts: 47
Likes: 0
From: DALLAS, TX, USA
after my little monologue i hope you won't be in the same position i am in the future...don't put yourself where i am..trust me you don't wanna be there..not everyone is made to put in gridiron hard work so hopefullly the people that are considering this don't paint the inside of their car this way......
here are the results i got from the second series of coat i put on after wet sanding with 600 grit, and let me add this........with this paint being as tough as it is...sanding dry with 600 will clog your paper way too fast...this is the only way to do it.....i mean i experimented with 320 dry and it worked really well...only problem is. i prepped the body with 320..so basically your getting the same results as you did with the first coat..its just working backwards almost...WET SAND THIS its the only way to go.....

here are the results i got from the second series of coat i put on after wet sanding with 600 grit, and let me add this........with this paint being as tough as it is...sanding dry with 600 will clog your paper way too fast...this is the only way to do it.....i mean i experimented with 320 dry and it worked really well...only problem is. i prepped the body with 320..so basically your getting the same results as you did with the first coat..its just working backwards almost...WET SAND THIS its the only way to go.....
Thread Starter
Joined: Aug 2007
Posts: 47
Likes: 0
From: DALLAS, TX, USA
lets step back for a second.....in the post from the 50 dollar paing job thread which is total BS....i can't believe they let that fly on here...they say to apply two coats in between sanding....which means you are applying two coats per sanding you are doing.....if i had it to do my way...i would say sand after each coat...don't go by what you just read...trust me after applying the paint you will more than likely have to improvise....paint is like emotions...it always changes its form when its applied to different applications...hence steel....when you apply paint which isn't automotive paint to steel, you get different results from applying it...remember that
Thread Starter
Joined: Aug 2007
Posts: 47
Likes: 0
From: DALLAS, TX, USA
so....to wrap things up....the paint isn't that bad of an idea if you are thinking in a main idea sense...but if you think work against cost....then ya this is a bad idea to choose...i actually have some good ambitions with this job..especially after this...at first when i sanded down the first coat i thought this was just another pipe dream...wasn't even close to gettting any props....but now after being patient....my ambitions have changed....this isn't so bad...so if your at a budget which sais no compression then yea i would say do this, but if you gotta booth and some proper applcational methods to apply paint...do it that way..it will save you so much work....it might cost you a little more, but isn't that what you pay for...so that you don't have to put in alotta hard work...
so after another 6 hour day on the car just applying another coat i am left with this...MORE Fin WORK......and more RUM to drink to coax it over that I am a moron
so after another 6 hour day on the car just applying another coat i am left with this...MORE Fin WORK......and more RUM to drink to coax it over that I am a moron