

My BB4 Project

Thread Starter
Honda-Tech Member
Joined: Feb 2006
Posts: 477
Likes: 0
From: Cary, NC
I already posted this in welding fab section but i want to post more than just the wire tuck and dont want to get my thread locked for off topic discussion, so i will repost here!
Got this 94 Lude stock, been messin with it for a couple years now, had the engine out last year for the build-up, the year before that i did body work/ suspension.
runs good but the time of year is starting where i cant drive it anyways so i figured i would get an early start this year so i could get it out early spring, Well this winters agenda is:
ABS Delete (and clean up all the fuel/brake lines under the hood
Manual rack conversion
And to get under the hood lookin as good as it runs!
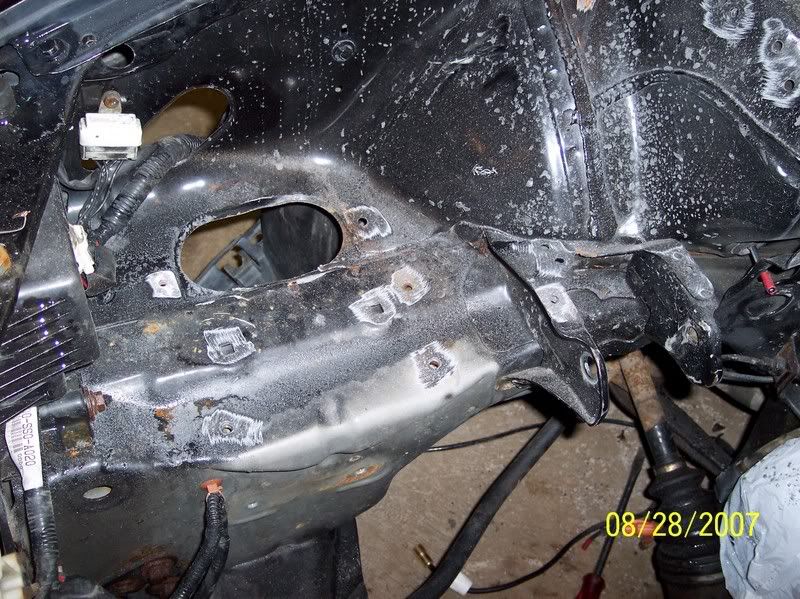
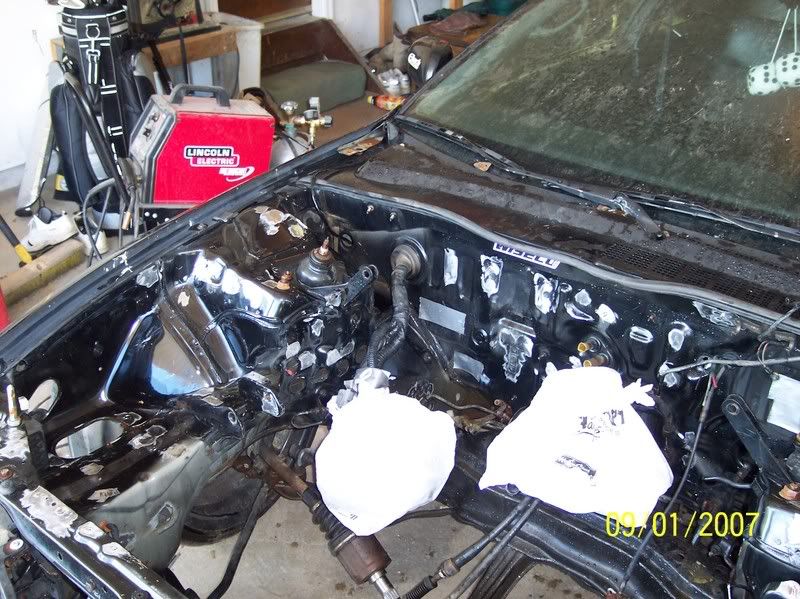
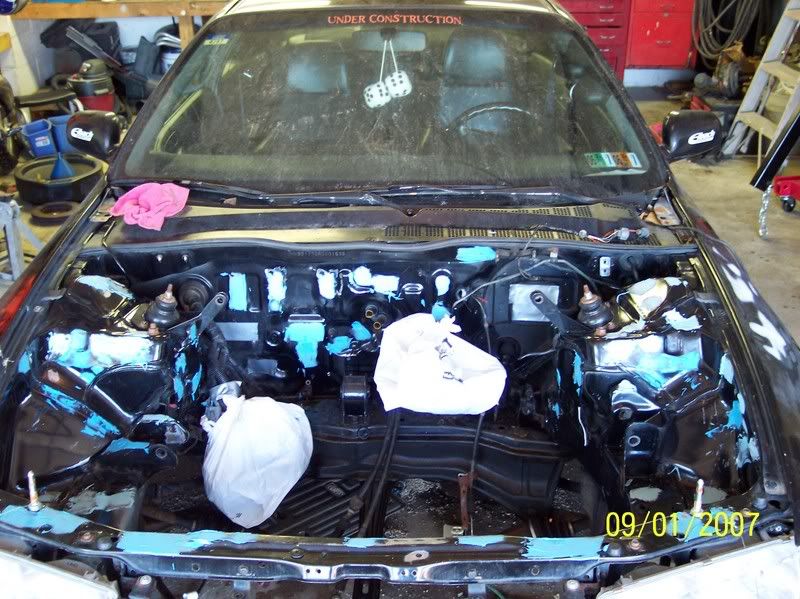
Off to a good start, got the bay mostly stripped day 1 And when i refer to "day" i usually mean the couple of hours i can squeez in after work
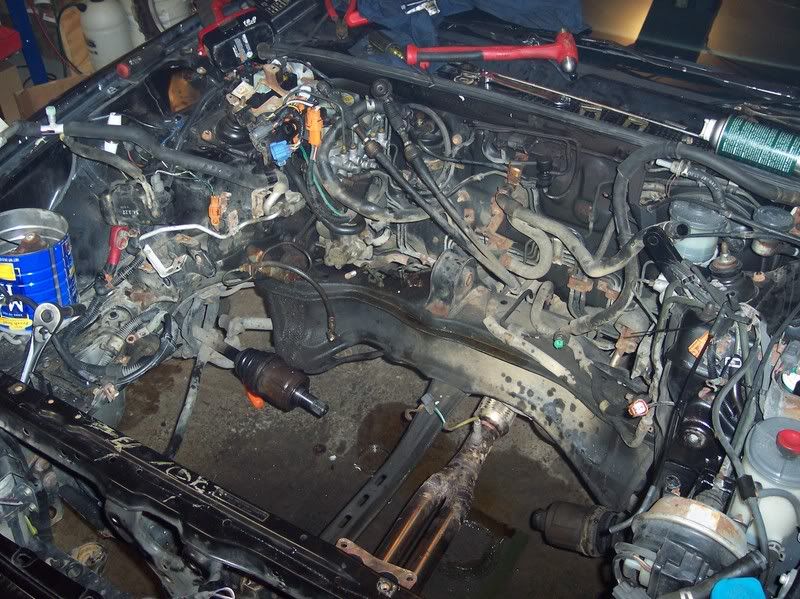

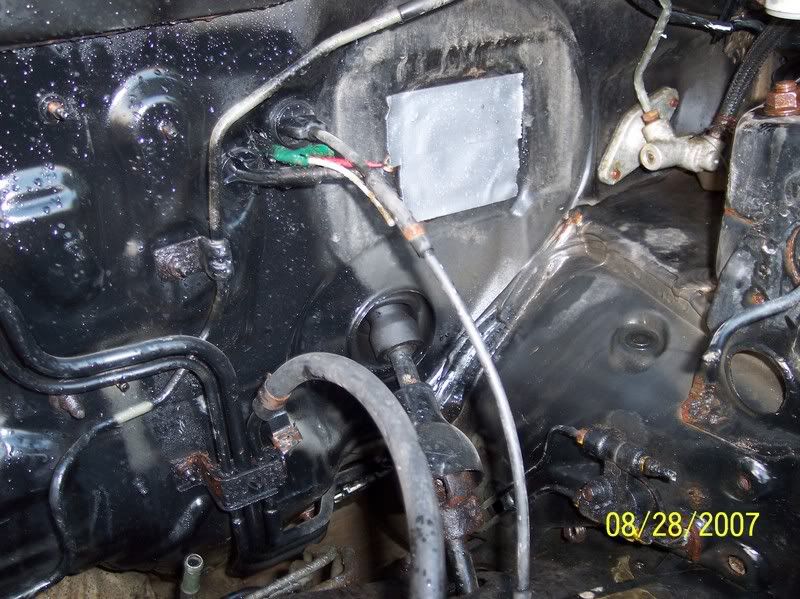
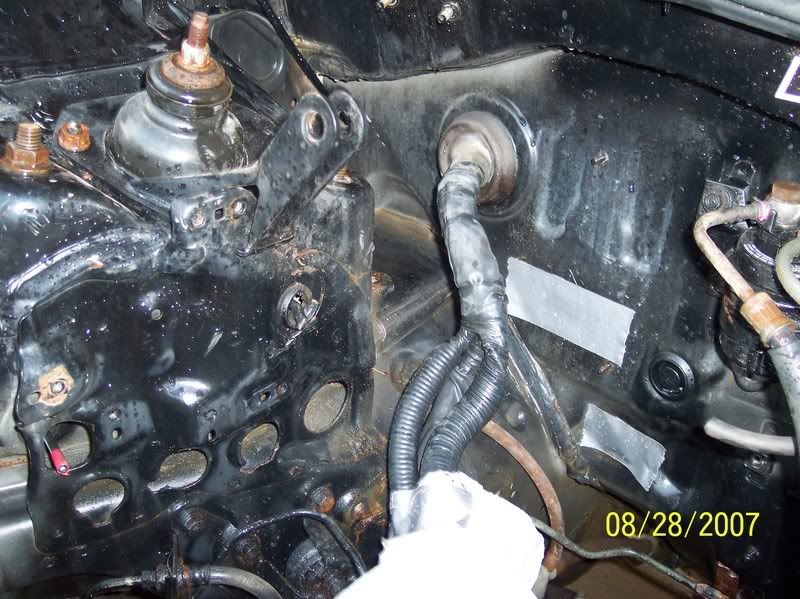
You see in the pics that the fuse box and harness are still through the firewall in the stock location, ireally dont want to gut my HVAC box to make room (i like my little touch of luxury in my lude, still wanna keep some of the creature comforts, but anyways i think i got some good ideas to keep things compromised, as you will see over the next couple of weeks
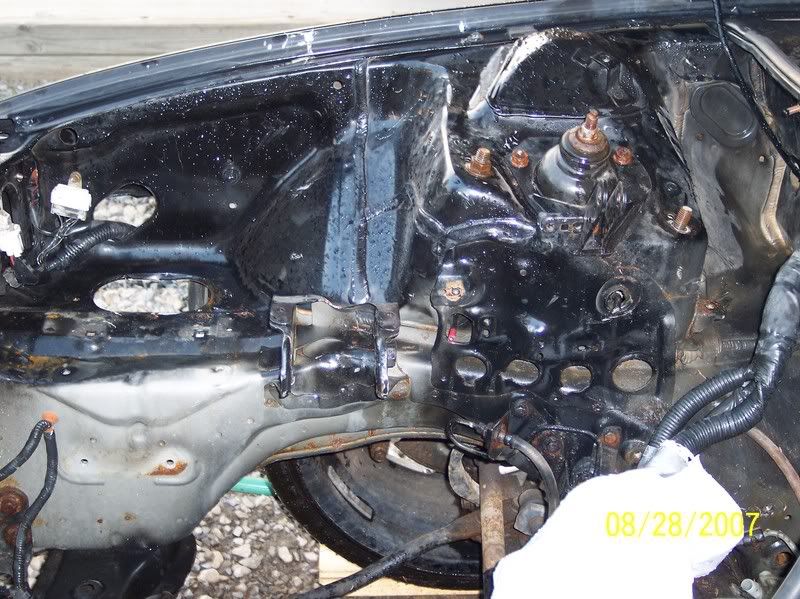
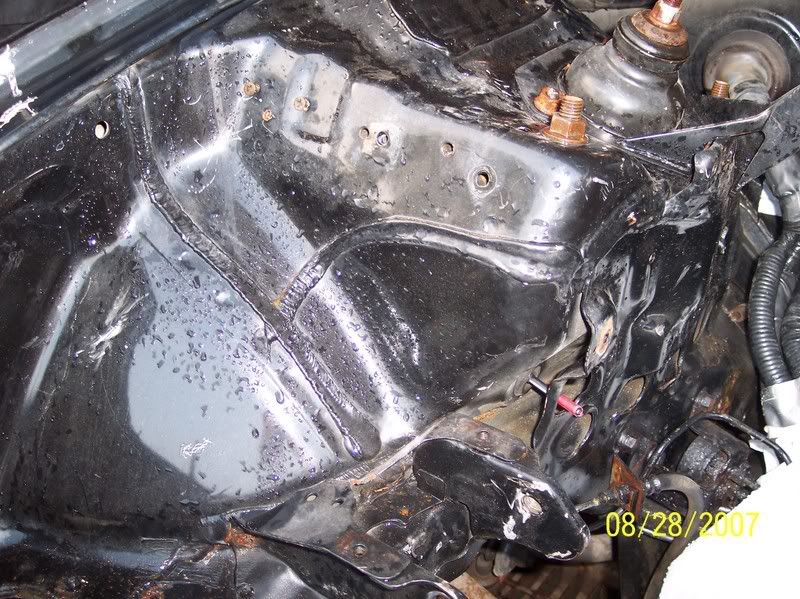
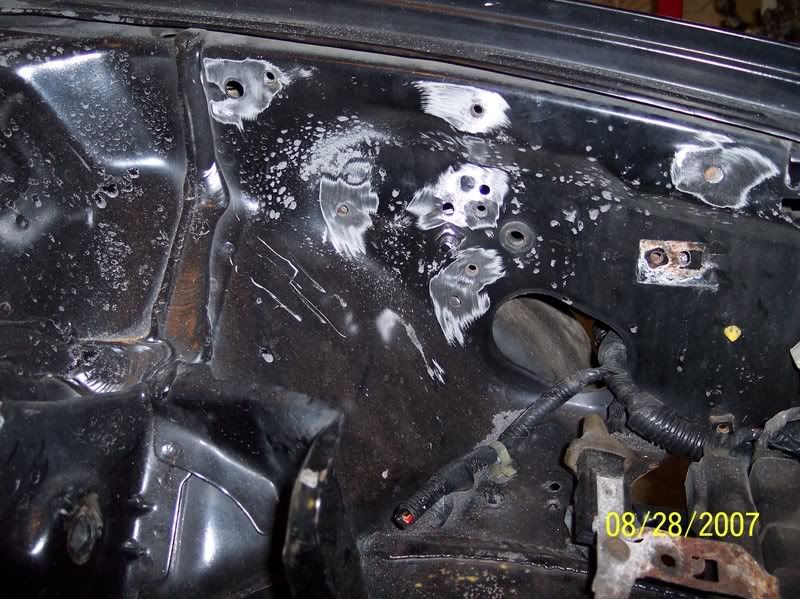
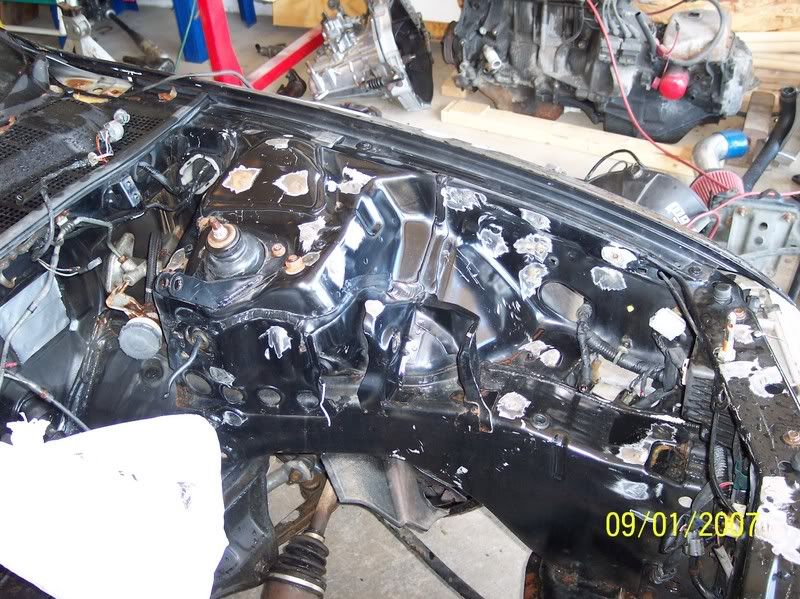
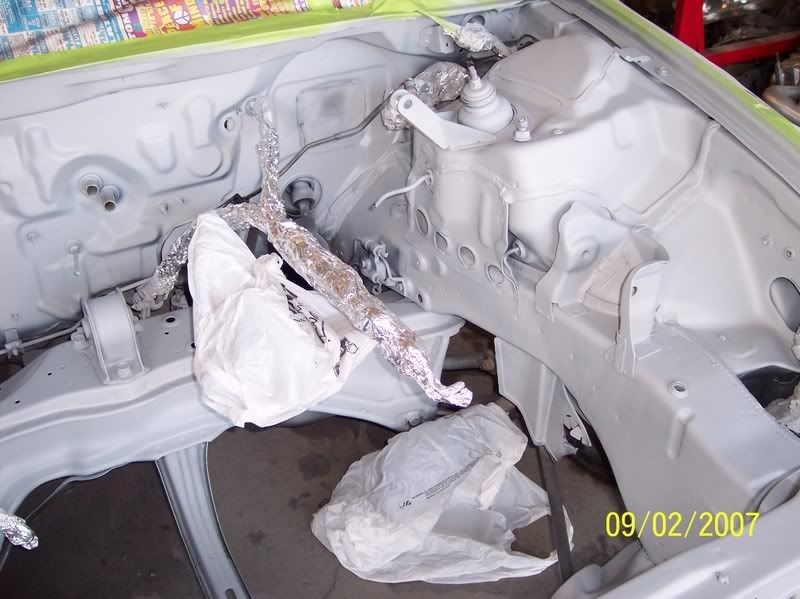
Day 2 got everything prepped for welding i know they are very small areas cleaned around the holes to be welded but im gonna be sanding down the entire engine bay anyways!

I got some of the welding done but i was in a rush to get out of there and didnt snap any pictures yet, will post updates as they come!
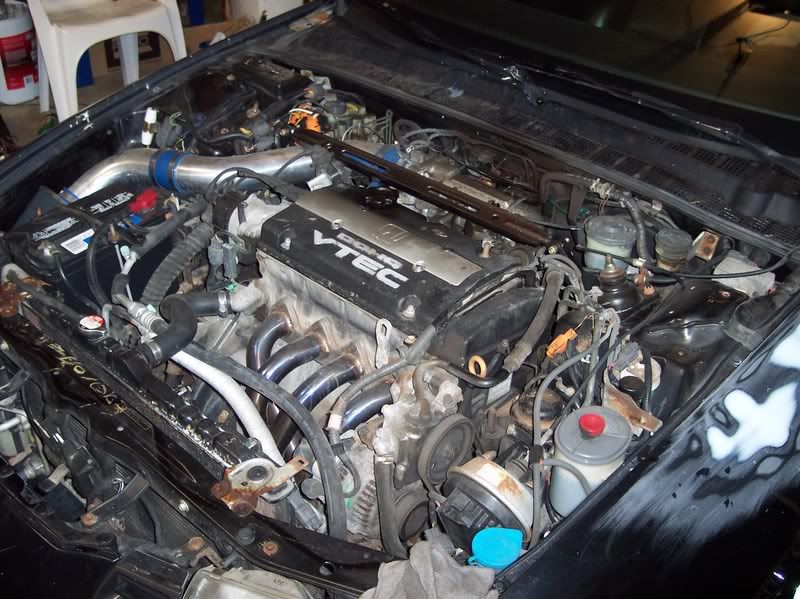
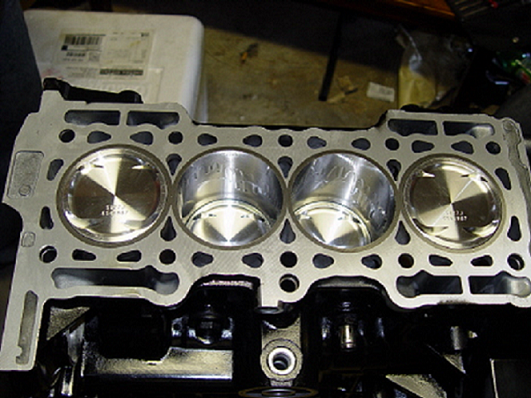
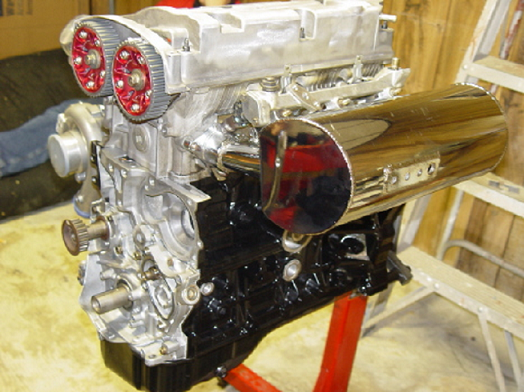
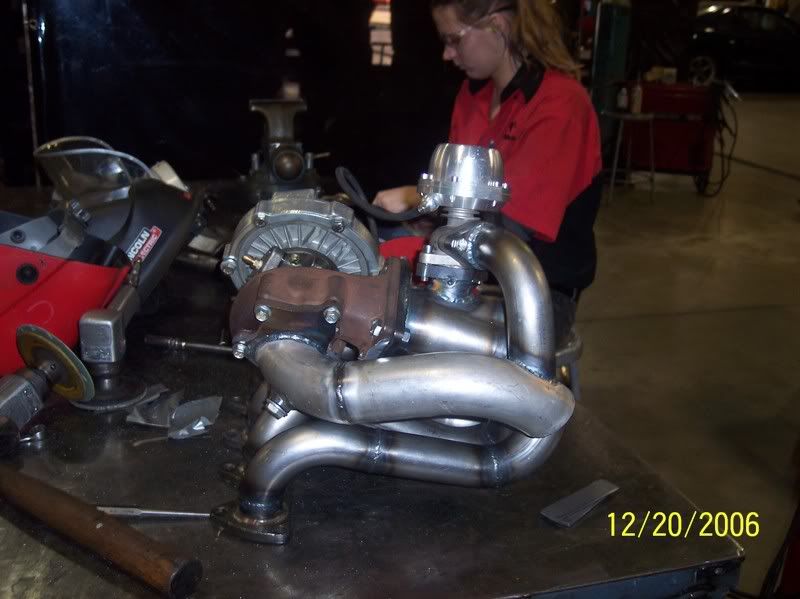
Heres some pics of the engine build, ill get it to details with the specs of this later!
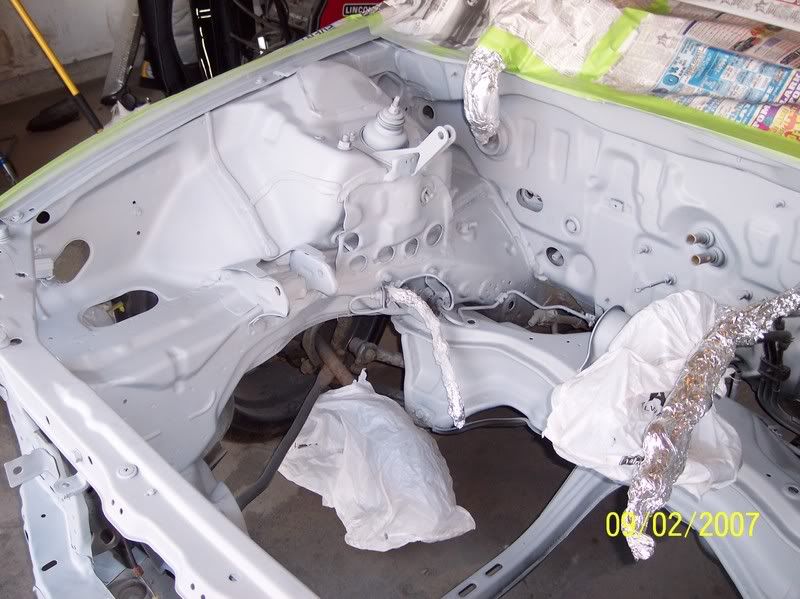
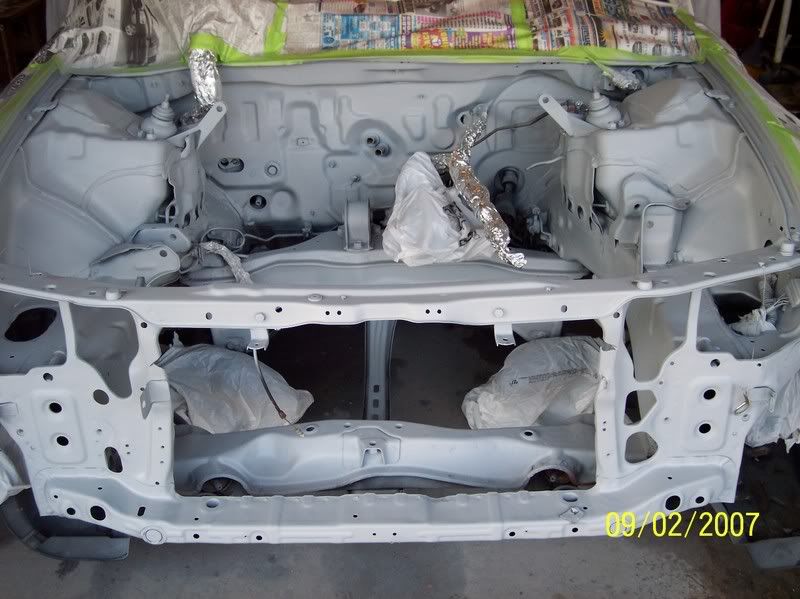
Holes welded Shut:
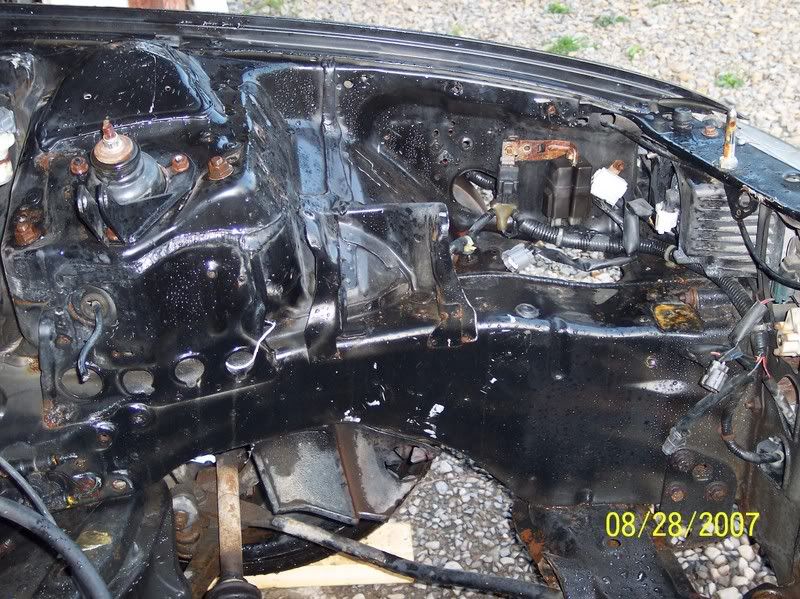
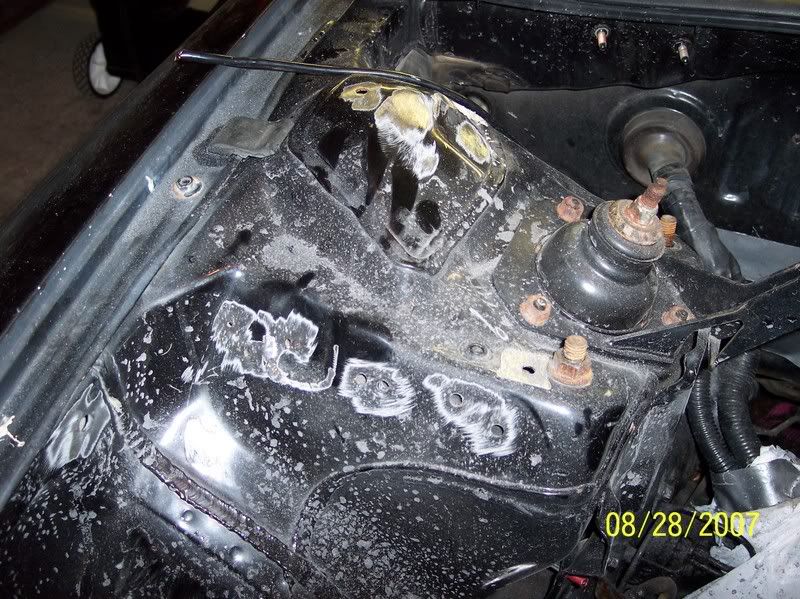
Za Putty Applied
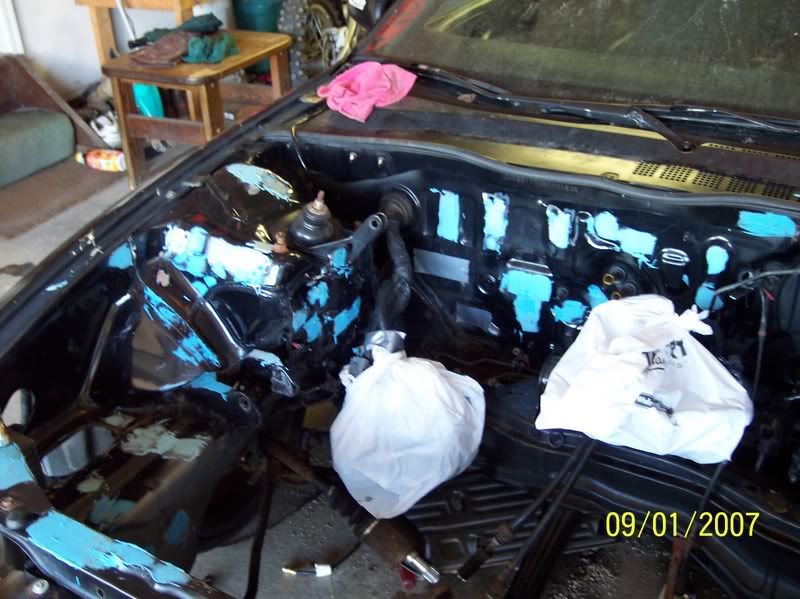

Was in to much of a rush to take pics of the sanding process, wanted to see it in primer
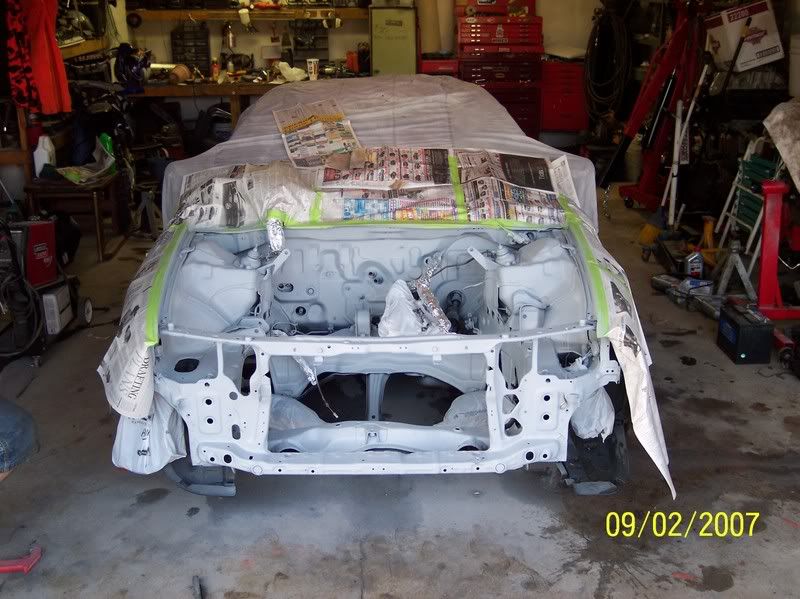
Wow i need to clean my garage
Will post as they come
Modified by H22Luda720 at 11:11 PM 9/6/2007
Modified by H22Luda720 at 3:37 AM 9/23/2007
Modified by H22Luda720 at 9:48 PM 3/1/2008
Got this 94 Lude stock, been messin with it for a couple years now, had the engine out last year for the build-up, the year before that i did body work/ suspension.
runs good but the time of year is starting where i cant drive it anyways so i figured i would get an early start this year so i could get it out early spring, Well this winters agenda is:
ABS Delete (and clean up all the fuel/brake lines under the hood
Manual rack conversion
And to get under the hood lookin as good as it runs!
Off to a good start, got the bay mostly stripped day 1 And when i refer to "day" i usually mean the couple of hours i can squeez in after work
You see in the pics that the fuse box and harness are still through the firewall in the stock location, ireally dont want to gut my HVAC box to make room (i like my little touch of luxury in my lude, still wanna keep some of the creature comforts, but anyways i think i got some good ideas to keep things compromised, as you will see over the next couple of weeks
Day 2 got everything prepped for welding i know they are very small areas cleaned around the holes to be welded but im gonna be sanding down the entire engine bay anyways!
I got some of the welding done but i was in a rush to get out of there and didnt snap any pictures yet, will post updates as they come!
Heres some pics of the engine build, ill get it to details with the specs of this later!
Holes welded Shut:
Za Putty Applied
Was in to much of a rush to take pics of the sanding process, wanted to see it in primer
Wow i need to clean my garage
Will post as they come
Modified by H22Luda720 at 11:11 PM 9/6/2007
Modified by H22Luda720 at 3:37 AM 9/23/2007
Modified by H22Luda720 at 9:48 PM 3/1/2008
Thread Starter
Honda-Tech Member
Joined: Feb 2006
Posts: 477
Likes: 0
From: Cary, NC
<TABLE WIDTH="90%" CELLSPACING=0 CELLPADDING=0 ALIGN=CENTER><TR><TD>Quote, originally posted by Hawkze_2.3 »</TD></TR><TR><TD CLASS="quote">Good stuff Looks like fun.
I think I would have covered up more stuff before doing primer, but oh well...</TD></TR></TABLE>
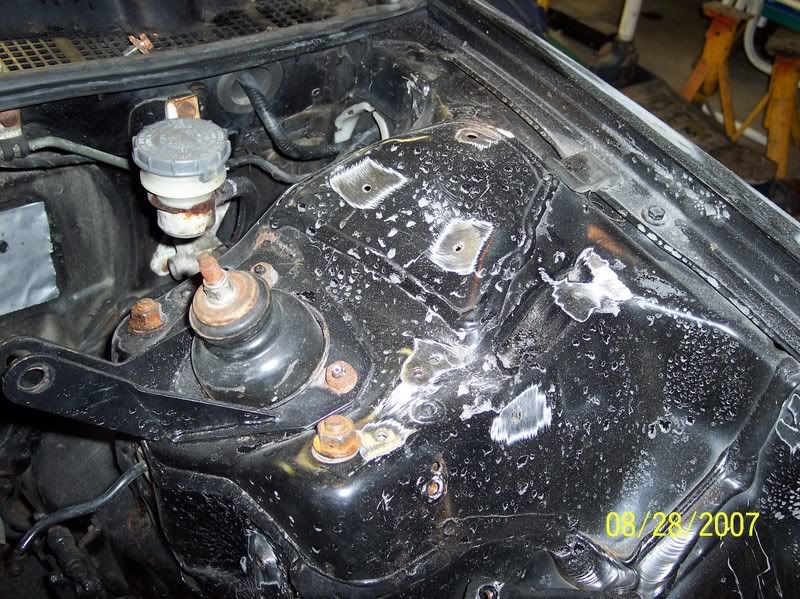
Thanks, My guess would be you are refering to the tops of the struts, they were UGLy, paint is better that anything else i could do to them
<TABLE WIDTH="90%" CELLSPACING=0 CELLPADDING=0 ALIGN=CENTER><TR><TD>Quote, originally posted by hamadiscool »</TD></TR><TR><TD CLASS="quote">Good work man. What kind of intake manifold is that? Your build looks good, need spec list .
I wanna do something similar once I get some money/time/engine/5spd swap .</TD></TR></TABLE>
Heres the build
H22a1
Balance & knife Edge
Darton Sleeves
Weisico 9:1 (Weight Balanced)
Scat H-Beams("" "")
Fererra Valves, springs, retainers
Mild port
Kinda custom I/M to answer you question, bought it off of a friend, not even sure what brand it is, i port matched it, its good
Made my topmount manifold(will post pics later)
Garret T04e
Tial 38mm
Greddy Type RS
Precision 880cc Injectors
Walbro 255
Hondata S300
And to many Misc bolt on to list,
Modified by H22Luda720 at 12:26 PM 9/3/2007
Looks like fun.I think I would have covered up more stuff before doing primer, but oh well...</TD></TR></TABLE>
Thanks, My guess would be you are refering to the tops of the struts, they were UGLy, paint is better that anything else i could do to them
<TABLE WIDTH="90%" CELLSPACING=0 CELLPADDING=0 ALIGN=CENTER><TR><TD>Quote, originally posted by hamadiscool »</TD></TR><TR><TD CLASS="quote">Good work man. What kind of intake manifold is that? Your build looks good, need spec list .
I wanna do something similar once I get some money/time/engine/5spd swap .</TD></TR></TABLE>
Heres the build
H22a1
Balance & knife Edge
Darton Sleeves
Weisico 9:1 (Weight Balanced)
Scat H-Beams("" "")
Fererra Valves, springs, retainers
Mild port
Kinda custom I/M to answer you question, bought it off of a friend, not even sure what brand it is, i port matched it, its good
Made my topmount manifold(will post pics later)
Garret T04e
Tial 38mm
Greddy Type RS
Precision 880cc Injectors
Walbro 255
Hondata S300
And to many Misc bolt on to list,
Modified by H22Luda720 at 12:26 PM 9/3/2007

Honda-Tech Member
Joined: Jan 2004
Posts: 10,629
Likes: 1
From: Further down the spiral, TX, usa
<TABLE WIDTH="90%" CELLSPACING=0 CELLPADDING=0 ALIGN=CENTER><TR><TD>Quote, originally posted by H22Luda720 »</TD></TR><TR><TD CLASS="quote">
Thanks, My guess would be you are refering to the tops of the struts, they were UGLy, paint is better that anything else i could do to them
</TD></TR></TABLE>
Yeah, that and the motor mount and the wiring, brake lines, prop valve, steering linkage, etc.... I'm just a painter by trade so don't mind my nit-picking.
What color are you going with?
this thread hit my 4th gen softspot *logs on craigslist + searches for 4th gen shell* great stuff, can't wait to see some progress pics. im curious to what color too w/ that setup i think you have to get neon green + paint a big flower on the hood. the ULTIMATE sleeper yO 
w/ that setup i think you have to get neon green + paint a big flower on the hood. the ULTIMATE sleeper yO

Trending Topics
Thread Starter
Honda-Tech Member
Joined: Feb 2006
Posts: 477
Likes: 0
From: Cary, NC
<TABLE WIDTH="90%" CELLSPACING=0 CELLPADDING=0 ALIGN=CENTER><TR><TD>Quote, originally posted by Hawkze_2.3 »</TD></TR><TR><TD CLASS="quote">
Yeah, that and the motor mount and the wiring, brake lines, prop valve, steering linkage, etc.... I'm just a painter by trade so don't mind my nit-picking.
What color are you going with?</TD></TR></TABLE>
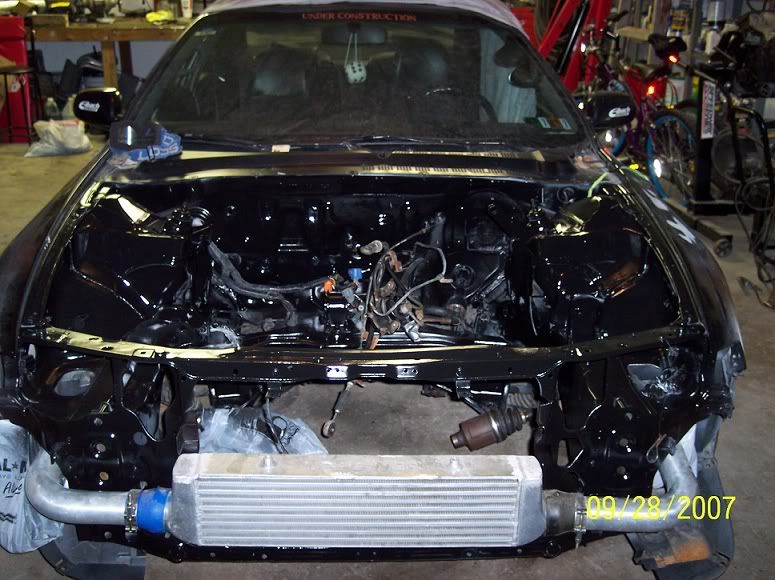
Good Eye, Prop valve is getting swapped for 5th gen non abs accord, along with the booster, and im forming all new fuel/gas lines, steering rack is coming out for manual conversion, so i will adress that later, if you look close you will see that exposed wiring etc is wrapped with the ultimate under hood masking material, aluminum foil
as for the color, im torn, i want either deep blue of black for the body so im thinking i cant go wrong with black under the hood, so im open to any serious suggestions, blue/black is not definate
<TABLE WIDTH="90%" CELLSPACING=0 CELLPADDING=0 ALIGN=CENTER><TR><TD>Quote, originally posted by 98vtec »</TD></TR><TR><TD CLASS="quote">insert some tech and i will keep this here. otherwise it is getting moved to appearance/cosmetics</TD></TR></TABLE>
Could you gimme a day or so till i get into the tech end of things?, its comin
Yeah, that and the motor mount and the wiring, brake lines, prop valve, steering linkage, etc.... I'm just a painter by trade so don't mind my nit-picking.
What color are you going with?</TD></TR></TABLE>
Good Eye, Prop valve is getting swapped for 5th gen non abs accord, along with the booster, and im forming all new fuel/gas lines, steering rack is coming out for manual conversion, so i will adress that later, if you look close you will see that exposed wiring etc is wrapped with the ultimate under hood masking material, aluminum foil
as for the color, im torn, i want either deep blue of black for the body so im thinking i cant go wrong with black under the hood, so im open to any serious suggestions, blue/black is not definate
<TABLE WIDTH="90%" CELLSPACING=0 CELLPADDING=0 ALIGN=CENTER><TR><TD>Quote, originally posted by 98vtec »</TD></TR><TR><TD CLASS="quote">insert some tech and i will keep this here. otherwise it is getting moved to appearance/cosmetics</TD></TR></TABLE>
Could you gimme a day or so till i get into the tech end of things?, its comin
Honda-Tech Member
Joined: Jan 2004
Posts: 10,629
Likes: 1
From: Further down the spiral, TX, usa
<TABLE WIDTH="90%" CELLSPACING=0 CELLPADDING=0 ALIGN=CENTER><TR><TD>Quote, originally posted by H22Luda720 »</TD></TR><TR><TD CLASS="quote">
Good Eye, Prop valve is getting swapped for 5th gen non abs accord, along with the booster, and im forming all new fuel/gas lines, steering rack is coming out for manual conversion, so i will adress that later, if you look close you will see that exposed wiring etc is wrapped with the ultimate under hood masking material, aluminum foil
as for the color, im torn, i want either deep blue of black for the body so im thinking i cant go wrong with black under the hood, so im open to any serious suggestions, blue/black is not definate</TD></TR></TABLE>
Hell yeah, we have huge rolls of industrial foil at work...it's SO convenient to cover things up quickly.
I think you would be happy with black under the hood.....IMO

moderator emeritus
Joined: Oct 2002
Posts: 16,357
Likes: 6
From: Cantonment, FL
<TABLE WIDTH="90%" CELLSPACING=0 CELLPADDING=0 ALIGN=CENTER><TR><TD>Quote, originally posted by H22Luda720 »</TD></TR><TR><TD CLASS="quote">
Could you gimme a day or so till i get into the tech end of things?, its comin</TD></TR></TABLE>
Could you gimme a day or so till i get into the tech end of things?, its comin</TD></TR></TABLE>
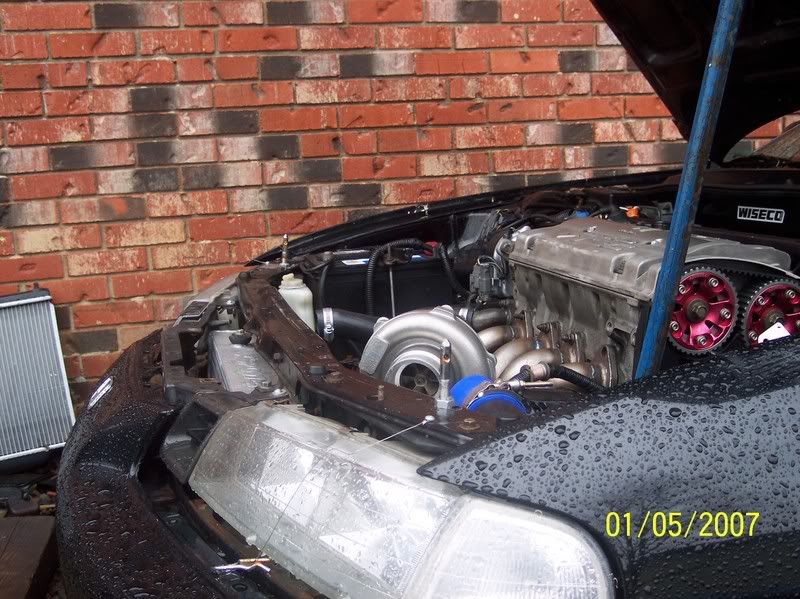
That's a nice Manifold... But that thing is huge, but still fits, huh?
lol, But where's the Radiator?!?!
Is it really in front of the Radiator Support!?
You should post a picture of a Top-Down view of the Manifold in the car.
I'd love to clean up and paint my engine bay, but LOLHAHA@getting the engine out to do that any time soon, and having time to paint it.. :S Man I need a second car, and then space to keep the first one! lol
Good work though..
Thread Starter
Honda-Tech Member
Joined: Feb 2006
Posts: 477
Likes: 0
From: Cary, NC
<TABLE WIDTH="90%" CELLSPACING=0 CELLPADDING=0 ALIGN=CENTER><TR><TD>Quote, originally posted by MLBZ521 »</TD></TR><TR><TD CLASS="quote">That's a nice Manifold... But that thing is huge, but still fits, huh?
lol, But where's the Radiator?!?!
Is it really in front of the Radiator Support!?
You should post a picture of a Top-Down view of the Manifold in the car.
I'd love to clean up and paint my engine bay, but LOLHAHA@getting the engine out to do that any time soon, and having time to paint it.. :S Man I need a second car, and then space to keep the first one! lol
Good work though.. </TD></TR></TABLE>
Its kind of an optical illusion in the pic, the rad fits where it should, but as you can tell from the current pics i kinda cant take anymore yet to show you what i mean, i will take plenty more when its all put back together
Im goin back to it, should have more updates tonite
lol, But where's the Radiator?!?!
Is it really in front of the Radiator Support!?
You should post a picture of a Top-Down view of the Manifold in the car.
I'd love to clean up and paint my engine bay, but LOLHAHA@getting the engine out to do that any time soon, and having time to paint it.. :S Man I need a second car, and then space to keep the first one! lol
Good work though..
</TD></TR></TABLE>Its kind of an optical illusion in the pic, the rad fits where it should, but as you can tell from the current pics i kinda cant take anymore yet to show you what i mean, i will take plenty more when its all put back together
Im goin back to it, should have more updates tonite
Thread Starter
Honda-Tech Member
Joined: Feb 2006
Posts: 477
Likes: 0
From: Cary, NC
Update:
Got my manual conversion done, no time for pictures though ill probly snap a few tommarrow
Theres really no point in me trying to do another writeup since the one in FAQ is pretty damn good, id like to throw in one trick though--
It takes a little more patience but i did it without disturbing alignment angles ( i will still align it at work just incase the rack shifted a little bit) but for someone with no means to do so you can disconnect the inner tie rod ends from the rack while its in the car, without even taking off the wheels, just pull the boots toward the wheel and start turning out the 1 7/16" nut, the inner tie rod end will allow for spinning it out. had the rack out in 18 minutes!
Honda-Tech Member
Joined: Jan 2004
Posts: 10,629
Likes: 1
From: Further down the spiral, TX, usa
<TABLE WIDTH="90%" CELLSPACING=0 CELLPADDING=0 ALIGN=CENTER><TR><TD>Quote, originally posted by H22Luda720 »</TD></TR><TR><TD CLASS="quote">Well im afraid theres gonna be a 6 to 8 week delay on the updates, broke my damn foot, dont think painting on crutches will turn out to well!</TD></TR></TABLE>

Don't forget the updates once you start again.
Don't forget the updates once you start again.
Thread Starter
Honda-Tech Member
Joined: Feb 2006
Posts: 477
Likes: 0
From: Cary, NC
<TABLE WIDTH="90%" CELLSPACING=0 CELLPADDING=0 ALIGN=CENTER><TR><TD>Quote, originally posted by hamadiscool »</TD></TR><TR><TD CLASS="quote">
Awww, hope your recovery goes well/quick.</TD></TR></TABLE>
Thanks
<TABLE WIDTH="90%" CELLSPACING=0 CELLPADDING=0 ALIGN=CENTER><TR><TD>Quote, originally posted by Hawkze_2.3 »</TD></TR><TR><TD CLASS="quote">
Don't forget the updates once you start again. </TD></TR></TABLE>
I will, guess it will gimme some time to plan
Awww, hope your recovery goes well/quick
.</TD></TR></TABLE>Thanks
<TABLE WIDTH="90%" CELLSPACING=0 CELLPADDING=0 ALIGN=CENTER><TR><TD>Quote, originally posted by Hawkze_2.3 »</TD></TR><TR><TD CLASS="quote">
Don't forget the updates once you start again. </TD></TR></TABLE>
I will, guess it will gimme some time to plan
Thread Starter
Honda-Tech Member
Joined: Feb 2006
Posts: 477
Likes: 0
From: Cary, NC
Bumpin so my thread doesnt go away, planning to paint fri, shouldnt(foot) but i have to in case the weather takes a turn for the worst, no heat in my garage, will post!
Thread Starter
Honda-Tech Member
Joined: Feb 2006
Posts: 477
Likes: 0
From: Cary, NC
Update!!
Sorry for that bad/lack off pics will take more monday
Got the Bay Sprayed
Next Update will be replacing that nasty jumbled mess of stock fuel/clutch/brake lines with stainless lines, and rerouting the electrical, also replacing vacume lines with hard lines
Gave the engine some love too
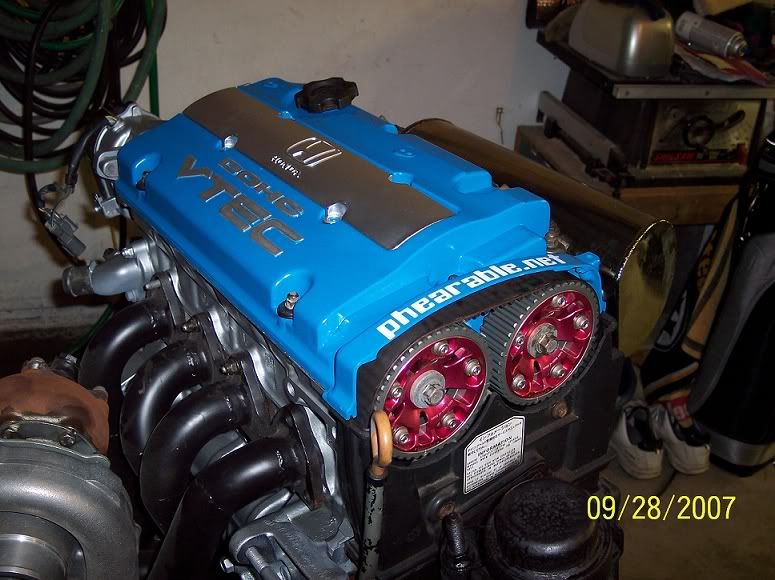
i was getting tired of the bare valve cover and it always looked dirty
My stainless bulk lines should be here monday, thinkin about tryin to do a write up on it redoing all the lines
Sorry for that bad/lack off pics will take more monday
Got the Bay Sprayed
Next Update will be replacing that nasty jumbled mess of stock fuel/clutch/brake lines with stainless lines, and rerouting the electrical, also replacing vacume lines with hard lines
Gave the engine some love too
i was getting tired of the bare valve cover and it always looked dirty
My stainless bulk lines should be here monday, thinkin about tryin to do a write up on it redoing all the lines
Honda-Tech Member
Joined: Dec 2006
Posts: 996
Likes: 1
From: Portland, OR, USA
that thing looked abused, good work with the welding and glazing putty , lots of work.
I like what you did with the valve cover and dust shield for the timing belt looks slick.
what are the power goals for that if you don't mind me asking?
I like what you did with the valve cover and dust shield for the timing belt looks slick.
what are the power goals for that if you don't mind me asking?