homegrown hybrid

Thread Starter
Honda-Tech Member
Joined: Jan 2007
Posts: 36
Likes: 0
From: knoxville, tn, usa
So this is a first for me to post on honda-tech, and it's gonna be quiet lengthy if i post most of my project which is actually ALMOST done. I lack body work and some AC lines. I have lurked on here since the beginning of the year as well as G2IC, and various other honda forums. I feel like i owe HT something after doing my fair share of searching for info on here. without posting 1 question i obtained everything in needed by searching, not bad. Except for info on the dash swap...read on. anyway, that's the intro.
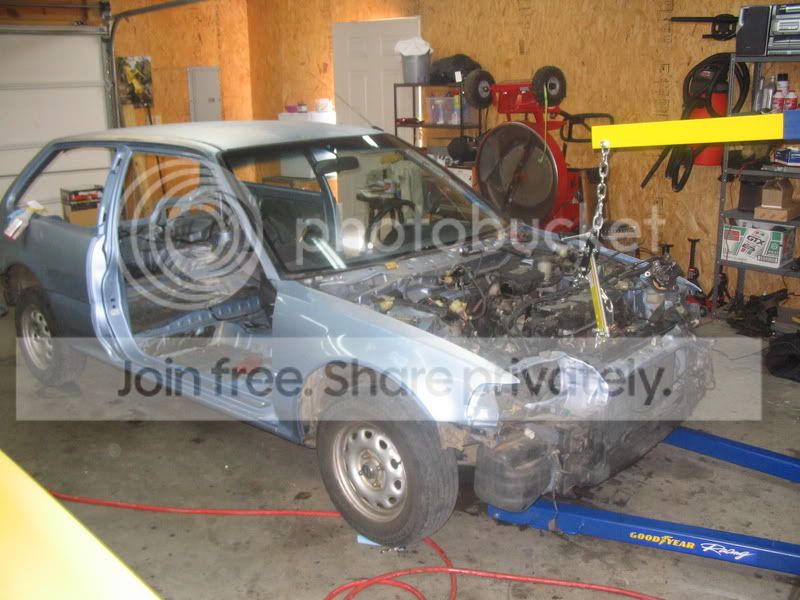
I decided to make my 89 dx auto a hybrid, thus i bought a 91 integra ls 5spd for dirty cheap that wasn't running. simple plan in thought, was to do it all out, make it challenging and do it cheap. the last part (cheap) is my favorite as you'll see during the course of this. basically i wanted to use the entire powertrain, integra front and rear brakes, Dash, rear sway bar, various other shiite. also, do bodywork and paint it.
here's what i started with


remember i have alot more pics, i just don't want to over do it, let me know if you want to see something specifically maybe.
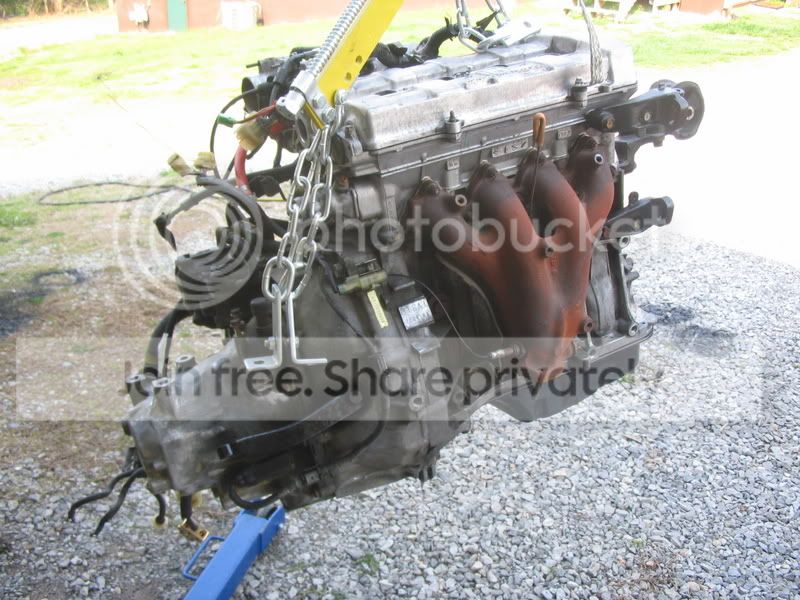
the donor, found the computer to be bad and was missing the keyway out of the intake cam gear. got a 92 5 spd ecu and had my bro in law take out the baro sensor from the old ecu and put it in the new one. it did come with a new distributor, compliments of the old owner who tossed parts at it.
disassembled junk
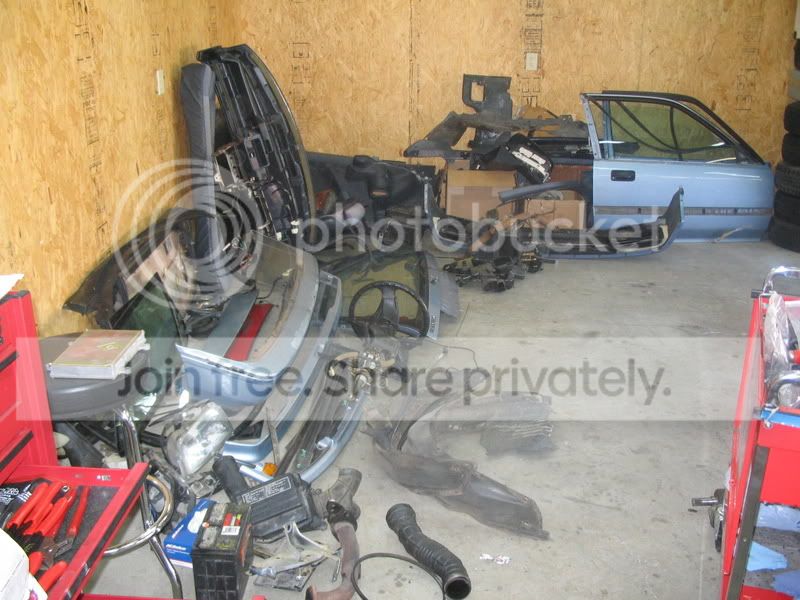
pretty much stripped down and pulling the engine out, this was probably around the end of february or beginning of march.
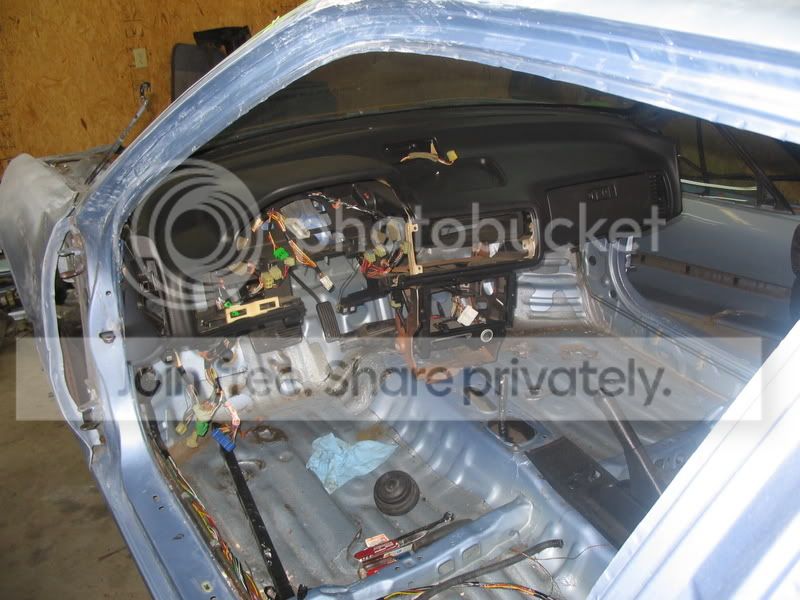
this was the first time i put the integra dash in to play around with it and see how i wanted to mount it up. this was a time consuming part of the swap over but it ended up looking fabulous!
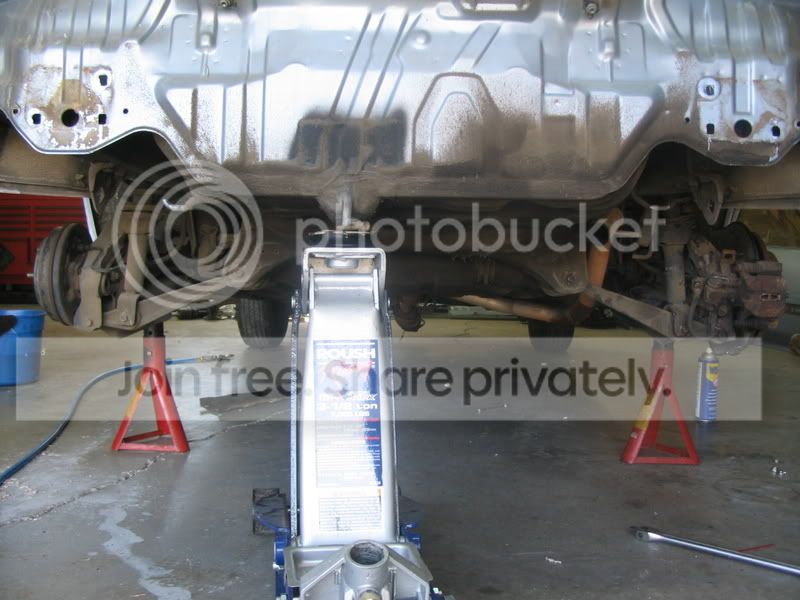
and the typical rear integra brakes, half done in this pic
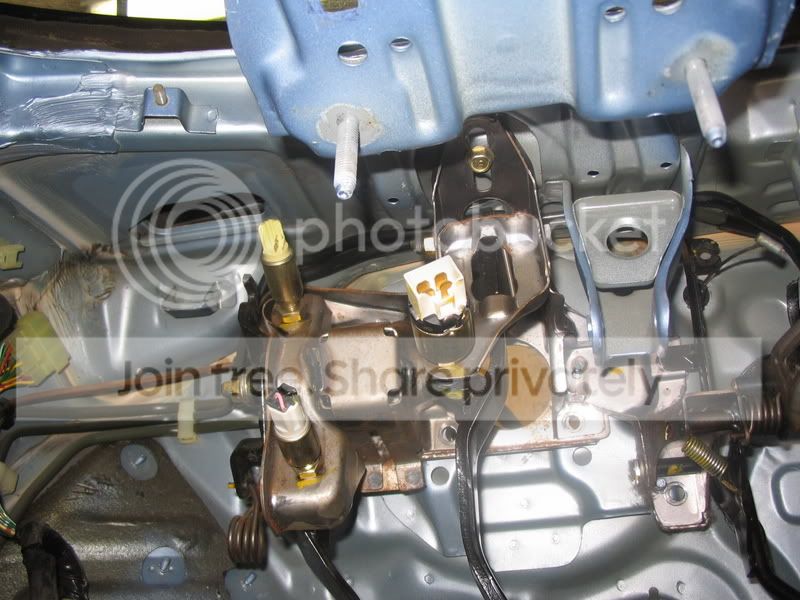
the pedal assembly was a severe pain in the butt swapping over. simply because besides the 4 main mounting points, the integra and civic's were a little different. the integra levers are shorter so i cut them all in a good location to simply extend them longer about a 1/4 of an inch and re-welded them. I had to cut off both the clutch switches, one for safety start and the other for cruise. i don't remember what they were in the way of but they had to go. this is what you must resort to when you refuse to buy what would really work on the car. All that matters is that it works in the end.
So i'm tired and I hope you enjoy what i put on here so far. I will put some additional info and pictures on here asap. I guess i'd like comments, but be sure to let me know if i should be a bit more descriptive or informative of what i've done or what not. i'll also add more pics if that is preferred. later
Modified by hatchet at 8:45 PM 6/1/2007
I decided to make my 89 dx auto a hybrid, thus i bought a 91 integra ls 5spd for dirty cheap that wasn't running. simple plan in thought, was to do it all out, make it challenging and do it cheap. the last part (cheap) is my favorite as you'll see during the course of this. basically i wanted to use the entire powertrain, integra front and rear brakes, Dash, rear sway bar, various other shiite. also, do bodywork and paint it.
here's what i started with
remember i have alot more pics, i just don't want to over do it, let me know if you want to see something specifically maybe.
the donor, found the computer to be bad and was missing the keyway out of the intake cam gear. got a 92 5 spd ecu and had my bro in law take out the baro sensor from the old ecu and put it in the new one. it did come with a new distributor, compliments of the old owner who tossed parts at it.
disassembled junk
pretty much stripped down and pulling the engine out, this was probably around the end of february or beginning of march.
this was the first time i put the integra dash in to play around with it and see how i wanted to mount it up. this was a time consuming part of the swap over but it ended up looking fabulous!
and the typical rear integra brakes, half done in this pic
the pedal assembly was a severe pain in the butt swapping over. simply because besides the 4 main mounting points, the integra and civic's were a little different. the integra levers are shorter so i cut them all in a good location to simply extend them longer about a 1/4 of an inch and re-welded them. I had to cut off both the clutch switches, one for safety start and the other for cruise. i don't remember what they were in the way of but they had to go. this is what you must resort to when you refuse to buy what would really work on the car. All that matters is that it works in the end.
So i'm tired and I hope you enjoy what i put on here so far. I will put some additional info and pictures on here asap. I guess i'd like comments, but be sure to let me know if i should be a bit more descriptive or informative of what i've done or what not. i'll also add more pics if that is preferred. later
Modified by hatchet at 8:45 PM 6/1/2007
Junior Member
Joined: May 2007
Posts: 131
Likes: 0
From: Kansas City, mo
Nice work so far!
I'd like to see pics on how the dash fits near the pillars and what you had to do to make it fit.
Also some pics of the completed pedal assembly would be nice too!
Honda-Tech Member
Joined: Feb 2004
Posts: 1,926
Likes: 2
From: That's the wrong tone... I'm Skunk2 certified.
Excellent first post!
Love the g2 dash! You should swap in a hydro clutch assembly from a 92-95 civic, or a 94+ teg if you want to run a hydro tranny.

EDIT: Cool avatar! I've got broken on vinyl. It came with a 7" that had the two bonus tracks on it. What do you think about his new album? I've been listening to it for about about a week, and I still don't know what to think of it.
Love the g2 dash! You should swap in a hydro clutch assembly from a 92-95 civic, or a 94+ teg if you want to run a hydro tranny.
EDIT: Cool avatar! I've got broken on vinyl. It came with a 7" that had the two bonus tracks on it. What do you think about his new album? I've been listening to it for about about a week, and I still don't know what to think of it.

Honda-Tech Member
Joined: Jun 2006
Posts: 4,334
Likes: 0
From: Long Beach
good luck on this  <TABLE WIDTH="90%" CELLSPACING=0 CELLPADDING=0 ALIGN=CENTER><TR><TD>Quote, originally posted by Blanket Jackson »</TD></TR><TR><TD CLASS="quote">Damn nice.
I am scared to do my auto-man trans swap. I even have an exact twin to my auto car that is a manual for a parts car.</TD></TR></TABLE>
its easy i just finished mine.
<TABLE WIDTH="90%" CELLSPACING=0 CELLPADDING=0 ALIGN=CENTER><TR><TD>Quote, originally posted by Blanket Jackson »</TD></TR><TR><TD CLASS="quote">Damn nice.I am scared to do my auto-man trans swap. I even have an exact twin to my auto car that is a manual for a parts car.</TD></TR></TABLE>
its easy i just finished mine.
Trending Topics
Thread Starter
Honda-Tech Member
Joined: Jan 2007
Posts: 36
Likes: 0
From: knoxville, tn, usa
I'll definately take some more detailed pics of how it currently sits of the dash, the pedal assembly and anything else exciting. my goal was to make this hybrid fully functional underneath the dash as well as making it look very nice. doing it like that, i don't see how anyone could do it feasibly at all unless they had a complete donor car. I also had to do an insane amount of cutting, shaping, and welding of many components. I custom did everything that was possible. i'll describe what i did as i go along.
trent never fails to please. I was stunned as i listened to the new album online with headphones. It's definately not the same as growing up to pretty hate and broken, but it's his sound that i like and i hear it on the new cd so i like it. the last one was a bit too depressing, but still enjoyable. that vinyl would be cool as hell to hear lol. awesome.
well here are some pics for the time being
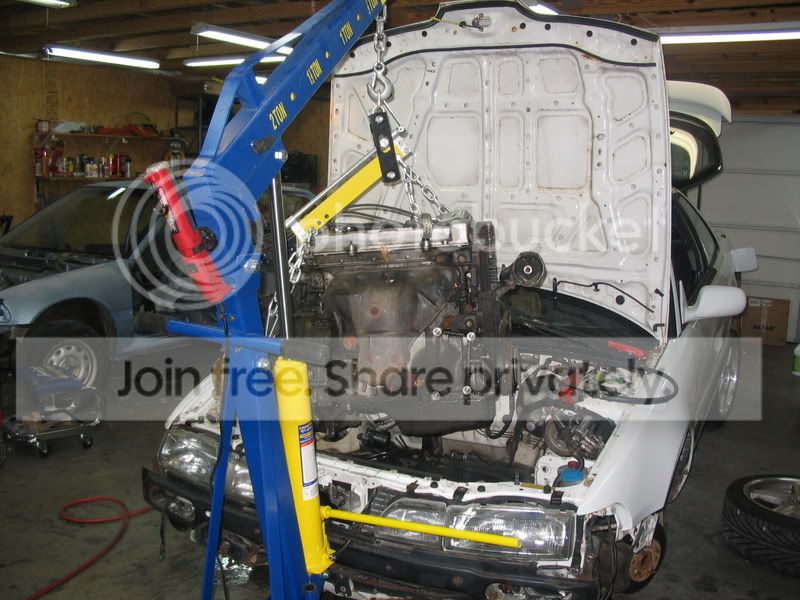
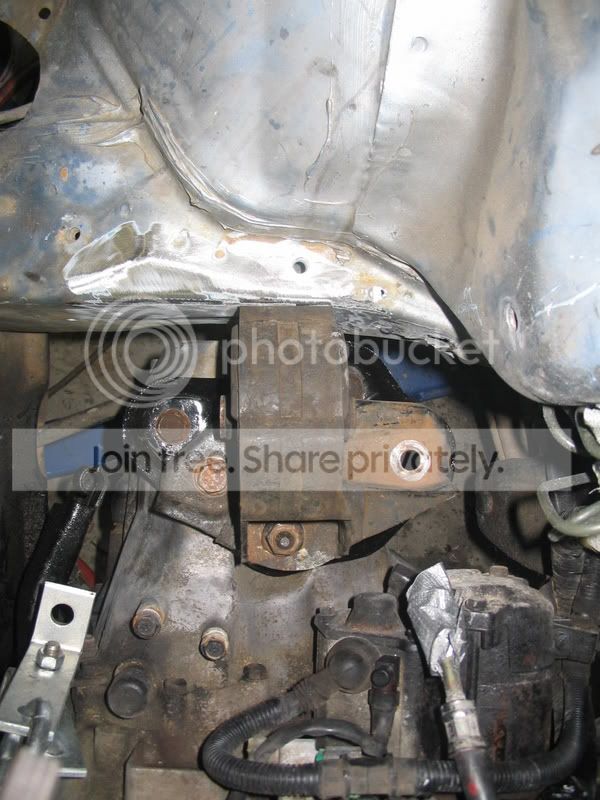
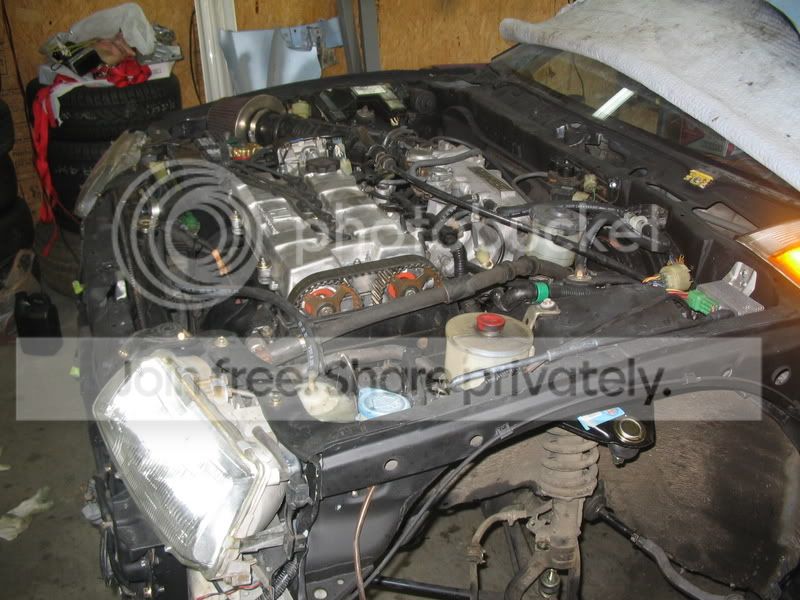
checking for hood clearance and doing some measuring and planning with how i wanted to customize my mounts. i originally could force the engine in position with the rear mount and driver side mount connected, but they were in a horrible bind and the engine would have still been sitting somewhat diagonal in the bay. i decided against simply doing that and relocating the passenger side mount. So i made a solid 3m window weld rear mount, moved the driver and pass. side engine mount, measured, measured again and welded into position.
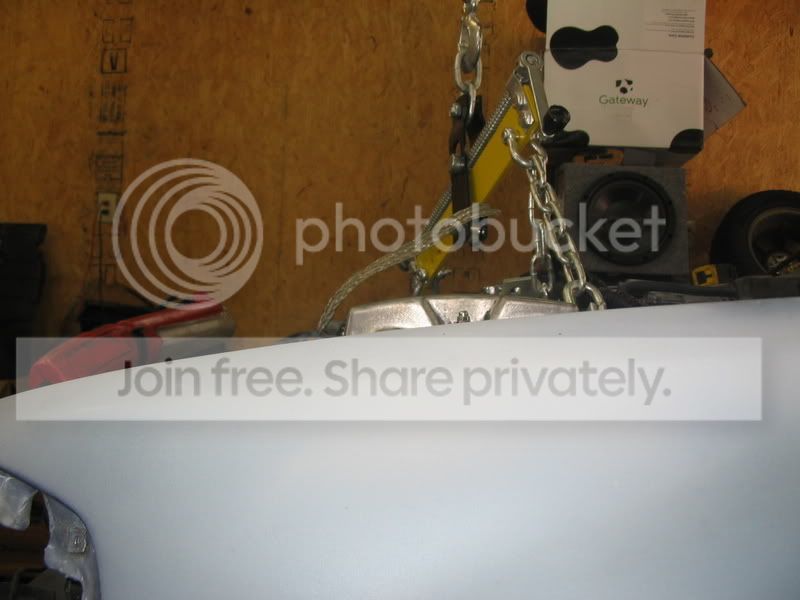

i chose to move the bolt hole back and up so as to give a bit more clearance in the front. it turned out that if i hadn't the AC compressor would have probably been into teh front subframe. I didn't want to move it too far back for fear of making the axles bind up to much.
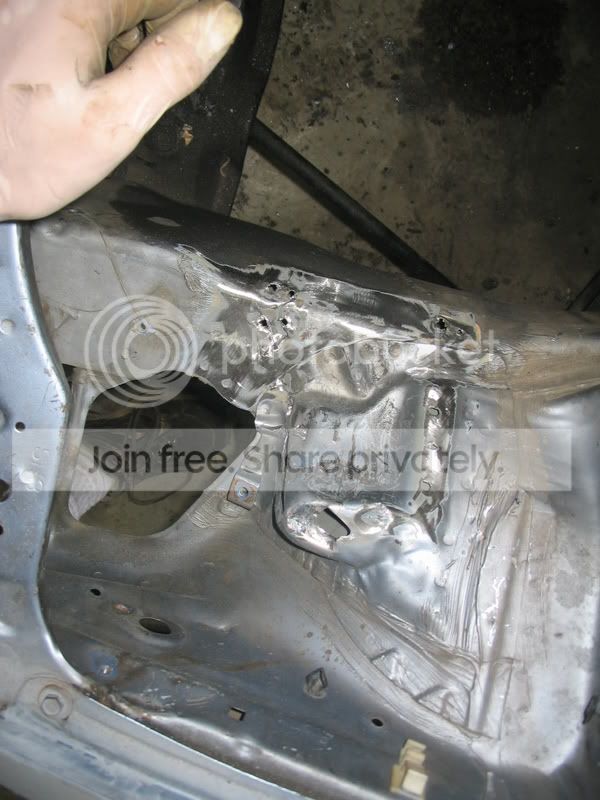
this isn't the prettiest thing in the world, won't get into why...but it still worked out great and cleaned up better.
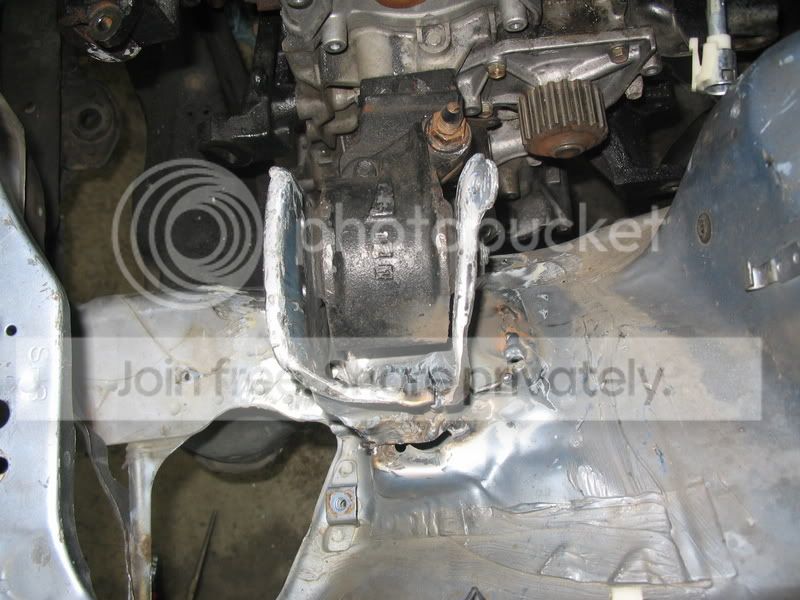
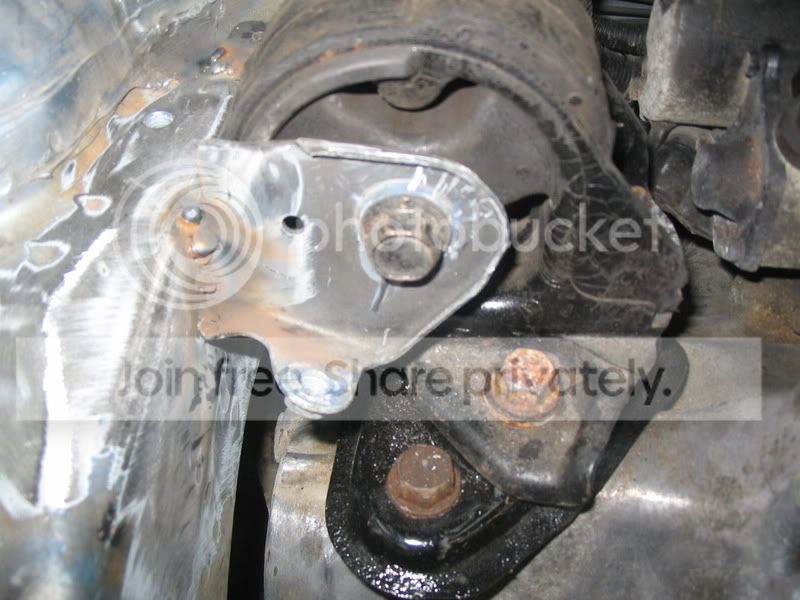
after mounts were tacked up and engine resting.
i wanted to leave the pass and driver side mounts stock so that it would hopefully alleviate the almost solid rear mount's influence on vibration. it doesn't seem like it vibrates much at all when at idle currently, but it's a bit hard to tell when you have straight exhaust going back without a muffler and don't have doors on. the engine does not move at all though.
that's all i have time for now. later
trent never fails to please. I was stunned as i listened to the new album online with headphones. It's definately not the same as growing up to pretty hate and broken, but it's his sound that i like and i hear it on the new cd so i like it. the last one was a bit too depressing, but still enjoyable. that vinyl would be cool as hell to hear lol. awesome.
well here are some pics for the time being
checking for hood clearance and doing some measuring and planning with how i wanted to customize my mounts. i originally could force the engine in position with the rear mount and driver side mount connected, but they were in a horrible bind and the engine would have still been sitting somewhat diagonal in the bay. i decided against simply doing that and relocating the passenger side mount. So i made a solid 3m window weld rear mount, moved the driver and pass. side engine mount, measured, measured again and welded into position.
i chose to move the bolt hole back and up so as to give a bit more clearance in the front. it turned out that if i hadn't the AC compressor would have probably been into teh front subframe. I didn't want to move it too far back for fear of making the axles bind up to much.
this isn't the prettiest thing in the world, won't get into why...but it still worked out great and cleaned up better.
after mounts were tacked up and engine resting.
i wanted to leave the pass and driver side mounts stock so that it would hopefully alleviate the almost solid rear mount's influence on vibration. it doesn't seem like it vibrates much at all when at idle currently, but it's a bit hard to tell when you have straight exhaust going back without a muffler and don't have doors on. the engine does not move at all though.
that's all i have time for now. later
Why the hell did you do that to the mounts. You can use all OEM mounts with no modification. I don't understand why you would rather hack up your car then get the correct mounts.
Thread Starter
Honda-Tech Member
Joined: Jan 2007
Posts: 36
Likes: 0
From: knoxville, tn, usa
i did that to the mounts b/c it was part of the plan all along. There is no reason to buy mounts at inflated prices when you have the skills to create it yourself. i personally didn't like the position that aftermarket mounts put the engine in also, and their use of polyurethane. So I made it how i wanted it. I'm extremely happy that i went that route b/c I have a nice vibrationless ride, the engine doesn't twist, and i have extra clearance in the front. there is no pull while driving, especially on WOT, and the axles are not close to binding. So it's all good!
This is all homegrown though. My major purchase for the actual project was only new front axles. Unless it's materials and supplies, I made everything i had (between teh civic and the integra) work and work well.
anyway while i'm here here are some more pics that i had a chance to upload.
this was when i figured out the best way to mount the dash in for the physical mounting points on the sides the one behind the clock, and the bottom one. I cut the high mount off the integra and welded it into position on hte civic, and i used the integra side mounts for the sides. I had to cut them and shape them so that they would fit appropriately. they are there mainly for support in holding the dash in position. teh bottom part i simply had to bend the lowest mount to make it fit right. I had this damn dash in and out so many times that it makes me cringe to think about it now. I wanted it to fit perfect across the windshield and to be angled out correctly.
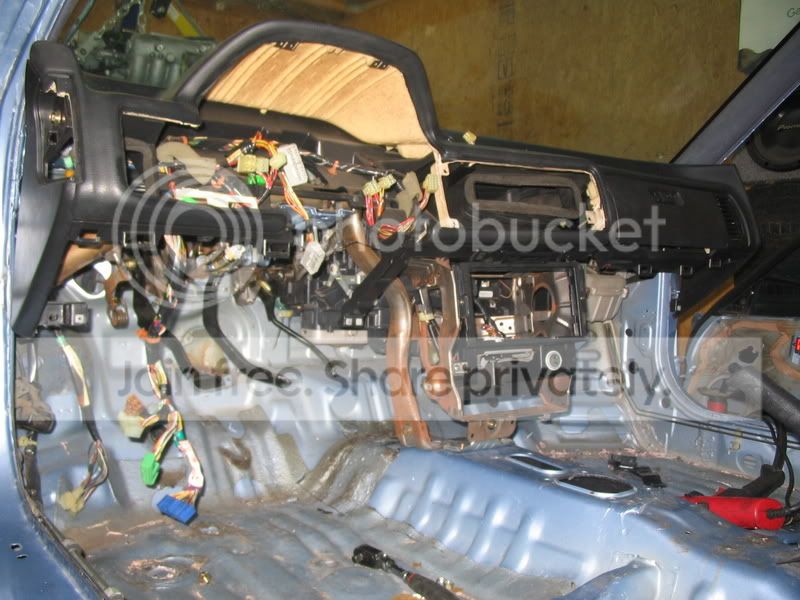
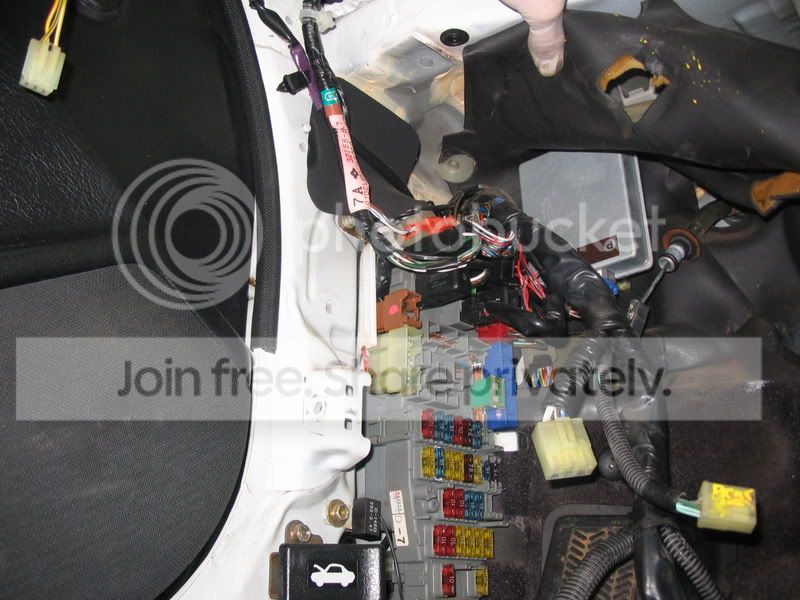
this fuse block is twice the size of the civic's and it really doesn't have a good place to go. you can't use the interior kick panels, but the carpet will cover most of it.
the next pics i put up should give you a closer idea for where i'm currently at. thanks guys for stoppin by. later
This is all homegrown though. My major purchase for the actual project was only new front axles. Unless it's materials and supplies, I made everything i had (between teh civic and the integra) work and work well.
anyway while i'm here here are some more pics that i had a chance to upload.
this was when i figured out the best way to mount the dash in for the physical mounting points on the sides the one behind the clock, and the bottom one. I cut the high mount off the integra and welded it into position on hte civic, and i used the integra side mounts for the sides. I had to cut them and shape them so that they would fit appropriately. they are there mainly for support in holding the dash in position. teh bottom part i simply had to bend the lowest mount to make it fit right. I had this damn dash in and out so many times that it makes me cringe to think about it now. I wanted it to fit perfect across the windshield and to be angled out correctly.
this fuse block is twice the size of the civic's and it really doesn't have a good place to go. you can't use the interior kick panels, but the carpet will cover most of it.
the next pics i put up should give you a closer idea for where i'm currently at. thanks guys for stoppin by. later
Thread Starter
Honda-Tech Member
Joined: Jan 2007
Posts: 36
Likes: 0
From: knoxville, tn, usa
the welds that you see were simply enough tacks to hold it to make sure it would positon itself ok when at rest. I spent alot of time welding them to make them stronger than the few spot welds that hold them on from the factory. it's surprising how weak spot welds really are. but anyway, i used gussets where i suspected any sort of weakness.

Honda-Tech Member
Joined: Nov 2001
Posts: 3,040
Likes: 1
From: Easton
<TABLE WIDTH="90%" CELLSPACING=0 CELLPADDING=0 ALIGN=CENTER><TR><TD>Quote, originally posted by hatchet »</TD></TR><TR><TD CLASS="quote">the welds that you see were simply enough tacks to hold it to make sure it would positon itself ok when at rest. I spent alot of time welding them to make them stronger than the few spot welds that hold them on from the factory. it's surprising how weak spot welds really are. but anyway, i used gussets where i suspected any sort of weakness.</TD></TR></TABLE>
Gotcha I was thinking those spots welds in the pics were the finished product. oh well nice work
Gotcha I was thinking those spots welds in the pics were the finished product. oh well nice work
Honda-Tech Member
Joined: Feb 2004
Posts: 3,262
Likes: 2
From: long island, ny, usa
<TABLE WIDTH="90%" CELLSPACING=0 CELLPADDING=0 ALIGN=CENTER><TR><TD>Quote, originally posted by hatchet »</TD></TR><TR><TD CLASS="quote">the welds that you see were simply enough tacks to hold it to make sure it would positon itself ok when at rest. I spent alot of time welding them to make them stronger than the few spot welds that hold them on from the factory. it's surprising how weak spot welds really are. but anyway, i used gussets where i suspected any sort of weakness.</TD></TR></TABLE>
i was just about to say, 4 tack welds would NOT hold that motor from ripping your frame, but those images were just from your mockup.
honestly, a lot of guys on this forum will be very interested to see this because you often get people complaining about excess vibration and an overall rough ride with aftermarket mounts.
do you plan on spraying the engine bay black or something to lock out rust once the welding is done?
are you using any sort of front mount?
innovative makes a front crossmember and a matching engine mount. with your fab skills you could probably get it to line up and make use of it.
nice work so far, snag some pics of the finished mounts.
Thread Starter
Honda-Tech Member
Joined: Jan 2007
Posts: 36
Likes: 0
From: knoxville, tn, usa
Originally Posted by doublethink
honestly, a lot of guys on this forum will be very interested to see this because you often get people complaining about excess vibration and an overall rough ride with aftermarket mounts.
do you plan on spraying the engine bay black or something to lock out rust once the welding is done?
are you using any sort of front mount?
innovative makes a front crossmember and a matching engine mount. with your fab skills you could probably get it to line up and make use of it.
nice work so far, snag some pics of the finished mounts.
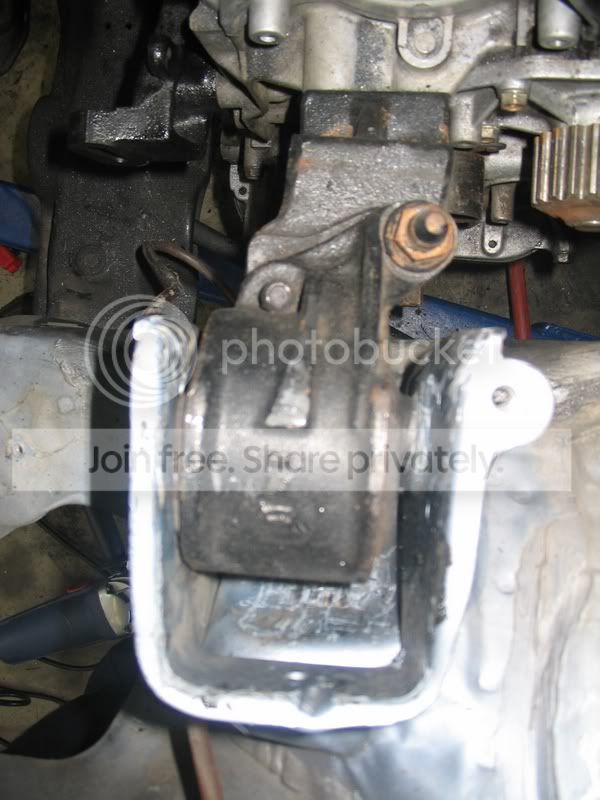
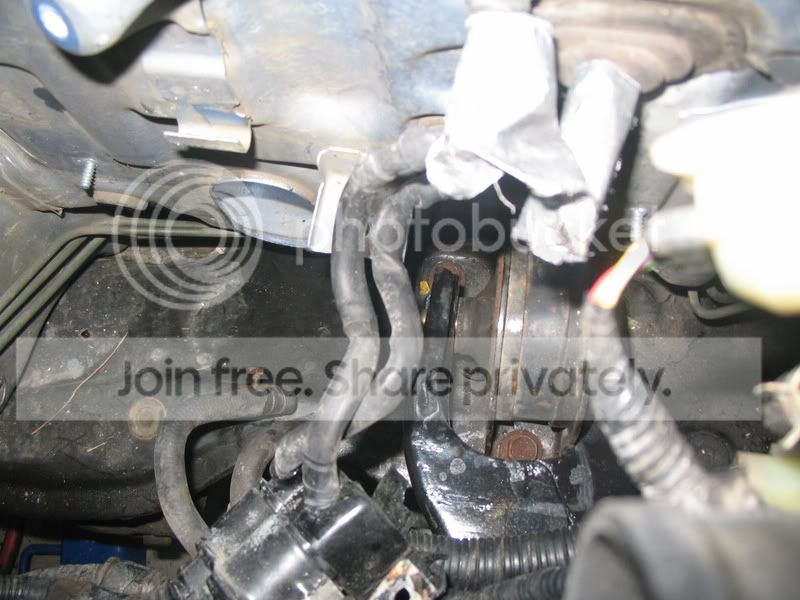
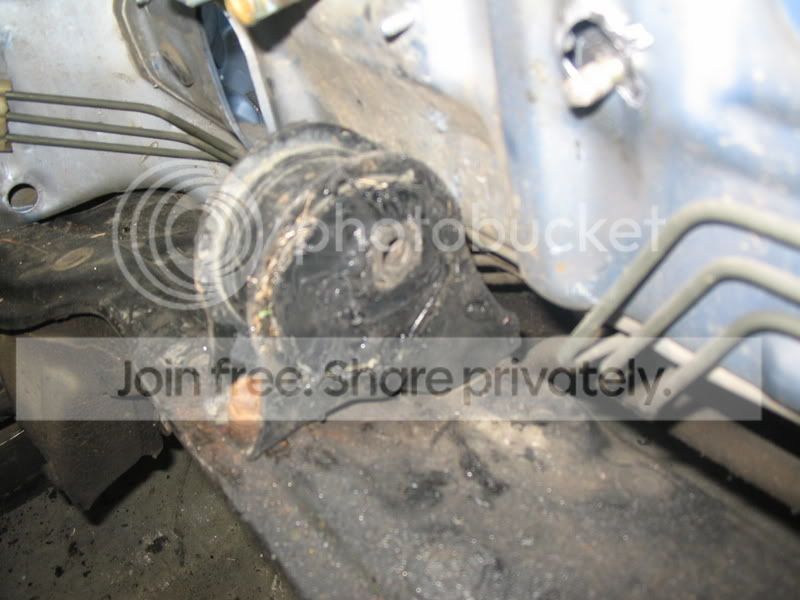
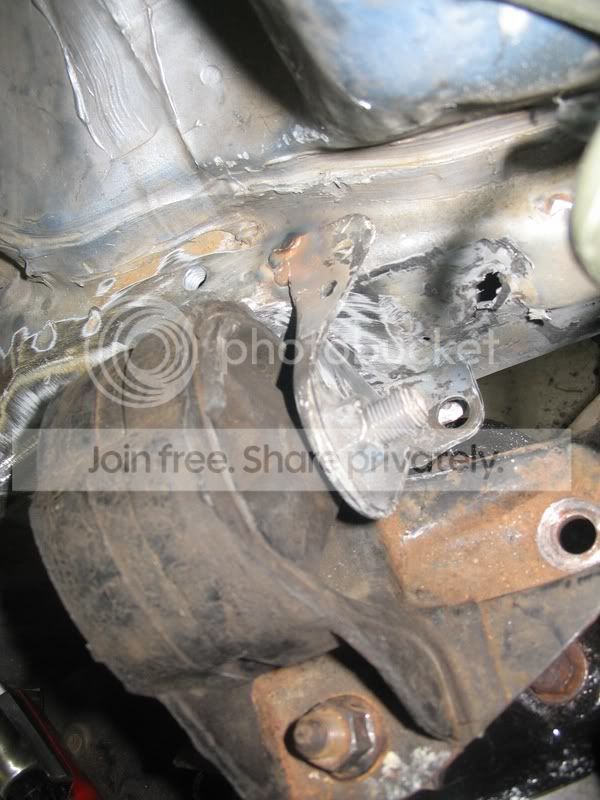
speaking of a front mount, i don't think i'll ever have one. the mount got ripped straight off the transmission of the donor car when it was in it's wreck. it ripped a chunk of aluminum where it bolts to the transmission clean off
 . i'll get a pic of that. i'd love to use a tubular front cross member but since i'm daily driving this guy it doesn't matter much to me now.
 here are a few more pics.
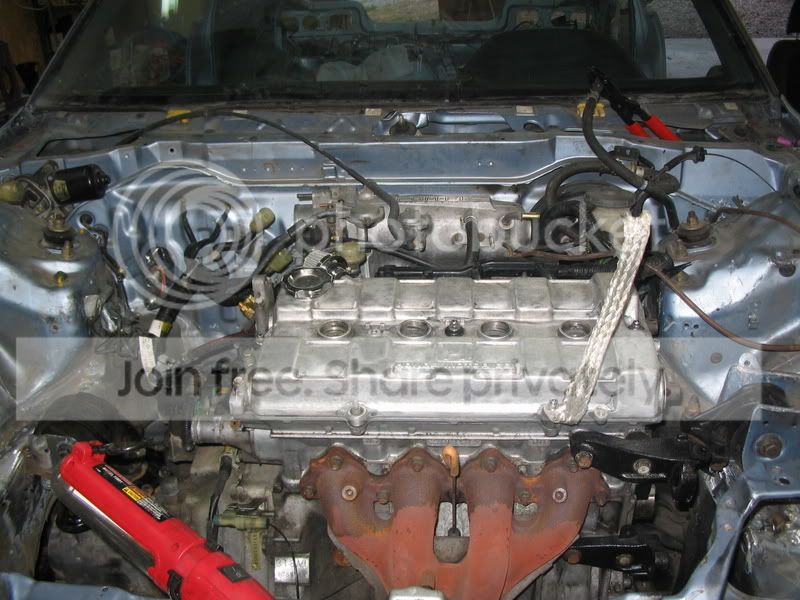
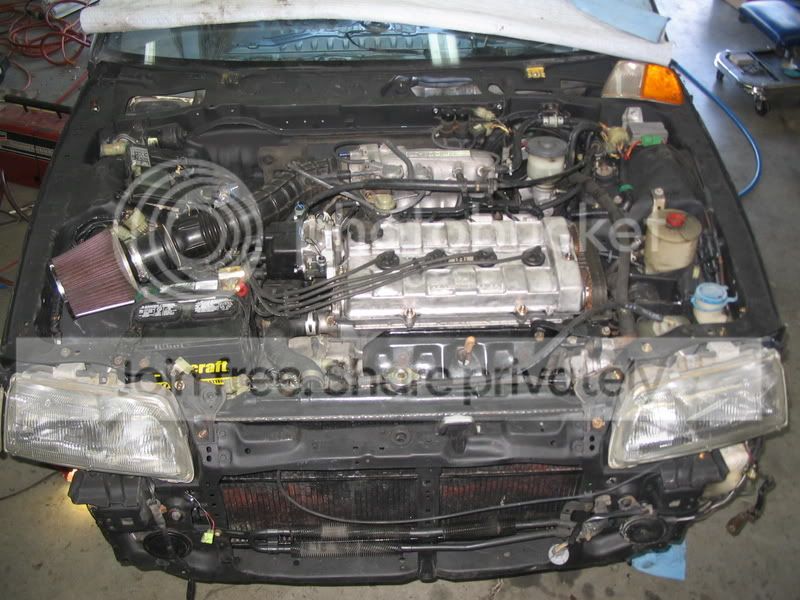
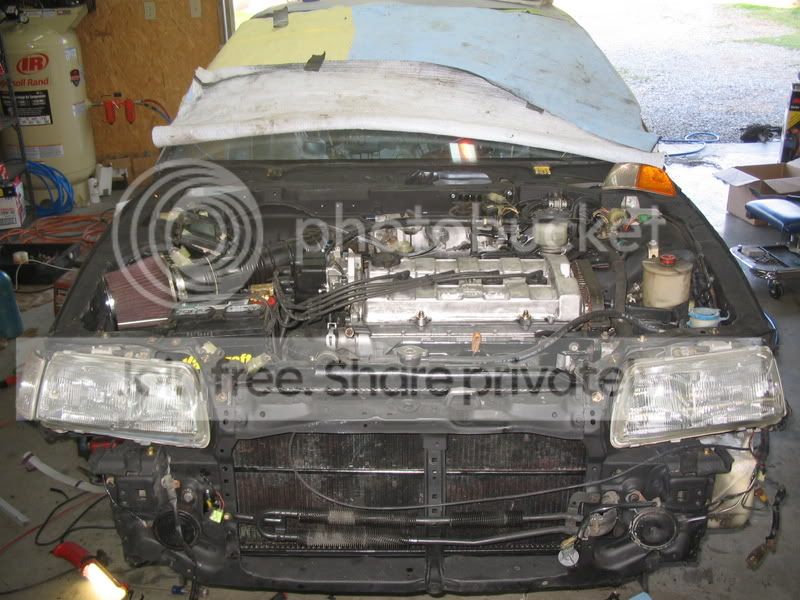
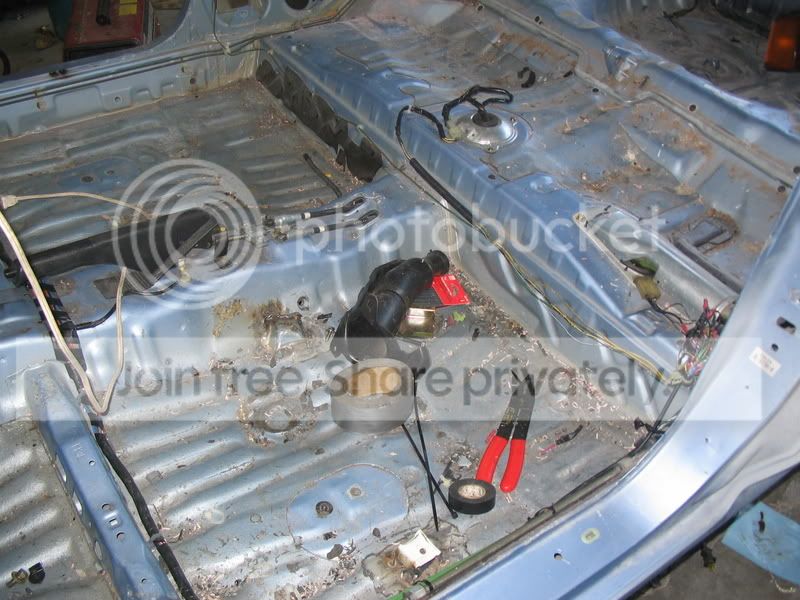
best pic i really have of the bay after doing mounts. this is the beginning of putting everything back together. notice the horizontal gusset for the passenger side mount. all integra brake components as well.
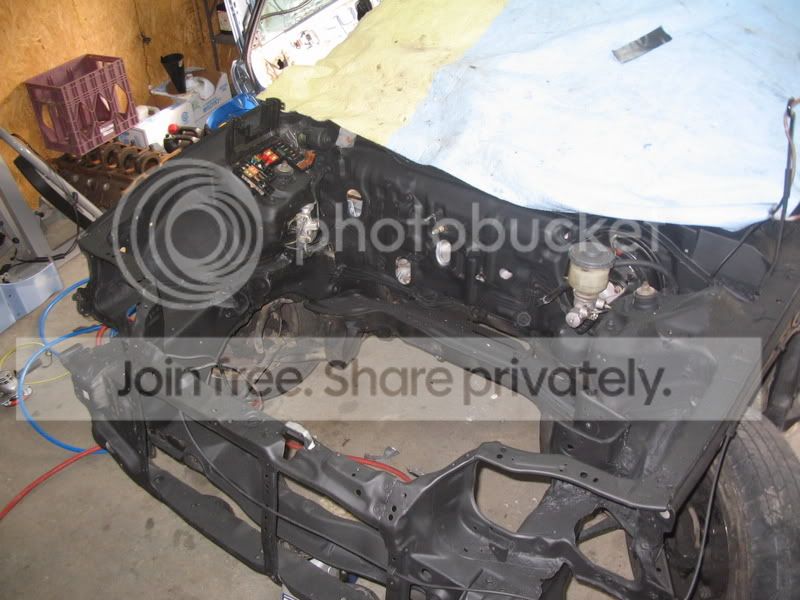
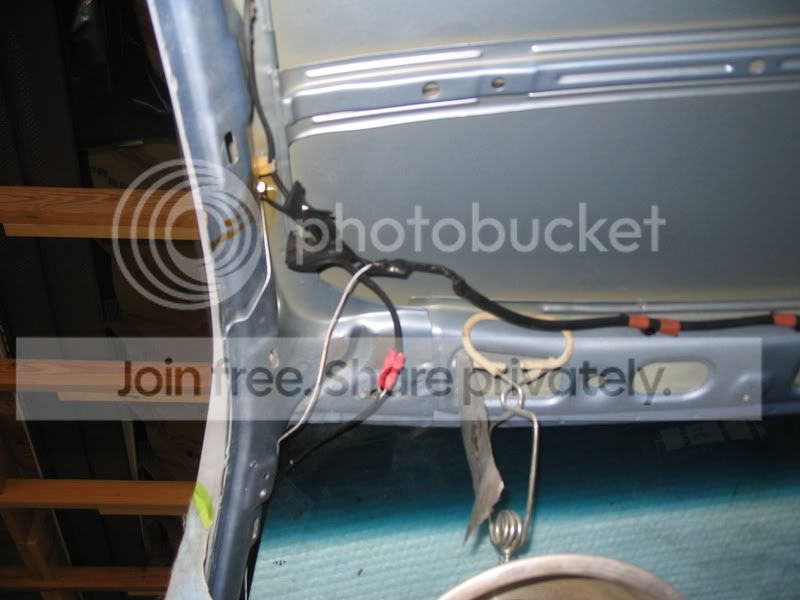
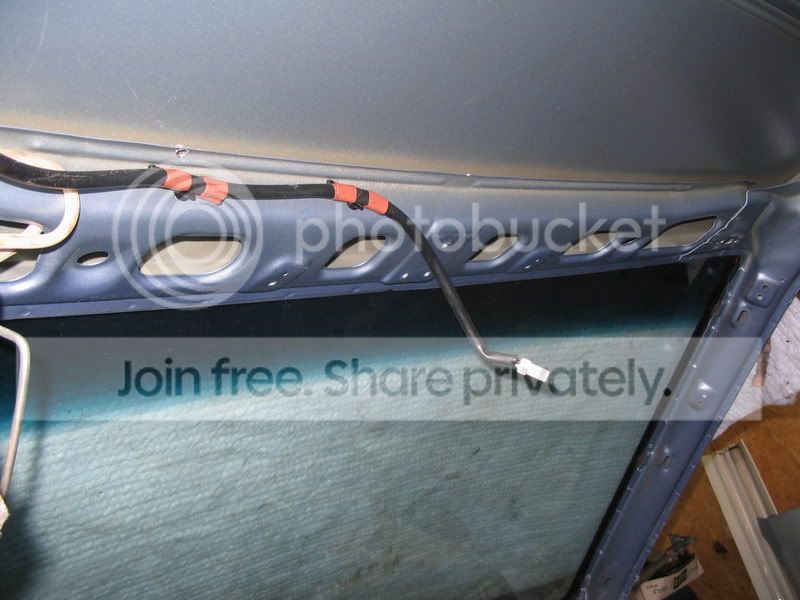
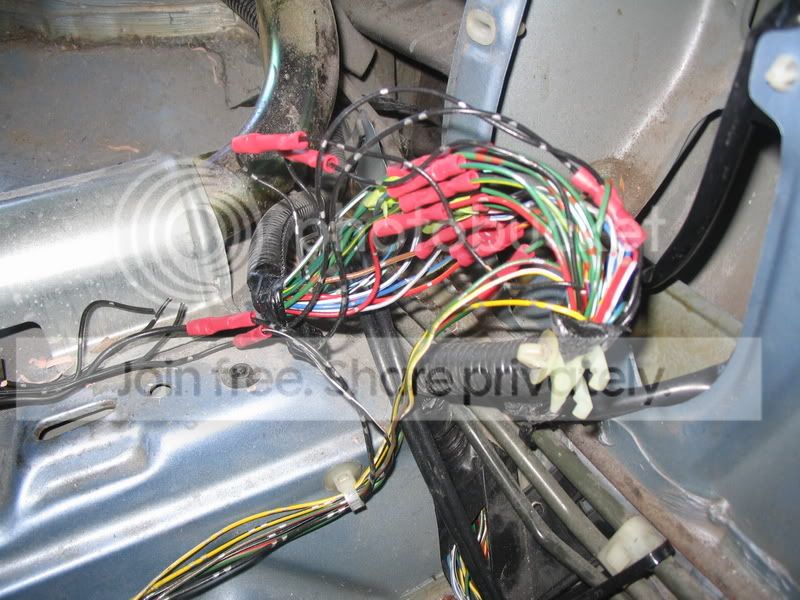
the integra harness where i began routing it. I also got powersteering swapped over.
The wiring harness was honestly one of the biggest pains to deal with for this project. It took forever to route it in the smaller spaced civic. It doesn't show it in this pic, but i ended up moving the harness over in the evaporator inlet/outlet closer to the passenger side so i coudl go ahead and put the evaporator in once i decided i would put AC back in. the powersteering was accomplished by using only the integra high pressure line i believe. might have had to switch another line but i don't remember for sure.
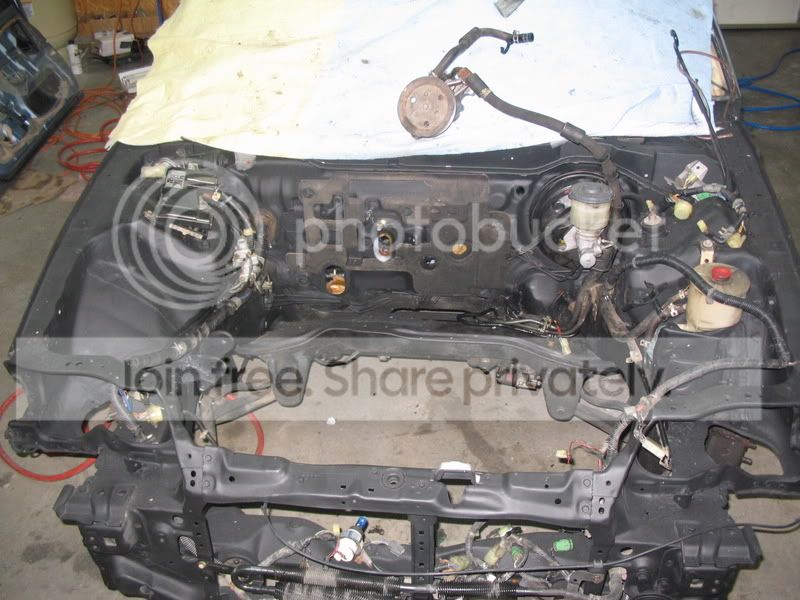
used the integra radiator, and i have since relocated the battery to the rear to free up some space up front. otherwise i wouldn't have. I haven't yet, but i'm going to relocate the reservoir on the passenger side probably, b/c space is limited on the driver side after moving the mount and with the pwr steer pump right at it.
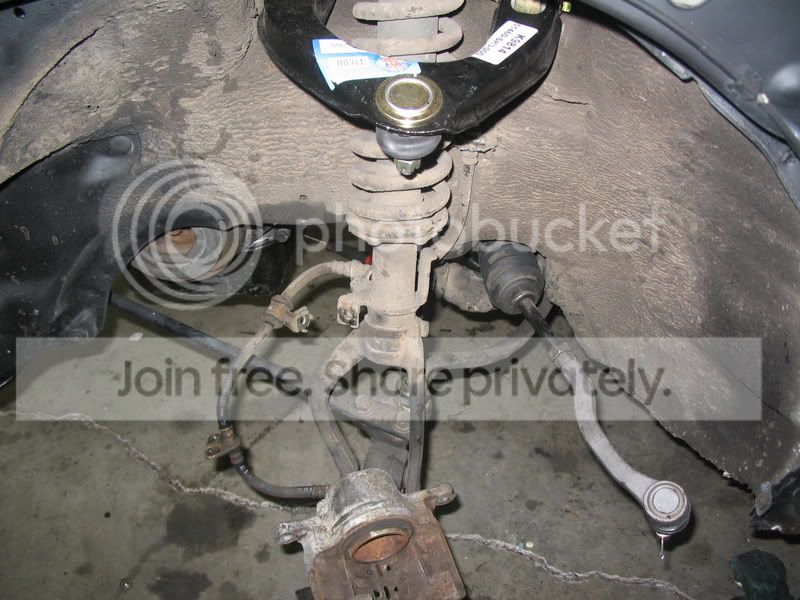
i meant to talk abou this one. i ordered a rebuild type kit on ebay for the front suspension. came with new upper control arms w/ bjoints and bushings, lower ball joint, inner and outer tie rods, and new sway bar end links and bushings. this was also right before i put the axles in. the driver side ended up having plenty of space to travel in and out, while the passenger side had maybe a 1/4" approx. to move in and out, while at ride height. So it should be fine always, even if i lower this guy in the future.
here's one of the goofiest things i did. You can't see it that well but i used the integra fuel gauge sending unit in the civic just so i could have my empty indicator light come on. I had to cut off a perfect circle so it could fit on the smaller opening in the civic tank. this pic is just showing the 5 prong harness, instead of the 4 prong that the civic used. also, it was a pain in the *** to get the sending unit inside the gas tank. i'm surprised i didn't damage it, but it works!

I'll be getting to some more pics of the dash and interior things next. later
Modified by hatchet at 6:56 PM 5/28/2007
Thread Starter
Honda-Tech Member
Joined: Jan 2007
Posts: 36
Likes: 0
From: knoxville, tn, usa
<TABLE WIDTH="90%" CELLSPACING=0 CELLPADDING=0 ALIGN=CENTER><TR><TD>Quote, originally posted by mahatma »</TD></TR><TR><TD CLASS="quote">very impressive, WOW @ swapping the entire harnesses over....
and i have a version of that same floor jack
it gets higher than snoop dogg </TD></TR></TABLE>
thanks man, was about the only solution to easily do the dash swap like i wanted. the rear most part of the harness i spliced into the civic, simply b,c i would have had so much extra wire bundled up., and i didn't feel like tearing it out of the teg and civic.

and i have a version of that same floor jack
it gets higher than snoop dogg
</TD></TR></TABLE>thanks man, was about the only solution to easily do the dash swap like i wanted. the rear most part of the harness i spliced into the civic, simply b,c i would have had so much extra wire bundled up., and i didn't feel like tearing it out of the teg and civic.