

And the battle begins... (56k go grab a beer)

Thread Starter
New User
Joined: Aug 2004
Posts: 521
Likes: 0
From: Somewhere, Ontario, Canada
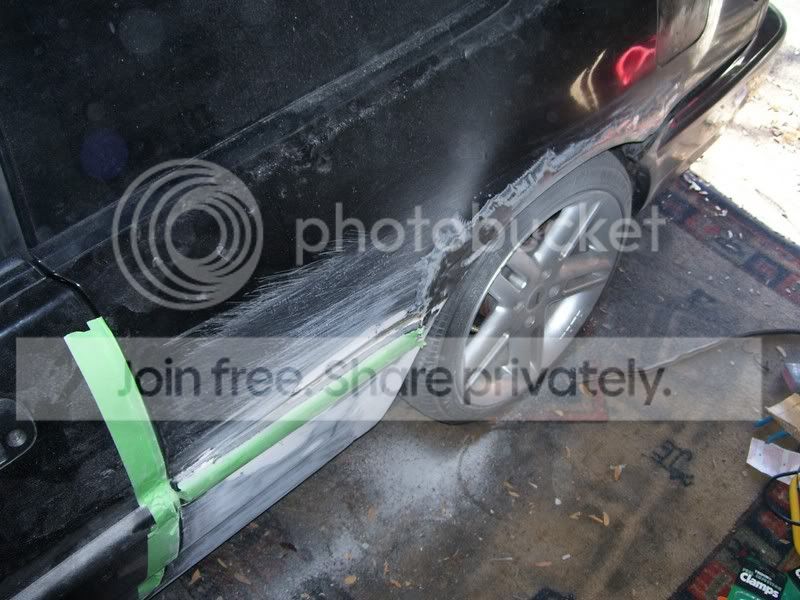
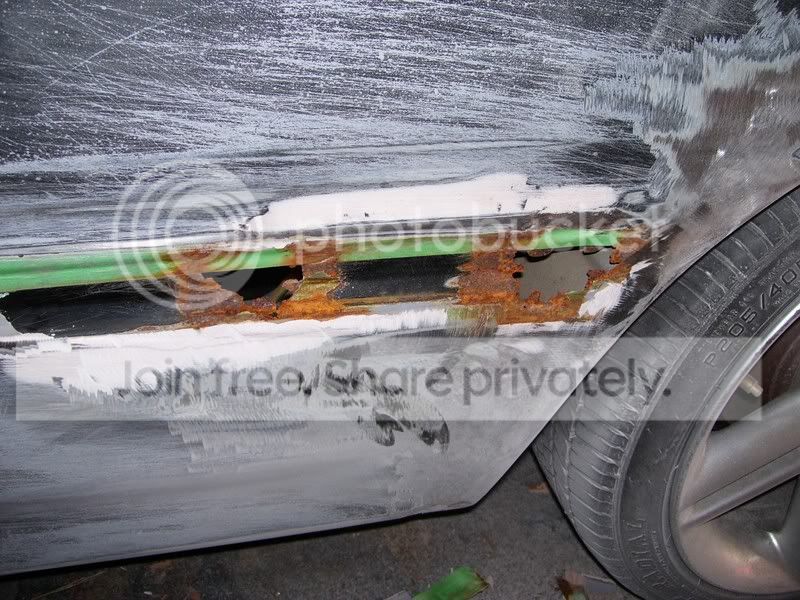
Ok, so my car has had a few little rust spots pop up over the past 2 years, and I've finally decided to do something about it. Car needs paint so what the hell, I'll get rid of the rust before I start paint prep.
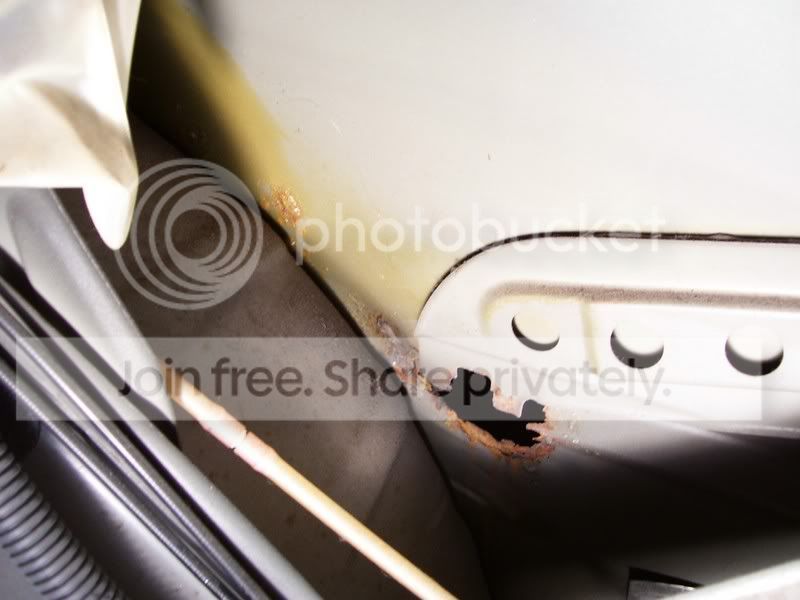
I really only noticed 3 area's on my driverside quarter area that were infected, and little did I know once I started grinding the paint/rust off, what I would find.
All I can say is OMFG...time to cut and weld
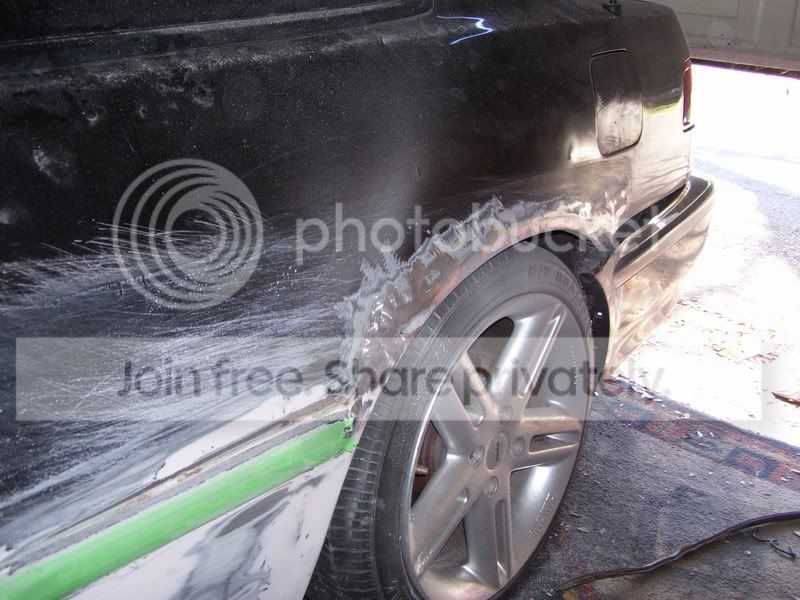
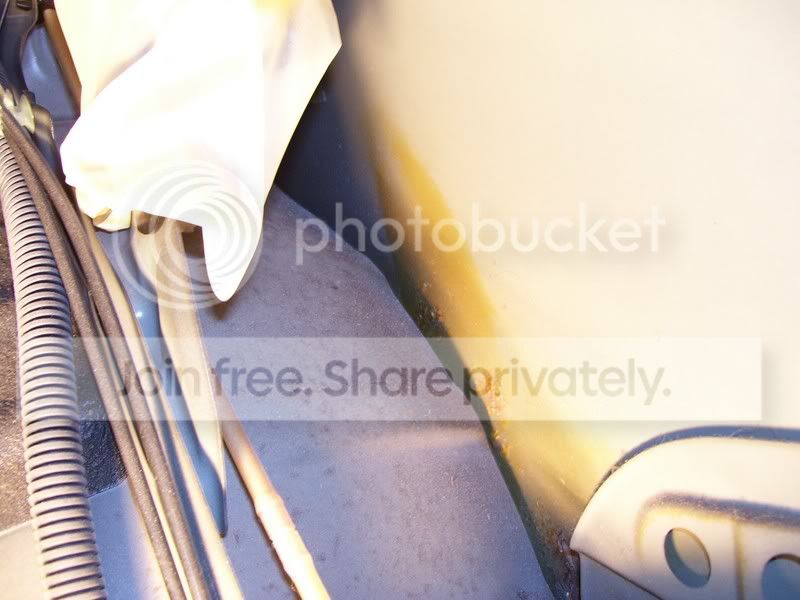
First pic after some sanding and droping rear bumper off mounts... I see bondo
Same thing different view
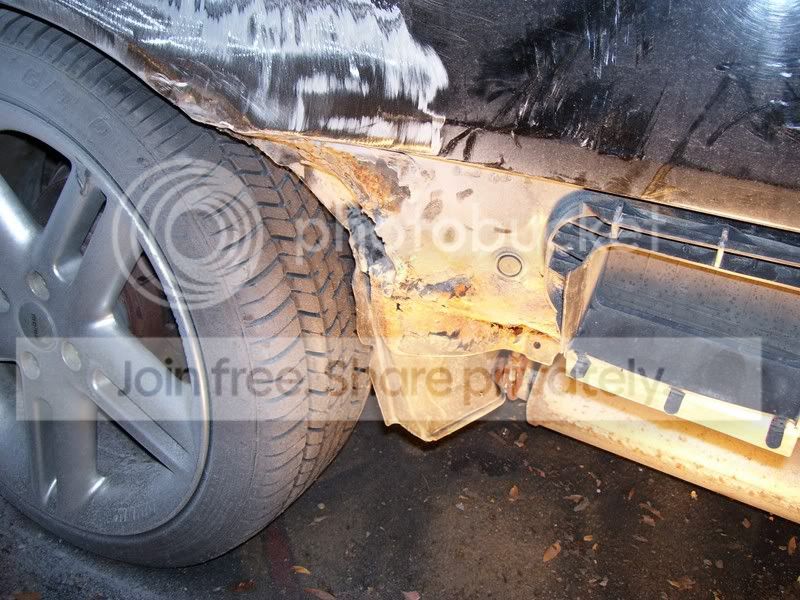
Started sanding the rust away from the top of quarter moulding, and the moulding pulled away from the car so I popped it off
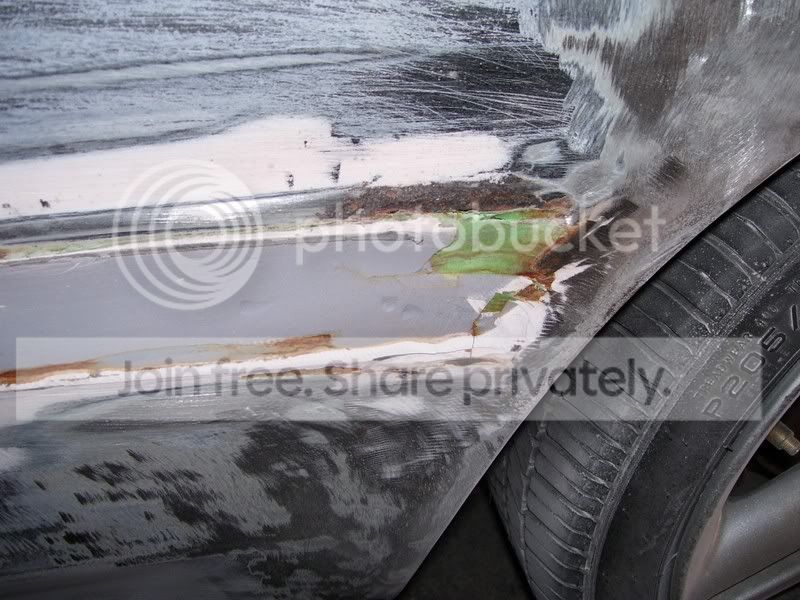
All I can say is WOW WTF IS THAT ****? previous owner ghetto'ized it.
I was scarred to knock that **** out of there, but did it anyways and found this.
Another pic
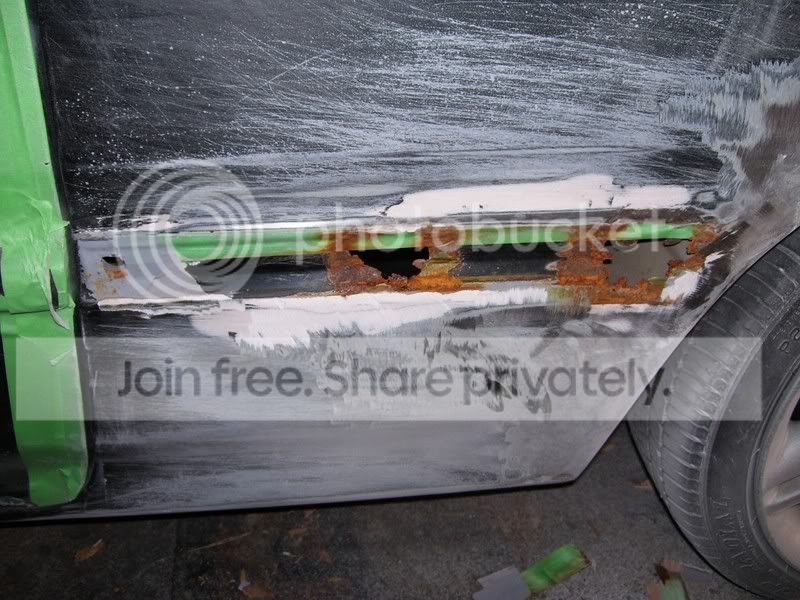
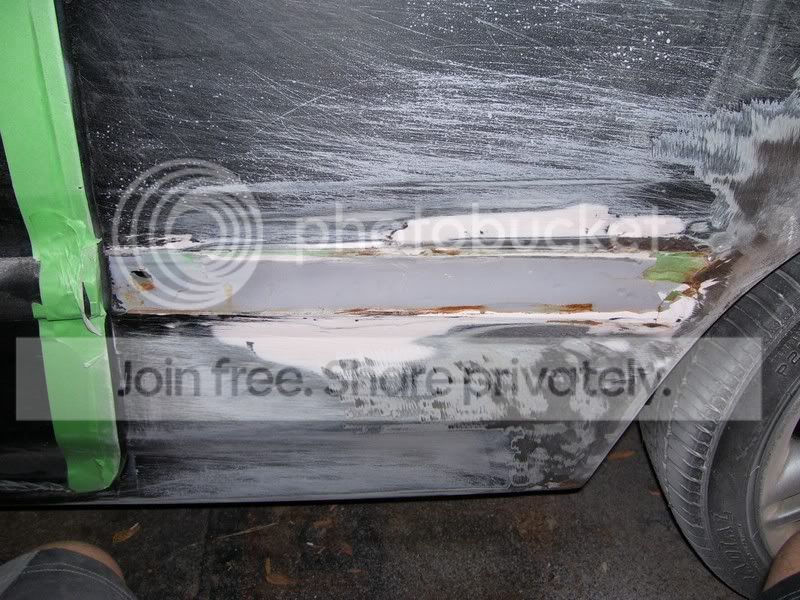
So came to the decision, expletive it, cut the whole panel out, get a donor and weld it in. Just checking for more cancer.
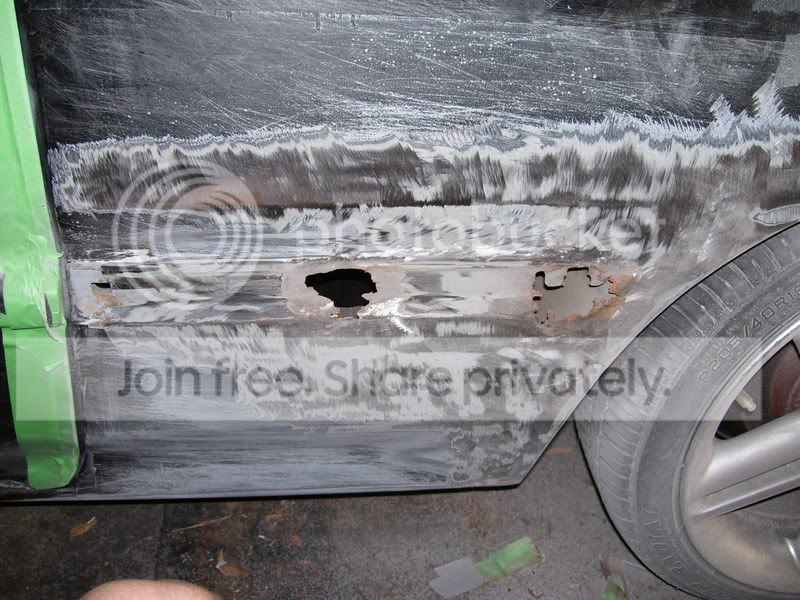
And finally, marking what I'm going to cut out and replace. Quarter panel wise anyways.

Now my question is, how much excess metal should I cut to make sure the rust is gone? I've given myself about 1 1/2". Any suggestions.
Check back will be updating the rest, and progress pics of rust removal, new panels going in and prep and finally paint.
I really only noticed 3 area's on my driverside quarter area that were infected, and little did I know once I started grinding the paint/rust off, what I would find.
All I can say is OMFG...time to cut and weld
First pic after some sanding and droping rear bumper off mounts... I see bondo
Same thing different view
Started sanding the rust away from the top of quarter moulding, and the moulding pulled away from the car so I popped it off
All I can say is WOW WTF IS THAT ****? previous owner ghetto'ized it.
I was scarred to knock that **** out of there, but did it anyways and found this.
Another pic
So came to the decision, expletive it, cut the whole panel out, get a donor and weld it in. Just checking for more cancer.
And finally, marking what I'm going to cut out and replace. Quarter panel wise anyways.
Now my question is, how much excess metal should I cut to make sure the rust is gone? I've given myself about 1 1/2". Any suggestions.
Check back will be updating the rest, and progress pics of rust removal, new panels going in and prep and finally paint.
Honda-Tech Member
Joined: Mar 2004
Posts: 3,828
Likes: 0
From: Penguin in the fridge,, IA, USA
<TABLE WIDTH="90%" CELLSPACING=0 CELLPADDING=0 ALIGN=CENTER><TR><TD>Quote, originally posted by sooo_slow »</TD></TR><TR><TD CLASS="quote">
Now my question is, how much excess metal should I cut to make sure the rust is gone? I've given myself about 1 1/2". Any suggestions.
</TD></TR></TABLE>
take your interior panel out and see if you can see what you can see from there. look behind your trunk carpet too. also, i would preferably cut along the straightest line on the car (not close to a body line) to ensure that when you weld it back up, filler, sand it that it comes out as smooth as possible.
good luck bro. that picture makes me cringe hah!
Thread Starter
New User
Joined: Aug 2004
Posts: 521
Likes: 0
From: Somewhere, Ontario, Canada
lol, thanks for the advice. I'll whip of the panels tomorrow and snap some pics and get some more opinions before the cutting wheel comes out.

Thread Starter
New User
Joined: Aug 2004
Posts: 521
Likes: 0
From: Somewhere, Ontario, Canada
So I got around to do a little more work on it today, nothing major but w/e. Found more rust, no big deal more metal and welding here and there. Started to disassemble the rear bumper area, and my rebar (or what ever its called) was rotted to ****, so badly I just pulled the whole bumper cover/bumper right off.
So here's a few more pics, not that anyone cares...
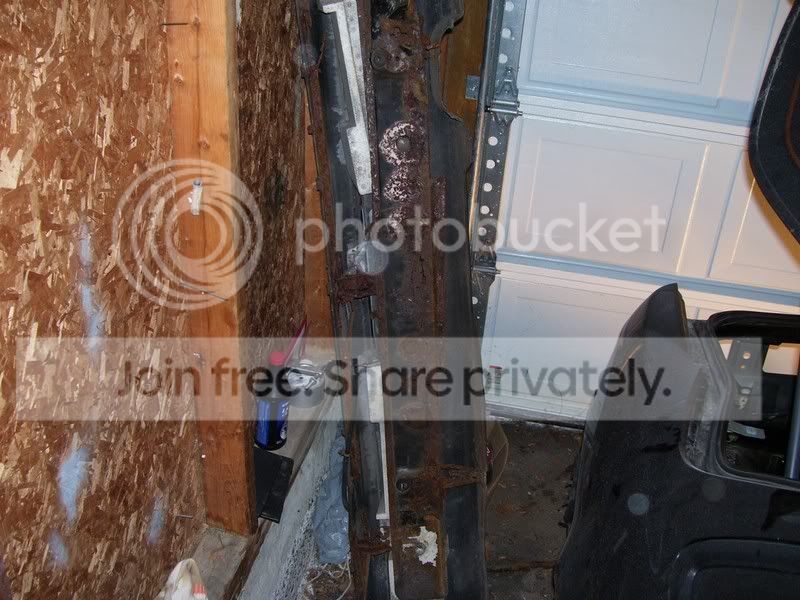
Inside the car looking at the quarters holes
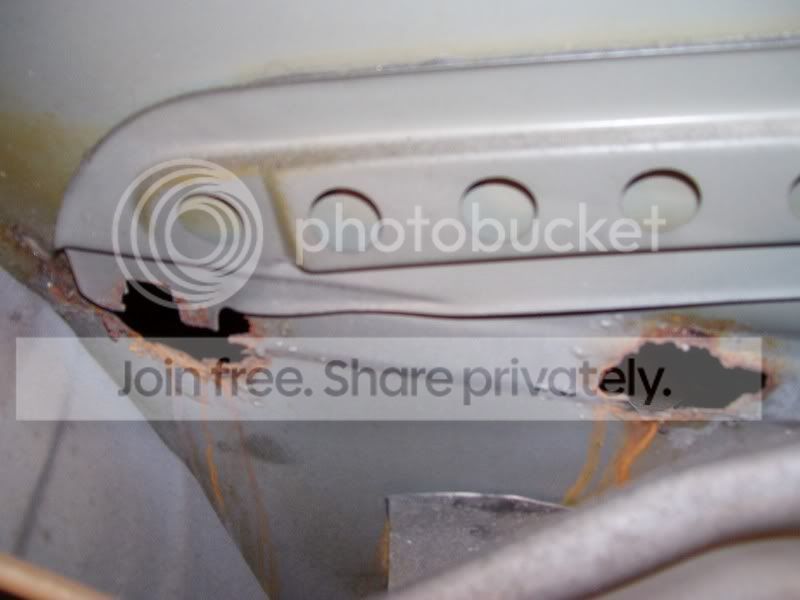
Rear of car

LOL @ bumper
And whats left of the re-inforcement bar (other then whats still in bumper cover)
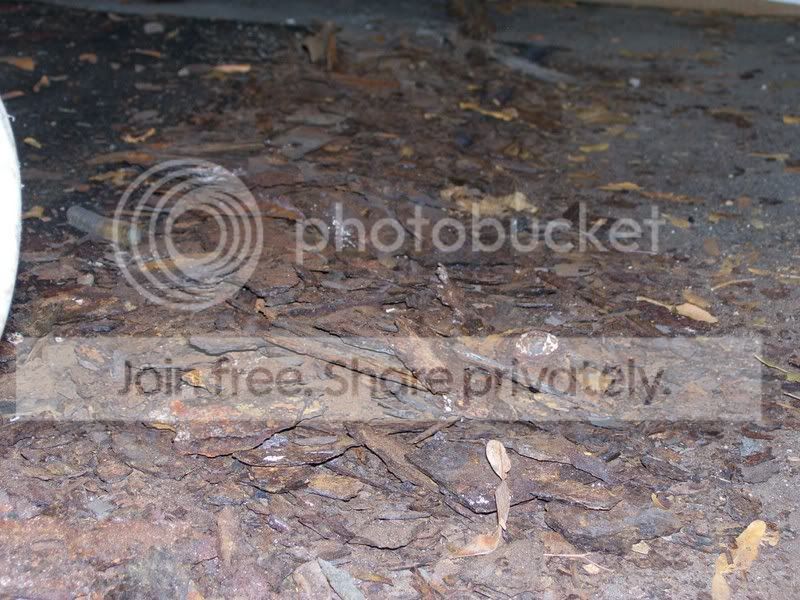
Yeah canadian winters take a toll, at least my floors are still mint.
So I'm going to start the other quarter tomorrow and I'll keep updating as I go along...like a little DIY type thing I guess.
So here's a few more pics, not that anyone cares...
Inside the car looking at the quarters holes
Rear of car
LOL @ bumper
And whats left of the re-inforcement bar (other then whats still in bumper cover)
Yeah canadian winters take a toll, at least my floors are still mint.
So I'm going to start the other quarter tomorrow and I'll keep updating as I go along...like a little DIY type thing I guess.
Honda-Tech Member
Joined: Sep 2002
Posts: 704
Likes: 0
From: I think fat chicks are hot and yummy.
Sheesh man. I thought the salt air in Hawaii was corrosive enough.
I usually cut between 3/4" - 2" around the damaged area. I also live
by POR 15 and/or epoxy primers on prepped metal.
Had some experience with DA's also. How is the metal around the
quarter glass also? Came across a few DA's where rust was forming
around quarter glass pinch seams.
Best of luck.
I usually cut between 3/4" - 2" around the damaged area. I also live
by POR 15 and/or epoxy primers on prepped metal.
Had some experience with DA's also. How is the metal around the
quarter glass also? Came across a few DA's where rust was forming
around quarter glass pinch seams.
Best of luck.
Thread Starter
New User
Joined: Aug 2004
Posts: 521
Likes: 0
From: Somewhere, Ontario, Canada
Its flawless around the glass.
As far as the por 15 is concerned (which I'm definitely going to use) do you throw it on the metal before you lay down the first primer coat? How many coats are needed of it?
Thanks
As far as the por 15 is concerned (which I'm definitely going to use) do you throw it on the metal before you lay down the first primer coat? How many coats are needed of it?
Thanks
Trending Topics

Thread
Thread Starter
Forum
Replies
Last Post
OneThirtyEight
Acura Integra
21
May 2, 2002 04:29 PM