

alpous 95 EJ1 budget build!

Thread Starter
Junior Member
Joined: Apr 2006
Posts: 164
Likes: 0
From: Brampton, ON
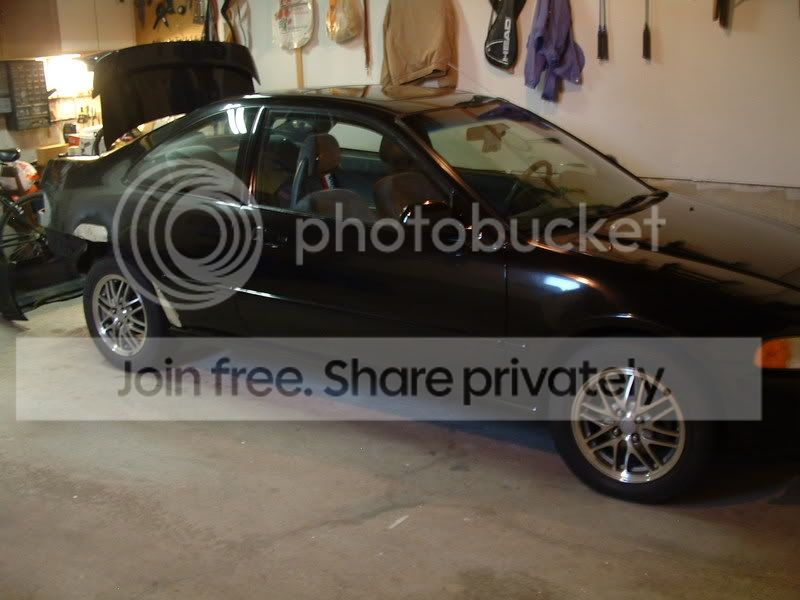
Hey everyone, welcome to my build up thread. The project has just began on April 29th... I hope to be done within the next few weeks. The plans i have for my project mostly consist of bodywork on a budget. This will not be an intense build up, and will not consist of too much mechanical work. I have just decided to repaint my car, and in the process grind out all of the rust, and replace it with sheet aluminum and fibreglass. It is a build on a VERY strict budget and I do not plan on spending more than $500 on the whole build. Hope you enjoy checking out the build as much as I enjoyed doing the work. Expect to see updated pictures really soon.
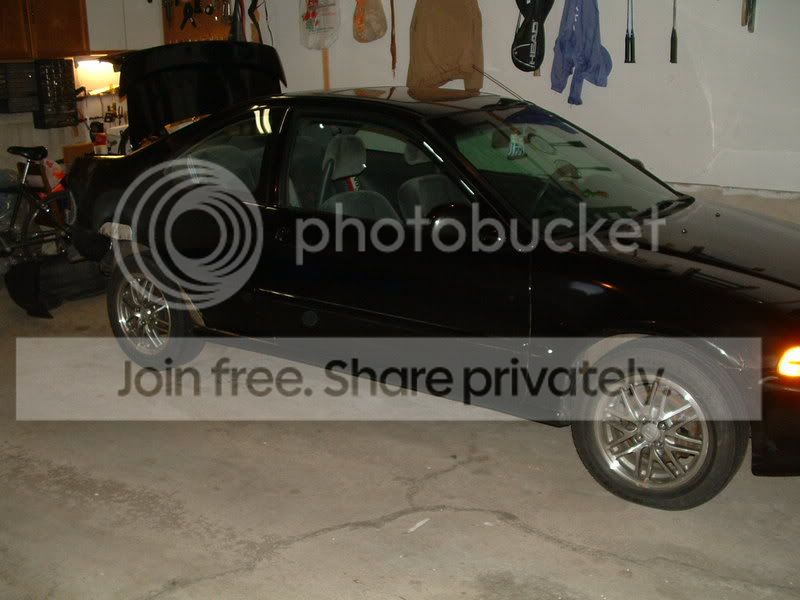
LAST SUMMER BEFORE THE RUST GOT OUT OF CONTROL
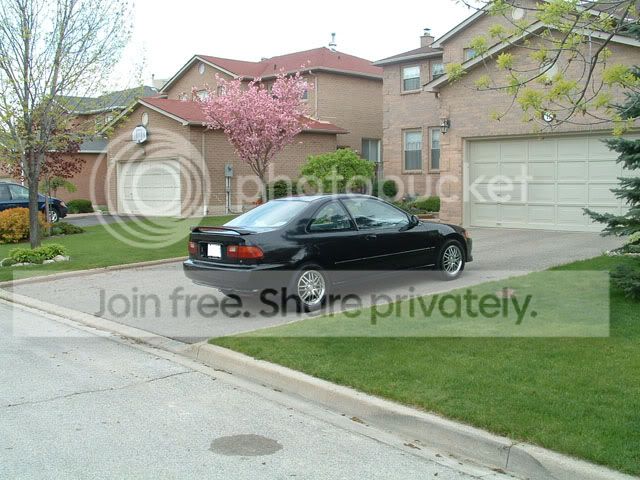


PICTURES TAKEN APRIL 27TH - RUST

Bumper has its fair share of stone chips

Was hit on the passenger bumper, walked back to my parked car found the corner smashed, and the paint on the bumper all chipped off.
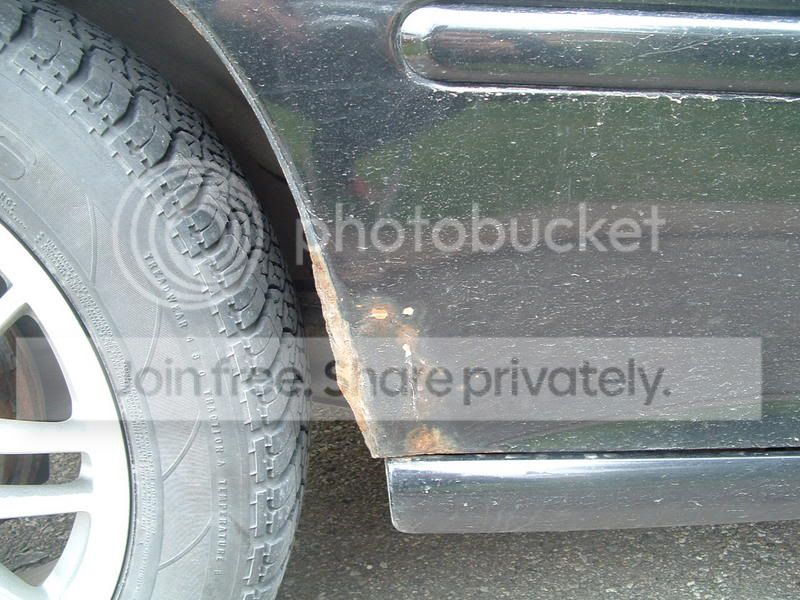
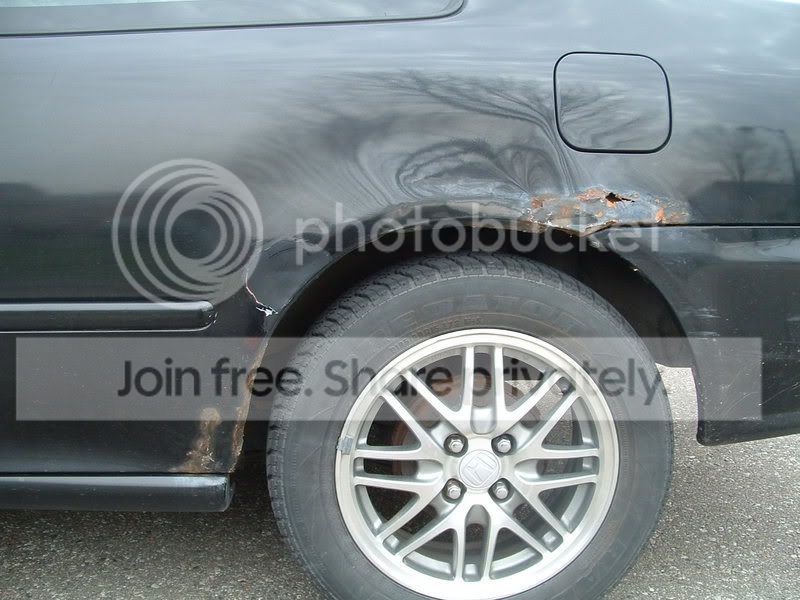
Passenger side fender, 3 year old DIY bodywork beginning to cheese up nicely
Passenger side QP
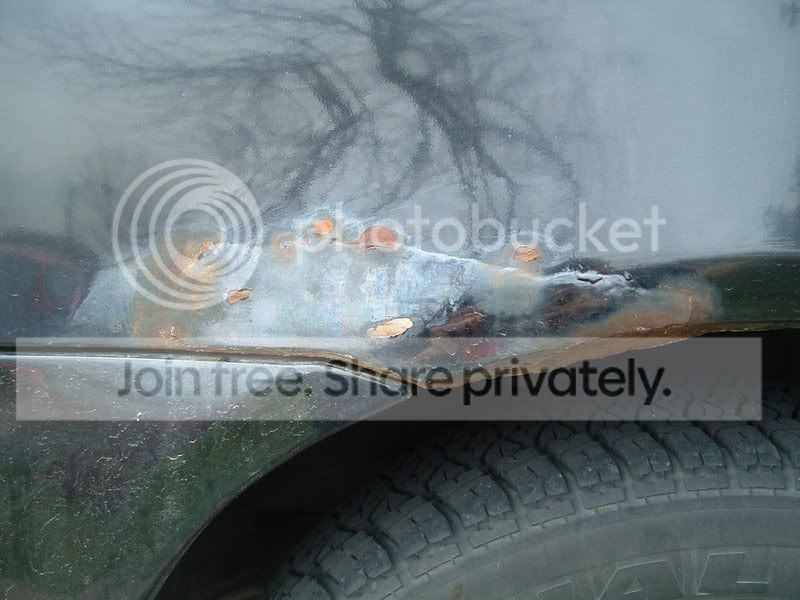
Passenger side QP
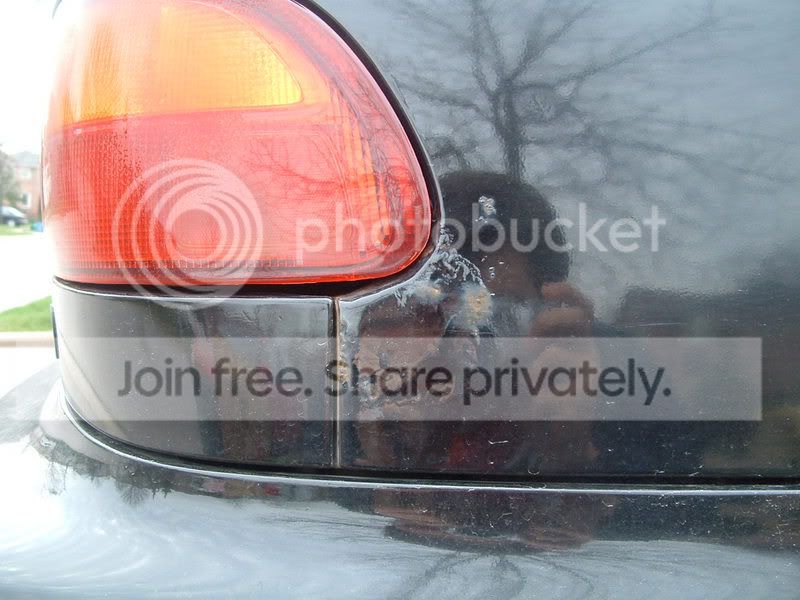
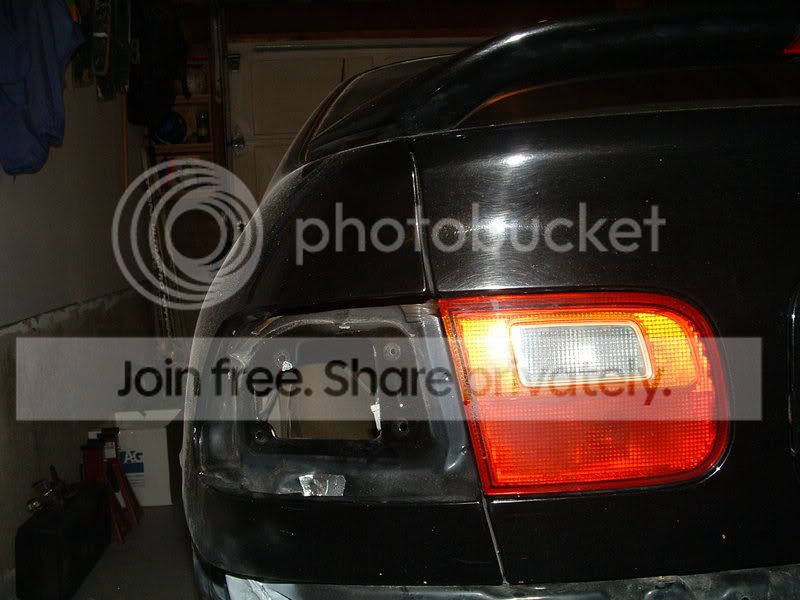
Passenger side rear taillight.
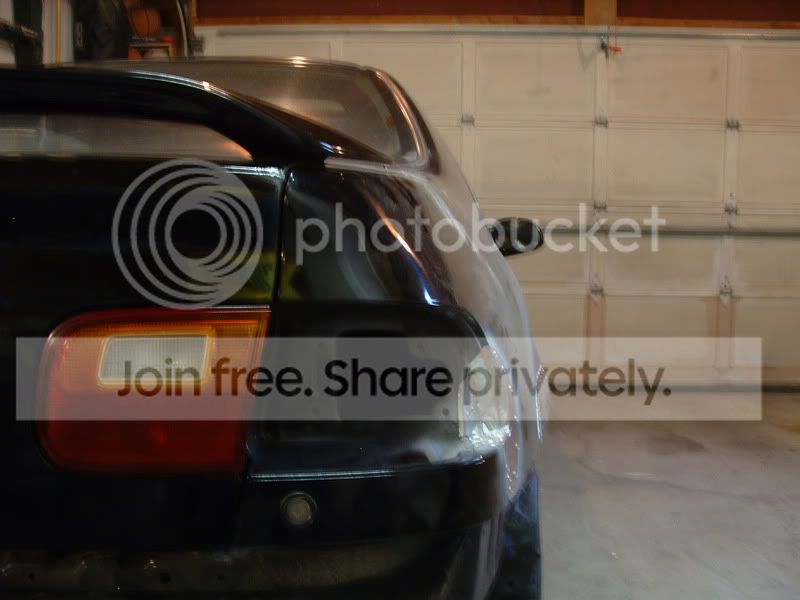
Si Spoiler caused some rust issues as well.

Was rear ended on the highway and this was all the damage that the other guy caused.
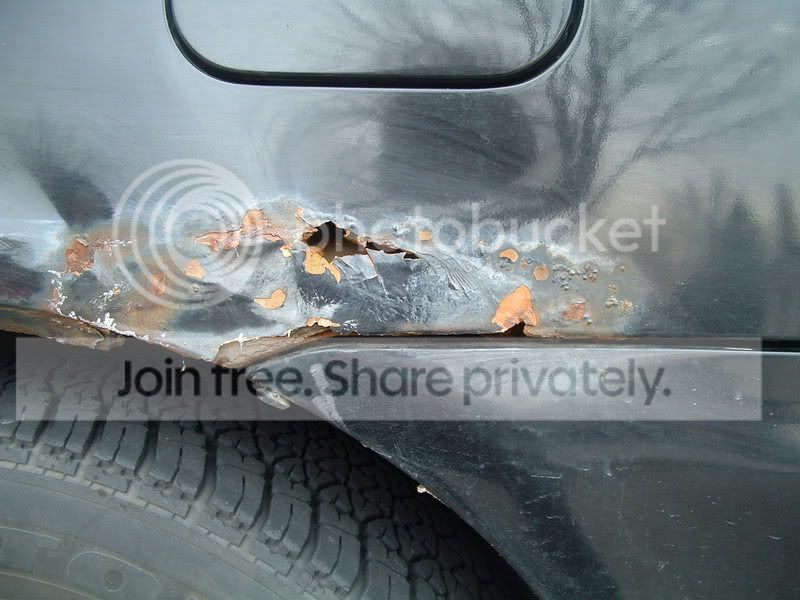
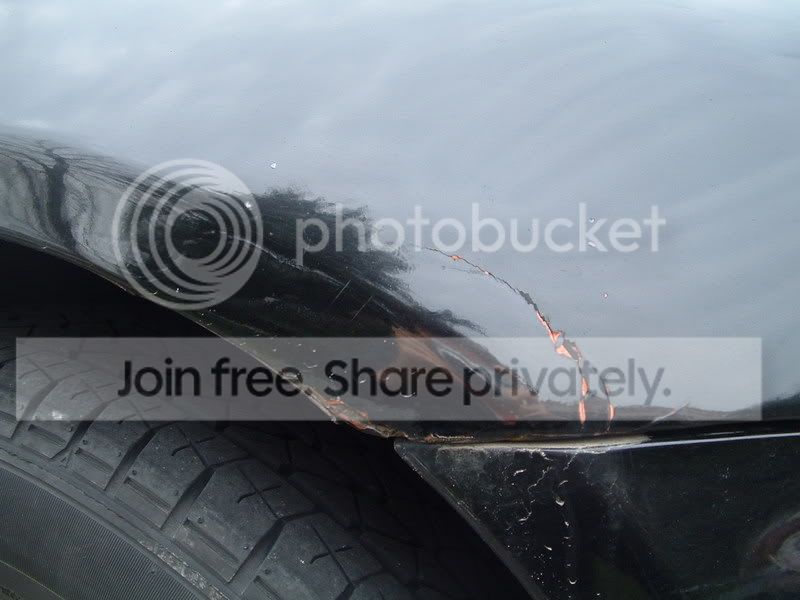
Drivers side QP - disgusting
Drivers side QP - yack sauce
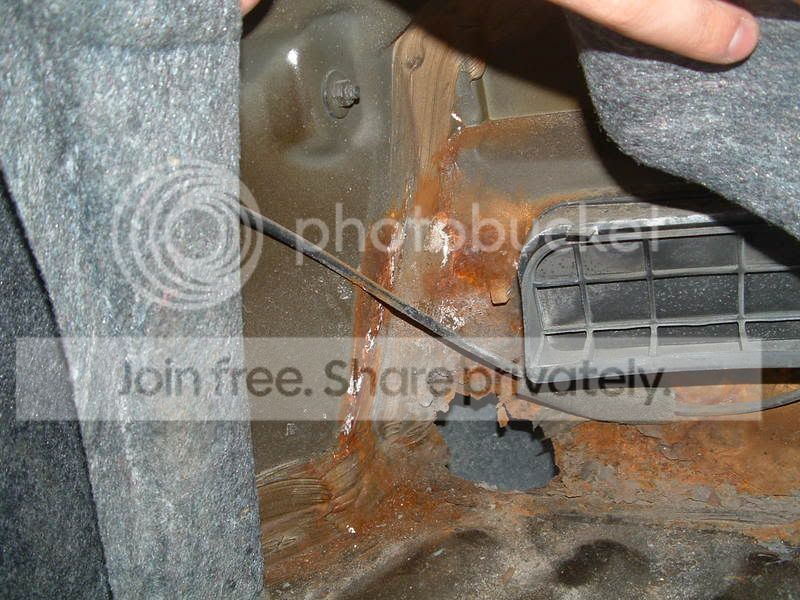
Trunk hole?!?!?!

Previous owner had the perfect answer to plug those holes .... yes thats newspaper.

Hood needs to be sanded down to remove stone chips and surface rust.

Hard to see in this picture but there is a dent on the hood from the inside outward, mechanic must have left a tool under there or something ...
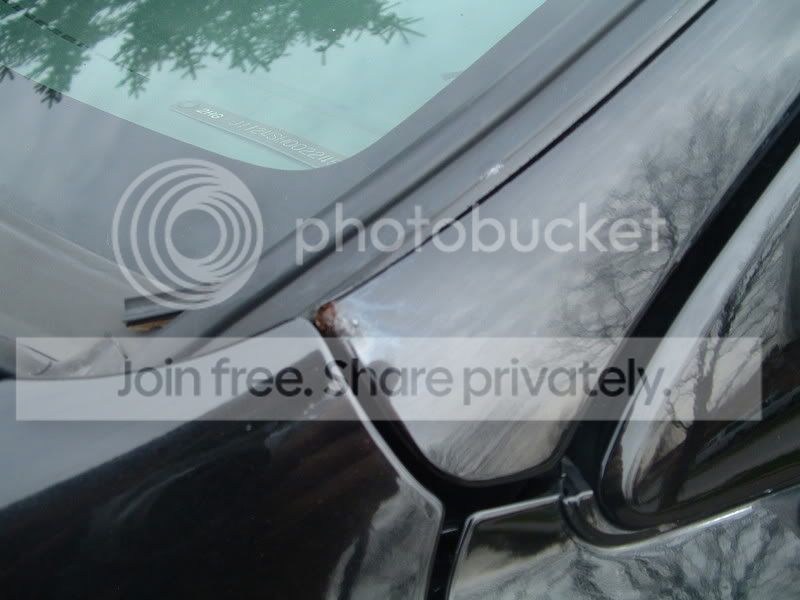
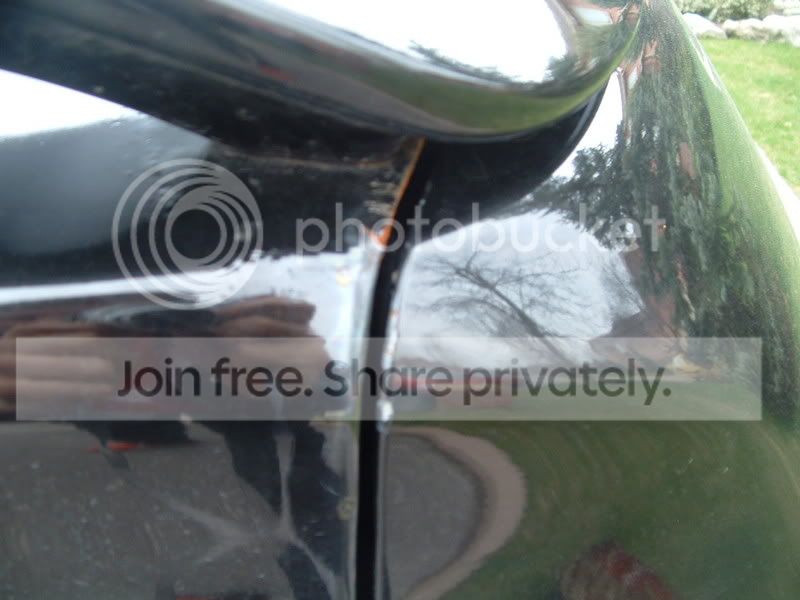
Rust near driver's mirror

Deep scratch on passenger door with surface rust...
So as you can see there is a LOT that needs to be done. So i started working on the car's body this weekend and my plan was to grind out all of the rust, than use sheet aluminium to cover any holes in the body, and than use fibreglass to finish it off. I'm by no means good at doing body work lol, so bare with me. This will be my second time doing my own body work, the last job held up good for 2 years, I hope for this one to last longer hopefully.
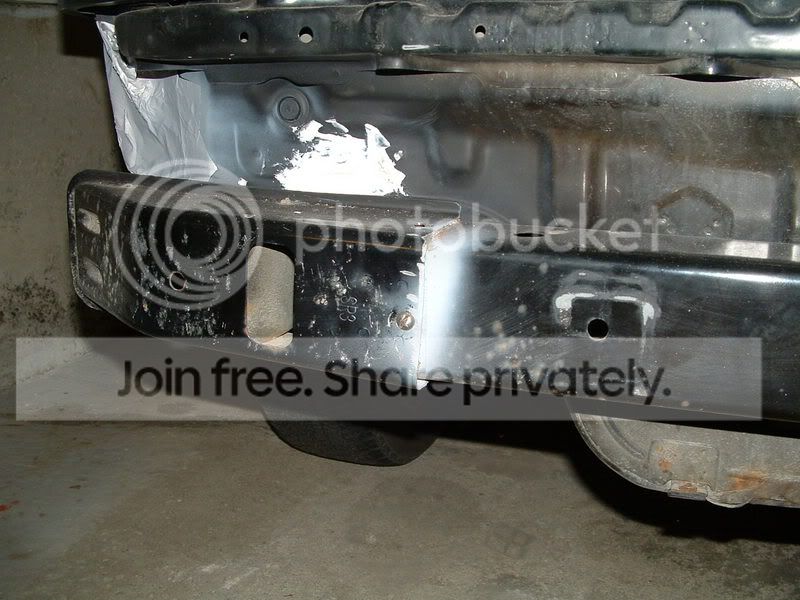
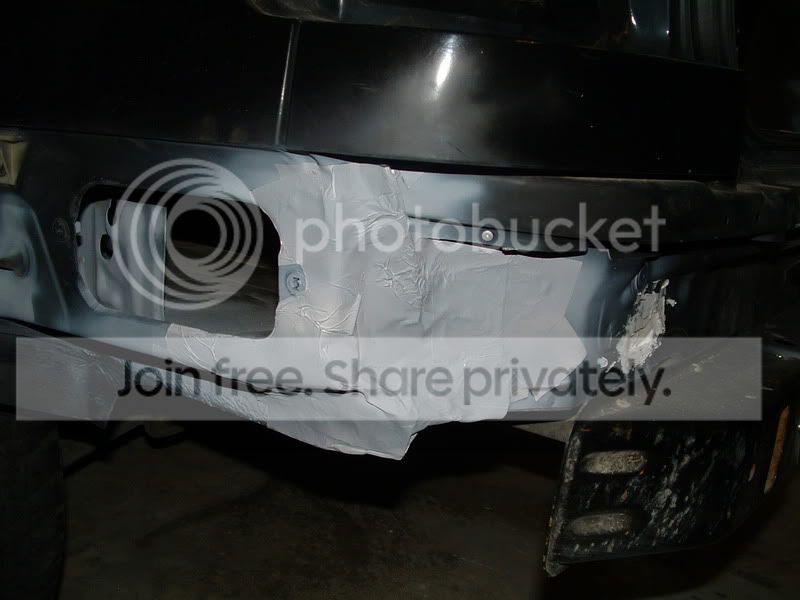
After taking the bumper off the weld on the re-bar had broken, so I bolted it back on... Hope it holds in an accident.
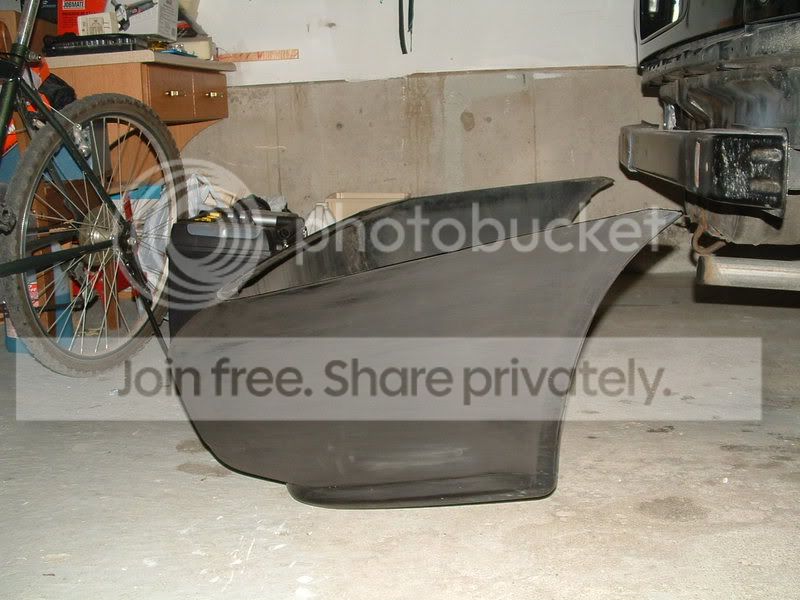
Rear bumper in the rough stages of sanding...
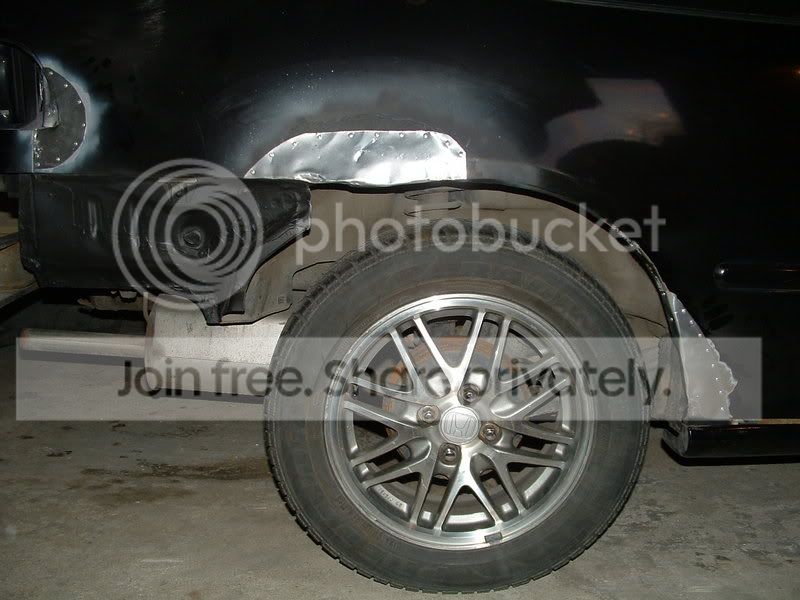
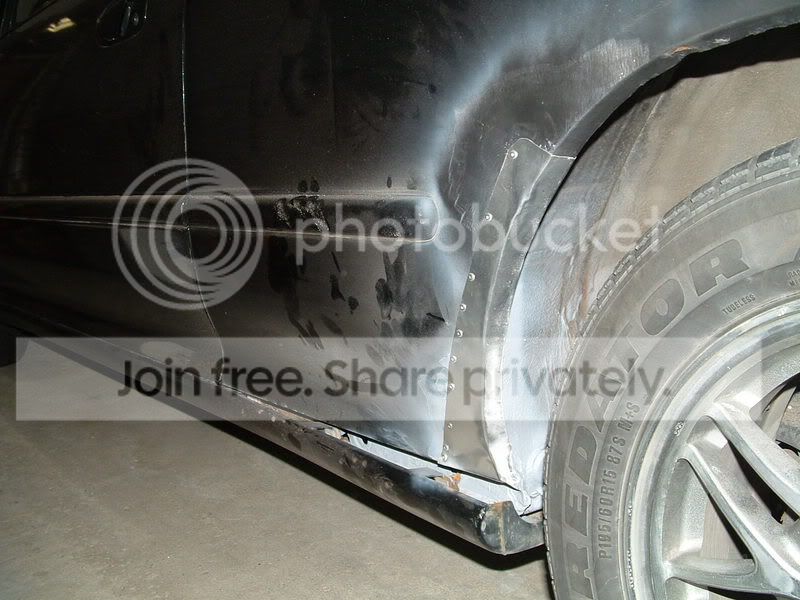
i'm using sheets of aluminum in place of rusted metal, and riveting it onto the non-rusted metal.
Day 1 of body work complete, all the rust on the rear of the car has been removed, and aluminum patching riveted into place.
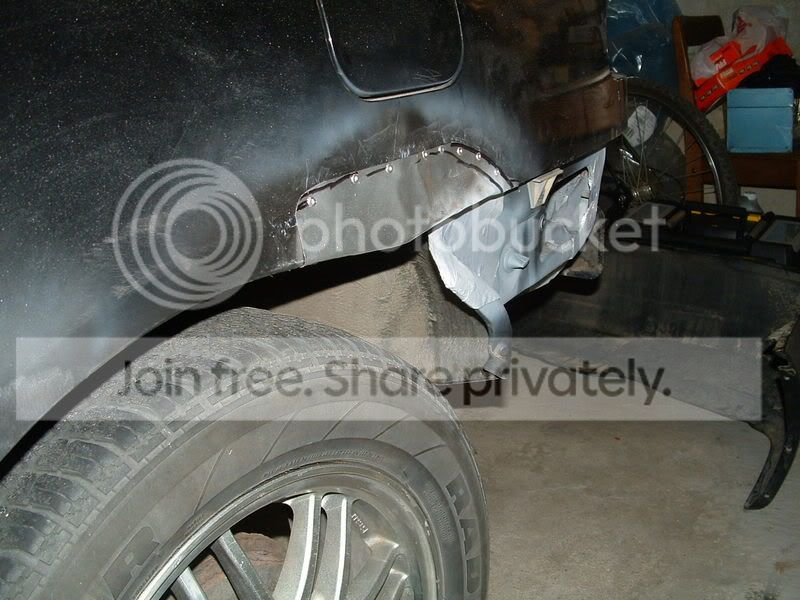
Closer shot, very rough metal work has been done, will be improved on day 2, and than covered by fiber glass.
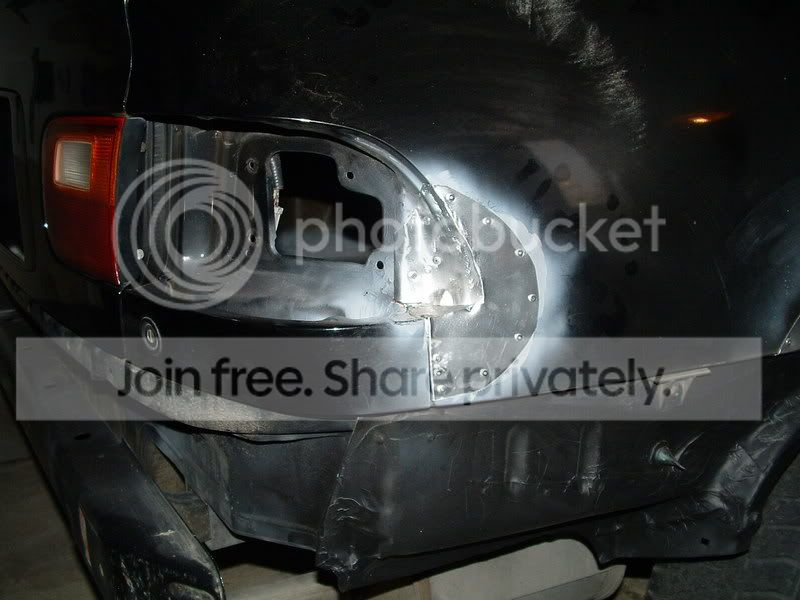
Can't really tell but not only has the area near the rear corner light replaced, but also the lower flat black area.
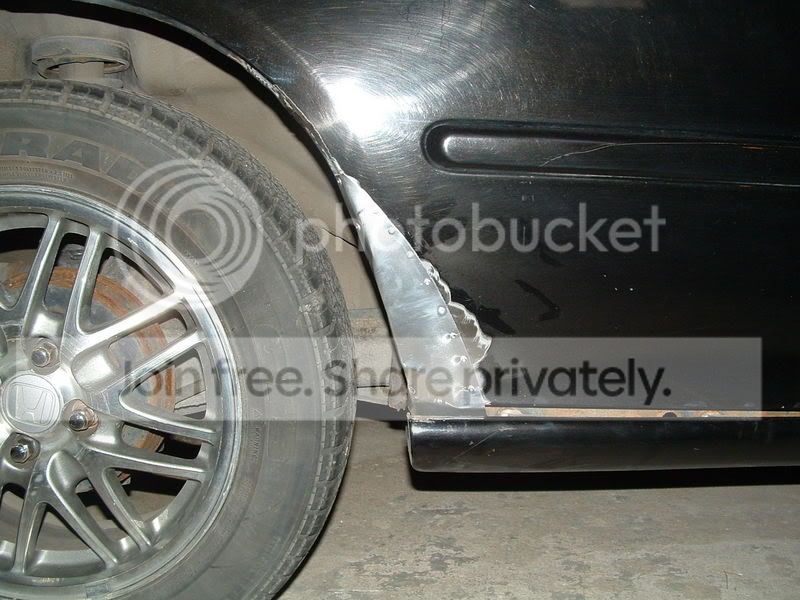
Rough stages of forming the QP arches.
Drivers side arches.
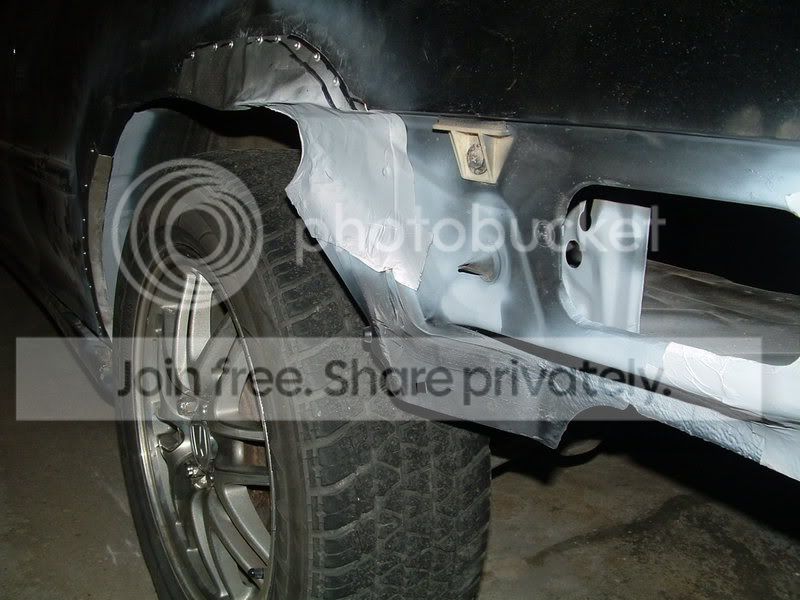
Trunk holes have all been grinded out and replaced with aluminum sheets.
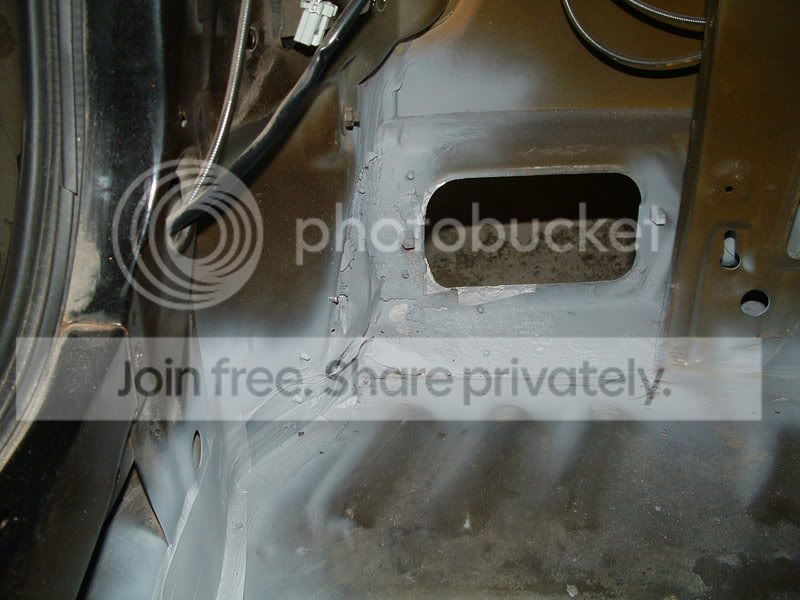
Inside look at the patched up holes.
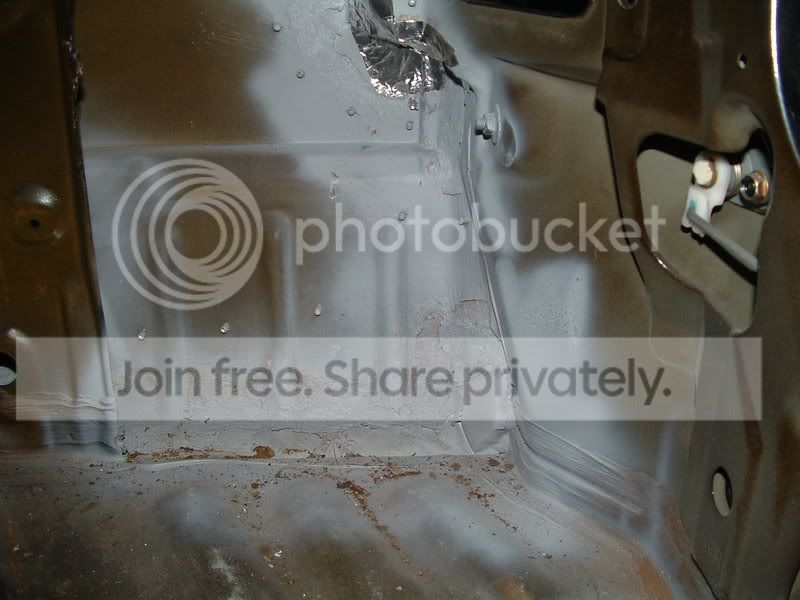
Inside look on the other side...
Thanks very much for taking the time to look at my post, lots of work ahead. Project is nowhere near complete. Wish me luck.
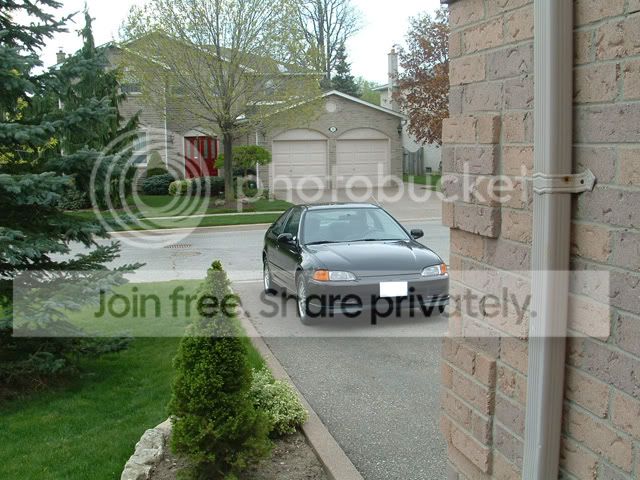
LAST SUMMER BEFORE THE RUST GOT OUT OF CONTROL
PICTURES TAKEN APRIL 27TH - RUST
Bumper has its fair share of stone chips
Was hit on the passenger bumper, walked back to my parked car found the corner smashed, and the paint on the bumper all chipped off.
Passenger side fender, 3 year old DIY bodywork beginning to cheese up nicely
Passenger side QP
Passenger side QP
Passenger side rear taillight.
Si Spoiler caused some rust issues as well.
Was rear ended on the highway and this was all the damage that the other guy caused.
Drivers side QP - disgusting
Drivers side QP - yack sauce
Trunk hole?!?!?!
Previous owner had the perfect answer to plug those holes .... yes thats newspaper.
Hood needs to be sanded down to remove stone chips and surface rust.
Hard to see in this picture but there is a dent on the hood from the inside outward, mechanic must have left a tool under there or something ...
Rust near driver's mirror
Deep scratch on passenger door with surface rust...
So as you can see there is a LOT that needs to be done. So i started working on the car's body this weekend and my plan was to grind out all of the rust, than use sheet aluminium to cover any holes in the body, and than use fibreglass to finish it off. I'm by no means good at doing body work lol, so bare with me. This will be my second time doing my own body work, the last job held up good for 2 years, I hope for this one to last longer hopefully.
After taking the bumper off the weld on the re-bar had broken, so I bolted it back on... Hope it holds in an accident.
Rear bumper in the rough stages of sanding...
i'm using sheets of aluminum in place of rusted metal, and riveting it onto the non-rusted metal.
Day 1 of body work complete, all the rust on the rear of the car has been removed, and aluminum patching riveted into place.
Closer shot, very rough metal work has been done, will be improved on day 2, and than covered by fiber glass.
Can't really tell but not only has the area near the rear corner light replaced, but also the lower flat black area.
Rough stages of forming the QP arches.
Drivers side arches.
Trunk holes have all been grinded out and replaced with aluminum sheets.
Inside look at the patched up holes.
Inside look on the other side...
Thanks very much for taking the time to look at my post, lots of work ahead. Project is nowhere near complete. Wish me luck.
Honda-Tech Member
Joined: Oct 2006
Posts: 4,420
Likes: 1
From: Lovin the EF, Wa
that car reminds me of a 20/20 girl
looks good going 20mph and from 20ft away, but when you get up close. she's buckled But at least you are restoring a black EJ
looks good going 20mph and from 20ft away, but when you get up close. she's buckled
But at least you are restoring a black EJ
Thread Starter
Junior Member
Joined: Apr 2006
Posts: 164
Likes: 0
From: Brampton, ON
<TABLE WIDTH="90%" CELLSPACING=0 CELLPADDING=0 ALIGN=CENTER><TR><TD>Quote, originally posted by b00sted-Hatch »</TD></TR><TR><TD CLASS="quote">that car reminds me of a 20/20 girl
looks good going 20mph and from 20ft away, but when you get up close. she's buckled But at least you are restoring a black EJ </TD></TR></TABLE>
hahahaha, thanks. I have no intentions on having it as a show car so the super expensive paint jobs, and the meticulous body work procedures all went out the window. I hope to receive good results, not perfection. thanks for the feedback
looks good going 20mph and from 20ft away, but when you get up close. she's buckled
But at least you are restoring a black EJ </TD></TR></TABLE>hahahaha, thanks. I have no intentions on having it as a show car so the super expensive paint jobs, and the meticulous body work procedures all went out the window. I hope to receive good results, not perfection. thanks for the feedback
Thread Starter
Junior Member
Joined: Apr 2006
Posts: 164
Likes: 0
From: Brampton, ON
thanks for the feedback, yeah i'm going to make sure i take care of the rust under the oem side skirts too. the car is not going to rust for a long time after i'm done with it i hope.
Trending Topics

Honda-Tech Member
Joined: Sep 2004
Posts: 1,524
Likes: 0
From: Texas
<TABLE WIDTH="90%" CELLSPACING=0 CELLPADDING=0 ALIGN=CENTER><TR><TD>Quote, originally posted by SoCal EJ1 »</TD></TR><TR><TD CLASS="quote">In for the build. I <3 my coupes.</TD></TR></TABLE>

Thread Starter
Junior Member
Joined: Apr 2006
Posts: 164
Likes: 0
From: Brampton, ON
Appreciate all of the comments. A lot of work was accomplished tonight. All metal work on the rear of the vehicle was completed. Fiber glassing has begun. Pictures will be posted tomorrow most likely was too tired to take pictures tonight. Front bumper was sanded down to remove all stone chips, and any chipped paint. Trunk, Rear Corner, and QP's all Fiber Glassed (WARNING: DON'T EVER DO FIBERGLASSING WITHOUT A VENTILATOR... I GOT SO LIGHT HEADED FROM BREATHING IN THAT ****!!!).
Other than body work, I may lower it and consider minor added performance mods but likely not when the body has 313,000km... Might opt for an EK in the near future I'm hoping.
EXPECT MORE PICTURES SOON, LOVE THE FEEDBACK!!!
Other than body work, I may lower it and consider minor added performance mods but likely not when the body has 313,000km... Might opt for an EK in the near future I'm hoping.
EXPECT MORE PICTURES SOON, LOVE THE FEEDBACK!!!
Thread Starter
Junior Member
Joined: Apr 2006
Posts: 164
Likes: 0
From: Brampton, ON
Important!!!
Really need some advice!!! I'm considering removing the Rear Si Spoiler permanently and just cutting out the areas that are rusted and replacing them with aluminum and fibreglass... Reason being is that the spoiler collects a lot of moisture and salt from the roads during the winter and will definitely be rusting in a few years anyways...
SPOILER vs. NO SPOILER ???
OPINIONS ARE WELCOME!!!!

Thread
Thread Starter
Forum
Replies
Last Post
Silvertc
Appearance Build Threads
28
Mar 25, 2011 07:02 AM