How To Create A Trippy Contrastic Picture In Photoshop

Thread Starter
Honda-Tech Member
Joined: Dec 2001
Posts: 7,817
Likes: 0
From: Canada
I have no idea really how to describe this. I just randomly made it up today because my dog Nacho was being cute and I wanted to make a picture of him. So I did the process on a picture of him.
For this tutorial Im going to use a picture of me instead. Its really simple to follow and shouldnt take you more than 15min to complete. So lets go!
Step 1:
Get a picture you want to mess around with. I chose those one because I kick ***.

Then open it up in Photoshop.
Step 2:
Outline the area behind the section you want to turn into the contrastic photo. For example if you want the person outline the rest of the area. It should look like this.

Step 3:
With the area still selected click on the Marquee Tool and then right click on the selected area. Then choose fill. Making sure that white is set as your forground colour make the box look the same as in this picture and select ok.

You should now have something that looks like this.

Step 4:
Depending on what version of Photoshop you have this step will vary, but you just want to remove the colour from the image. If you cant find it at the menu on the top then you can just press Shift + Ctrl + U and it will remove the colour.

You should now have something that looks like this.

Step 5:
Now you want to open up your brightness and contrast controls. Again this varys on what version of Photoshop you are using.
For Photoshop Elements its:

For Photoshop CS its:

Either way you want to open it up. You will get something that looks like this.

Step 6:
You want to now increase the contrast of the picture all the way to the right. Its going to make it look really messed up but dont worry you will be able to bring it to the desired position by increasing the brightness at the same time. Just make sure that the preview button is selected so you can see exactly how its going to turn out.
So with the contrast all the way to the right and the brightness pretty much all the way aswell to the right you should have something that looks like this.

Step 7:
Youre almost done. Now its time to bust out the filter. Go to the top menu and choose Filter -> Artistic -> Cutout. Just like you see here.

Now setup that window so that it looks like this.

You should now have something that looks like this.

Notice how smoother and cleaner it is?
Step 8:
Find the gradient tool and select it. The gradient tool looks like this.

Step 9:
Once again depending on the version of Photoshop you have this may vary but it should be pretty much the same. Go to the options for your gradient tool.
Select the one that looks like the rainbow. Its actually called the spectrum gradient, but whatever you know the one Im talking about. It looks like this.

Step 10:
CREATE A NEW LAYER!!!
Press Shift + Ctrl + N to create a new layer.
Now on the new layer and with that gradient selected move your cursor to the top of the image and hold down the left mouse button then hold down shift. With shift and the left mouse button still down drag the mouse all the way from the top of the image to the bottom of the image to the bottom of the image. You will see a nice line there. Then release the mouse button before shift and it will look like this.

Step 11:
Dont worry its gonna be ok. Go to your layers tab and make sure that the rainbow layer is selected and then go to the layers options and select Color.

And thats it. Youre done. You should have something that looks like this.

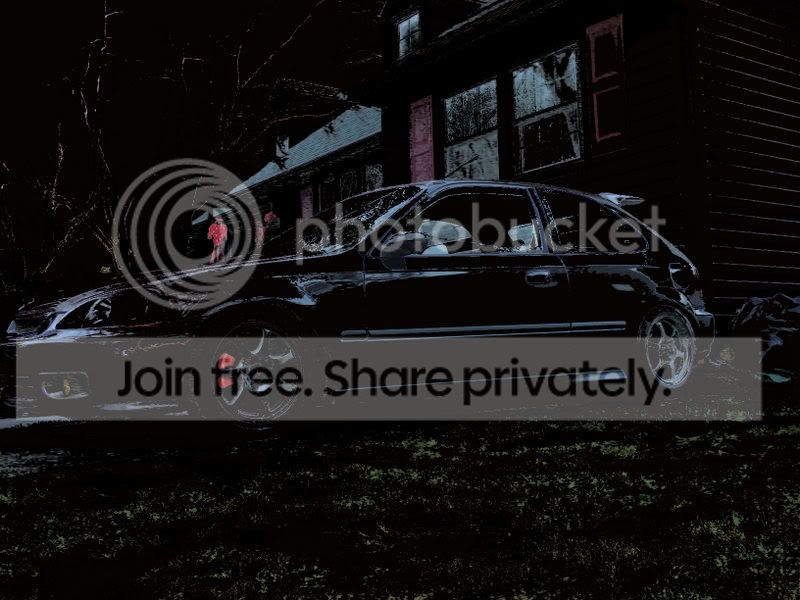
Now you can do it with other images and get similar results like this.

Just depends on how far you want to go with it. I hope you guys enjoy and wouldnt mind seeing some of your own creations.
CRX Forum
For this tutorial Im going to use a picture of me instead. Its really simple to follow and shouldnt take you more than 15min to complete. So lets go!
Step 1:
Get a picture you want to mess around with. I chose those one because I kick ***.
Then open it up in Photoshop.
Step 2:
Outline the area behind the section you want to turn into the contrastic photo. For example if you want the person outline the rest of the area. It should look like this.
Step 3:
With the area still selected click on the Marquee Tool and then right click on the selected area. Then choose fill. Making sure that white is set as your forground colour make the box look the same as in this picture and select ok.
You should now have something that looks like this.
Step 4:
Depending on what version of Photoshop you have this step will vary, but you just want to remove the colour from the image. If you cant find it at the menu on the top then you can just press Shift + Ctrl + U and it will remove the colour.
You should now have something that looks like this.
Step 5:
Now you want to open up your brightness and contrast controls. Again this varys on what version of Photoshop you are using.
For Photoshop Elements its:
For Photoshop CS its:
Either way you want to open it up. You will get something that looks like this.
Step 6:
You want to now increase the contrast of the picture all the way to the right. Its going to make it look really messed up but dont worry you will be able to bring it to the desired position by increasing the brightness at the same time. Just make sure that the preview button is selected so you can see exactly how its going to turn out.
So with the contrast all the way to the right and the brightness pretty much all the way aswell to the right you should have something that looks like this.
Step 7:
Youre almost done. Now its time to bust out the filter. Go to the top menu and choose Filter -> Artistic -> Cutout. Just like you see here.
Now setup that window so that it looks like this.
You should now have something that looks like this.
Notice how smoother and cleaner it is?
Step 8:
Find the gradient tool and select it. The gradient tool looks like this.
Step 9:
Once again depending on the version of Photoshop you have this may vary but it should be pretty much the same. Go to the options for your gradient tool.
Select the one that looks like the rainbow. Its actually called the spectrum gradient, but whatever you know the one Im talking about. It looks like this.
Step 10:
CREATE A NEW LAYER!!!
Press Shift + Ctrl + N to create a new layer.
Now on the new layer and with that gradient selected move your cursor to the top of the image and hold down the left mouse button then hold down shift. With shift and the left mouse button still down drag the mouse all the way from the top of the image to the bottom of the image to the bottom of the image. You will see a nice line there. Then release the mouse button before shift and it will look like this.
Step 11:
Dont worry its gonna be ok. Go to your layers tab and make sure that the rainbow layer is selected and then go to the layers options and select Color.
And thats it. Youre done. You should have something that looks like this.
Now you can do it with other images and get similar results like this.
Just depends on how far you want to go with it. I hope you guys enjoy and wouldnt mind seeing some of your own creations.
CRX Forum


Honda-Tech Member
Joined: Feb 2004
Posts: 16,512
Likes: 0
From: Miami, FL
<TABLE WIDTH="90%" CELLSPACING=0 CELLPADDING=0 ALIGN=CENTER><TR><TD>Quote, originally posted by alltech.magoo »</TD></TR><TR><TD CLASS="quote">nice random write up ima have to try this....  </TD></TR></TABLE>
lol...Keep this in the back of my head for those boring hours during the day.
Good write up.
</TD></TR></TABLE>lol...Keep this in the back of my head for those boring hours during the day.
Good write up.
Trending Topics


Thread Starter
Honda-Tech Member
Joined: Dec 2001
Posts: 7,817
Likes: 0
From: Canada
<TABLE WIDTH="90%" CELLSPACING=0 CELLPADDING=0 ALIGN=CENTER><TR><TD>Quote, originally posted by dez4o8 »</TD></TR><TR><TD CLASS="quote">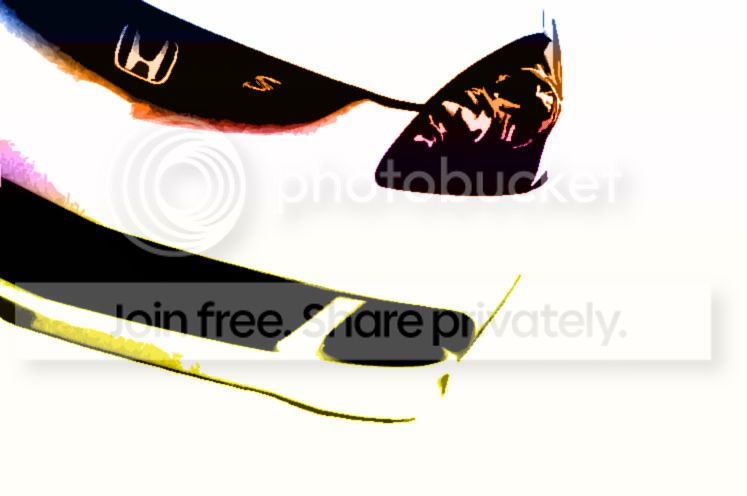
i tried?  </TD></TR></TABLE>
Definately that looks sweet!
CRX Forum
i tried?
</TD></TR></TABLE>Definately
that looks sweet!CRX Forum