

I made a very helpful discovery this weekend when welding AL

Thread Starter
Joined: Jan 2006
Posts: 123
Likes: 0
Hey,
When welding some aluminum this weekend I discovered that I was adding filler rod when I didn't need to be. I was making a lot of corner welds where I was welding on the outside of the corner and I was trying to add filler rod thinking that it was necessary. Somewhere along the way I noticed that if I just let the heat pour into the joint evenly on boths pieces of metal eventually the two puddles would "pop" together forming one nice little puddle that I could push down the seam without adding ANY filler.
Upon further reading on the internet it seems that there are many kinds of joints that don't require any filler rod which really suprised me, I just assumed that the rod was a critical part of the process. It appears that on the thinner aluminum adding rod is most often not needed especially if you're making non load bearing parts.
This may be common knowledge to the welding masters here but it was a major breakthrough for me so I thought I'd share incase it helps anyone here.
Thanks,
Free
Honda-Tech Member
Joined: Oct 2004
Posts: 1,972
Likes: 0
From: sheridan, wyoming, usa
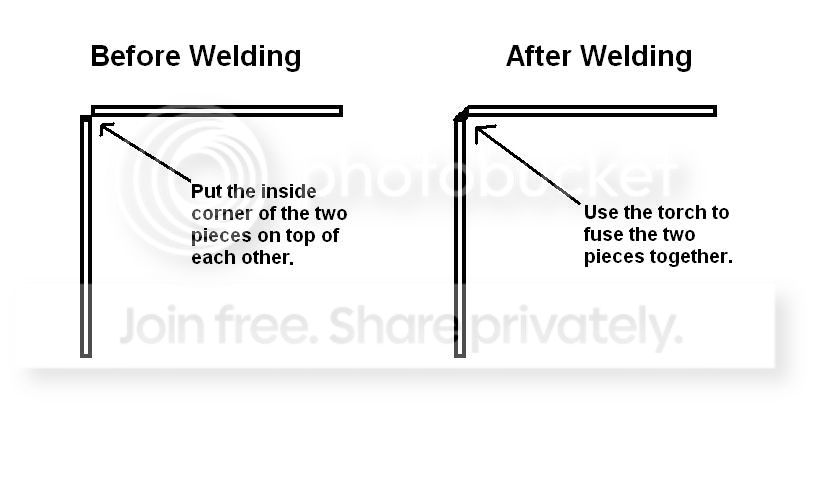
How are you fitting up your outside corner? I leave a nice V by lining up the inside edges of the square cut pieces and fill the V in with filler. easiest weld ever and much stronger than mitering the pieces at a 45 deg angle and fusing the edge. AL also has a tendency to crack really really easily when fused.
Honda-Tech Member
Joined: Oct 2004
Posts: 1,972
Likes: 0
From: sheridan, wyoming, usa
<TABLE WIDTH="90%" CELLSPACING=0 CELLPADDING=0 ALIGN=CENTER><TR><TD>Quote, originally posted by Fred_Allen_Burge »</TD></TR><TR><TD CLASS="quote">I've been just lapping one piece over the edge of the other one, flush with the top, kinda hard to explain for some reason.
Fred</TD></TR></TABLE>
Yeah I get what you are saying. That's probably why you find it easier to fuse the pieces together. If you understood what I said in my previous post (i suck at explaining things) you will find it much much easier to weld with filler and will probably never fuse an outside corner again
Honda-Tech Member
Joined: Jun 2004
Posts: 416
Likes: 0
From: Tempe, AZ, U.S.A.
I use this property all the time. I made an air box for a Chevy S-10 and use maybe 10" of filler for the whole deal.
It pretty much goes like this:
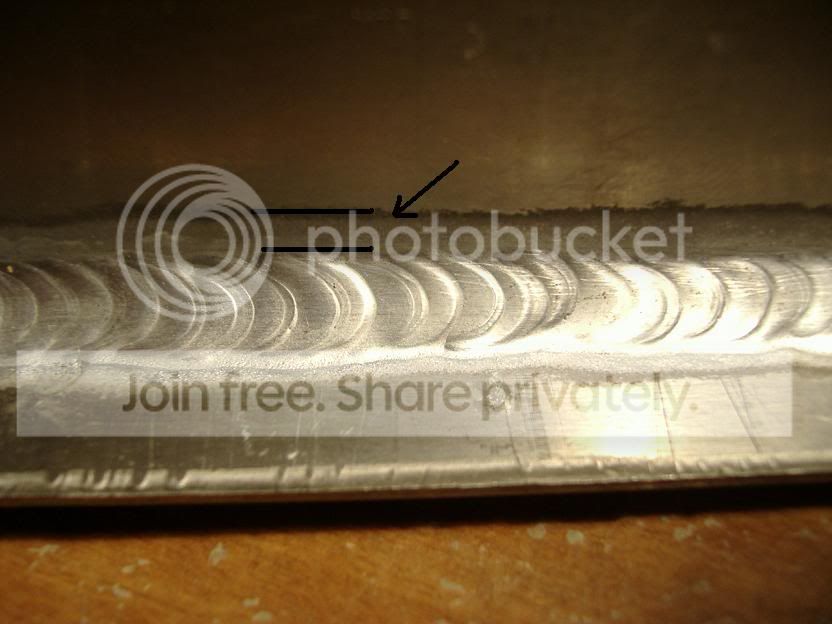
Mine comes out looking like this:
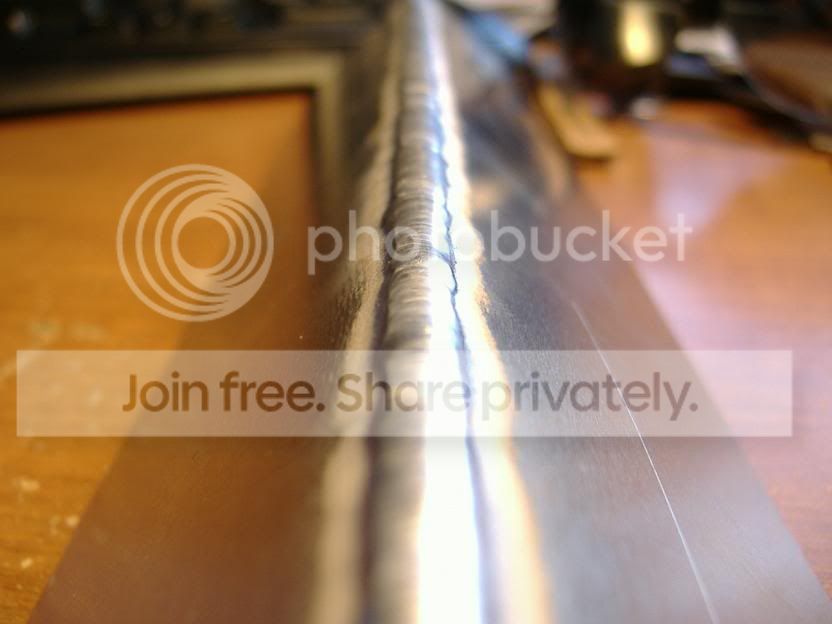
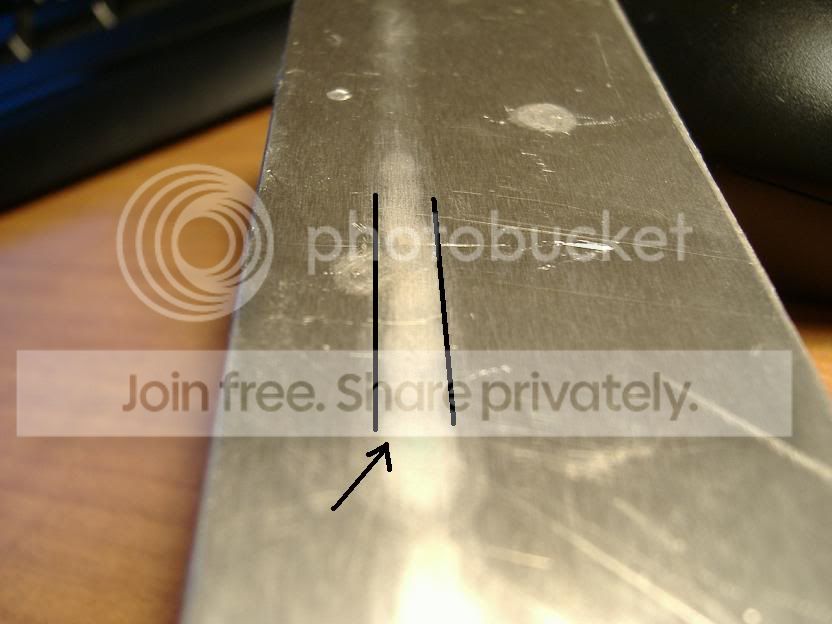
Just make sure you have atleast a "heat trail" on the other side of the weld. This insures a strong weld. Otherwise, chances are you don't have good penetration and the weld would crack.
Good luck
It pretty much goes like this:
Mine comes out looking like this:
Just make sure you have atleast a "heat trail" on the other side of the weld. This insures a strong weld. Otherwise, chances are you don't have good penetration and the weld would crack.
Good luck

Trending Topics
Honda-Tech Member
Joined: May 2003
Posts: 2,830
Likes: 0
From: kzoo, small town mi, usa
some aluminum cannot be fused together, and can only be welded with the correct filler rod. So if you find yourself messing up, make sure you look into what type of al your going to be welding be for you start going hog wild and messing up some expensive aluminum.

Honda-Tech Member
Joined: May 2002
Posts: 3,599
Likes: 0
From: BeLlInGhAm, Wa
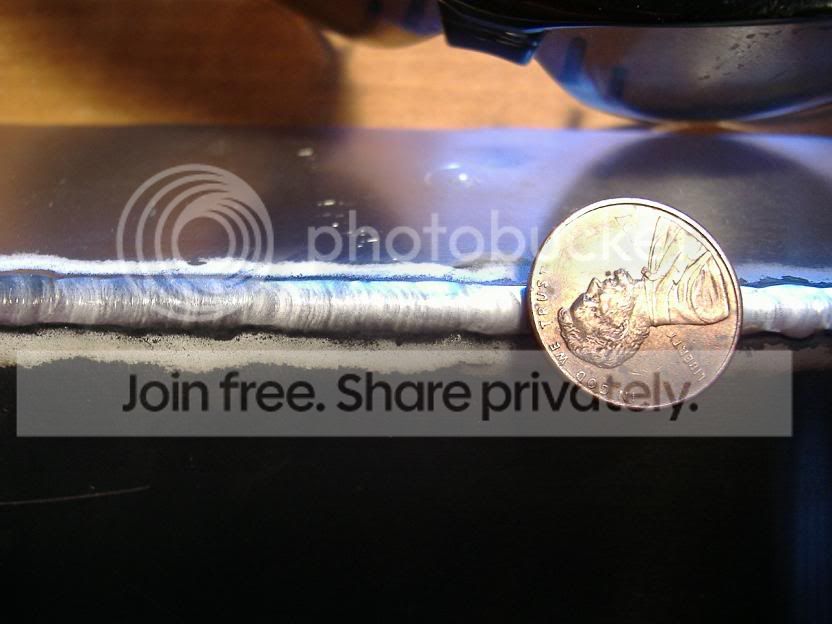
btw its not a "heat trail" its an "etch" trail when your tig welder is in the etching side of the square wave(i believe DCEN)...then it switches to penetration. This adjustment is your balance. Lower your number the more etch(cleaning)higher the number the more penetration
Honda-Tech Member
Joined: Jun 2004
Posts: 416
Likes: 0
From: Tempe, AZ, U.S.A.
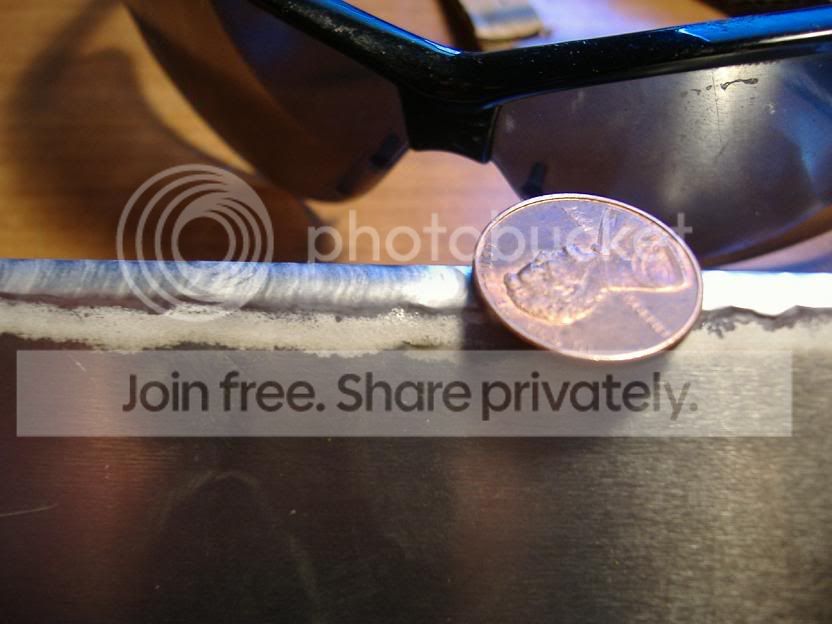
I'm not familiar with some of the terminology, but I'm talking about the back (penetration) side of the weld, not the top.
I believe this is what's you're referring to as "etch trail", correct?
What I'm referring to is the back side of the weld. I was under the impression that it was called the heat trail.
I believe this is what's you're referring to as "etch trail", correct?
What I'm referring to is the back side of the weld. I was under the impression that it was called the heat trail.
Honda-Tech Member
Joined: Apr 2005
Posts: 1,895
Likes: 0
From: Lincoln, Ne, USA
The cleaning portion of the arc is when it is on the EP side of the cycle. The oxides form on the outside of the bead, the "etch trail" that ernie is talking about.

Thread
Thread Starter
Forum
Replies
Last Post
pjr710
Honda Civic / Del Sol (1992 - 2000)
2
Aug 18, 2008 11:18 PM