

DIY amber/orange corner lights. (56kILLA)

Thread Starter
Member
Joined: Sep 2004
Posts: 998
Likes: 0
From: everywhere YOU want to be., mb, Canada
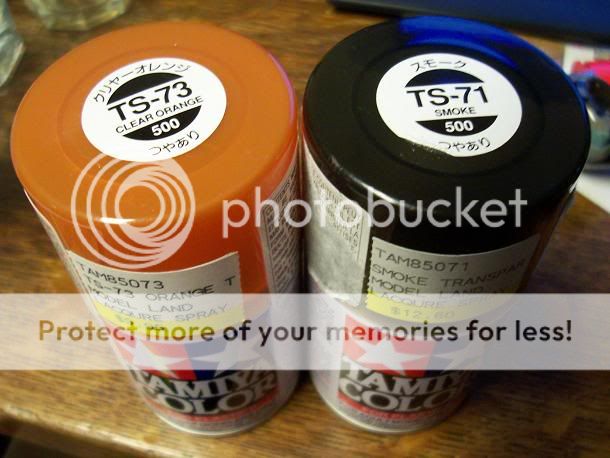
just thought id share my experience with tamiya orange clear, and smoke model paint, as the krylon stained glass paint is discontinued to my knowledge.
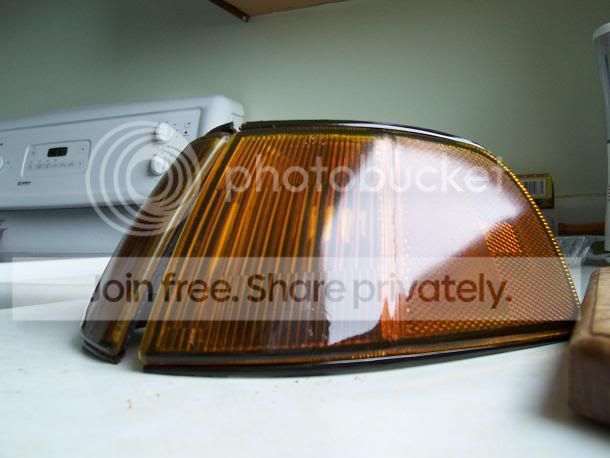
i bought the black housing signals and corners, and wanted to make them a dark, dark orange, like vision smoked corners but darker.
ok so heres how mine went.
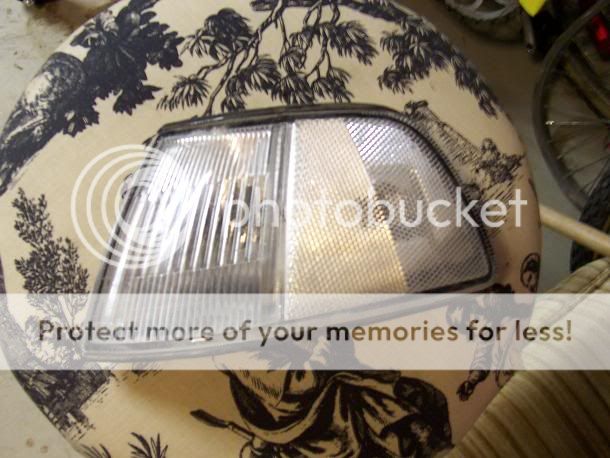
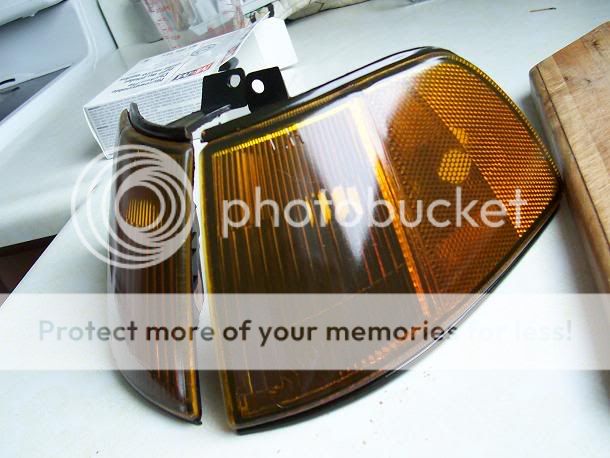
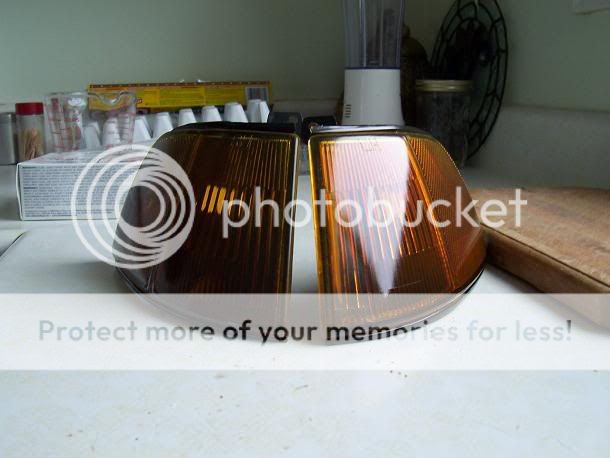
started with an extra clearcorner to test out some coats.
oooOOOooohh, jdm paint y0!!
1 coat
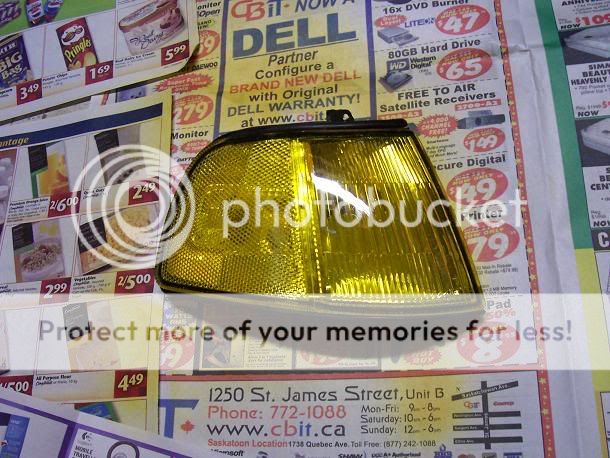
3 coats and one of smoke
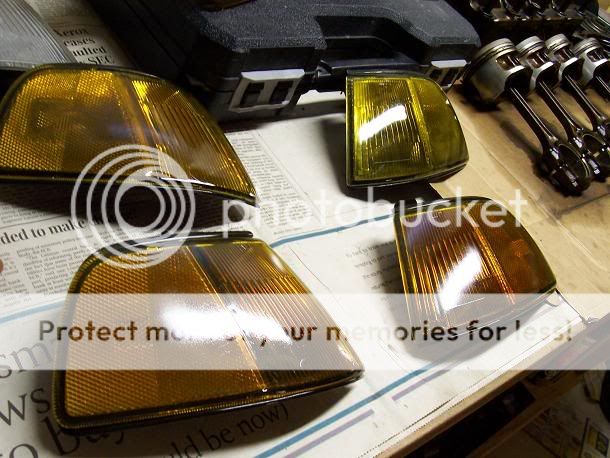
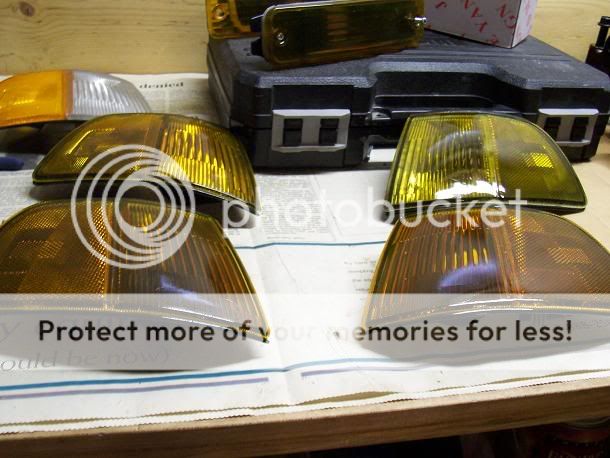
seeing how the colour was turning out, i realized that it would take numerous coats to attain the deep orange look im going for and decided to save some paint, so i stopped and, started on the new black housing corners i had, and was going to use.
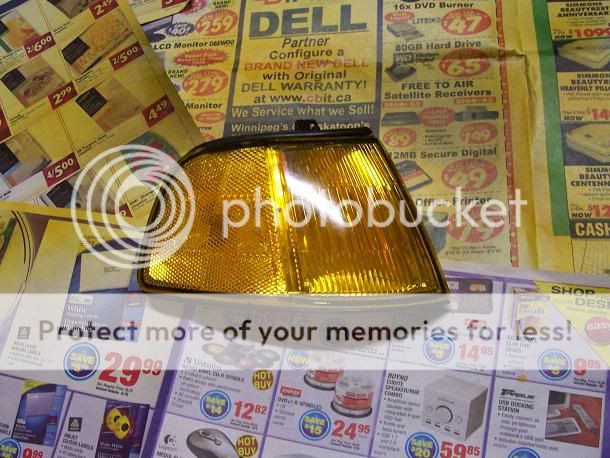
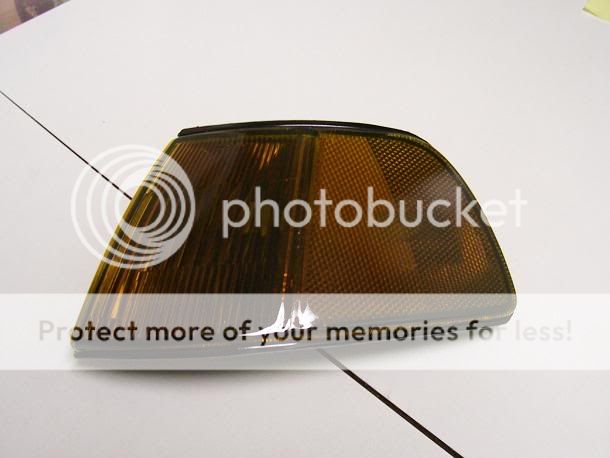
so after numerous coats of orange, and 2 coats of smoke afterward, this is what i ended up with. you can see the test models i used above. (i will be putting on another coat or two of smoke to make them even darker)
better light
i am very pleased with how they turned out.
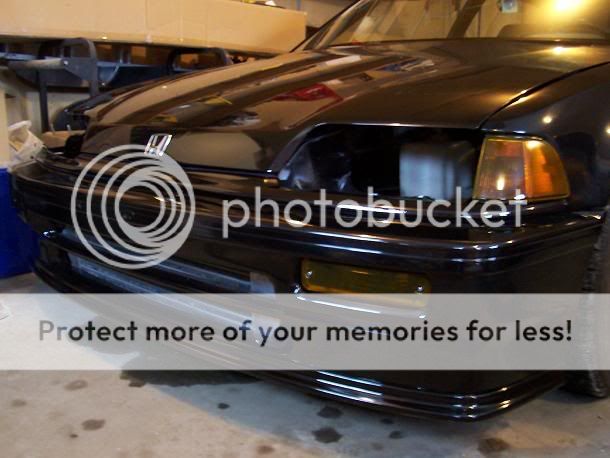
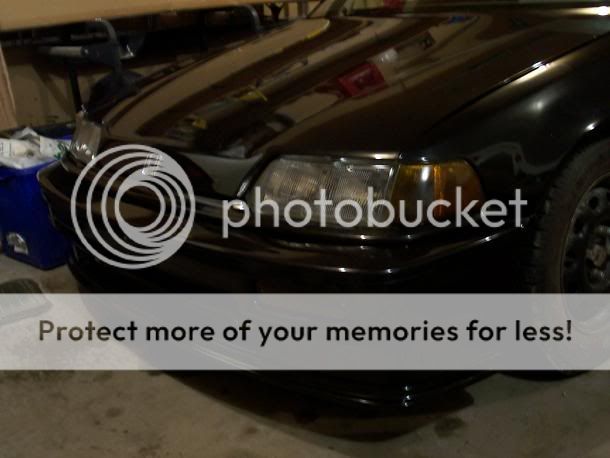
but after putting them on my car, i now want them darker, but they still look okay.
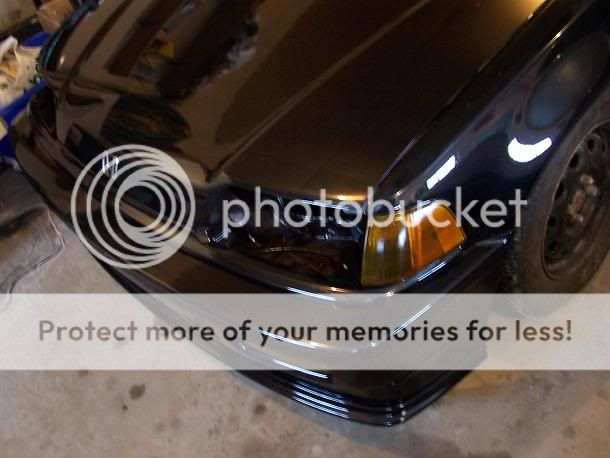
so i sprayed some more smoke, and now im happy, this is exactly how i wanted them to turn out.
before:
after:

Modified by juice91si at 7:33 PM 2/9/2006
i bought the black housing signals and corners, and wanted to make them a dark, dark orange, like vision smoked corners but darker.
ok so heres how mine went.
started with an extra clearcorner to test out some coats.
oooOOOooohh, jdm paint y0!!
1 coat
3 coats and one of smoke
seeing how the colour was turning out, i realized that it would take numerous coats to attain the deep orange look im going for and decided to save some paint, so i stopped and, started on the new black housing corners i had, and was going to use.
so after numerous coats of orange, and 2 coats of smoke afterward, this is what i ended up with. you can see the test models i used above. (i will be putting on another coat or two of smoke to make them even darker)
better light
i am very pleased with how they turned out.
but after putting them on my car, i now want them darker, but they still look okay.
so i sprayed some more smoke, and now im happy, this is exactly how i wanted them to turn out.
before:
after:
Modified by juice91si at 7:33 PM 2/9/2006
Thread Starter
Member
Joined: Sep 2004
Posts: 998
Likes: 0
From: everywhere YOU want to be., mb, Canada
<TABLE WIDTH="90%" CELLSPACING=0 CELLPADDING=0 ALIGN=CENTER><TR><TD>Quote, originally posted by TapOrSnap »</TD></TR><TR><TD CLASS="quote">awesome job. how would we get our hands on some of that Tamiya brand Clear Orange?</TD></TR></TABLE>
for a dealer near you:
https://www.tamiyausa.com/dealers/index.php
and in canada, contact your local hobby shop, i had to scour around the net to find someone who had it in stock
http://www.borgfeldt.ca/
http://www.tamiya.ca/
i ended up buying it from here:
http://www.modelland.com/

for a dealer near you:
https://www.tamiyausa.com/dealers/index.php
and in canada, contact your local hobby shop, i had to scour around the net to find someone who had it in stock
http://www.borgfeldt.ca/
http://www.tamiya.ca/
i ended up buying it from here:
http://www.modelland.com/
Thread Starter
Member
Joined: Sep 2004
Posts: 998
Likes: 0
From: everywhere YOU want to be., mb, Canada
<TABLE WIDTH="90%" CELLSPACING=0 CELLPADDING=0 ALIGN=CENTER><TR><TD>Quote, originally posted by Stupid EF »</TD></TR><TR><TD CLASS="quote">show us a pic w/ the headlights in </TD></TR></TABLE>
im lazy, and its cold out, but when i do put the headlights back in, a picture will be taken asap.
im lazy, and its cold out, but when i do put the headlights back in, a picture will be taken asap.
Trending Topics
Thread Starter
Member
Joined: Sep 2004
Posts: 998
Likes: 0
From: everywhere YOU want to be., mb, Canada
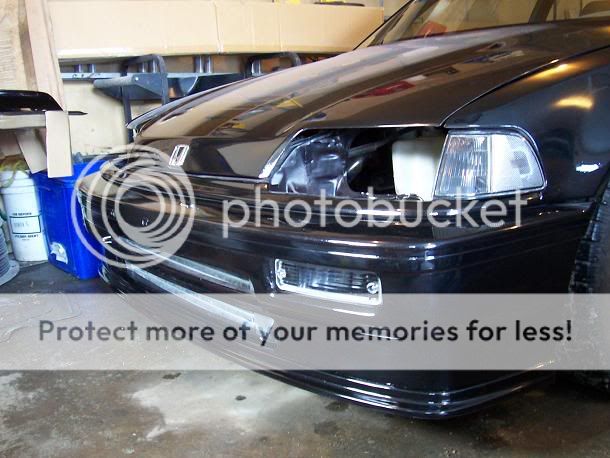
<TABLE WIDTH="90%" CELLSPACING=0 CELLPADDING=0 ALIGN=CENTER><TR><TD>Quote, originally posted by ilovemyef9 »</TD></TR><TR><TD CLASS="quote">is it just me or does anyone else notice that those corners are for 90 91 and the bumper is for 88 89?</TD></TR></TABLE>
correctamundo my friend, i like the 88-89 bumper better, so i used it on my 91 civic si
correctamundo my friend, i like the 88-89 bumper better, so i used it on my 91 civic si
Honda-Tech Member
Joined: Dec 2005
Posts: 1,225
Likes: 0
From: Frederick, MD
<TABLE WIDTH="90%" CELLSPACING=0 CELLPADDING=0 ALIGN=CENTER><TR><TD>Quote, originally posted by Stupid EF »</TD></TR><TR><TD CLASS="quote">show us a pic w/ the headlights in </TD></TR></TABLE>
x2 xD
</TD></TR></TABLE>x2 xD
Member
Joined: Nov 2002
Posts: 2,020
Likes: 0
From: Fargo, ND, U.S.A.
The only thing I hate about this way of doing it is that one: you risk the possibility of chipping, 2: spray cans suck, and 3: you get a funky texture. I am going to bake mine and pull them apart and have my buddy use is airbrush to put the paint on. Will have photos up sometime in the near future.
Thread Starter
Member
Joined: Sep 2004
Posts: 998
Likes: 0
From: everywhere YOU want to be., mb, Canada
<TABLE WIDTH="90%" CELLSPACING=0 CELLPADDING=0 ALIGN=CENTER><TR><TD>Quote, originally posted by spankjelly »</TD></TR><TR><TD CLASS="quote">The only thing I hate about this way of doing it is that one: you risk the possibility of chipping, 2: spray cans suck, and 3: you get a funky texture. I am going to bake mine and pull them apart and have my buddy use is airbrush to put the paint on. Will have photos up sometime in the near future.</TD></TR></TABLE>
all valid points. i intend on spraying clearcoat on them , and wetsanding a bit to alleviate said problems.
all valid points. i intend on spraying clearcoat on them , and wetsanding a bit to alleviate said problems.
Member
Joined: Nov 2002
Posts: 2,020
Likes: 0
From: Fargo, ND, U.S.A.
<TABLE WIDTH="90%" CELLSPACING=0 CELLPADDING=0 ALIGN=CENTER><TR><TD>Quote, originally posted by juice91si »</TD></TR><TR><TD CLASS="quote">
all valid points. i intend on spraying clearcoat on them , and wetsanding a bit to alleviate said problems. </TD></TR></TABLE>
Get krylone clear gloss finish, it is UV resistant and will help resist fading
all valid points. i intend on spraying clearcoat on them , and wetsanding a bit to alleviate said problems.
</TD></TR></TABLE>Get krylone clear gloss finish, it is UV resistant and will help resist fading

Joined: Jan 2006
Posts: 842
Likes: 0
From: Chicago, IL
<TABLE WIDTH="90%" CELLSPACING=0 CELLPADDING=0 ALIGN=CENTER><TR><TD>Quote, originally posted by Pee Wee »</TD></TR><TR><TD CLASS="quote">pringles are expensive where you live </TD></TR></TABLE>
LoL. Peewee, you didnt just take down my address to molest me did you ?
</TD></TR></TABLE>LoL. Peewee, you didnt just take down my address to molest me did you ?

Honda-Tech Member
Joined: Nov 2003
Posts: 2,271
Likes: 1
From: - 724/PA from 201/NJ
not to thread jack but i know the stained glass is still available at michaels craft stores, i just got a can like 2 months ago..
nice diy though! i did my sedans too
nice diy though! i did my sedans too
Thread Starter
Member
Joined: Sep 2004
Posts: 998
Likes: 0
From: everywhere YOU want to be., mb, Canada
ok, so i finished putting the headlights in, and it was night time, so the lighting sucked, the camera sucks, so whattya know, the pictures suck too. ill get some if i have time tmw.


Honda-Tech Member
Joined: Jun 2004
Posts: 4,955
Likes: 0
From: Chico, CA, USA
<TABLE WIDTH="90%" CELLSPACING=0 CELLPADDING=0 ALIGN=CENTER><TR><TD>Quote, originally posted by Stupid EF »</TD></TR><TR><TD CLASS="quote">good stuff </TD></TR></TABLE>
</TD></TR></TABLE>