

How to do body work, prep, and paint a car??? Please post pics and write ups

Thread Starter
Honda-Tech Member

Joined: Sep 2004
Posts: 4,780
Likes: 1
From: Nashville, TN, USA
for those of you that have done your own body work and paint, could you post write ups and pics if possible..
thanks
thanks

Joined: Sep 2005
Posts: 799
Likes: 0
From: moo cow fuk milk Maryland
Originally Posted by NrG
is the whole car ready for a paint job, as in no body repair needed
Preping:
anyways, you first need to water sand the whole car down,
600 grit 3m wet/dry sandpaper
it took me and my dad a whole hour or so to do my car.
if you dont know how to water sand, you better go ask someone. i would take pictures and show you how it looks, its best doing it on a sunny day or a lit up area, so you can see the surface, and tell if you water sand an area good enough.
after that, you need to tape up area like windows, moldings, etc.
you first need 1/2 inch 3M masking tape, and tape around all the edges of the windows, moldings, etc.
then you take the roll of paper with the tape on the edge of it, (forgot what its called) and you cover up the rest of the open area.
once you do that, wet the ground with water, so the paint doesn't stick to the ground.
then you get laqar thiner i think, and take a 3M non-lint cloth, and wipe down the whole surface of the car.
Painting:
buy your paint, from an automotive paint store like: Paint master in Montclair, CA
the brand they would carry would be PPG, some carry dupont.
PPG is medium quality, and dupont is the better quality.
dont forget your clear coat
hope you got a good gun, and compressor 120psi and up.
if your gun is dirty from a previous paint job, clean it with laquar, put some in the can, and spray it out the nossile.
then fill up the gun with paint, and put on your face mask, and start spraying.
you first want to start from the top down, and from the middle of the car to the ends of the car.
when i paint, i first do the top of the car, then the edges of the windows, then the doors, then go on to the back of the trunk and half way there i move on to the front of the car, and do the same on the other side.
a good quick layer of spray is good for the first layer but most of the time you only need a good first layer, because the gun sprays a good amount of surface area.
once you're done spraying, let it sit for like 10mins, it drys quick.
look at the paint and make sure their are no mistakes. if dust or crap gets on it, get out some 3M non-linted cloth and wipe away, wont hurt the paint much.
Clear coat:
empty out the spray can, clean it out with laquar, fill it up with clear coat, and spray away. same way as you spray the paint on.
once thats finish, it takes about 4-6 hours to dry, but if you have a oven like at my dad's work, the car can dry in like 10-15mins, and the clear coat sits better to the paint. but overnight drying sometimes leave dust in the clera coat
but thats what water sanding is for
if you're koo with your paint job by this point then its all good, but if not, water sanding will fix all the orange peal, and over clearcoat. also gives the paint a good shine for years.
bring out the 600 grit wet/dry sand paper, and start going.
do the whole car. it will look like the car had a fucked up paint job, looks all faded, but it wont be after some polishing.
get yourself some 3m compound polish, its like 25 bucks, and get a good buffer, from Dewelt (sp?). they look like a grinder, but with a pad at one end.
throw some compound on the car, and polish that **** out till it shines.
after you're all done, a good car wash is needed. then you got yourself a finish paint job
if none of these make sence, then i must have been very tired and bored while typing hah.
or take a college class and learn
peace. nite time.. expletive its 5am!
Joined: Sep 2005
Posts: 799
Likes: 0
From: moo cow fuk milk Maryland
Originally Posted by EKFerioHawaii
Also some tips on painting EG's, civic's, and vehicles of any kind.
-For civics and integras. The strip of black plastic trim on the roof is removable. Remove, clean the crevice because after the final rinse before painting, remaining dirt may seep out and ruin the paint job (ex. paint adhesion = crap in that area----happened to my brothers car)
-Make sure your taping/masking before painting is done precisely! Otherwise, you'll have overspray on parts you don't want it on. Also when masking the car windows, make sure there are NO creases sticking out in the mask paper. Reason is, paint overspray may build up in the folds and get on your uncured paint when the pressurized air from the paint gun kicks it up.
-For EG's, the front left and right windshield trimmings maybe removed before painting to catch under the trims, for a super clean paint job around the windshield. (Putting it back might be a bitch. But nevertheless it is possible.)
-EG's again. The front windshield middle window seal is a bitch to put back after the car is painted. Leave it on and paint. Or have a automotive glass shop re-do it for you.
-EG's again. Painting front air dam with bumper on the car = pain in the ****. Do it of the car on a stand. Much easier IMO.
 Also can be applied for the rear bumper.
-EG's and cars alike. After removing the front bumper for painting, mask off the remaining front end (ex. radiator, transmission cooler, basically everything forward of the radiator support) because you don't wanna drive with white overspray showing through your front bumper. Overspray on radiator = ghey. Also remove all lights from the car. Don't want your precious type R headlights to have overspray on them. Which from 2 sentences ago, will equal gh3yness.
-EG's and cars alike. If I could get 1 dollar for every person who resprayed their cars without removing their emblems--I would be only 5 dollars richer. Point is--don't ruin a perfectly good paint job by being lazy and not removing emblems. Otherwise, just shave'em off.
-I'm pretty sure most of the car being painted are lowered. When painting your/someone's car, put it on jack stands at a comfortable height for painting. You don't wanna become fatigued when painting because of bending over too many times to catch the lower portion of the car. Fatigue while painting = crap paint job.
-If your unsure about removing window trimmings, leave them on. What I do is tape the edges of the trim leaving about a 1-2mm's of it exposed for painting. Tape all edges first so as to leave a border of tape. Then you fill in the rest my roughly taping masking paper to the exposed area. Believe me, its much easier to do it this way than taping the edges with paper on the first try.
-Please use quality masking tape. Wal-Mart brand types do not cut it. It tears/leaves a rough edge on the paint edge. Trust me on this one, I've messed up one paint job because the owner was being a cheap ***. (You get what you paid for). Buy 3M.
-DO NOT get lazy with the preparation of the body prior to painting. Degrease it using an automotive body cleaner/degreaser and tack rag prior to painting. Condition bare metal areas with metal conditioner prior to priming/prime sealing. Minimize touching the car by you or anyone prior to entering the paint booth. Wear latex gloves when opening doors, then degrease the handles after if you have to. Five letters to remember before a paint job--CLEAN.
-If using a paint booth, visit it prior to painting. Is smick smack clean? Are the paint booth filters clean and reasonably new? Is the air hose clean and void of any leaks? Is the inline air regulators, filters, water evaporators clean and working properly? Are there stands to paint your bumpers on? A clean table or make shift work bench with proper accessories (ex. paint gun holder, mixing buckets, gloves) to work on? Enough space to walk freely around the car? Wheel covers? Enough lighting to work in? Do they offer further safety equipment other than yours? Can you leave the car overnight to cure? How much is the paint booth rental? Does the owner have a hot daughter(s)? You know, basic questions like these.
-If you're painting in a home garage. Drape the garage really good. Have fans to provide proper ventilation. Have a fridge in the garage, to store a few bottles of beer for those in-between-coats-refreshments...
If you have stuck up neighbors like me, offer them a case of Bud light to keep them from complaining to the cops. LOL I learned this from experience.-Also, what I really find helpful and time saving is painting under the hood, under the trunk lid, door jambs, and any other interior body panels at least a day before the actual spraying of the exterior of the car. Do it at home, saves time and money if your going to a paint booth the next day. Just tape under the hood and previously mentioned areas prior to painting the exterior.
-Make sure the hose(s) do not come in contact with the fresh paint. Also make sure articles of clothing are not swinging freely which could potentially touch the paint and ruining it. What I do is wrap masking tape around my wrists, elbows, knees, and waist to prevent my cloths from swinging freely. Also, wear some kinda hat or bandana to prevent falling hair from enter your paint. I've painted a car with Phoenix Gold paint only to find out that my hair got stuck in the clear coat. Talk about putting your mark on a paint job...muhahahah
-I don't know if this might work for you guys. Its more of a matter of preference. I found that moving comfortably in the paint booth is a must in order to achieve a good paint job. I don't wear underwear when painting mainly because it gets in the way at times..... Wear some busted up shoes also. Clear coat is super sticky and thick when the overspray settles on your shoes. Unless of course you wanna clear coat your adidas shell toes for the bling'in factor. Also, have a buddy help you paint by holding the hose(s) away from the car and giving you slack in the hose when you need it. The only drawback to this is, you need to have equipment for him/her and buy him lunch afterwards.
-This is my best tip of all when mixing paint...and automotive painters alike will agree. We all want that "glass" smooth and evenly applied paint job--or perhaps a show quality enough finish. Expect to buy at least 2 more quarts of reducer for the this next step.
When mixing paint, mix more reducer than usual, but not excessively. Doing this thins out the paint even more. For example, the mixing sequence is this:
[ 2 part base : 1 part reducer ]
go ahead an make it:
[ 2 parts base : 1.25- 1.5 parts reducer ]
This gives you the control of laying more super thin coats of paint to achieve that "deep" look to the base coat. Also, you minimize orange peel drastically in the paint because the paint has a longer time to settle flat, thus smoothening out the imperfections in paint applying techniques. It also gives you more flash time to apply in that time interval. This technique work really good to achieving that "smooth as glass" clear coat.
-Most important of all (aside from personal safety)!!! Keep the paint gun clean at all times. Between coats, run reducer/paint thinner thoroughly through the paint gun. Remove paint gun nozzle and swish it around in the paint canister for a good minute or two. Basically keep it clean. When in doubt, grab a toothbrush/rag with some reducer and use some elbow grease.
-Make sure you have proper safety equipment. Proper mask and new filters!! Eye protection. Wear old long sleeve shirts and long pants to cover your skin. If your ball'in out of control, consider one of these bad boys:
http://satausa.com/respire.htm
hehehhehe
-Imperfections in paint can be wet sanded and buffed. Wet sand the area with 2000 grit; to the point where it looks hazy. Do not sand too much, you might hit basecoat, or the unthinkable--bare metal, thus ruining your hard-worked paint job.
Then use a fine cutting buffing compound. Use 3m buffing compound if you can afford it (sorry, I forgot the product no. for this specific one I use.) I'm somewhat of a cheap *** and use "Optic Express" made by UPol. So far I've had no complaints from friends painted cars using this product! Follow up with a coat of glazing/polishing compound to bring that bling'in shine out. Then seal with a super lite coat of carnuba wax. Be careful, freshly painted cars may react with certain waxes. If unsure do not apply a layer of carnuba wax. Wait a month for the car's paint to fully cure.
-Bahhh...I'm tired. its 4am here in hawaii. Just some tips off the top of my head. Hope I could assist you guys to some degree with this write up!!!
BTW b16a ferio: to answer your ? about the paint guns. I would recommend a at least a sharpe HVLP gravity fed with 1.7oz can. Possibly a cobalt HVLP gun. Or if your ball'in out of control, get a SATA gun....precisely this one with digital LCD readouts:
http://www.satausa.com/HVLP/nr2000_hvlp.htm

It all depends your preferences. Certain guns behave differently in different hands. I've seen show quality paint jobs shot by a crap gun.
I do this on my spare time as a hobby, I'm not employed by body shops. Although the pay is sometimes tempting.

So far I've done about 15 cars during the past 5 years, 6 of which were show queens, by myself from bodywork to buffing. Its good having friends that work in body shops to help you out when your in deeepppp sh*t. Ever dropped a gallon of very expensive base coat on the ground? and the car's owner paid for it? muahahah...muahahahhahaha....mauahhahahahahah
For further paint applying tips visit:
http://www.scottgrundfor.com/ideas/paint3.html Somewhat of a good site.
[Modified by EKFerioHawaii, 4:41 AM 1/6/2003]

Trending Topics
Joined: Sep 2005
Posts: 799
Likes: 0
From: moo cow fuk milk Maryland
<TABLE WIDTH="90%" CELLSPACING=0 CELLPADDING=0 ALIGN=CENTER><TR><TD>Quote, originally posted by MI4EH2 »</TD></TR><TR><TD CLASS="quote">dope..now any bodywork topics such as messing with bondo and priming the area</TD></TR></TABLE>
I dont think it requires much explaining other than apply, let dry, and sand down. chime in if im wrong.
I dont think it requires much explaining other than apply, let dry, and sand down. chime in if im wrong.
Senior Member
Joined: Oct 2002
Posts: 6,208
Likes: 1
From: Rancho Cucamonga, CA, USA
this is much more detailed than what i posted.
http://forums.freshalloy.com/u...art=1
Originally Posted by freshalloy.com
DIY Paint 101
Tools needed :
Air compressor , at least a 40 gal capable of 90 cfm .
Paint gun (s) : HVLP at least a 1.4 nozzle , this will allow fine atomization of all paints and top coats.
(optional) primer gun 1.6-2.0 nozzle . Primers are generally thicker than base / topcoats ,. A primer gun is recommended but not needed .( spraying primer thru a smaller jetted gun will over time enlarge the cavities and the nozzle in the paint gun .)
Sanders : DA sander ( dual action ) 6 � air powered . Sanding blocks 18� , 12�, 6�, 4 �.
Hammer and Fender dolly set : Harbor Freight has a great starter kit 7pc , 3 hammers and 4 dolly�s for 20-25$
Basic Hand tools : self explanatory , for removing trim, lights, mirrors, etc.
Grinder : either a 6� grinder or a 90 degree die grinder, with assorted disks ( 24 grit-80 grit)
Variable speed buffer: 1000rpm-3500rpm. Air or electric
Optional tools for repairing larger damage:
Stud puller . This tool welds a stud to the sheet metal and you use a slide hammer to pull on the stud ,pulling out the dent/ding.
Air file : straight line sander that use 18�x3� paper
Materials:
Sand paper : 3M , Fandelli, Norton, Micra are the preferred brands. You�ll need the following grits , 80,150-180,
240,320 . This is 6� stick it back paper. A couple roles of blocking paper 80 grit ,150 grit, 320 grit.
Wet sand paper : (3M) 400 grit , 1200 grit , 1500 grit , 2000 grit,
Scotch brite pads : Fine (gray) pads.
Degreaser / Blend Prep: You can use a couple different things for this . The cheapest is a cleaner like Comet or Ajax. The paint companies make a few products such as �Ting� , �Blend prep� , just to name a few.
Buffing compounds : 3M extra cut II , Clean cut , 3M perfect it II ultra fine , and your favorite wax or polish.
Buffing pads : wool best to use, easiest to mess the finish up with. So I would recommend the foam pads , these pads come in different compounds you have a coarse , medium , fine pads . A course and fine pad should work just fine.
Primer : Urethane primer . Brands I recommend ( cheapest to most expensive) Limco 700k primmer �80$ sprayable gallon, RM diamont DP20 2k primer -160$ spray able gallon, Sikkens Auto Surfacer 940 HS-190$ spray able gallon.
Sealer :RM/ Diamont DP200 low VOC wet on wet sealer 65 $ qt. Sikkens color build sealer 75 $ qt.
Basecoat : RM/Diamont , Sikkens Auto Base are what I prefer . Price varies on color . S13, S14�s should take 3 qt�s of base to spray it and a gallon to do a complete color change.
Clear coat : You want to use the same manufacturer as the basecoat . RM/Diamont I like DC 5100 , and Sikkens I like Auto Clear Plus . Make sure you get the appropriate hardener�s and reducer �s for the job (Reducers are classified by the temperature in which you are working and the hardeners are available in slow, med, fast and rapid.. SO pick out the reducer according to the temp. you will be spraying in .If your painting a whole car the slow or medium hardener will be just fine depending on the temp. Heat makes paint dry faster so use common sense.)
Lacquer thinner : You�ll need 2 gallons for clean up purposes .
Plastic Filler : DO NOT USE BONDO BRAND!!!! . Use a high quality filler such as 3M, Evercoat, NAPA�S brand Martin Seymour is also pretty good.
Glazing putty : DO NOT USE BONDO BRAND the red oxide bondo glazing put will shrink and expand in the heat !!!! Evercoats metal glaze is my personal favorite.
Plastic spreaders : A handful of these should be fine , clean them off with lacquer thinner after each use .
Anti -static eliminator : If your painting OEM bumpers or urethane parts then you�ll need this.
Fiberglass filler : If your putting on fiberglass aero parts then you�ll need some of this to build up the imperfections .Dynaglass and Tiger Hair are the best on the market.
Masking Tape : 3M !!!!!! A couple roll�s of 3/4 � and 2 � should be fine.
Masking paper: You can use newspaper but sometimes the paint soaks thru a roll of masking paper only runs 15 $
Body work 101
Assess the overall condition of the car , note the major damage and anything you�ll have to fix before painting.
Rock chips : Hold the DA sander flat on the panel with the chips, starting with 180 grit move in a X pattern over the rock chips. Sand until the chip is sanded out and the bare metal is showing . Then switch to some 240 grit paper and feather edge the are you sanded , move up to 320 grit when finished the are should be free of any rough sanding marks and should look like a topographic map ( you should be able to see different layers of paint ).
Small dents : Dent�s less than 1/4 � deep can be filled with out pulling the sheet metal . Use a picking hammer ( the pointed one) nock any high spots down , sand the area about 3� bigger than the dent with 80 grit then mix up some plastic filler and wipe the area in an X pattern , wipe the spot about 1� bigger than the dent . Let the Filler dry and sand with 80 grit on the DA in an X pattern. Next Sand the spot with a hand block and some 150 grit.
Mix up some glazing putty and wipe firmly in an X pattern about 1 � bigger than the dent was .. Let the glaze dry
And sand with a block w/ 150 grit then move to 240 grit. Till the panel is straight.
Large dents : There's two ways to fix large dents. (1) find the low spots in the metal and drill holes in the lowest spots first size your drill bit so the screw bit on the slide hammer will tighten up in the hole. Now working slowly with the side hammer pull out the sheet metal working in the reverse order the damage happened. The other way is just the same instead of using a drill you use the stud gun . Once you got the sheet metal pulled out a close to the original shape as possible . Mix up some plastic filler and fill the dent this might take a couple of tries to get it close enough to use glazing putty. Glazing putty should not be more than the thickness of a nickel . Start with 80 grit moving in an X pattern then work your way up to 180 grit now your ready for the glazing putty . Wipe the area with glaze in an X pattern . And sand until you finish with 240 grit.
Fiberglass aero parts: Fit your parts first and note any fitment issues . I always take a wooden mallet ( face of the mallet is 1/2� . ) and a flashlight and shine thru the gel coat to the inside to see if there�s any air pockets between the fiberglass and gel coat. If you see any tap lightly with the mallet to expose the air pockets . Mix up some fiberglass filler and wipe the area sand in an X pattern starting with 80 grit rough out the area and blow it off . Mix some plastic filler and sand in an X pattern starting with 80 grit and work up to 180. Next mix your glaze and wipe in an X pattern , start sanding with 180 grit and finish with 240 grit.
Deep scratches: Follow the procedure for rock chips. Keep the DA flat and follow the length of the scratch.
Filling large holes : ( side markers , third brake lights, etc.) pretty simple if you can weld .
Cut you a piece of steel around the same thickness as the surrounding metal to match the shape of the hole your trying to feel, cut the piece 1/4� -1/2� larger than the spot you are trying to fill ,clean both pieces down to bare metal and start tack welding moving in alternate patterns so you don�t warp the metal . Grind down the welds with a grinder and fill with plastic filler , then glaze , always sanding in an X pattern finish in 240 grit.
When I talk about sanding in an X pattern , sand the spot down in 45 degree strokes then switch your body position and cross cut it in 45 degree strokes the other way.
Priming your body work
Take the scotch �brite and scuff up the area about 5 � bigger than the are you sanded. Mask off anything you don�t want to get over spray on . Mix your primer and stir it up good ( mix accordingly to the manufacturer ) and pour thru a strainer ( paint store should give you some and some paint paddles ) and pour into your gun. Adjust your air pressure to around 35-40 psi . Practice on the masking paper , on your first coat start about 1� bigger than the dent over lap 50% , let the coat flash ( flash means the primer is dry enough to accept another coat ) you can tell because it will go from wet looking to semi flat . On your 2nd coat prime about 2 � bigger than the dent., let coat flash. On your third coat prime 3� bigger than the dent and let flash .
Its best to do all your body work and prime at one time
Prep work
Take all the areas you repaired and primed , spray some black spray paint just enough to mist over the primer this is your guide coat. Go to Lowe's / Home depot and get some 5 gallon paint paddles these work great for wet sanding. Take your 400 grit sand paper and roll your paint paddle up in it . Get you a cool bucket of water and a spray bottle full of water . Spray down the primed areas with water and sand in 45 degree strokes making sure to cross cut your strokes. Keep the paper clean by rinsing it in the bucket and keeping the surface wet. Sand until all the guide coat is gone , you should be able to tell if the area is straight or if it needs more work. If all is well Mask the car up again and spray one coat of primer over the repaired areas.
Next remove all the trim you possibly can . Door handles, mirrors, belt moldings , all lights and lenses , fuel door
, emblems , pin stripe ( 3M makes an eraser wheel that works for pin stripes and bumper stickers that chucks in to a standard drill).
Next Mask off anything you couldn�t remove that you don�t want to sand by accident. Blow dry the car off ,
grab the DA sander and the roll of 320 sandpaper. Sand the entire car down don�t hit the primered spots to heavy .
Wet the whole vehicle down and grab the paint paddles and 400grit wet sand paper . Wet sand the whole vehicle using the paint paddle as a block, keep it flat and remember to use 45 degree strokes and cross cut your work .
Now its time for the degreaser/blend prep . Take a scotch-brite pad and wet it take your Ajax/ Comet or �Ting� ,
�blend prep� and put a liberal amount on the pad fold it in half and wet it again . Now wet the vehicle and wash it using the pad and cleaner . The reason your doing this is to clean any contaminants from the surface and the particles in the cleaners along with the scotch-brite pads scuff �s the surface and helps out with adhesion.
Rinse the vehicle and blow dry .
Mask up anything you don�t want painted , windows moldings , etc. Trash bags work great for wheels and tires, and lunch bags work good for exhausts
Now wipe the car down with the precleaner that the paint line calls for .Use one lint free wipe soaked in the cleaner , and one to go behind it to dry it. ( think wax on , wax off) Next using a tack cloth ( the correct way to use a tack cloth is to open it all the way and fold it in halves . ) wipe down the entire car and all the area�s you have masked up.
Paint booth prep is simple ,sweep it out and we the floor and the walls down . ( do this before the car is in there.)
Now mix your sealer up and pour it in your gun . Put your respirator on , and get started .
Adjust your air pressure to 40-50 psi and your fan control on your gun 12� pattern, starting with the roof at the back in the middle hold the gun parallel and start moving toward the front of the roof when you get to the end go past the roof and overlap your pattern 50% and work your way back and forth till half of the roof is covered.
Walk to the other side and repeat the same procedure.
Move to the A pillars and then the sail panel
Next is the trunk and then the quarter panel and the door then the other quarter panel and door . Then the hood and fender then the other fender. I always paint bumpers off the car its just easier to get in all the tight spots with out leaning down . So paint the bumpers and all the small parts off the car .
Let the sealer flash and clean out your gun . Mix your base coat up and strain it and pour it in your gun .
Repeat the order , spraying the panels like that helps eliminate dry over spray.
If the paint has heavy metallic in it you may need to do a drop /fog coat to get the flake in uniform.
Hold your gun about 2 feet above the panel and pull the trigger moving the gun rapidly in the original pattern you sprayed in .
3 coats of base coat is the norm .
If you have any trash in the base coat don�t sweat it , once the base is dry to the touch ( check on the masking paper) take your spray bottle full of water and wet some 1500 grit and sand the pieces of trash out , touch up the spots with the spray gun , ITS IMPORTANT TO LET EACH COAT OF BASE FLASH OFF AND DRY ,WIPE EACH COAT WITH THE TACK CLOTH TO REMOVE ANY OVERSPRAY AND TRASH.
Clean your gun and mix enough clear for two coats I generally over reduce my first two coats when I�m painting in a non heated booth . It helps the clear lay down slick . Follow the panel order that you followed with the sealer and the base let each coat of clear flash off ( touch the wet clear on the masking paper the clear will be ready for the next coat when the clear sticks to your finger and makes little strings like hot bubble gum. Put your 2nd coat on and wait for it to flash . Mix up enough clear for two more coats ( mix it as the manufacturer suggests) and put the next two coats on observing the correct panel order and flash times. when the clear cmes out of the gun it has orange peel textue to it , don't worry it'll flow out and become smooth.
Clean your gun and let the car dry 12 �15 hours.
Un tape the car after the paint is dry wait 1 day before you buff it slick.
BEFORE YOU START WETSANDING THE CLEARCOAT REMEMBER ANY EDGE OR BODYLINE PEAK WILL HAVE LESS CLEAR THAN THE REST AND IS EASIER TO SAND THRU.!
Wet the whole car down , fill your spray bottle and get out the 1000 grit sand paper use a block and sand out the big pieces of trash and runs using the /////// pattern do not cross cut your strokes . After all the big stuff and runs are gone move up to 1500 grit . Cross cut your 1000 grit marks \\\\\\\\\\. Then sand the rest of the vehicle with 2000 grit and a block . Cross cutting the 1500 marks ///////////. Rinse the vehicle with water and blow dry. Put on some dirty clothes and some safety glasses and dust mask. Get out the extra cut compound and coarse foam pad . And start on the hood . On about 1/4 of the entire hood and put a bead of compound down rub it in with the buffer off .
Turn the buffer on to 2500-2800 rpm�s and move back and forth moderately holding the buffer tight Do one panel at a time and take your time and be patience . After the whole truck is buffed with the extra cut . Clean the pad , and repeat the process with the Clean cut compound . After that�s done switch to the fine pad and 3M perfect it II ultra fine, repeat the process until the shine is restored . Now grab your favorite polish / wax and hand rub the finish , buff off the hazed wax with a micro fiber towel. Wash the excess compound off and detail.
Buffing a fresh paint job is probably the hardest part of the job . There�s several good books to read on buffing a perfect finish .
Reassemble the car and take some Pic�s and enjoy.
Hope that helps out if you have any ?�s or something need s a little more explanation let me know I�ll try to help out.
Thread Starter
Honda-Tech Member
Joined: Sep 2004
Posts: 4,780
Likes: 1
From: Nashville, TN, USA
very nice guys
thanks.. ill be reading this over the next few days.
thanks.. ill be reading this over the next few days.
Honda-Tech Member
Joined: Mar 2002
Posts: 7,506
Likes: 0
From: ATL to SAV to ORL, USA
<TABLE WIDTH="90%" CELLSPACING=0 CELLPADDING=0 ALIGN=CENTER><TR><TD>Quote »</TD></TR><TR><TD CLASS="quote">Small dents : Dent�s less than 1/4 � deep can be filled with out pulling the sheet metal . Use a picking hammer ( the pointed one) nock any high spots down , sand the area about 3� bigger than the dent with 80 grit then mix up some plastic filler and wipe the area in an X pattern , wipe the spot about 1� bigger than the dent . Let the Filler dry and sand with 80 grit on the DA in an X pattern. Next Sand the spot with a hand block and some 150 grit.
Mix up some glazing putty and wipe firmly in an X pattern about 1 � bigger than the dent was .. Let the glaze dry
And sand with a block w/ 150 grit then move to 240 grit. Till the panel is straight.</TD></TR></TABLE>
Is this time consuming more than being difficult? My doors have some small dents and want them gone when I have my hatch painted. Anyone have experiene with this?
PS <> My bro is in school learning to paint. He's painted probably 8 cars now. His car is really clean but still has "ripples" along the sides. How can this be fixed?
<TABLE WIDTH="90%" CELLSPACING=0 CELLPADDING=0 ALIGN=CENTER><TR><TD>Quote, originally posted by Hybrid93Hatch »</TD></TR><TR><TD CLASS="quote">
Is this time consuming more than being difficult? My doors have some small dents and want them gone when I have my hatch painted. Anyone have experiene with this?
PS <> My bro is in school learning to paint. He's painted probably 8 cars now. His car is really clean but still has "ripples" along the sides. How can this be fixed?
</TD></TR></TABLE>
The best way to obtain this is to replace your door skin.
Honda-Tech Member
Joined: Mar 2002
Posts: 7,506
Likes: 0
From: ATL to SAV to ORL, USA
<TABLE WIDTH="90%" CELLSPACING=0 CELLPADDING=0 ALIGN=CENTER><TR><TD>Quote, originally posted by Spoon Si »</TD></TR><TR><TD CLASS="quote">
The best way to obtain this is to replace your door skin.
</TD></TR></TABLE>
My bro did mention this option as well......
I'm going to look for info on doing this.
The best way to obtain this is to replace your door skin.
</TD></TR></TABLE>
My bro did mention this option as well......
I'm going to look for info on doing this.
Senior Member
Joined: Oct 2002
Posts: 6,208
Likes: 1
From: Rancho Cucamonga, CA, USA
<TABLE WIDTH="90%" CELLSPACING=0 CELLPADDING=0 ALIGN=CENTER><TR><TD>Quote, originally posted by Hybrid93Hatch »</TD></TR><TR><TD CLASS="quote">
Is this time consuming more than being difficult? My doors have some small dents and want them gone when I have my hatch painted. Anyone have experiene with this?
PS <> My bro is in school learning to paint. He's painted probably 8 cars now. His car is really clean but still has "ripples" along the sides. How can this be fixed?
</TD></TR></TABLE>
getting a new door shell will be more time consumming.
i had tons of dents and ripples on my car. all dents and ripples are fixed by pulling the dents out. it takes less time then the door shell.

rear quarter panel had like 20 ripples. to the right of that was a small dent. the door had a huge long gash-dent. My dad backed up into my car =X
fender were used and had a small dent near the A piller. the lower fender was small imperfection from a previous owner body kit.
door shell is only good for really large dents.
Is this time consuming more than being difficult? My doors have some small dents and want them gone when I have my hatch painted. Anyone have experiene with this?
PS <> My bro is in school learning to paint. He's painted probably 8 cars now. His car is really clean but still has "ripples" along the sides. How can this be fixed?
</TD></TR></TABLE>
getting a new door shell will be more time consumming.
i had tons of dents and ripples on my car. all dents and ripples are fixed by pulling the dents out. it takes less time then the door shell.
rear quarter panel had like 20 ripples. to the right of that was a small dent. the door had a huge long gash-dent. My dad backed up into my car =X
fender were used and had a small dent near the A piller. the lower fender was small imperfection from a previous owner body kit.
door shell is only good for really large dents.
Senior Member
Joined: Oct 2002
Posts: 6,208
Likes: 1
From: Rancho Cucamonga, CA, USA
Yes I do, but this isn't a thread to ***** out my car. Plus i'm not a fan of whoring out my car. I'll be removing my pictures in 24hrs; like I always do.


car is stock btw. Oh yea, I also haven't wet sanded and buff the paint. been too lazy about it.
car is stock btw. Oh yea, I also haven't wet sanded and buff the paint. been too lazy about it.
Honda-Tech Member
Joined: Mar 2002
Posts: 7,506
Likes: 0
From: ATL to SAV to ORL, USA
<TABLE WIDTH="90%" CELLSPACING=0 CELLPADDING=0 ALIGN=CENTER><TR><TD>Quote, originally posted by NrG »</TD></TR><TR><TD CLASS="quote">Yes I do, but this isn't a thread to ***** out my car. Plus i'm not a fan of whoring out my car. I'll be removing my pictures in 24hrs; like I always do. </TD></TR></TABLE>
How about a nice contour pic looking down the pass. side that would show the imperfections (looks like your $hit is PERFECT!!)
How about a nice contour pic looking down the pass. side that would show the imperfections (looks like your $hit is PERFECT!!)
Senior Member
Joined: Oct 2002
Posts: 6,208
Likes: 1
From: Rancho Cucamonga, CA, USA
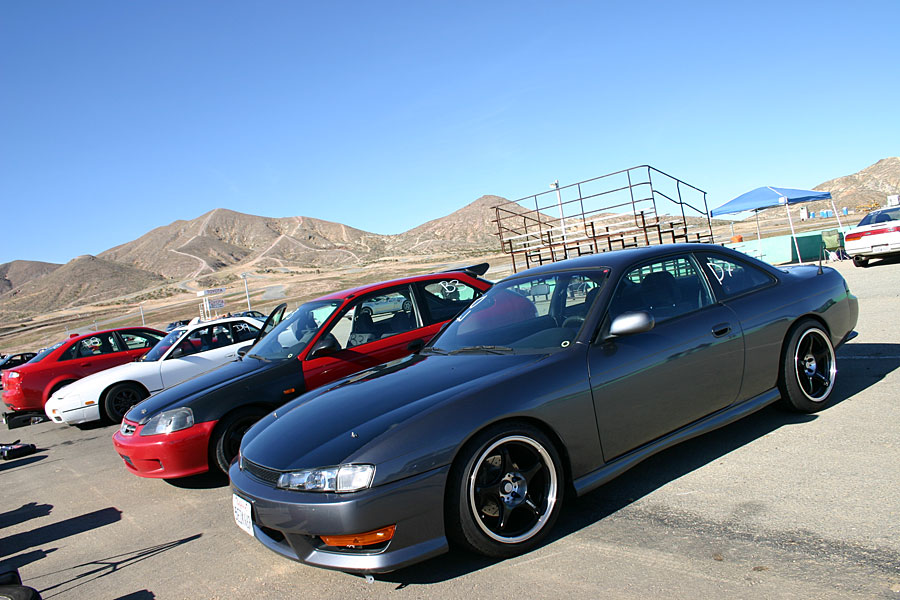
it's not 100% perfect. i'd would say 92% It can be much better soon. There's a few small run spot on the door tho. and on the driver side fender doesn't have enough clear coat as it should.
The bumper is all fucked up from cones and crap on the freeway. 300 dollar JDM OEM bumper. oh well, buy another one lol.
these are the best pictures of the paint I have.


oh yea, this was all painted with a Husky Home depot 69.99 gravity feed gun haha. The paint is Dupont Chroma Base with Chroma clear. Body filler is Evercoat. two primer were used. My dad and I did this in two weekends.
The bumper is all fucked up from cones and crap on the freeway. 300 dollar JDM OEM bumper. oh well, buy another one lol.
these are the best pictures of the paint I have.
oh yea, this was all painted with a Husky Home depot 69.99 gravity feed gun haha. The paint is Dupont Chroma Base with Chroma clear. Body filler is Evercoat. two primer were used. My dad and I did this in two weekends.
Senior Member
Joined: Oct 2002
Posts: 6,208
Likes: 1
From: Rancho Cucamonga, CA, USA
<TABLE WIDTH="90%" CELLSPACING=0 CELLPADDING=0 ALIGN=CENTER><TR><TD>Quote, originally posted by Pat McGroin »</TD></TR><TR><TD CLASS="quote">What did you use to pull the dents? Doing some work on my bro's 240 as well.</TD></TR></TABLE>
A Stud Gun with a slide hammer. the one my dad has is a commercial version.
here are some decent ones: http://www.autotoolmart.com/cg...id=62
A Stud Gun with a slide hammer. the one my dad has is a commercial version.
here are some decent ones: http://www.autotoolmart.com/cg...id=62