


How To: Soldering Ring Terminals


Thread Starter
Honda-Tech Member
Joined: Sep 2004
Posts: 892
Likes: 2
From: Miami, FL
 How To: Soldering Ring Terminals
Hey guys I had someone message me on how to solder ring terminals so I am making this so it will help out many other people; I know I wish I knew how to solder ring terminals to thick power wire a while ago.
This will save you money if you didn’t know how and had a shop do this. I know I had a shop do this and it was $25 for 3 terminals
Materials:
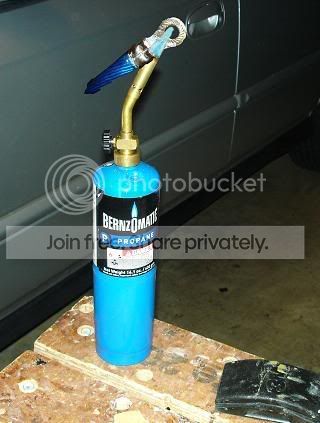
Bernzomatic Torch (at Wal-Mart for about $12)
60/40 Rosin Core Solder(as thick as you can find)
Ring Terminals (I prefer high-quality ones like in the following pics)
Crimper (I didn’t have one so you will see below what I did)
Screw Driver
Hammer/mallet
***Warning: read, understand and use all safety procedures that come with the tools and/or materials that you use. Not responsible for any injuries, damages..etc.****
Some of these pictures I couldn't safely take(don’t want to mess around with burning flames!) so some of these pictures are obviously photoshopped(hint: the floating ring terminals lol ) I have also had to learn this on my own with a description from some people on here so I hope this is the 'correct' way...in either case, its worked for me
OK lets get crackin:
Step one, slip the ring terminals vinyl jacket onto the wire. You can use the jacket that comes with it. If it doesn't come with any jacket, you can use heat shrink tubing. Put it a good ways away from the end of the wire especially if its heat shrink tube...the wire will get very hot at the end so if its heat shrink, it will shrink to the wire where you don’t want it to.
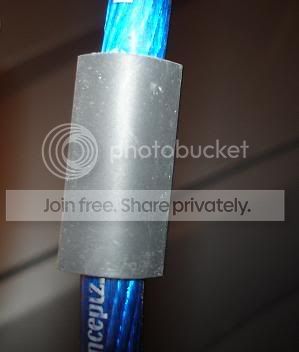
Now you want to trim the insulation off the end of the wire. Trim it so that not too much wire is hanging outside of the "tunnel" where the wire slides into.
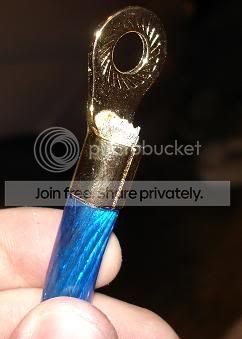
Now you have to crimp the terminal to the wire. I didn't have a crimper that was big enough for a 4 gauge wire so I used a flathead screw driver and a hammer. **if you do this wear eye protection. Pieces may chip from the screw driver**. I used a craftsmen screwdriver so if it broke(very unlikely using this little of force) I could take it back for replacement. I didn’t "crimp" this as tightly as I would have if I wasn't going to solder it. I did this in 2 spots:
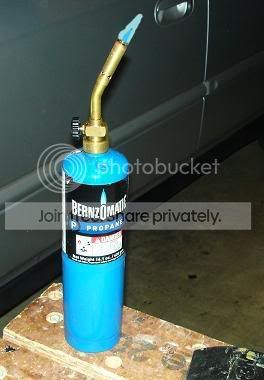
Now its time to start heating up the terminal. First, light the torch. For 4 gauge and smaller wire, adjust the height of the flame so its not too big.
Angle the wire up and start heating the bottom side of the ring terminal. Make sure the terminal is in the flame and not the insulation also...you do not want to burn the insulation. After a few seconds, rotate the terminal so that all sides get heated (make sure to use hand protection, this can get very hot, very quick on your hands):

Now that everything is heated, rotate the ring terminal so its on its "side" with the crimp seam towards you. While the flame is "covering" the terminal, stick a little bit of solder onto the crimped joint (from the 'front' of the crimp. Make sure the flame touches the solder to get it to first start melting. After it starts melting, you can most likely pull the terminal out of the flame and just "feed" the solder into the joint; if it’s hot enough, it will suck it up until its full. Every few seconds you might want to put the terminal in the flame to keep it plenty hot. I usually feed the solder into the bottom part of the joint first. If its melted on the terminal but the wire is not 'sucking up' the solder at first, heat it some more fromt the bottom side:
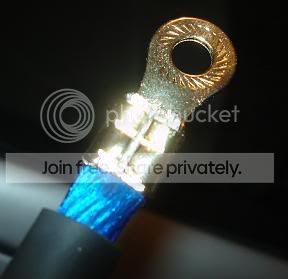
After it has sucked up all the solder it can, it should look like this:
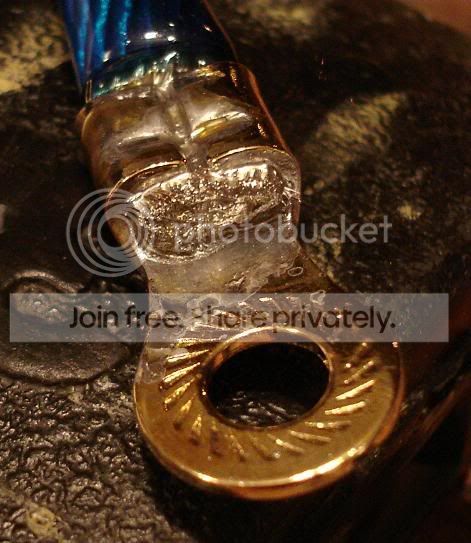
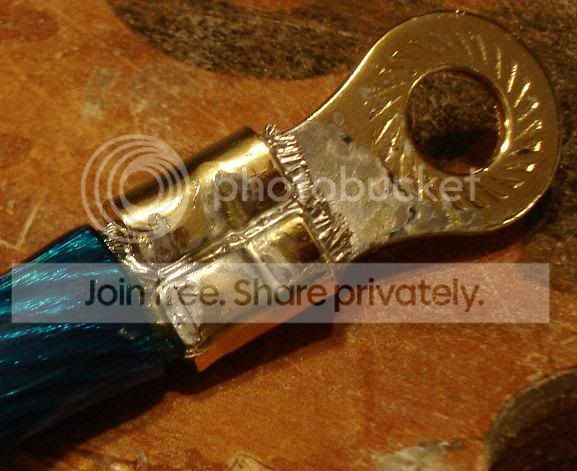
Do not touch this terminal; it will stay hot for a while. After it is cooled, you can slip the vinyl jacket over the end. If you use the heat shrink, you can use your torch to shrink the tube to the wire end. Just pass the flame over the heat shrink, so not keep a constant flame on the heat shrink tube. Pass the flame over until it has all shrank to the wire:

I hope this helps some people!
This will save you money if you didn’t know how and had a shop do this. I know I had a shop do this and it was $25 for 3 terminals
Materials:
Bernzomatic Torch (at Wal-Mart for about $12)
60/40 Rosin Core Solder(as thick as you can find)
Ring Terminals (I prefer high-quality ones like in the following pics)
Crimper (I didn’t have one so you will see below what I did)
Screw Driver
Hammer/mallet
***Warning: read, understand and use all safety procedures that come with the tools and/or materials that you use. Not responsible for any injuries, damages..etc.****
Some of these pictures I couldn't safely take(don’t want to mess around with burning flames!) so some of these pictures are obviously photoshopped(hint: the floating ring terminals lol
) I have also had to learn this on my own with a description from some people on here so I hope this is the 'correct' way...in either case, its worked for meOK lets get crackin:
Step one, slip the ring terminals vinyl jacket onto the wire. You can use the jacket that comes with it. If it doesn't come with any jacket, you can use heat shrink tubing. Put it a good ways away from the end of the wire especially if its heat shrink tube...the wire will get very hot at the end so if its heat shrink, it will shrink to the wire where you don’t want it to.
Now you want to trim the insulation off the end of the wire. Trim it so that not too much wire is hanging outside of the "tunnel" where the wire slides into.
Now you have to crimp the terminal to the wire. I didn't have a crimper that was big enough for a 4 gauge wire so I used a flathead screw driver and a hammer. **if you do this wear eye protection. Pieces may chip from the screw driver**. I used a craftsmen screwdriver so if it broke(very unlikely using this little of force) I could take it back for replacement. I didn’t "crimp" this as tightly as I would have if I wasn't going to solder it. I did this in 2 spots:
Now its time to start heating up the terminal. First, light the torch. For 4 gauge and smaller wire, adjust the height of the flame so its not too big.
Angle the wire up and start heating the bottom side of the ring terminal. Make sure the terminal is in the flame and not the insulation also...you do not want to burn the insulation. After a few seconds, rotate the terminal so that all sides get heated (make sure to use hand protection, this can get very hot, very quick on your hands):
Now that everything is heated, rotate the ring terminal so its on its "side" with the crimp seam towards you. While the flame is "covering" the terminal, stick a little bit of solder onto the crimped joint (from the 'front' of the crimp. Make sure the flame touches the solder to get it to first start melting. After it starts melting, you can most likely pull the terminal out of the flame and just "feed" the solder into the joint; if it’s hot enough, it will suck it up until its full. Every few seconds you might want to put the terminal in the flame to keep it plenty hot. I usually feed the solder into the bottom part of the joint first. If its melted on the terminal but the wire is not 'sucking up' the solder at first, heat it some more fromt the bottom side:
After it has sucked up all the solder it can, it should look like this:
Do not touch this terminal; it will stay hot for a while. After it is cooled, you can slip the vinyl jacket over the end. If you use the heat shrink, you can use your torch to shrink the tube to the wire end. Just pass the flame over the heat shrink, so not keep a constant flame on the heat shrink tube. Pass the flame over until it has all shrank to the wire:
I hope this helps some people!

Honda-Tech Member
Joined: Jan 2002
Posts: 5,143
Likes: 1
From: Beavertown, OR
I use my stove burner does exactly the same thing but no flame.
I would recommend NOT using rosin core solder. Try to use something without a flux core. The problem with using flux is it wicks up the strands of wire and is physically impossible to clean out. This will allow your wire to corrode over time underneath the jacket. Contrary to popular belief you can produce nice solder joint without flux. It just requires a little more skill.
I would recommend NOT using rosin core solder. Try to use something without a flux core. The problem with using flux is it wicks up the strands of wire and is physically impossible to clean out. This will allow your wire to corrode over time underneath the jacket. Contrary to popular belief you can produce nice solder joint without flux. It just requires a little more skill.


Thread
Thread Starter
Forum
Replies
Last Post
96 GSR-T
Welding / Fabrication
8
Apr 12, 2010 05:09 AM
JDMCRX
All Motor / Naturally Aspirated
7
Dec 23, 2008 05:03 AM
Tommy_Gunns
Audio / Security / Video
4
Jun 15, 2002 11:04 AM
