

SRDFTITAN'S 97 EJ8 TURBO BUILD THREAD!! PICS/VIDS **CUSTOM GAUGE HOLDER**

Thread Starter
Honda-Tech Member
iTrader: (3)
Joined: Apr 2005
Posts: 496
Likes: 0
From: ROME, GA, UNITED STATES
Really great build, and awesome documentation. I agree, the aero wings/splitters etc.. are second to none on fitment.
I think the cold air box you did was great, and big props for battling with the paint/cut/buff work yourself. That's really impressive! That your boy there in the pics? Daddy too? Great work and enjoy this masterpiece.
I think the cold air box you did was great, and big props for battling with the paint/cut/buff work yourself. That's really impressive! That your boy there in the pics? Daddy too? Great work and enjoy this masterpiece.
Thread Starter
Honda-Tech Member
iTrader: (3)
Joined: Apr 2005
Posts: 496
Likes: 0
From: ROME, GA, UNITED STATES
I have a huge update. Over the past month or so I've been very busy with the car, especially over this holiday vacation. I ended up adding a five point harness, harness bar, new vibrant exhaust, wire tuck, fuse box tuck, battery relocation, carbon kevlar hood, carbon kevlar trunk and made a new catch can with new black fittings and lines. I've been busy lol.
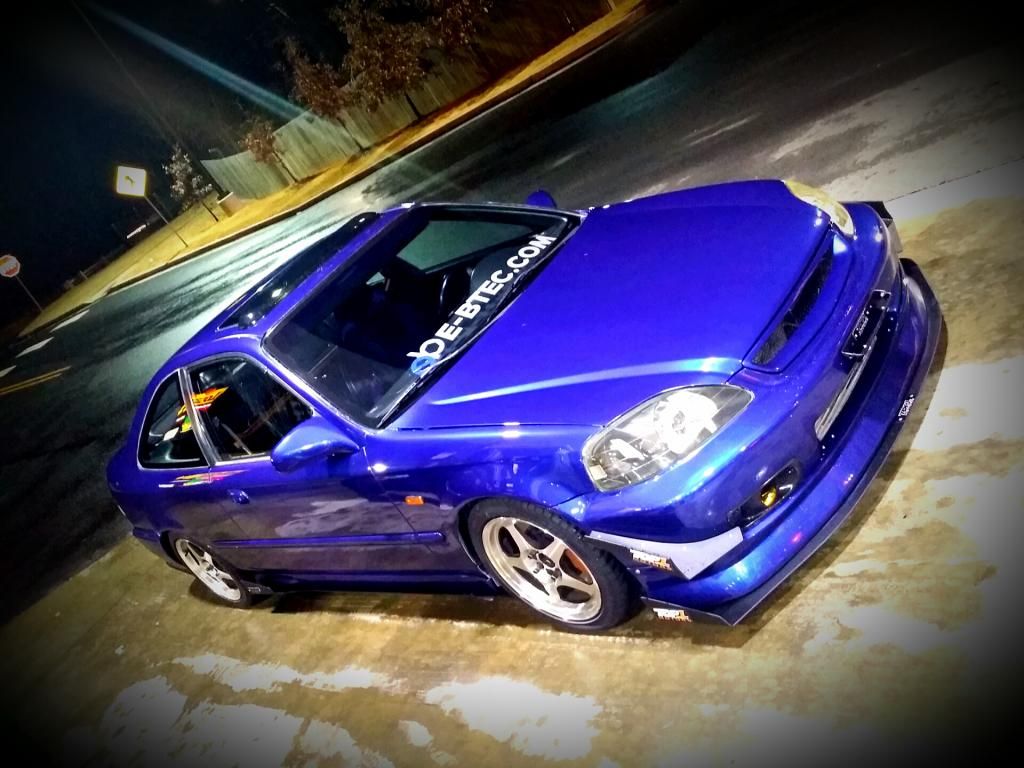
Here is a pic of the car before I got started, I ended up peeling the plasti dip that was on the passenger side off of the wheels. Now all of the wheels are polished again.
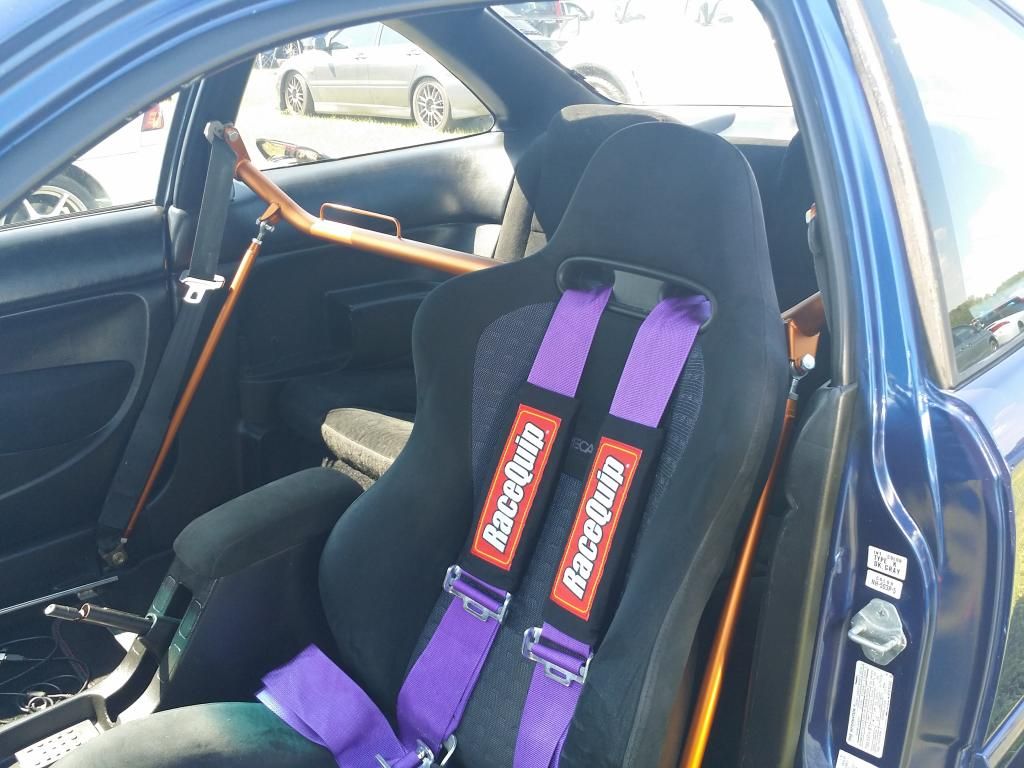
First thing that I started with was the adding of some five point harnesses and a harness bar.
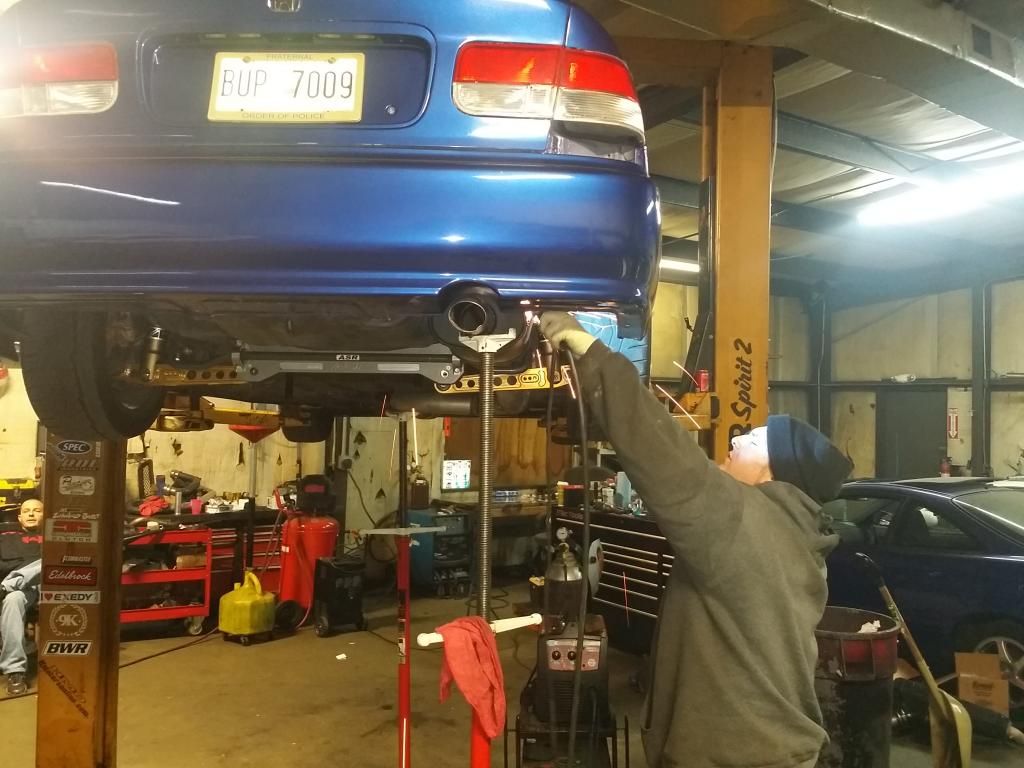
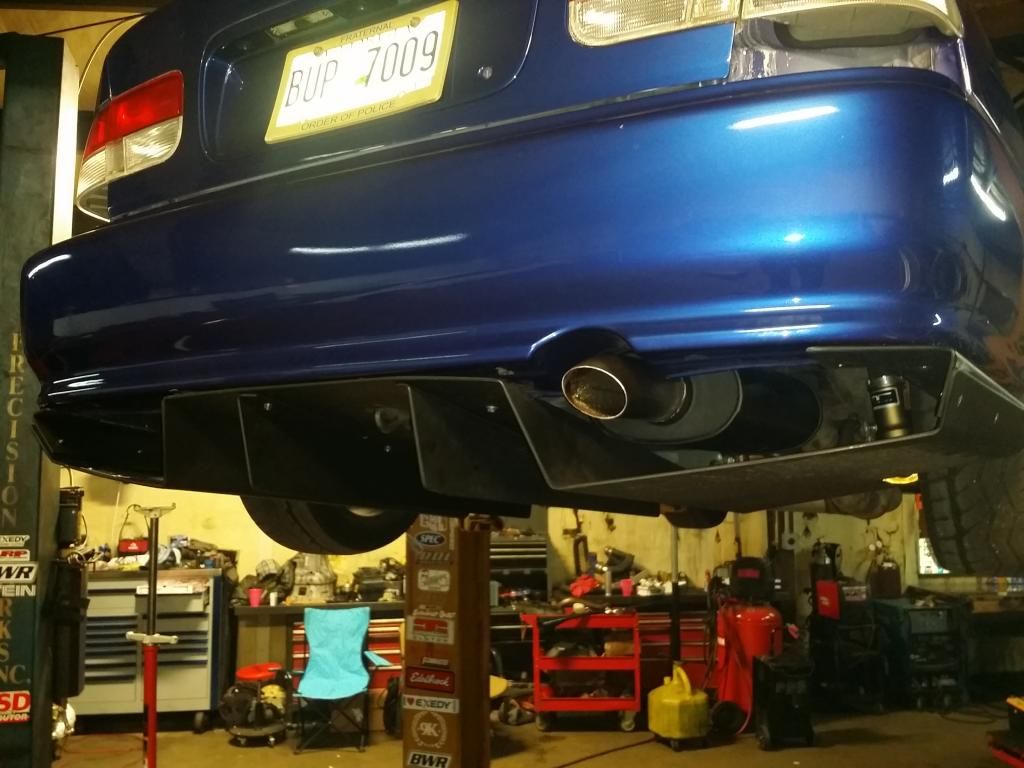
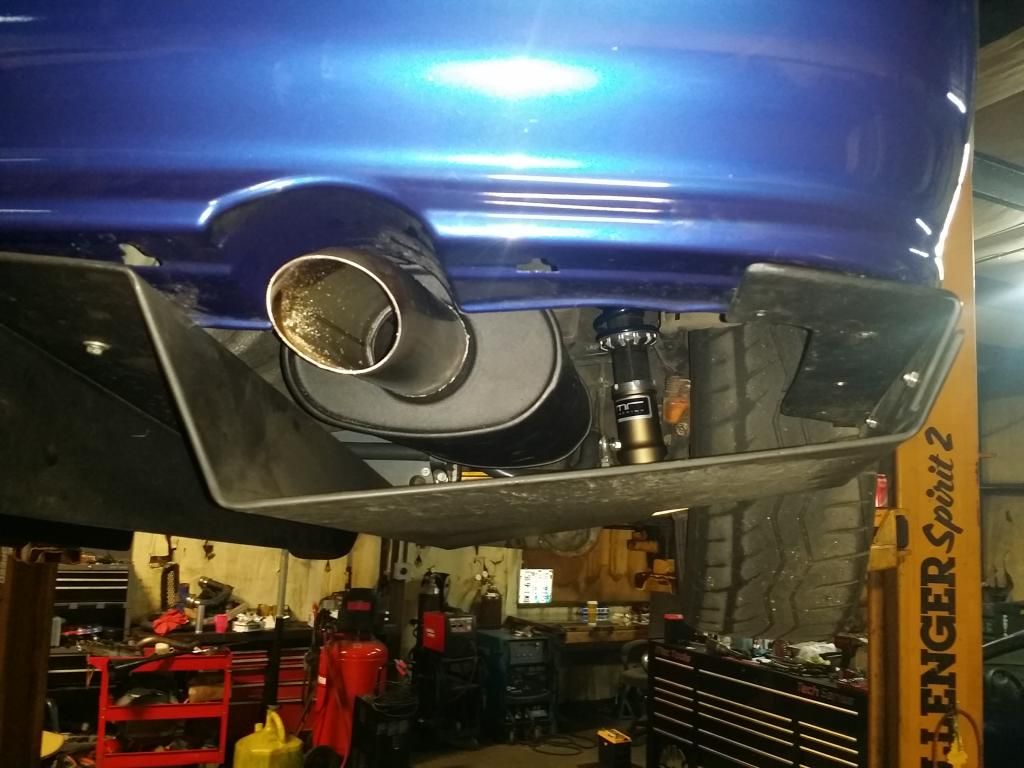
Then I wanted my exhaust to be a little quieter so I went to my buddies over at EBTEC and had them hook me up with a Vibrant muffler. Man do I love how quiet it's gotten since then. Put it this way my engine/camming is louder then the exhaust now and I love it. I had the guys add a little turn down to the tip for that extra little flare, came out perfect!
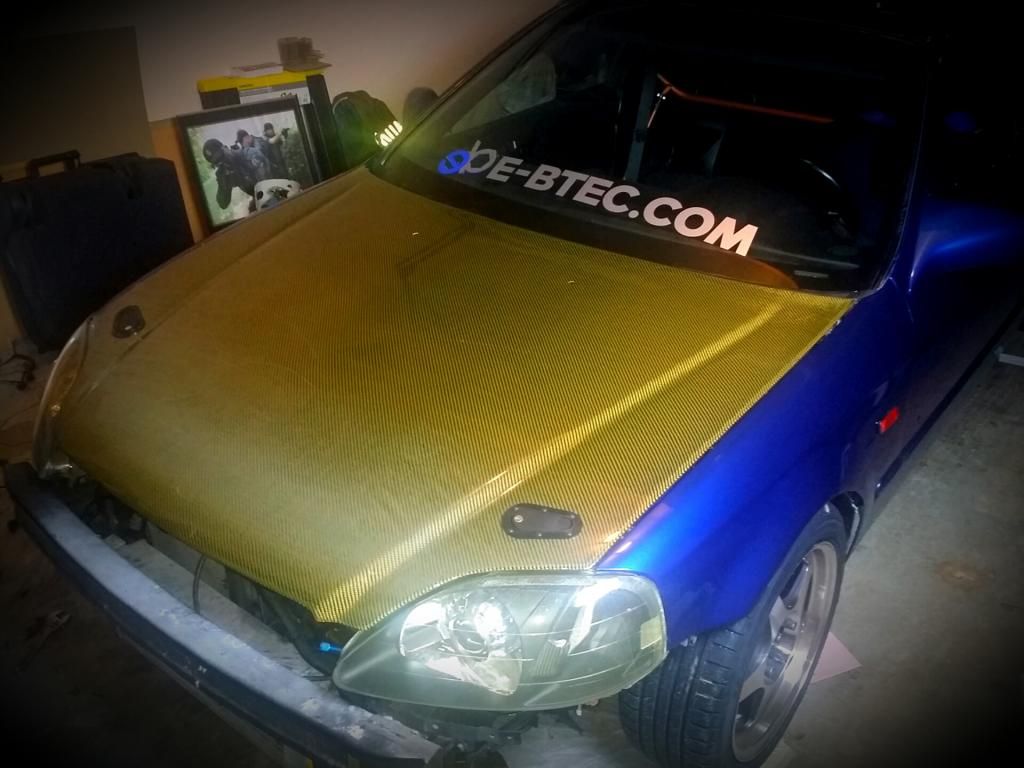
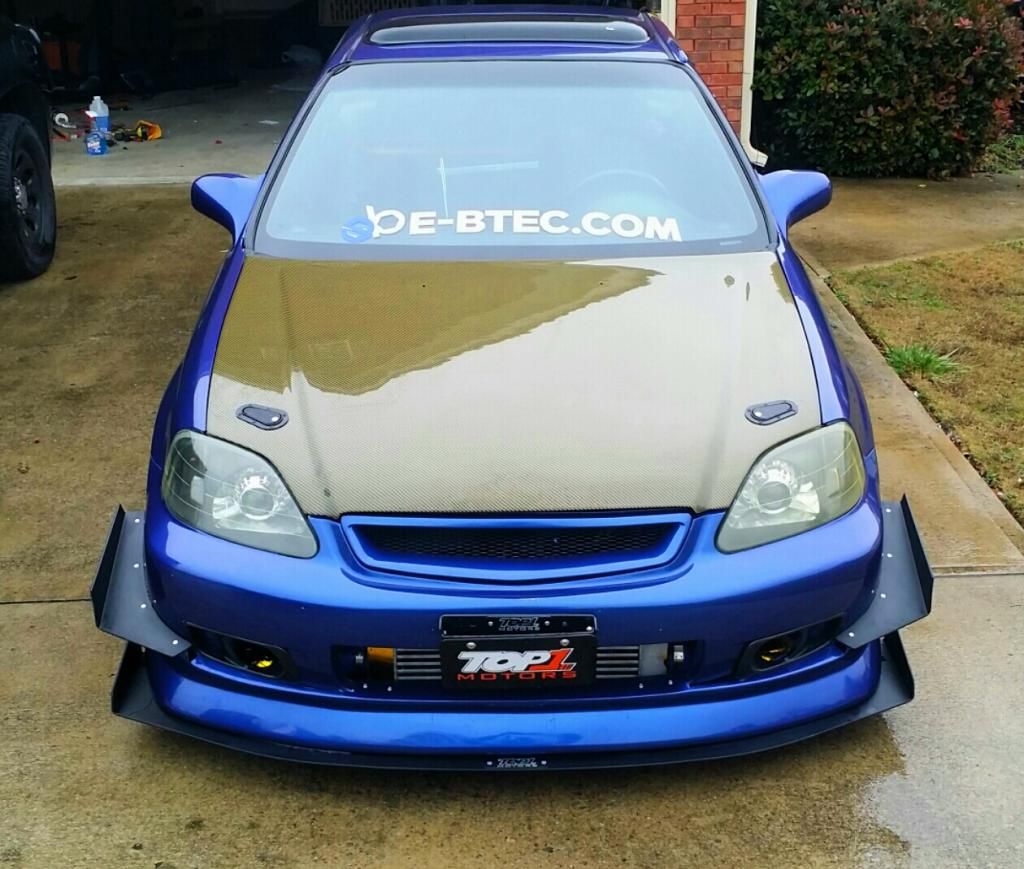
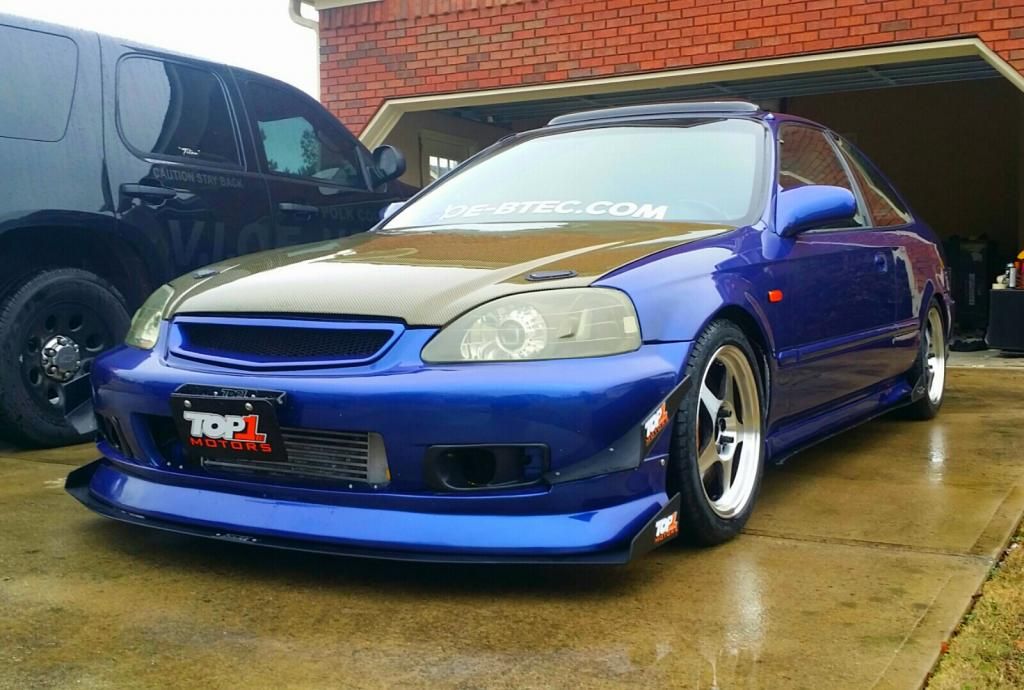
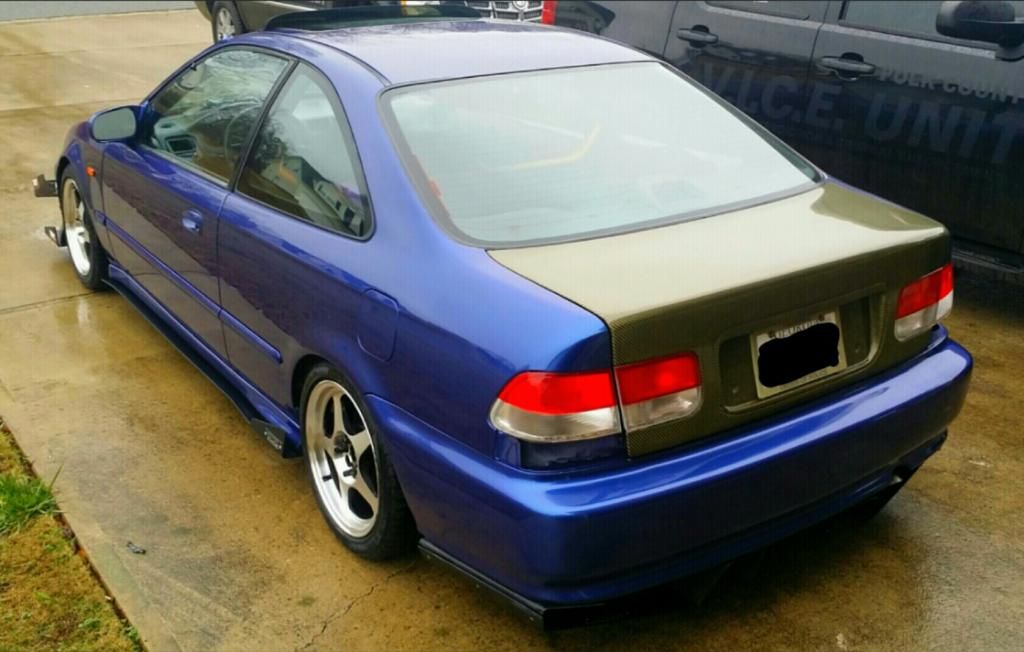
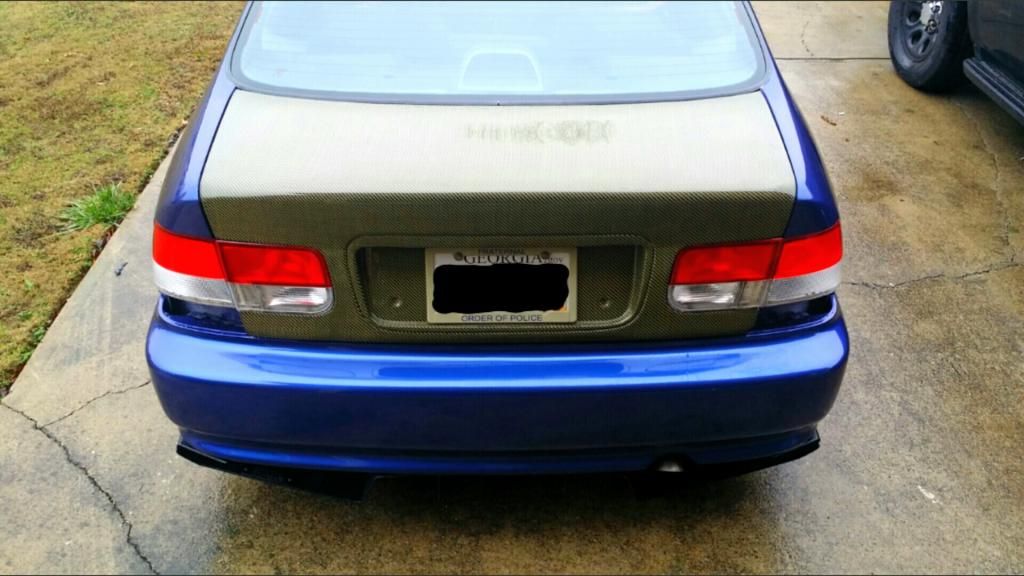
After the exhaust I had been looking long and hard for a carbon/kevlar hood and trunk. Luckily some of the guys at EBTEC remembered a post of one for sale online. I got in touch with the guy and he still had both the hood and trunk so I scooped them up. Man is it nice and extremely light. I was told that the hood and trunk that I have is one of a very few in the U.S. so I guess that's pretty cool. Sneak peak pic, better photos coming soon!
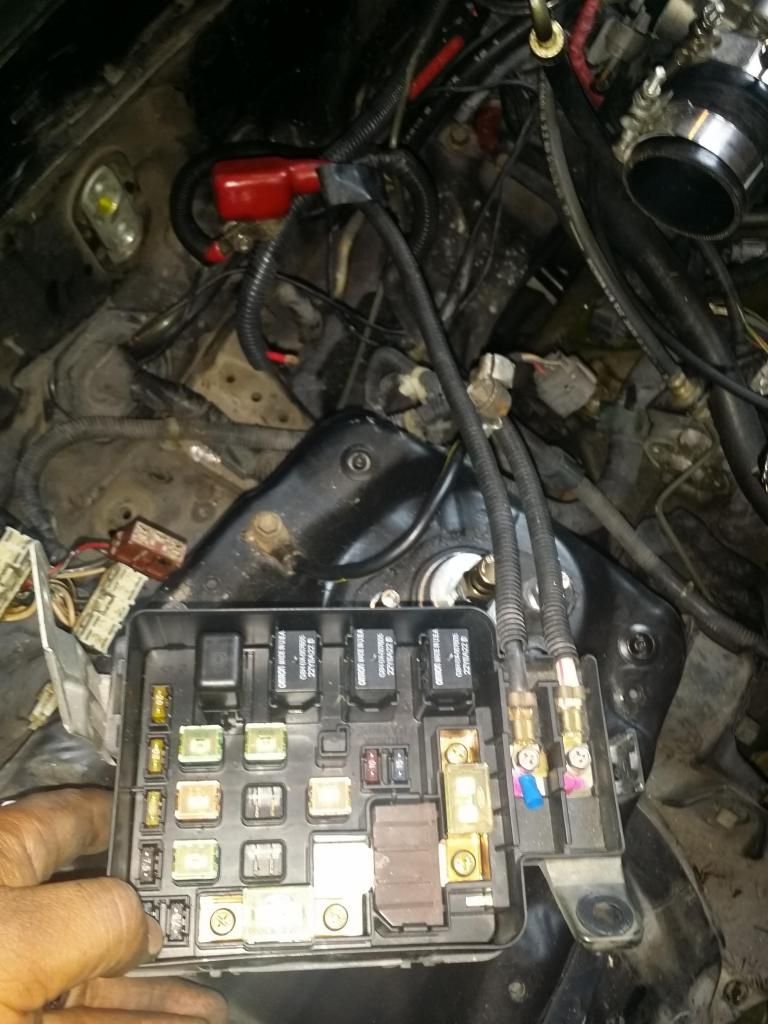
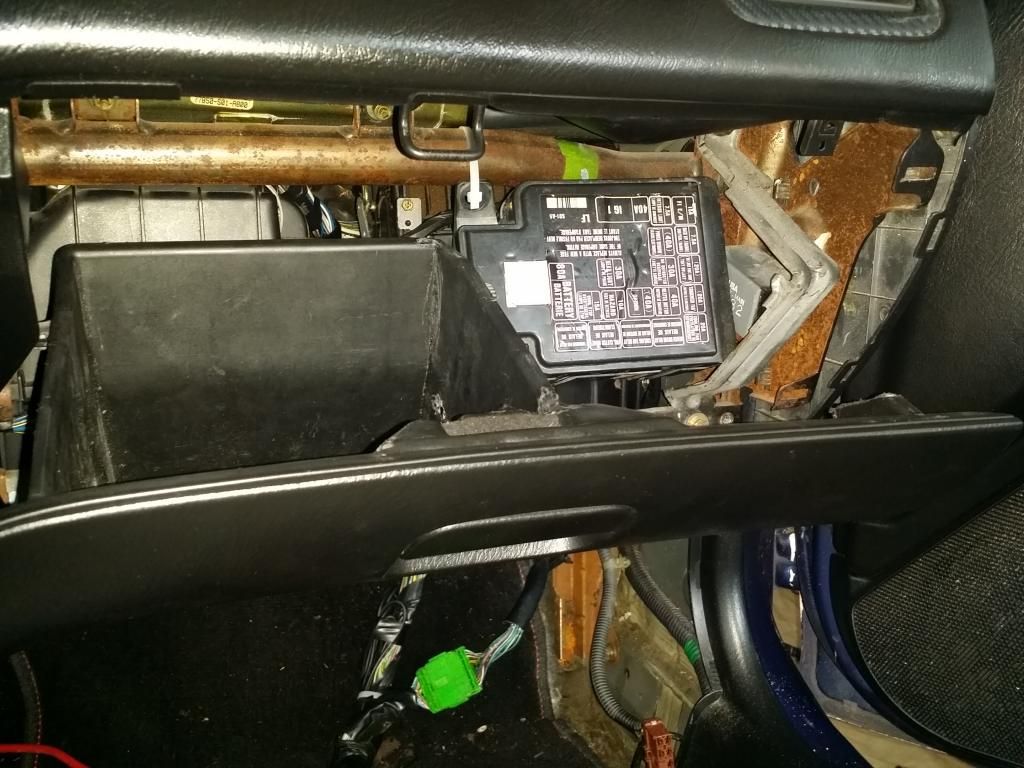
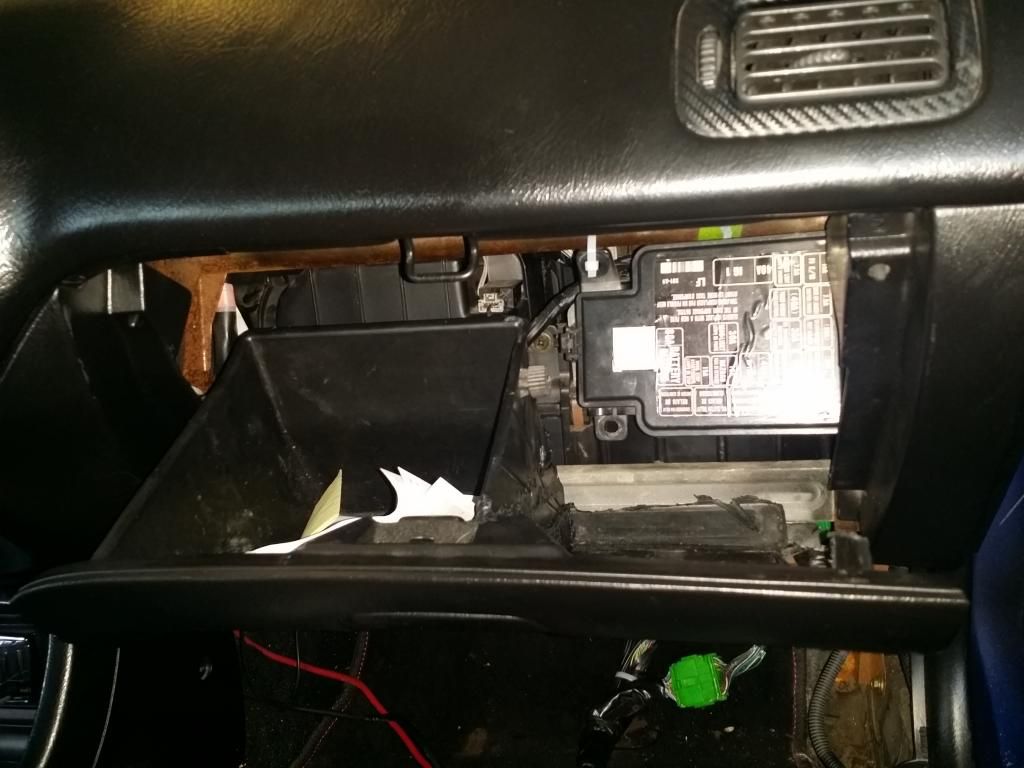
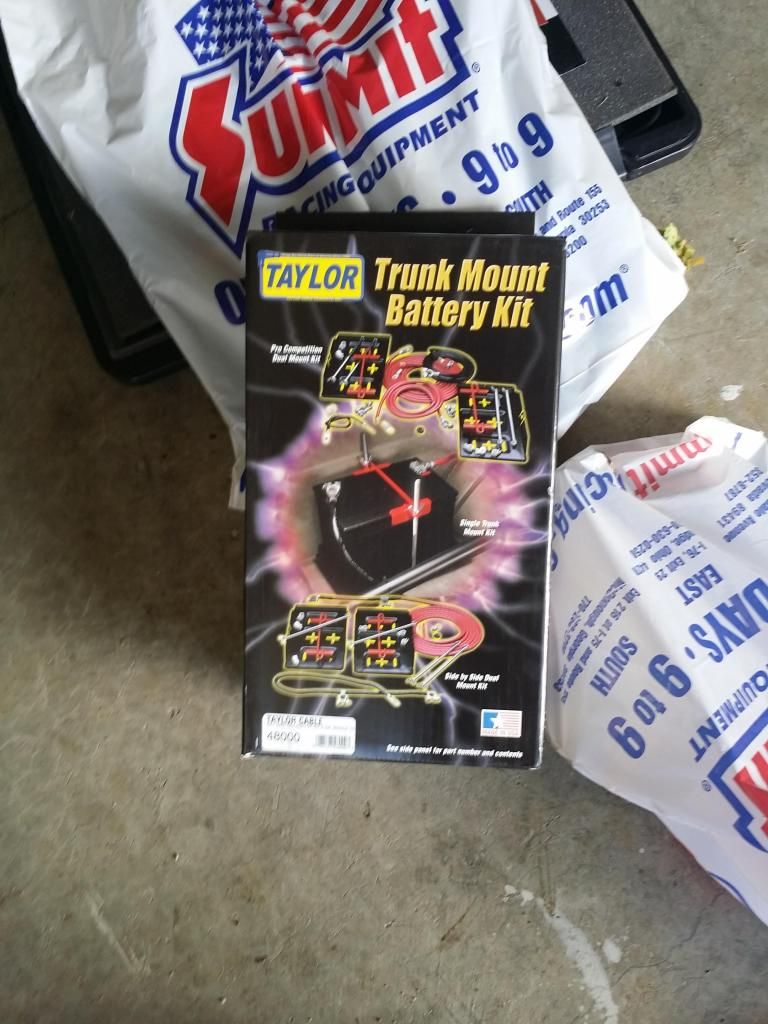
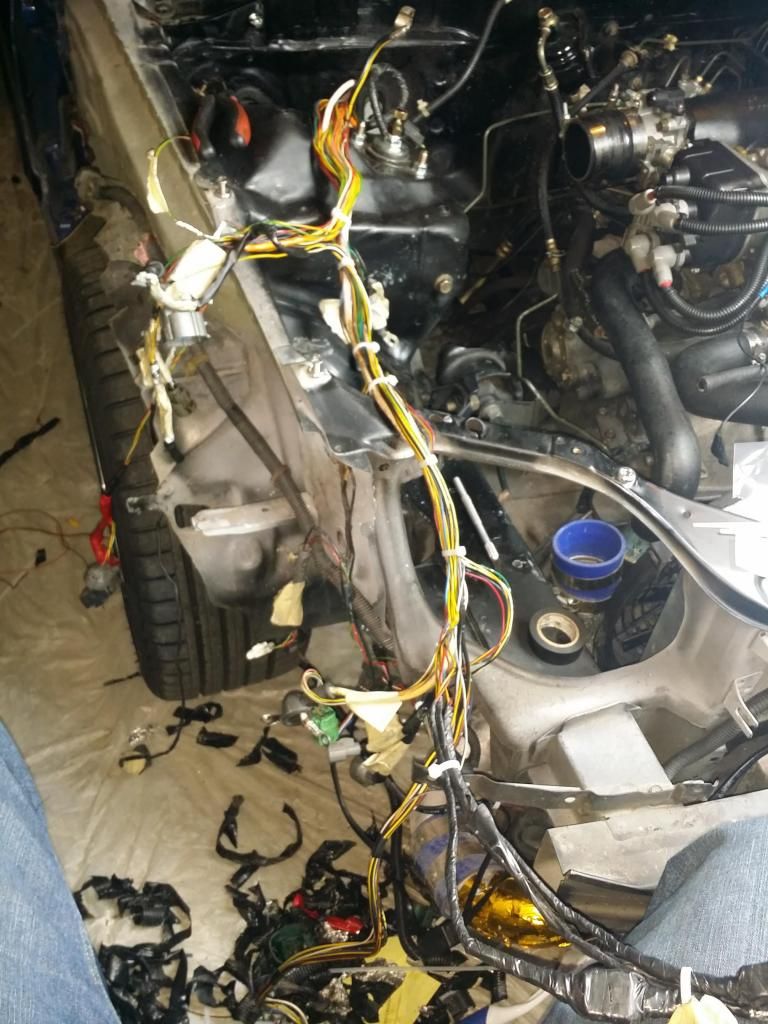
I had been putting off doing a wire tuck for a very long time, mainly because of the horror stories that I've heard about people really messing their cars up due to not doing it correctly. Plus I'm lazy and just didn't want to do it. Well I got a wild hair about a week ago and just dove right in. I ordered my braided sleeving and shrink tube from wirecare.com. After it arrived in the mail I got started. I started with the headlight harness, as everyone had stated that it is the easiest and provides the most yield as far as looks go. It went pretty smoothly and before I knew it I was done. After completing that I started messing around with the fuse box and figured out that it unplugs from the bottom. Now this was my big question; why do people cut all of the wires that lead to the fuse box when relocating it under the dash? Doesn't make any sense to me, I just simply unplugged the harness and fed the plugs through the fire wall. After doing that I wanted to mount the fuse box inside the passenger air bag compartment but realized that my head is too big to fit between the windshield and dash in the event I had to troubleshoot anything inside of the fuse box. So I mounted the fuse box inside of the glove box. After mounting it I trimmed the glove box until it was pretty much cut in half. I then took the end piece that was cut off and plastic welded it to the remaining pieces of the glove box that was still attached. This worked out very well as I still can store important documents while making a new home for the fuse box. I really like how it came out. The wire running from the alternator that connects to the fuse box was just barely long enough to still screw in to the fuse box. I had to extend the positive wire that runs from the battery quite a bit, as I relocated the battery to the trunk using a battery relocation kit from Taylor. I then went ahead and cleaned up the engine harness, stripped off all the old wire loom and electrical tape, eliminated plugs that I no longer use, shortened/lengthened some wires and finally reloomed everything. I really like how everything came out.
As I got started
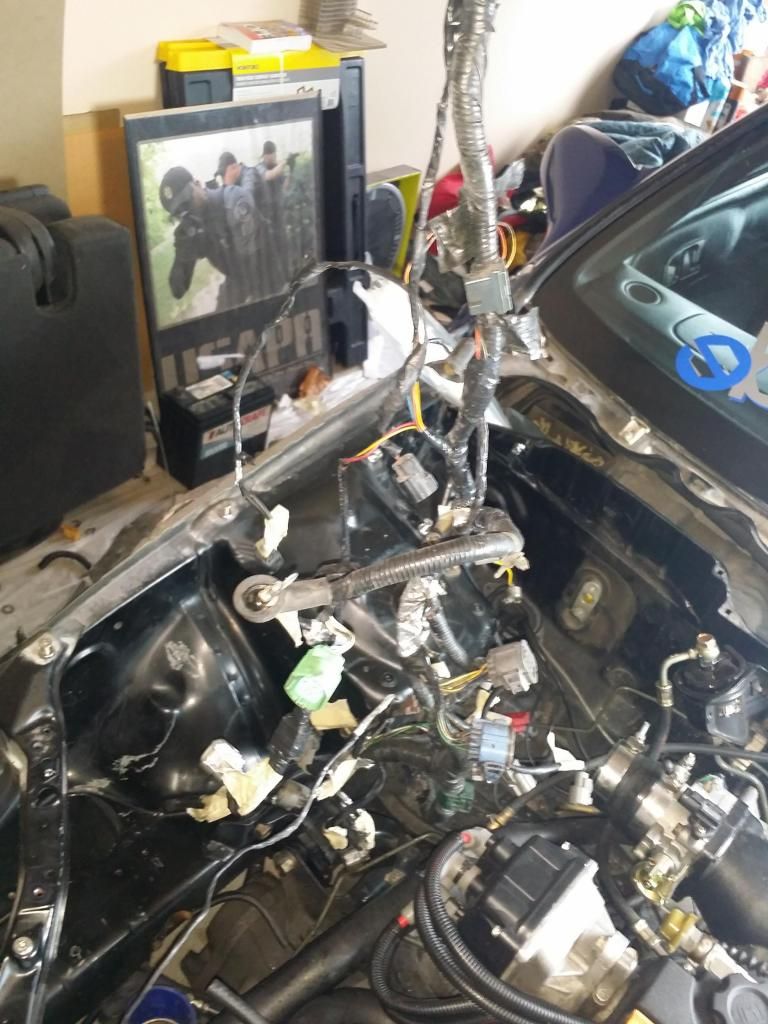
After pulling the headlight harness out
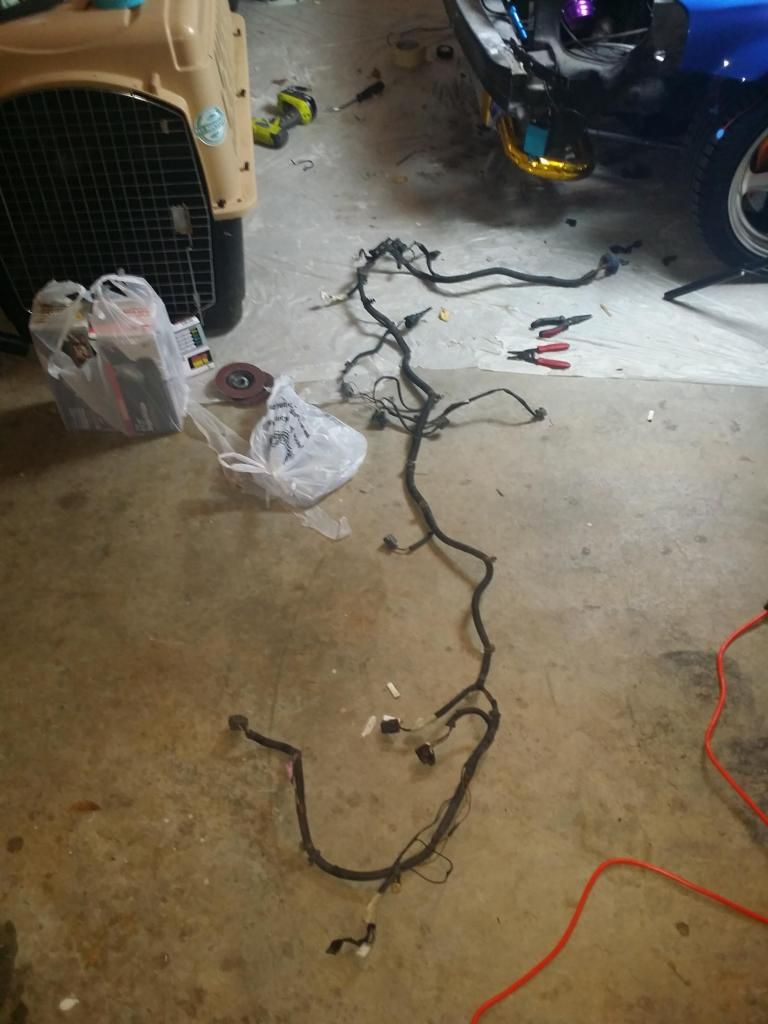
Man it was a sea of wires, at this point I felt that I was in over my head lol!

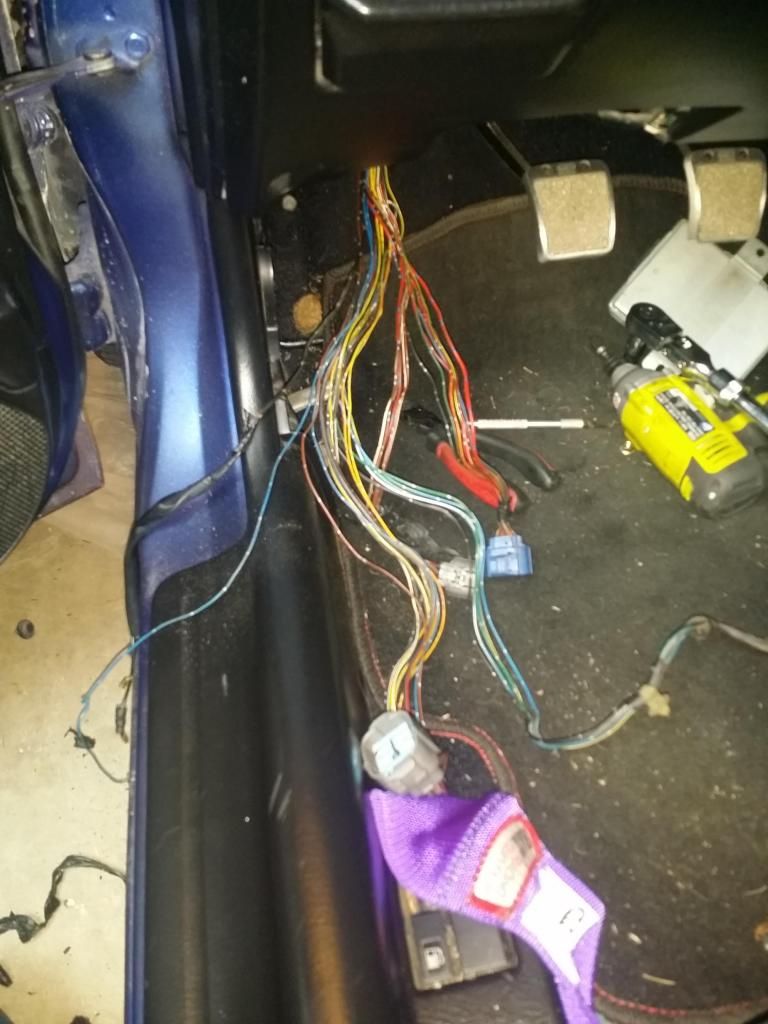
Pulled the harness plug through a hole that is already used for the wiring that runs to my doors and after running the harness around the outside of the engine bay I was done.
Now it was time to find a suitable place for my fuse box and I found it in the glove box.

After cutting and then plastic welding my glove box back together, came out pretty good.
Used this kit from Taylor to relocate the battery to the trunk, very straight forward.
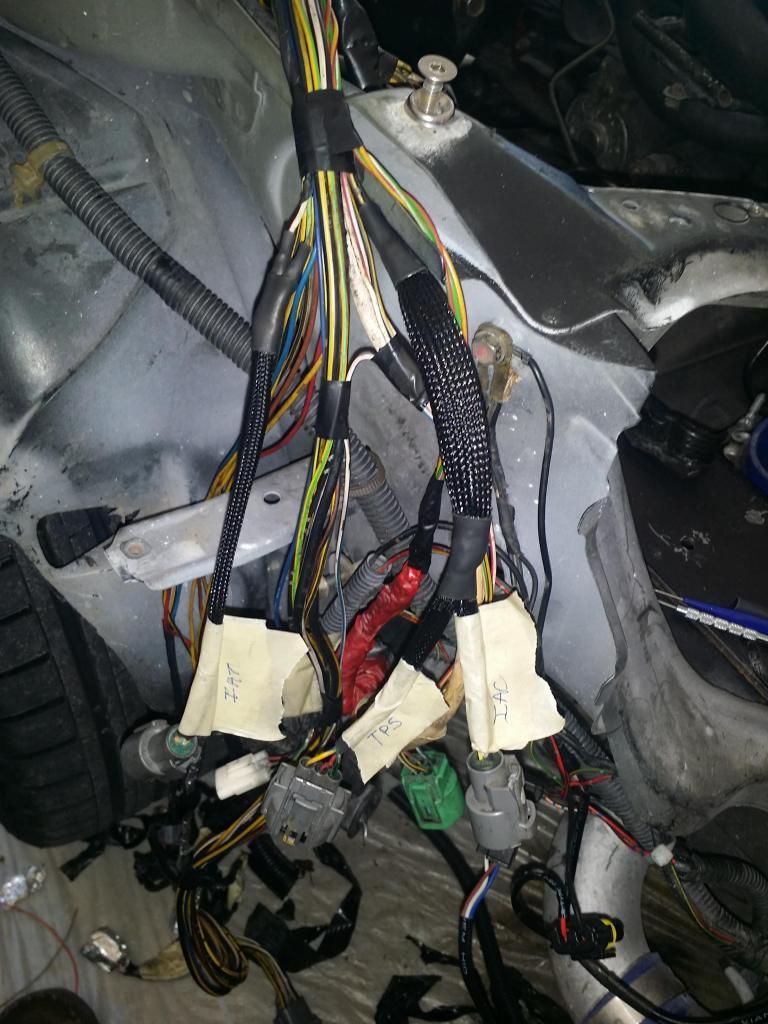
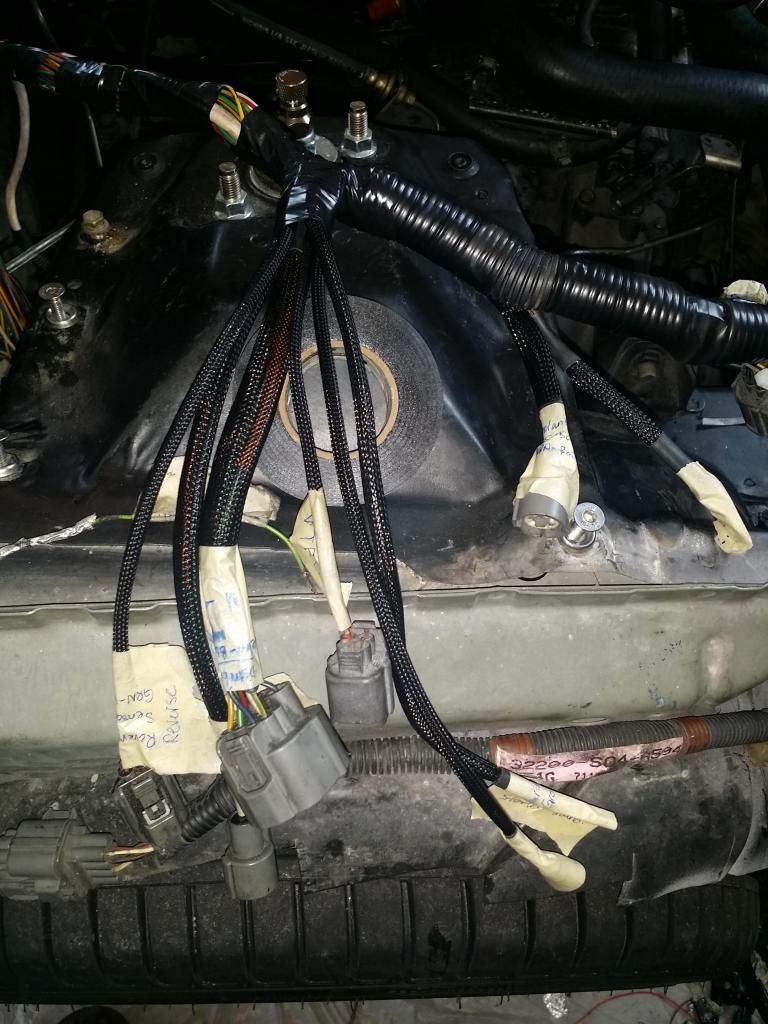
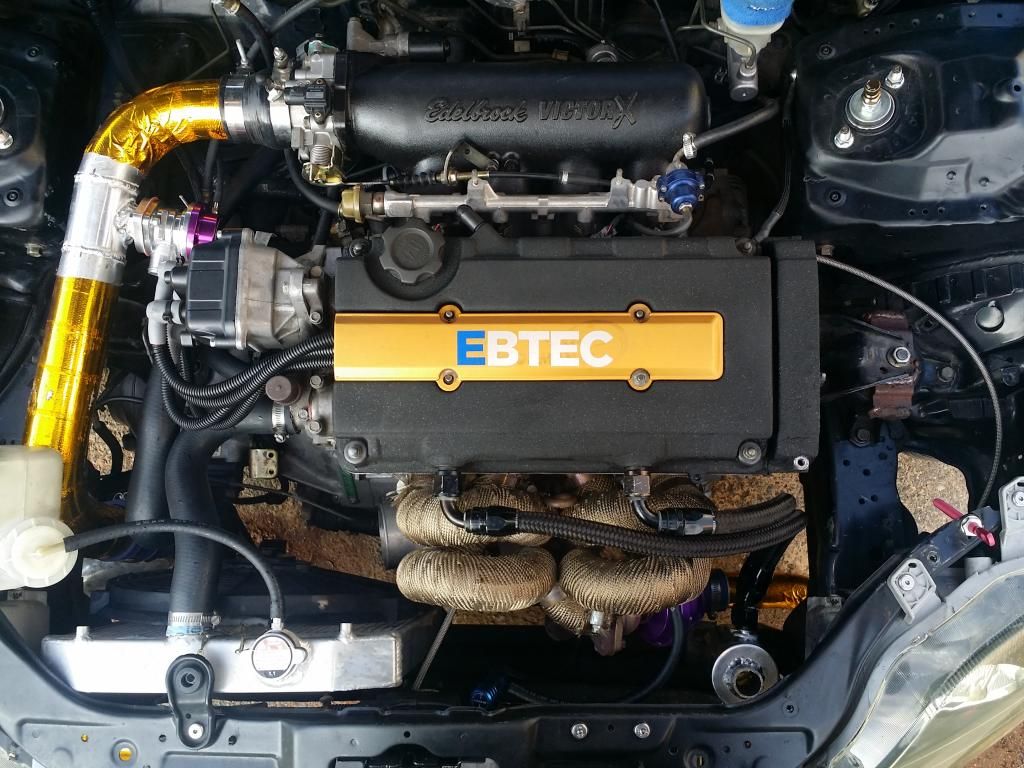
Then it was time to clean up the engine harness.
Everything was tagged and labeled properly so I knew where everything plugged back into.
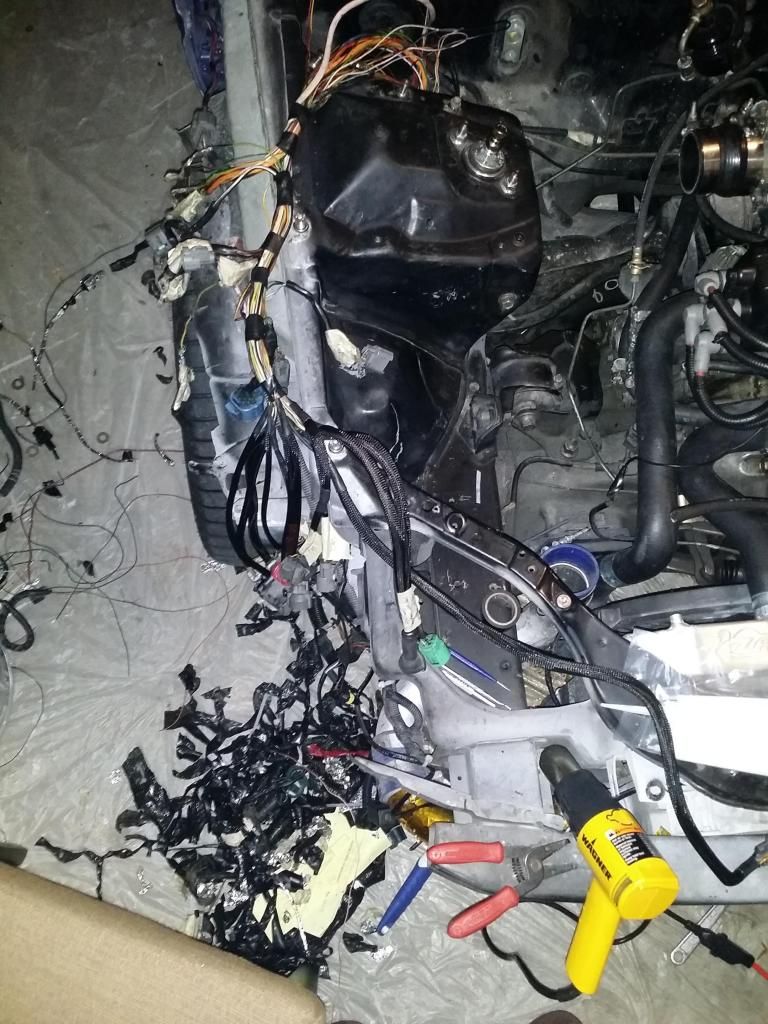
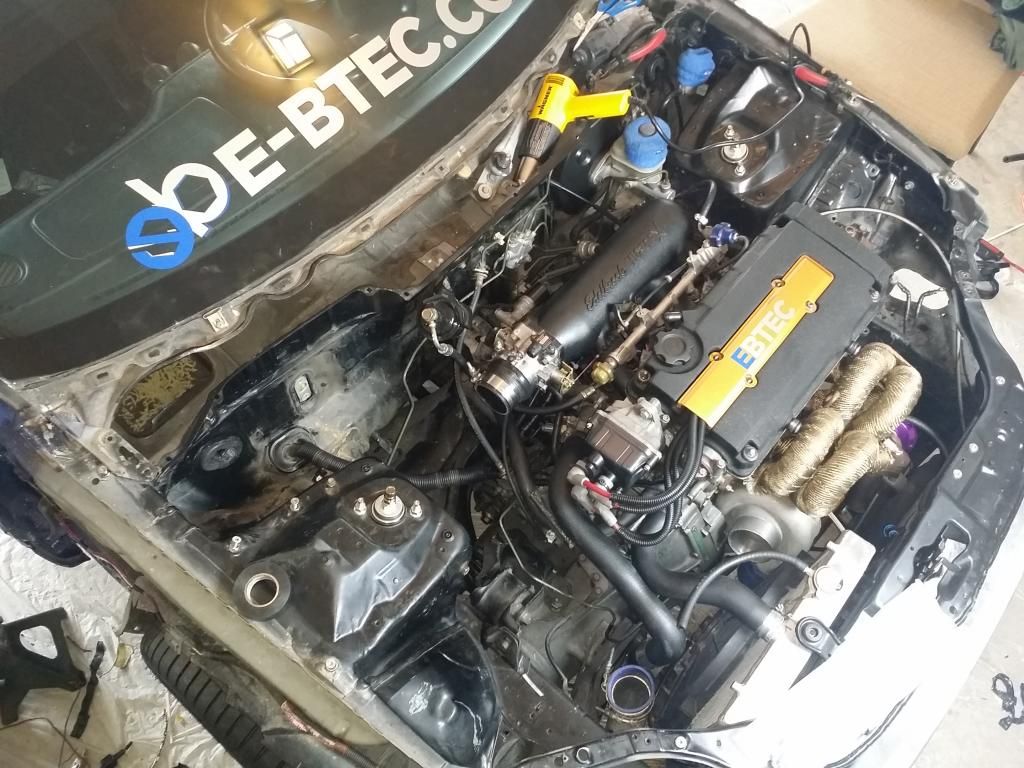
Got all the loom stripped off, now it was time to plug everything back in and start shortening and lengthening wires......lots of fun!
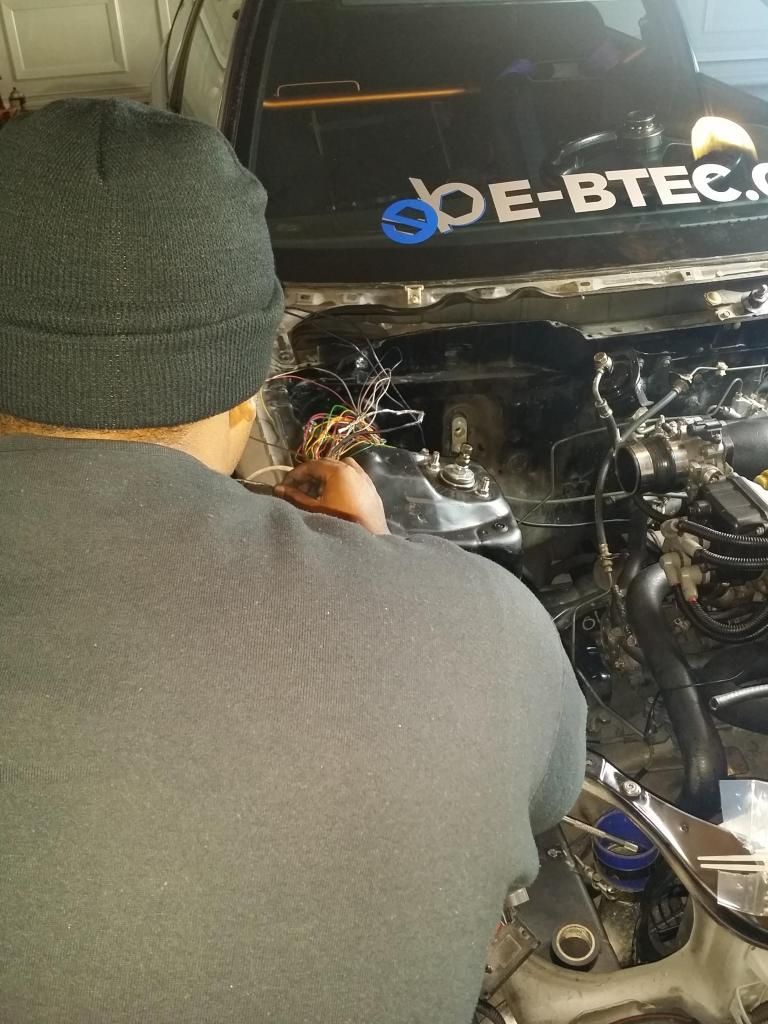
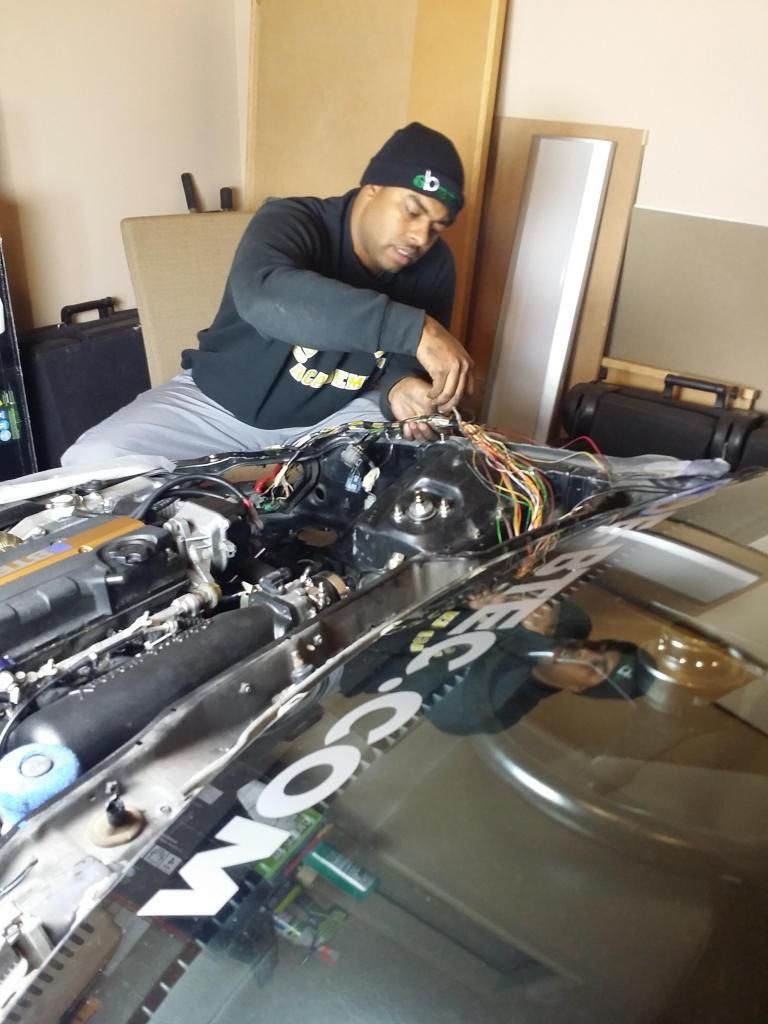
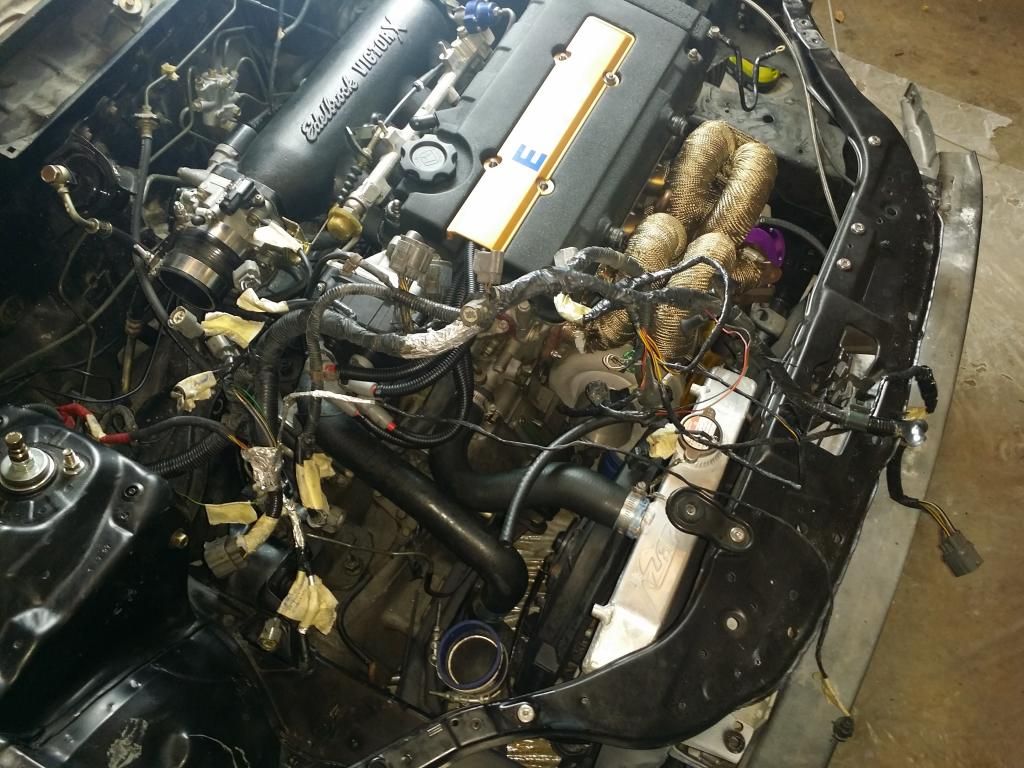
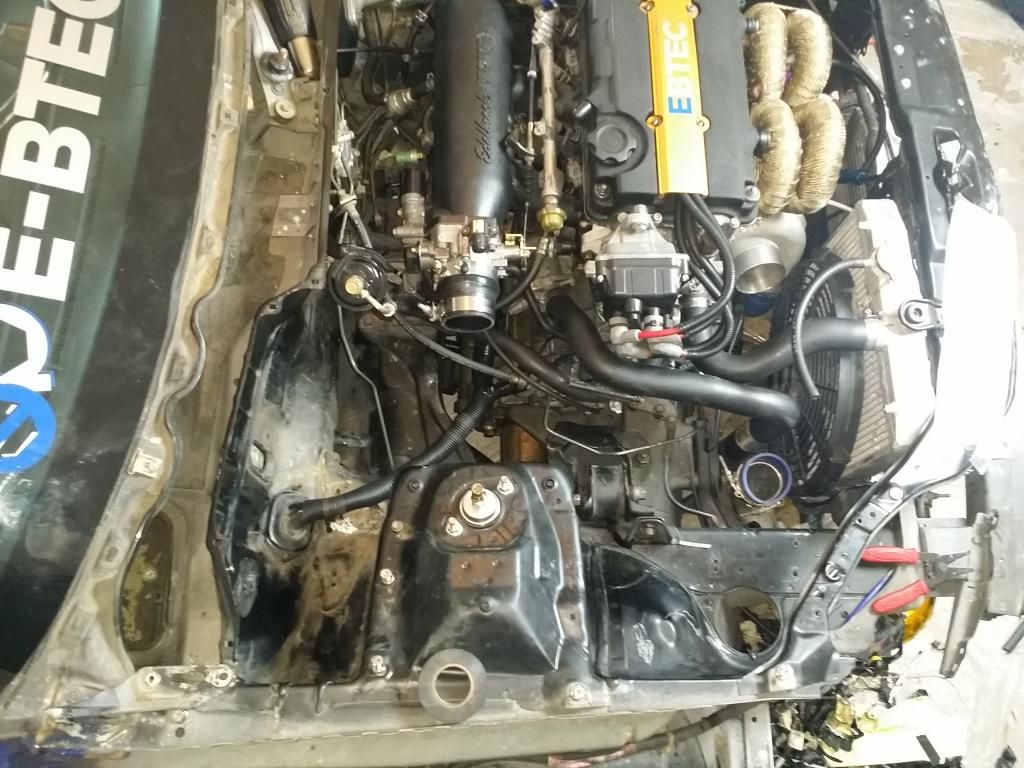
Started to reloom everything with braided sleeving and shrink tubing
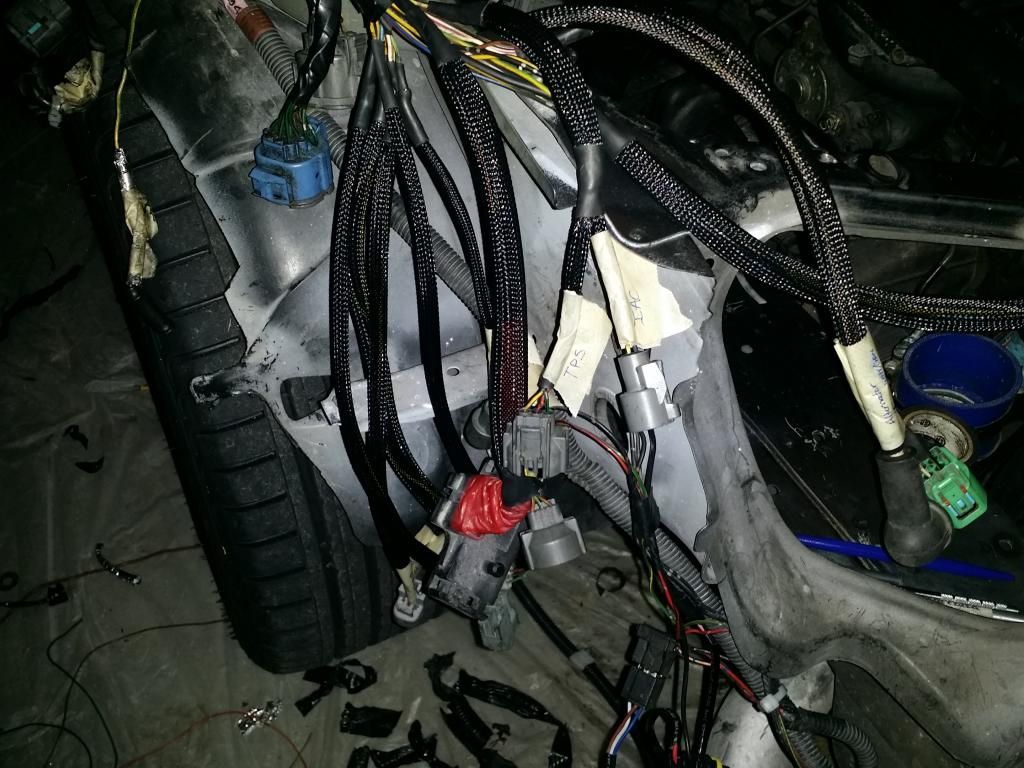
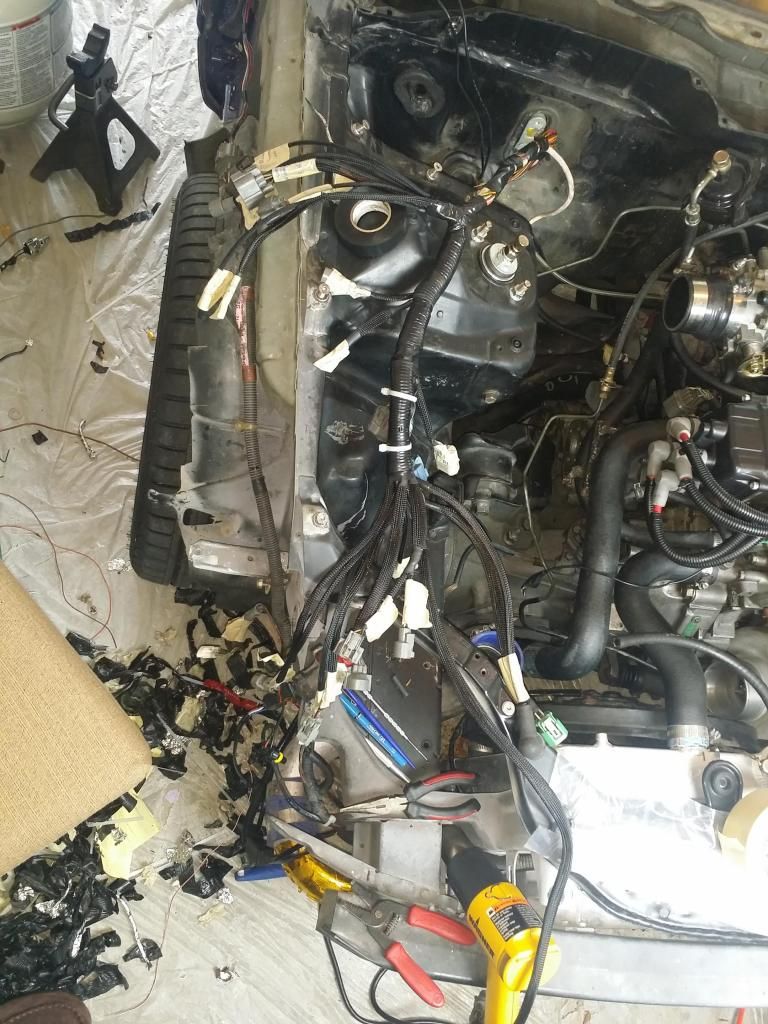
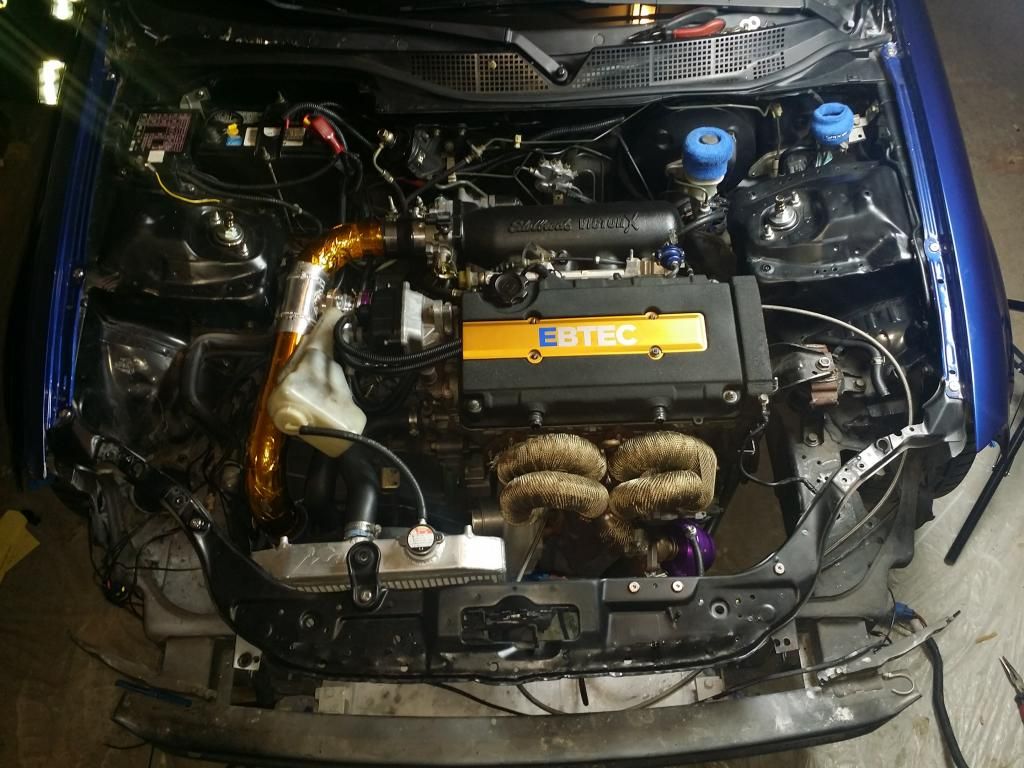
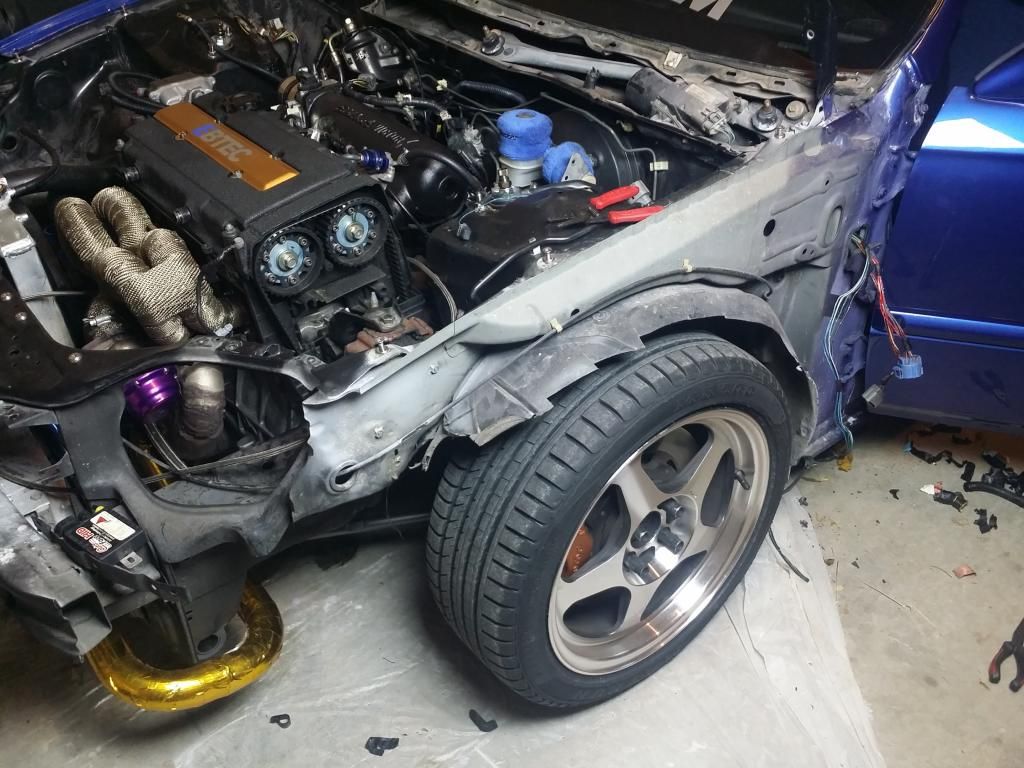
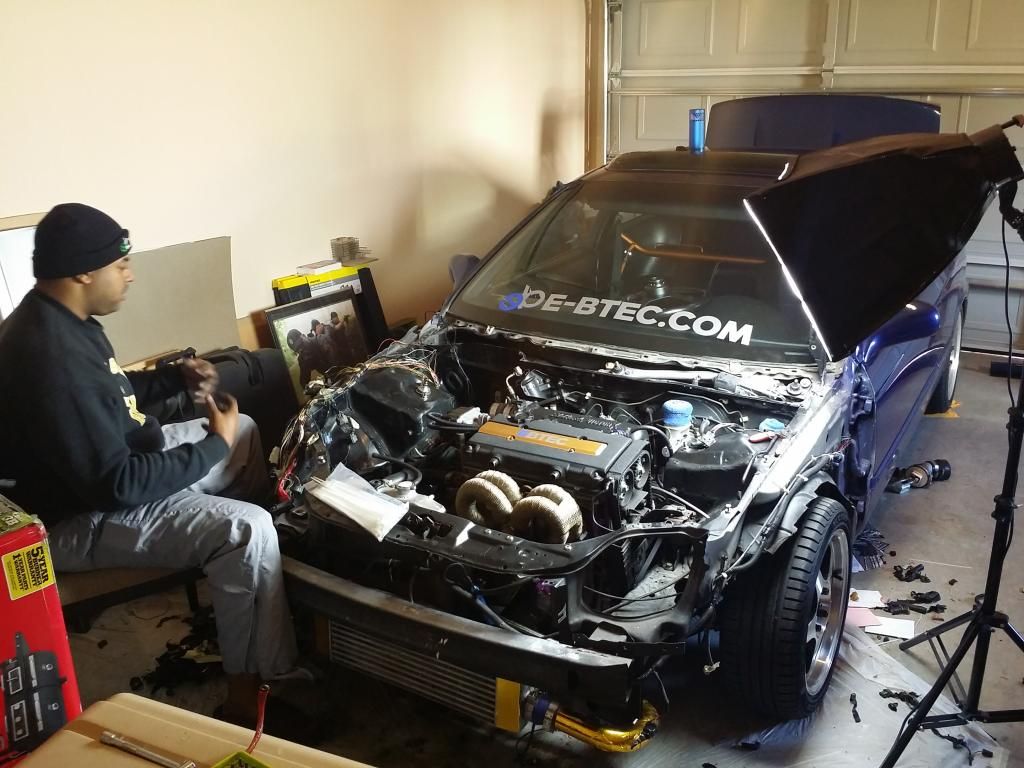
This is after everything was pretty much done. I was unable to reloom the large bundle of wires in the braided sleeving, as I didn't order the correct size to do it with. I have another solution for this just have to wait for it to come in the mail.
Looks much better under there!!!

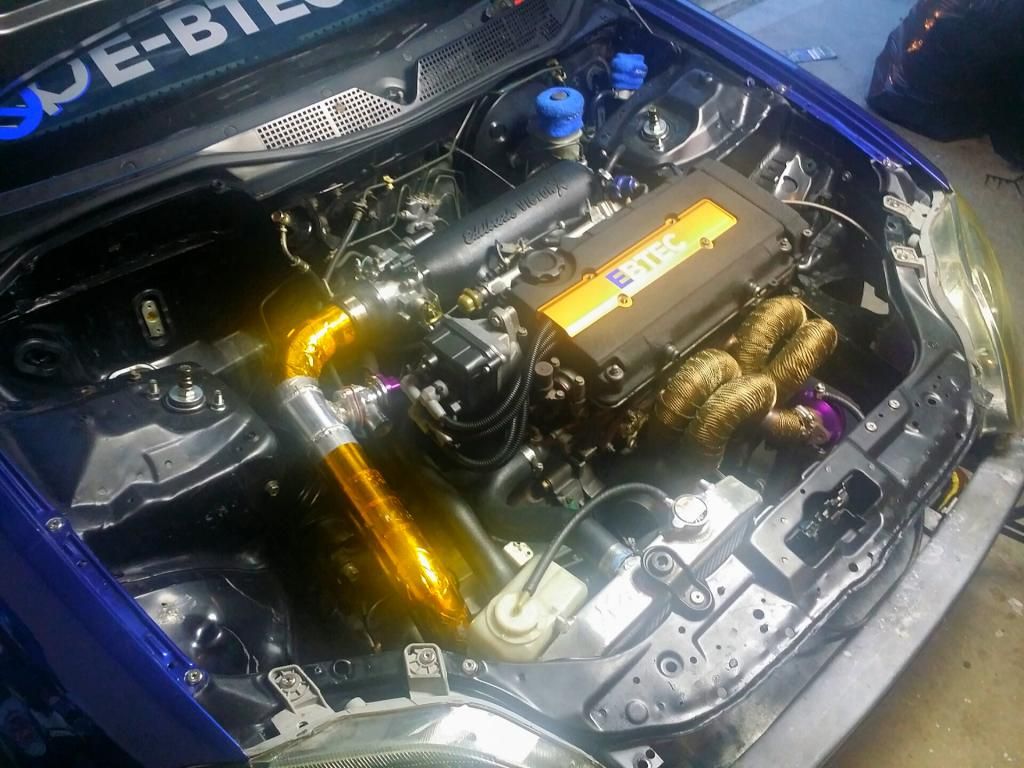
After completing the wire tuck I didn't want to put my catch can back in it's original place (right over the driver's side motor mount) so I sold it and made a simpler and smaller one that it now mounted up against the radiator support, nicely tucked out of the way. It came out pretty nice, I like the black fittings with the black hoses.
Now the only thing that's next is to send my intake manifold, turbo manifold, valve cover and intercooler piping to a buddy of mines at Coatings MD, to have him coat everything in gloss black. After that I'm going to paint the bay but I'm not sure if I just want to go back with black or pearl white. Thanks for checking everything out, hope everyone likes the progress.
Here is a pic of the car before I got started, I ended up peeling the plasti dip that was on the passenger side off of the wheels. Now all of the wheels are polished again.

First thing that I started with was the adding of some five point harnesses and a harness bar.

Then I wanted my exhaust to be a little quieter so I went to my buddies over at EBTEC and had them hook me up with a Vibrant muffler. Man do I love how quiet it's gotten since then. Put it this way my engine/camming is louder then the exhaust now and I love it. I had the guys add a little turn down to the tip for that extra little flare, came out perfect!


After the exhaust I had been looking long and hard for a carbon/kevlar hood and trunk. Luckily some of the guys at EBTEC remembered a post of one for sale online. I got in touch with the guy and he still had both the hood and trunk so I scooped them up. Man is it nice and extremely light. I was told that the hood and trunk that I have is one of a very few in the U.S. so I guess that's pretty cool. Sneak peak pic, better photos coming soon!

I had been putting off doing a wire tuck for a very long time, mainly because of the horror stories that I've heard about people really messing their cars up due to not doing it correctly. Plus I'm lazy and just didn't want to do it. Well I got a wild hair about a week ago and just dove right in. I ordered my braided sleeving and shrink tube from wirecare.com. After it arrived in the mail I got started. I started with the headlight harness, as everyone had stated that it is the easiest and provides the most yield as far as looks go. It went pretty smoothly and before I knew it I was done. After completing that I started messing around with the fuse box and figured out that it unplugs from the bottom. Now this was my big question; why do people cut all of the wires that lead to the fuse box when relocating it under the dash? Doesn't make any sense to me, I just simply unplugged the harness and fed the plugs through the fire wall. After doing that I wanted to mount the fuse box inside the passenger air bag compartment but realized that my head is too big to fit between the windshield and dash in the event I had to troubleshoot anything inside of the fuse box. So I mounted the fuse box inside of the glove box. After mounting it I trimmed the glove box until it was pretty much cut in half. I then took the end piece that was cut off and plastic welded it to the remaining pieces of the glove box that was still attached. This worked out very well as I still can store important documents while making a new home for the fuse box. I really like how it came out. The wire running from the alternator that connects to the fuse box was just barely long enough to still screw in to the fuse box. I had to extend the positive wire that runs from the battery quite a bit, as I relocated the battery to the trunk using a battery relocation kit from Taylor. I then went ahead and cleaned up the engine harness, stripped off all the old wire loom and electrical tape, eliminated plugs that I no longer use, shortened/lengthened some wires and finally reloomed everything. I really like how everything came out.
As I got started

After pulling the headlight harness out

Man it was a sea of wires, at this point I felt that I was in over my head lol!


Pulled the harness plug through a hole that is already used for the wiring that runs to my doors and after running the harness around the outside of the engine bay I was done.

Now it was time to find a suitable place for my fuse box and I found it in the glove box.

After cutting and then plastic welding my glove box back together, came out pretty good.


Used this kit from Taylor to relocate the battery to the trunk, very straight forward.

Then it was time to clean up the engine harness.

Everything was tagged and labeled properly so I knew where everything plugged back into.

Got all the loom stripped off, now it was time to plug everything back in and start shortening and lengthening wires......lots of fun!


Started to reloom everything with braided sleeving and shrink tubing


This is after everything was pretty much done. I was unable to reloom the large bundle of wires in the braided sleeving, as I didn't order the correct size to do it with. I have another solution for this just have to wait for it to come in the mail.

Looks much better under there!!!


After completing the wire tuck I didn't want to put my catch can back in it's original place (right over the driver's side motor mount) so I sold it and made a simpler and smaller one that it now mounted up against the radiator support, nicely tucked out of the way. It came out pretty nice, I like the black fittings with the black hoses.

Now the only thing that's next is to send my intake manifold, turbo manifold, valve cover and intercooler piping to a buddy of mines at Coatings MD, to have him coat everything in gloss black. After that I'm going to paint the bay but I'm not sure if I just want to go back with black or pearl white. Thanks for checking everything out, hope everyone likes the progress.
Last edited by SRDFTITAN; Dec 31, 2014 at 02:27 PM.

Trial User
Joined: Jan 2015
Posts: 2
Likes: 0
From: Lawrenceville, GA
Just read it all at work, it gives me motivation to start working on my hatch and especially since this car is also in Georgia.
Thread Starter
Honda-Tech Member
iTrader: (3)
Joined: Apr 2005
Posts: 496
Likes: 0
From: ROME, GA, UNITED STATES
Thread Starter
Honda-Tech Member
iTrader: (3)
Joined: Apr 2005
Posts: 496
Likes: 0
From: ROME, GA, UNITED STATES
Got some new updates. Got the hood and trunk all mounted up and its starting to look like a car again. Got some more stuff on order and in the works.
Thanks everyone for checking out my build.


Thanks everyone for checking out my build.
Thread Starter
Honda-Tech Member
iTrader: (3)
Joined: Apr 2005
Posts: 496
Likes: 0
From: ROME, GA, UNITED STATES
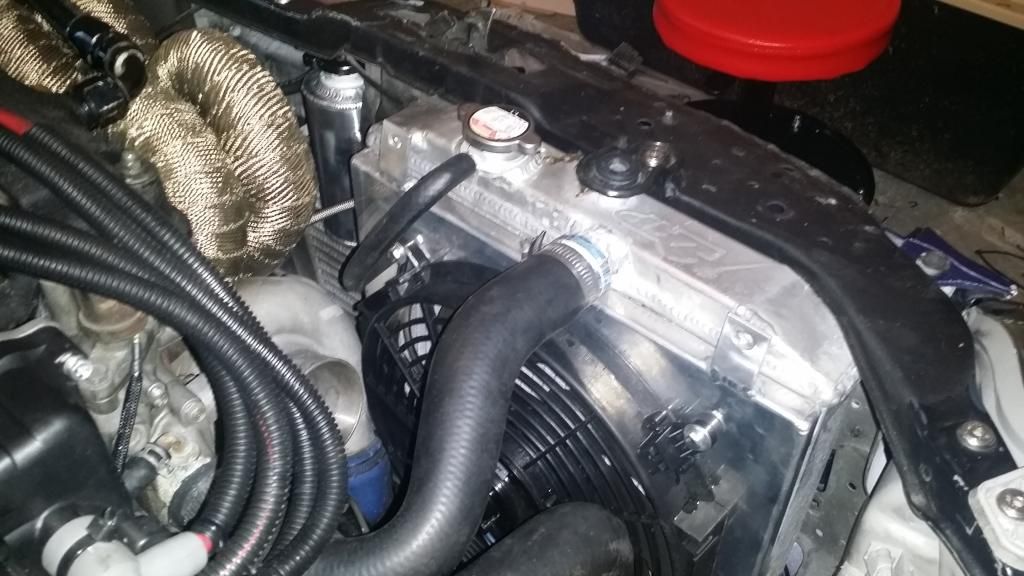
Got some more updates. Ordered a new radiator fan and got it installed.
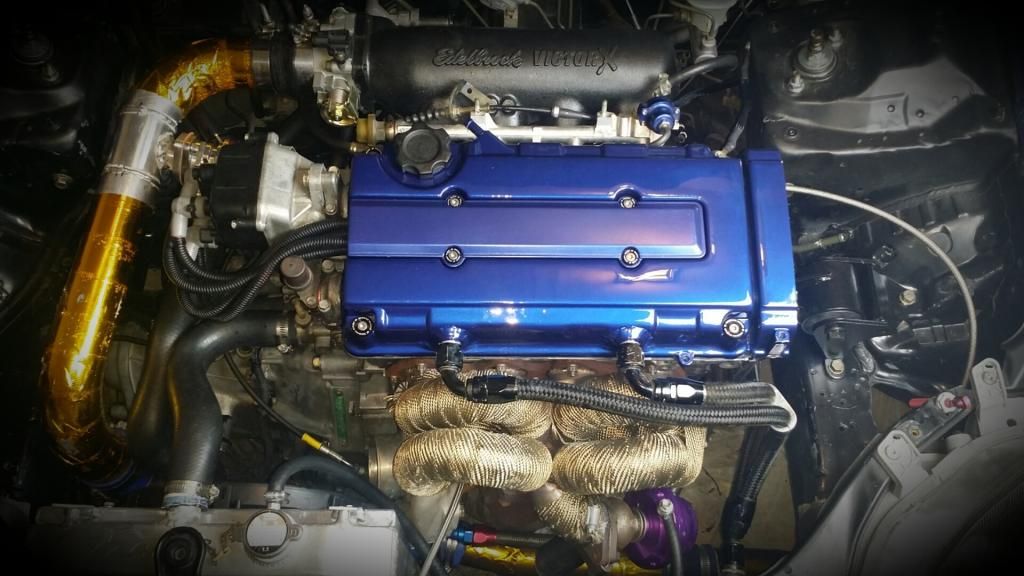
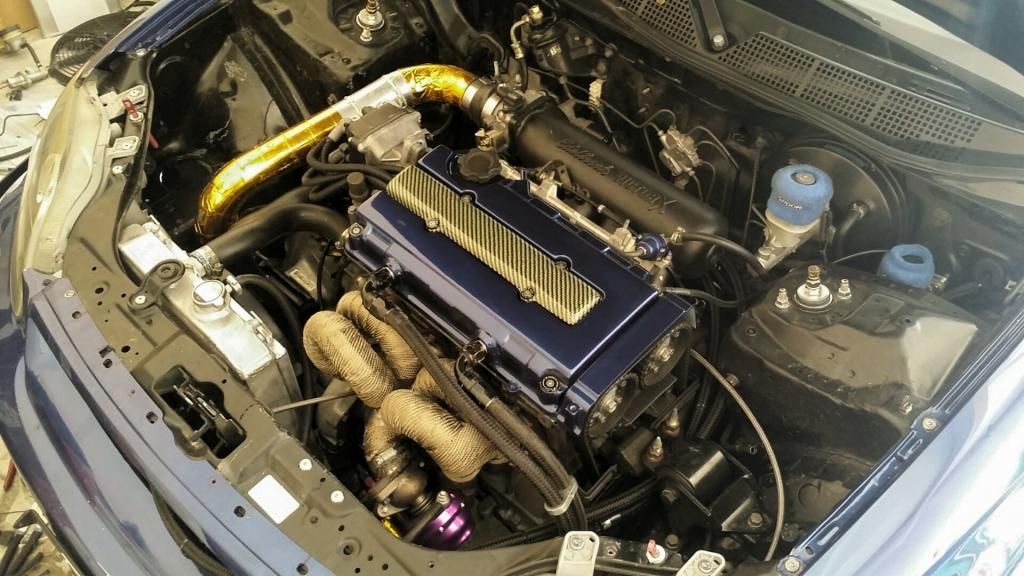
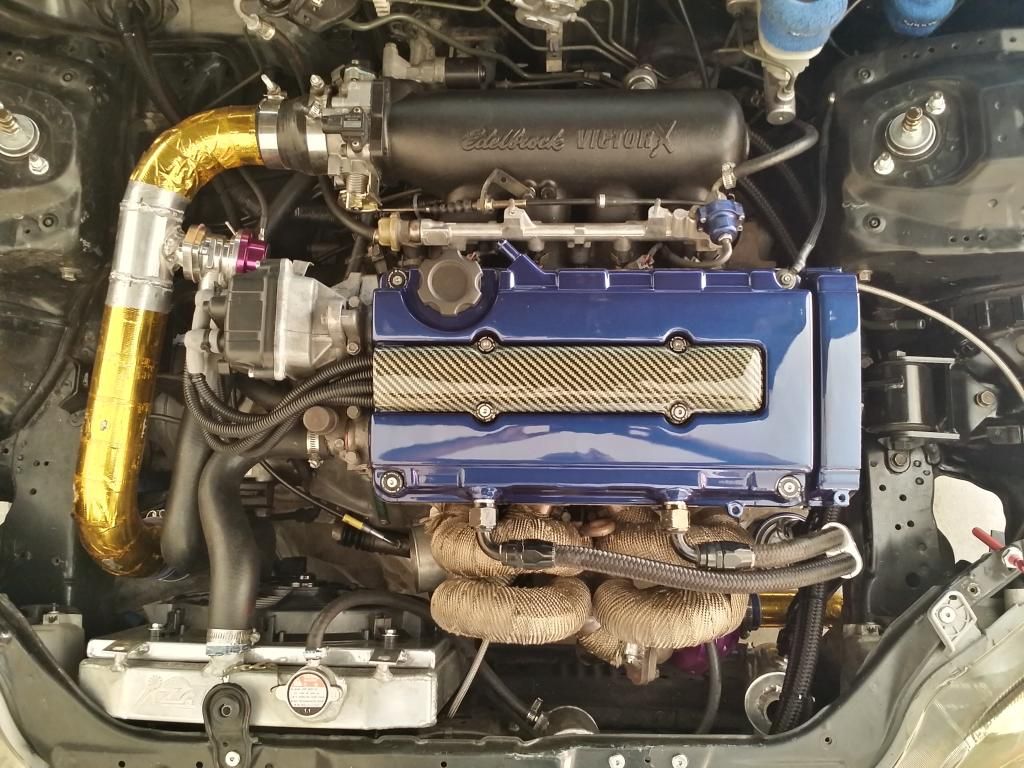
Stripped my valve cover and repainted it montego blue metallic to match my car.
Also ordered a new set of motor mounts, S2000 clutch master cylinder, circuit hero spacer and Goodridge clutch line.

Then took a road trip with the guys up to the tail of the dragon, its like 300 or so turns on the side of a mountain. It was awesome, the car did very well.


After going on the day trip it ended up being about 500 miles of some really hard driving. I started noticing my oil temperatures spiking really high on the way back home. So I decided to order a oil cooler and oil filter relocation kit. Got everything installed, but I'm still working out some leaks. I did however let the car run for a very long time and took the car around the block and noticed a 40 degree drop in temps so I'm pleased.

I initially bought a small electric fan for the cooler but it wasn't enough room for it. I ended up placing the cooler between my intercooler and radiator. The radiator fan should keep the temps down and the radiant heat from the radiator should keep the oil temps up, as the oil cooler is pretty large.
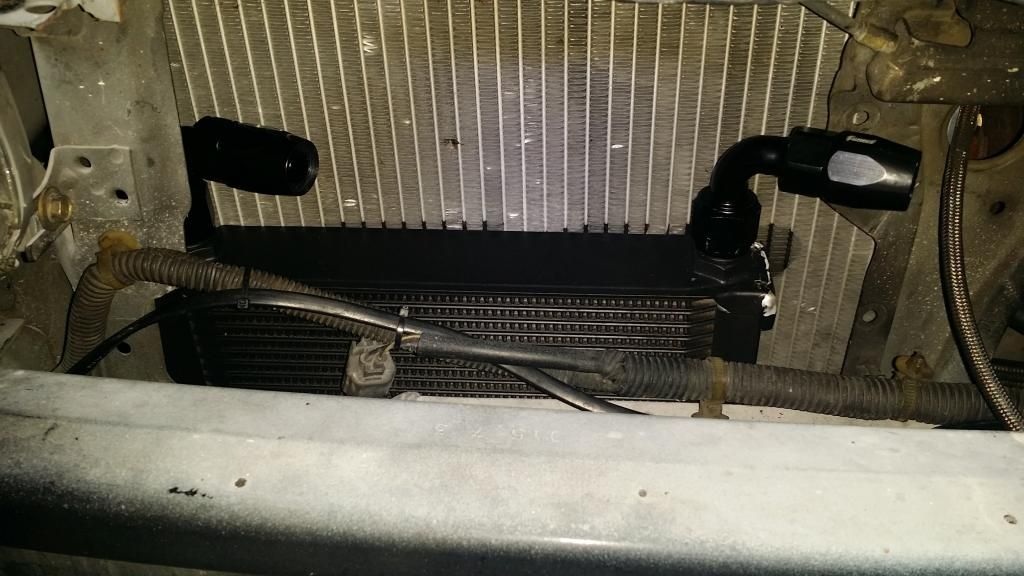
Relocated the oil filter to the driver's side frame rail. Its going to be much easier to do oil filter changes now.
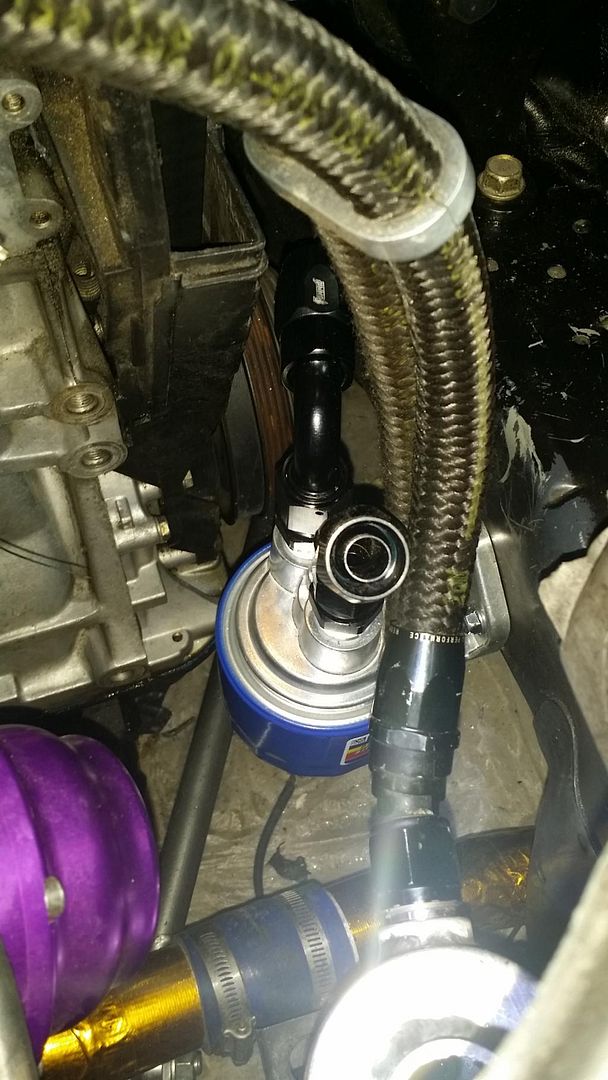
Mounted my lines


I then ordered a carbon kevlar spark plug cover to try and tie in the kevlar from the outside to the inside... I guess lol.


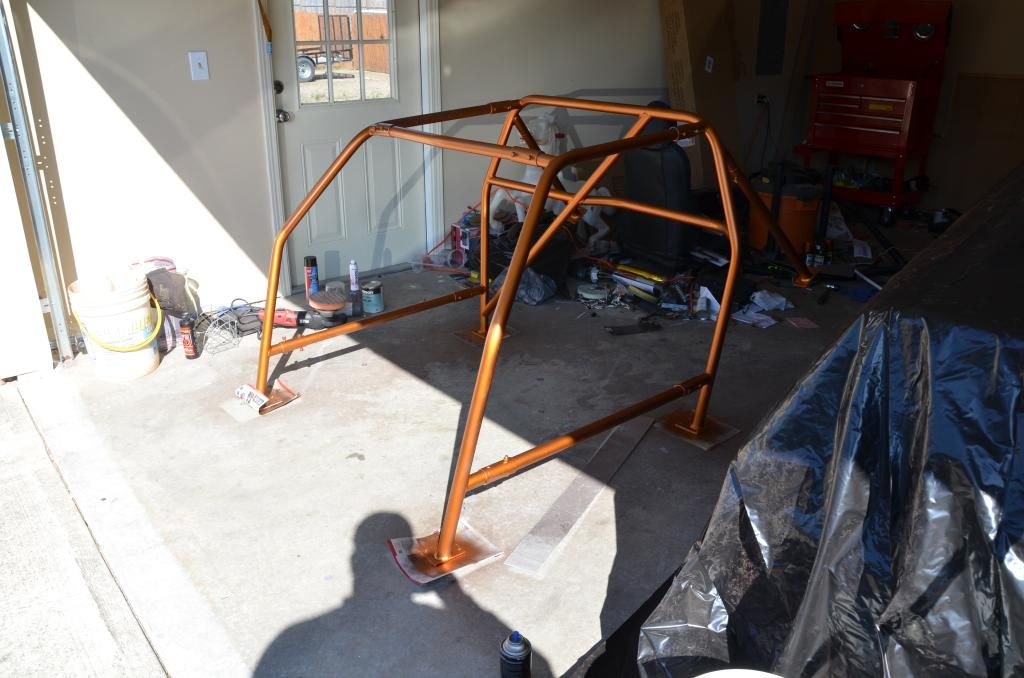
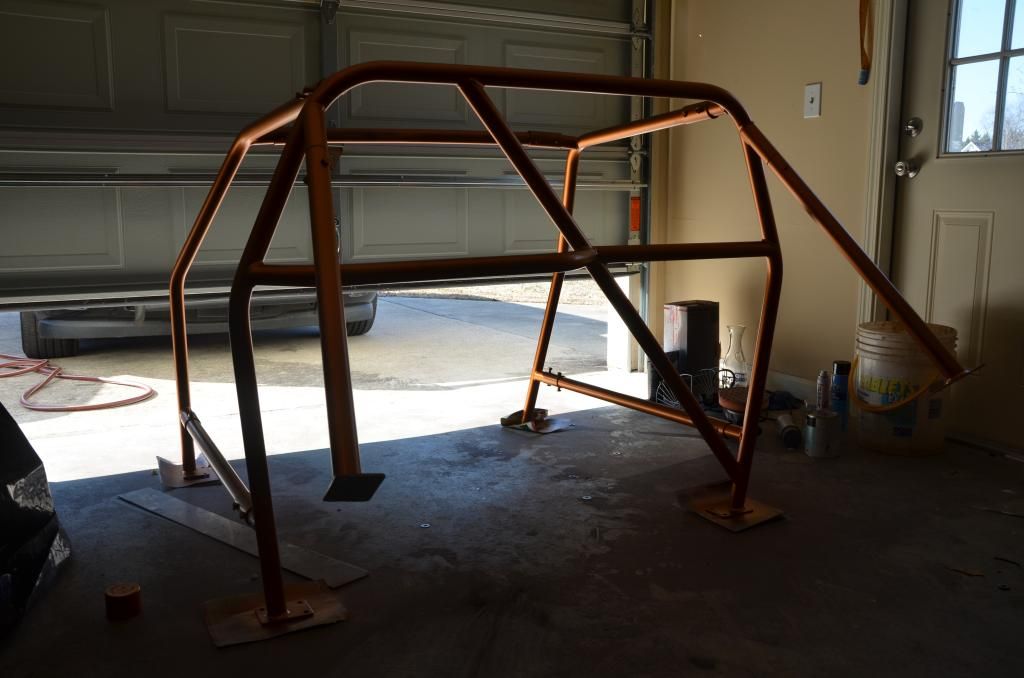
Then I lucked up and got a stupid deal on a Autopower 6 point roll cage and it was local!! I jumped on it as soon as I saw it. Got it back home and cleaned it up some. Ended up painting it (temporarily) and got it half way installed. I still have to drill the holes and do some interior panel and carpet trimming to button it up. I'm really liking it.
Just after bringing it home.


Sorry for the crappy *** pics but they will owrk for now. Thanks for stopping by.

Stripped my valve cover and repainted it montego blue metallic to match my car.

Also ordered a new set of motor mounts, S2000 clutch master cylinder, circuit hero spacer and Goodridge clutch line.

Then took a road trip with the guys up to the tail of the dragon, its like 300 or so turns on the side of a mountain. It was awesome, the car did very well.


After going on the day trip it ended up being about 500 miles of some really hard driving. I started noticing my oil temperatures spiking really high on the way back home. So I decided to order a oil cooler and oil filter relocation kit. Got everything installed, but I'm still working out some leaks. I did however let the car run for a very long time and took the car around the block and noticed a 40 degree drop in temps so I'm pleased.

I initially bought a small electric fan for the cooler but it wasn't enough room for it. I ended up placing the cooler between my intercooler and radiator. The radiator fan should keep the temps down and the radiant heat from the radiator should keep the oil temps up, as the oil cooler is pretty large.

Relocated the oil filter to the driver's side frame rail. Its going to be much easier to do oil filter changes now.

Mounted my lines


I then ordered a carbon kevlar spark plug cover to try and tie in the kevlar from the outside to the inside... I guess lol.


Then I lucked up and got a stupid deal on a Autopower 6 point roll cage and it was local!! I jumped on it as soon as I saw it. Got it back home and cleaned it up some. Ended up painting it (temporarily) and got it half way installed. I still have to drill the holes and do some interior panel and carpet trimming to button it up. I'm really liking it.
Just after bringing it home.


Sorry for the crappy *** pics but they will owrk for now. Thanks for stopping by.
Honda-Tech Member
Joined: Oct 2006
Posts: 755
Likes: 0
From: Covered in Tattoos, NYC
Car is looking really good. Only suggestions tho: the polished slips need to go, ruining the exterior. Also a 6pt cage in a street driven car is a very bad idea, lil accident and your head cracking open on the bars is going to be a problem. Even padded wont protect you without a helmet on. I would only install a 4pt roll bar on a street driven car, where a helmet isn't required. other than those, car is coming along very nicely
Thread Starter
Honda-Tech Member
iTrader: (3)
Joined: Apr 2005
Posts: 496
Likes: 0
From: ROME, GA, UNITED STATES
Car is looking really good. Only suggestions tho: the polished slips need to go, ruining the exterior. Also a 6pt cage in a street driven car is a very bad idea, lil accident and your head cracking open on the bars is going to be a problem. Even padded wont protect you without a helmet on. I would only install a 4pt roll bar on a street driven car, where a helmet isn't required. other than those, car is coming along very nicely

Honda-Tech Member
Joined: Apr 2013
Posts: 20
Likes: 0
From: Columbus, GA
I'm glad to see the newer pics of the cars progress looks great man. I think i need you to teach me how to paint lol my car looks like crap, since i spent my money on the motor and every where els.
Honda-Tech Member
Joined: Nov 2006
Posts: 140
Likes: 0
From: Burgenland, Austria


Thread Starter
Honda-Tech Member
iTrader: (3)
Joined: Apr 2005
Posts: 496
Likes: 0
From: ROME, GA, UNITED STATES
Thanks everyone for the compliments. I'm thinking of either getting rpf1's or k1's. But I think the rpf1's are the only ones that will fit over my brakes. I will be purchasing some Dunlop Direzza ZII Star Specs for the track. I'm going to keep the slips though. May plasti dip them. Anyway enjoy the pics.
Thread Starter
Honda-Tech Member
iTrader: (3)
Joined: Apr 2005
Posts: 496
Likes: 0
From: ROME, GA, UNITED STATES
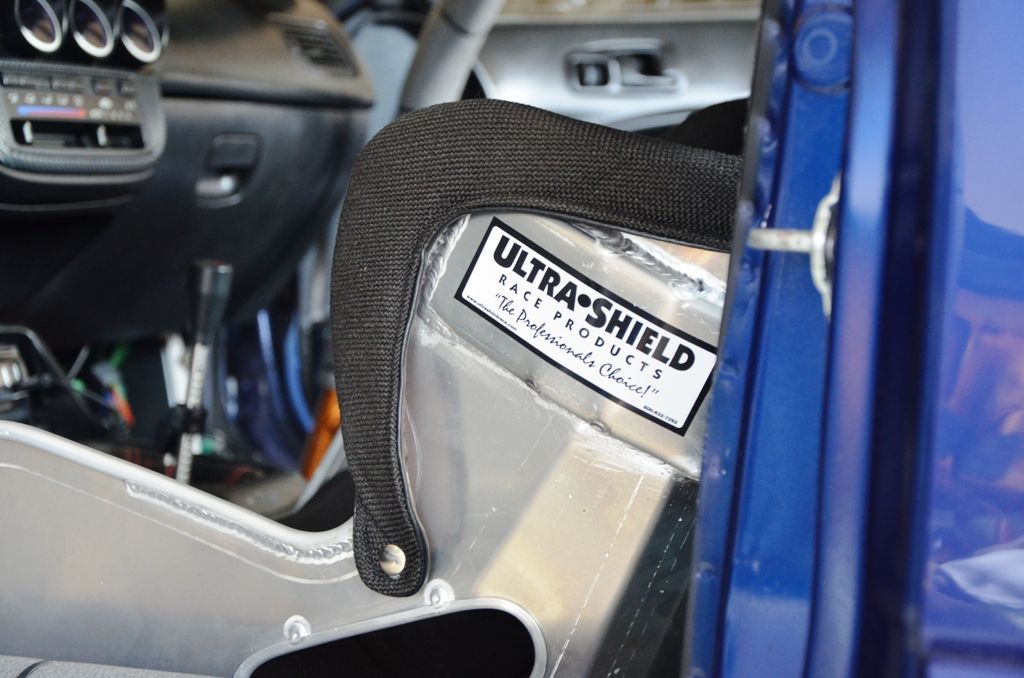
Ok got a nice little update. I pulled all of the carpet out and finally drilled all of the holes for the Autopower cage. After drilling the holes I got everything all snugged down. I can't believe how well a 92-95 Civic cage fits into a 97-00 Civic. Everything lined up perfectly and clearances were great. Autopower makes a great product. After getting the cage in I started modifying and installing my Ultra Shield VS Halo seat that I got from Racedaysafety.com. Raceday Safety is local if you live in Georgia. They are located in Dallas to be exact and always have seats, belts, helmets, suits, etc in stock. I like dealing with them because they are a small business and their prices are very good. Plus when purchasing a seat it is crucial to go somewhere and sit in as many seats as you can so that you can get the proper size. Anyway after a few hours I got the seat in and bolted up with some new floor pan/seat bracket bolts. Then I installed the 5 point RCI harness and then added some padding to the cage. I really like how everything came out. The car is pretty much done, all I need to do is track down one last oil leak, buy some 16" "track" wheels and then wrap them in Dunlop Direzza ZII Star Specs. My next event is right around the corner (March 28th) so its about that time. Oh and I almost forgot, about a week ago I was able to buy a brand new 18' steel bottom car hauler. Got a really good deal on it and it will be finally nice to not have to borrow someones trailer. I plan on adding a tire rack, tool box, winch, gas grill and other amenities to make the track days more enjoyable. Thanks for looking.
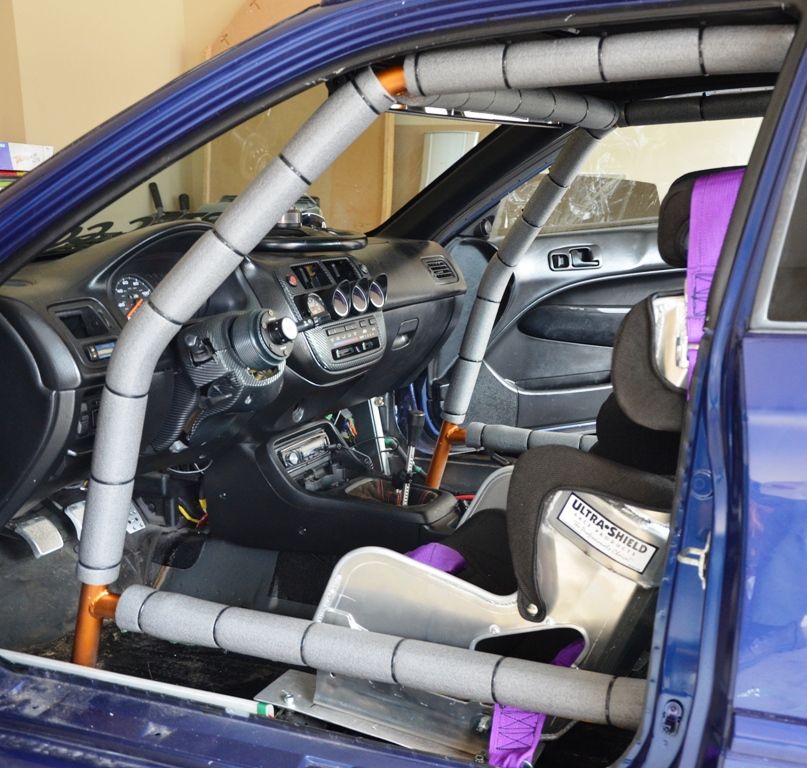
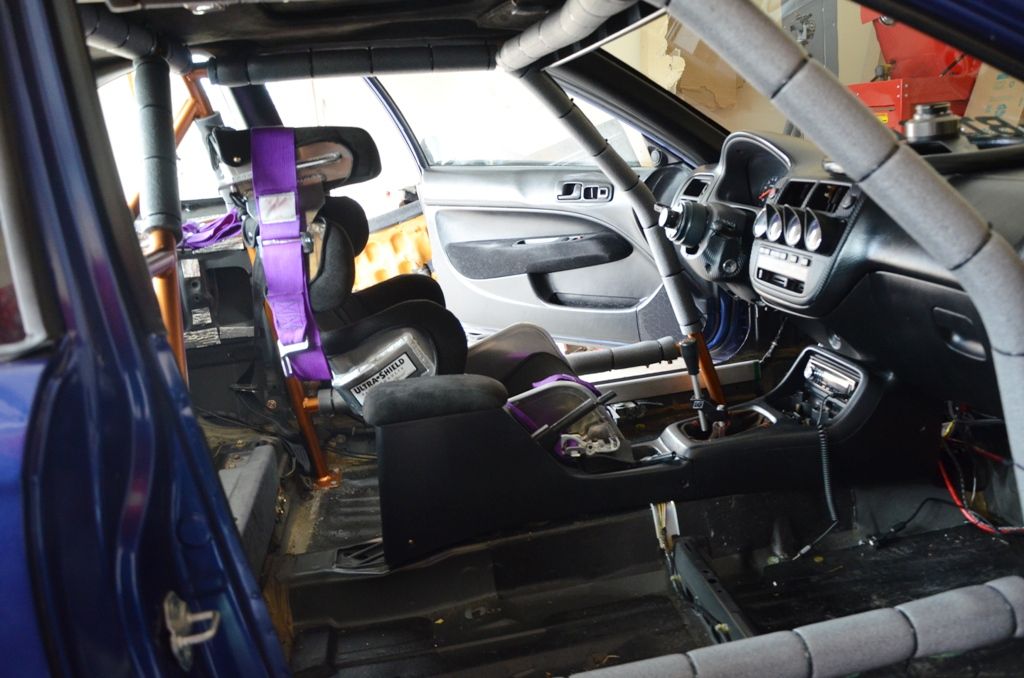
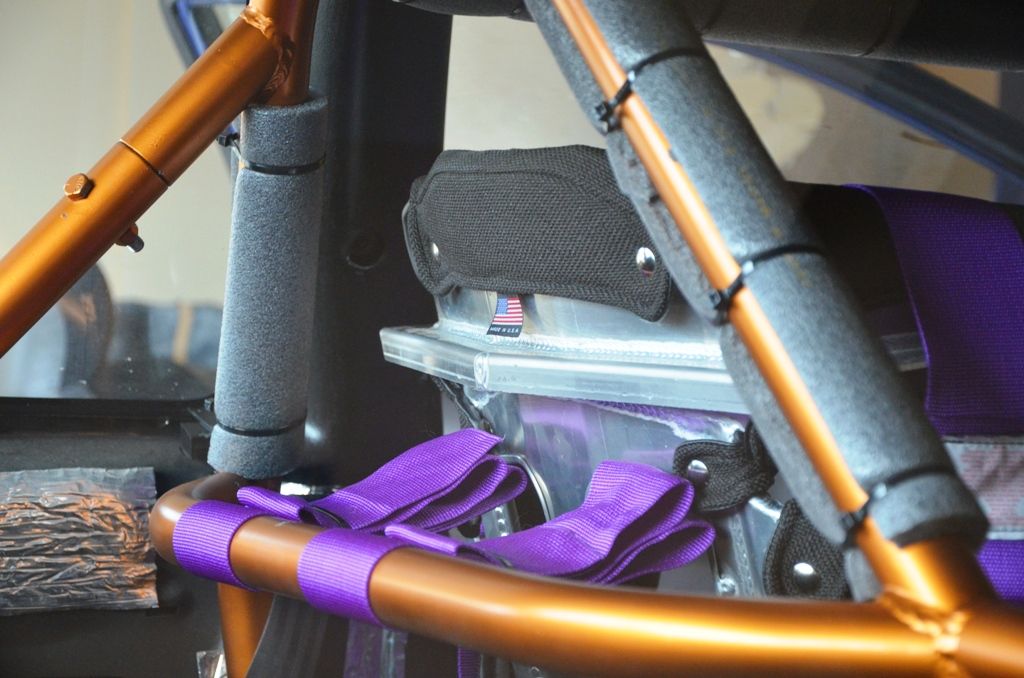
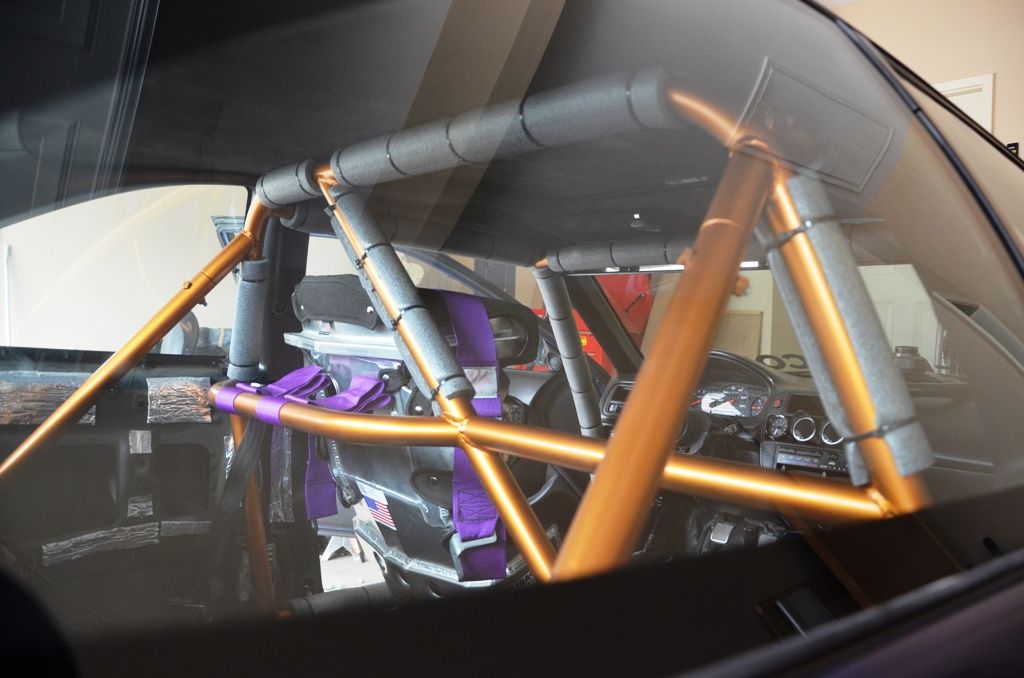
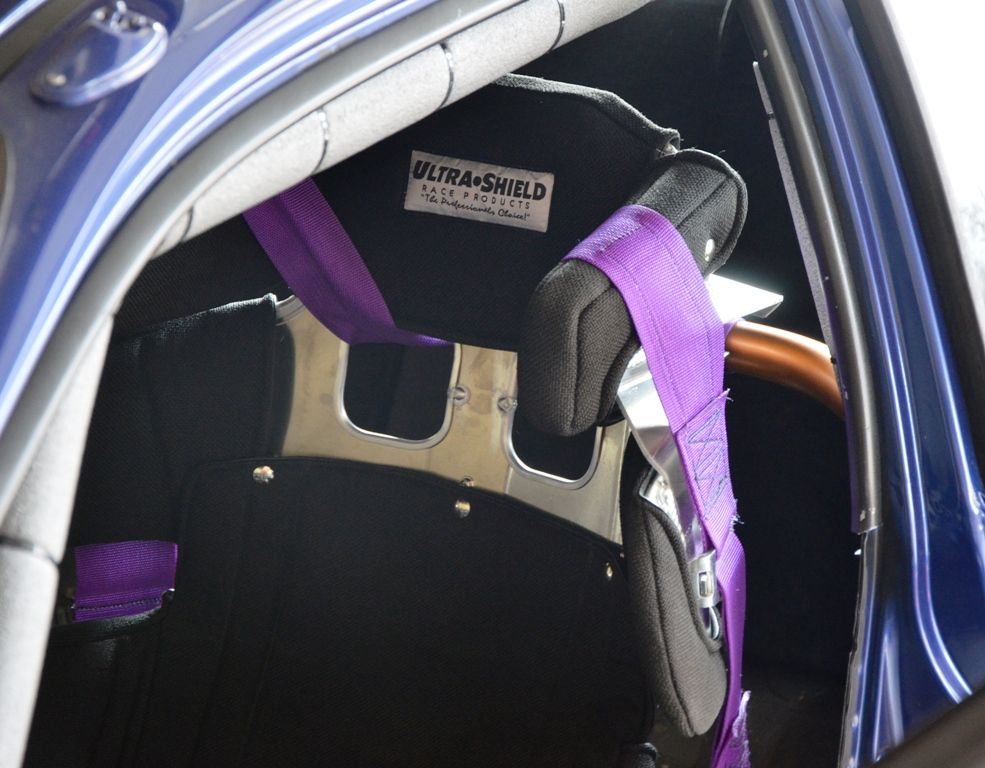
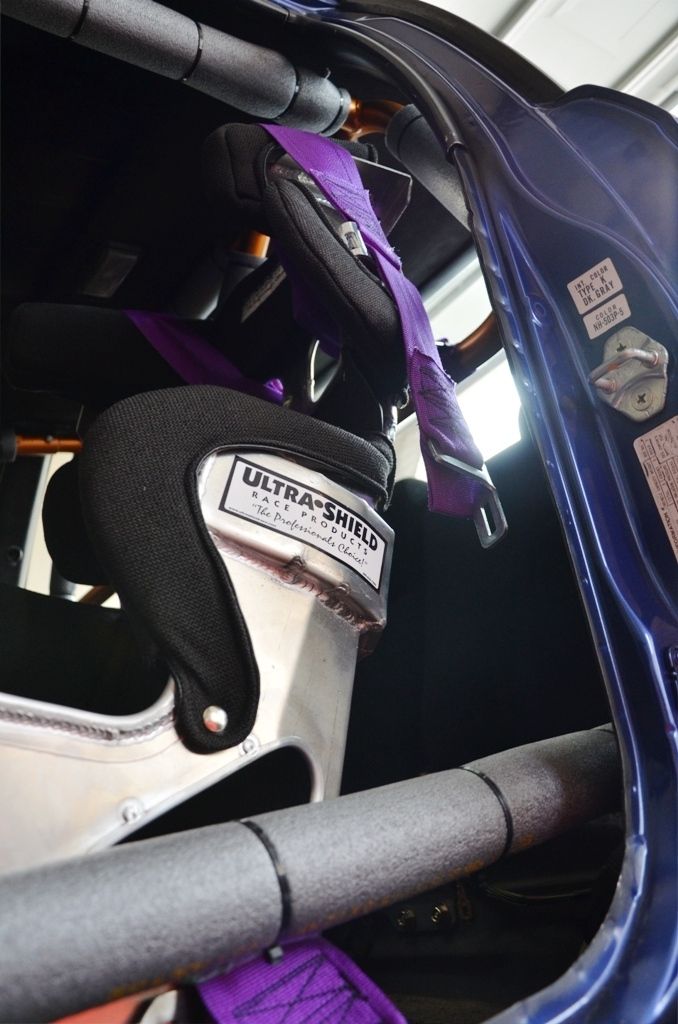
Some of the pics may seem repetitive.....got a little camera happy lol!!!!


Some of the pics may seem repetitive.....got a little camera happy lol!!!!
Thread Starter
Honda-Tech Member
iTrader: (3)
Joined: Apr 2005
Posts: 496
Likes: 0
From: ROME, GA, UNITED STATES
Thread Starter
Honda-Tech Member
iTrader: (3)
Joined: Apr 2005
Posts: 496
Likes: 0
From: ROME, GA, UNITED STATES
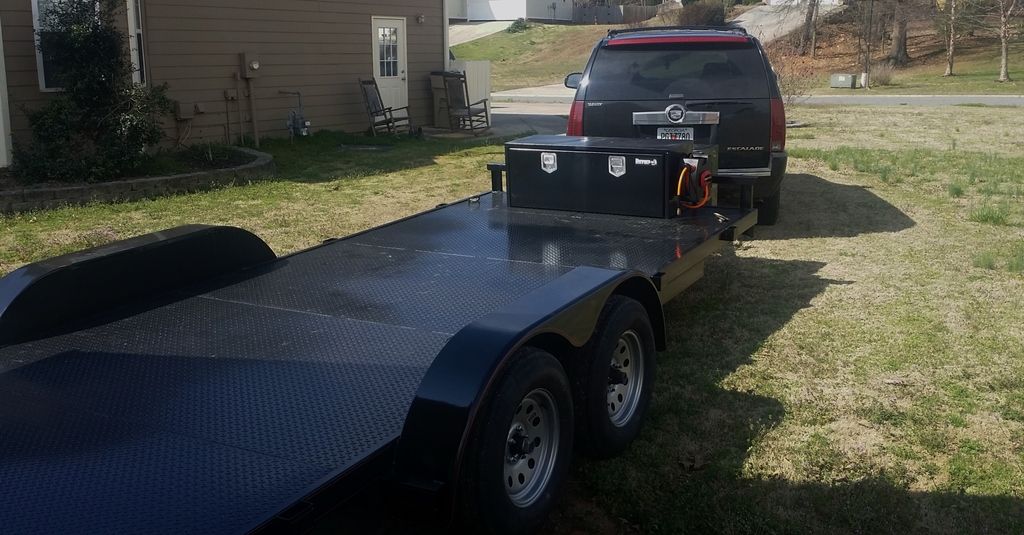
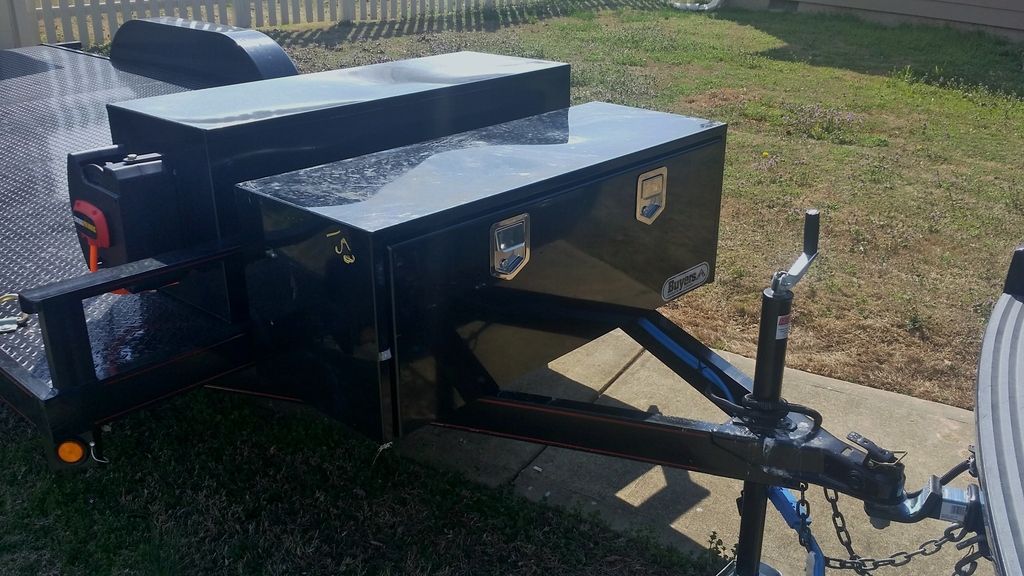
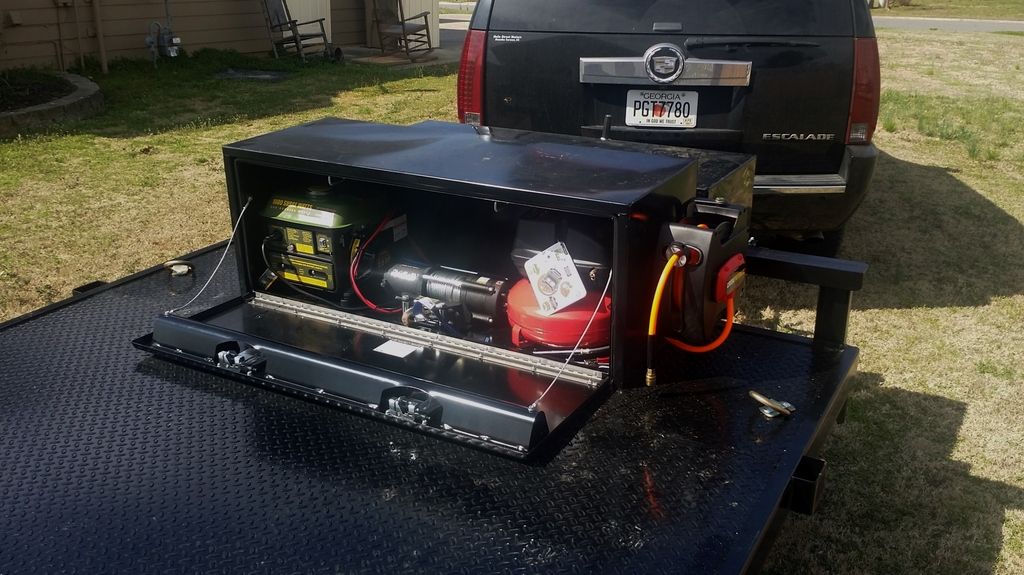
I am very excited about this update. I purchased a new 18 foot steel deck trailer to pull my car with. I only paid right at $2,000.00 for it. It came with trailer brakes already installed and weighs in at 2000lbs. I'm really excited about it, as I was tired of borrowing trailer when I needed one. The trailer is black to match my tow vehicle and has a 2 foot dovetail.
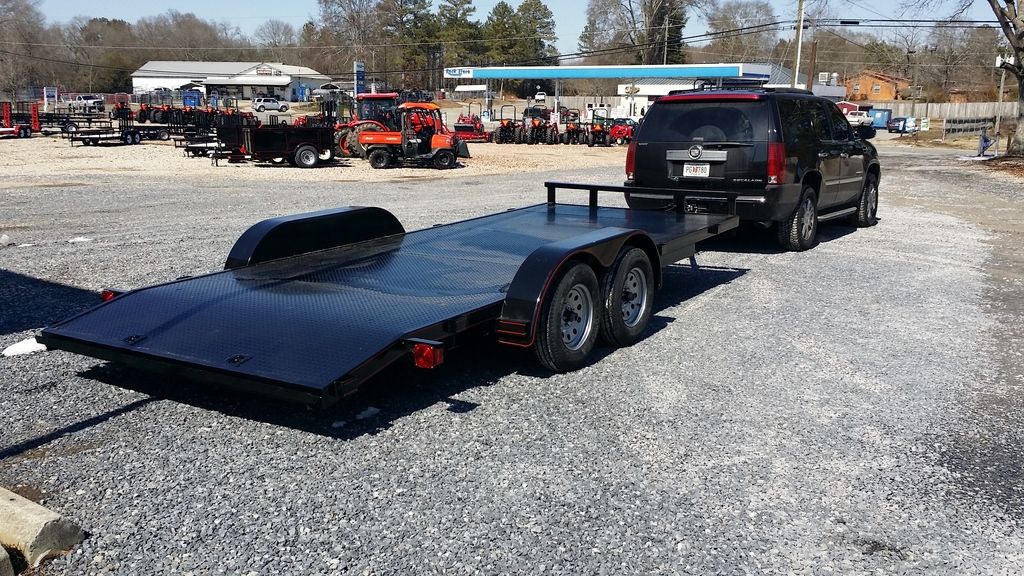
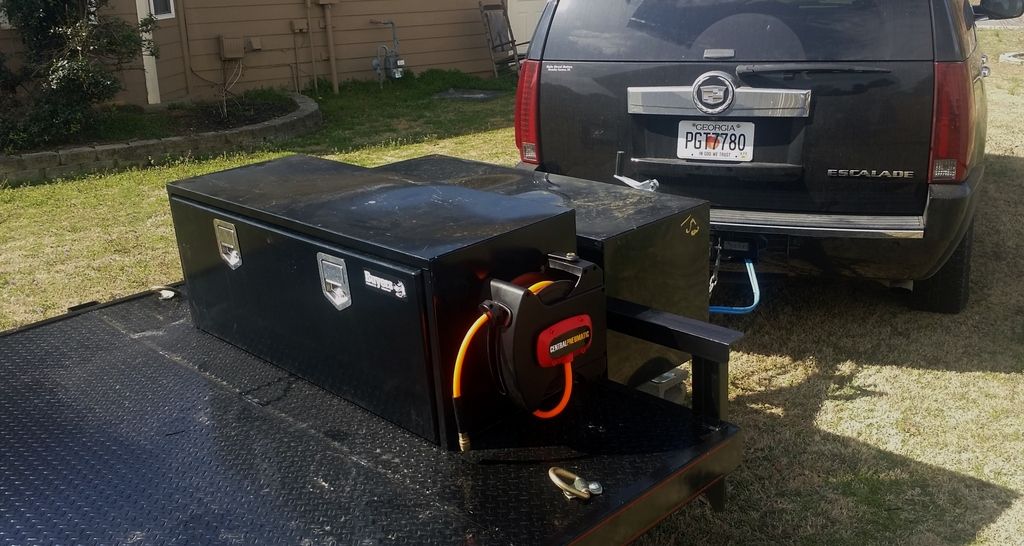
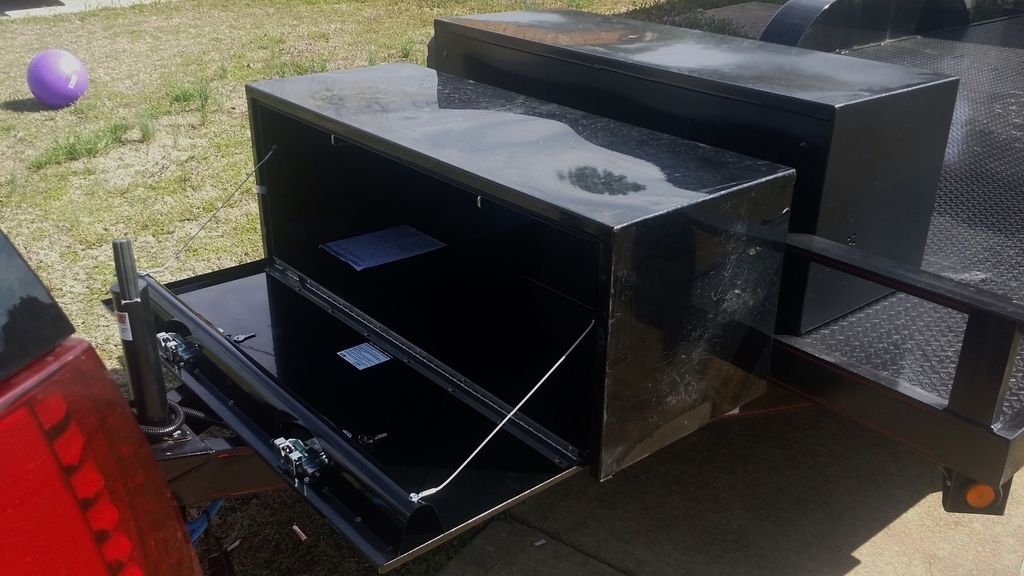
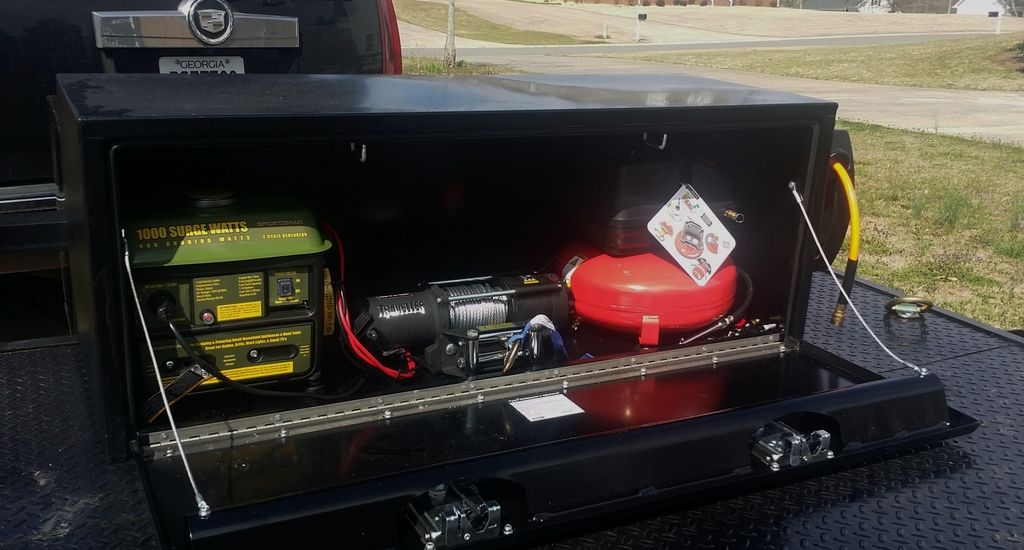
So you know I couldn't just leave the trailer stock lol. So I bought two underbody mount tool boxes. They measured 48 inches long by 18 inches wide and deep. The retail price for these boxes were in the mid 400's. I found a place right around the corner from my house that had plenty of them. At first I thought the boxes were used but once I opened up the inside I realized that the boxes were brand new. Nothing had ever been inside of them. They even had the keys still zip tied to the inside. Best part, I only paid $300.00 for both of them. Anyway I wanted to use one of the boxes to mount a generator, winch and air compressor inside of. The other one I wanted to use to store my jack, jack stands, tools and other stuff. So I mounted the first box on the actual trailer and mounted the other one on the trailer tongue.
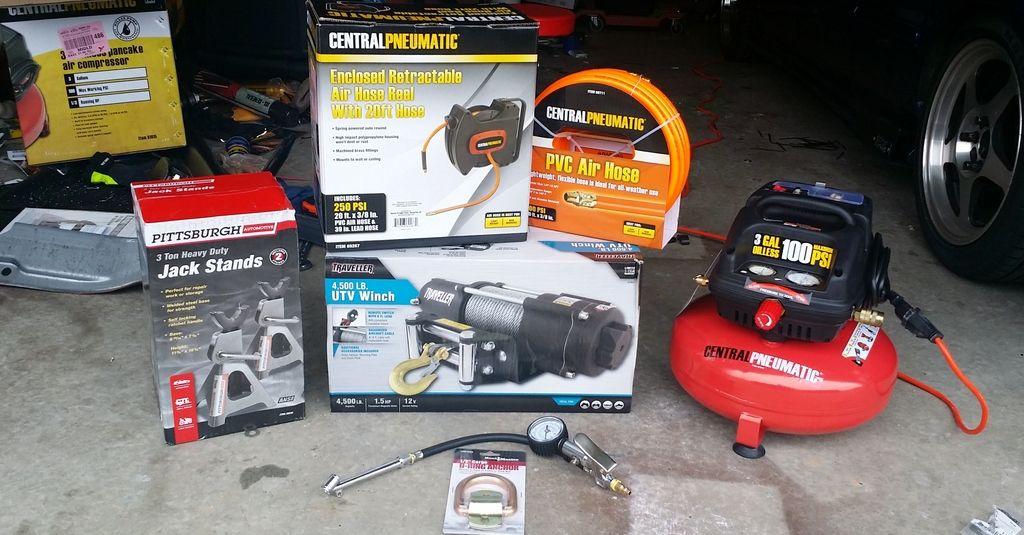

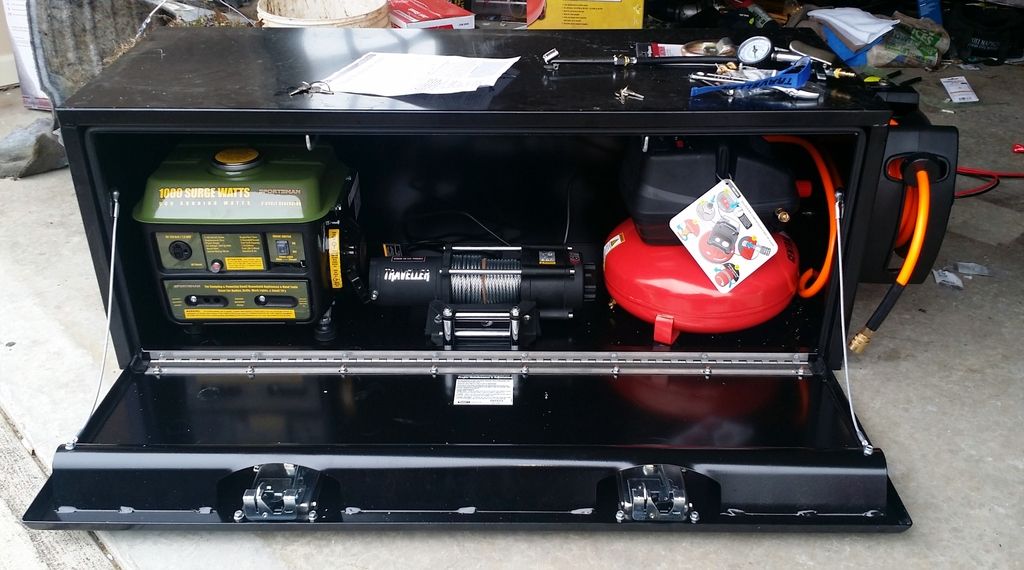
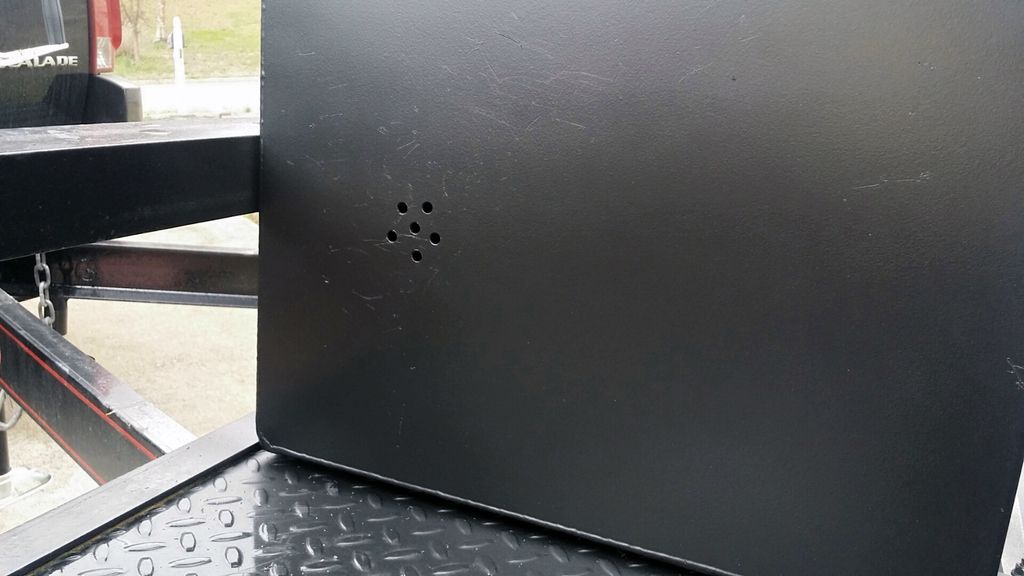
The next order of business was to have portable power and air. So I purchased a 1000 watt generator from Home Depot for $99.00. It came with a 1 year warranty and I bought a 2 year extended warranty for a total of 3 years coverage. Best part was it arrived in the mail in 2 days. The next thing I bought was a 3 gallon air compressor from harbor freight. It was funny because I was at harbor freight the day before and saw the same compressor for $60. The next day it was on sale for $39.00 so I picked it up. I also picked up a 20 foot retractable air hose reel from harbor freight for $35.00. I then went to tractor supply and purchased their 4500 lb winch for $150.00. I then mounted everything inside the box, drilled a hole for the air hose to pass through and then drilled some more holes so the exhaust gasses from the generator could escape.
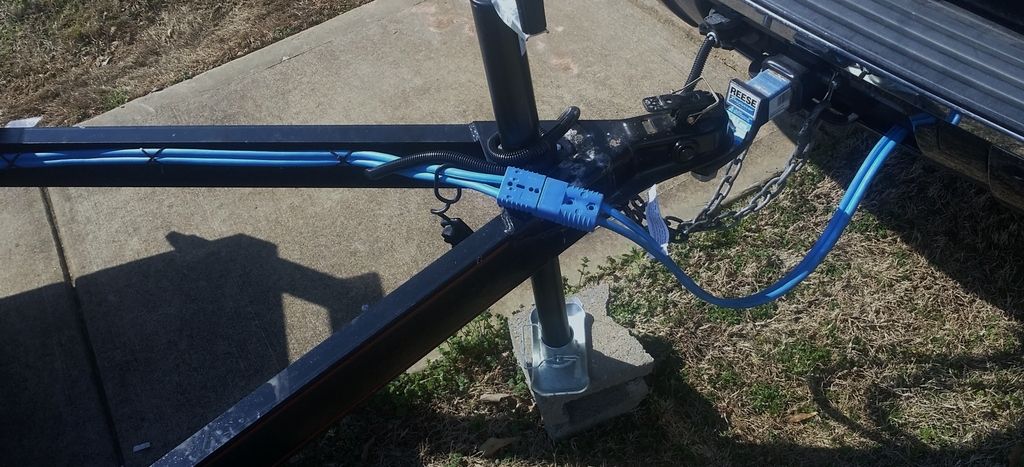
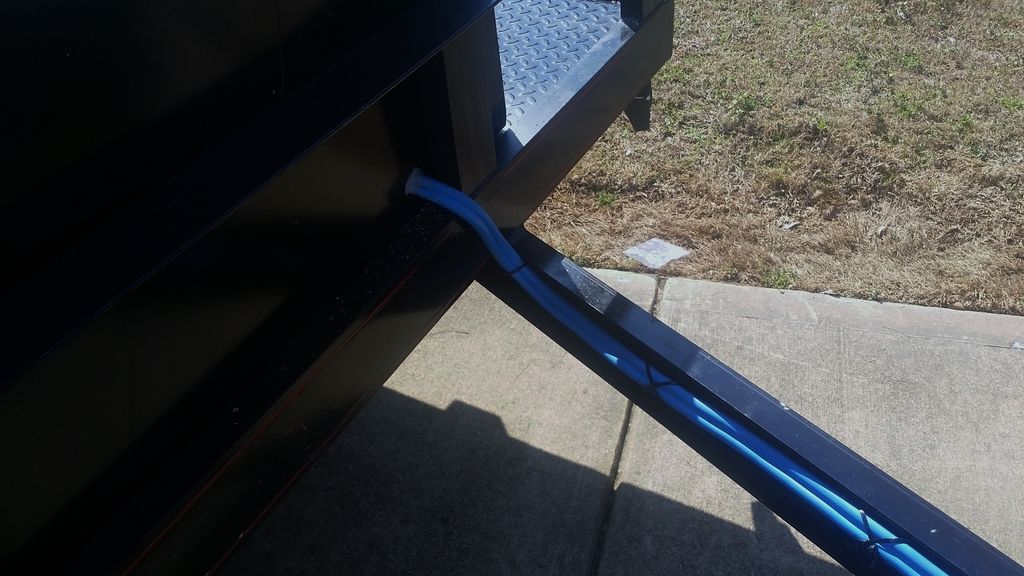

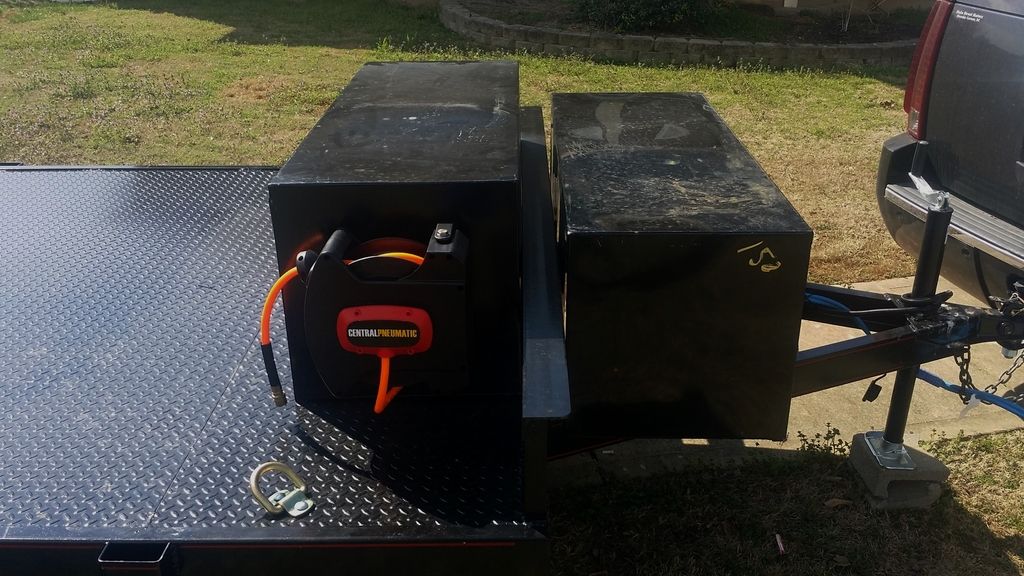
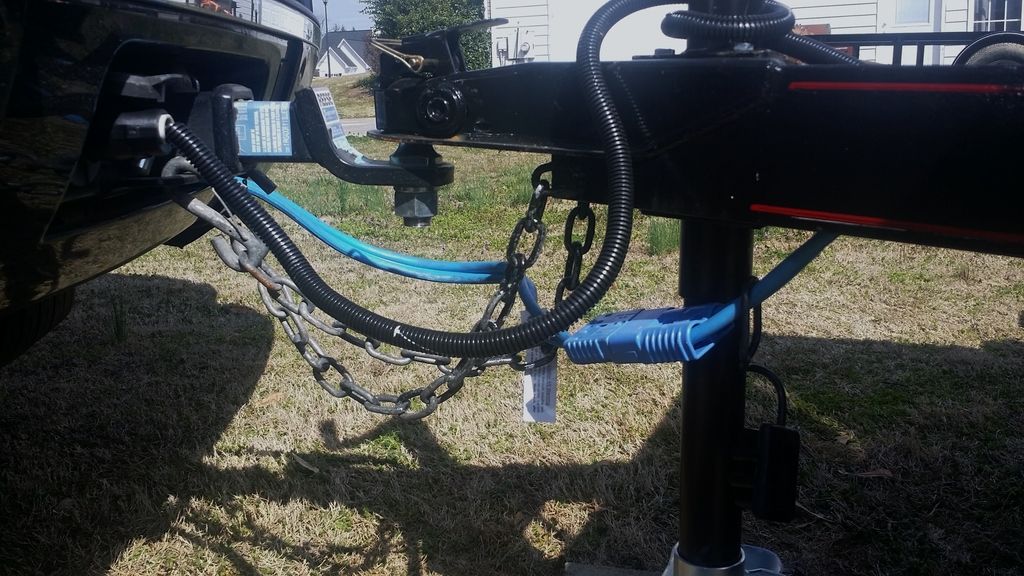
Now usually when winches are mounted to trailers the only power available for the winch is a battery. Only problem is the battery doesn't last very long and you have to remember to charge the battery before each use. I figured out a great way to solve this problem by buying a quick disconnect 25 foot 4 gauge jumper cable set commonly used by towing services. This way I can pull power from my tow vehicle battery and never have to worry about anything. Now however I did upgrade my tow vehicle battery to an optima just in case. I installed the cables/lines in my tow vehicle and then mounted the rest to the trailer, eventually connecting it to the winch. I had to drill a small hole in the box for this, but I was able to seal the hole back up with some silicone.
The absolute best part:
Trailer $2000.00
Under Mount boxes $300.00
Generator $100.00
Winch $150.00
Air Compressor $39.00
Retractable Hose Reel $35.00
2 Additional D rings $10.00
Quick Disconnect 4 gauge cable (25ft) $150.00
Weight Distribution Hitch $200.00
Grand Total: $2,984.00
Thats pretty cheap for a fully capable, fully functioning trailer that has it's own power and plenty of storage. A good example is when I was pricing trailers I was finding trailers just like mine for $3,000.00 and some even more than that and they had no accessories. So I'm very pleased. Only thing left to do is mount my weight distribution hitch. Anyway enjoy the pictures and comment.

So you know I couldn't just leave the trailer stock lol. So I bought two underbody mount tool boxes. They measured 48 inches long by 18 inches wide and deep. The retail price for these boxes were in the mid 400's. I found a place right around the corner from my house that had plenty of them. At first I thought the boxes were used but once I opened up the inside I realized that the boxes were brand new. Nothing had ever been inside of them. They even had the keys still zip tied to the inside. Best part, I only paid $300.00 for both of them. Anyway I wanted to use one of the boxes to mount a generator, winch and air compressor inside of. The other one I wanted to use to store my jack, jack stands, tools and other stuff. So I mounted the first box on the actual trailer and mounted the other one on the trailer tongue.


The next order of business was to have portable power and air. So I purchased a 1000 watt generator from Home Depot for $99.00. It came with a 1 year warranty and I bought a 2 year extended warranty for a total of 3 years coverage. Best part was it arrived in the mail in 2 days. The next thing I bought was a 3 gallon air compressor from harbor freight. It was funny because I was at harbor freight the day before and saw the same compressor for $60. The next day it was on sale for $39.00 so I picked it up. I also picked up a 20 foot retractable air hose reel from harbor freight for $35.00. I then went to tractor supply and purchased their 4500 lb winch for $150.00. I then mounted everything inside the box, drilled a hole for the air hose to pass through and then drilled some more holes so the exhaust gasses from the generator could escape.


Now usually when winches are mounted to trailers the only power available for the winch is a battery. Only problem is the battery doesn't last very long and you have to remember to charge the battery before each use. I figured out a great way to solve this problem by buying a quick disconnect 25 foot 4 gauge jumper cable set commonly used by towing services. This way I can pull power from my tow vehicle battery and never have to worry about anything. Now however I did upgrade my tow vehicle battery to an optima just in case. I installed the cables/lines in my tow vehicle and then mounted the rest to the trailer, eventually connecting it to the winch. I had to drill a small hole in the box for this, but I was able to seal the hole back up with some silicone.


The absolute best part:
Trailer $2000.00
Under Mount boxes $300.00
Generator $100.00
Winch $150.00
Air Compressor $39.00
Retractable Hose Reel $35.00
2 Additional D rings $10.00
Quick Disconnect 4 gauge cable (25ft) $150.00
Weight Distribution Hitch $200.00
Grand Total: $2,984.00
Thats pretty cheap for a fully capable, fully functioning trailer that has it's own power and plenty of storage. A good example is when I was pricing trailers I was finding trailers just like mine for $3,000.00 and some even more than that and they had no accessories. So I'm very pleased. Only thing left to do is mount my weight distribution hitch. Anyway enjoy the pictures and comment.
About that wire tuck thought, do you know about how much loom is required. Is this something u estimated or did you measure before buying?

Honda-Tech Member
Joined: Oct 2014
Posts: 21
Likes: 0
From: Santa Cruz
I might have missed this... but if you winch a powerless car onto the trailer, would the angle of the cable coming off the winch possibly rub/destroy the toolbox drop down door?


Thread
Thread Starter
Forum
Replies
Last Post
SRDFTITAN
Honda Civic / Del Sol (1992 - 2000)
15
Mar 5, 2012 06:39 AM