ED7 Build-up

Thread Starter
Member
Joined: Dec 2004
Posts: 1,244
Likes: 0
From: Bowling Green, KY, United States
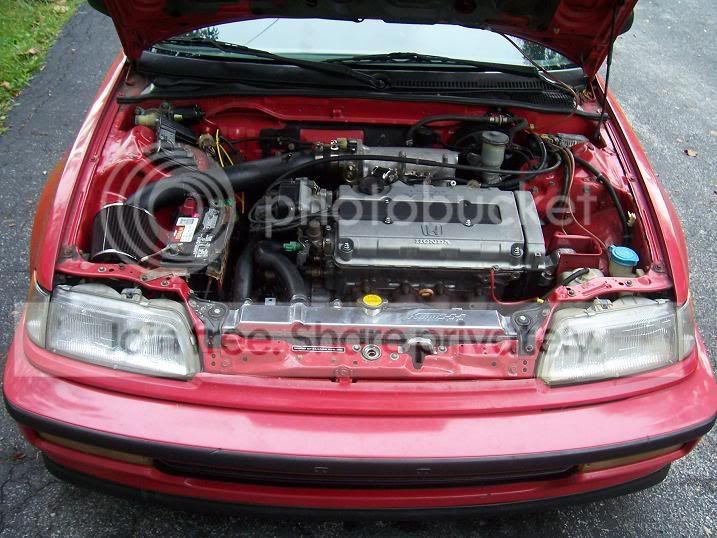
So the past year I've been trying to get a car built up the way I want it. I have even went so far to go to Virginia to buy an Si with a clean title that would last me.

I realize some of you may recognize some of these pictures (that I'll be posting later) as pictures that are in another thread I've already made, but that build kind of came to a halt and the host site for the pictures only works half the time.
My little brother drove his car for an extended period of time with half the amount of oil he was supposed to have in it and so it finally took a crap the other day. I was able to persuade him to let me sell him my D16A6 the other day for 350 (this includes me installing the engine and getting it running for him, so it's not all that bad), and I get to keep the parts that don't interchange between motors.
My car will be getting the B16A that I've been harboring in my garage for the last year and a half or so. Here is the final mod list:
-ITR intake manifold
-ITR throttle body
-ITR LMA's (old ones were sticking badly)
-Skunk 2 Pro Series Cam Gears
-Supertech Nitride-coated flat faced valves
-Supertech Dual Valvesprings
-Supertech Retainers
-Marshall FPG on fuel filter (OMG!)
-Rywire OBD0-OBD1 conversion, running a P28
-2.25 inch mandrel-bent exhaust (car already has)
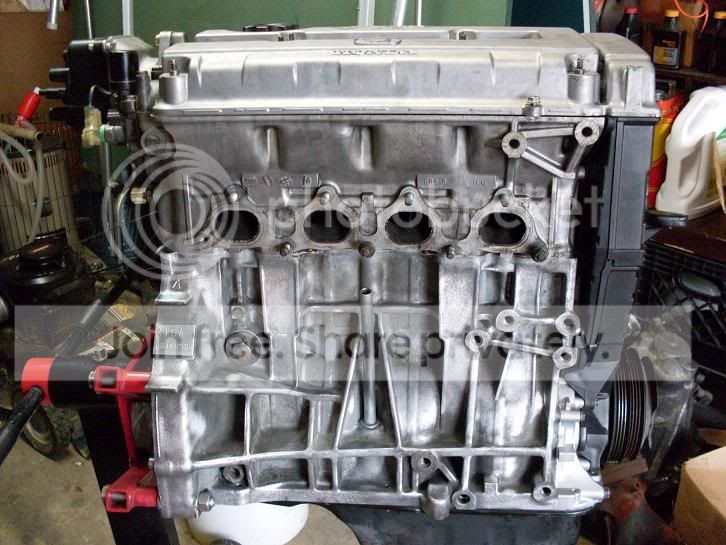
Pics of the bottom end so far:
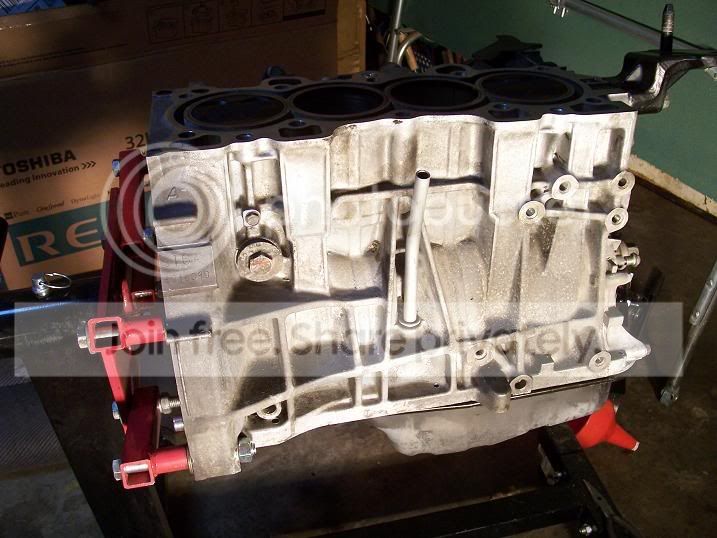
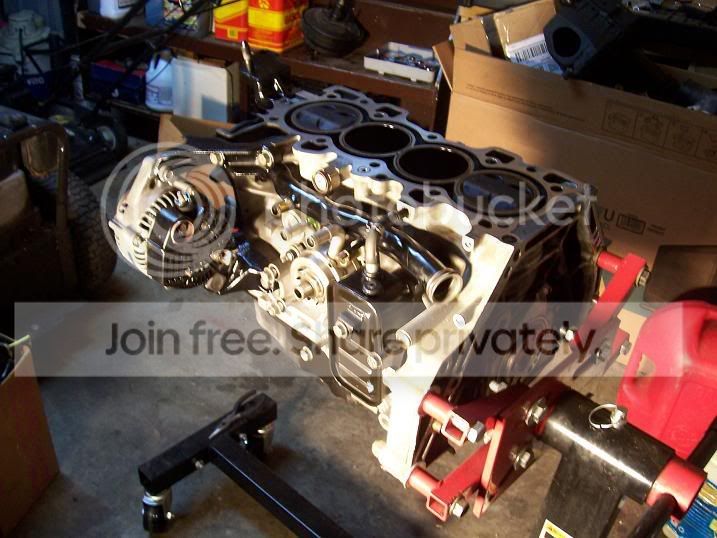
For aesthetic purposes, I've painted some of the mounts for the alternator semi gloss black, as well as the water pipe. Figured I would try to freshen up everything about an almost 20 year old motor.
It's not much but when I'm ready for cams it'll be a whole lot quicker than doing the valvetrain too.
So here is what I've been working on the last couple of days while I've been waiting on a friend to let me commandeer his engine hoist: Prepping the engine for removal by myself (it's amazing how much quicker you can do this after you've done a couple).
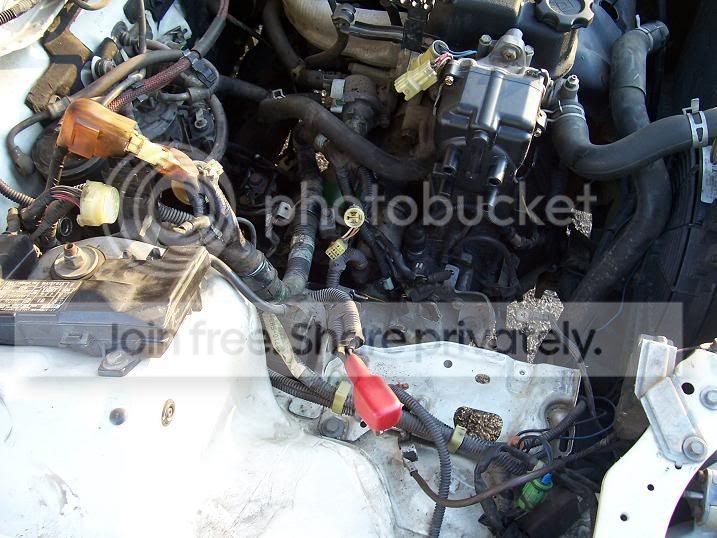
And today when I got home from school, it had stopped raining for a few so I went and finished grabbing the passenger side harness out from under the intake manifold on Wren's car.
(sorry for the crappy picture)

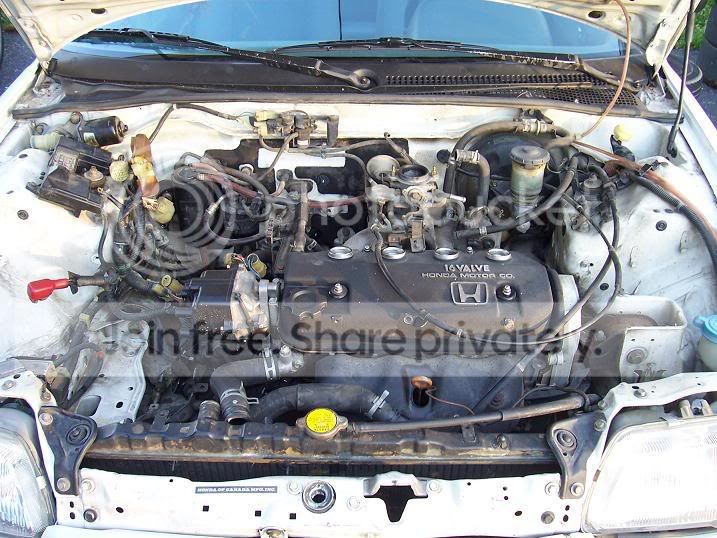
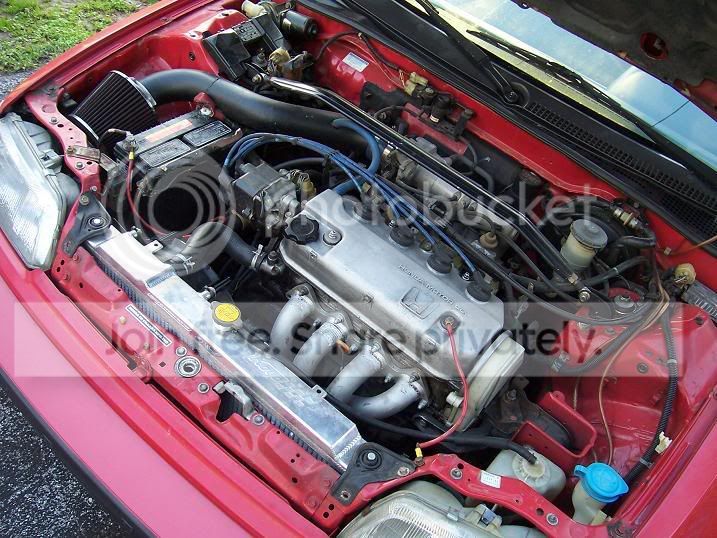
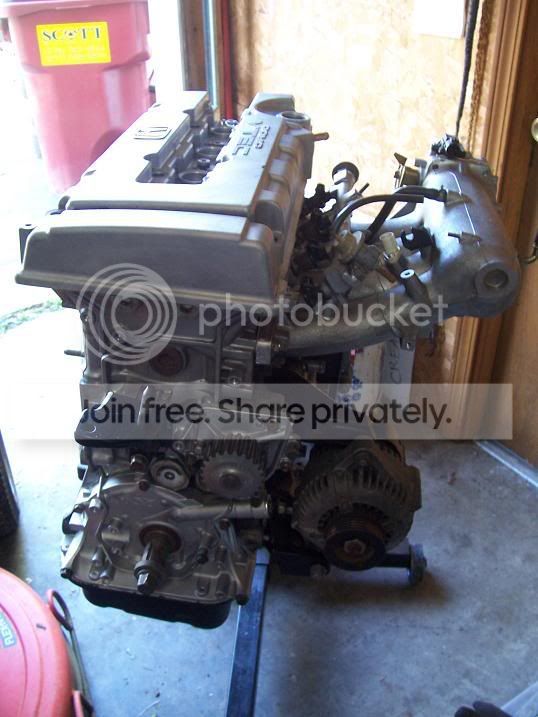
And here is what his car is getting (albeit the D16A6 will have the DPFI intake manifold on it, his oem header, and his DX transmission).
I'll be installing my valvetrain in my head tomorrow when it arrives, and then the head will be ready to put back together. I'll try to get pics of seating the valves with the grinding compound as well since I've not seen many how-to's on this by others.
I'll also have his engine out this weekend hopefully.
Check back for more!
Modified by stockbee at 8:41 PM 4/7/2008
I realize some of you may recognize some of these pictures (that I'll be posting later) as pictures that are in another thread I've already made, but that build kind of came to a halt and the host site for the pictures only works half the time.
My little brother drove his car for an extended period of time with half the amount of oil he was supposed to have in it and so it finally took a crap the other day. I was able to persuade him to let me sell him my D16A6 the other day for 350 (this includes me installing the engine and getting it running for him, so it's not all that bad), and I get to keep the parts that don't interchange between motors.
My car will be getting the B16A that I've been harboring in my garage for the last year and a half or so. Here is the final mod list:
-ITR intake manifold
-ITR throttle body
-ITR LMA's (old ones were sticking badly)
-Skunk 2 Pro Series Cam Gears
-Supertech Nitride-coated flat faced valves
-Supertech Dual Valvesprings
-Supertech Retainers
-Marshall FPG on fuel filter (OMG!)
-Rywire OBD0-OBD1 conversion, running a P28
-2.25 inch mandrel-bent exhaust (car already has)
Pics of the bottom end so far:
For aesthetic purposes, I've painted some of the mounts for the alternator semi gloss black, as well as the water pipe. Figured I would try to freshen up everything about an almost 20 year old motor.
It's not much but when I'm ready for cams it'll be a whole lot quicker than doing the valvetrain too.
So here is what I've been working on the last couple of days while I've been waiting on a friend to let me commandeer his engine hoist: Prepping the engine for removal by myself (it's amazing how much quicker you can do this after you've done a couple).
And today when I got home from school, it had stopped raining for a few so I went and finished grabbing the passenger side harness out from under the intake manifold on Wren's car.
(sorry for the crappy picture)
And here is what his car is getting (albeit the D16A6 will have the DPFI intake manifold on it, his oem header, and his DX transmission).
I'll be installing my valvetrain in my head tomorrow when it arrives, and then the head will be ready to put back together. I'll try to get pics of seating the valves with the grinding compound as well since I've not seen many how-to's on this by others.
I'll also have his engine out this weekend hopefully.
Check back for more!
Modified by stockbee at 8:41 PM 4/7/2008
Thread Starter
Member
Joined: Dec 2004
Posts: 1,244
Likes: 0
From: Bowling Green, KY, United States
no replies yet eh? oh well, whatever, here's an update so far.
I got my valvetrain in yesterday.
 \
\
So my girlfriend (willing to learn) and I went over to a friends house where the head was already disassembled from when I installed new LMA's with newer ITR units that actually work in place of my old non-functioning units.
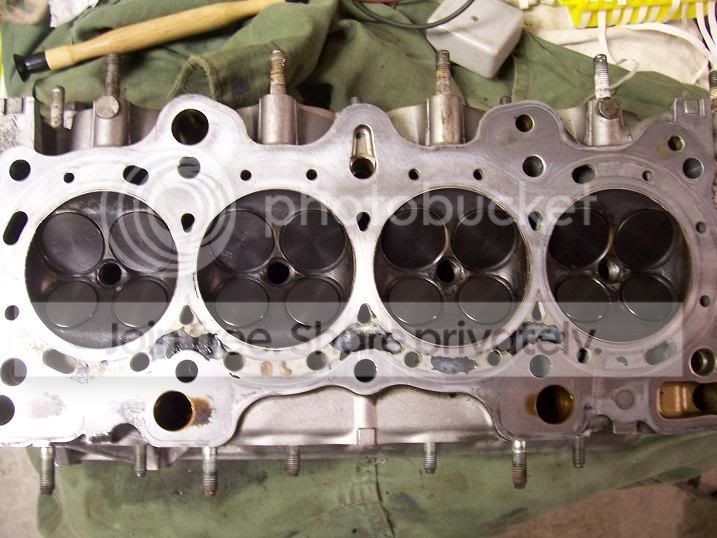
We started using the valve grinding compound to seat the valves in the combustion chamber using a suction tool. You have to do this action 32 times, as there are 16 valves and you have to use coarse compound first and then the fine compound. Gets boring but it's not so bad.
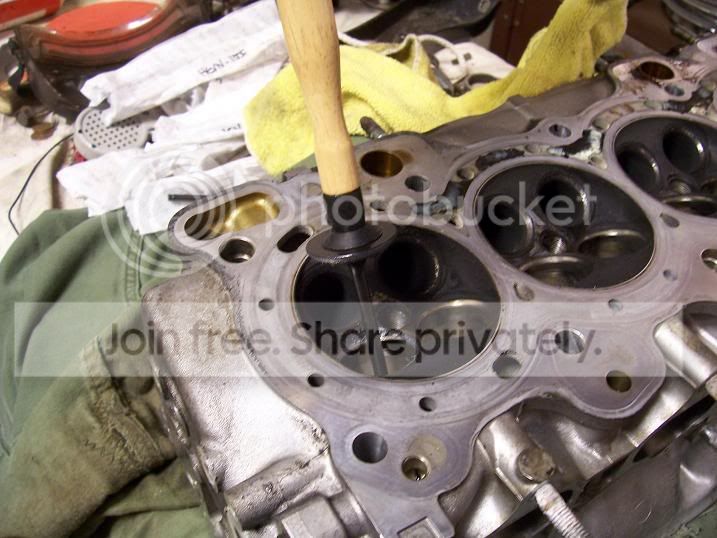
This is what the valves look like in the head (all flat-faced and nice looking). It'll be nice once I get my turbo on......jk .
Then we installed the new valve stem seals, which I'm kind of leery about. As far as we could tell all you do is just push them down over where they go and push hard until the rib slips over the necessary spot. Other than that I have no clue. Hope my head doesn't burn a lot of oil as a result of my inexperience!
After that we used a valve spring compressor tool that I borrowed from a very longsuffering friend to reinstall the supertech valvetrain. I have a new pet peeve as of now: VALVE KEEPERS.
We finally got them on, but all I have to say to you is Good luck, and don't lose any. I dropped on and we weren't able to put the last one in until we found it. How did I find it? I didn't. But this guy did!
Enter Kevin, from Georgia.....
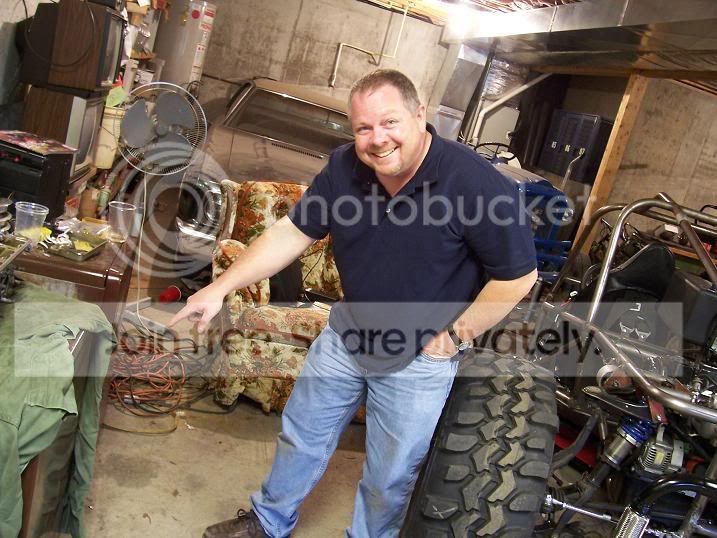
He looked for fifteen minutes compared to my 2.5 hours of looking around and under using a magnet and found it sitting under a big old oven that my laptop was sitting on. How it got where it did will forever remain a mystery. With that done we, were able to install the last set of spring and retainer. Here is a picture of all of them installed minus the one we couldn't find:
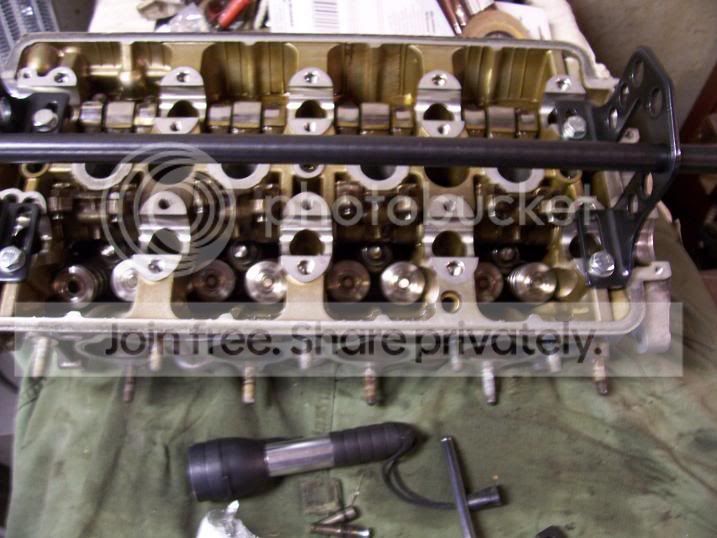
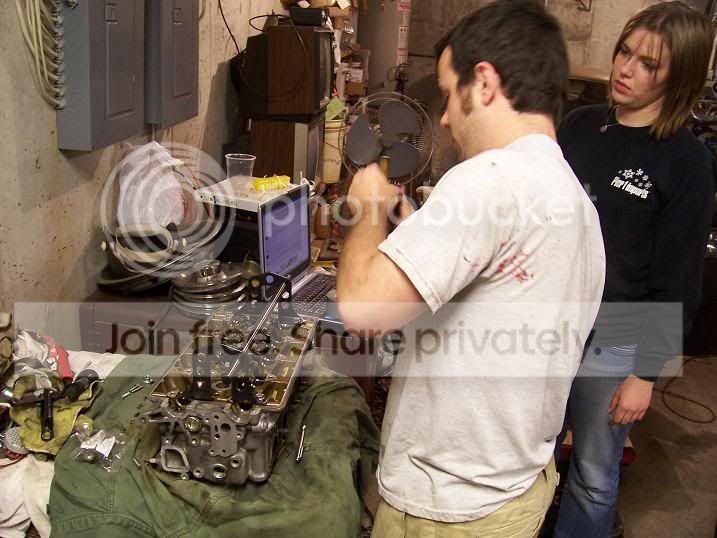
Jason (eh3civic on honda-tech) teaching Alex how to reinstall valve keepers.
That's a pretty solid update as of yet I think.
Will have more later of me putting things together and getting the engine swap out of Wren's car.
Until then here's a picture you all can drool over. May I introduce a project that two of my friends have been workin on building for the past couple of years. A Honda powered Dune buggy!
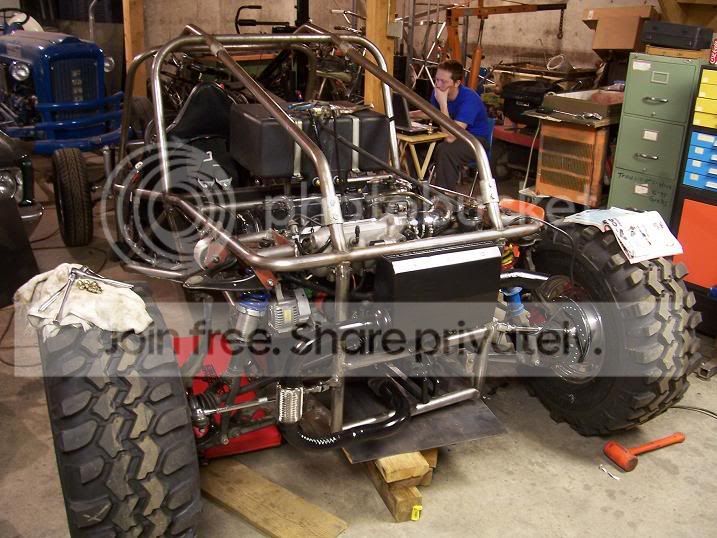
I'll answer all the questions I can but let's keep this thread focused on what it's about.
I got my valvetrain in yesterday.
\So my girlfriend (willing to learn) and I went over to a friends house where the head was already disassembled from when I installed new LMA's with newer ITR units that actually work in place of my old non-functioning units.
We started using the valve grinding compound to seat the valves in the combustion chamber using a suction tool. You have to do this action 32 times, as there are 16 valves and you have to use coarse compound first and then the fine compound. Gets boring but it's not so bad.
This is what the valves look like in the head (all flat-faced and nice looking). It'll be nice once I get my turbo on......jk .
Then we installed the new valve stem seals, which I'm kind of leery about. As far as we could tell all you do is just push them down over where they go and push hard until the rib slips over the necessary spot. Other than that I have no clue. Hope my head doesn't burn a lot of oil as a result of my inexperience!
After that we used a valve spring compressor tool that I borrowed from a very longsuffering friend to reinstall the supertech valvetrain. I have a new pet peeve as of now: VALVE KEEPERS.
We finally got them on, but all I have to say to you is Good luck, and don't lose any. I dropped on and we weren't able to put the last one in until we found it. How did I find it? I didn't. But this guy did!
Enter Kevin, from Georgia.....
He looked for fifteen minutes compared to my 2.5 hours of looking around and under using a magnet and found it sitting under a big old oven that my laptop was sitting on. How it got where it did will forever remain a mystery. With that done we, were able to install the last set of spring and retainer. Here is a picture of all of them installed minus the one we couldn't find:
Jason (eh3civic on honda-tech) teaching Alex how to reinstall valve keepers.
That's a pretty solid update as of yet I think.
Will have more later of me putting things together and getting the engine swap out of Wren's car.
Until then here's a picture you all can drool over. May I introduce a project that two of my friends have been workin on building for the past couple of years. A Honda powered Dune buggy!
I'll answer all the questions I can but let's keep this thread focused on what it's about.
 subscribing!

Thread Starter
Member
Joined: Dec 2004
Posts: 1,244
Likes: 0
From: Bowling Green, KY, United States
Thanks for the comments so far guys.
I guess the next thing I'll try to get done with my motor (the B16A) is to get the mating surfaces of the head and the top of the block cleaned off adequately, and then install my ARP head studs and headgasket. Then I'll be ready to install the head on to the block, and tighten it down.
Does anyone know what the minimum size headgasket I can install with flat faced valves and stock pistons is on this motor without having to worry about piston to valve clearance?
Thread Starter
Member
Joined: Dec 2004
Posts: 1,244
Likes: 0
From: Bowling Green, KY, United States
Somewhat of any update. I called honda today and ordered a new timing belt, oil pan gasket, and I need to call them back and order both VTEC solenoid gaskets as well, a main seal, and that should be it.
Trending Topics
Thread Starter
Member
Joined: Dec 2004
Posts: 1,244
Likes: 0
From: Bowling Green, KY, United States
Parts will be here next week.
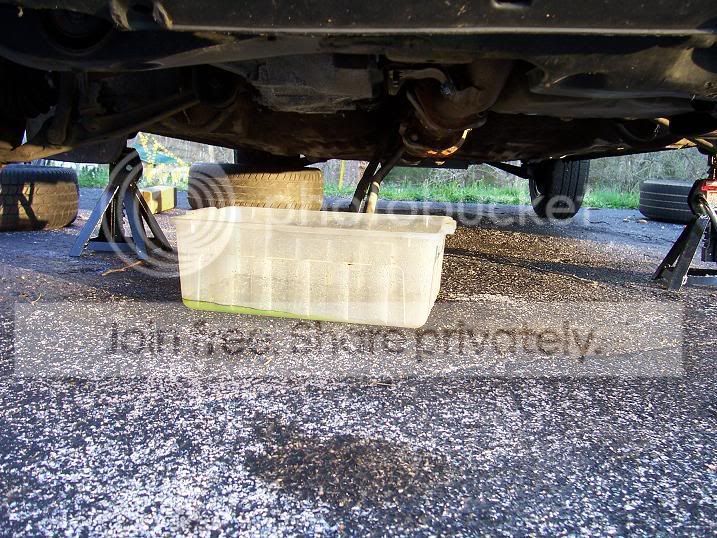
Today my girlfriend and I took my little brothers motor the rest of the way out of his car.
I've got take his transmission, intake mani, and header and put them on my engine once I get mine taken out.
Today my girlfriend and I took my little brothers motor the rest of the way out of his car.
I've got take his transmission, intake mani, and header and put them on my engine once I get mine taken out.
Honda-Tech Member
Joined: Oct 2007
Posts: 702
Likes: 0
From: Neverland Ranch
yea vavle spring keepers are a btch. the best ive found is using a pneumatic spring compressor. and holding the keepers and easing the compressor out slowly. granted if it jumps the spring, watch your fingers. a kid did that in my engines class and almost ripped his finger off with the spring flying out. nice progress
Thread Starter
Member
Joined: Dec 2004
Posts: 1,244
Likes: 0
From: Bowling Green, KY, United States
Well, somewhat of an update:
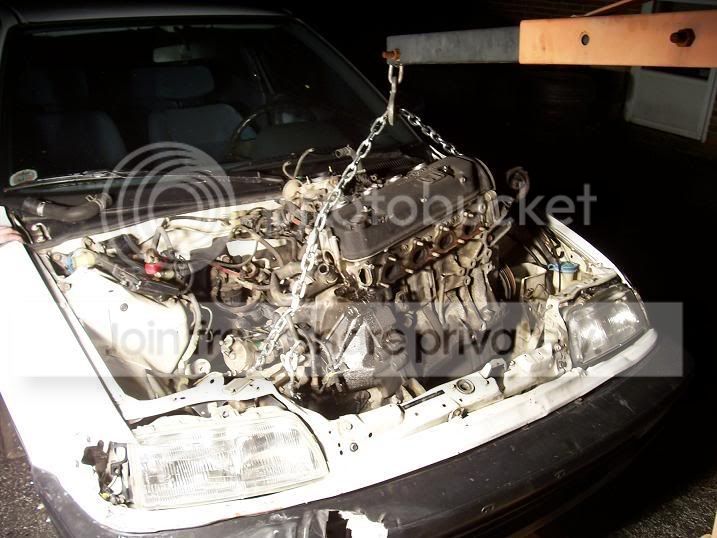
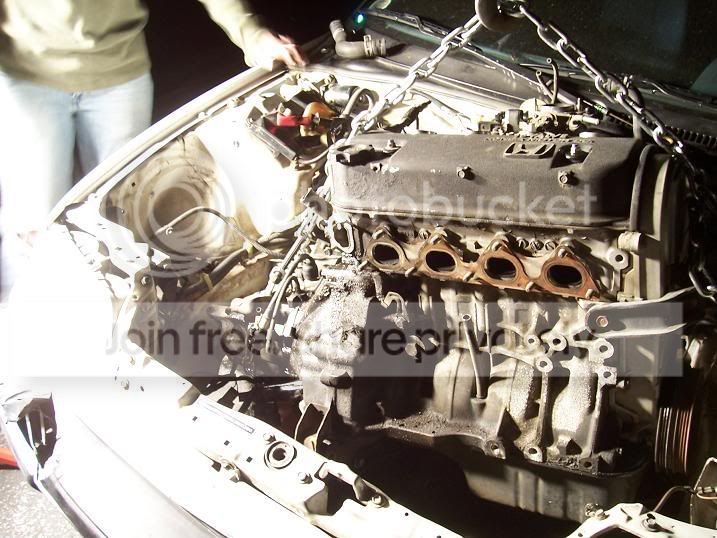
The other night My girlfriend and I removed the engine out of my little brother's car. Here were the two pics we took (didn't take much because we wanted to get done around dark, and as you can see it took us that long).
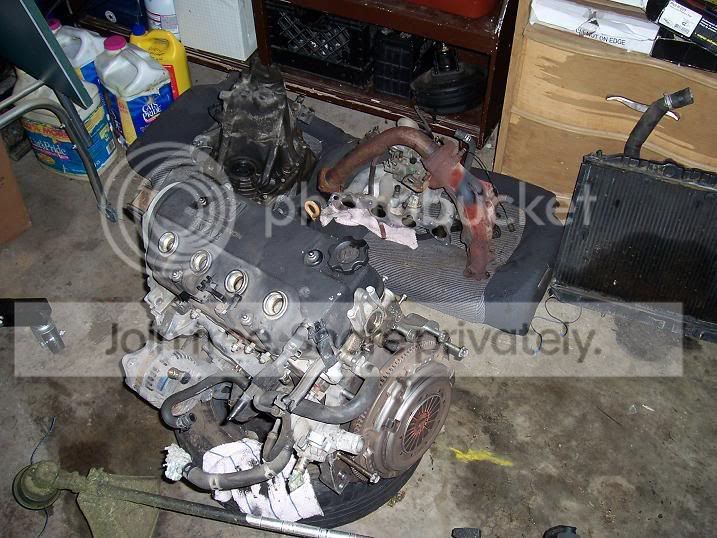
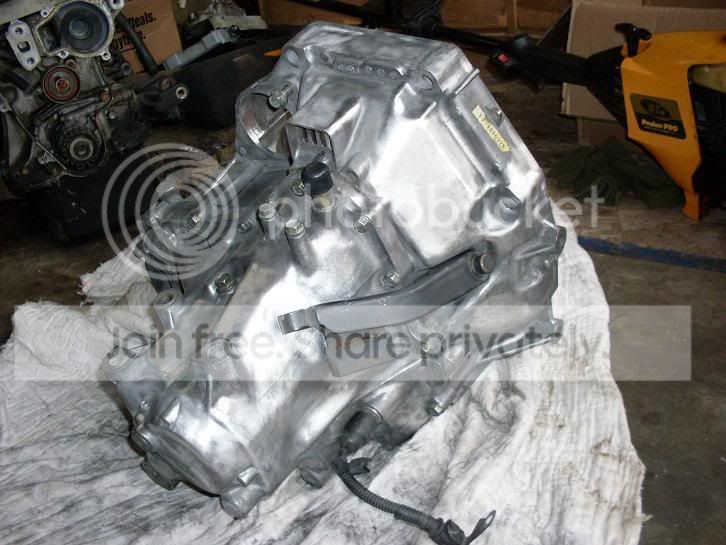
Today I took the liberty of using my afternoon to take off his DX transmission and DPFI intake manifold that I'll be putting on the A6. Here's how that looked after I cleaned up and put everything back in the garage.
On a better note, about my engine, I got the rest of the parts that I need in to start putting the block and head together. In came the timing belt, VTEC gaskets, main seal, and the oil pan gasket. A friend should be coming over around next week to make sure I get everything right. It's ALWAYS good to have someone double check your stuff.
I put everything that I've worked long and hard (on a college budget) to afford so you all could see what would be getting replaced/upgraded:

? What are these huge rings that were included with my OEM Honda top end gasket kit? I have no idea. They're circled in white in the below picture.
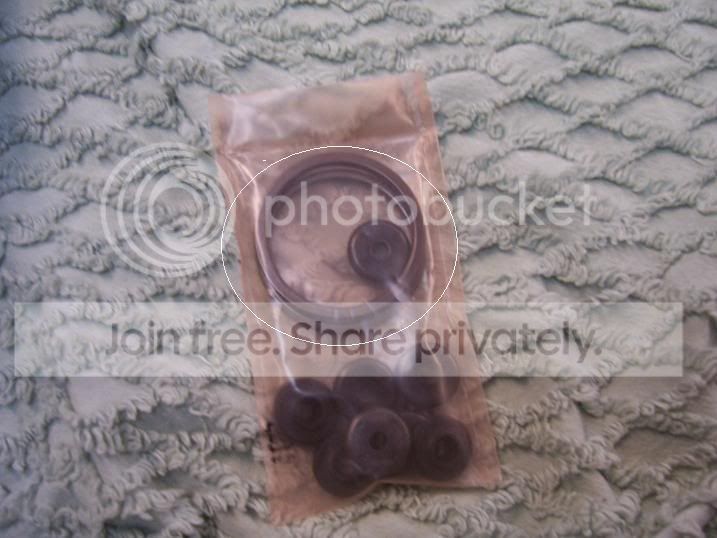
I also wanted to know what can be done about this:

It won't screw down into the fittings I ordered for it. Either the thread on the FPG or the fittings are bad. Can I rethread this at all?
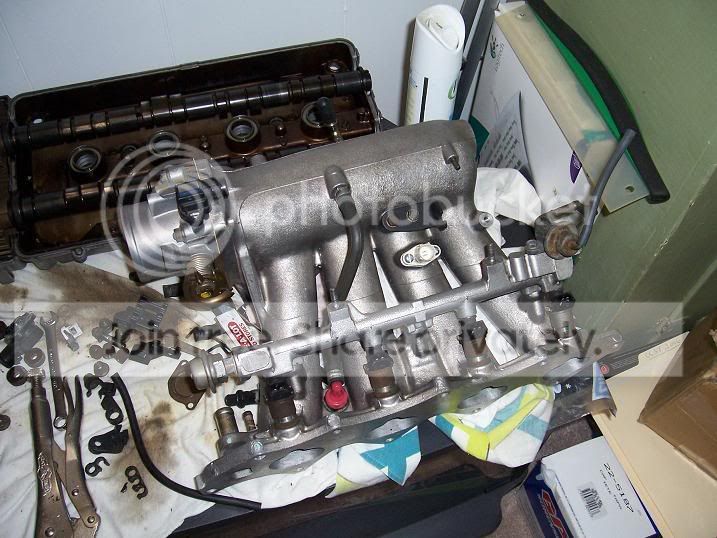
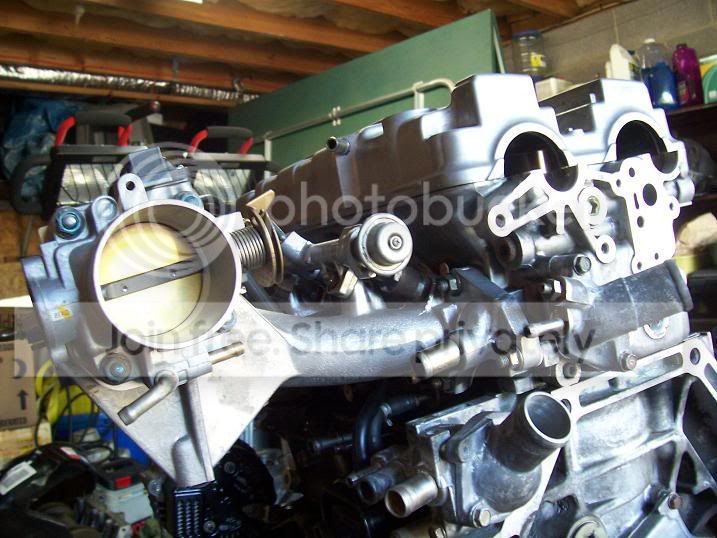
And here is the ITR intake manifold that I'll be running fitted with the new(er) Fuel rail that mounts the FPR away from the IAT sensor.
Have a good one. Hopefully I'll be getting everything back together on these cars soon. Please answer these questions so I can take care of these little things as I go along.
The other night My girlfriend and I removed the engine out of my little brother's car. Here were the two pics we took (didn't take much because we wanted to get done around dark, and as you can see it took us that long).
Today I took the liberty of using my afternoon to take off his DX transmission and DPFI intake manifold that I'll be putting on the A6. Here's how that looked after I cleaned up and put everything back in the garage.
On a better note, about my engine, I got the rest of the parts that I need in to start putting the block and head together. In came the timing belt, VTEC gaskets, main seal, and the oil pan gasket. A friend should be coming over around next week to make sure I get everything right. It's ALWAYS good to have someone double check your stuff.
I put everything that I've worked long and hard (on a college budget) to afford so you all could see what would be getting replaced/upgraded:
? What are these huge rings that were included with my OEM Honda top end gasket kit? I have no idea. They're circled in white in the below picture.
I also wanted to know what can be done about this:
It won't screw down into the fittings I ordered for it. Either the thread on the FPG or the fittings are bad. Can I rethread this at all?
And here is the ITR intake manifold that I'll be running fitted with the new(er) Fuel rail that mounts the FPR away from the IAT sensor.
Have a good one. Hopefully I'll be getting everything back together on these cars soon. Please answer these questions so I can take care of these little things as I go along.
Thread Starter
Member
Joined: Dec 2004
Posts: 1,244
Likes: 0
From: Bowling Green, KY, United States
Somewhat of an update. I just ordered a OBD0-OBD1 distributor adapter from "nigaphan" off of ebay. A friend told me about him so I figured it would work out okay.
so when that gets in I'll be closer to taking out the A6 and swapping in the B16A.
so when that gets in I'll be closer to taking out the A6 and swapping in the B16A.
Thread Starter
Member
Joined: Dec 2004
Posts: 1,244
Likes: 0
From: Bowling Green, KY, United States
Jeez, I sure do appreciate the enciouragement on this build so far....
Anyway, my Distributor Adapter just came in today. I'll be waiting until the end of next week so finals'll be over before I put everything together.
Anyway, my Distributor Adapter just came in today. I'll be waiting until the end of next week so finals'll be over before I put everything together.
Thread Starter
Member
Joined: Dec 2004
Posts: 1,244
Likes: 0
From: Bowling Green, KY, United States
Was lucky enough to get my hands on some 15x6.5 BBS RA's off of some random guys rusted GLI sedan. 180 bucks and a set of steelies and they were mine. I think it was a pretty good deal all in all, but they need to be balanced for real!!.

I know I've said this a couple of times before as well, but I ordered the last bunch of parts that I will need for the last time this time. Some crush washers for the fuel lines as well as a thermostat/and gasket, IACV gasket, hondabond, oil pump o-ring, and oil pickup gasket. When I get that stuff in I can button up the bottom end and place the head where it belongs.
I know I've said this a couple of times before as well, but I ordered the last bunch of parts that I will need for the last time this time. Some crush washers for the fuel lines as well as a thermostat/and gasket, IACV gasket, hondabond, oil pump o-ring, and oil pickup gasket. When I get that stuff in I can button up the bottom end and place the head where it belongs.
Thread Starter
Member
Joined: Dec 2004
Posts: 1,244
Likes: 0
From: Bowling Green, KY, United States
update!!
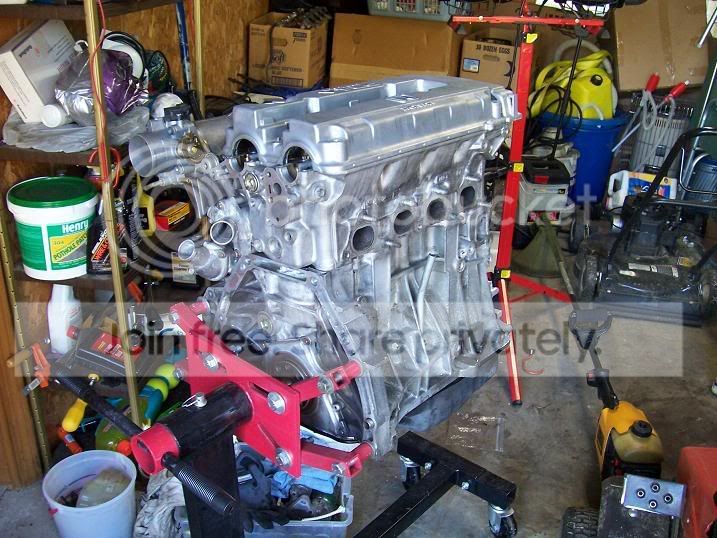
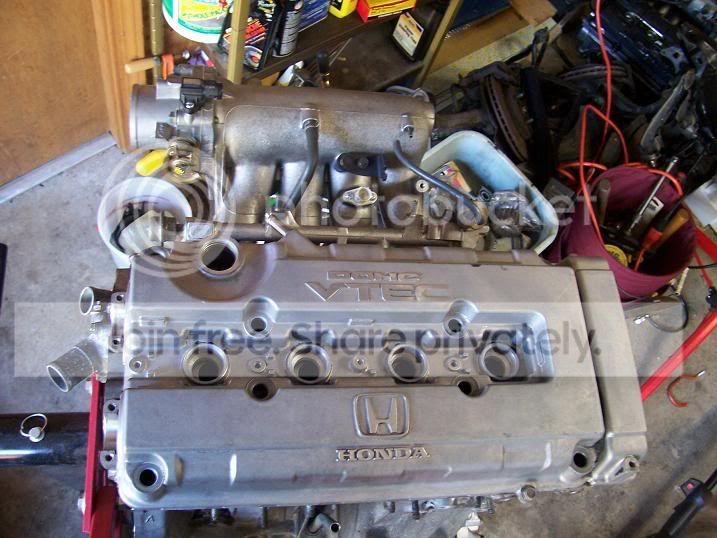
Friend (eh3civic) came over the other day and helped me get my head installed and torqued to ARP's specs (used the ARP head studs). Also installed the oil pump windage tray, and oil pan with new OEM gasket.
The day after that I put the ITR intake manifold on and got the pcv hooked to the breather box on the back of the block. \
Also got a pic of the entire four wheels for whoever is interested in seeing dirty old V-dub's.

By the way, how would you all clean out a lot of brake dust on wheels that is caked on and won't come off with wheel cleaners.
Friend (eh3civic) came over the other day and helped me get my head installed and torqued to ARP's specs (used the ARP head studs). Also installed the oil pump windage tray, and oil pan with new OEM gasket.
The day after that I put the ITR intake manifold on and got the pcv hooked to the breather box on the back of the block. \
Also got a pic of the entire four wheels for whoever is interested in seeing dirty old V-dub's.
By the way, how would you all clean out a lot of brake dust on wheels that is caked on and won't come off with wheel cleaners.
Thread Starter
Member
Joined: Dec 2004
Posts: 1,244
Likes: 0
From: Bowling Green, KY, United States
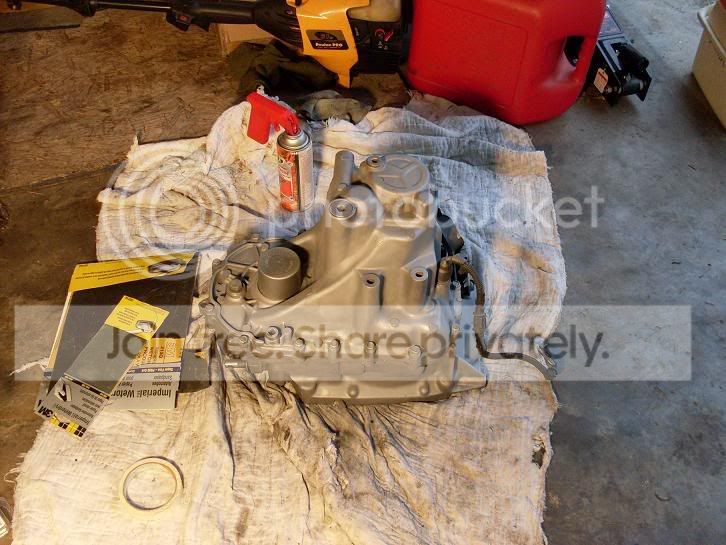
I've made some headway in the last couple of days. I've pulled out the transmission and have started cleaning it up. I used a wire wheel on it (fine, NOT coarse), and this is what I ended up with.
After that I added some flat aluminum paint and ended up with this. It still needs a few more coats but you get the picture.
And one of the block before I attempt to paint it the same color.
With the help of a friend since I'm still learning (and not afraid to give credit where credit is in fact due), I was able to get the cams installed and the covers torqued down properly with a torque wrench I picked up from Sears the other day.
Now I need to finish painting the block and get it off the engine stand so I can install the clutch/flywheel and get the tranny mated to the block. That might happen tomorrow.
And for those of you that are ever thinking of using a GSR oil pump on a B16 block you're gonna have to use a GSR lower timing cover. That is if you have a pump that is after the 98 year design change. I didn't know and it cost me 65 bucks in the form of a new plastic timing cover and seal. So be wary of that.
Stay tuned.
Thread Starter
Member
Joined: Dec 2004
Posts: 1,244
Likes: 0
From: Bowling Green, KY, United States
Well, it's been forever but I've got the motor in the car and running.
Last few things before it's roadworthy that I have to fix/replace are as follows:
-replace brake rotors (I accidently hit one with a hammer and it's warped as crap, needed to be replaced soon anyway).
-fuel leak (need new crush washers for fuel filter.
-oil leak(think I torqued the oil pan gasket down too much or not enough.
-Clean the IACV, or replace it as it's throwing code 14.
-Install JDM gauge cluster and wire up the speed sensor on the tranny to it so I can get VTEC working.
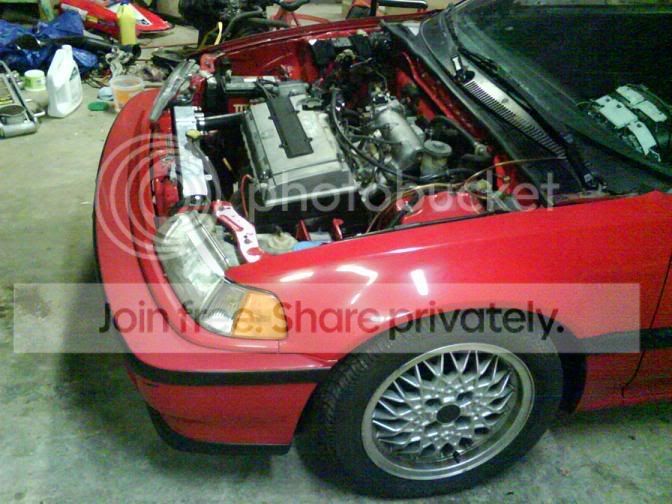
Hopefully I'll have all of those things done before we head to IA with the dune buggy next weekend. Here a some terrible cell phone pics of the car as it sits presently.
Last few things before it's roadworthy that I have to fix/replace are as follows:
-replace brake rotors (I accidently hit one with a hammer and it's warped as crap, needed to be replaced soon anyway).
-fuel leak (need new crush washers for fuel filter.
-oil leak(think I torqued the oil pan gasket down too much or not enough.
-Clean the IACV, or replace it as it's throwing code 14.
-Install JDM gauge cluster and wire up the speed sensor on the tranny to it so I can get VTEC working.
Hopefully I'll have all of those things done before we head to IA with the dune buggy next weekend. Here a some terrible cell phone pics of the car as it sits presently.
Honda-Tech Member
Joined: Apr 2003
Posts: 5,365
Likes: 2
From: 60ft garage, CA, USA
<TABLE WIDTH="90%" CELLSPACING=0 CELLPADDING=0 ALIGN=CENTER><TR><TD>Quote, originally posted by stockbee »</TD></TR><TR><TD CLASS="quote">
What are these huge rings that were included with my OEM Honda top end gasket kit? I have no idea. They're circled in white in the below picture.
</TD></TR></TABLE>
Kinda late to this thread but those rings look like the crush washers/rings that go in the exhaust manifold...you know at the 4 to 2 connection.
oh and your oil pan leak is probably due to overtightening. Pretty typical. I always clean both mating surfaces (block and pan), apply a thin smear of hondabond to both sides of the gasket, and then thread all bolts in by hand (no ratchet), then go like a 1/4 turn tighter.
Thread Starter
Member
Joined: Dec 2004
Posts: 1,244
Likes: 0
From: Bowling Green, KY, United States
Thanks a lot for the tip with the oil pan and the crush washers for the exhaust. I hope to get those things sorted out asap.
It's hard to find out what amount of torque will work for those oil pan bolts for fear of them vibrating lose.
It's hard to find out what amount of torque will work for those oil pan bolts for fear of them vibrating lose.
Honda-Tech Member
Joined: Apr 2003
Posts: 5,365
Likes: 2
From: 60ft garage, CA, USA
<TABLE WIDTH="90%" CELLSPACING=0 CELLPADDING=0 ALIGN=CENTER><TR><TD>Quote, originally posted by stockbee »</TD></TR><TR><TD CLASS="quote">
It's hard to find out what amount of torque will work for those oil pan bolts for fear of them vibrating lose. </TD></TR></TABLE>
I hear ya. I always see stock hondas missing a few oil pan bolts/nuts every now and then. If you're that worried about it though put a small dab, and i mean small, of hondabond on each bolt/nut and i doubt they'd vibrate loose on their own.
Err on the side of looser versus tighter for the pan.
Thread Starter
Member
Joined: Dec 2004
Posts: 1,244
Likes: 0
From: Bowling Green, KY, United States
well, I went to adv auto parts to get some new rotors and pads yesterday and they had some in stock. I ordered them for the car that I have and was completely pissed to find out that my new rotors were 10.3 inches after I already took my car apart.
Adv Auto. said that they have that exact part number for my model year and said that those cars have 10.3 inch brakes basically. I thought all Civics from 88-91 other than the EX sedan had 9.5's. Guess they know more about honda's than I do........right....
I went back and got the right ones today though, had to order them for an '89.
Thread Starter
Member
Joined: Dec 2004
Posts: 1,244
Likes: 0
From: Bowling Green, KY, United States
Engine's in the car and runs, as I've driven it from the shop where I did all the work and its now in the driveway, with quite a large and untolerable leak. I've posted a thread about it in the Tech section and hopefully will have it resolved soon.
The engine sounds good, the head is quiet in it's operation (no more LMA chatter thank God), and the only thing irritating me is the leak and the freaking header being open due to the exhaust not meeting up in the middle (I'll leave that to a muffler shop after I sort out the rest of the BIGGER issues.
Thanks for looking, and if you have any insight as to what my leak might be, read more about it here and then respond in either thread.
https://honda-tech.com/zeropost?cmd=fshow&id=15
Thread Starter
Member
Joined: Dec 2004
Posts: 1,244
Likes: 0
From: Bowling Green, KY, United States
Drove the car to school today, as I believe I've ironed out all of the leak problems I was having. Thanks for checking the thread. I'll have pics of what things look like here today maybe, however it's raining so I may wait a while longer.
Thread Starter
Member
Joined: Dec 2004
Posts: 1,244
Likes: 0
From: Bowling Green, KY, United States
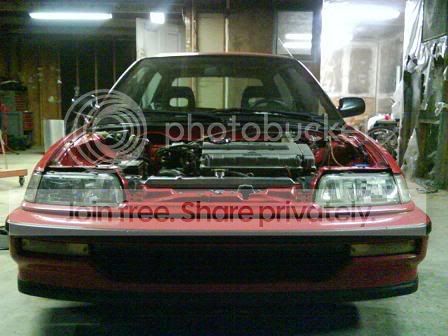
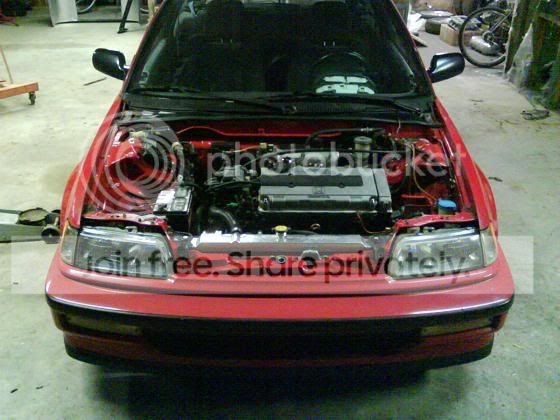
Got home and was able to get a couple of pictures of the engine all hooked up in its present configuration. I also got one picture of it's unwashed chassis. It did rain today though and made it look somewhat bearable.