

♪♫Fresh’86 big build up thread♫♪


Thread Starter
Honda-Tech Member
Joined: Feb 2006
Posts: 2,069
Likes: 0
From: Hella North, Toronto

Don't hate, I currently have like 0 cash to put into this car, unless I find a job really soon. I really hope I do so I can drive this thing again

there isnt that many nice cars on jdmr, lots of half assers.
i can't believe i sold the hatch, but its good im actually saving alot of money now, i went an bought a 02 blazer zr2, so i can do some offroading
send me this site where you have the complete build of this thing
i can't believe i sold the hatch, but its good im actually saving alot of money now, i went an bought a 02 blazer zr2, so i can do some offroading
send me this site where you have the complete build of this thing
I actually recently met the new owner of your car, and he's very happy with it. I'm looking forward to seeing the legacy of that badboy continue. Offroading is fun, my dad loves that ****. Always talks to me about his dream TJ lol.
The other site this is on is NWP: http://********.zeroforum.com/zeroth...d=22356&page=1 (change the ****** to NWP 4 LIFE)
Basically the same thing as here, but I don't check on here as often.
Nice! I hate the new change over, it's so much more annoying using this forum.
Word, I have a good feeling you will...this year in Tennessee perhaps?
Thread Starter
Honda-Tech Member
Joined: Feb 2006
Posts: 2,069
Likes: 0
From: Hella North, Toronto
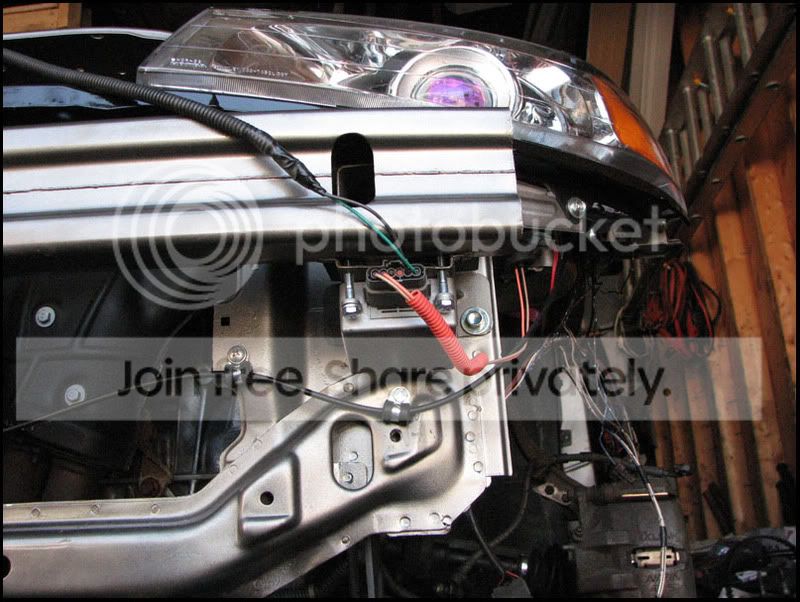
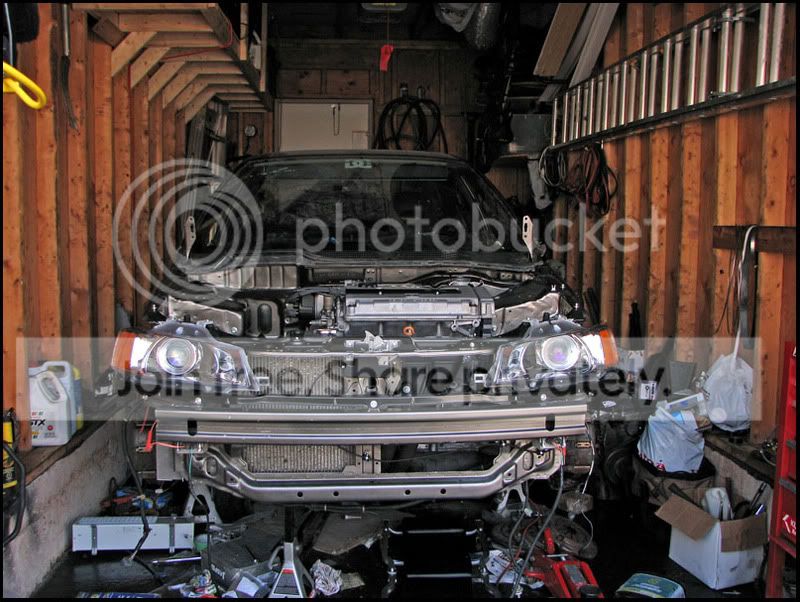
So the past few weeks I put in a lot of work on the car. First off, I wanted to get the outter wiring done, or at least started. So I installed the headlights back on:
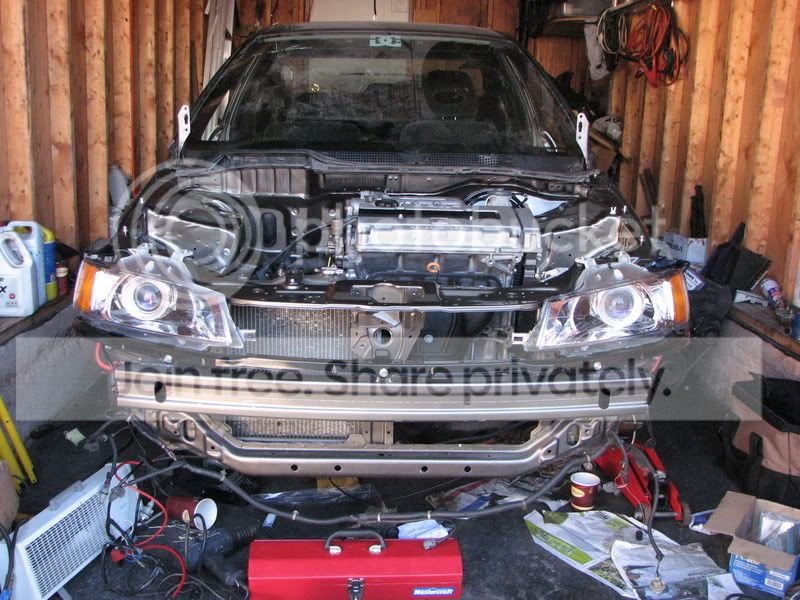
The car is starting to look like a car lol.
I ran the harness and plugged in the headlights. As you can see, the harness won't be visable, I still need to sleeve it to hide it some more:
Thanks to the fancy Mercedes HID system, it helps me cover up the wiring a lot more")
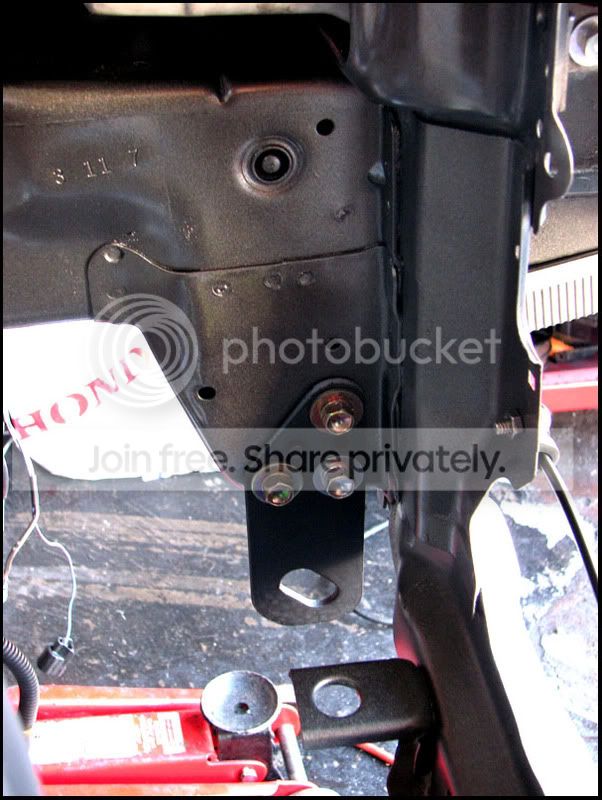
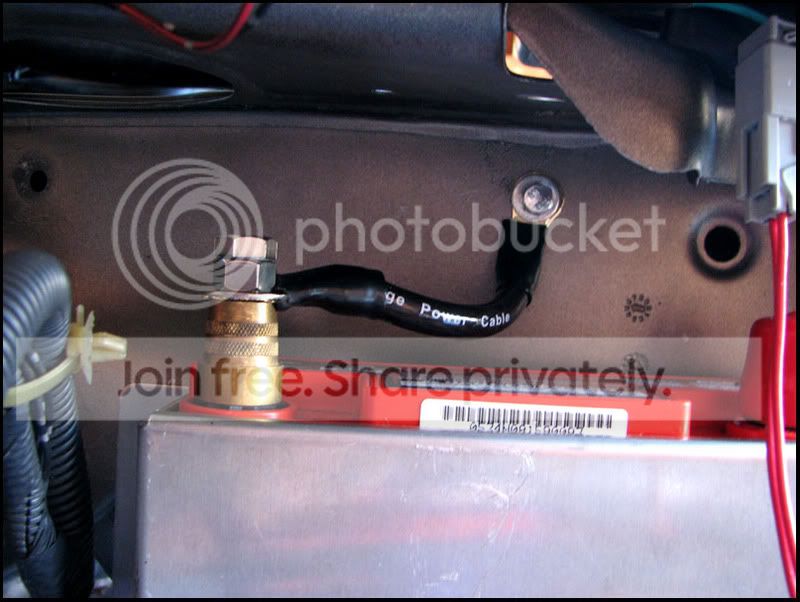
Battery is now also installed:
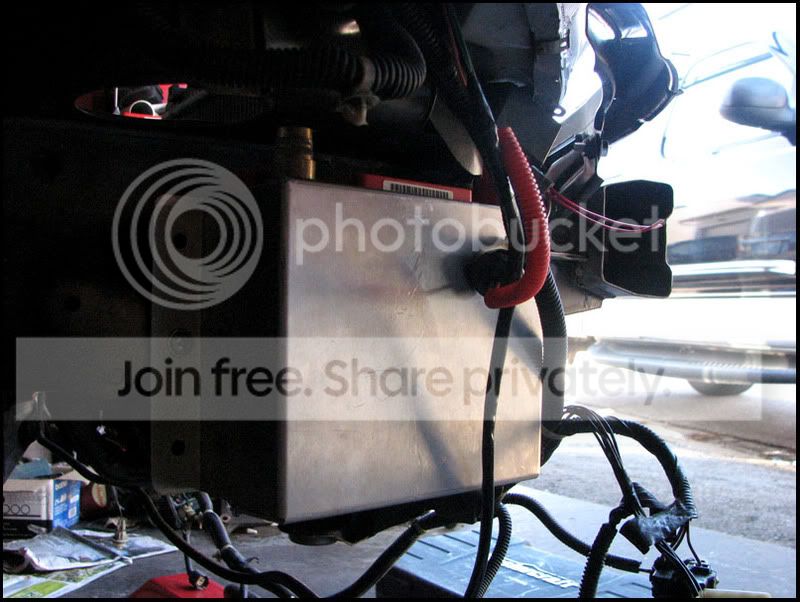
But as I soon discovered, this was sitting way too high, so I moved it down about an inch and a half (as seen in the pics pretty much, but one bolt lower. Scroll further down to see)
Then the other brake line was installed:
Only to be taked off to be sent back because the **** nut who sold me these gave me the wrong ones. The rear lines were the incorrect application. When I contacted him, he wanted me to send them back to get them modified and I would be paying for shipping and parts and labour so I said **** it and decided to make the rear lines myself. Basically I got 2 rear lines for some reason so I'll be cutting them and merging them together with a straight fitting.
And some of my harness is installed, thanks to rogue for the labels :bang: Here is how it will look:
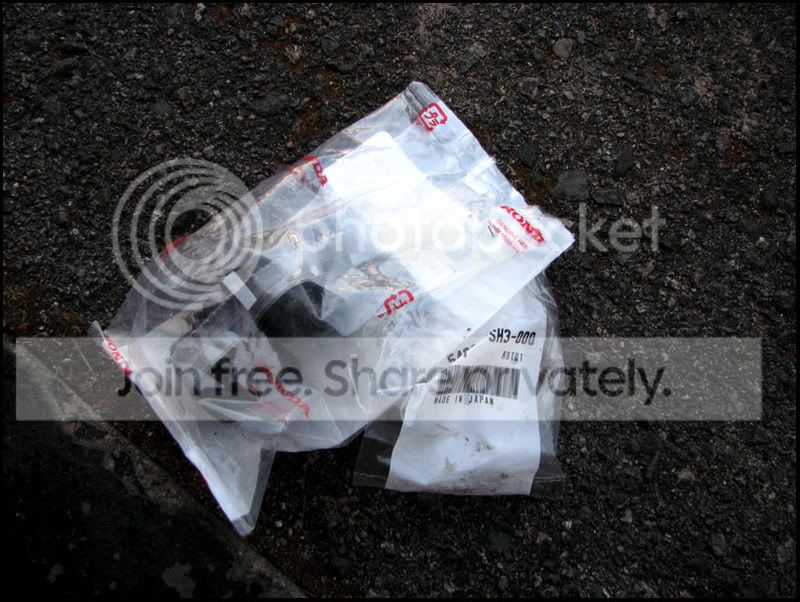
Then I also got more bolts and rubber boots from Honda for the linkage. It's ready to be installed, except I kinda ran out of time and I need two more bolts to mount it that I'll pick up from the hardware store. Just need to find the correct pitch basically.
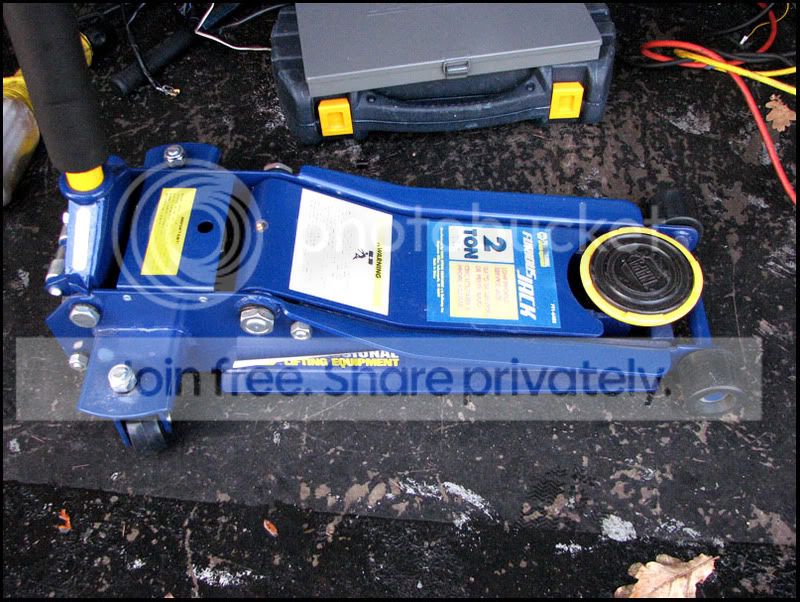
Then I borrowed my buddy's new badass jack that he got, and I was able to lift the car another foot and a half so I can get under it:
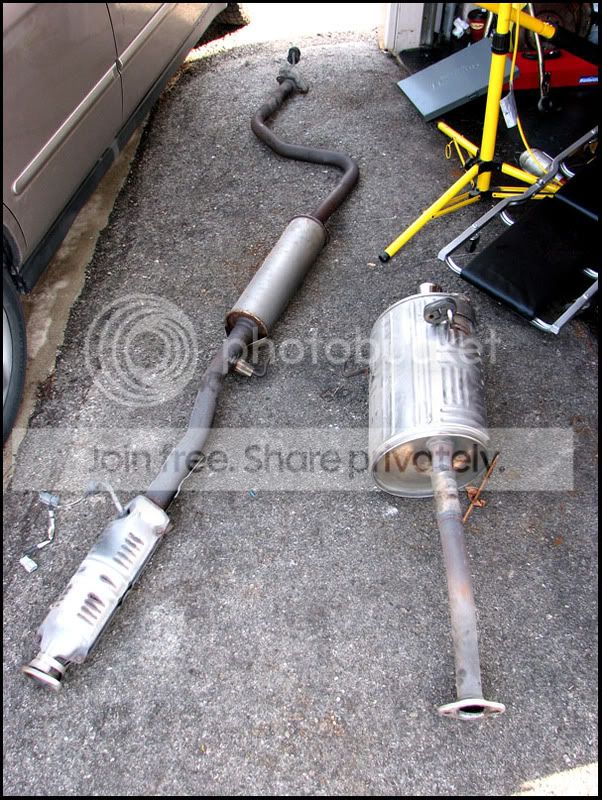
With the added height, I was able to get under and remove the exhaust:
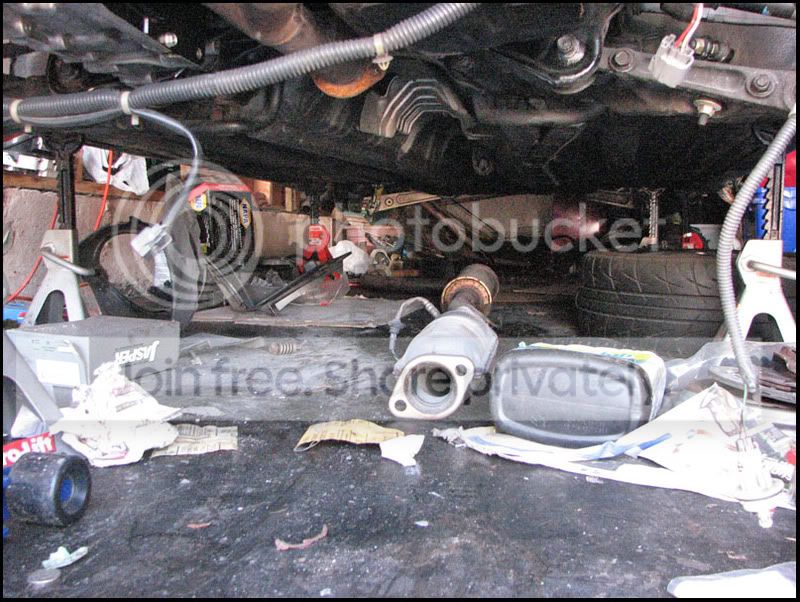
Old unit off:
(pics of what's going on is coming soon...nothing to get too excited over though)
Installed newly resprayed towhooks with the brand new bolts I bought for them:
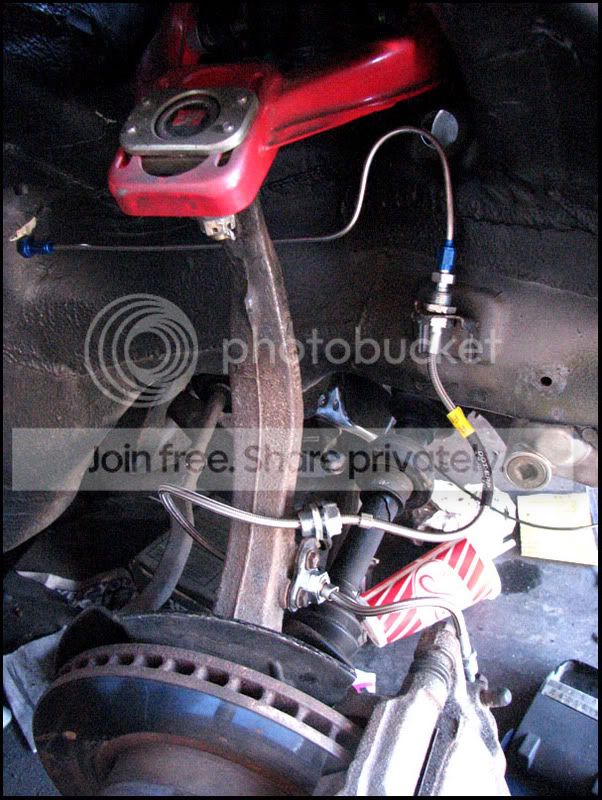
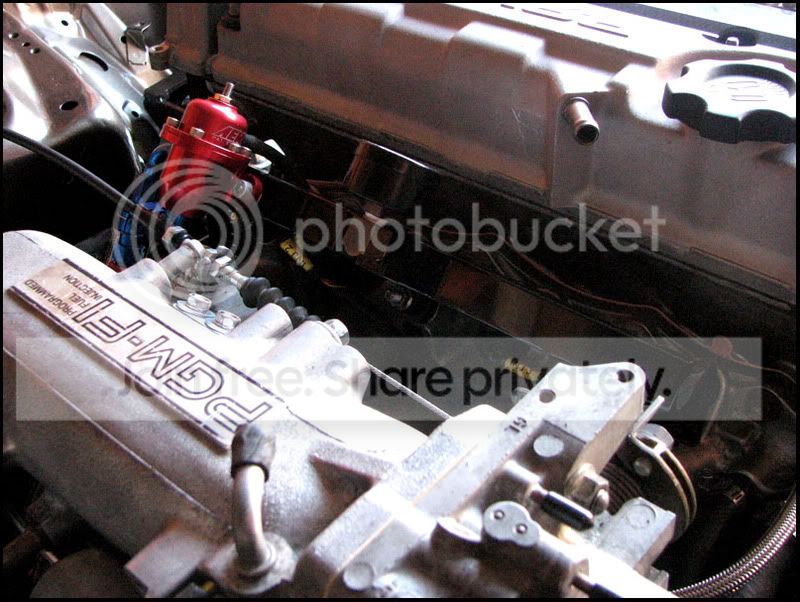
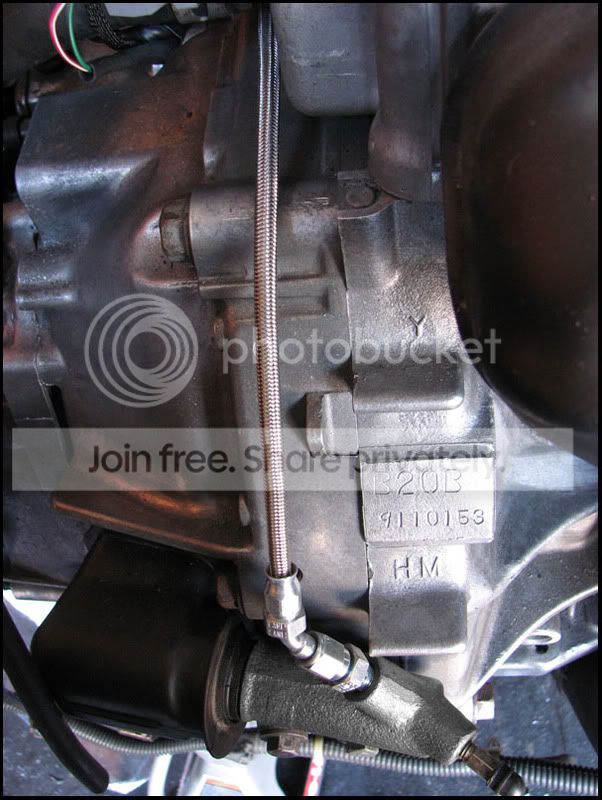
Finally the clutch line is finished and installed, I still need to mount a few tabs here and there in the engine bay to hold that line. I also may shorten it a bit. I'll have better pics of how I routed it down the road:
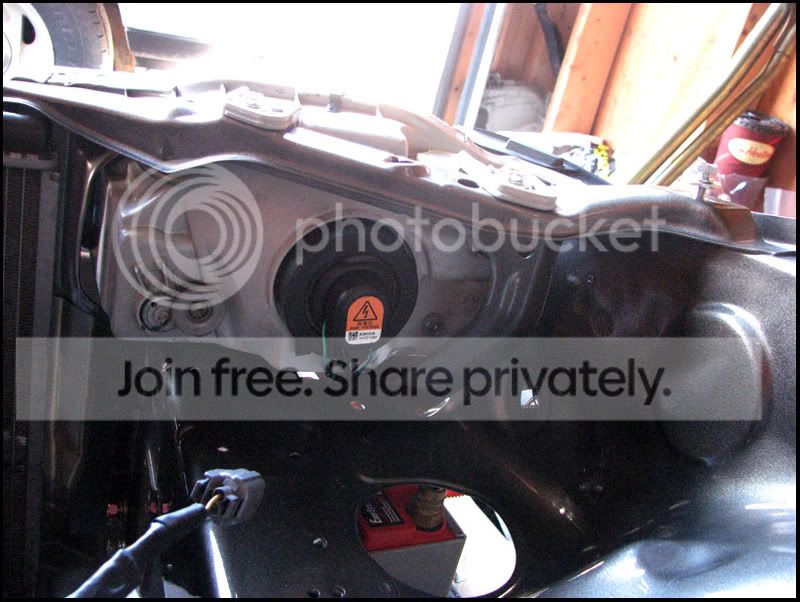
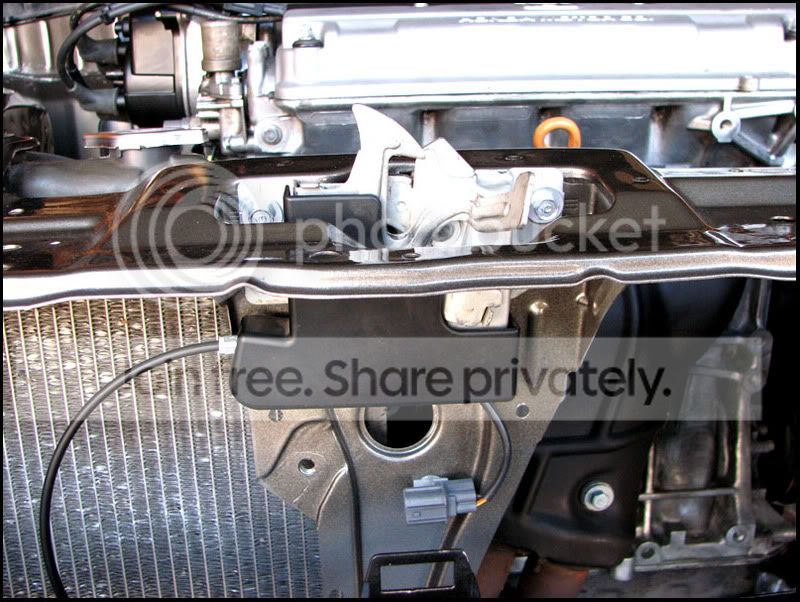
Hood latch was basically black with grease, and I cleaned it up, installed with new bolts and installed newly cleaned cover back on. Also connected the latch cable and fully mounted it:
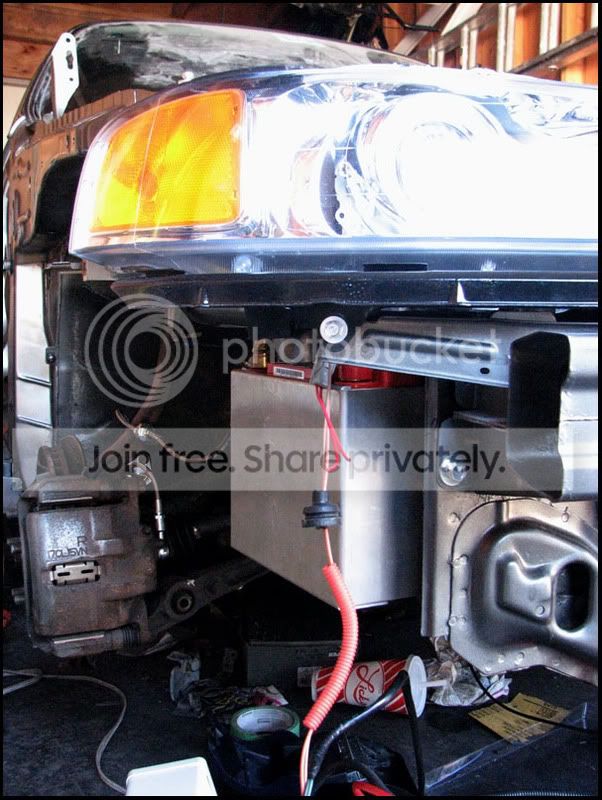
Installed my HID ballasts in this neat location:
every bolt hole was drilled out, tapped and I used metric screws
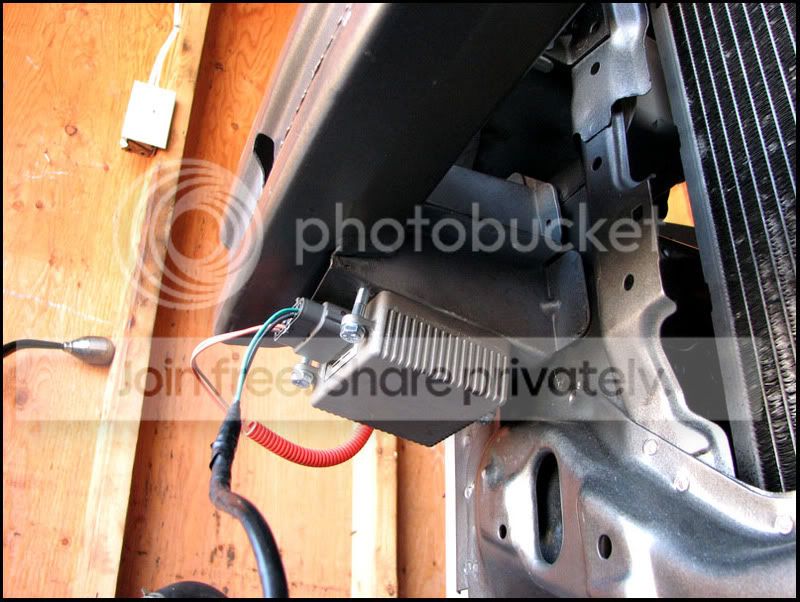
I'm very impressed how well it fit under there, now it looks uber clean.
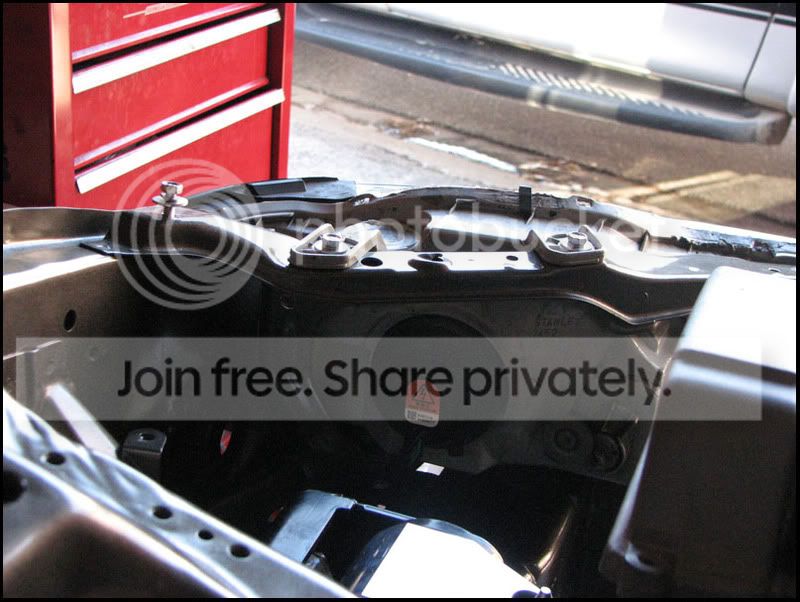
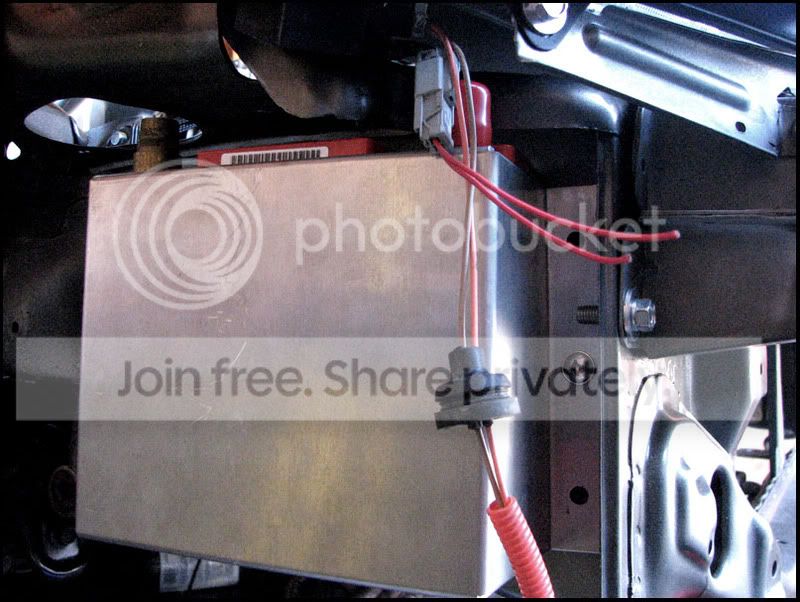
Also, this is how much lower the battery went. I also grounded the battery and started working on my grounds for the motor:
Distributor is also installed:
Not 100% if it will be cracked open again to get modified before motor gets cranked and tuned however.
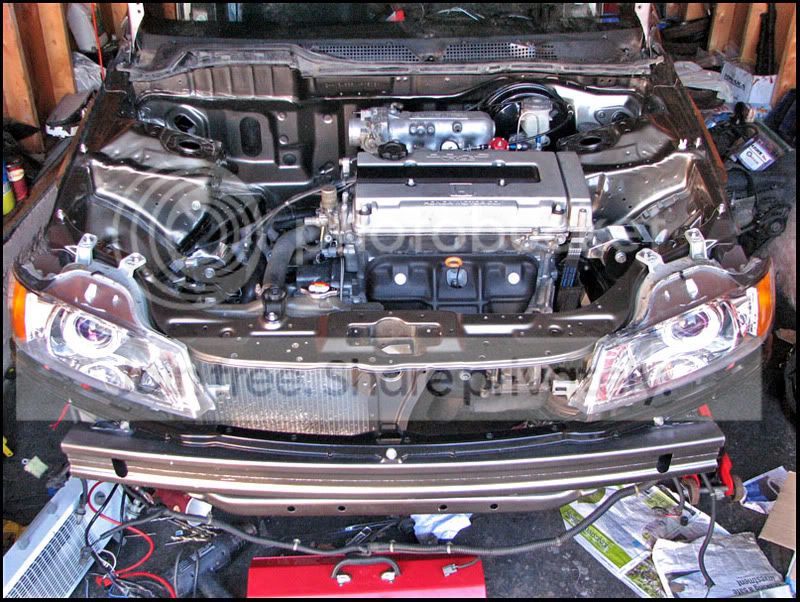
So, headlights, battery, dizzy, clutch line, hood latch, hood cable, ballasts are finally installed:
I got some more updates coming a bit soon, the brake lines inside are finally done I need to take pics of that. :bang:
The car is starting to look like a car lol.
I ran the harness and plugged in the headlights. As you can see, the harness won't be visable, I still need to sleeve it to hide it some more:
Thanks to the fancy Mercedes HID system, it helps me cover up the wiring a lot more
Battery is now also installed:
But as I soon discovered, this was sitting way too high, so I moved it down about an inch and a half (as seen in the pics pretty much, but one bolt lower. Scroll further down to see)
Then the other brake line was installed:
Only to be taked off to be sent back because the **** nut who sold me these gave me the wrong ones. The rear lines were the incorrect application. When I contacted him, he wanted me to send them back to get them modified and I would be paying for shipping and parts and labour so I said **** it and decided to make the rear lines myself. Basically I got 2 rear lines for some reason so I'll be cutting them and merging them together with a straight fitting.
And some of my harness is installed, thanks to rogue for the labels :bang: Here is how it will look:
Then I also got more bolts and rubber boots from Honda for the linkage. It's ready to be installed, except I kinda ran out of time and I need two more bolts to mount it that I'll pick up from the hardware store. Just need to find the correct pitch basically.
Then I borrowed my buddy's new badass jack that he got, and I was able to lift the car another foot and a half so I can get under it:
With the added height, I was able to get under and remove the exhaust:
Old unit off:
(pics of what's going on is coming soon...nothing to get too excited over though
)Installed newly resprayed towhooks with the brand new bolts I bought for them:
Finally the clutch line is finished and installed, I still need to mount a few tabs here and there in the engine bay to hold that line. I also may shorten it a bit. I'll have better pics of how I routed it down the road:
Hood latch was basically black with grease, and I cleaned it up, installed with new bolts and installed newly cleaned cover back on. Also connected the latch cable and fully mounted it:
Installed my HID ballasts in this neat location:
every bolt hole was drilled out, tapped and I used metric screws
I'm very impressed how well it fit under there, now it looks uber clean.
Also, this is how much lower the battery went. I also grounded the battery and started working on my grounds for the motor:
Distributor is also installed:
Not 100% if it will be cracked open again to get modified before motor gets cranked and tuned however.
So, headlights, battery, dizzy, clutch line, hood latch, hood cable, ballasts are finally installed:
I got some more updates coming a bit soon, the brake lines inside are finally done I need to take pics of that. :bang:
Thread Starter
Honda-Tech Member
Joined: Feb 2006
Posts: 2,069
Likes: 0
From: Hella North, Toronto
Thanks guys! I have more:
So today started off with me busting out the "Mugen Barrel"

Brought it over to my buddy's old school, where he had a hook up to let me in to the engineering department. There they had some really nice looks...and a sandblaster :D


After on the left, before on the right

Took out the sealed off centrecap, brand spankin' new

And threw it onto the naked MF10's for a test fit

I still have to blast 3 rims (finished 2 of them so far). Took me 1.5 hours to blast one rim because the glass beads they use there is extremely fine. The benefit is that it doesn't pit, but the downside it is takes forever, especially with spokey rims like these.
So today started off with me busting out the "Mugen Barrel"
Brought it over to my buddy's old school, where he had a hook up to let me in to the engineering department. There they had some really nice looks...and a sandblaster :D
After on the left, before on the right
Took out the sealed off centrecap, brand spankin' new
And threw it onto the naked MF10's for a test fit
I still have to blast 3 rims (finished 2 of them so far). Took me 1.5 hours to blast one rim because the glass beads they use there is extremely fine. The benefit is that it doesn't pit, but the downside it is takes forever, especially with spokey rims like these.
Thread Starter
Honda-Tech Member
Joined: Feb 2006
Posts: 2,069
Likes: 0
From: Hella North, Toronto

Thread Starter
Honda-Tech Member
Joined: Feb 2006
Posts: 2,069
Likes: 0
From: Hella North, Toronto
Haha, my favorite mod for my car for sure! Local's love them too, I keep getting asked to lend them out for photoshoots
Updates coming really really soon! Like 2 minutes.
Thread Starter
Honda-Tech Member
Joined: Feb 2006
Posts: 2,069
Likes: 0
From: Hella North, Toronto
Damn for some reason the post disappeared, so I'll put it back up:
I had a ripped steering rack boot, so I had to replace it. Luckily it only happened recently and the car wasn't driven much, so no debree got into the steering rack:

and the new one that went in:

Had the brake lines finished up completely, tested the lines and had no leaks :D
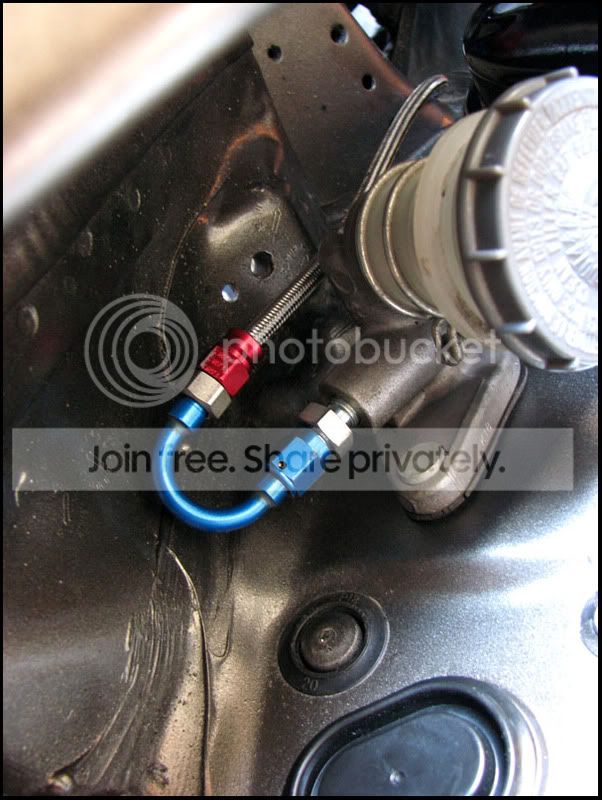
Last of what I had left to do since I last updated this thread was the inside cabin brake lines and I had to install the 4040 prop valve, so here is a pic for those who asked:

Timing belt needed an adjustment, so I had that done, and in the meanwhile decided to take a pic of the new mint rebuilt head:

Finished installing the clutch master cylinder, also while I was at it I had to remove the original S2000 rod and replace it with my D16 unit (could have cut S2000 unit to be shorter, but this was a cleaner install), so that was done via these ghetto snap ring pliers. worked perfectly, and now the clutch master cylinder is installed and bleed.

Alternator and belt were installed:

I found out I have the wrong plug, but I recently picked one up from a friend of mine, so all is good. The plug should be switched this week and the alternator will be plugged in
I also picked up a few brand new grommets, I'm still missing some for the bay but that will be taken care of soon. They look incredibly fresh in the bay though:


Got a bunch of OEM mint condition original bolts in gold

Installed


New slim fan is installed with reveresed polarity so that it spins the correct way (push rather than pull):


Removed, stripped, sanded and recoated in flat black my shell for the interior. All interior brackets had the same process applied to them.
Before:


After:

Then had that shell installed, along with my steering wheel installed:


My front suspension went in, matched the fuel setup PERFECTLY:


Cleaned every little last duct in my interior, as well as my dash and finally installed it since everything was complete, here is the aftermath after a day-long cleaning:

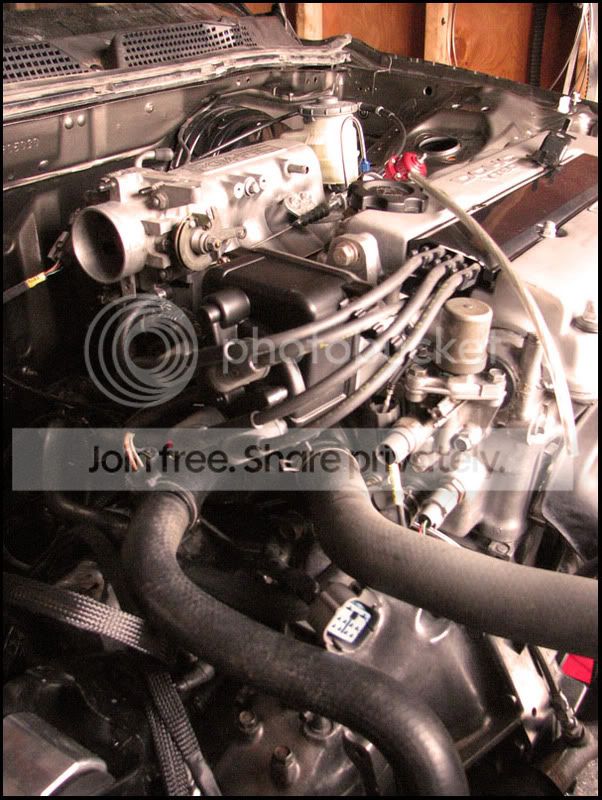
Engine bay almost done, just need to install the throttle body, and intake. I have some grounds I'm making right now for the tranny and cylinder head, more will be posted later this week:

Last but not least, I had the grill installed:


Can't wait 'till it's done! Almost there!!!
I had a ripped steering rack boot, so I had to replace it. Luckily it only happened recently and the car wasn't driven much, so no debree got into the steering rack:
and the new one that went in:
Had the brake lines finished up completely, tested the lines and had no leaks :D
Last of what I had left to do since I last updated this thread was the inside cabin brake lines and I had to install the 4040 prop valve, so here is a pic for those who asked:
Timing belt needed an adjustment, so I had that done, and in the meanwhile decided to take a pic of the new mint rebuilt head:
Finished installing the clutch master cylinder, also while I was at it I had to remove the original S2000 rod and replace it with my D16 unit (could have cut S2000 unit to be shorter, but this was a cleaner install), so that was done via these ghetto snap ring pliers. worked perfectly, and now the clutch master cylinder is installed and bleed.
Alternator and belt were installed:
I found out I have the wrong plug, but I recently picked one up from a friend of mine, so all is good. The plug should be switched this week and the alternator will be plugged in
I also picked up a few brand new grommets, I'm still missing some for the bay but that will be taken care of soon. They look incredibly fresh in the bay though:
Got a bunch of OEM mint condition original bolts in gold
Installed
New slim fan is installed with reveresed polarity so that it spins the correct way (push rather than pull):
Removed, stripped, sanded and recoated in flat black my shell for the interior. All interior brackets had the same process applied to them.
Before:
After:
Then had that shell installed, along with my steering wheel installed:
My front suspension went in, matched the fuel setup PERFECTLY:
Cleaned every little last duct in my interior, as well as my dash and finally installed it since everything was complete, here is the aftermath after a day-long cleaning:
Engine bay almost done, just need to install the throttle body, and intake. I have some grounds I'm making right now for the tranny and cylinder head, more will be posted later this week:
Last but not least, I had the grill installed:
Can't wait 'till it's done! Almost there!!!
Thread Starter
Honda-Tech Member
Joined: Feb 2006
Posts: 2,069
Likes: 0
From: Hella North, Toronto
Thread Starter
Honda-Tech Member
Joined: Feb 2006
Posts: 2,069
Likes: 0
From: Hella North, Toronto
I actually have a centre piece of sale, it's not the centre console where the radio goes, but the coin pocket underneath it. If you're interested shoot me a PM and we can working something out. If you really want the centre console, I can most likely get a hold of one for you this upcoming week. Lemme know.

Joined: Jul 2008
Posts: 2,163
Likes: 0
From: Howcome we park on driveways, and drive on parkways?

i read through this whole thread waiting to see the finished product saying to myself well if he was trying to get done by I.A....that was a couple weeks ago, so it should be done this is gonna look sick.....
but then no more updates??
im sure its done and it looks great! post some pics and finish this build thread!!!!
Honda-Tech Member
Joined: Jan 2008
Posts: 5,191
Likes: 0
From: Portland, OR, USA
damn too bad you have to sell this car, was soo sweet. hopefully it goes to a good home. i'd pick it up if i had money. hopefully things come through and you don't have to sell it.
