
♪♫Fresh’86 big build up thread♫♪
 07-08-2008, 01:06 AM
#1
Honda-Tech Member
Thread Starter

Join Date: Feb 2006
Location: Hella North, Toronto
Posts: 2,069
Likes: 0
Received 0 Likes
on
0 Posts
Update:
31/08/2010
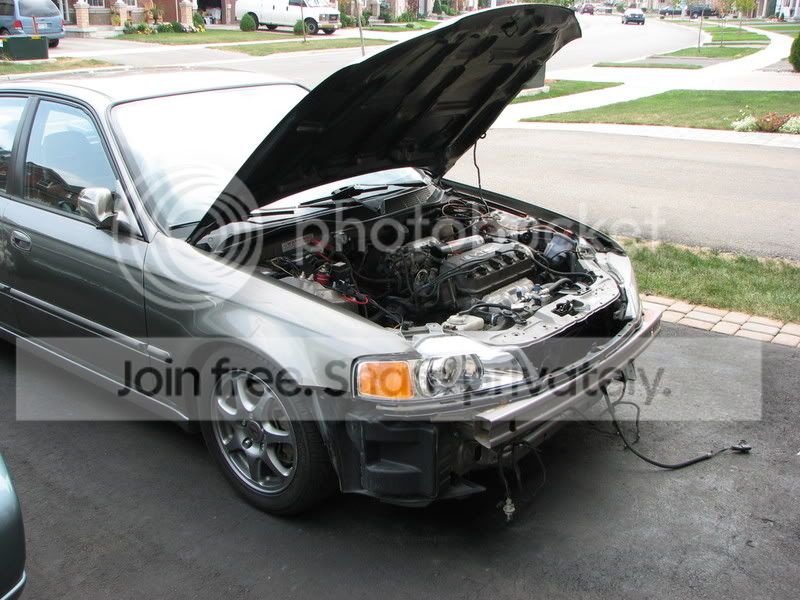
Car is completed for now, I managed to get her done in time for the Honda-Tech 7 Meet in Toronto:
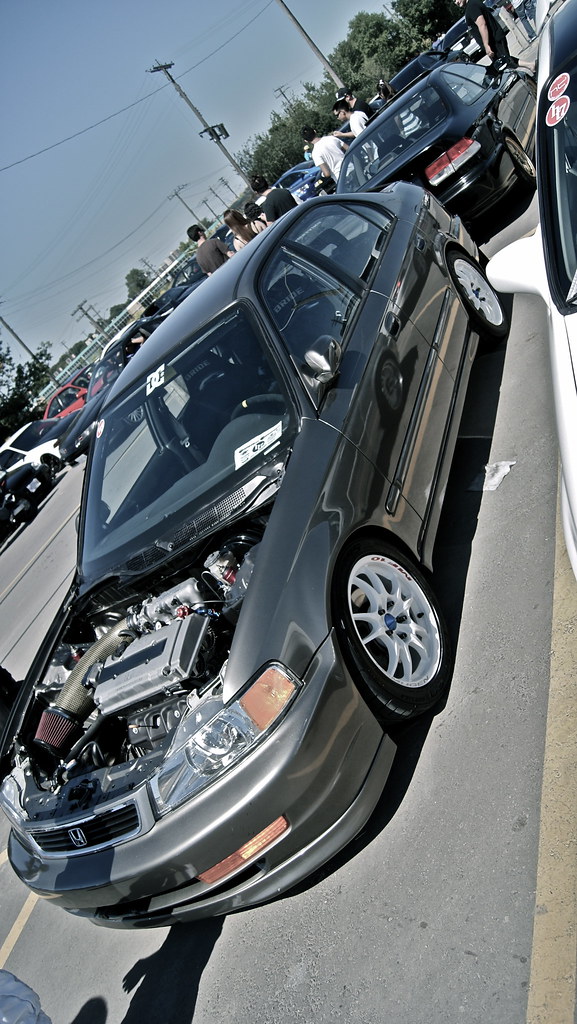
So I've been putting off this build thread for months...The car has sat in the same spot for over a year now, and finally we decided that the car will be finished for Import Alliance. I'm still unsure as to whether it will happen or not, but I have 2 weeks to go, and things are really starting to pick up with this car and getting finished. This isn't going to be a simple engine swap thread, but will included a fully tucked bay, along with some of the other upgrades I'll be doing to the car.
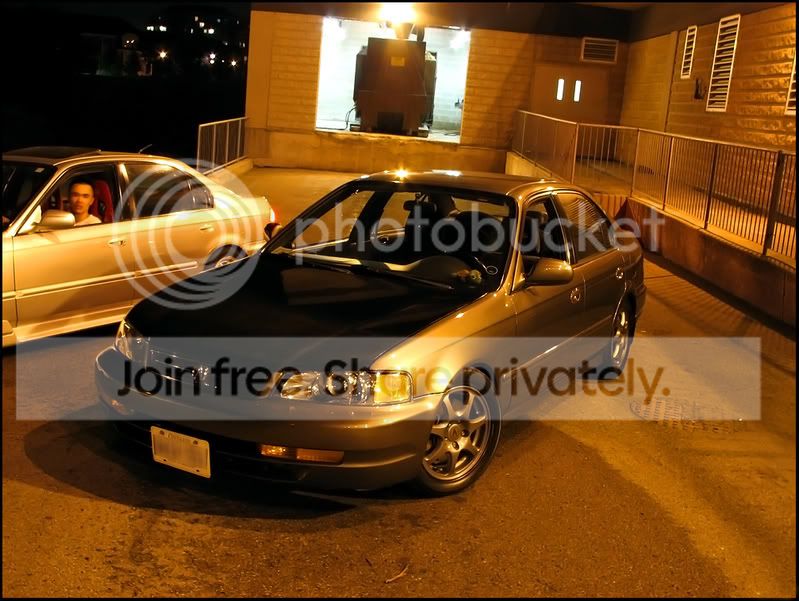
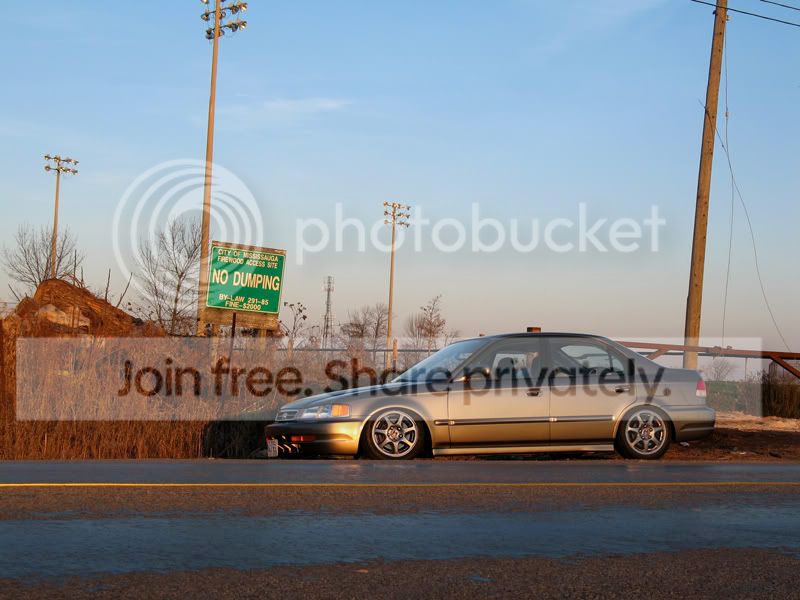
Some pics of the car before the build:


<FONT SIZE="2">Table Of Content</FONT>
Pics of the following can be found on these pages:
**(click on the description to view pictures in seperate window)**
page 1
- Before pics of how crappy the car looked, and the poor condition
- Motor that was picked up
- New clutch line, Brake line, Battery terminals, Harness sleeves and Brake diagrams
- Pics of Bay bleached, and dashboard removed
- New Flare Tool pics, as well as some fittings and lines fabbed and installed
- Brake line studs cut off
- New tranny polished, new clutch and flywheel pics, new head (polished) and polished cam gears
Page 2
- New ARC intake that needs to be restored
- Polished ASR plate
- Engine Bay Primered
- Base coat applied to bay, ITR strut brace test fitted
Page 3
- Engine Bay fully coated in basecoat and clearcoated
- Subframe primered, basecoated in gloss black and clearcoated
- Fenderwells primered, and coated in flat black rust encapsulator
- New Hasport Mounts, Hasport mounts polished
Page 4
-Engine bay and subframe fully buffed (compounded and polished)
-Brake booster painted the first time (Brake fluid leaks causes me to repaint)
-New Competition Clutch and Fidanza flywheel come in and get installed in to motor
-ARP Head studs get installed onto the motor
-Head and Tranny are mounted to block
-Brake booster is stripped to bare metal, primed, rust proof paint coated, painted gloss black and cleared
Page 6
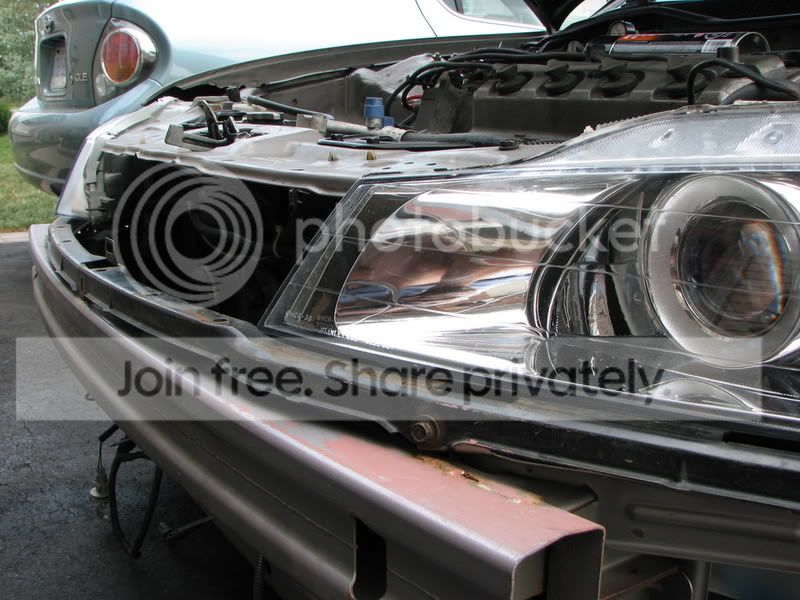
-Headlights came back from retrofitter
-Fuel setup came in (New fuel rail, FPR)
-Before and after Engine harness pics
-Brake lines from master cylinder are complete and posted
-Pic of my beater
-Bought a BNIB full bra
-More Earl's fittings came in the mail
-Got my tranny bracket and headlight bracket repainted gloss black
Page 7
-New shipment of OEM parts came in, all brand new bolts for my bay
-More brakeline flaring
-Did the lines from the rear brakes into the firewall
-Pic of motor 90% assembled
-Took apart throttlebody and cleaned it fully using brake cleaner
-Clean cylinder head along with valves
-Polished lines going to rear of car from firewall to match
-Put together fuel assembly
-Yet another Honda order came in with more bolts
Page 8
-Posted up pics of my new seats...Bride BrixII's
-New wheels have been posted as well...Mugen MF10's
-Mocked up front end by putting it together and putting wheels in fender
-Pics of MF10 centre caps
-New valve cover, courtesy of streetwerkz
-New Odyssey battery
-New battery tray
-Momo ITR DC5 steering wheel swapped with RSX wheel
-Head put to spec, with new cams, timing belt installed
-New clutch master cylinder
-Exhaust issues and intermediate shaft issues
Page 11
-JDM ITR Gold shifter linkage
-New bolts, tranny cover, tranny fluid, ground wire, ES bushings, thermal wrap for harness
-Vtec conversion line fittings
-Magnetic Drain Plug
-Long Mirror
-New JDM Domani Grille
-AN fuel line install
-Tranny cover installed
-Modified FPR
-Fuel setup installed
-Tucked harness pics
-Throttle cable and bracket modified and installed
-S2K Master cylinder Resevoir
-Radiator installed
-Coolant and vacume lines installed
-Rebar and headlight beam installed with fresh new Honda bolts
-New hood support clip.
-Heat sheild restored
-Skunk2 Shift ****
-Brake Lines installed
-Clutch lines installed
Page 12
-Took the MF10's in to get sandblasted
-Test fit MF10 centrecaps on sandblasted wheel
-Ripped steering rack boot replaced
-Brake lines and proportioning valve finished up behind the dash
-Timing belt adjusted, and valve adjustment completed
-S2000 clutch master altered and installed
-Alternator and belt installed
-New gromets in the bay installed
-New gold OEM bolts
-New slimfan
-Inner dash brackets, frame and components blasted and recoated
-DC5-R wheel installed
-Front suspension installed
-Dashboard cleaned entirely inside and out
-Grill installed
Page 14
Picture of car completed at the Honda-Tech 7 Toronto Meet
<FONT SIZE="4">Contents Updated: 19/08/10</FONT>
31/08/2010
Car is completed for now, I managed to get her done in time for the Honda-Tech 7 Meet in Toronto:
So I've been putting off this build thread for months...The car has sat in the same spot for over a year now, and finally we decided that the car will be finished for Import Alliance. I'm still unsure as to whether it will happen or not, but I have 2 weeks to go, and things are really starting to pick up with this car and getting finished. This isn't going to be a simple engine swap thread, but will included a fully tucked bay, along with some of the other upgrades I'll be doing to the car.
Some pics of the car before the build:
<FONT SIZE="2">Table Of Content</FONT>
Pics of the following can be found on these pages:
**(click on the description to view pictures in seperate window)**
page 1
- Before pics of how crappy the car looked, and the poor condition
- Motor that was picked up
- New clutch line, Brake line, Battery terminals, Harness sleeves and Brake diagrams
- Pics of Bay bleached, and dashboard removed
- New Flare Tool pics, as well as some fittings and lines fabbed and installed
- Brake line studs cut off
- New tranny polished, new clutch and flywheel pics, new head (polished) and polished cam gears
Page 2
- New ARC intake that needs to be restored
- Polished ASR plate
- Engine Bay Primered
- Base coat applied to bay, ITR strut brace test fitted
Page 3
- Engine Bay fully coated in basecoat and clearcoated
- Subframe primered, basecoated in gloss black and clearcoated
- Fenderwells primered, and coated in flat black rust encapsulator
- New Hasport Mounts, Hasport mounts polished
Page 4
-Engine bay and subframe fully buffed (compounded and polished)
-Brake booster painted the first time (Brake fluid leaks causes me to repaint)
-New Competition Clutch and Fidanza flywheel come in and get installed in to motor
-ARP Head studs get installed onto the motor
-Head and Tranny are mounted to block
-Brake booster is stripped to bare metal, primed, rust proof paint coated, painted gloss black and cleared
Page 6
-Headlights came back from retrofitter
-Fuel setup came in (New fuel rail, FPR)
-Before and after Engine harness pics
-Brake lines from master cylinder are complete and posted
-Pic of my beater
-Bought a BNIB full bra
-More Earl's fittings came in the mail
-Got my tranny bracket and headlight bracket repainted gloss black
Page 7
-New shipment of OEM parts came in, all brand new bolts for my bay
-More brakeline flaring
-Did the lines from the rear brakes into the firewall
-Pic of motor 90% assembled
-Took apart throttlebody and cleaned it fully using brake cleaner
-Clean cylinder head along with valves
-Polished lines going to rear of car from firewall to match
-Put together fuel assembly
-Yet another Honda order came in with more bolts
Page 8
-Posted up pics of my new seats...Bride BrixII's
-New wheels have been posted as well...Mugen MF10's
-Mocked up front end by putting it together and putting wheels in fender
-Pics of MF10 centre caps
-New valve cover, courtesy of streetwerkz
-New Odyssey battery
-New battery tray
-Momo ITR DC5 steering wheel swapped with RSX wheel
-Head put to spec, with new cams, timing belt installed
-New clutch master cylinder
-Exhaust issues and intermediate shaft issues
Page 11
-JDM ITR Gold shifter linkage
-New bolts, tranny cover, tranny fluid, ground wire, ES bushings, thermal wrap for harness
-Vtec conversion line fittings
-Magnetic Drain Plug
-Long Mirror
-New JDM Domani Grille
-AN fuel line install
-Tranny cover installed
-Modified FPR
-Fuel setup installed
-Tucked harness pics
-Throttle cable and bracket modified and installed
-S2K Master cylinder Resevoir
-Radiator installed
-Coolant and vacume lines installed
-Rebar and headlight beam installed with fresh new Honda bolts
-New hood support clip.
-Heat sheild restored
-Skunk2 Shift ****
-Brake Lines installed
-Clutch lines installed
Page 12
-Took the MF10's in to get sandblasted
-Test fit MF10 centrecaps on sandblasted wheel
-Ripped steering rack boot replaced
-Brake lines and proportioning valve finished up behind the dash
-Timing belt adjusted, and valve adjustment completed
-S2000 clutch master altered and installed
-Alternator and belt installed
-New gromets in the bay installed
-New gold OEM bolts
-New slimfan
-Inner dash brackets, frame and components blasted and recoated
-DC5-R wheel installed
-Front suspension installed
-Dashboard cleaned entirely inside and out
-Grill installed
Page 14
Picture of car completed at the Honda-Tech 7 Toronto Meet
<FONT SIZE="4">Contents Updated: 19/08/10</FONT>
Last edited by Fresh'86; 09-20-2010 at 07:48 AM.
 07-08-2008, 01:17 AM
#2
Honda-Tech Member
Thread Starter
Join Date: Feb 2006
Location: Hella North, Toronto
Posts: 2,069
Likes: 0
Received 0 Likes
on
0 Posts
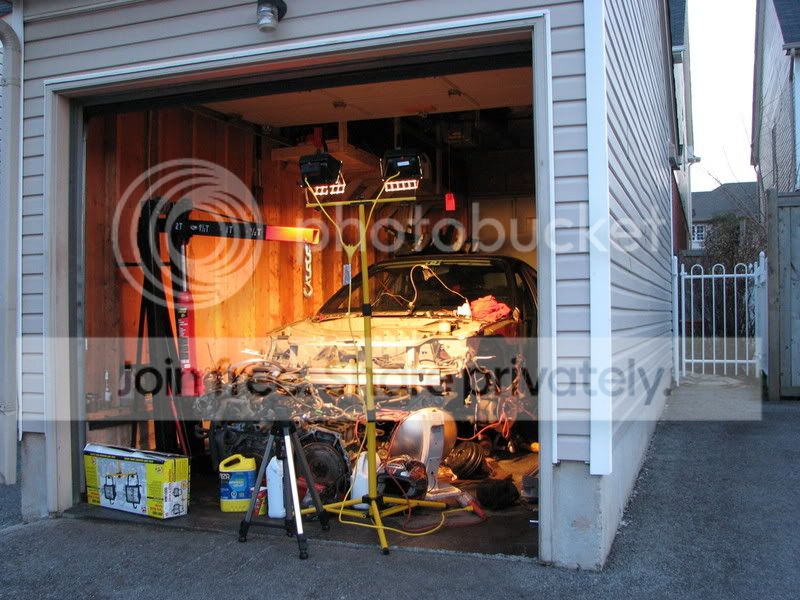
So I'll start with pics of the bay from day 1:
Car was brought into it's new home for the next little while, and will start getting stripped:
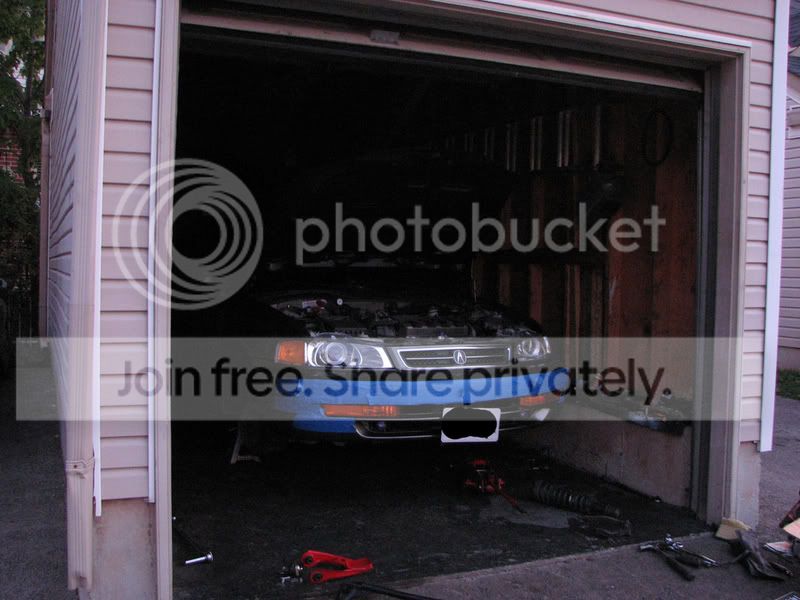
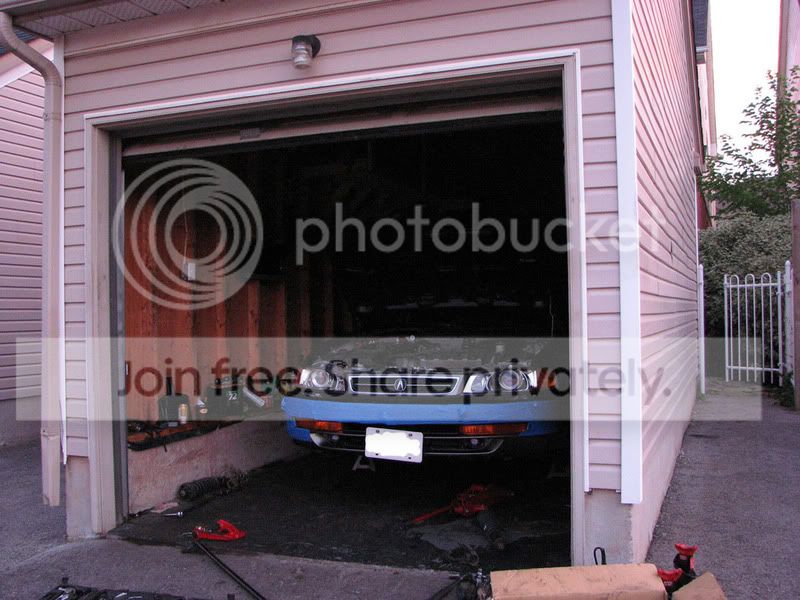
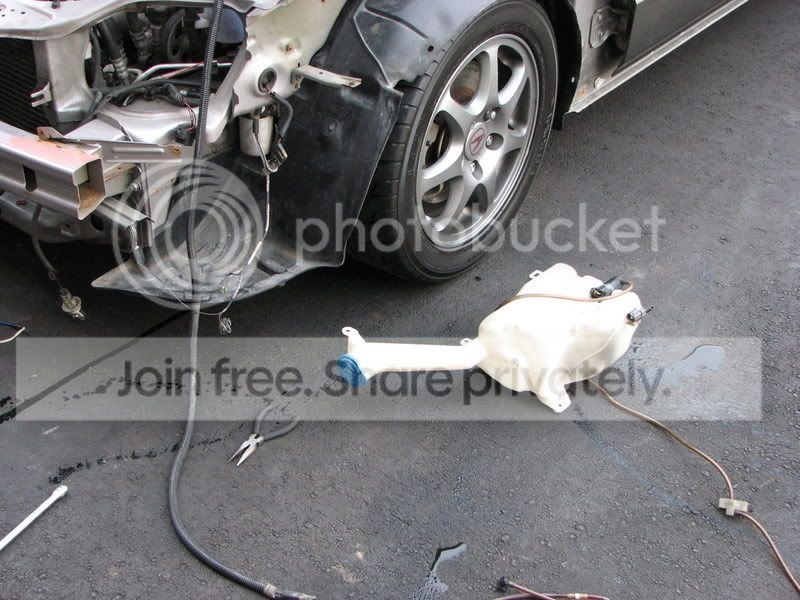
The bay:
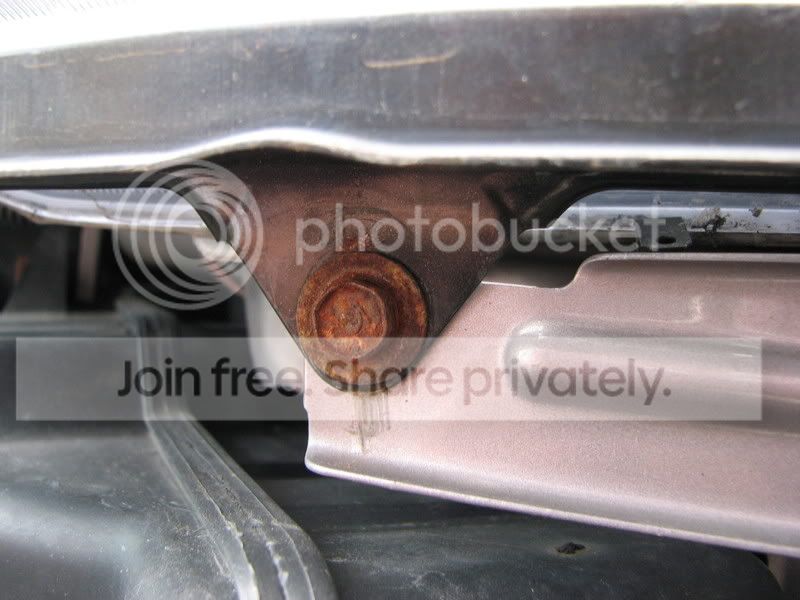
Some pretty bad rust all over the bay that will be deleted soon (the car has spent most of it's life in Manitoba, Canada...what do you expect?):

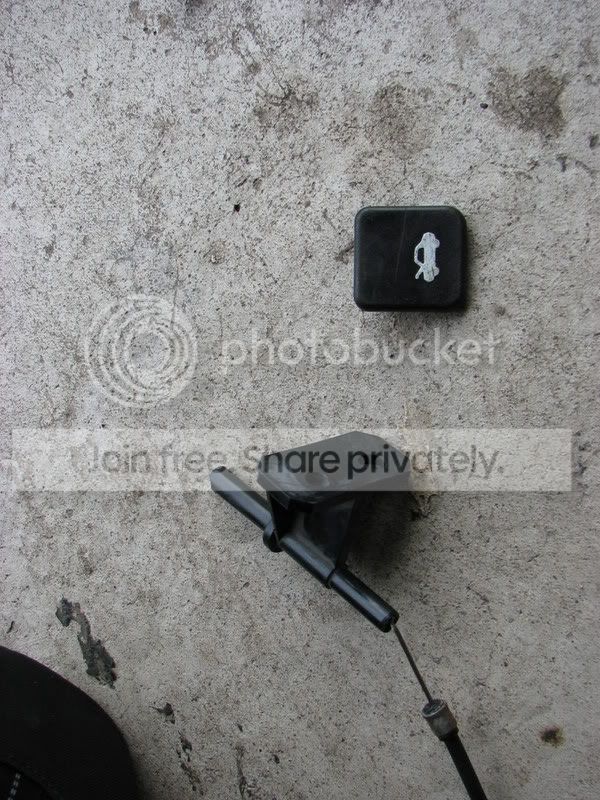
The hood latch lever actually broke off, so I'll have to be getting a new one:


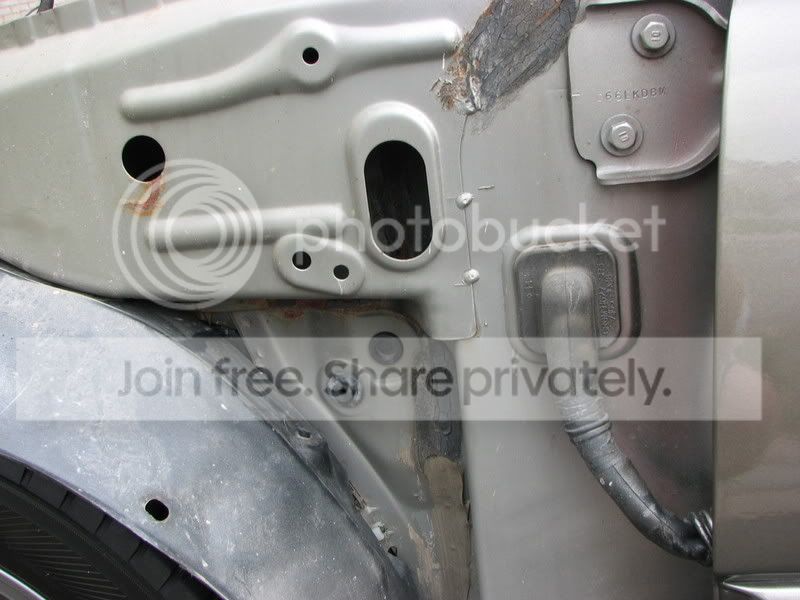
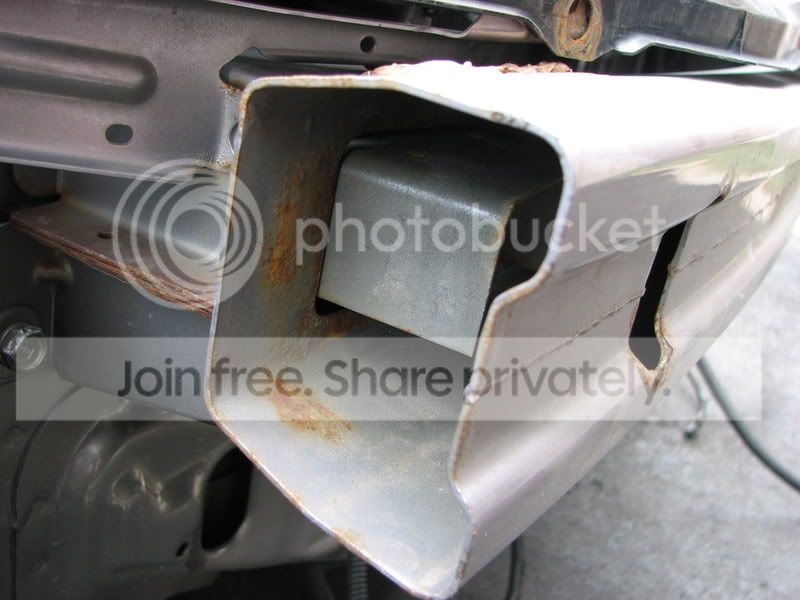
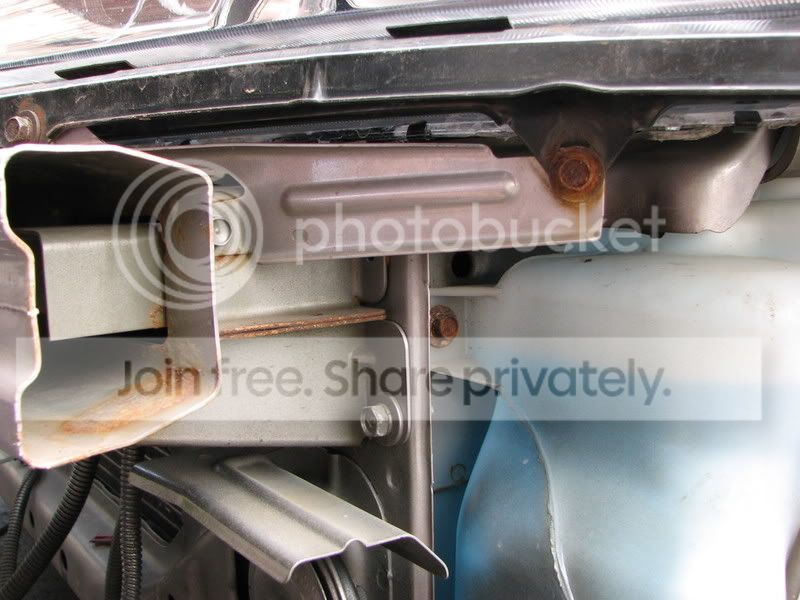
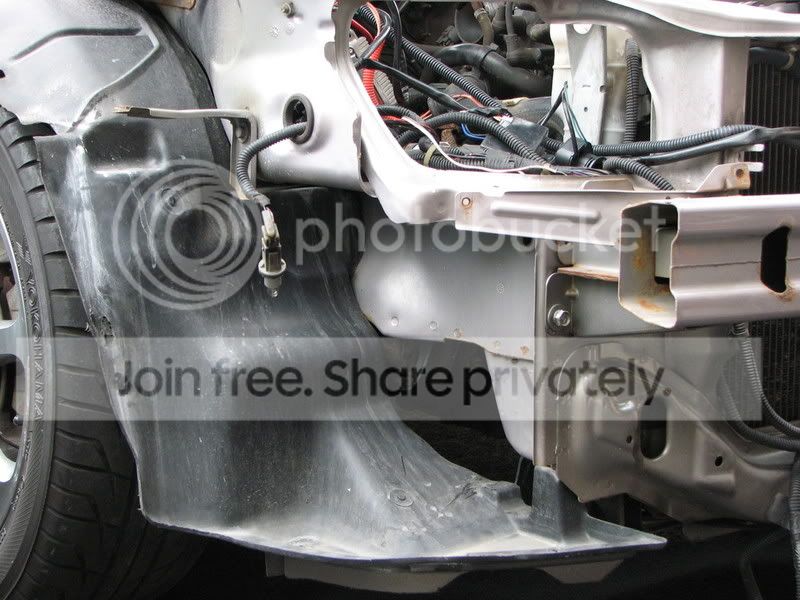
Overall 'horrible' condition of the bay and it's surroundings:


Removed the intake air chamber box:

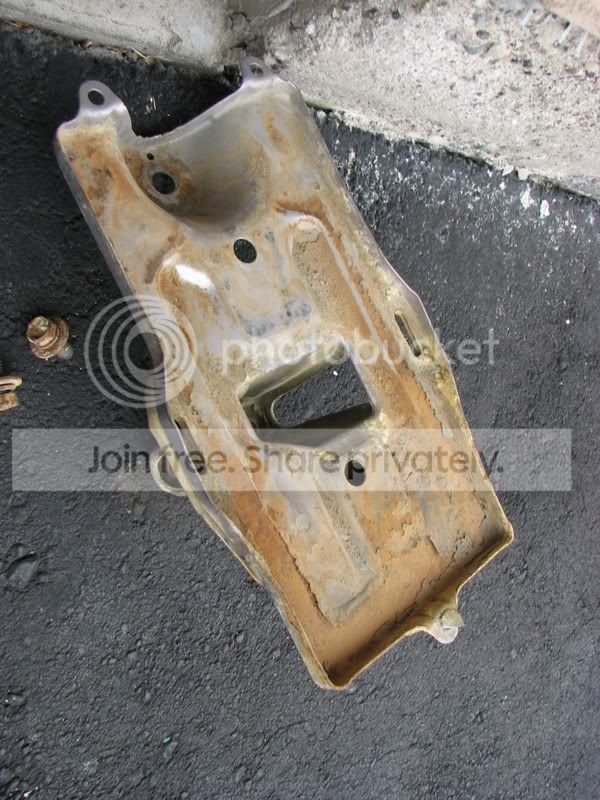
Battery tray was simply rotten (had a leaky battery when I first got the car):

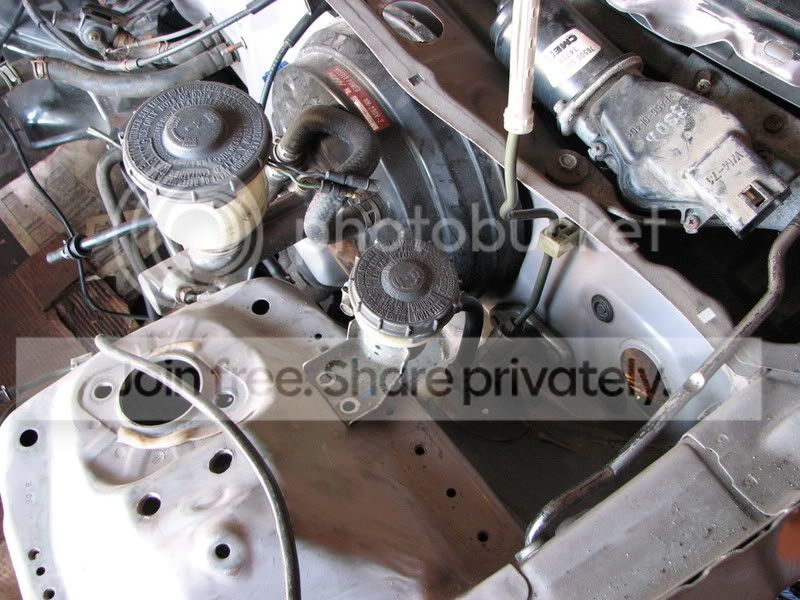
Pulled out the washer fluid resevoir, need to get it modified (shortened) to make it seem invisable in the bay
Cruise will stay, but won't be seen...here is a before:

Car was brought into it's new home for the next little while, and will start getting stripped:
The bay:
Some pretty bad rust all over the bay that will be deleted soon (the car has spent most of it's life in Manitoba, Canada...what do you expect?):
The hood latch lever actually broke off, so I'll have to be getting a new one:
Overall 'horrible' condition of the bay and it's surroundings:
Removed the intake air chamber box:
Battery tray was simply rotten (had a leaky battery when I first got the car):
Pulled out the washer fluid resevoir, need to get it modified (shortened) to make it seem invisable in the bay
Cruise will stay, but won't be seen...here is a before:
07-08-2008, 01:28 AM
#3
Honda-Tech Member
Thread Starter
Join Date: Feb 2006
Location: Hella North, Toronto
Posts: 2,069
Likes: 0
Received 0 Likes
on
0 Posts
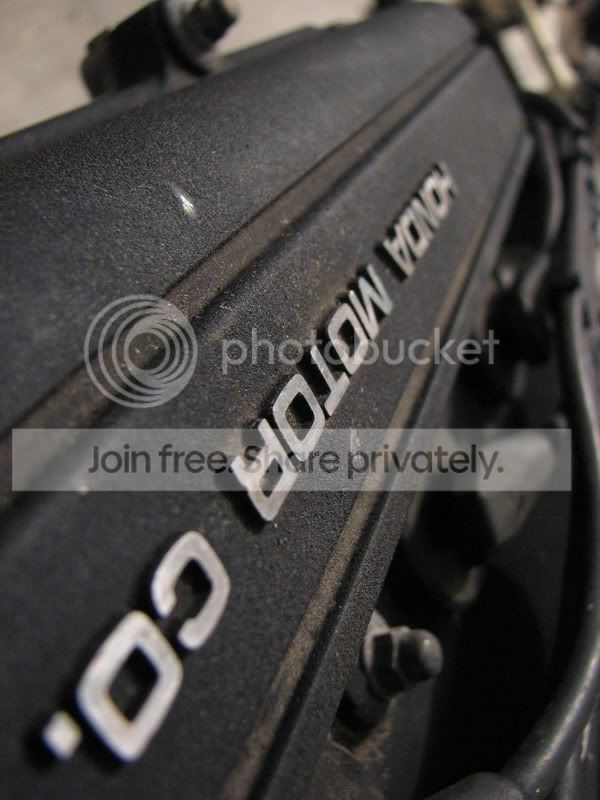
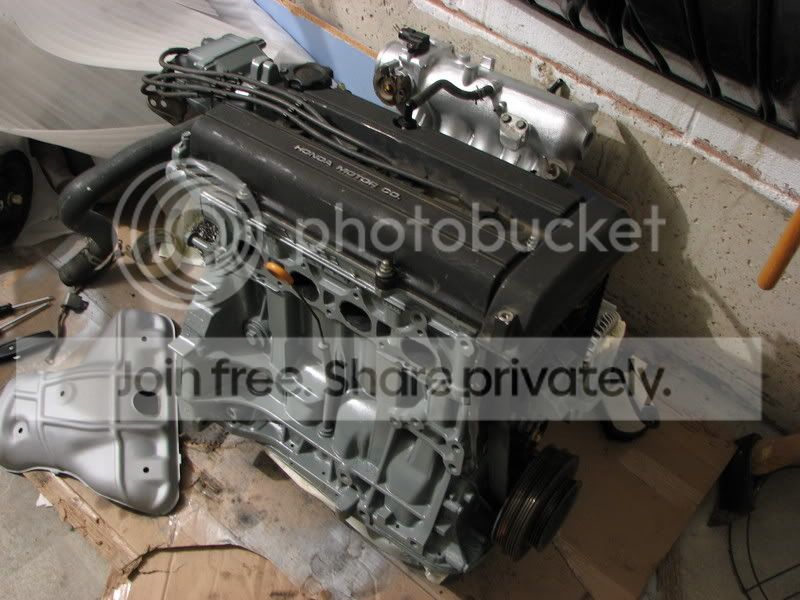
Also, here are the pics of the motor which I picked up off a friend who decided to upgrade to a C5 rather than play with the whole B20/Vtec conversion:
My GF and my buddy had to make a pose
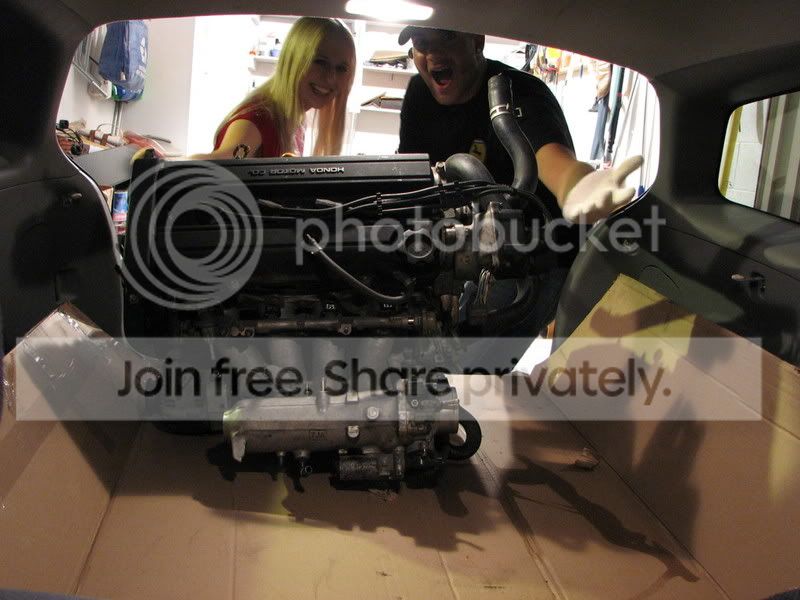
Brought the motor back in my old beater...the toyota matrix
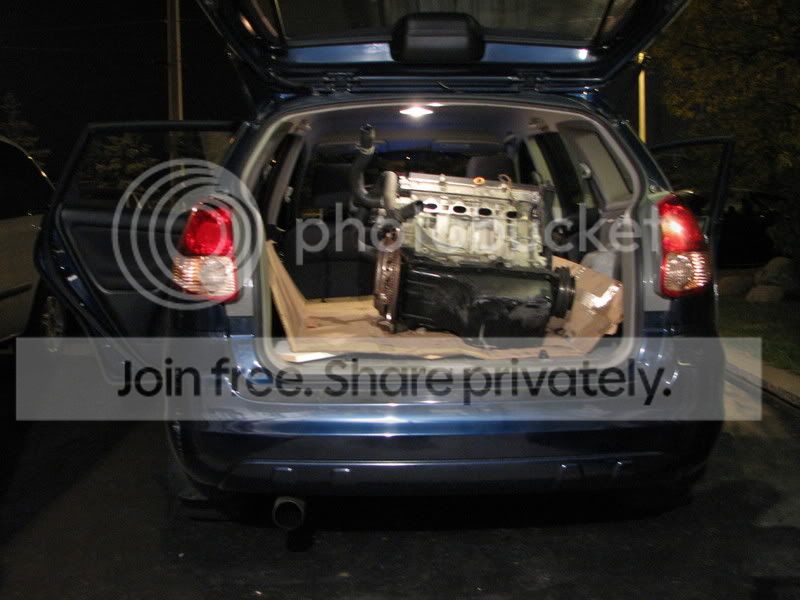

The overall condition of this motor was excellent, and it had very low low mileage:
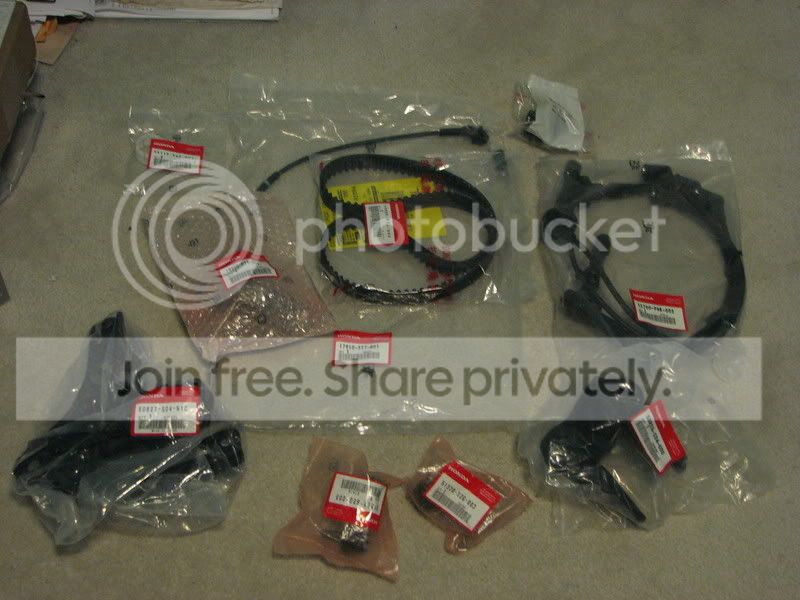
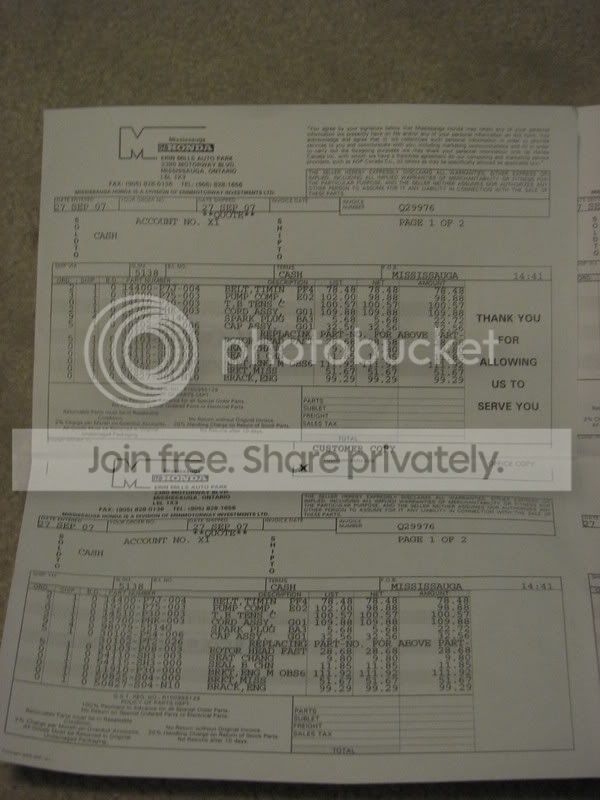
So I grabbed a bunch of parts for the swap:
So I decided to paint the motor "battleship grey" at the time, and it turned out sorta like this:


(will post more updates tomorrow when I get home from work)
My GF and my buddy had to make a pose
Brought the motor back in my old beater...the toyota matrix
The overall condition of this motor was excellent, and it had very low low mileage:
So I grabbed a bunch of parts for the swap:
So I decided to paint the motor "battleship grey" at the time, and it turned out sorta like this:
(will post more updates tomorrow when I get home from work)
07-08-2008, 01:50 AM
#4
Honda-Tech Member
Join Date: Jun 2006
Location: Windmill in the sky.
Posts: 331
Likes: 0
Received 0 Likes
on
0 Posts
Great build!
I dunno what to say about these "Domani" conversions though.
I dont hate em and I dont like em, they just look wierd in a good way.
It looks fresh with those ITR's though!
I dunno what to say about these "Domani" conversions though.
I dont hate em and I dont like em, they just look wierd in a good way.
It looks fresh with those ITR's though!
07-08-2008, 08:42 AM
#6
Sweet Title
Join Date: Feb 2006
Location: Bay Area, CA
Posts: 3,966
Likes: 0
Received 0 Likes
on
0 Posts
<TABLE WIDTH="90%" CELLSPACING=0 CELLPADDING=0 ALIGN=CENTER><TR><TD>Quote, originally posted by OneOhNine27 »</TD></TR><TR><TD CLASS="quote">I dunno what to say about these "Domani" conversions though.</TD></TR></TABLE>
Pretty sure his car is an Acura EL
Pretty sure his car is an Acura EL
Trending Topics
07-08-2008, 01:55 PM
#8
Honda-Tech Member
Thread Starter
Join Date: Feb 2006
Location: Hella North, Toronto
Posts: 2,069
Likes: 0
Received 0 Likes
on
0 Posts
<TABLE WIDTH="90%" CELLSPACING=0 CELLPADDING=0 ALIGN=CENTER><TR><TD>Quote, originally posted by OneOhNine27 »</TD></TR><TR><TD CLASS="quote">Great build!
I dunno what to say about these "Domani" conversions though.
I dont hate em and I dont like em, they just look wierd in a good way.
It looks fresh with those ITR's though!</TD></TR></TABLE>
Thanks!
It's actually an Acura EL, like sixfiveoh said. I am from Canada, and we sell them here. I actually own two
I've been down to the states once and I had a lot of people at gas stations ask my why I have accord parts on my civic
Thanks for the compliment, the ITR's are daily/beater rims. Car is getting a set of MF10's in white.
<TABLE WIDTH="90%" CELLSPACING=0 CELLPADDING=0 ALIGN=CENTER><TR><TD>Quote, originally posted by siblues »</TD></TR><TR><TD CLASS="quote">Very nice man you better get that car done.One of our cars has to get done this summer </TD></TR></TABLE>
haha, yeah well you better come to AI! I'm pretty sure this car will be ready within the next few weeks.
<TABLE WIDTH="90%" CELLSPACING=0 CELLPADDING=0 ALIGN=CENTER><TR><TD>Quote, originally posted by sh!tsWEAK! »</TD></TR><TR><TD CLASS="quote">good luck mayne </TD></TR></TABLE>
Thank you sir
I dunno what to say about these "Domani" conversions though.
I dont hate em and I dont like em, they just look wierd in a good way.
It looks fresh with those ITR's though!</TD></TR></TABLE>
Thanks!
It's actually an Acura EL, like sixfiveoh said. I am from Canada, and we sell them here. I actually own two
I've been down to the states once and I had a lot of people at gas stations ask my why I have accord parts on my civic
Thanks for the compliment, the ITR's are daily/beater rims. Car is getting a set of MF10's in white.
<TABLE WIDTH="90%" CELLSPACING=0 CELLPADDING=0 ALIGN=CENTER><TR><TD>Quote, originally posted by siblues »</TD></TR><TR><TD CLASS="quote">Very nice man you better get that car done.One of our cars has to get done this summer
</TD></TR></TABLE>haha, yeah well you better come to AI! I'm pretty sure this car will be ready within the next few weeks.
<TABLE WIDTH="90%" CELLSPACING=0 CELLPADDING=0 ALIGN=CENTER><TR><TD>Quote, originally posted by sh!tsWEAK! »</TD></TR><TR><TD CLASS="quote">good luck mayne
</TD></TR></TABLE>Thank you sir
07-08-2008, 04:23 PM
#9
Honda-Tech Member
Thread Starter
Join Date: Feb 2006
Location: Hella North, Toronto
Posts: 2,069
Likes: 0
Received 0 Likes
on
0 Posts
Ok, so I got my photobucket working again...
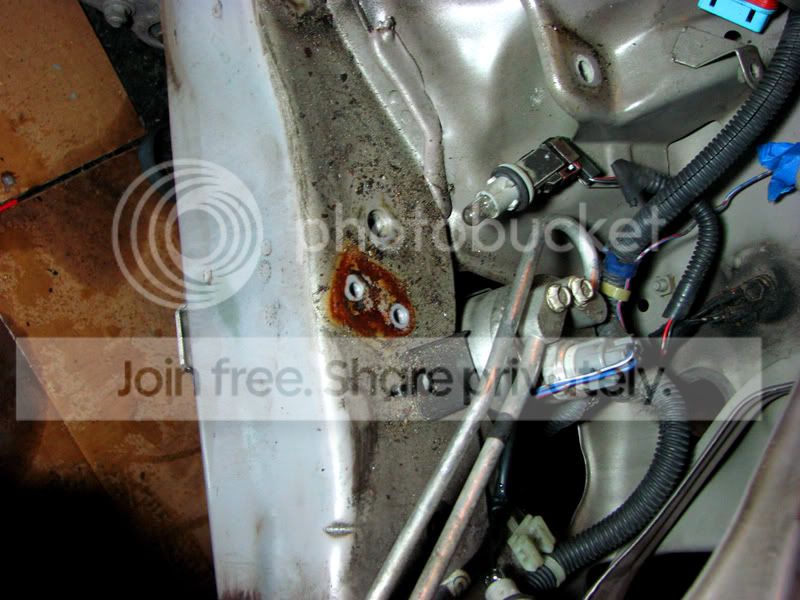
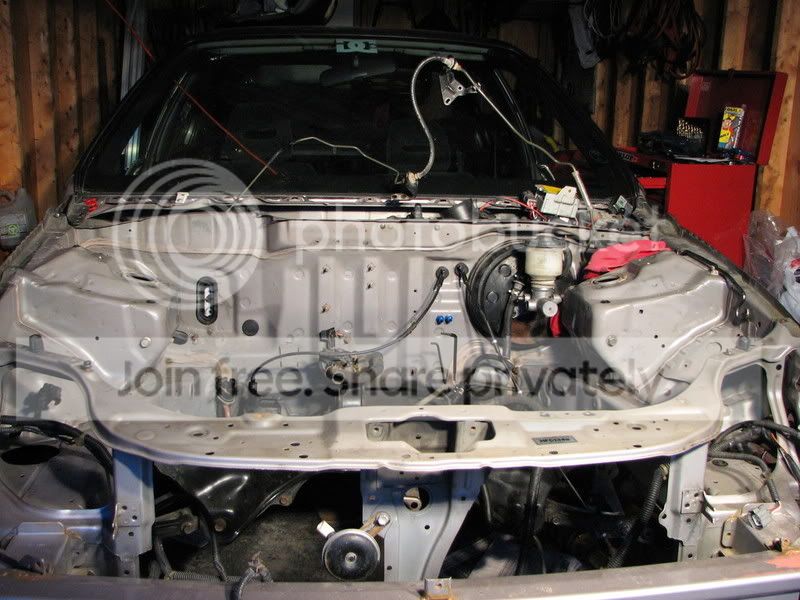
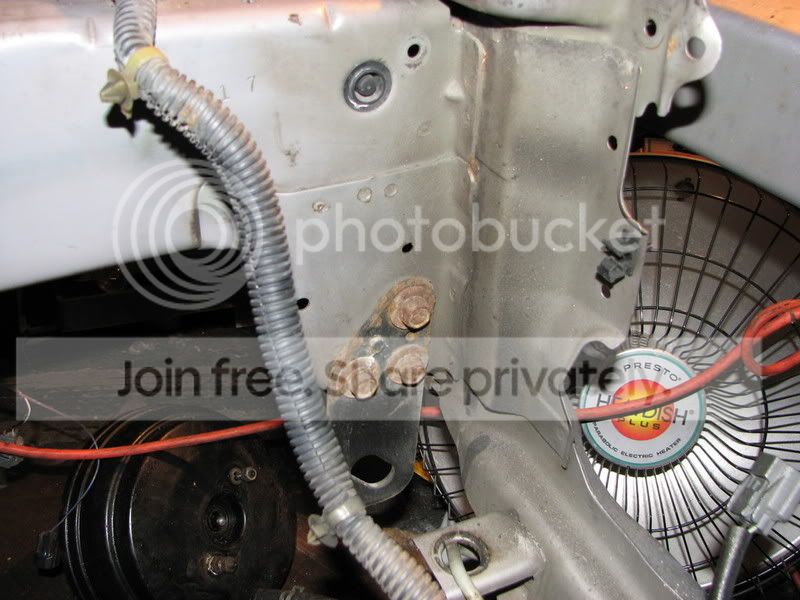
Ok, so here is how my bay looked like before I cleaned it. Note: this was after I sprayed it with degreaser :S
Leaking batteries suck

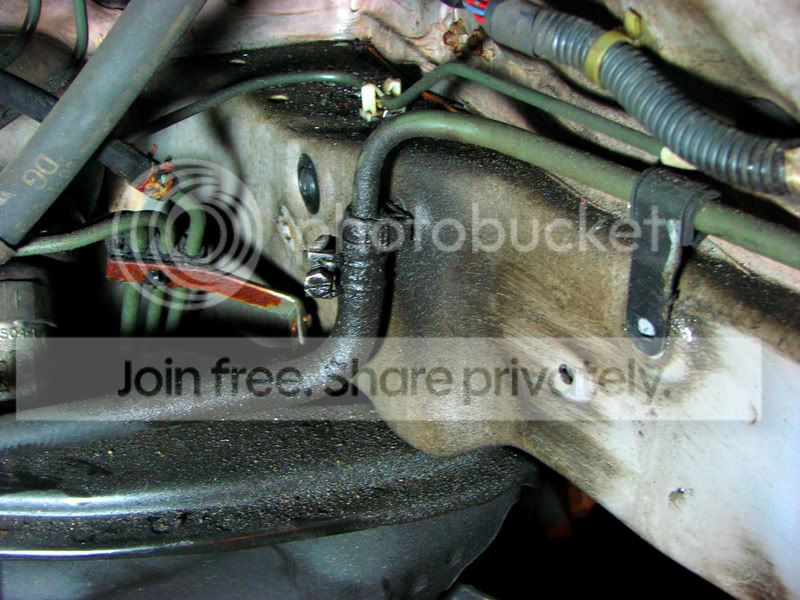


Rust under the brackets:
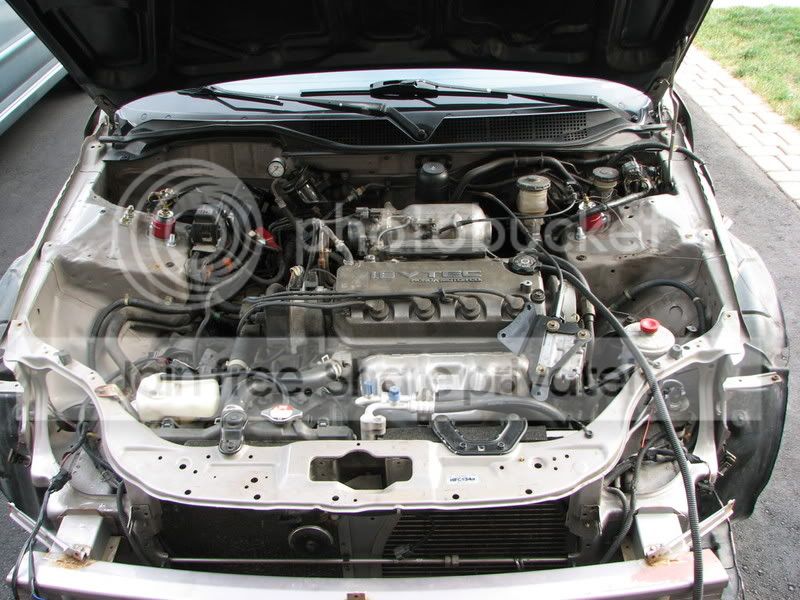
This is how the car looked after cleaning the entire bay with a green scrub pad and Comet Bleach:


Note: All the A/C lines were still in the car because at this point, I was thinking of running A/C...
Ok, so here is how my bay looked like before I cleaned it. Note: this was after I sprayed it with degreaser :S
Leaking batteries suck
Rust under the brackets:
This is how the car looked after cleaning the entire bay with a green scrub pad and Comet Bleach:
Note: All the A/C lines were still in the car because at this point, I was thinking of running A/C...
07-08-2008, 10:54 PM
#10
Honda-Tech Member
Thread Starter
Join Date: Feb 2006
Location: Hella North, Toronto
Posts: 2,069
Likes: 0
Received 0 Likes
on
0 Posts
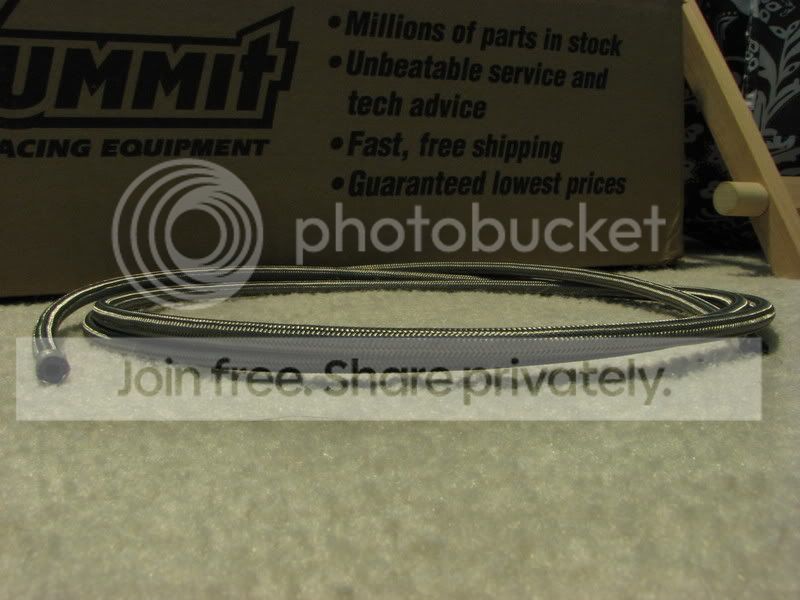
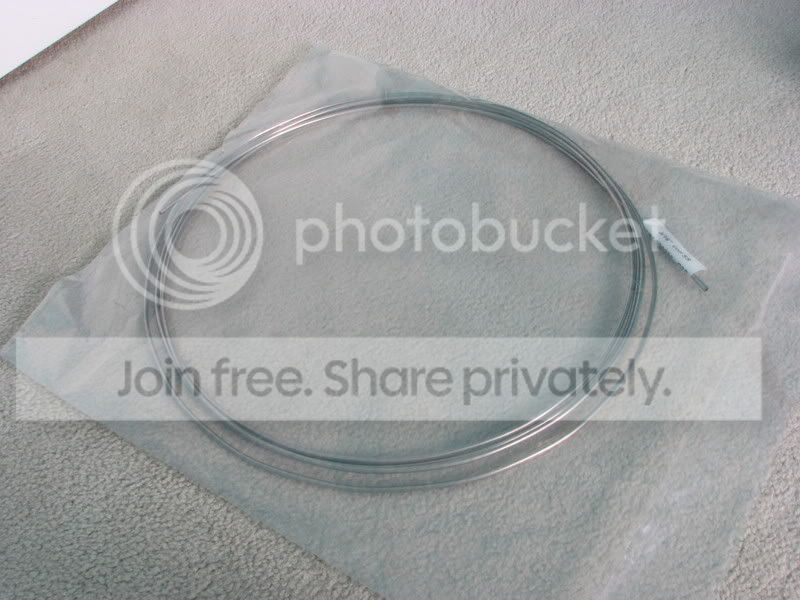
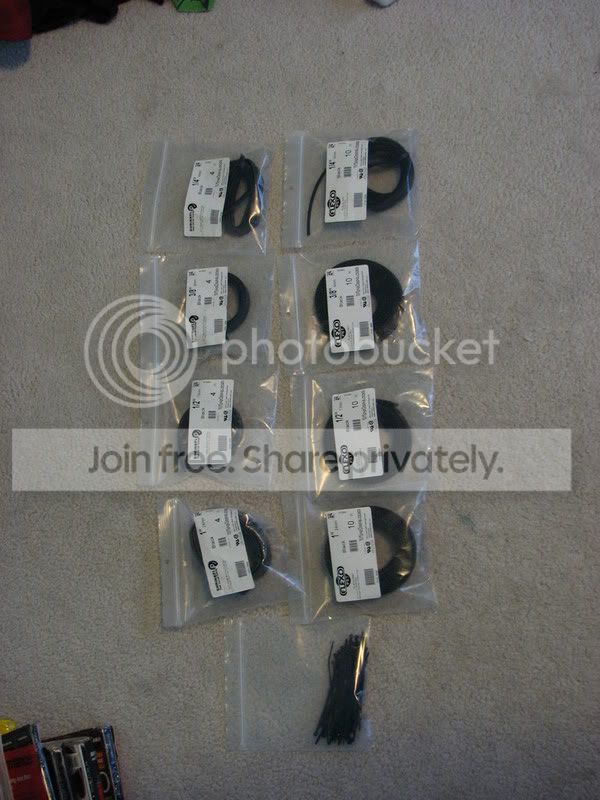
Placed an Order with ANPluming.com and Summit.com and wirecare.com to get these goodies:


And here is a quick sketch of the brake system:

Basically, the shopping list consists of:
-Remote Battery Terminals
-Clutch line, fuel line and brake lines in stainless steel hard and soft line. I will be running a mild steel line inside the cabin as well for the OEM fittings, but will run stainless all around the cabin
Also, that sketch got a bit altered. I decided to run a 98-01 spec ITR 1", so the banjo won't be necessary as I did have a 94-97 GSR 1" MC before. Turns out these can't fit an EK chassis, and barely clears with a banjo.
And here is a quick sketch of the brake system:
Basically, the shopping list consists of:
-Remote Battery Terminals
-Clutch line, fuel line and brake lines in stainless steel hard and soft line. I will be running a mild steel line inside the cabin as well for the OEM fittings, but will run stainless all around the cabin
Also, that sketch got a bit altered. I decided to run a 98-01 spec ITR 1", so the banjo won't be necessary as I did have a 94-97 GSR 1" MC before. Turns out these can't fit an EK chassis, and barely clears with a banjo.
07-08-2008, 11:04 PM
#11
Honda-Tech Member
Thread Starter
Join Date: Feb 2006
Location: Hella North, Toronto
Posts: 2,069
Likes: 0
Received 0 Likes
on
0 Posts
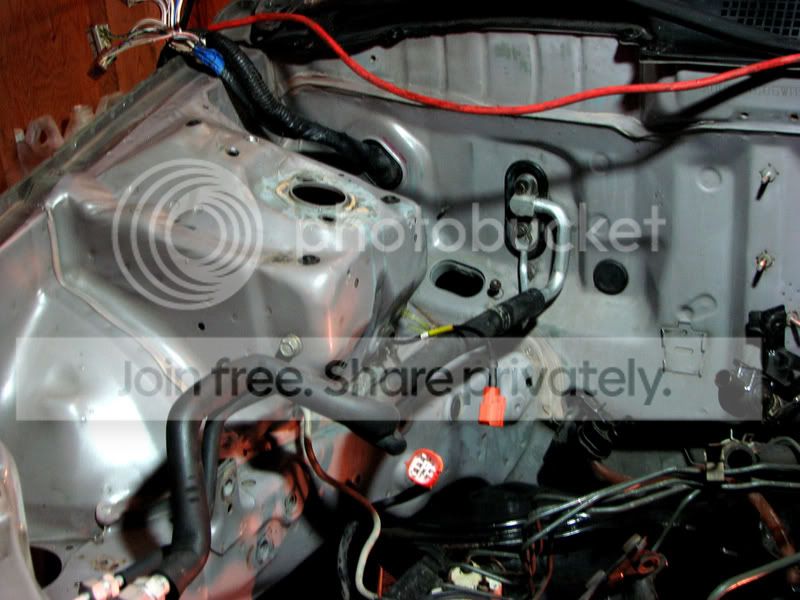
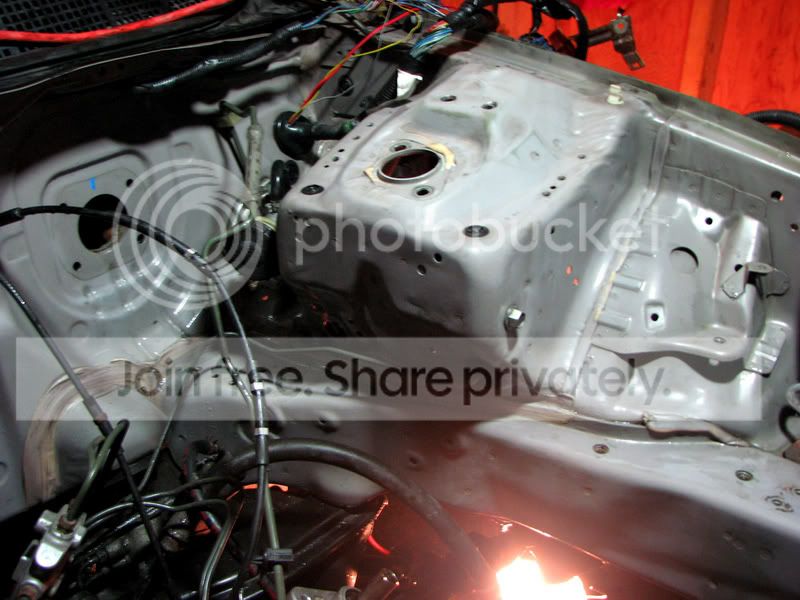
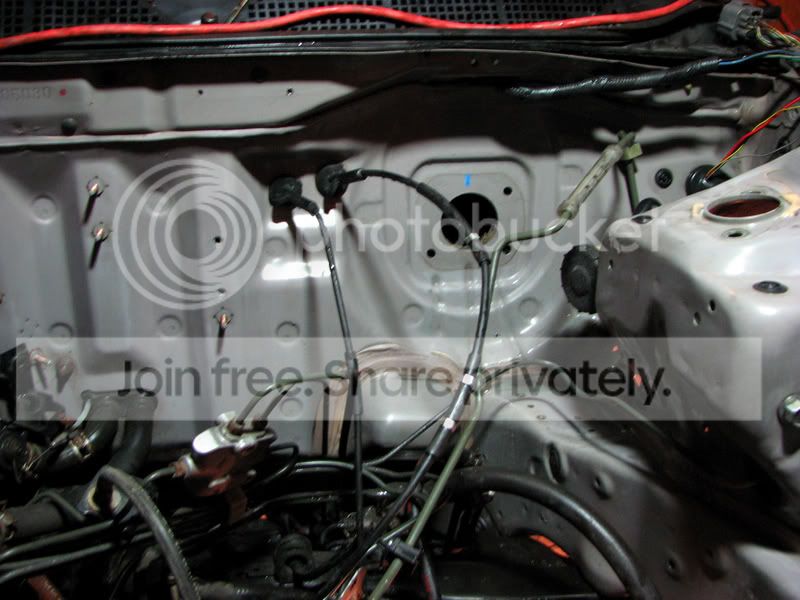
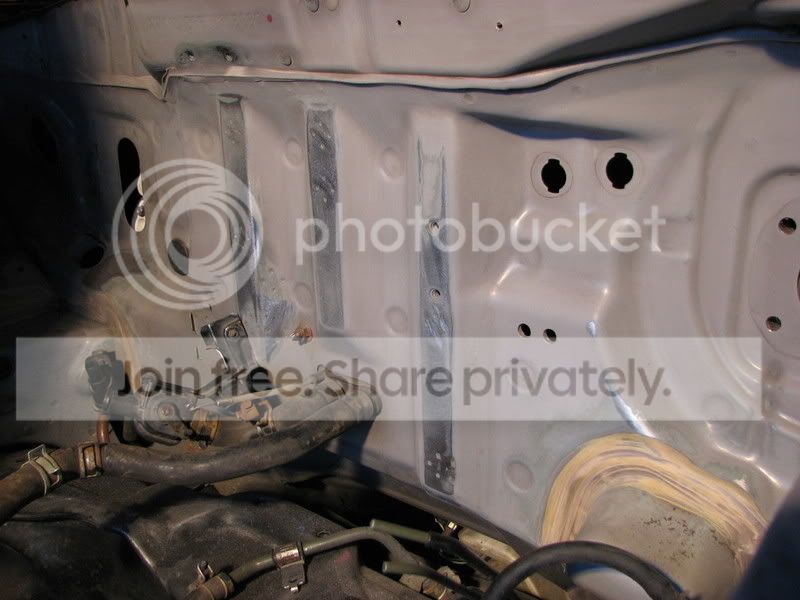
SO I had the A/C professionally contained and I had the lines removed. I cleaned the engine bay this time with Mineral spirits and a cloth, and after the bleach, it turned out like this:
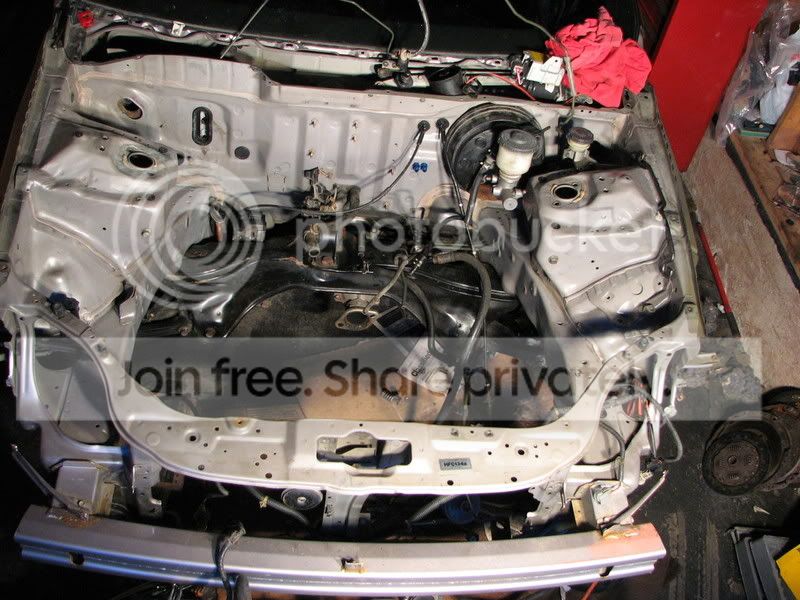
Getting more and more stripped each day...

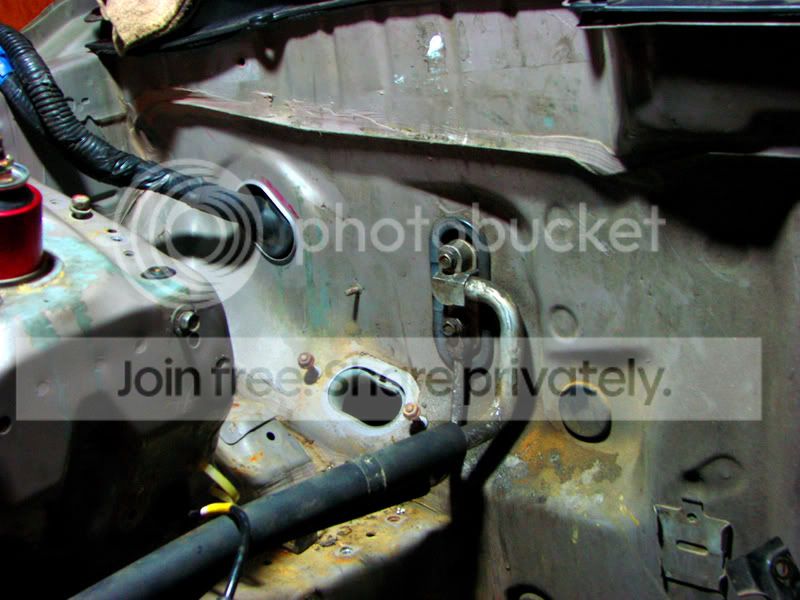
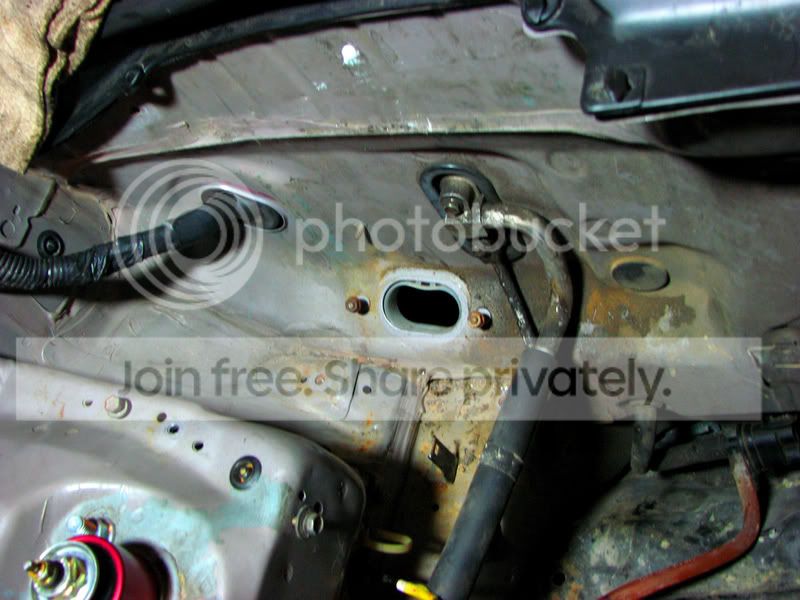
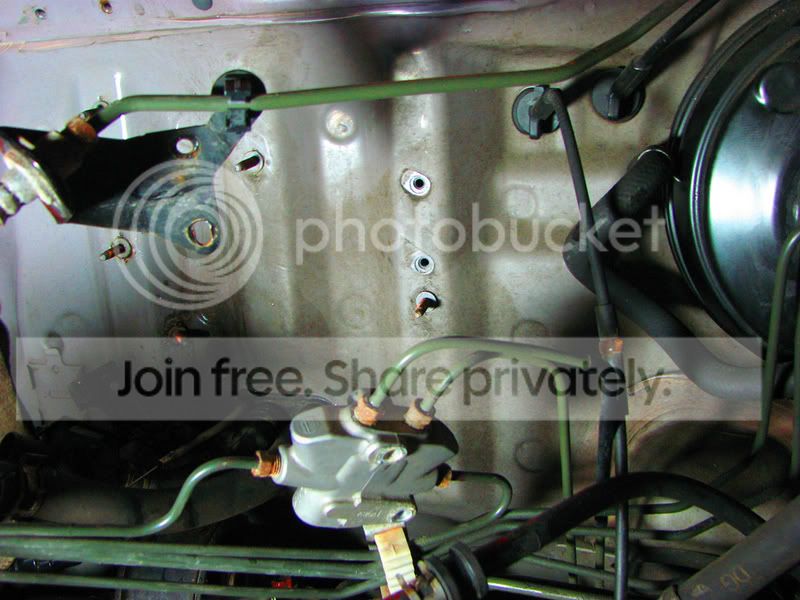
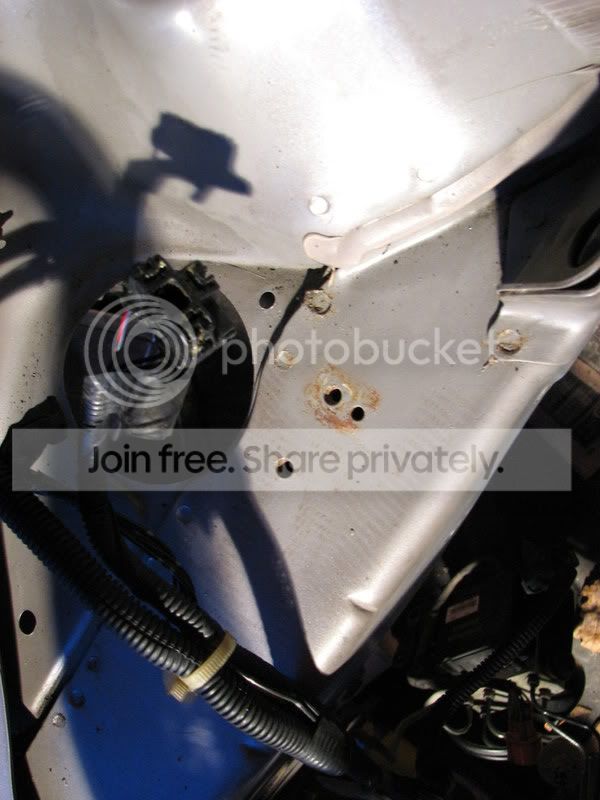
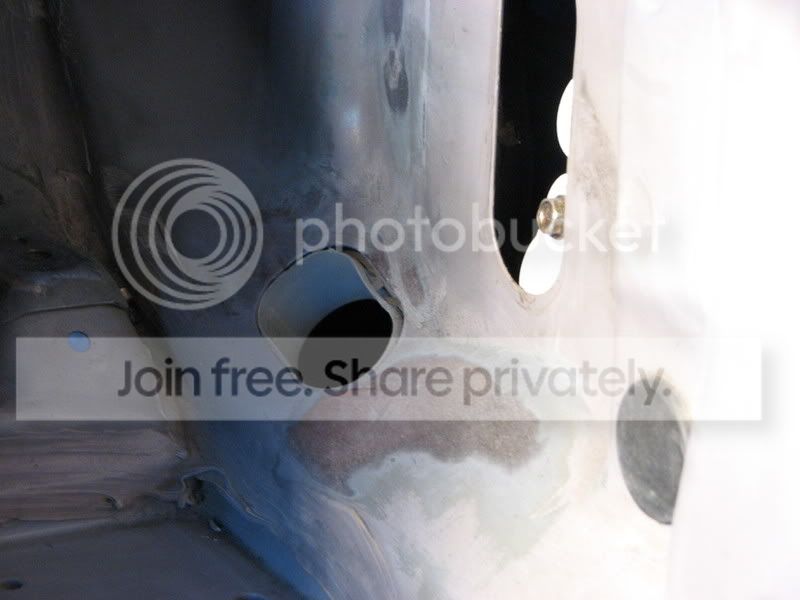
I had the two holes drilled out on the firewall for the inlet/outlet brake line holes for the MC here:

inside:

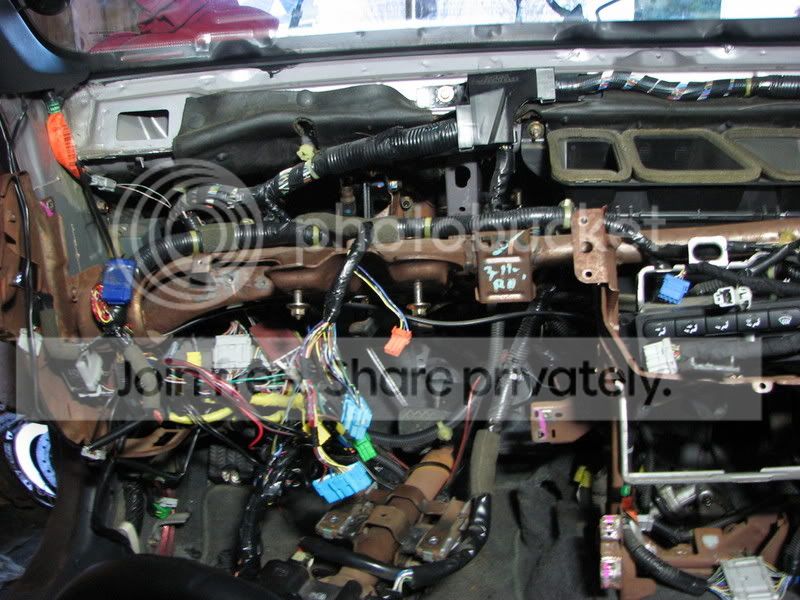
Gutted the inside further, taking out the dash so it would be easier to run all the lines:


Few patches that were a bit uneven and that still need further sanding, nothing a little wire wheel can't fix :
:

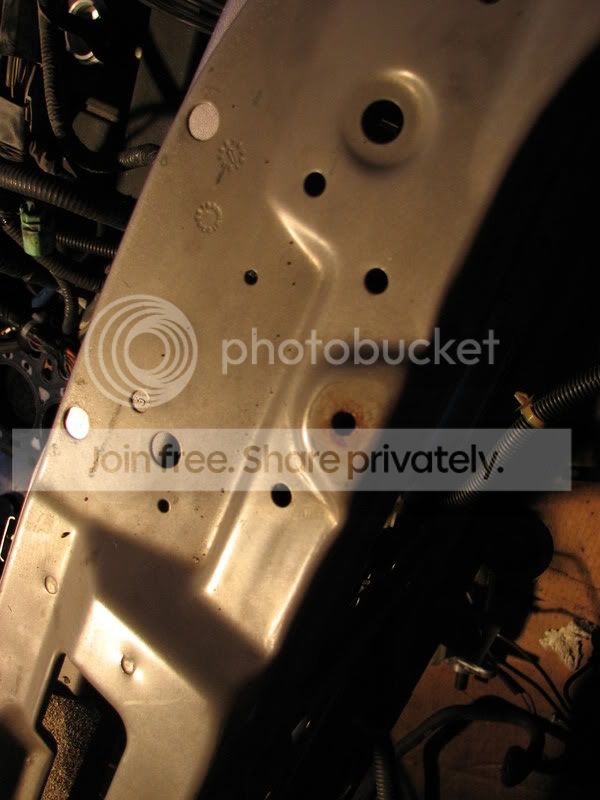
These studs have to go:
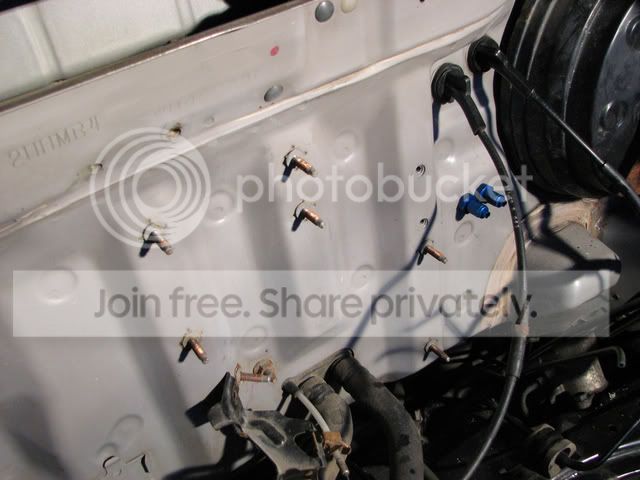
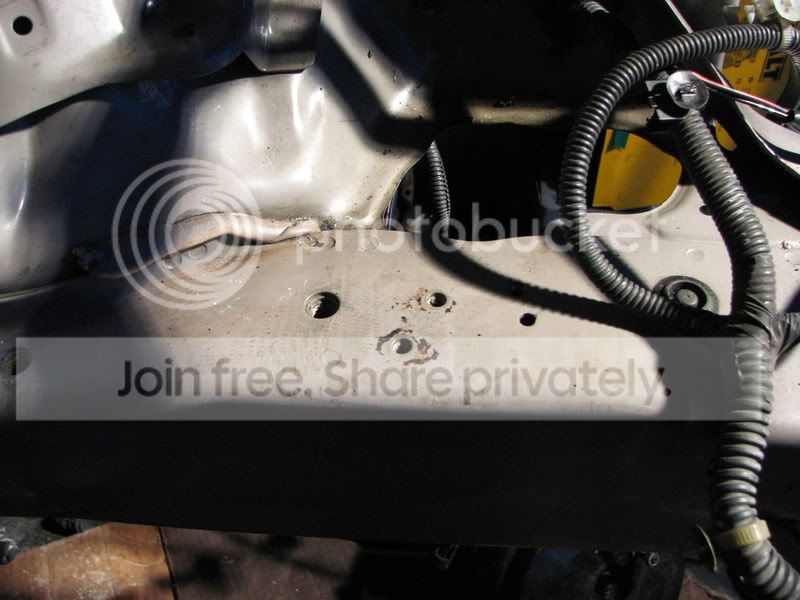
Going to have to replace the bolts and tow hooks eventually as well:
Getting more and more stripped each day...
I had the two holes drilled out on the firewall for the inlet/outlet brake line holes for the MC here:
inside:
Gutted the inside further, taking out the dash so it would be easier to run all the lines:
Few patches that were a bit uneven and that still need further sanding, nothing a little wire wheel can't fix
:These studs have to go:
Going to have to replace the bolts and tow hooks eventually as well:
07-09-2008, 02:30 AM
#13
Honda-Tech Member
Join Date: May 2005
Location: Hamilton, New Zealand
Posts: 696
Likes: 0
Received 0 Likes
on
0 Posts
<TABLE WIDTH="90%" CELLSPACING=0 CELLPADDING=0 ALIGN=CENTER><TR><TD>Quote, originally posted by Desired_Speeds »</TD></TR><TR><TD CLASS="quote">good progress! in for more!</TD></TR></TABLE>
x2
Man that bay was in a state! GL.
x2
Man that bay was in a state! GL.
 07-09-2008, 03:04 PM
#20
Honda-Tech Member
Thread Starter
Join Date: Feb 2006
Location: Hella North, Toronto
Posts: 2,069
Likes: 0
Received 0 Likes
on
0 Posts
I'll be updating this thread so far daily...as I have a lot of pics. Each pic is like 3 megs each, and I have to downsize so it's taking me a while. I'm actually done painting the bay, will be painting the subframe tomorrow. We also got 90% of the motor put together, just waiting on some parts to come in. Harness should be done by this weekend as well for it
Thanks for the comments!
Uh sort of...I decided not to run a catchcan since the car won't make anymore than 200 wheel horse, however I may be putting one in sometime next year if I do any head work. I would probably mount it by the headers somewhere though so it wouldn't be as visable. But, for the catchcan I bought, I'll be using it as a rad overflow container to replace the stock ugly one.
Cant wait to see this car at IA.
For sure, don't be shy if you see me 
Oh hell yeah! Looking forward so some drunk escapades in that hotel 
x2
Man that bay was in a state! GL.
Oh yeah, when I looked back at the pics I posted, I couldn't believe it looked like that. Stay tuned for pics of the restored bay.
Oh for sure I gotta work quick tho...there is still a lot left to do. 
Hell ya! And oldly enough, even thought the car was repainted twice...I still have that tiny clear coat drip on that one side 
Originally Posted by Ramirez428
build is looking good
Originally Posted by Desired_Speeds
good progress! in for more!
Originally Posted by siblues
Did you figure out the catch can situation and great progress on the car
Originally Posted by Simmerman
Cant wait to see this car at IA.
Originally Posted by B16B_coupe
Hell yeah buddy, you got your hands full!!!!!!!!!!!!!!!!!!!!!! See THIS and YOU at IA 
Originally Posted by Hayce
x2
Man that bay was in a state! GL.
Originally Posted by Silvertc
hope to see this at IA!
I gotta work quick tho...there is still a lot left to do.
Originally Posted by Junk2910
Nice goin Arthur, those still my old mirrors?
07-09-2008, 03:38 PM
#21
Honda-Tech Member
Thread Starter
Join Date: Feb 2006
Location: Hella North, Toronto
Posts: 2,069
Likes: 0
Received 0 Likes
on
0 Posts
OK, another update as promised!!!
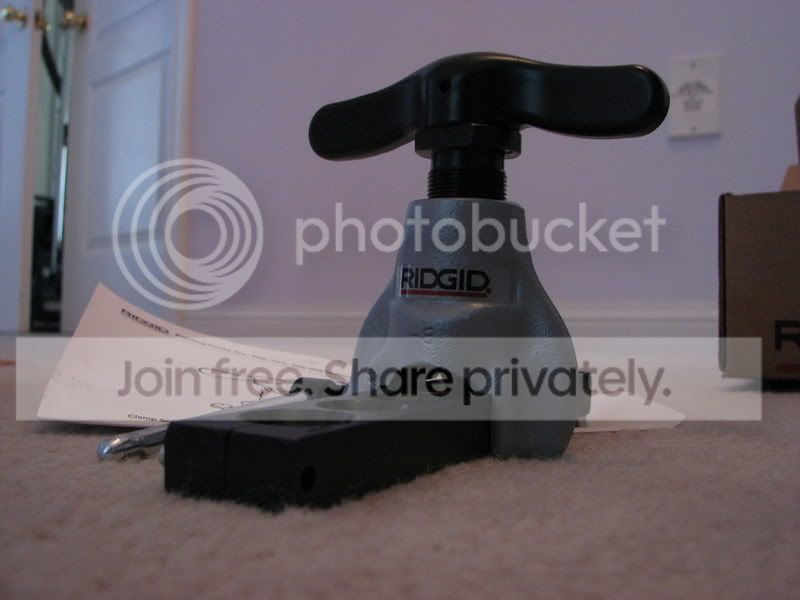
So a few weeks ago, I was in a delema...The flaring tool that my buddy had could not flare any of my SS lines. He flared and flared till he was blue in the face, and it just didn't happen. He was certain I needed to go with mild steel lines. I did some research and asked some guys in the Tucked/Engine Bay thread, and everyone seemed to recommend the Ridgid flare tool. So I grabbed one off toolup.com. Cost me $100 plus shipping and taxes...so it came out to around $214 or so since shipping was close to $90 (yeah, sucks living in canada for that alone)
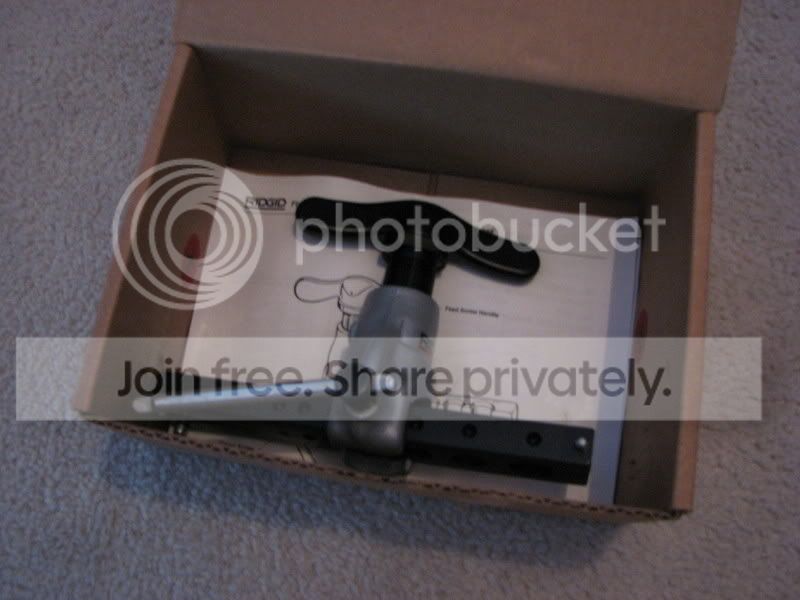
The day I got it:
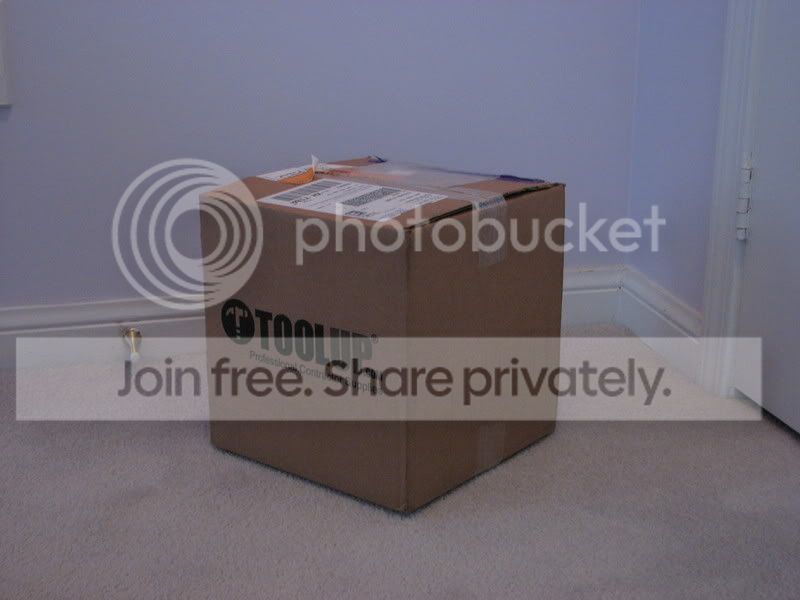
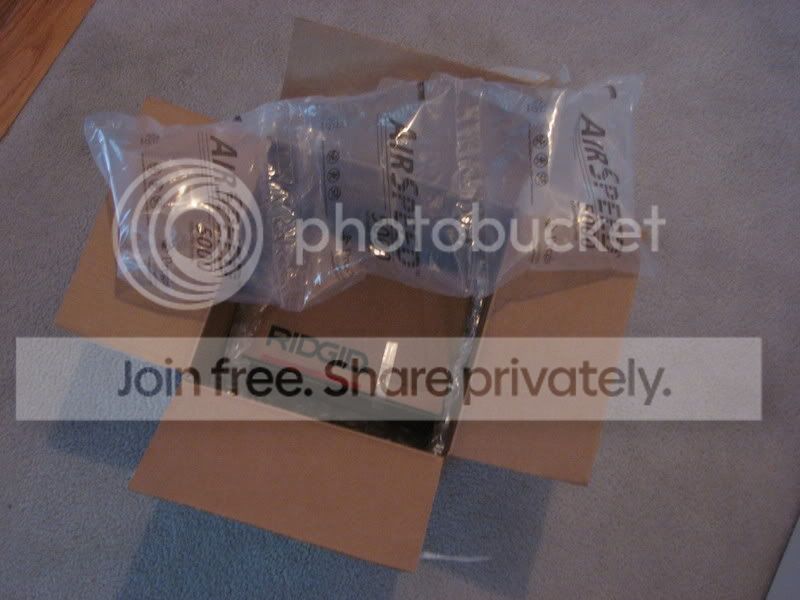
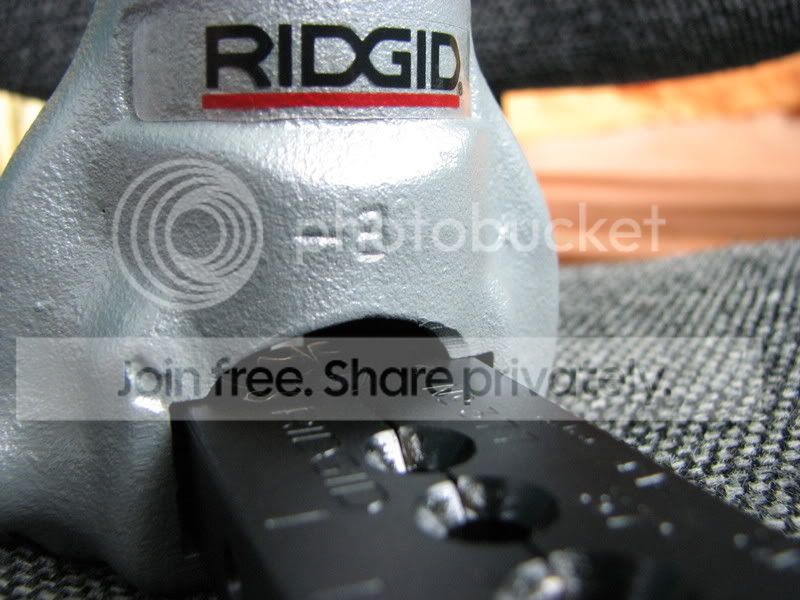
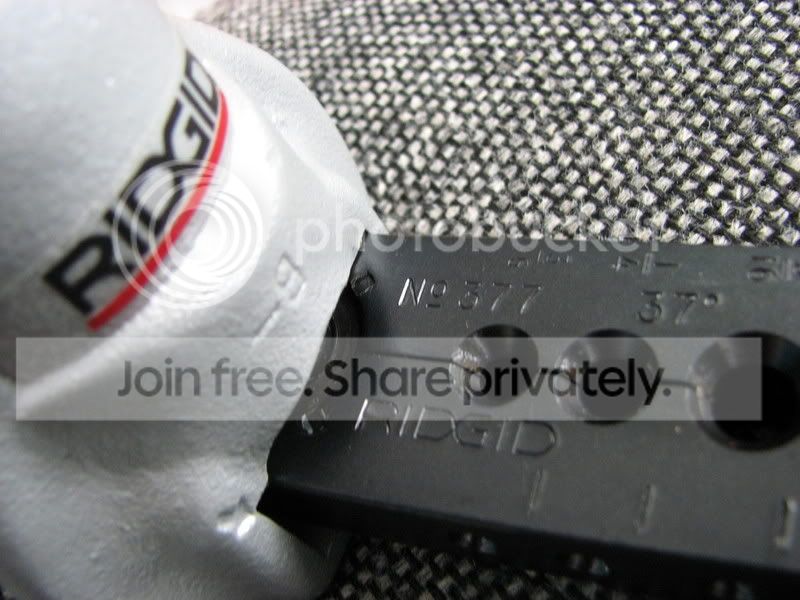
Needless to say, it worked...and dayum did it put a smile on my buddies face. He went nuts and started flaring up a bunch of lines for the fun of it. Not only does this tool produce perfect flares with nearly any metal, but just like a torque wrench, it stops once the flare is perfect, and clicks and pops up. I love it.
Positioning the master cylinder and Brake booster, I realized that the line will directly hit the shock tower...So I sold it and got a 98-01 ITR, which looks like the stock EK, but it's a 1"
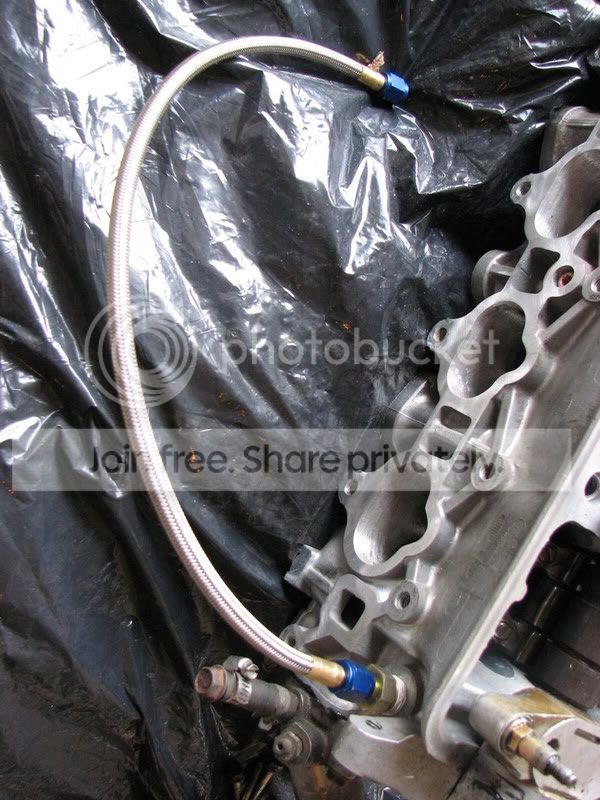
The first line that was made:
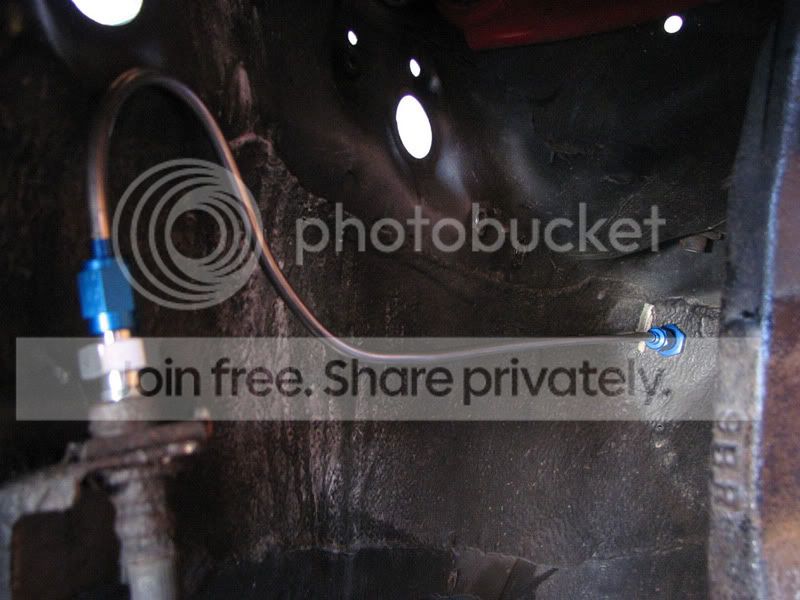
Looks soooo sexy. And the stainless steel will never rust Oh, and the stock rubber lines and fittings will go. Earls all the way
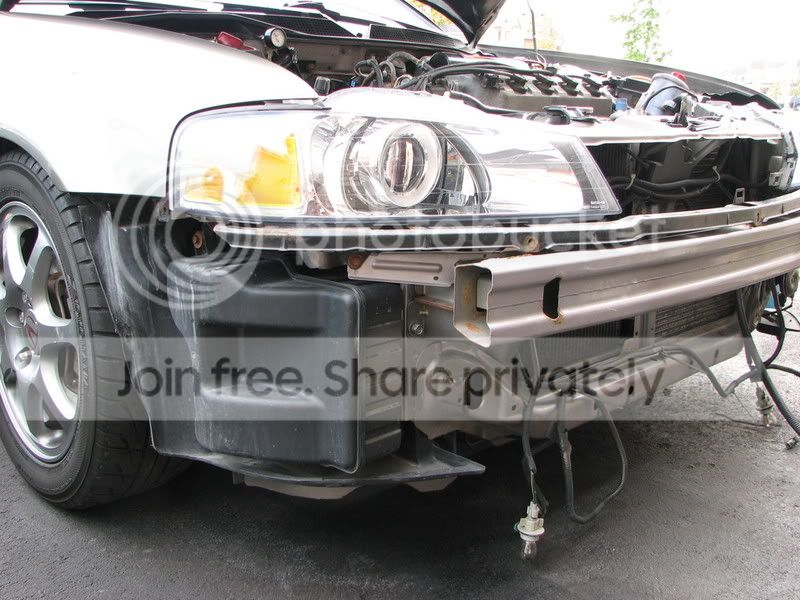
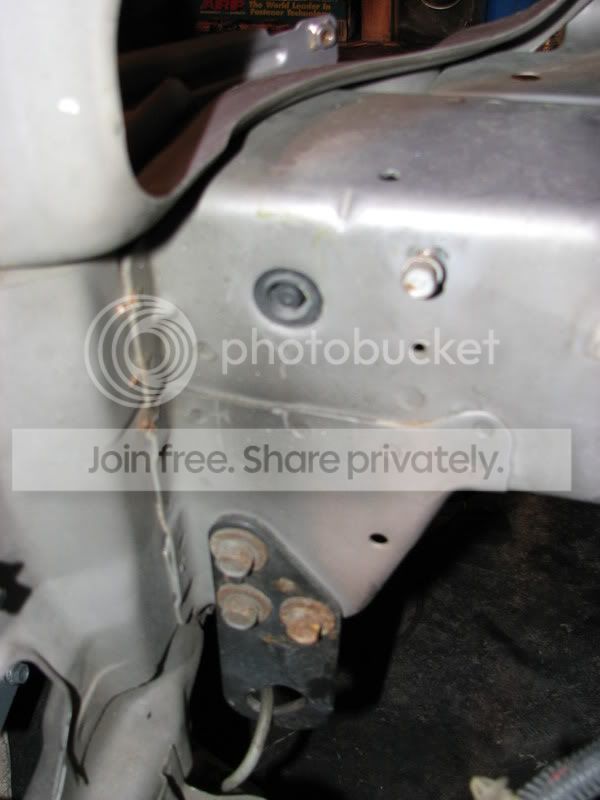
Prepped the firewall for a light shave:

and here is me and my trusty angle grinder that I got for xmas from my gf's sister
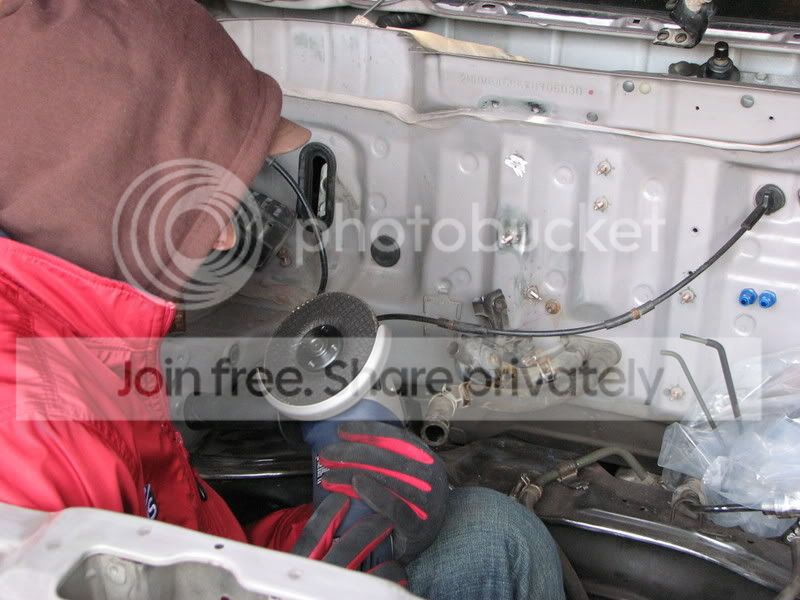
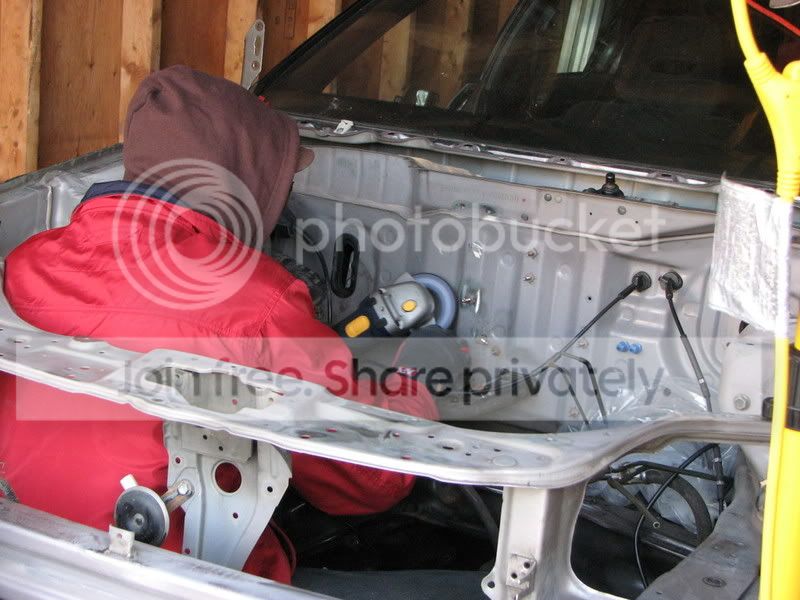
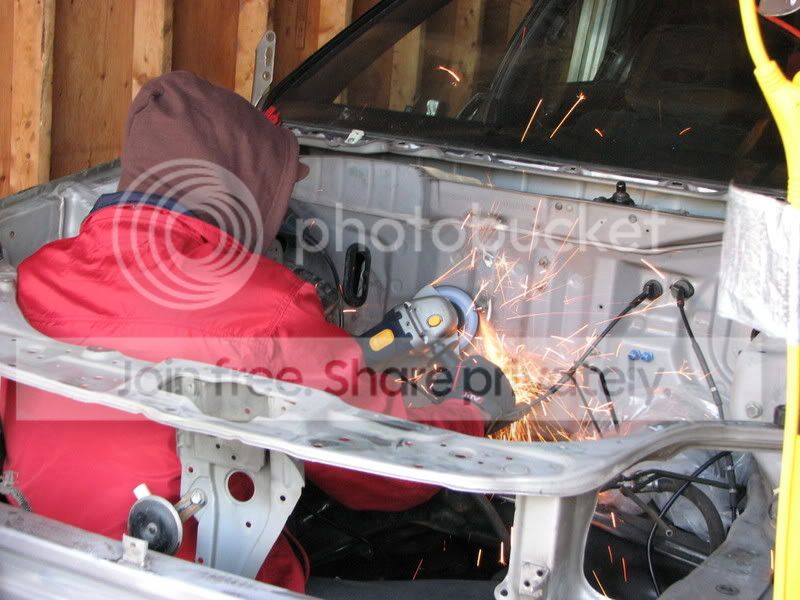
I got a bit too excited:
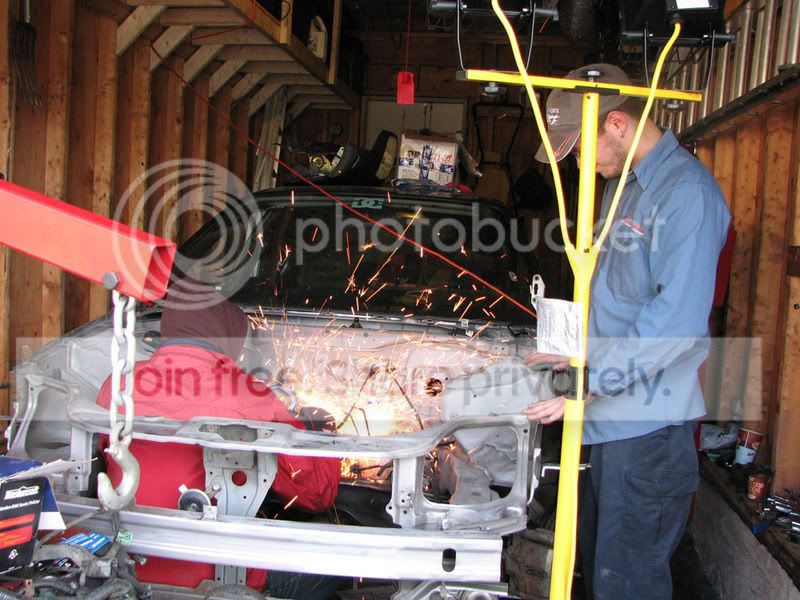
Seeing how much fun it was, my buddy had to try it as well:


I ended up shaving every stud that was used for brake lines, or the OEM proportioning valve mounts since the new 4040 DA proportioning valve will now be sitting somewhere around my cup holder.
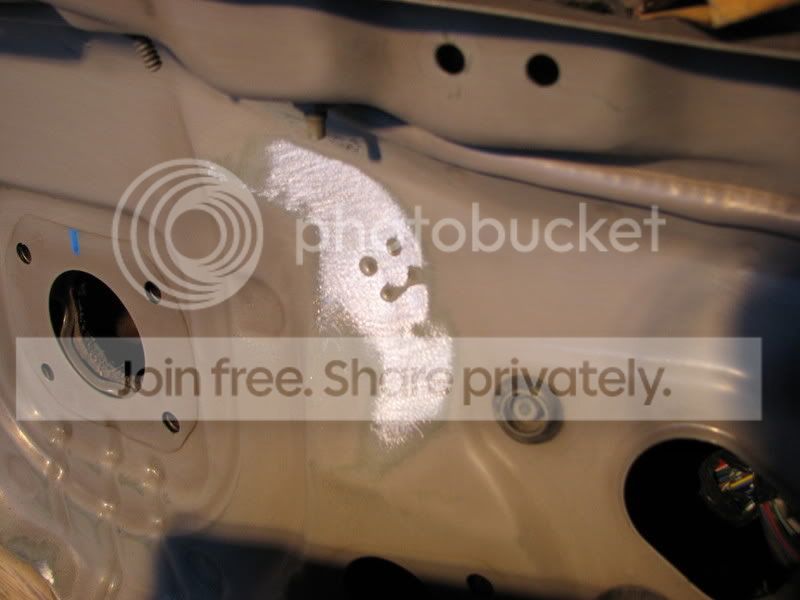
I forgot to take pics, but I took some glaze and lightly filled the holes and imperfections. I also filled in those two bolt holes for the bracket that held the clutch line. Also shaved the studs that held the clutch line. I know glaze is not recommended in the engine bay since it cracks, but I'm only using it on the firewall and there is very very little flex in that area, so I feel pretty confident about it not cracking.
Modified by Fresh'86 at 4:46 PM 7/9/2008
So a few weeks ago, I was in a delema...The flaring tool that my buddy had could not flare any of my SS lines. He flared and flared till he was blue in the face, and it just didn't happen. He was certain I needed to go with mild steel lines. I did some research and asked some guys in the Tucked/Engine Bay thread, and everyone seemed to recommend the Ridgid flare tool. So I grabbed one off toolup.com. Cost me $100 plus shipping and taxes...so it came out to around $214 or so since shipping was close to $90 (yeah, sucks living in canada for that alone)
The day I got it:
Needless to say, it worked...and dayum did it put a smile on my buddies face. He went nuts and started flaring up a bunch of lines for the fun of it. Not only does this tool produce perfect flares with nearly any metal, but just like a torque wrench, it stops once the flare is perfect, and clicks and pops up. I love it.
Positioning the master cylinder and Brake booster, I realized that the line will directly hit the shock tower...So I sold it and got a 98-01 ITR, which looks like the stock EK, but it's a 1"
The first line that was made:
Looks soooo sexy. And the stainless steel will never rust
Oh, and the stock rubber lines and fittings will go. Earls all the way Prepped the firewall for a light shave:
and here is me and my trusty angle grinder that I got for xmas from my gf's sister
I got a bit too excited:
Seeing how much fun it was, my buddy had to try it as well:
I ended up shaving every stud that was used for brake lines, or the OEM proportioning valve mounts since the new 4040 DA proportioning valve will now be sitting somewhere around my cup holder.
I forgot to take pics, but I took some glaze and lightly filled the holes and imperfections. I also filled in those two bolt holes for the bracket that held the clutch line. Also shaved the studs that held the clutch line. I know glaze is not recommended in the engine bay since it cracks, but I'm only using it on the firewall and there is very very little flex in that area, so I feel pretty confident about it not cracking.
Modified by Fresh'86 at 4:46 PM 7/9/2008
07-09-2008, 03:53 PM
#23
Honda-Tech Member
Thread Starter
Join Date: Feb 2006
Location: Hella North, Toronto
Posts: 2,069
Likes: 0
Received 0 Likes
on
0 Posts
A few notes:
The brake lines and fuel lines were all thanks to Chase. I would like to thank him for all the help he's given me over IM, including the advice on getting the Ridgid. I find people take his help for granted, it's not everyday a business owner comes in and shares his ideas and gives out the ideas he has that can make him money.
I would also like to thank Easy_E. The guy has come a long way in helping my build my car, and for all the small querks that bugged me, he threw in some great advice. Not only that, but I found his thread to be very inspirational and kept me on the **** side when building my car Like him, I want everything to look and run perfect.
And thanks a lot to all the guys in the tucked/shaved/custom bay theory/discussion thread. I've learned a lot there, and taken a lot of the ideas I have for my car. I find it pointless taking all the credit to myself, because if it wasn't for these guys. I'd probably just have stuck to a B18B swap and a turbo and not even touched the bay.
The brake lines and fuel lines were all thanks to Chase. I would like to thank him for all the help he's given me over IM, including the advice on getting the Ridgid. I find people take his help for granted, it's not everyday a business owner comes in and shares his ideas and gives out the ideas he has that can make him money.
I would also like to thank Easy_E. The guy has come a long way in helping my build my car, and for all the small querks that bugged me, he threw in some great advice. Not only that, but I found his thread to be very inspirational and kept me on the **** side when building my car
Like him, I want everything to look and run perfect.And thanks a lot to all the guys in the tucked/shaved/custom bay theory/discussion thread. I've learned a lot there, and taken a lot of the ideas I have for my car. I find it pointless taking all the credit to myself, because if it wasn't for these guys. I'd probably just have stuck to a B18B swap and a turbo and not even touched the bay.
07-09-2008, 04:13 PM
#24
Honda-Tech Member
iTrader: (1)
Join Date: Feb 2005
Location: Sunny CA
Posts: 7,792
Likes: 0
Received 0 Likes
on
0 Posts
Props! proyect coming along pretty good! good tools , good parts, great proyect... keep us updated...!!
Btw love the tons of pics!!
Btw love the tons of pics!!
07-09-2008, 04:15 PM
#25
Honda-Tech Member
Thread Starter
Join Date: Feb 2006
Location: Hella North, Toronto
Posts: 2,069
Likes: 0
Received 0 Likes
on
0 Posts
Alright, so I'll try and keep this up to date as best as I can...
I got an LSD ITR tranny a few months ago:
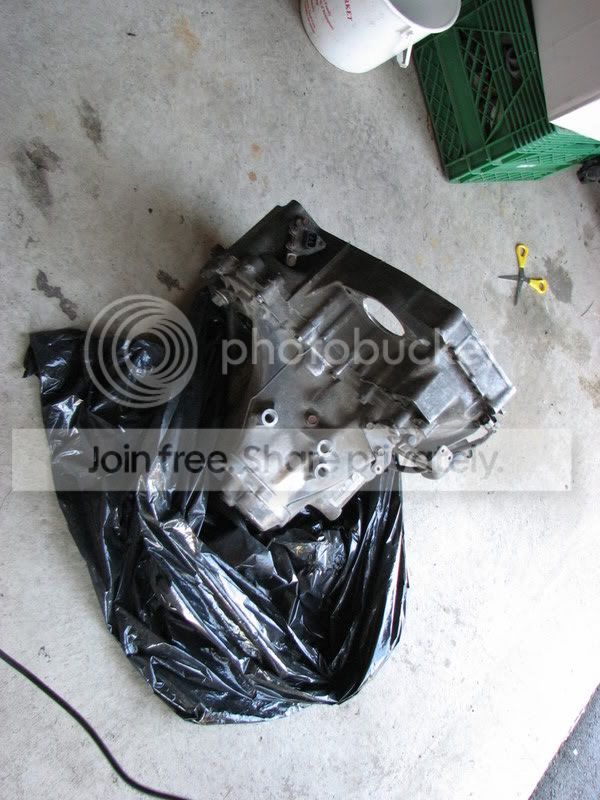
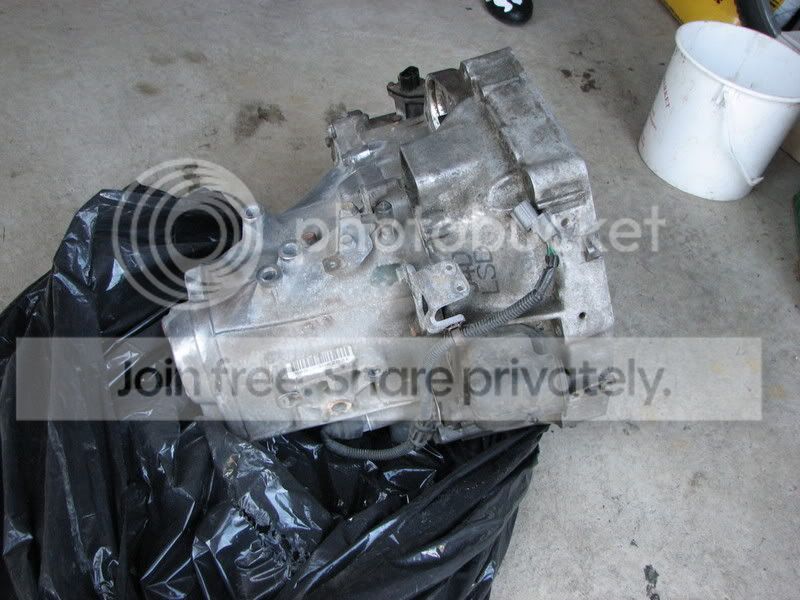

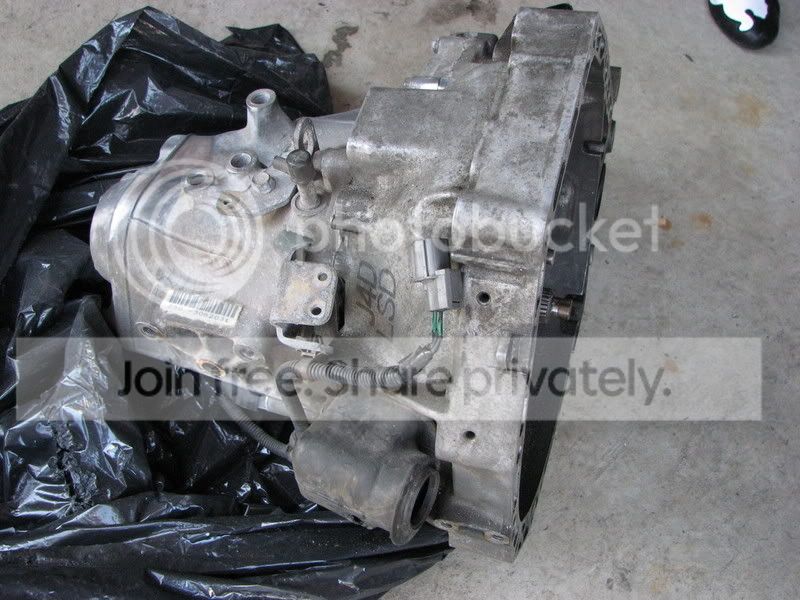
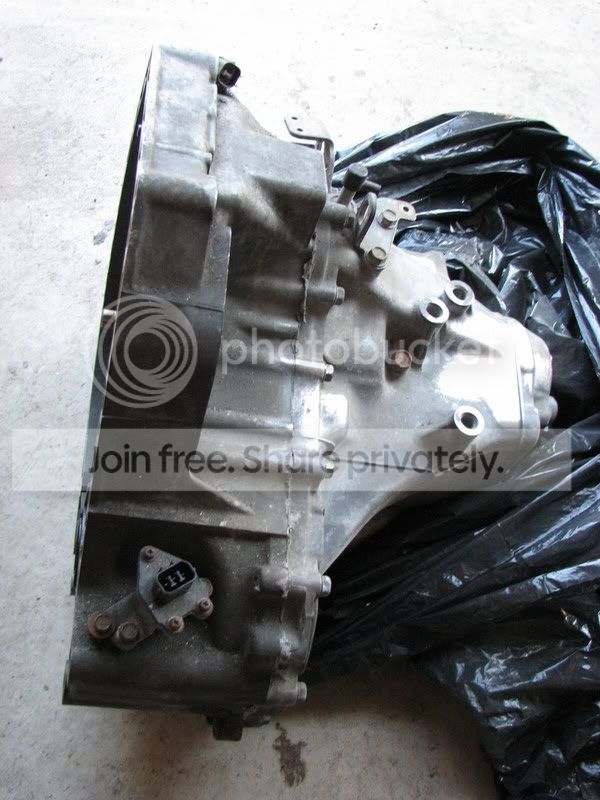
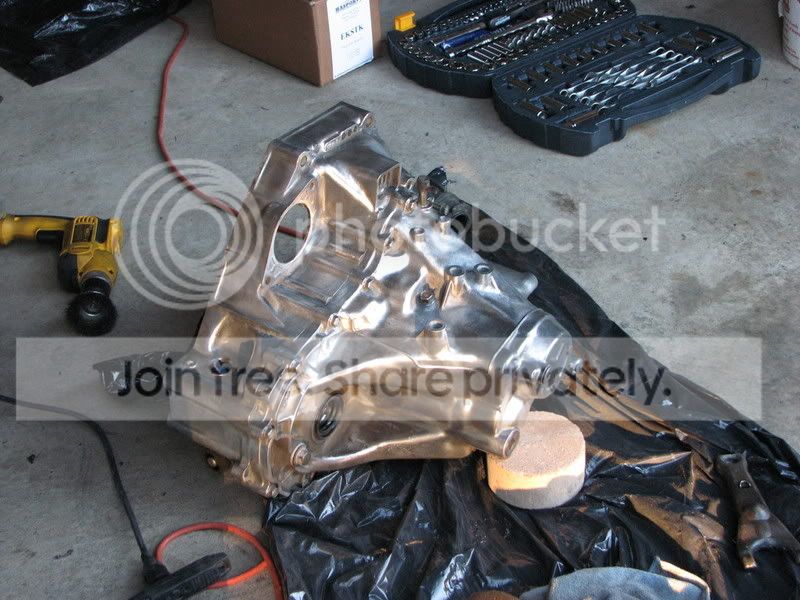
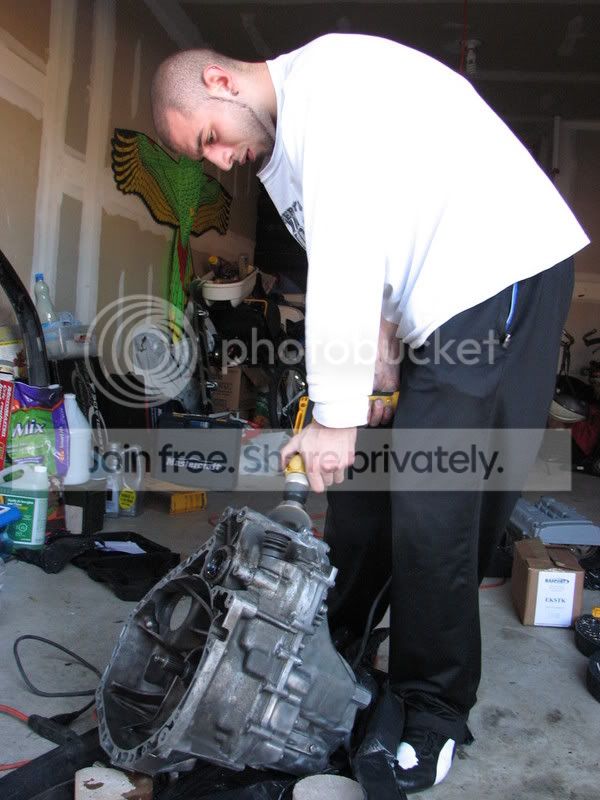
And not until two weeks ago did I start cleaning it. I decided to keep it OEMish, so me and my buddy sanded off all the nasty junk off it:

Pic of my buddy working:
A lot of people like the shiney new look, a lot of people hate it. We'll see how it looks once it's all together I guess. I had that battleship grey paint chip as it sat over winter int he garage on the motor. I figured if it chips from extreme temperatures, it's bound to crack from driving. So I'll keep it just shiney/bare for now.
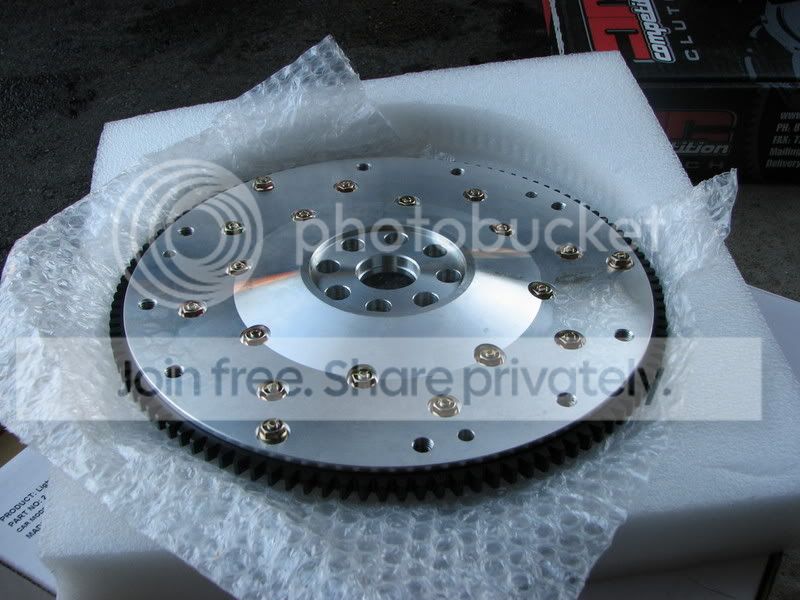
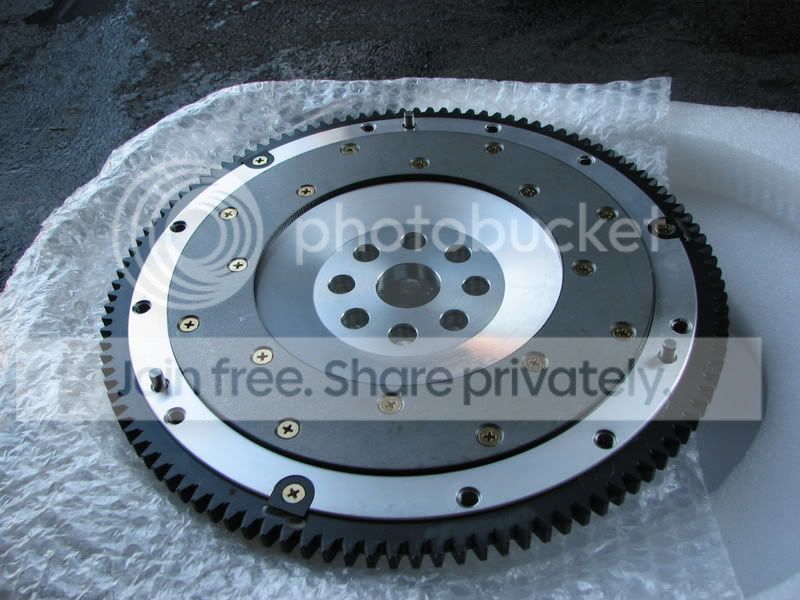
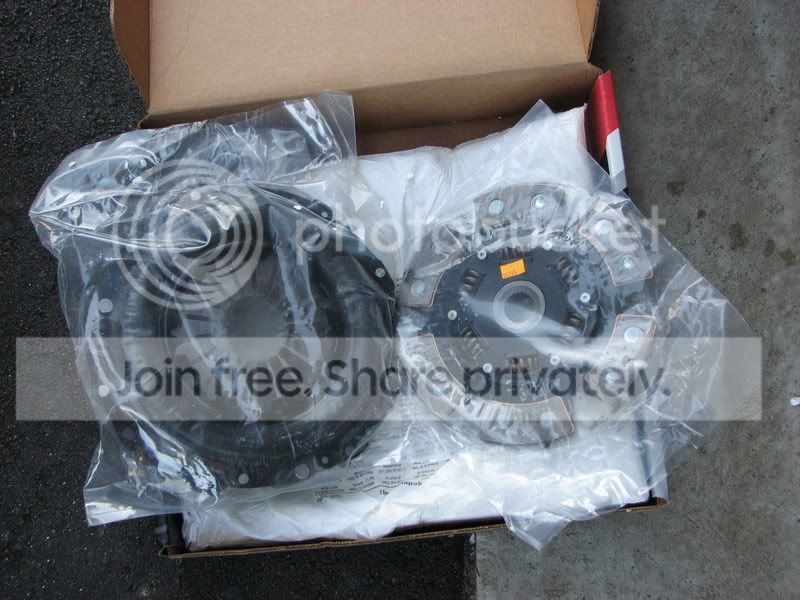
Did an upgrade on the clutch/flywheel as well. Went with the 7.5lb Fidanza Fly wheel (I believe OEM is 12/13lbs?). Either way, it looks so friggen awesome:
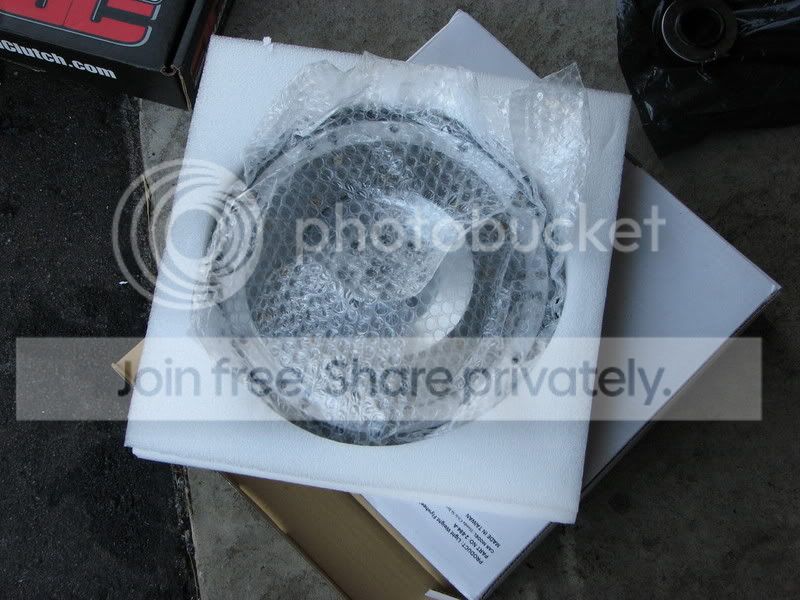
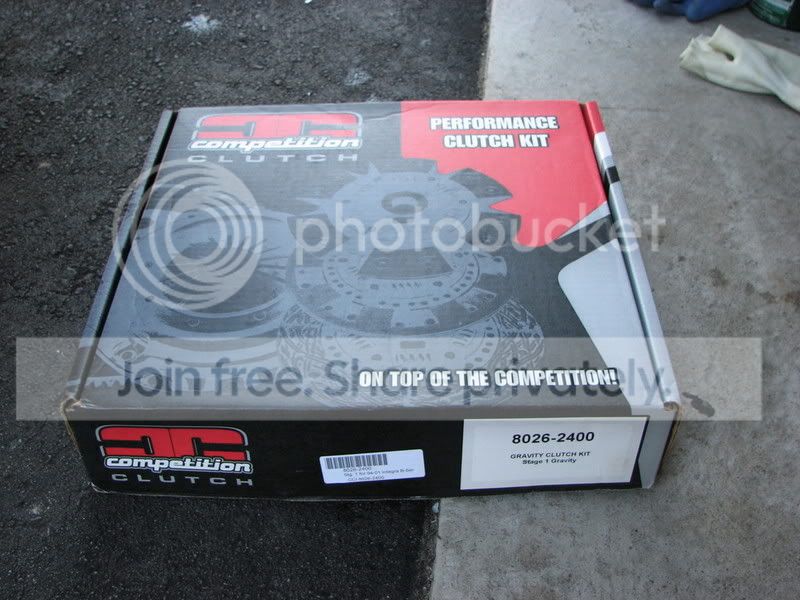
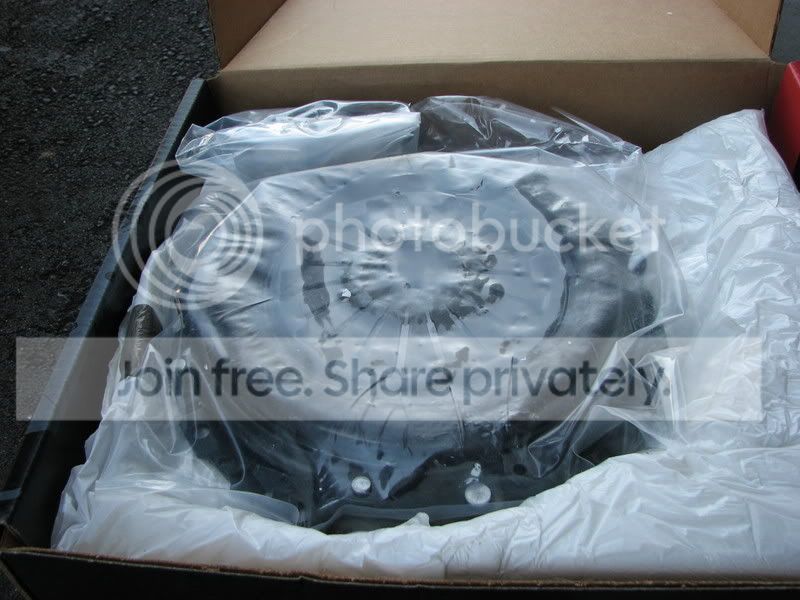
Stage 1 Gravy Competition Clutch. I was highly advised to stay away from the Exedy, due to many many warranty issues. I stuck with a Stage 1 as it's good for 270whp:


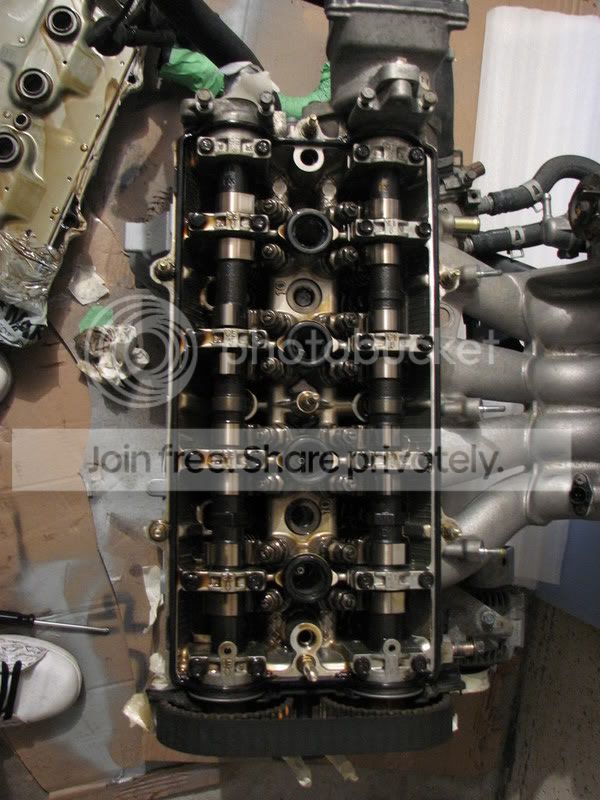
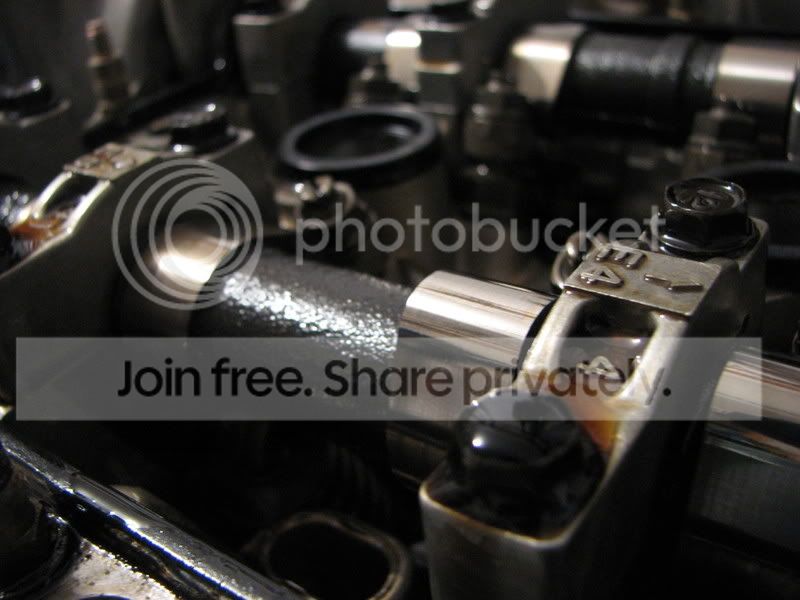
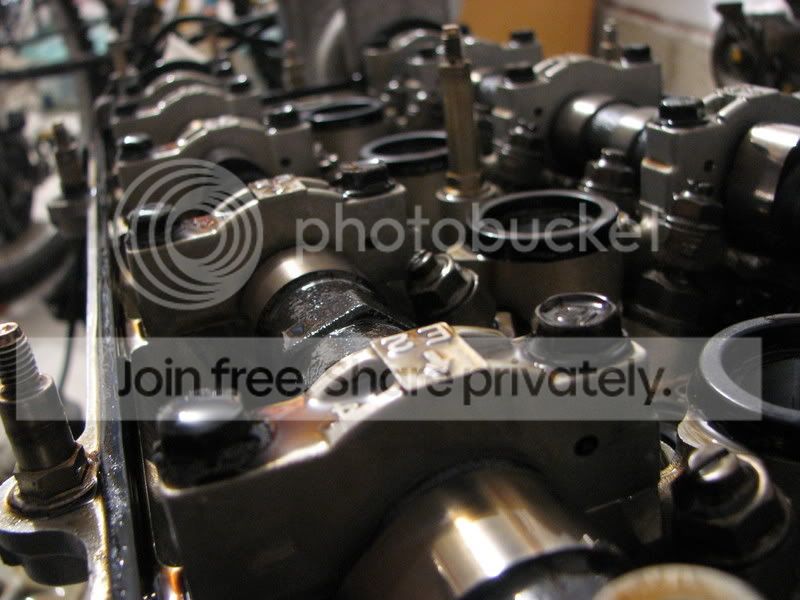
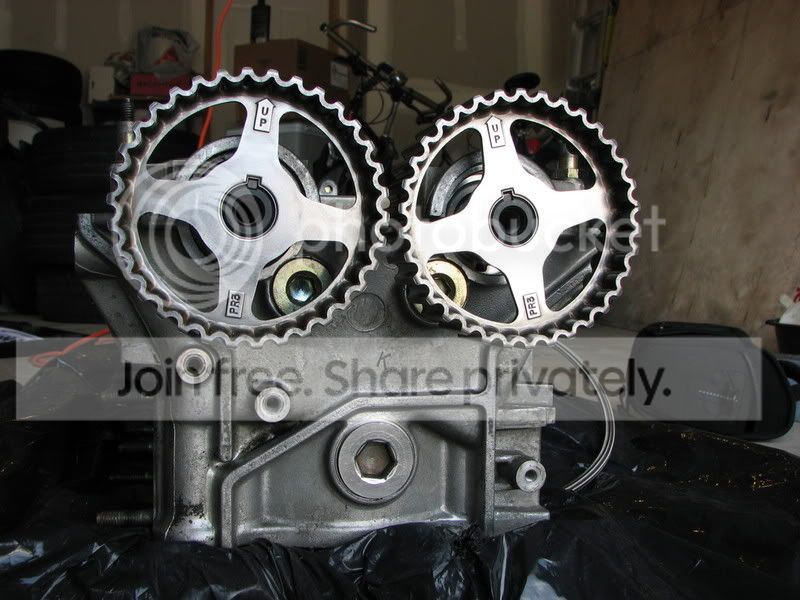
And lastly, a few months ago I picked up a Ported and Polished head that was also decked, and had the dowels machined for a LS/B20-Vtec swap off a friend who decided to buy a bike instead of building a car:
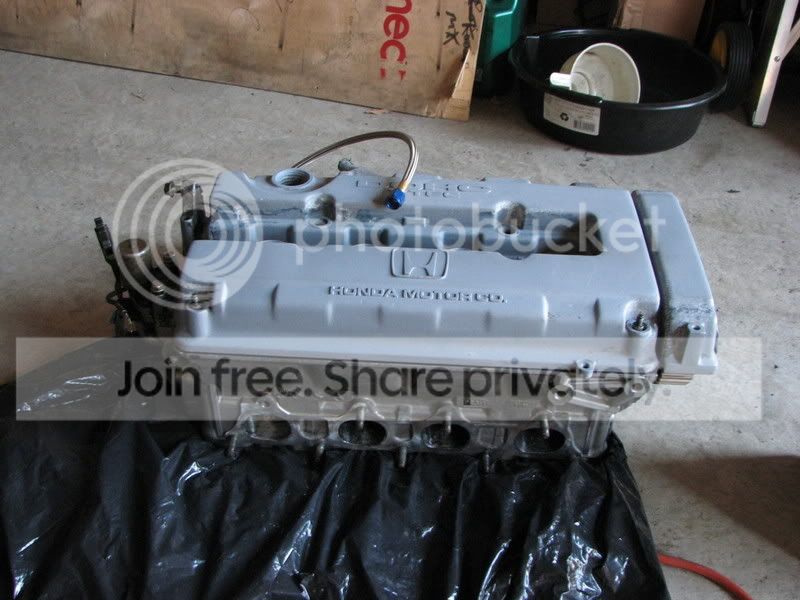

The head came in pretty good condition since it was at the machine shop and has never been installed. I decided it needed more work anyway So I cleaned it up with a wirewheel and drill:
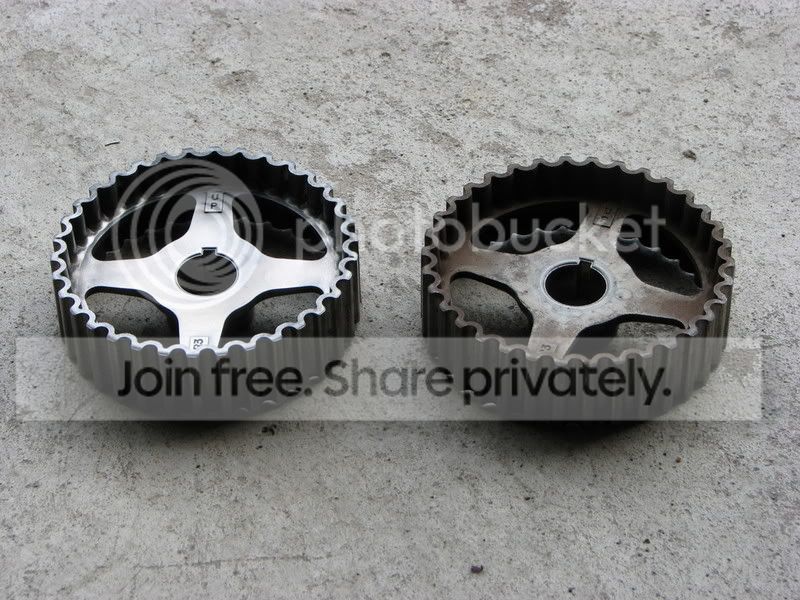
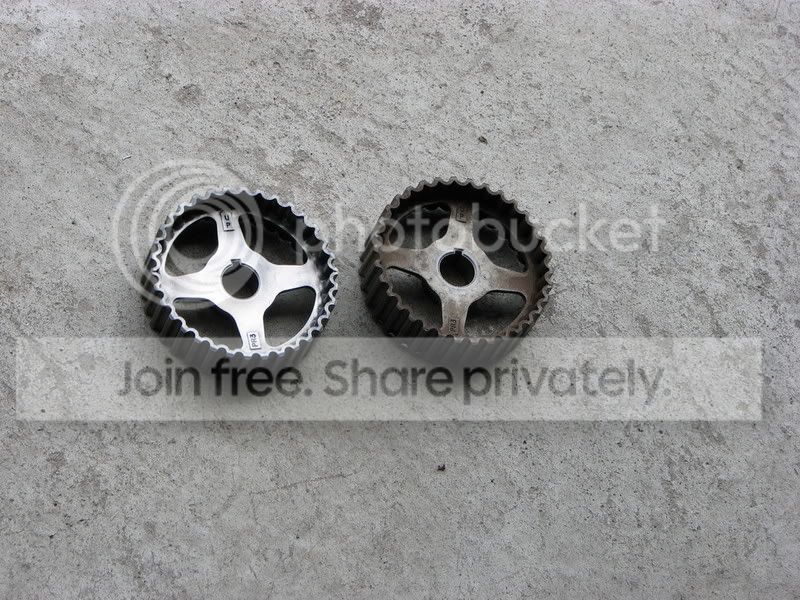
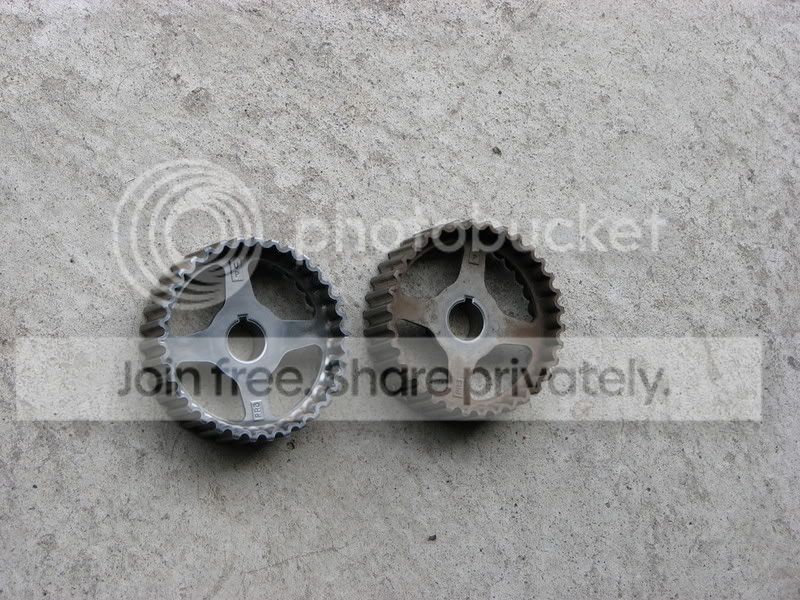
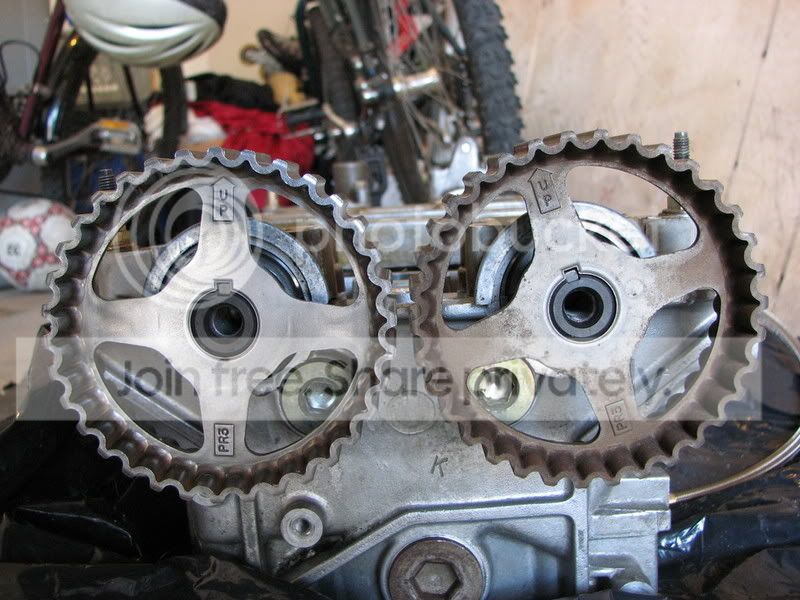
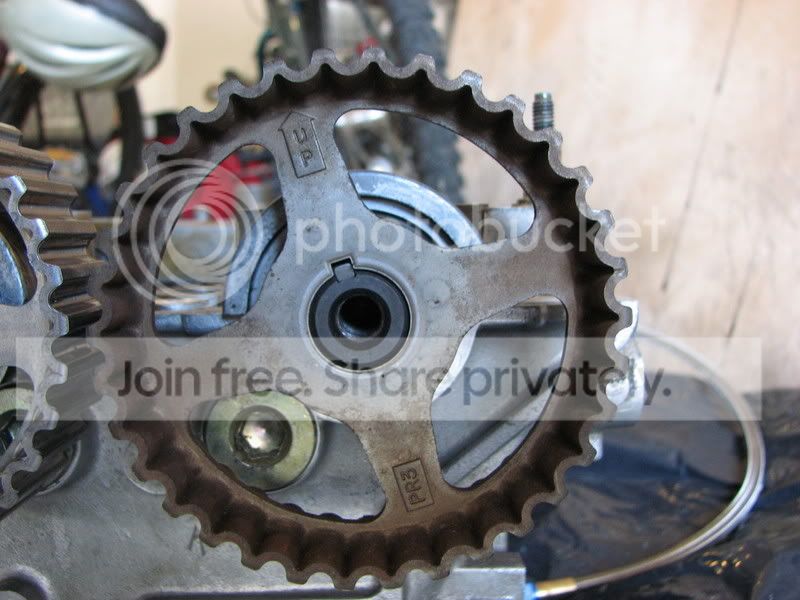
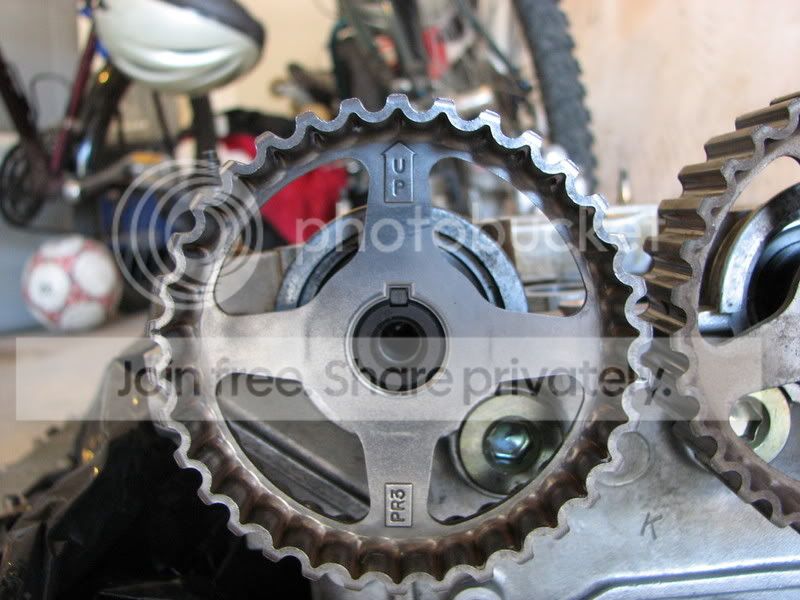
Cam Gears before:

After/Before:


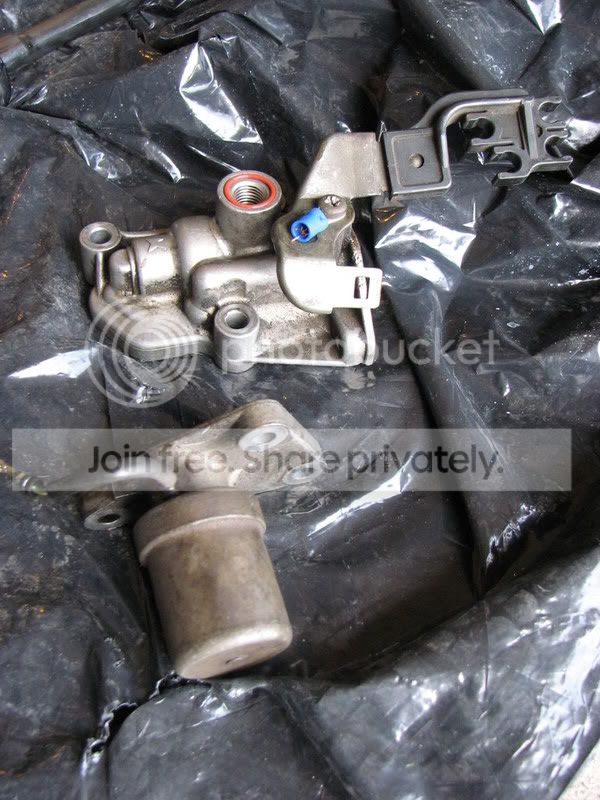
Took apart the VTEC solenoid, and preparing to polish it, and clean up:

Half way done, here are more head shots:


I got an LSD ITR tranny a few months ago:
And not until two weeks ago did I start cleaning it. I decided to keep it OEMish, so me and my buddy sanded off all the nasty junk off it:
Pic of my buddy working:
A lot of people like the shiney new look, a lot of people hate it. We'll see how it looks once it's all together I guess. I had that battleship grey paint chip as it sat over winter int he garage on the motor. I figured if it chips from extreme temperatures, it's bound to crack from driving. So I'll keep it just shiney/bare for now.
Did an upgrade on the clutch/flywheel as well. Went with the 7.5lb Fidanza Fly wheel (I believe OEM is 12/13lbs?). Either way, it looks so friggen awesome:
Stage 1 Gravy Competition Clutch. I was highly advised to stay away from the Exedy, due to many many warranty issues. I stuck with a Stage 1 as it's good for 270whp:
And lastly, a few months ago I picked up a Ported and Polished head that was also decked, and had the dowels machined for a LS/B20-Vtec swap off a friend who decided to buy a bike instead of building a car:
The head came in pretty good condition since it was at the machine shop and has never been installed. I decided it needed more work anyway
So I cleaned it up with a wirewheel and drill:Cam Gears before:
After/Before:
Took apart the VTEC solenoid, and preparing to polish it, and clean up:
Half way done, here are more head shots:

