
New fab I'm working on, non-honda warning

 10-04-2008, 02:36 PM
#277
Honda-Tech Member
Join Date: Jun 2003
Location: Portland, OR
Posts: 4,167
Likes: 0
Received 0 Likes
on
0 Posts
<TABLE WIDTH="90%" CELLSPACING=0 CELLPADDING=0 ALIGN=CENTER><TR><TD>Quote, originally posted by 9295EJ-t »</TD></TR><TR><TD CLASS="quote">what are you planning to do about bumps on the road?</TD></TR></TABLE>
see pages 5 & 6
see pages 5 & 6
10-24-2008, 09:49 PM
#278
Honda-Tech Member
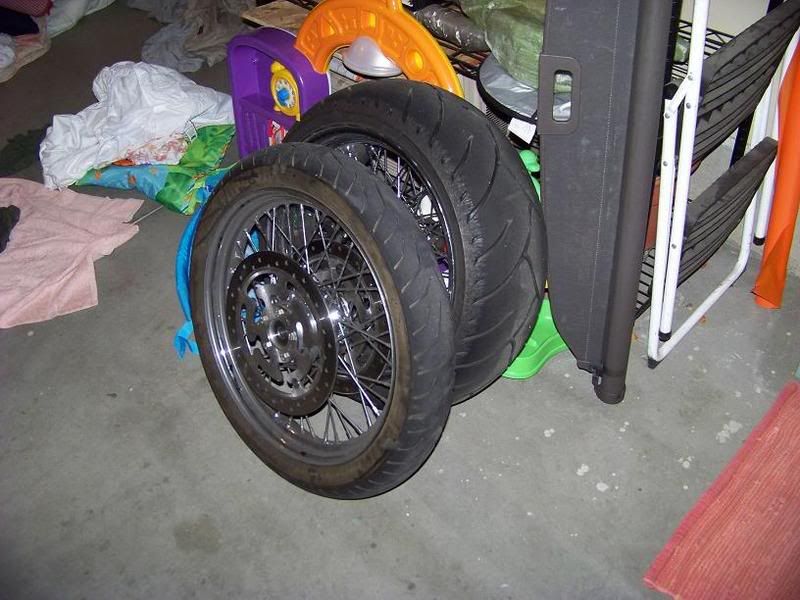
<TABLE WIDTH="90%" CELLSPACING=0 CELLPADDING=0 ALIGN=CENTER><TR><TD>Quote, originally posted by 96supercharged »</TD></TR><TR><TD CLASS="quote">Hooray for Parts!!!!
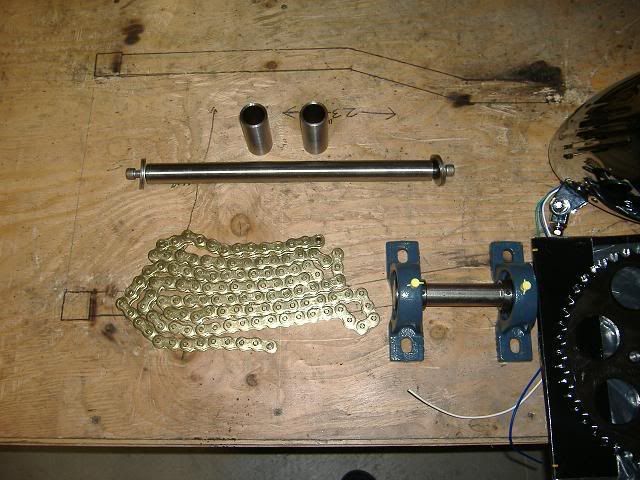
Here you can see, the chain (which was a nice suprise, because the color scheme on this bike is going to be satin black and gold, I didn't know the chain would come gold like that.)
Thanks
Sky
</TD></TR></TABLE>
are you still going with the satin black and gold theme?
Here you can see, the chain (which was a nice suprise, because the color scheme on this bike is going to be satin black and gold, I didn't know the chain would come gold like that.)
Thanks
Sky
</TD></TR></TABLE>
are you still going with the satin black and gold theme?
10-24-2008, 11:33 PM
#279
Honda-Tech Member
Join Date: Sep 2005
Location: Los Angeles, CA, United States
Posts: 1,252
Likes: 0
Received 2 Likes
on
2 Posts
ive been keeping up with your build for sometime but honestly how can u drive that anywhere??? is it strictly a show bike? does the suspension raise up?
also is this still registered as the bike it started off as or is it registered as a custom built bike??
im just wondering if this is some sort of loophole cause if it is then im gona do it too cause i want a bike but i dont want the bills asociated with owning a bike.
also is this still registered as the bike it started off as or is it registered as a custom built bike??
im just wondering if this is some sort of loophole cause if it is then im gona do it too cause i want a bike but i dont want the bills asociated with owning a bike.
10-27-2008, 06:25 PM
#280
Honda-Tech Member
Thread Starter
Join Date: Oct 2006
Location: bend, or, usa
Posts: 278
Likes: 0
Received 0 Likes
on
0 Posts
Yep, the suspension raises up about 4", I've been riding it since June, rides like a champ.
Here's a vid back when I didn't quite have it done yet, but you can still see me riding it:
http://www.youtube.com/watch?v=IqYnoqdWDFc
And, I'm not sure how it works in your state for bikes, but here in Oregon, my bike is registered as a 2008 Yamaha assembled vehicle. Just got my new title for it the other day.
As to the other question, no, it's not going to be satin black and gold, it's going to be mostly gloss black and the tins will be a dark forest green, possibly with some flake in it.
Bike is getting torn down this week and I'll start the prep work to paint it.
Thanks
Sky
11-25-2008, 06:36 PM
#282
Honda-Tech Member
Thread Starter
Join Date: Oct 2006
Location: bend, or, usa
Posts: 278
Likes: 0
Received 0 Likes
on
0 Posts
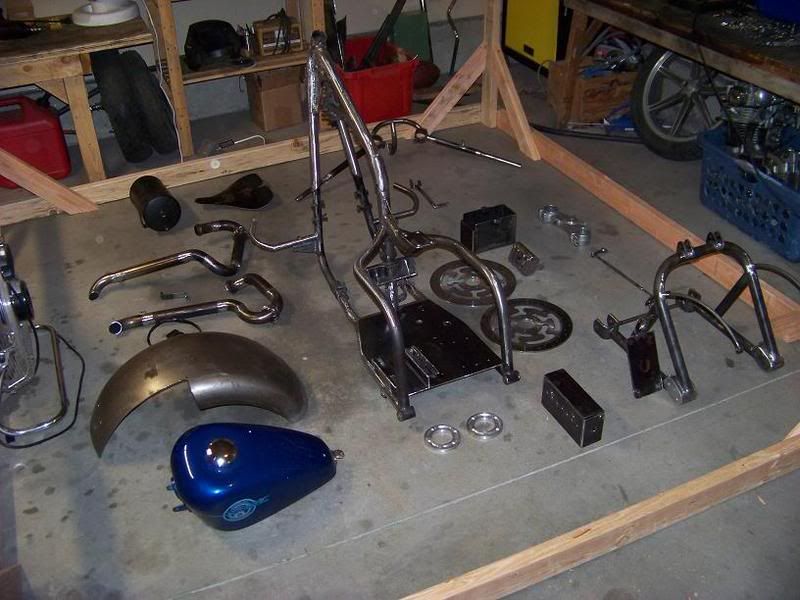
Started breaking the bike down for paint the other day:
Here's some of it here:
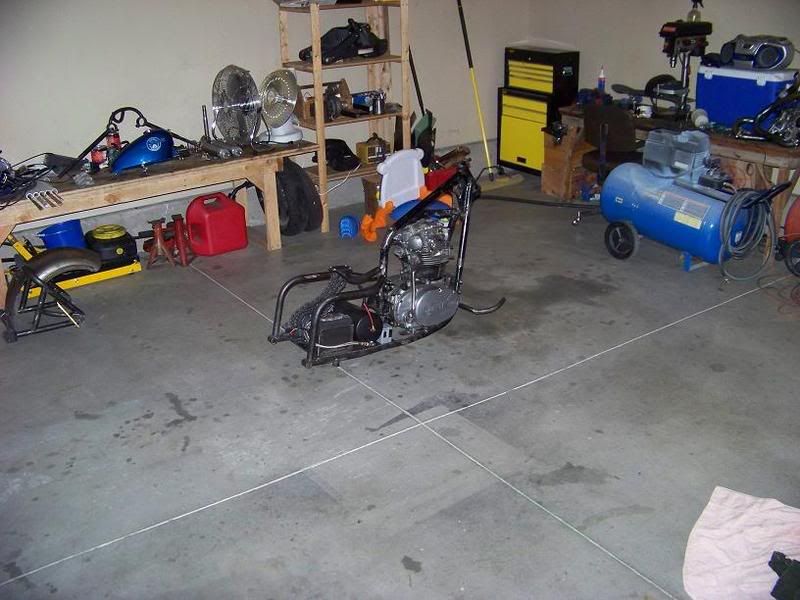
Some more here:
and here and here:
I need to do some final fab and a couple extra brackets for the air system, then clean up all the metal for painting.
Paint scheme has changed again as well, probably going to be black and silver now.
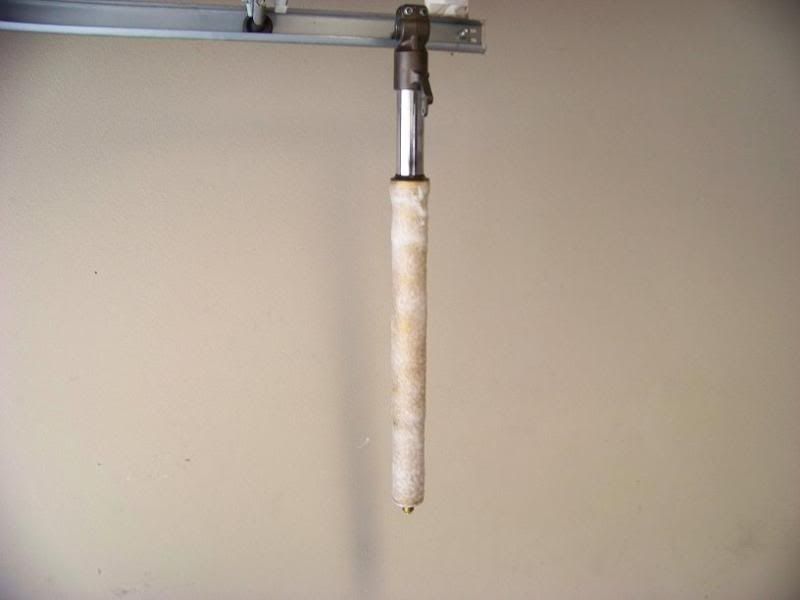
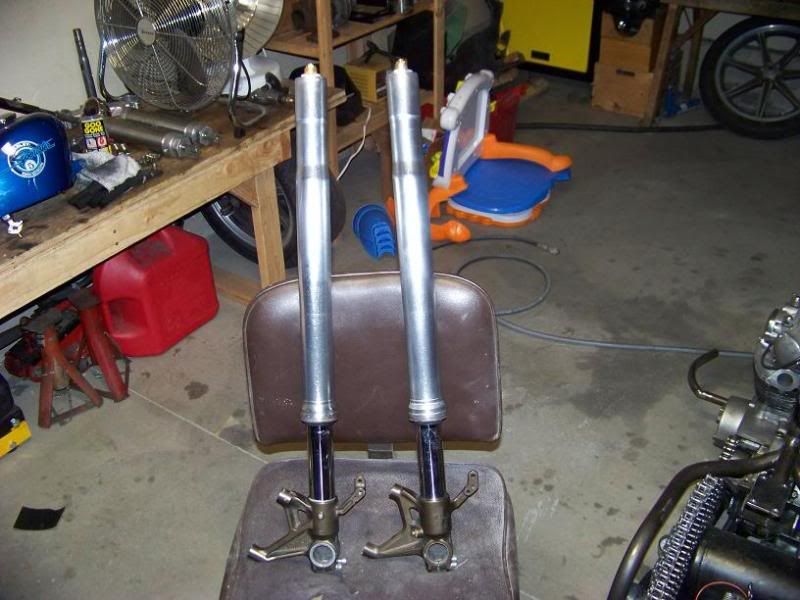
Also today I was working on taking the gold anodized coating off of the forks. They'll be painted black eventually but I wanted to strip them first.
I had heard that oven cleaner will remove anodizing, but this is only partially true. It thins it a lot and removes it pretty well, but it definitely leaves a residue that must be sanded off. Also, the stock forks have little tiny ridges from the CNC machining when they are made, and the anodizing hides in these little ridges, so they must all be sanded smooth to get all of it. Giant pain in the neck, but here's a couple photos of the work.
Oven cleaner, let sit for about a half hour:
One fork mostly clean, viewed against an untouched one. Also here you can see my sander of choice:
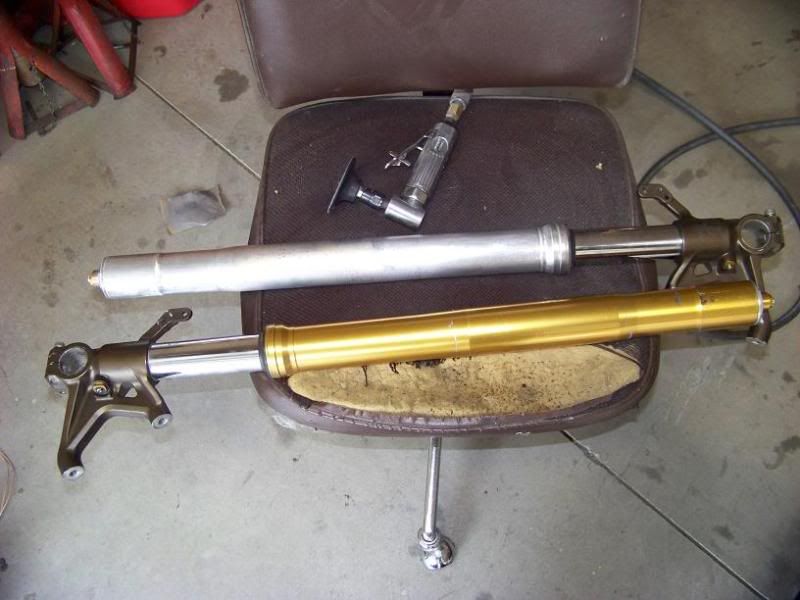
Using the whiz wheel leaves a fairly rough finish, so I started sanding the forks starting with 220grit, then moving to 400 then 800grit. There's still some imperfections, but they'll be painted black eventually anyway:
One side mostly done:
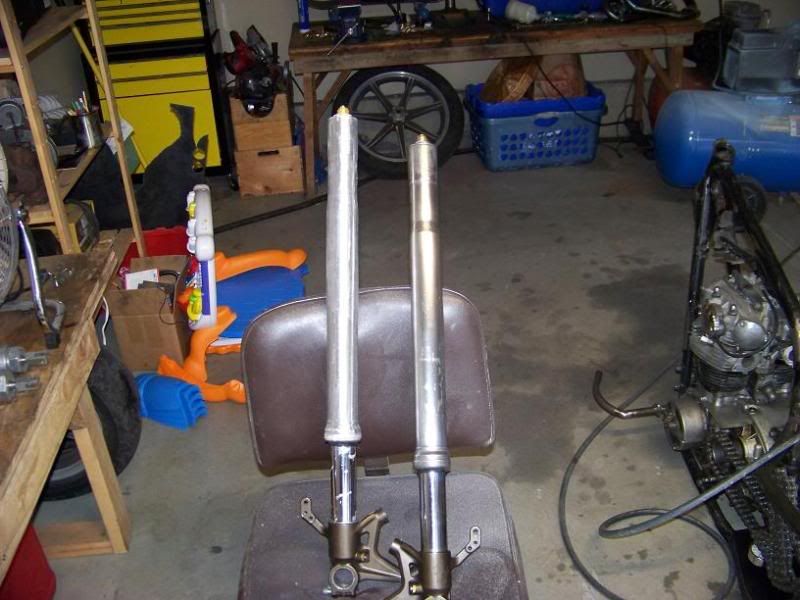
Both legs polished fairly well:
Take a look and let me know whatcha think.
thanks
Sky
Here's some of it here:
Some more here:
and here and here:
I need to do some final fab and a couple extra brackets for the air system, then clean up all the metal for painting.
Paint scheme has changed again as well, probably going to be black and silver now.
Also today I was working on taking the gold anodized coating off of the forks. They'll be painted black eventually but I wanted to strip them first.
I had heard that oven cleaner will remove anodizing, but this is only partially true. It thins it a lot and removes it pretty well, but it definitely leaves a residue that must be sanded off. Also, the stock forks have little tiny ridges from the CNC machining when they are made, and the anodizing hides in these little ridges, so they must all be sanded smooth to get all of it. Giant pain in the neck, but here's a couple photos of the work.
Oven cleaner, let sit for about a half hour:
One fork mostly clean, viewed against an untouched one. Also here you can see my sander of choice:
Using the whiz wheel leaves a fairly rough finish, so I started sanding the forks starting with 220grit, then moving to 400 then 800grit. There's still some imperfections, but they'll be painted black eventually anyway:
One side mostly done:
Both legs polished fairly well:
Take a look and let me know whatcha think.
thanks
Sky
12-05-2008, 06:14 PM
#284
Honda-Tech Member
Thread Starter
Join Date: Oct 2006
Location: bend, or, usa
Posts: 278
Likes: 0
Received 0 Likes
on
0 Posts
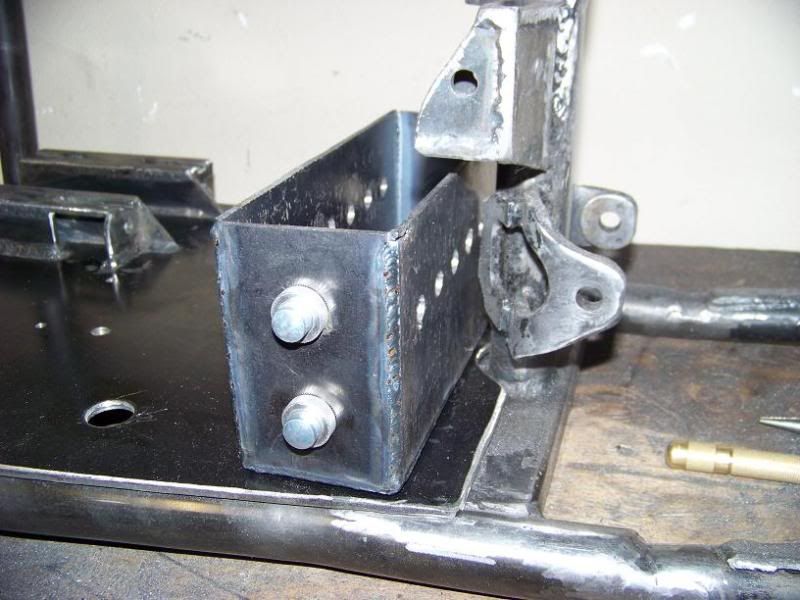
More work today:
All this metal prep takes forever, because now I have to get the metal real nice for painting and just the way I want it because once it's painted it's done.
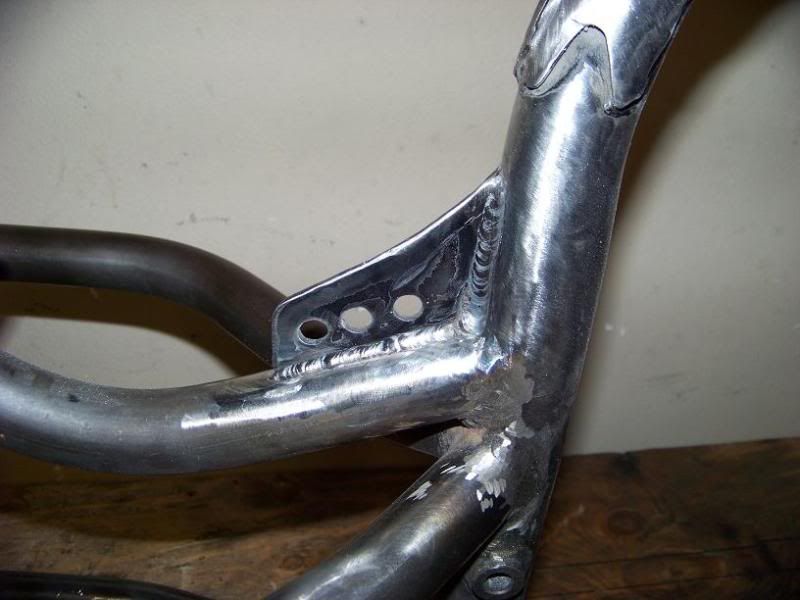
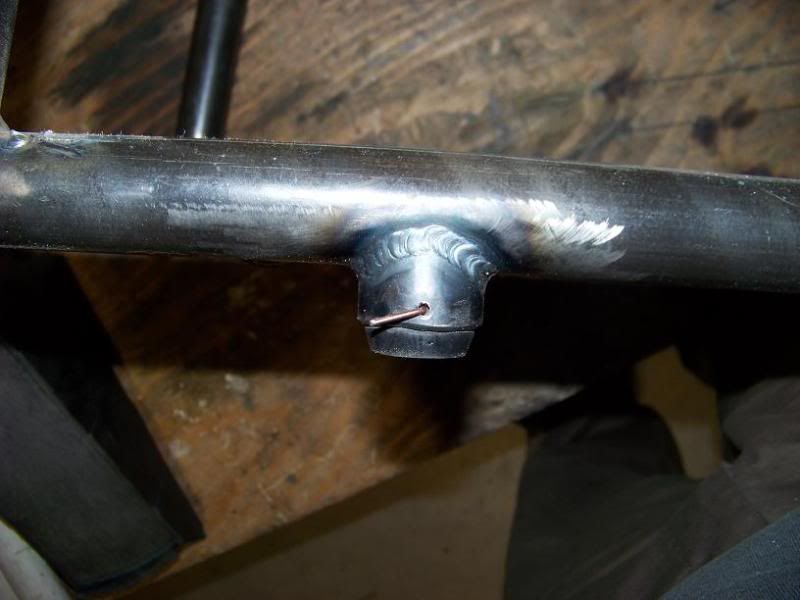
made a little gusset for the seat post area.
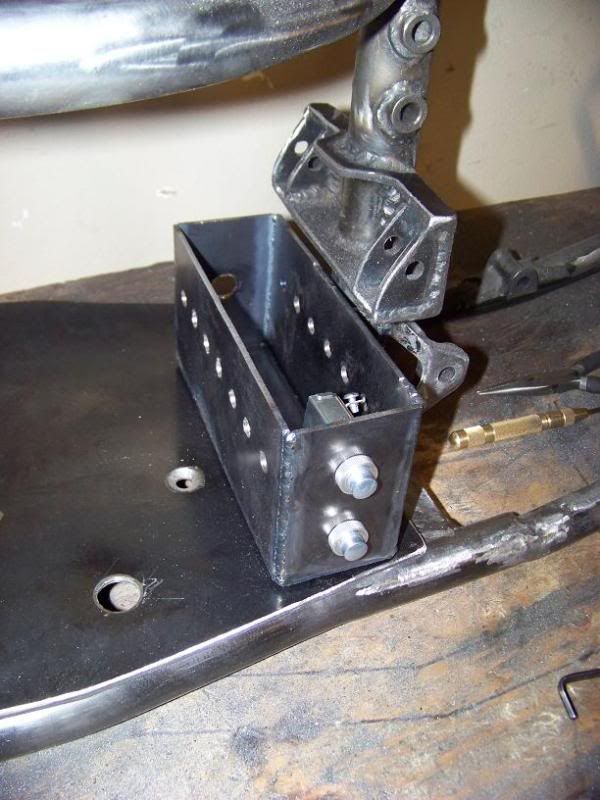
Had to cut the nose section of the seat pan down a bit to make it fit.
Made a couple of similar gussets for the pegs.

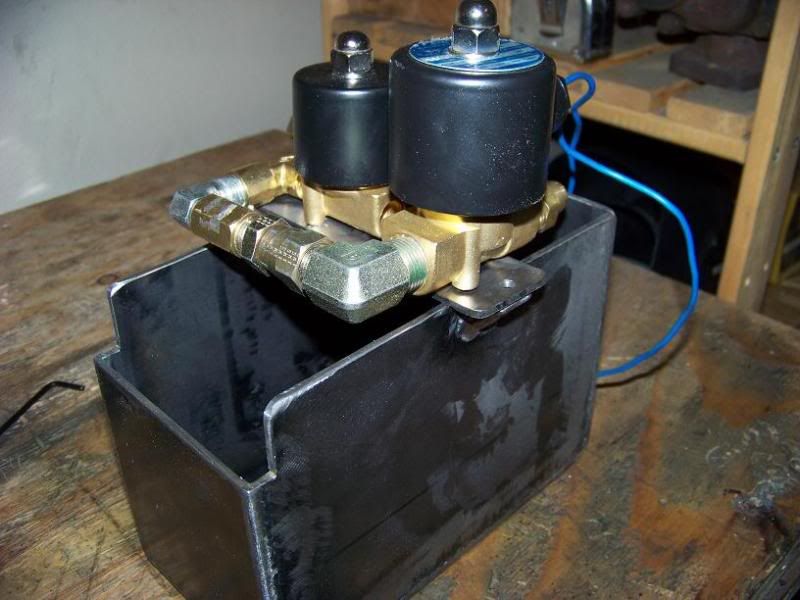
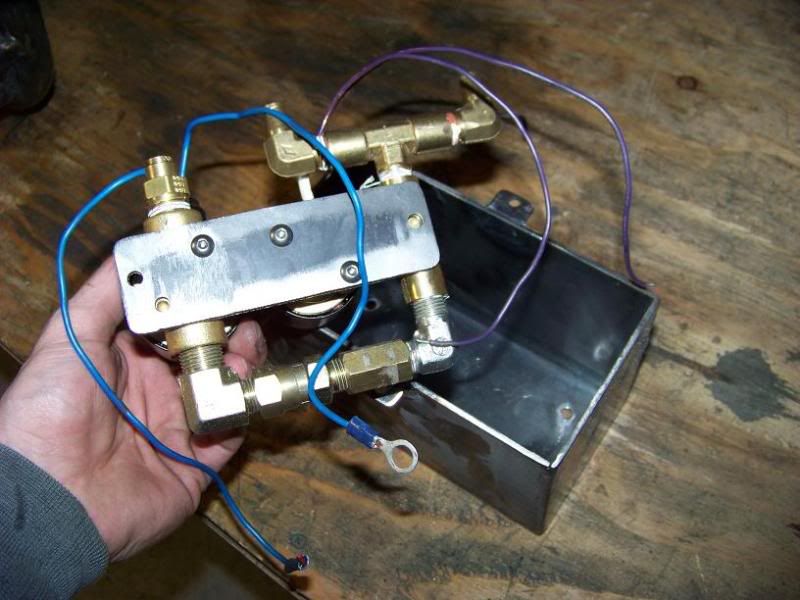
Made the battery hold down/air solenoid mounting plate.
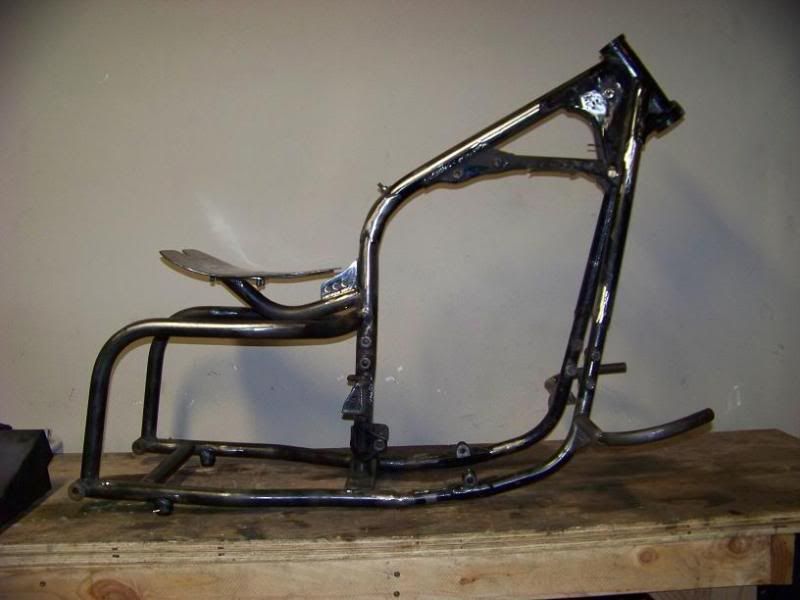
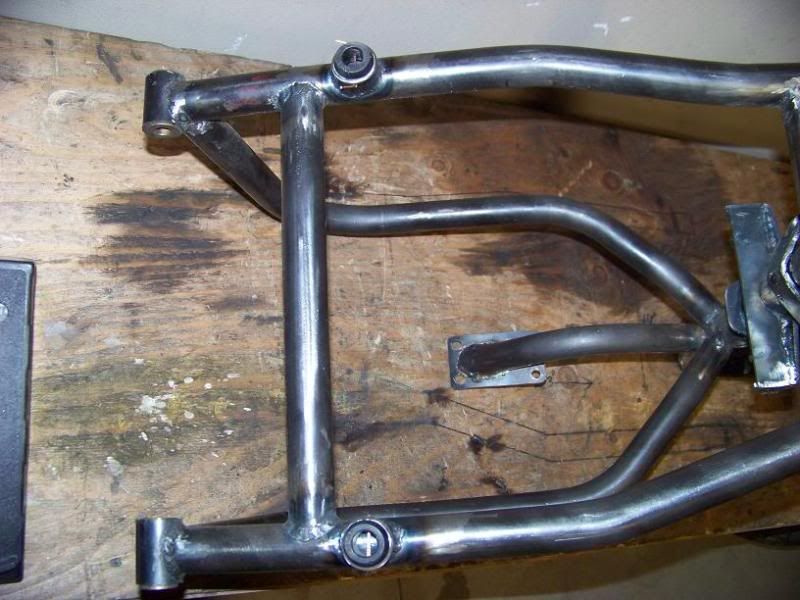
also, on the bottom of the frame, there are little posts that the bike rests on, they were just tacked on before, and weren't quite the right size, so I cut them to the proper length, and bought some polyeurethane shock mounting bushings, cut those in half, and shaved them down to fit into the tubing. Then I drilled a hole through the tubing, in the final version cotter pins will be used to hold these in place.
Thanks for looking everyone, more work to come soon.....
Sky
All this metal prep takes forever, because now I have to get the metal real nice for painting and just the way I want it because once it's painted it's done.
made a little gusset for the seat post area.
Had to cut the nose section of the seat pan down a bit to make it fit.
Made a couple of similar gussets for the pegs.
Made the battery hold down/air solenoid mounting plate.
also, on the bottom of the frame, there are little posts that the bike rests on, they were just tacked on before, and weren't quite the right size, so I cut them to the proper length, and bought some polyeurethane shock mounting bushings, cut those in half, and shaved them down to fit into the tubing. Then I drilled a hole through the tubing, in the final version cotter pins will be used to hold these in place.
Thanks for looking everyone, more work to come soon.....
Sky
12-15-2008, 03:47 PM
#285
Honda-Tech Member
Thread Starter
Join Date: Oct 2006
Location: bend, or, usa
Posts: 278
Likes: 0
Received 0 Likes
on
0 Posts
Finally got my electrical box built today, I just need to smooth it out and make the cover for it. Added a bunch of holes to the sides for airflow, single hole in the back for the wires, and two holes in the front for the Momentary switches for the air system.
This is a lot cleaner setup than I had before, Now it's real simple, the top button for up, and the bottom one for down.
Almost finished with the metal prep finally, just a little bit more to go and I can prime everything up.
Although it's the wrong time to paint right now, we had a high of 6 degrees today, and it's supposed to stay like this for a week or so.
Thanks for looking
Sky
12-15-2008, 06:03 PM
#287
Honda-Tech Member
Join Date: Apr 2003
Location: Montreal, Quebec, Canada
Posts: 988
Likes: 0
Received 0 Likes
on
0 Posts
When I look at these pics, I see that your wife is very involved in your projects and that's great. Not everyone's girl is willing to snap pics of their BF's sitting on a bike, every single step of the way. 
12-24-2008, 07:44 PM
#288
Honda-Tech Member
Thread Starter
Join Date: Oct 2006
Location: bend, or, usa
Posts: 278
Likes: 0
Received 0 Likes
on
0 Posts
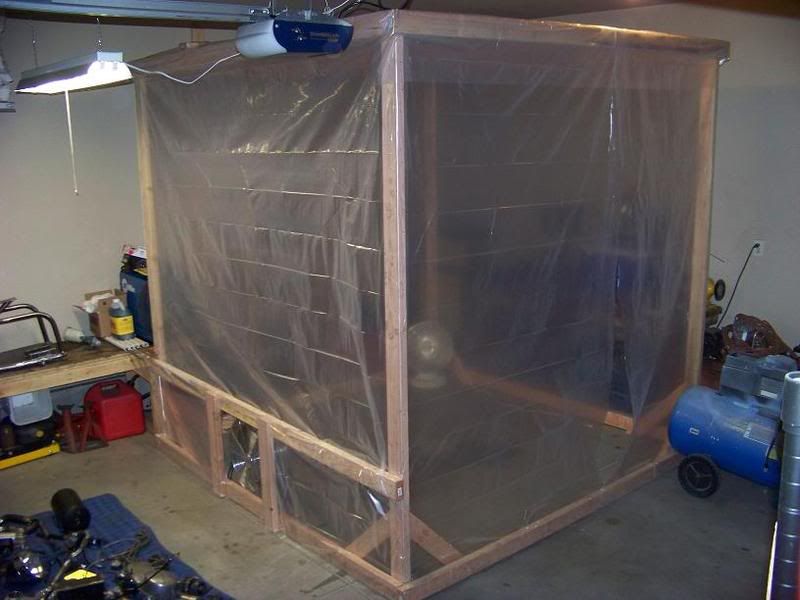
Whipped together most of my makeshift paint booth today
Going to wrap it in plastic tomorrow:
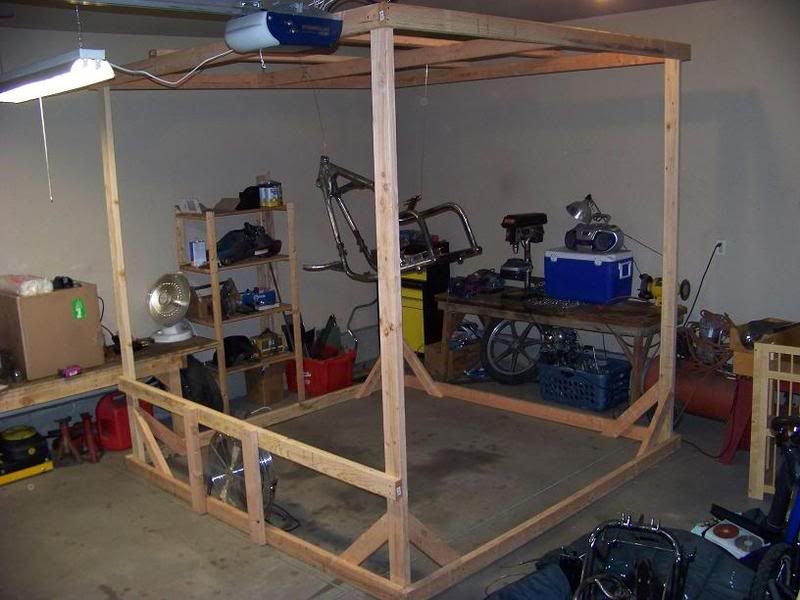
Finally finished with all the metal prep. Phew, that sucked. I still have to strip a couple items and fill the little dents in the tank, then etch the metal.
Thanks to Mechwerks for the tip about getting the metal etch for cheaper at Home Depot:
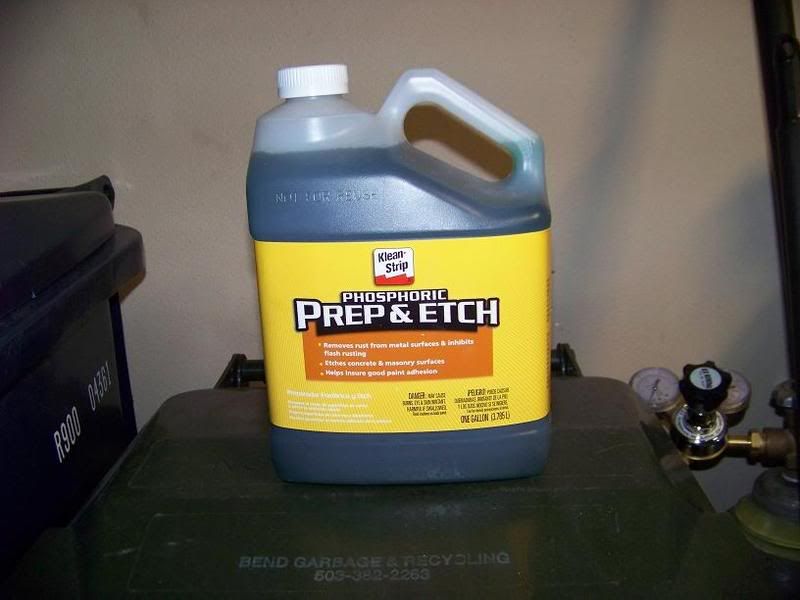
Got some of the paint, still need the silver and clear.
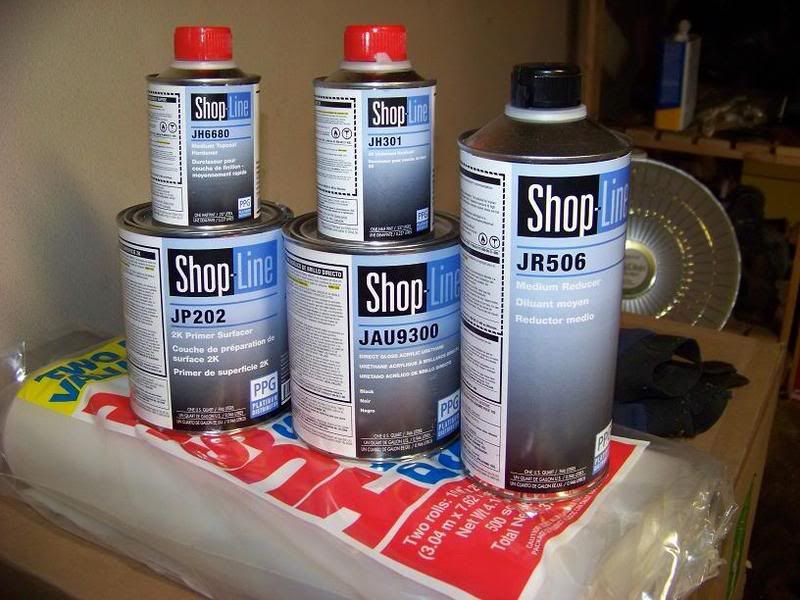
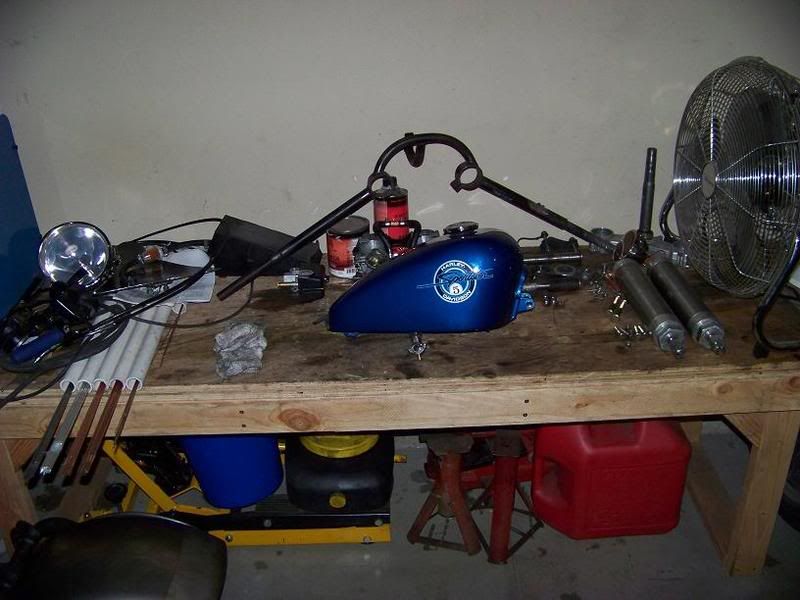
And here's most of what's waiting for paint, more little things here and there, but this is the majority of it. Now I just need it to warm up at least a little bit around here!
One of these days the bike will actually be done, I swear it!
Going to wrap it in plastic tomorrow:
Finally finished with all the metal prep. Phew, that sucked. I still have to strip a couple items and fill the little dents in the tank, then etch the metal.
Thanks to Mechwerks for the tip about getting the metal etch for cheaper at Home Depot:
Got some of the paint, still need the silver and clear.
And here's most of what's waiting for paint, more little things here and there, but this is the majority of it. Now I just need it to warm up at least a little bit around here!
One of these days the bike will actually be done, I swear it!
 great job!
 12-27-2008, 05:43 AM
#291
Honda-Tech Member
Join Date: Feb 2003
Location: Somewhere in, CT
Posts: 459
Likes: 0
Received 0 Likes
on
0 Posts
My suggestions o the booth you built. Put a large box fan on the ceiling of the structure to suck air up. Updraft booths kick ***. Youll also want to buy an air filter for the inlet. Put it as low as you can get it. An A/C filter from Home Depot will work perfect. Also, wet the ground in the booth to keep dust down. Just remember, prep, prep, prep. Paint work looks like crap because the material wasnt prepped right.
12-27-2008, 02:54 PM
#293
Honda-Tech Member
Thread Starter
Join Date: Oct 2006
Location: bend, or, usa
Posts: 278
Likes: 0
Received 0 Likes
on
0 Posts
Got my tank stripped today:
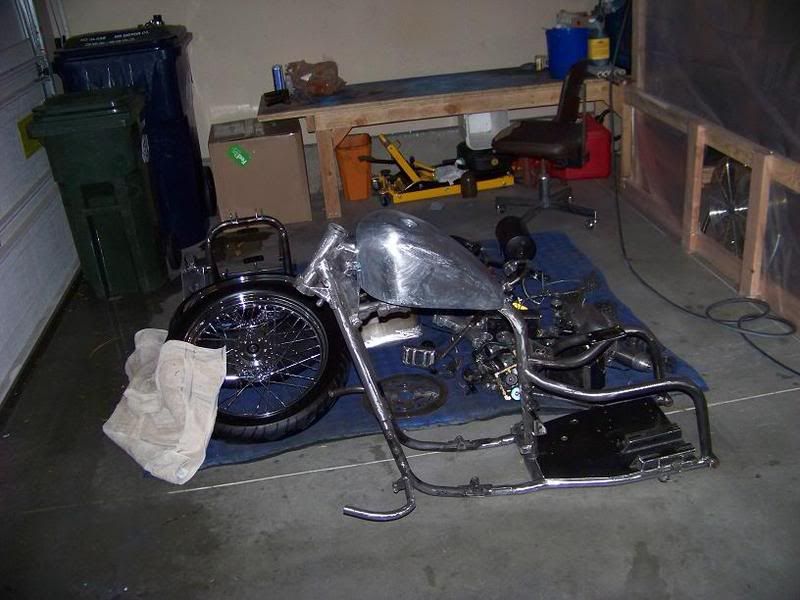
Man, what a pain in the butt! took several coats of paint stripper, then sanding afterward. Still have to finish stripping the front half of the frame itself, and the air tank, but I'm getting really close to priming everything.
I'm also about a hairs-width away from deciding to darth Vader this bike. I know black has been done to death, but I'm just not liking my color combo's right now. I'm thinking about the bike being all black (gloss black not flat black), with chrome wheels, chrome headlight/taillight, and polished forks, everything else black, could be really cool.
What do you guys think?
12-27-2008, 03:48 PM
#294
Honda-Tech Member
Join Date: Feb 2003
Location: Somewhere in, CT
Posts: 459
Likes: 0
Received 0 Likes
on
0 Posts
You are using metal etch primer, right? Using regular filler primer will work but its best to use the metal etch primer then go over it with filler primer, sand out any imperfections, then paint. Also, have your primer tinted to the color that you're going to paint it. This way, if you get a chip, itll be hard to see.
Ag, a fan wont blow the house up, itll keep the air moving. Its when solvents settle do they cause an explosion hazard.
Ag, a fan wont blow the house up, itll keep the air moving. Its when solvents settle do they cause an explosion hazard.
12-27-2008, 04:39 PM
#295
Honda-Tech Member
Thread Starter
Join Date: Oct 2006
Location: bend, or, usa
Posts: 278
Likes: 0
Received 0 Likes
on
0 Posts
I thought about doing that. My dad did that with his project, and I'm sure in the long run it's the right thing to do.
However, This is my first paint job ever, I know it's not going to be amazing. I'll make do with just the filler primer. Besides, the motorcycle will live it's entire life inside at night, so the paint job itself shouldn't be exposed to too many elements.
I'm sure at some point in the future if I still have the bike I'll want to tear it back down and either repaint, or paint it a different color, and perhaps at that point and time I'll have a little more cash to work with.
12-29-2008, 04:28 PM
#297
Junior Member
Join Date: Nov 2002
Location: upstate, ny, usa
Posts: 396
Likes: 0
Received 0 Likes
on
0 Posts
Hey man, such a great build. I have a small amount of input on your darth vader plan. Here is my bike, (nowhere near as cool as yours) all blacked out. Just wanted to inspire and persued you to go the all black route! Great build and I look foward to seeing the finished product! Keep up the amazing work!
12-29-2008, 05:05 PM
#298
Honda-Tech Member
Thread Starter
Join Date: Oct 2006
Location: bend, or, usa
Posts: 278
Likes: 0
Received 0 Likes
on
0 Posts
Great looking bike man!
Yeah I am going to go with the all black idea. I don't feel like paying for the extra silver paint anyway
Everything is ready for metal etching now, only things I need are a respirator mask and some paint thinner and I'm ready to go!
Yeah I am going to go with the all black idea. I don't feel like paying for the extra silver paint anyway
Everything is ready for metal etching now, only things I need are a respirator mask and some paint thinner and I'm ready to go!
01-04-2009, 05:27 PM
#299
Honda-Tech Member
Thread Starter
Join Date: Oct 2006
Location: bend, or, usa
Posts: 278
Likes: 0
Received 0 Likes
on
0 Posts
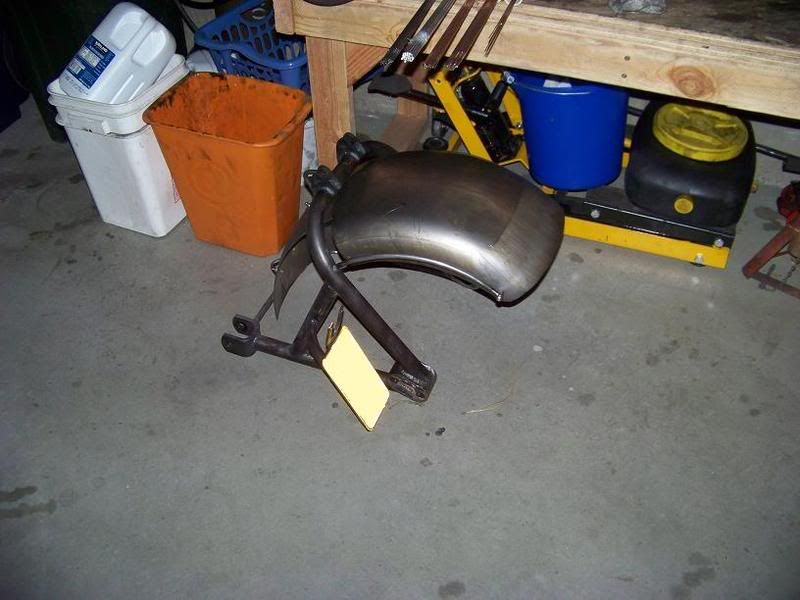
It begins-

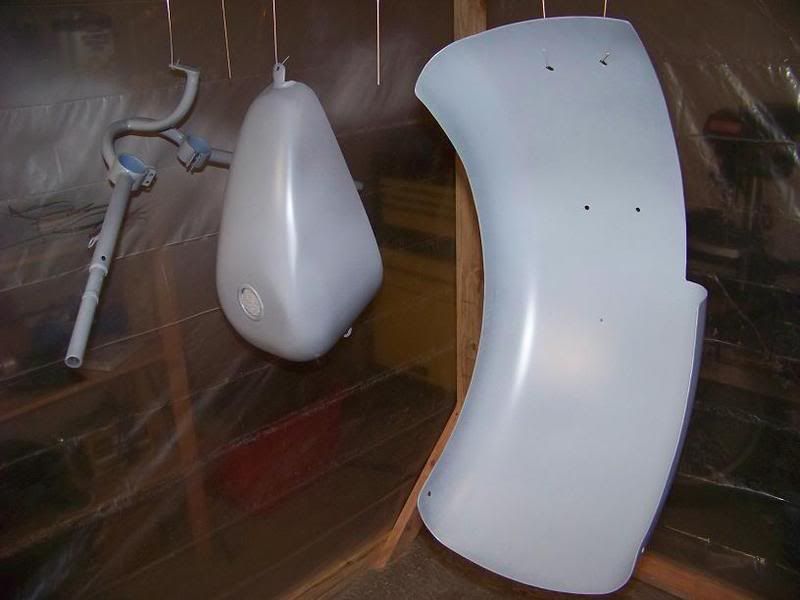
Overall I'm pretty happy with how the primer went on.
There was a moment about 2 minutes into the painting where I was scared of what I got myself into. But when it all comes down to it, you can't learn unless you try, and if I screw it up, who cares? Give it another try down the road I guess
I'll update as I go along
Sky
01-04-2009, 06:06 PM
#300
Working
Looks great. I see that you taped off the inside of the clamps on the bars. Good man. I have seen so many people forget that paint adds to the size and it will affect the fitment of everything on final assembly. Keep up the good work and as always well done.