
How to : Power folding mirrors
 01-01-2014, 01:56 PM
#1
Honda-Tech Member
Thread Starter
Join Date: Oct 2013
Location: Miami, Fl
Posts: 396
Likes: 0
Received 0 Likes
on
0 Posts
Ive been meaning to throw this together for a little while, but this will show you how to install the mirrors on any 94-01 dc/db. Most of the other guides I've came across were helpful for the basic switch and relay setup, but I ended up with a switch from an ek9 that had a built in relay. So along with running the wires for the switch and relay setup ill show you how to wire in the ek9 switch so you won't need to use the external relay.
Ok so get started by removing the door panel. Theres three screws in total, one behind the handle, one close to the mirror and another in the pocket where the arm rest is.
Once thats done, pop off the plastic triangle that covers the connector and bolts for the mirror. Unplug the connector, unbolt the old mirror and bolt up the new one.
Now, with the connector still unplugged from the mirror you have two options. Depin the wires from the oem connector and repin the new plug (I suggest doing this method, I wasnt paying attention when I did the drivers side and cut mine by accident), or cut and solder the new plug onto the oem wires. Your choice, do the same thing on the opposite side you started on.
You should have two wires left over on the plugs now (mine were green/yellow and blue/red, yours may differ). Take the two long wires I mentioned earlier and solder them to the extra wires on the passenger side.
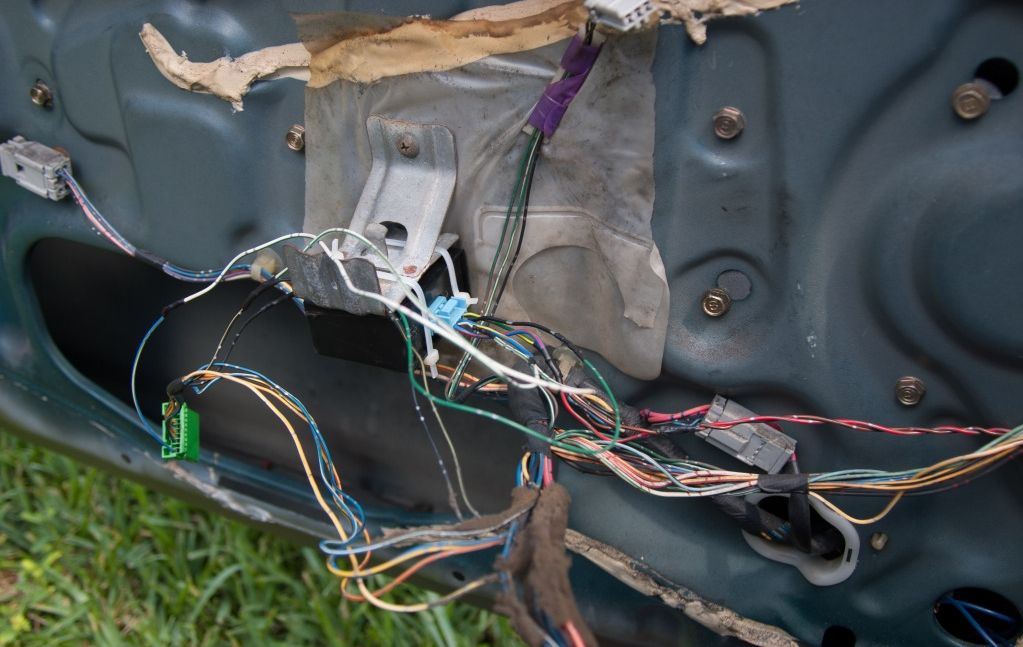
For this part its up to you how you want the wires ran, if you decide to put them through the molex plug on the door I suggest going to the junkyard and getting a male and female door connector. The pins used on that connector are longer than most other ones. Make sure you mark which wire goes to what color on the new plug.
Once the wires inside the car, tuck it under the carpet and get it to the other side of the car. Once its there do the same thing you did on the passenger side to get the wire into the door.
After the wires inside the door, the hard parts over with and it should be smooth sailing from here on. Now the wires you just brought into the driver side door get combined with the other two extra wires from the driver side plug. Make sure you reverse the wires before connecting them. If the two wire colors on the passenger side were blue and green, match the blue wire from the passenger side to the green on the driver side, and the green to blue. If you dont reverse them one mirror will close and the other will open when you hit the switch.
From there you should have just two wires now coming from the plug, so its onto the switch.
For the basic switch relay setup its very simple. As you can see theres only one extra wire thats added to the main switch pug. It'd be in your best interest to just depin that one wire and add it in, then to depin/repin or cut and solder the whole pigtail.
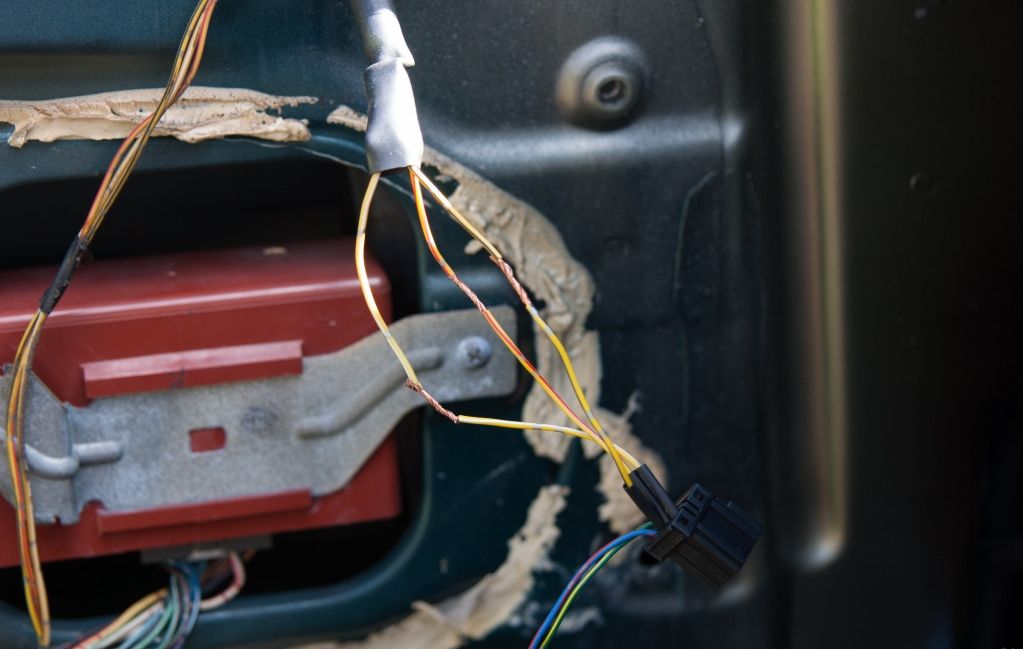
Once thats done, move onto the oem relay box. There should be 5 wires coming out from it.
When those wires are all matched up your done and ready to test them out, if everything works fine secure the relay and your done. I couldn't find a decent spot to mount my relay since it didn't come with the bracket, so I ended up using two zip ties to hold it under the pocket brace. (excuse the wiring mess, I realized at this point the switch I got wasn't going to work for this setup). If theres an issue, trace the wires back and make sure nothing got pinched or connected wrong.
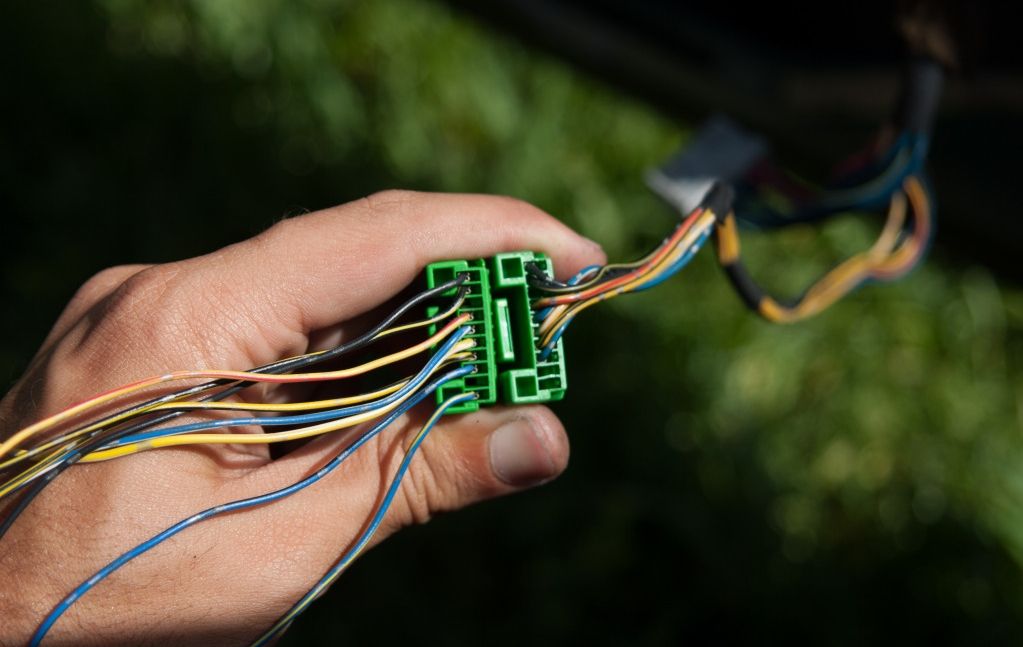
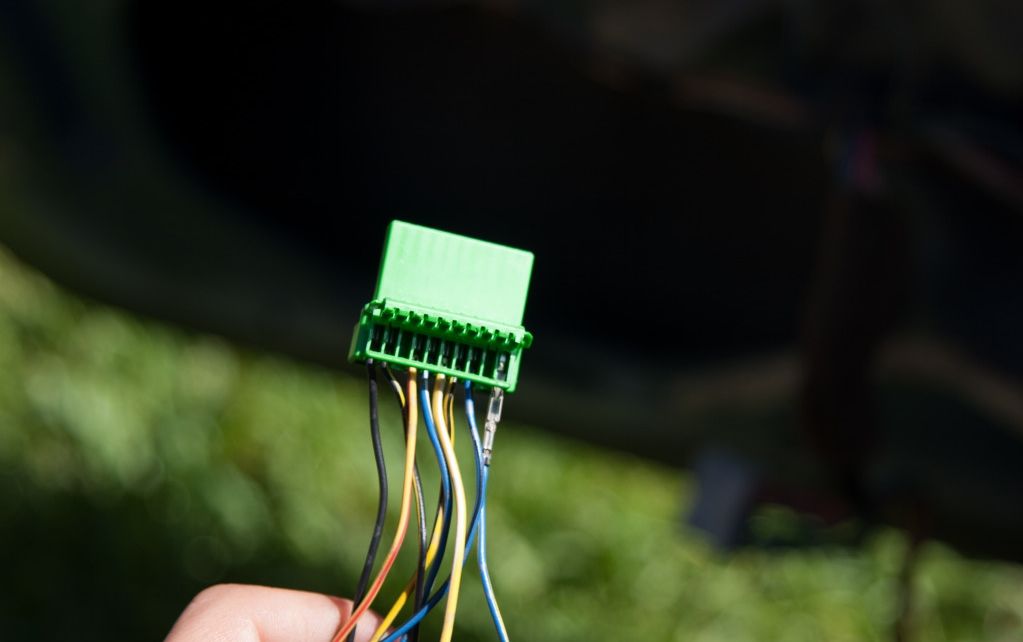
Ok so onto the ek9 switch wiring. The switch I ended up receiving was one with a built in relay. They do make ones that are just normal and require a relay, so if you intend on purchasing this specific switch, make sure it stays pressed down on its own and comes up with another press.
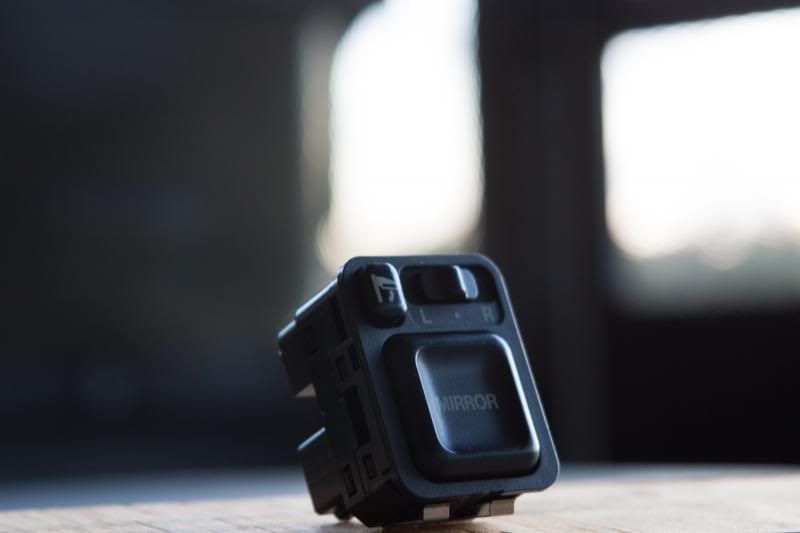
Notice how it stays depressed.
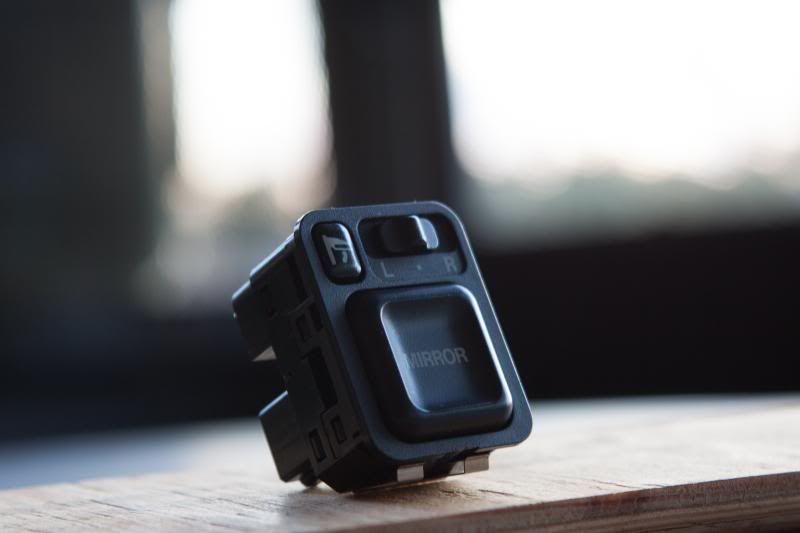
Wiring wise its basically the same as the normal switch and relay setup, other than theres no extra wire leading to an external relay.
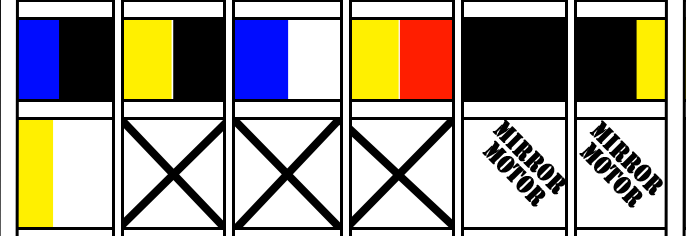
On this switch there should be 9 wires 6 on the bottom 3 on the top, in the diagram below the connector is facing so the tab is on the bottom.
Now depending on how you hook up the mirror motor wires, will determine whether the mirrors will open or close when the switch is pushed down.
And thats that, if every things working pat your self on the back and enjoy.
- Parts needed :
- Two wires long enough to reach from the passenger door to the driver side mirror connector.
- Switch with oem relay box
- Switch from an ek9 (they do make two types of these as I found out, the one I'm using stays down when its pressed and comes back up when its pressed again. The other style ek9 switch is basically the same as the usual switch and relay setup).
- Wire cutters / Strippers
- Soldering iron
- Heat shrink
- Solder
- Phillips screw driver
- 8mm socket
- 000 Flathead or needle
Ok so get started by removing the door panel. Theres three screws in total, one behind the handle, one close to the mirror and another in the pocket where the arm rest is.
Once thats done, pop off the plastic triangle that covers the connector and bolts for the mirror. Unplug the connector, unbolt the old mirror and bolt up the new one.
Now, with the connector still unplugged from the mirror you have two options. Depin the wires from the oem connector and repin the new plug (I suggest doing this method, I wasnt paying attention when I did the drivers side and cut mine by accident), or cut and solder the new plug onto the oem wires. Your choice, do the same thing on the opposite side you started on.
You should have two wires left over on the plugs now (mine were green/yellow and blue/red, yours may differ). Take the two long wires I mentioned earlier and solder them to the extra wires on the passenger side.
For this part its up to you how you want the wires ran, if you decide to put them through the molex plug on the door I suggest going to the junkyard and getting a male and female door connector. The pins used on that connector are longer than most other ones. Make sure you mark which wire goes to what color on the new plug.
- Theres a push tab on the outer part behind the fender to release that portion of the plug. The plug inside the door has two tabs that hold it in place I think, I got mine out by rocking it side to side. Once thats out theres a cover that slides over the wires, take that off and slide the pins into any open spot in the connector. I can't speak for the driver side connector having extra slots open since I ran the wire on that side outside of the plug. Once you put the pins in the connector, match them up on the outer part of the connector and run the wires through the boot and into the car. Connect the two back together and your done.
- Now the second easier way to run the wires, is to have them run behind the door panel and out to the connector boot. From there you just run the wires through the boot and into the car, bypassing the molex plug.
Once the wires inside the car, tuck it under the carpet and get it to the other side of the car. Once its there do the same thing you did on the passenger side to get the wire into the door.
After the wires inside the door, the hard parts over with and it should be smooth sailing from here on. Now the wires you just brought into the driver side door get combined with the other two extra wires from the driver side plug. Make sure you reverse the wires before connecting them. If the two wire colors on the passenger side were blue and green, match the blue wire from the passenger side to the green on the driver side, and the green to blue. If you dont reverse them one mirror will close and the other will open when you hit the switch.
From there you should have just two wires now coming from the plug, so its onto the switch.
For the basic switch relay setup its very simple. As you can see theres only one extra wire thats added to the main switch pug. It'd be in your best interest to just depin that one wire and add it in, then to depin/repin or cut and solder the whole pigtail.
Once thats done, move onto the oem relay box. There should be 5 wires coming out from it.
- Green/yellow - Goes to one of the two mirror motor wires.
- White/blue - Tap into the black/yellow wire on the main switch harness.
- Blue/yellow - Solder to the extra pin on the main mirror switch. (Same color)
- Black - Tap it into the solid black wire on the main switch harness.
- Blue/red - Goes to the other mirror motor wire.
When those wires are all matched up your done and ready to test them out, if everything works fine secure the relay and your done. I couldn't find a decent spot to mount my relay since it didn't come with the bracket, so I ended up using two zip ties to hold it under the pocket brace. (excuse the wiring mess, I realized at this point the switch I got wasn't going to work for this setup). If theres an issue, trace the wires back and make sure nothing got pinched or connected wrong.
Ok so onto the ek9 switch wiring. The switch I ended up receiving was one with a built in relay. They do make ones that are just normal and require a relay, so if you intend on purchasing this specific switch, make sure it stays pressed down on its own and comes up with another press.
Notice how it stays depressed.
Wiring wise its basically the same as the normal switch and relay setup, other than theres no extra wire leading to an external relay.
On this switch there should be 9 wires 6 on the bottom 3 on the top, in the diagram below the connector is facing so the tab is on the bottom.
Now depending on how you hook up the mirror motor wires, will determine whether the mirrors will open or close when the switch is pushed down.
And thats that, if every things working pat your self on the back and enjoy.


Thread
Thread Starter
Forum
Replies
Last Post
sk8shorty012
Honda Civic / Del Sol (1992 - 2000)
8
11-28-2008 04:51 PM
frankie11
Honda Civic / Del Sol (1992 - 2000)
24
06-08-2007 01:39 PM