

97-01 CRV Short Shifter: How-To


Thread Starter
Honda-Tech Member
Joined: Jan 2013
Posts: 136
Likes: 0
I figured I'd do a write-up on the first gen short shift mod since I could only find basic instructions on how to do it. It's not a complicated job but here's how it's done.
First thing's first, you'll need a short shift adapter for either a 2007-2008 Honda Fit or a 2006-2008 Honda Civic which you can find one Ebay, Amazon, etc. You'll also need the pivot ball cup for a 2006-2008 Civic which only seems to exist at http://www.twmperformance.com/hardware.htm although I suppose you could probably go to a Honda dealer. Now that we have all our parts, lets get started.
Start off by removing your shift ****.
Then you'll want to remove the shifter console by removing the 4 screws and two clips that hold it in place.


Now full off the cover and you should be looking at this..

Next we'll pull of the carpet trim by removing the two clips.


and you should be looking at this
 .
.
Thread Starter
Honda-Tech Member
Joined: Jan 2013
Posts: 136
Likes: 0
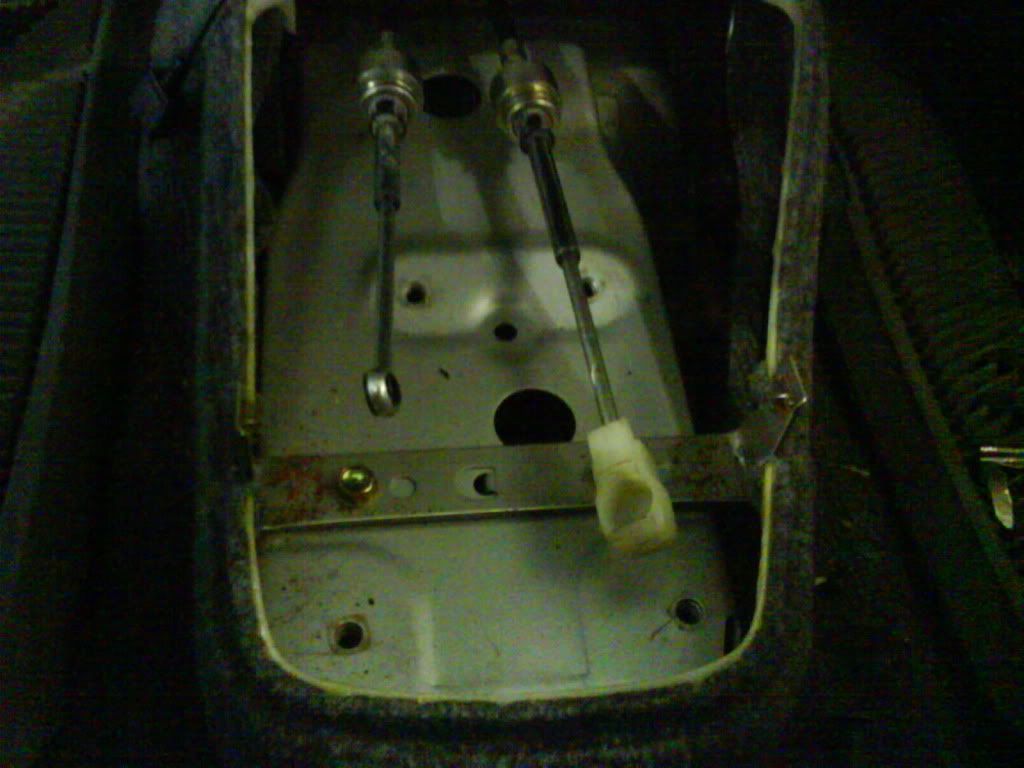
Pry up the two big clips at the front of the assembly that hold the cables in place. Now remove the small clip that holds the side cable to the shifter.

In order to get the main cable off, you'll have to remove a strange little spring clip by reaching through the small opening at the rear-facing end of the assembly.

Just spread it open (that's what she said) and the cable should basically fall off. Don't lose this clip, in fact, put it right back on the cable, the shift will slide through it when you reassemble everything. Now remove the 4 12mm bolts that hold the assembly in place and remove the assembly. use a 13mm open-end wrench to pop off the stock pivot cup from the bottom of the shifter, put the short shift adapter in place, put the new pivot cup on the adapter and tighten the allen screws.
 .
.
While you have the assmebly out, you'll need to clearance it so the main cable doesn't get caught up, just cut out the "V" section right where the cable goes.
From this...

To this, I used an air saw but a hacksaw, dremel or jigsaw would work fine too...


In order to get the main cable off, you'll have to remove a strange little spring clip by reaching through the small opening at the rear-facing end of the assembly.

Just spread it open (that's what she said) and the cable should basically fall off. Don't lose this clip, in fact, put it right back on the cable, the shift will slide through it when you reassemble everything. Now remove the 4 12mm bolts that hold the assembly in place and remove the assembly. use a 13mm open-end wrench to pop off the stock pivot cup from the bottom of the shifter, put the short shift adapter in place, put the new pivot cup on the adapter and tighten the allen screws.
 .
.While you have the assmebly out, you'll need to clearance it so the main cable doesn't get caught up, just cut out the "V" section right where the cable goes.
From this...

To this, I used an air saw but a hacksaw, dremel or jigsaw would work fine too...

Thread Starter
Honda-Tech Member
Joined: Jan 2013
Posts: 136
Likes: 0
At this point, it's just a matter of reassembly; put your cables back in place, make sure you've got all your clips, etc. etc.
Now, so the cable doesn't bottom out, we need to rearrange the assembly bushing like so..

These will go under the assembly to raise it up like so..

No reinstall all your covers and your shift **** and enjoy.

Now, so the cable doesn't bottom out, we need to rearrange the assembly bushing like so..

These will go under the assembly to raise it up like so..

No reinstall all your covers and your shift **** and enjoy.


Trending Topics
Honda-Tech Member
Joined: May 2013
Posts: 791
Likes: 0
From: Burlington, Ontario, Canada.
Honda-Tech Member
Joined: Apr 2013
Posts: 526
Likes: 0
From: Cleveland, OH
( pun intended
 )
)
Honda-Tech Member
Joined: Apr 2013
Posts: 526
Likes: 0
From: Cleveland, OH
The whole shift plate was replaced - shorter distance between the **** and the leverage bolt, plus shorter distance between the bolt and the linkage (cables).
Also, stiffer bushings (urethane or solid vs rubber) help shifting quite a bit.
Also, stiffer bushings (urethane or solid vs rubber) help shifting quite a bit.
Honda-Tech Member
Joined: Jul 2008
Posts: 1,821
Likes: 2
From: tri state (ny-nj)
short throw... not really to shorten the shifter in terms of lenght of the shifter..
good mods if you have a standard V, all of my 5spd Vs have this upgrade, i think illegal and b20vtec had done this mods too.. all buried in their build threads,..
good job on the pics! thats what lacked in our builds,lol!
good mods if you have a standard V, all of my 5spd Vs have this upgrade, i think illegal and b20vtec had done this mods too.. all buried in their build threads,..
good job on the pics! thats what lacked in our builds,lol!
Honda-Tech Member
Joined: Jan 2006
Posts: 1,318
Likes: 0
From: NOVA
Not to thread jack, but im going to put up the one I did years ago, just to keep it all in the same thread.
I originally did my mounting the same as above, but swapped it the next day. It was way to loose. But now everyone can see two ways to do it, and it looks like with different parts too.
I originally did my mounting the same as above, but swapped it the next day. It was way to loose. But now everyone can see two ways to do it, and it looks like with different parts too.
Honda-Tech Member
Joined: Jan 2006
Posts: 1,318
Likes: 0
From: NOVA
Next we have the how to on the short shifter. Basically it is the kit for the honda fit, and the "cup" from a '06 civic. You dont end up using anything from the kit other than the extender. You reuse the factory bolts AND the factory bushings, just a different way.
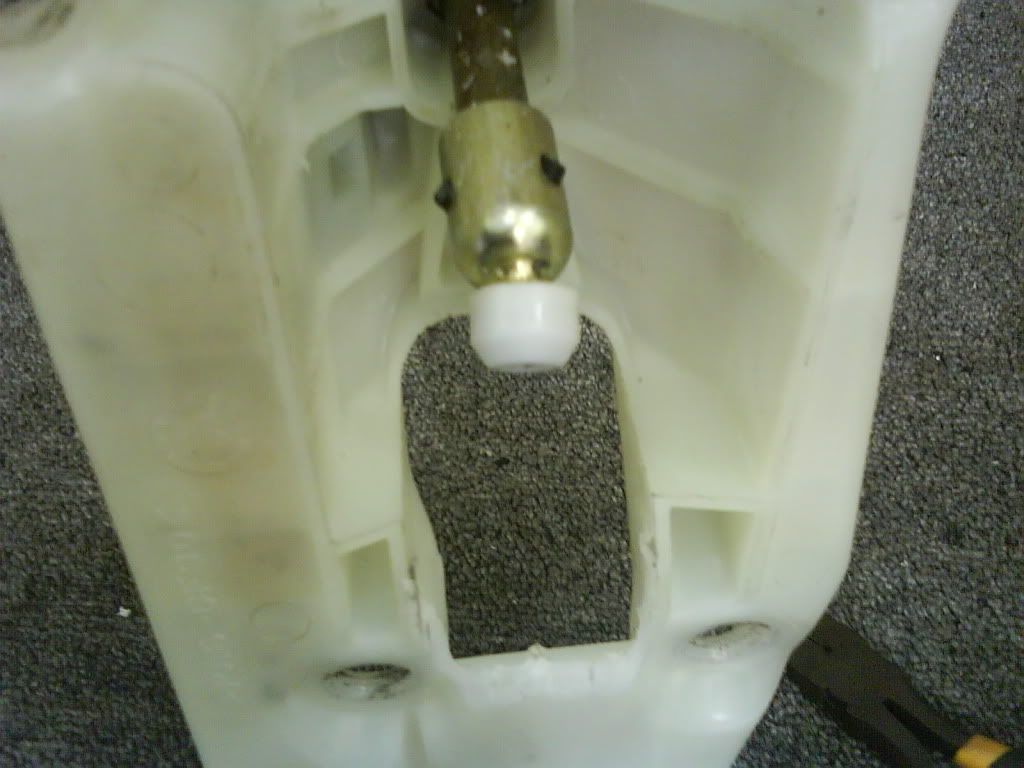
Ok, here is a pic of the oem set up apart, your new civic cup will fit inside the oem plastic cup. It is easier to also remove the carpet section underneath the factory botom plastic to gain access to lining up the gaskets later....
This pic is of the extention added on already to the oem shifter bottom. The allen key bolts a a bit weird to get in and tight. Also if your looking at your oem piece right now you will see a section that I removed. it is a decent size, and so the right cable doesnt hit the oem plastic now that the angles and heights are different.....
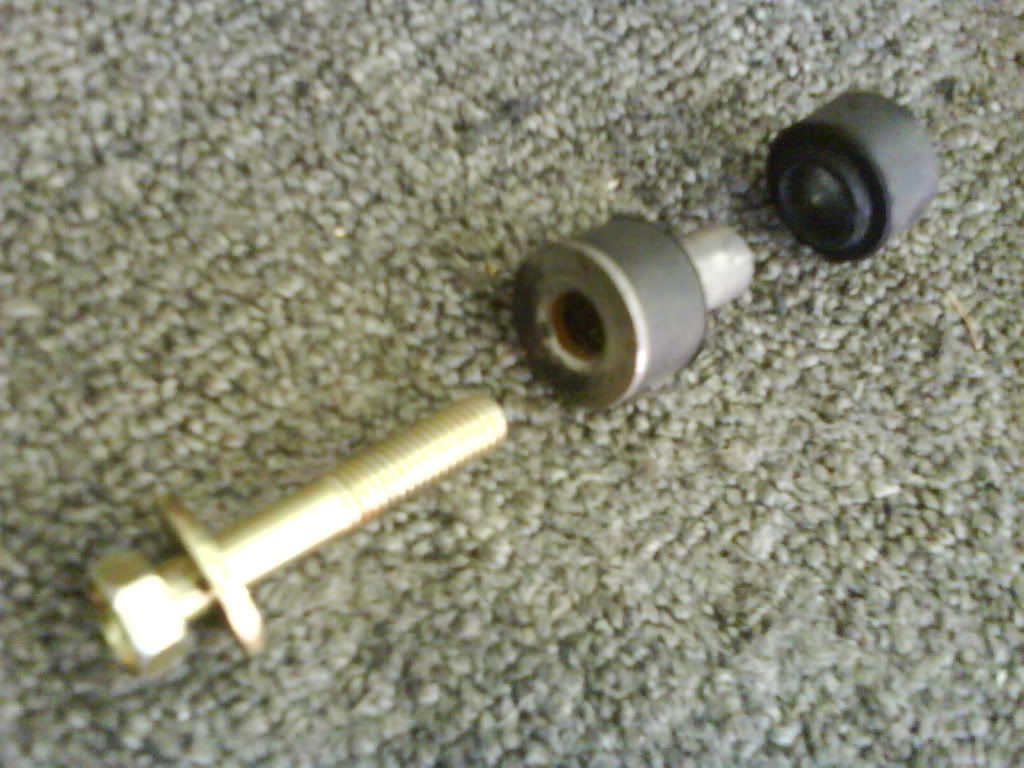
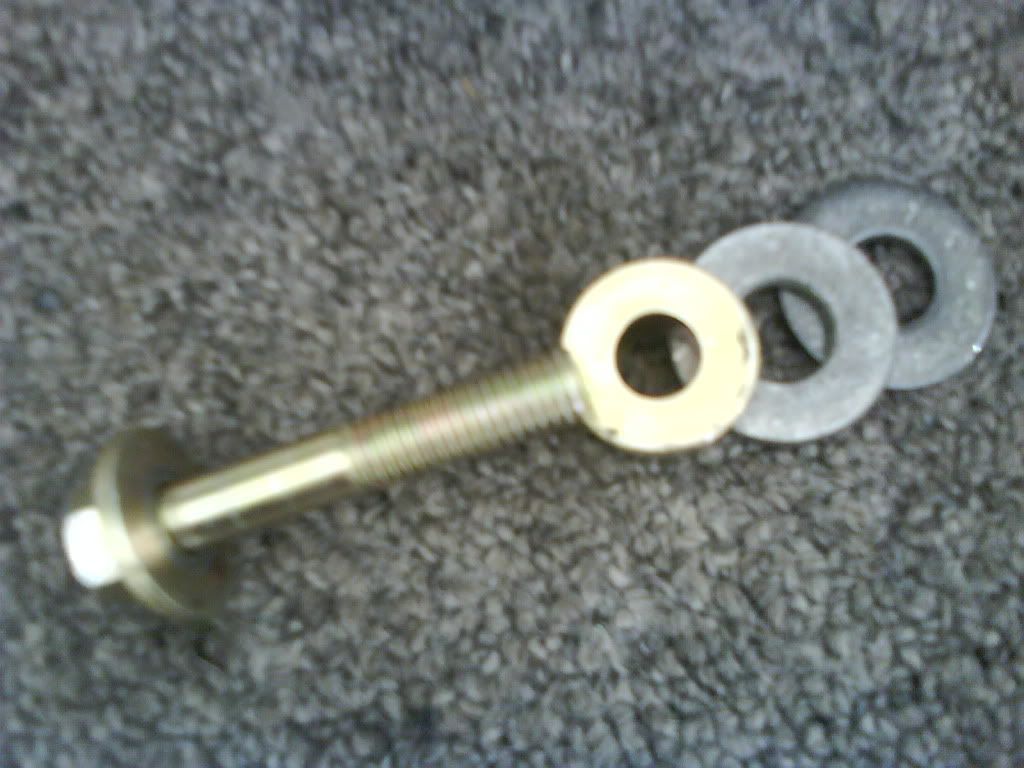
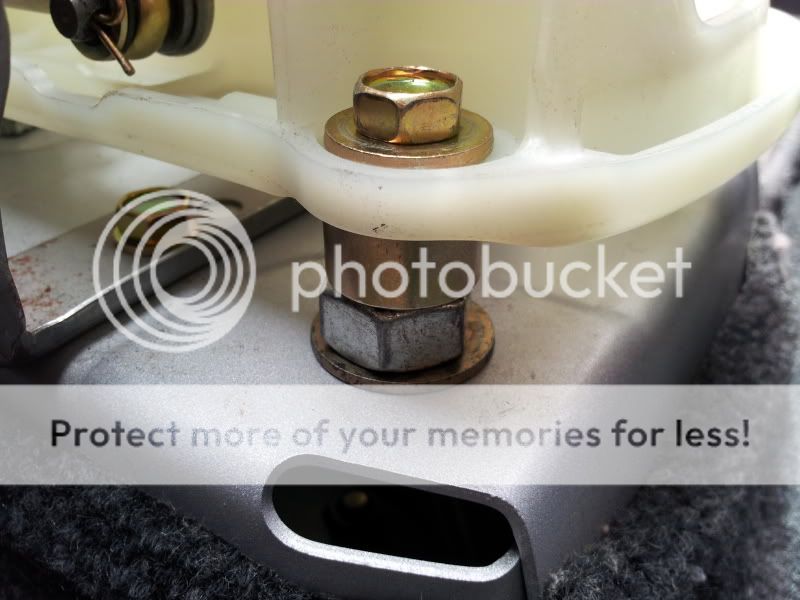
The next pic shows the oem parts you will reuse in the order it must go in when rebolting. So the oem bolt will go through the plastic shelf (shifting plastic block) as it did before, BUT the gaskets will now be situated as shown here. picture the bolt going into the next piece as shown, into the one following as shown. It is important not to have the washer portion that is built into the sleeve rubber piece facing down. This will let the whole shifter flex, and it wont work, so everything must ba facing as it is in this pic.....
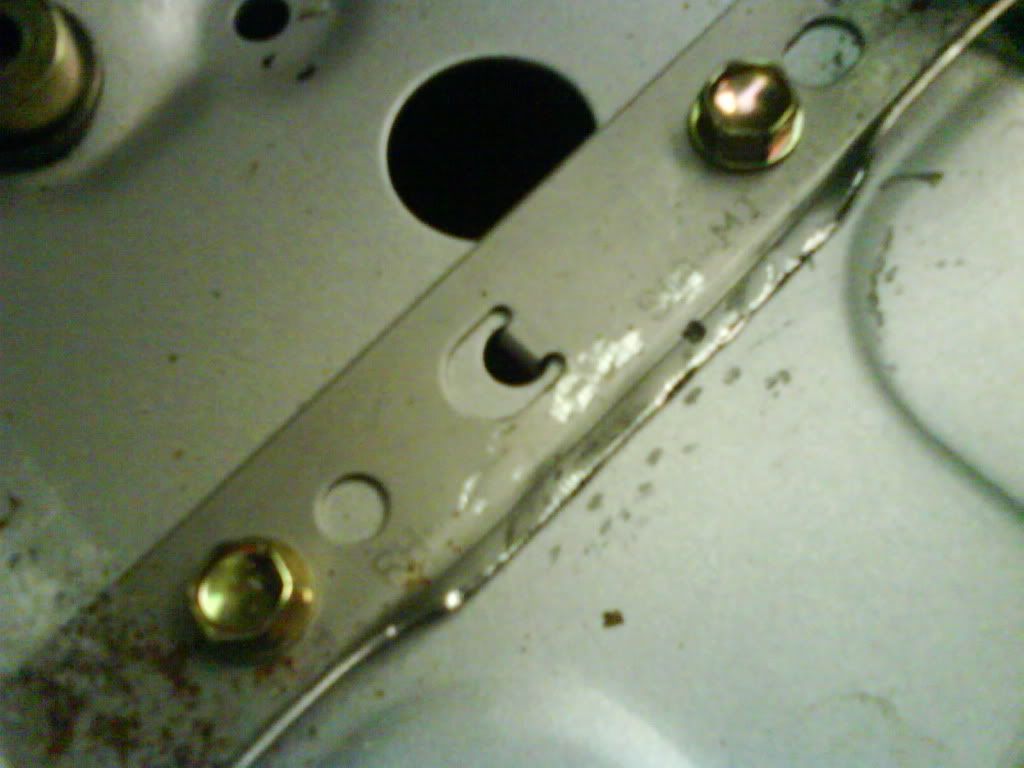
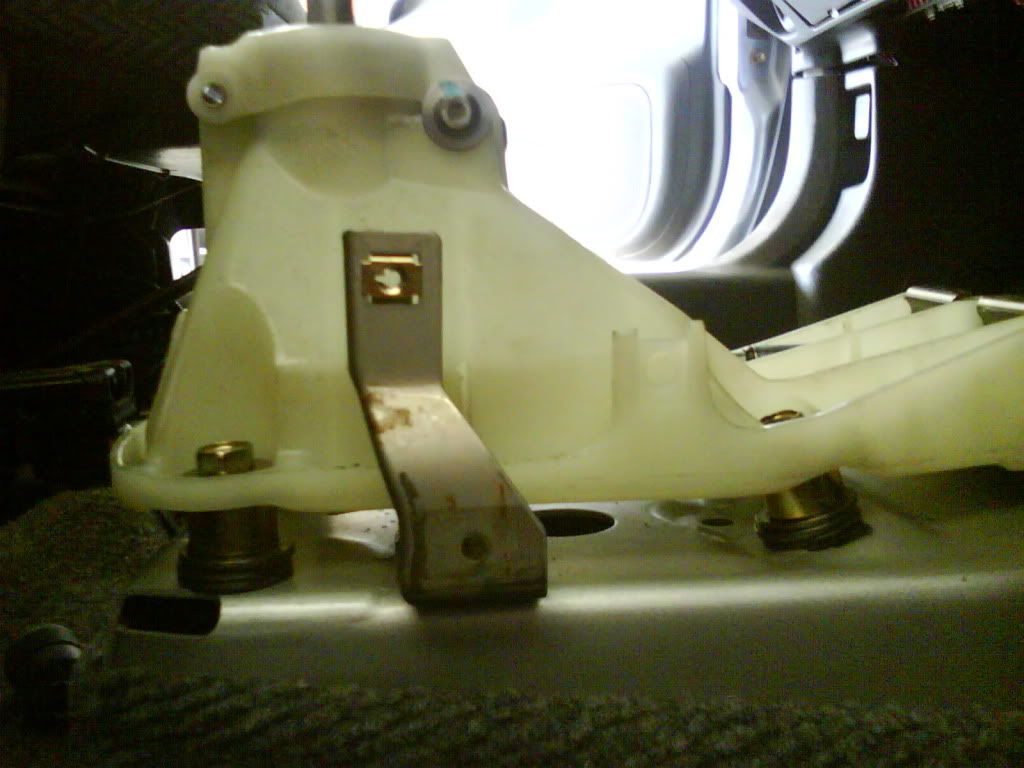
Here is the side view installed. It is a little higher than stock, but with my skunk 2 weighted shift **** it feels fantastic. All the plastics and carpet fit back oem and it is solid. Remember this is not just 2 rubber pieces together as spaces, they are more there for looks, the metal channel (tube) is what is acting as the spacer for the whole system.
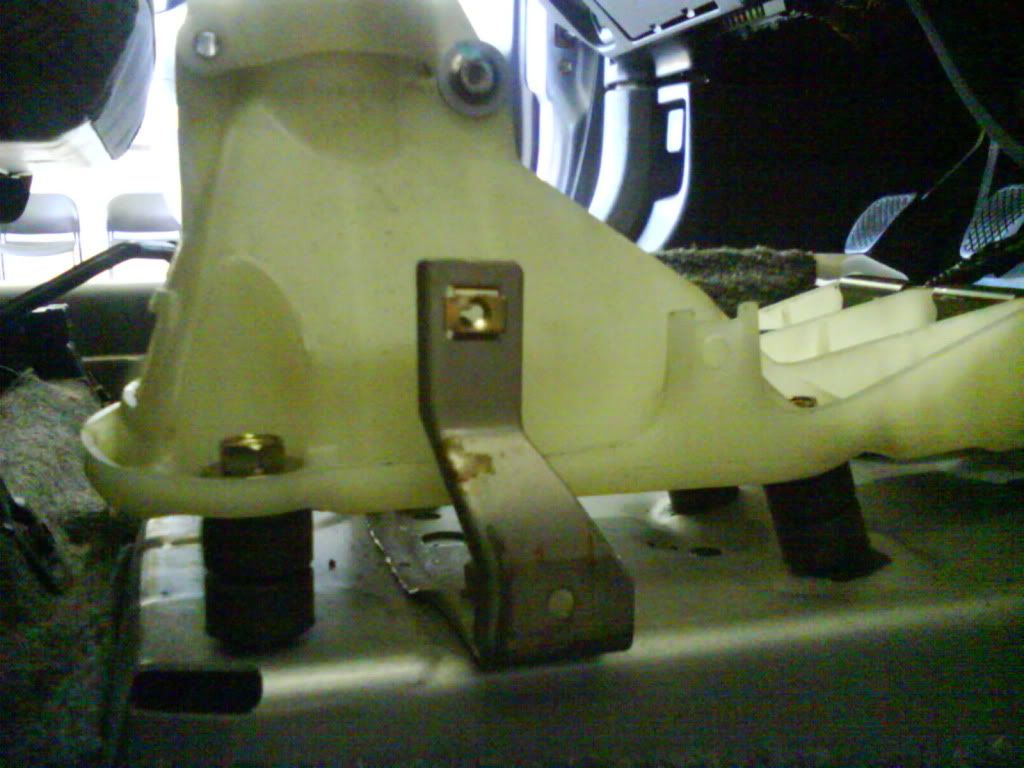
I think the best way to do it would have been with the oem bolt and 8 skunk 2 spacers, but it only has 4.
I used the oem bolt because the washer is a better fit.
update. So I went back the next day and redid the mounting situation. I used the skunk 2 spacer with a couple washers, beat down a tiny lip that was on t bracket so the cup wouldnt catch, and it is much stiffer! Here are the final pics......
gotta use the right hardware for the job I love this shift **** and this company....
Ok, here is a pic of the oem set up apart, your new civic cup will fit inside the oem plastic cup. It is easier to also remove the carpet section underneath the factory botom plastic to gain access to lining up the gaskets later....
This pic is of the extention added on already to the oem shifter bottom. The allen key bolts a a bit weird to get in and tight. Also if your looking at your oem piece right now you will see a section that I removed. it is a decent size, and so the right cable doesnt hit the oem plastic now that the angles and heights are different.....
The next pic shows the oem parts you will reuse in the order it must go in when rebolting. So the oem bolt will go through the plastic shelf (shifting plastic block) as it did before, BUT the gaskets will now be situated as shown here. picture the bolt going into the next piece as shown, into the one following as shown. It is important not to have the washer portion that is built into the sleeve rubber piece facing down. This will let the whole shifter flex, and it wont work, so everything must ba facing as it is in this pic.....
Here is the side view installed. It is a little higher than stock, but with my skunk 2 weighted shift **** it feels fantastic. All the plastics and carpet fit back oem and it is solid. Remember this is not just 2 rubber pieces together as spaces, they are more there for looks, the metal channel (tube) is what is acting as the spacer for the whole system.
I think the best way to do it would have been with the oem bolt and 8 skunk 2 spacers, but it only has 4.
I used the oem bolt because the washer is a better fit.
update. So I went back the next day and redid the mounting situation. I used the skunk 2 spacer with a couple washers, beat down a tiny lip that was on t bracket so the cup wouldnt catch, and it is much stiffer! Here are the final pics......
gotta use the right hardware for the job
I love this shift **** and this company....
Thread Starter
Honda-Tech Member
Joined: Jan 2013
Posts: 136
Likes: 0
Thanks mega. My adapter didn't come with spacers so I was only left with one option lol. I know some guys get longer bolts to so they can do what you did but put the top bushing back in its proper spot. I didn't see any clearance issue with that little lip but it can't hurt anything.
The only thing I did differently than how everyone else did it was that my friend decided to use the OEM bolt with the Skunk2 spacer, an unknown sized nut, and a washer he had in his garage to clear the clearance issue doing this. It sits a little bit higher now, but it feels a lot more comfortable when shifting now because of the height. Currently using my S2000 shift **** for the weight. Shifts easier vs stock shift ****.

dscarps I've done it to my V, and have had it for about a year now. Although instead of using a combination of nuts,rubber bushings, washers to hold up my shifter assembly....I used some solid brass sleeves from ACE HARDWARE to hold up the assembly. You want to do so if you think you're gonna be doing some hard shifting later on down the road.