
D.I.Y Valve Adjustments
 03-30-2011, 02:43 PM
#1
DC5/EP3 MOD :)
Thread Starter
So today Dan and I did a valve adjustment and inspection on the new k24a2 I swapped into my DC5. We noticed several valves were getting "sloppy" and so I'm glad we were able to get this done. So here we go.
Tools Needed:
Angled feeler gauges
19mm deep socket and extension
Flat head Screwdriver
10mm socket
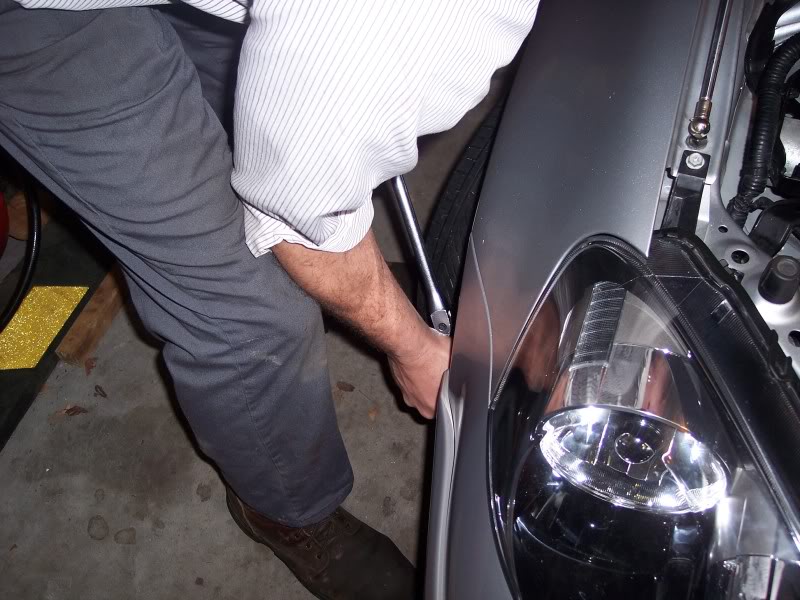
First you will want to turn the wheel to the right as far as possible. This will open the space to stick the extension and 19mm socket on to the crank pulley.
Now that you've done that it's time to start preparing.
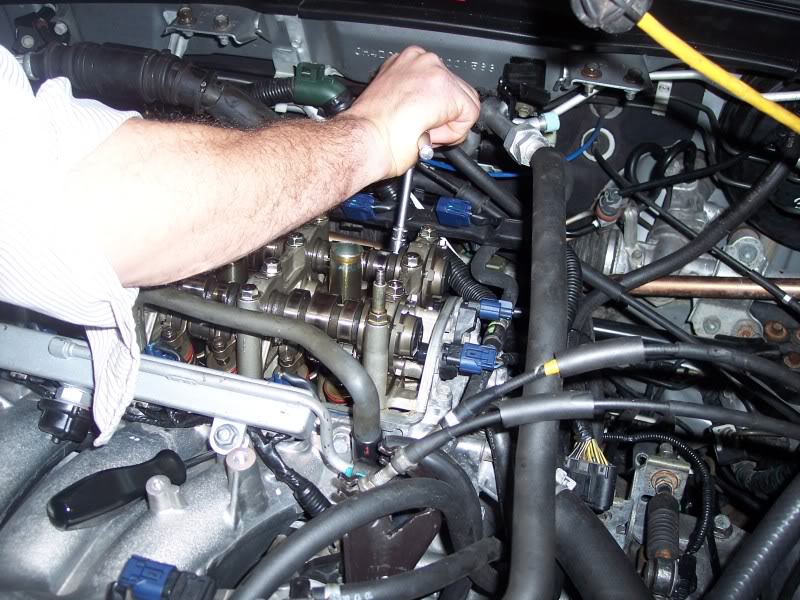
I then took off the valve cover and placed it off to the side.

Heres your exposed engine head
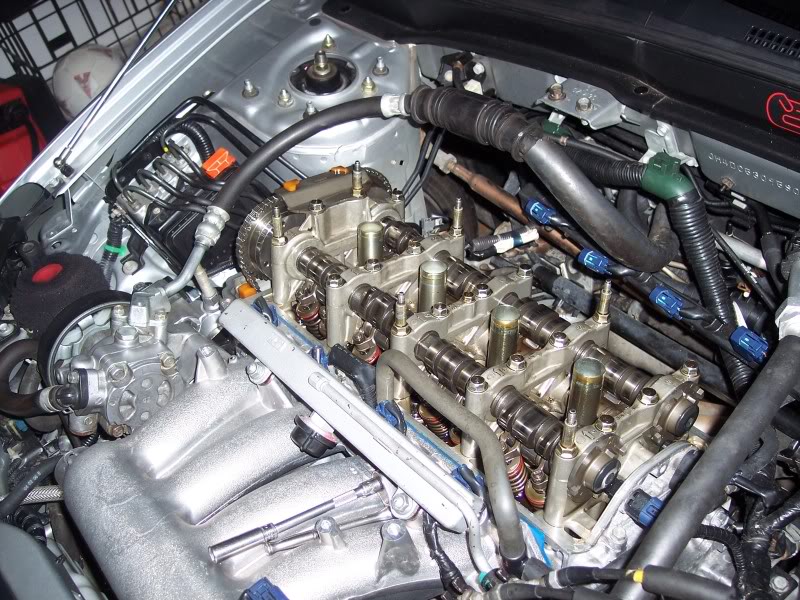
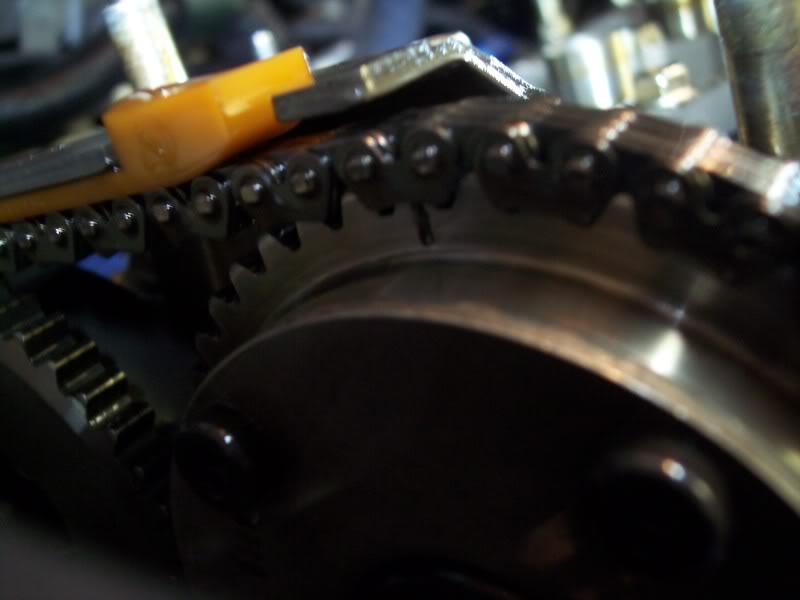
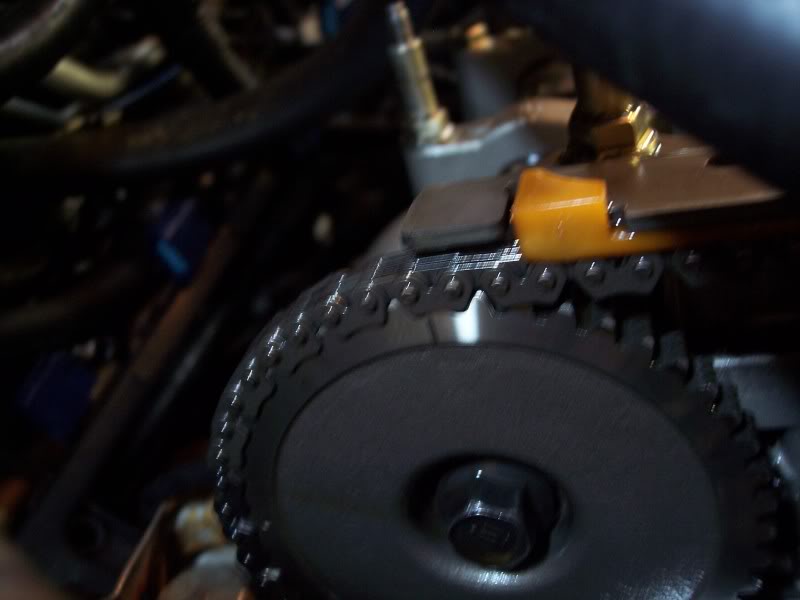
From there you will want to use the 19mm socket and manually turn the engine over to top dead center on cylinder one. You can use the marks on the intake VTC gear to do so (the little arrow) and the marks down below on the crank pulley

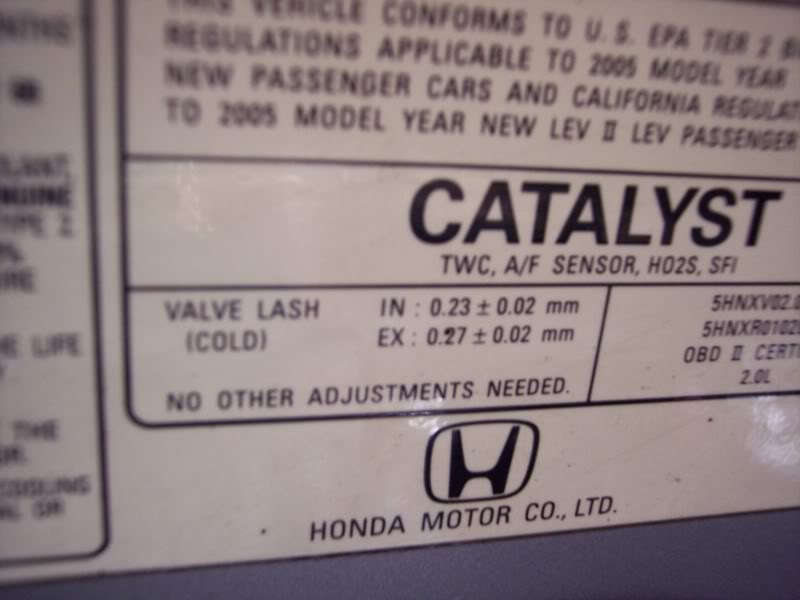
Before you do anything you should know what your specs are. On the hood is the factory engine specs and it lists the valve clearances. I was not aware of that till just now. Pretty cool
You will be using 2 different feeler gauge sizes. One for intake side and one for the exhaust side. Start with cylinder one (closest to the cam gears) and check the clearance.
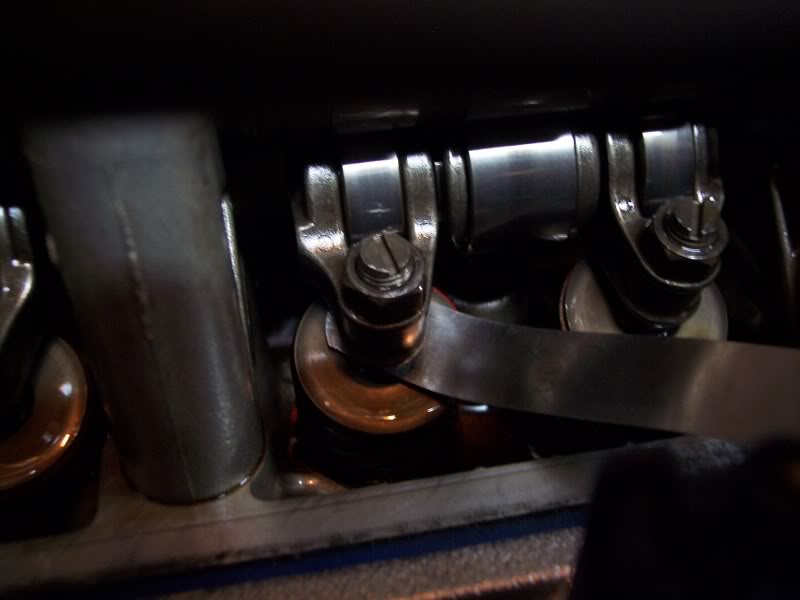
To start, loosen the bolt and slide the feeler gauge in. The most important thing to remember is to hold the feeler gauge as flat as possible.
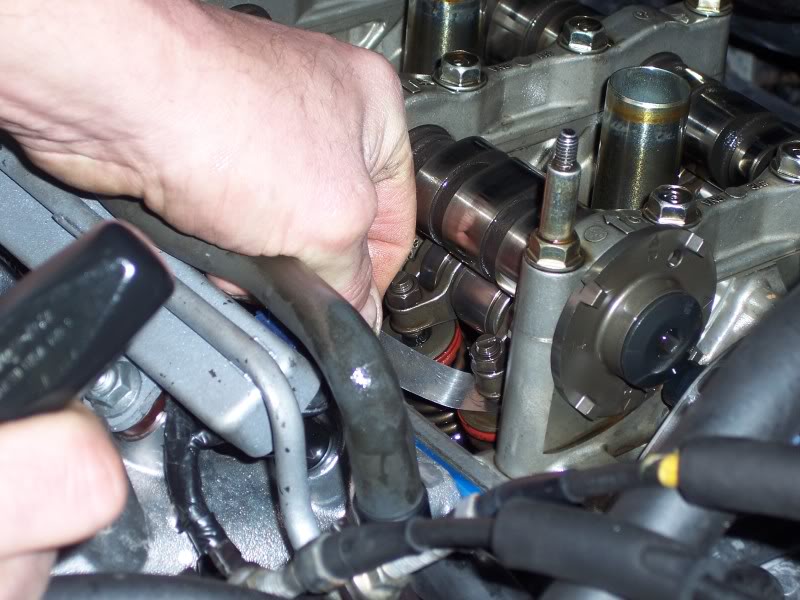
You will then want to take the flat head screw driver and adjust the rod until it fits snug onto the feeler gauge. You should be able to slide the feeler gauge back out so don't over tighten the screw. Once you've got the screw set, tighten the bolt back down and recheck the clearance. When you're finished with the intake side move to the back and do the exhaust side.
Picture of screw and bolt

The firing order for any inline 4cyl engine is 1-3-4-2
When finished with cylinder one, turn the engine over manually again until you get the next cam gear alignment line at the top of the intake cam.
Move to cylinder 3 and repeat the valve adjustment process. Then just keep turning the engine over to the next marker to do the fourth cylinder
and one final turn so you can do the second cylinder. After finishing, go back around and check all of the bolts and clearances and call it a day.
Tools Needed:
Angled feeler gauges
19mm deep socket and extension
Flat head Screwdriver
10mm socket
First you will want to turn the wheel to the right as far as possible. This will open the space to stick the extension and 19mm socket on to the crank pulley.
Now that you've done that it's time to start preparing.
I then took off the valve cover and placed it off to the side.
Heres your exposed engine head
From there you will want to use the 19mm socket and manually turn the engine over to top dead center on cylinder one. You can use the marks on the intake VTC gear to do so (the little arrow) and the marks down below on the crank pulley
Before you do anything you should know what your specs are. On the hood is the factory engine specs and it lists the valve clearances. I was not aware of that till just now. Pretty cool
You will be using 2 different feeler gauge sizes. One for intake side and one for the exhaust side. Start with cylinder one (closest to the cam gears) and check the clearance.
To start, loosen the bolt and slide the feeler gauge in. The most important thing to remember is to hold the feeler gauge as flat as possible.
You will then want to take the flat head screw driver and adjust the rod until it fits snug onto the feeler gauge. You should be able to slide the feeler gauge back out so don't over tighten the screw. Once you've got the screw set, tighten the bolt back down and recheck the clearance. When you're finished with the intake side move to the back and do the exhaust side.
Picture of screw and bolt
The firing order for any inline 4cyl engine is 1-3-4-2
When finished with cylinder one, turn the engine over manually again until you get the next cam gear alignment line at the top of the intake cam.
Move to cylinder 3 and repeat the valve adjustment process. Then just keep turning the engine over to the next marker to do the fourth cylinder
and one final turn so you can do the second cylinder. After finishing, go back around and check all of the bolts and clearances and call it a day.

 01-02-2012, 12:32 PM
#3
Darth ModerVader
Nice tutorial. Two things I would add:
1. You'll want to make sure that the motor is completely cold (preferably having sat overnight) before doing the adjustment.
2. If you don't mind putting a slight bend in the ends of your feeler gauges, it will make it easier to obtain the proper angle when checking the clearances.
1. You'll want to make sure that the motor is completely cold (preferably having sat overnight) before doing the adjustment.
2. If you don't mind putting a slight bend in the ends of your feeler gauges, it will make it easier to obtain the proper angle when checking the clearances.

 04-05-2012, 03:06 PM
#7
Honda-Tech Member
nice writeup. i would like to add something
Do it near the end of an oil change interval, drive it for few miles to let the oil suspend any foreign particles that could have gotten in while you were performing an adjustment and finally change the oil.
Do it near the end of an oil change interval, drive it for few miles to let the oil suspend any foreign particles that could have gotten in while you were performing an adjustment and finally change the oil.
Trending Topics
05-08-2012, 11:20 AM
#8
Trial User

Join Date: May 2012
Posts: 3
Likes: 0
Received 0 Likes
on
0 Posts
Hello,
Just joined the forum as i was looking for valve adjustment tips.
I have an 03 rsx type S.* Is this tutorial for that engine?* (Im not sure of the Engine numbers but I think its the one stated in this tutorial) k20____
I am at 110k and ready to do the sparkplugs and valve adjustment.*
Basically what i see is you loosen the "locknut" to be able to turn the flat head screw to the correct spec, then tighten the locknut down correct?Of course following the other steps..* No need for the "honda valve adjustment tool"??* I just need the feeler gauges and my basic mechanics tools?*
Do I need to replace the head gasket?(dealer adjustment quote included replacing that {total of $190} ,would rather do the job myself)
Thanks!
Jon
05-08-2012, 06:39 PM
#9
Honda-Tech Member
Basically what i see is you loosen the "locknut" to be able to turn the flat head screw to the correct spec, then tighten the locknut down correct?Of course following the other steps..* No need for the "honda valve adjustment tool"??* I just need the feeler gauges and my basic mechanics tools?*
Just personal preference, but I like to tighten it without the feeler gauge in between the valve/adjuster. I just go a little bit at a time and recheck constantly.

Valve cover gasket I would look at and see if you see anything unusual. Generally I would leave it though as long as the car wasn't leaking from that area before (it's not hard to change later if you have to so you might as well save the money).
05-09-2012, 02:06 AM
#10
Trial User
Join Date: May 2012
Posts: 3
Likes: 0
Received 0 Likes
on
0 Posts
K20A2 and the procedure will be the same.
Yes. Only tools you need are the ones listed in this thread.
Just personal preference, but I like to tighten it without the feeler gauge in between the valve/adjuster. I just go a little bit at a time and recheck constantly.
Do you mean valve cover gasket? Head gasket would be a much bigger job than $190.
Valve cover gasket I would look at and see if you see anything unusual. Generally I would leave it though as long as the car wasn't leaking from that area before (it's not hard to change later if you have to so you might as well save the money).
05-09-2012, 05:34 AM
#11
Honda-Tech Member
Join Date: Sep 2007
Location: South Jersey
Posts: 4
Likes: 0
Received 0 Likes
on
0 Posts
It's not crazy hard, but I recommend you triple check your work... and check once more just to be safe. I recently did it to mine. Really 'tightened' everything up.
05-09-2012, 10:14 AM
#13
DC5/EP3 MOD :)
Thread Starter
Depends on how off they are in the first place... the first k24 engine I got the valves were really bad on the exhaust side and once we did the adjustment it sounded 1000x better and it felt stronger. This is not a HP gainer... it's a routine engine adjustment to keep the motor healthy and strong and running at it's best.
05-25-2012, 07:13 AM
#14
Honda-Tech Member
Join Date: Dec 2005
Location: Chicago, Illinois, United States
Posts: 1,007
Likes: 0
Received 0 Likes
on
0 Posts
05-26-2012, 04:57 PM
#15
Honda-Tech Member

Join Date: Apr 2012
Location: Panama City, FL
Posts: 106
Likes: 0
Received 0 Likes
on
0 Posts
i perfer using a wrench instead of a socket to tighten the locknut then i torque it (i'm a torque freak) and double check my valves i've never had a comeback and can usually do a valve adjust with new valve cover gasket spark plug seals and the washer for all the 10mm valve cover bolts in about 30-45 just taking my time
 06-24-2014, 01:42 PM
#17
Honda-Tech Member

Join Date: Nov 2013
Posts: 10
Likes: 0
Received 0 Likes
on
0 Posts
Depends on how off they are in the first place... the first k24 engine I got the valves were really bad on the exhaust side and once we did the adjustment it sounded 1000x better and it felt stronger. This is not a HP gainer... it's a routine engine adjustment to keep the motor healthy and strong and running at it's best.
Cheers

Thread
Thread Starter
Forum
Replies
Last Post
alejo98cx
Tech / Misc
8
07-24-2016 04:13 PM
rollercosta123
Honda Accord (1990 - 2002)
23
09-06-2006 03:20 PM
vietdragontekx
Honda Prelude
39
04-21-2006 10:40 PM