
Project 'Make Gagnar's Car Nice Again:' My Build Thread
 03-25-2013, 11:34 AM
#301
UPDATE AGAIN!
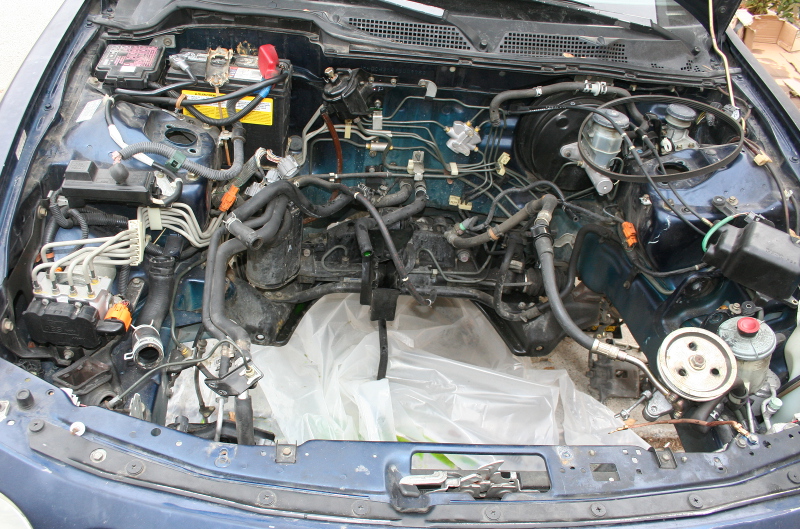
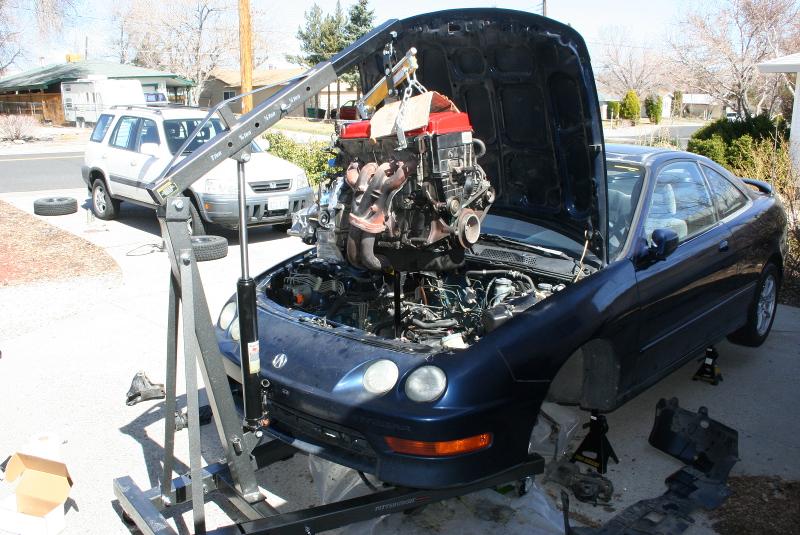
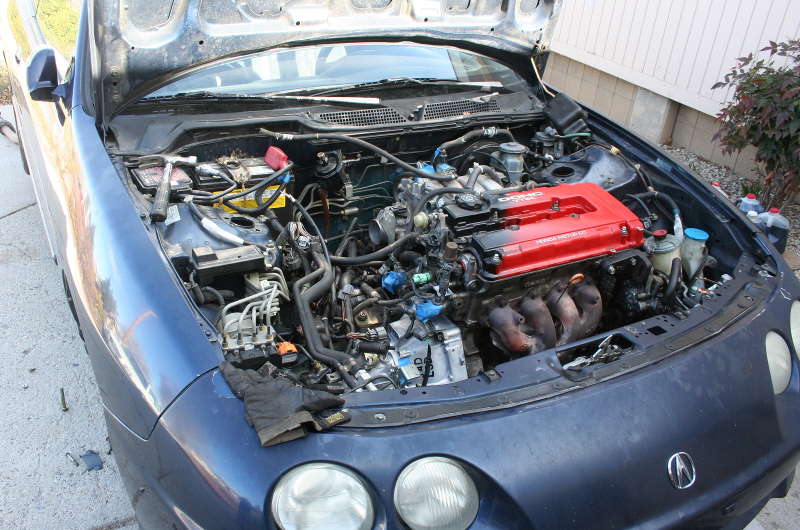
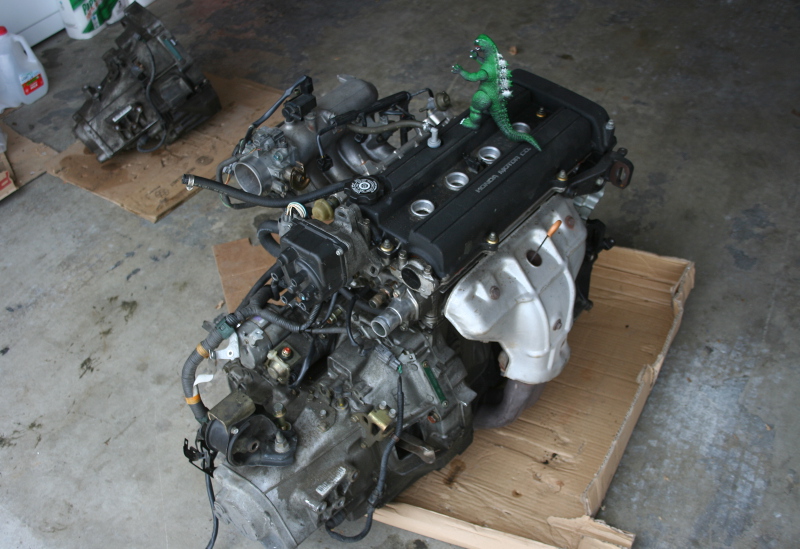
OK, here's the starting point for today: An empty LS engine bay, soon to receive a B18C1 with an ITR transmission.
But first...
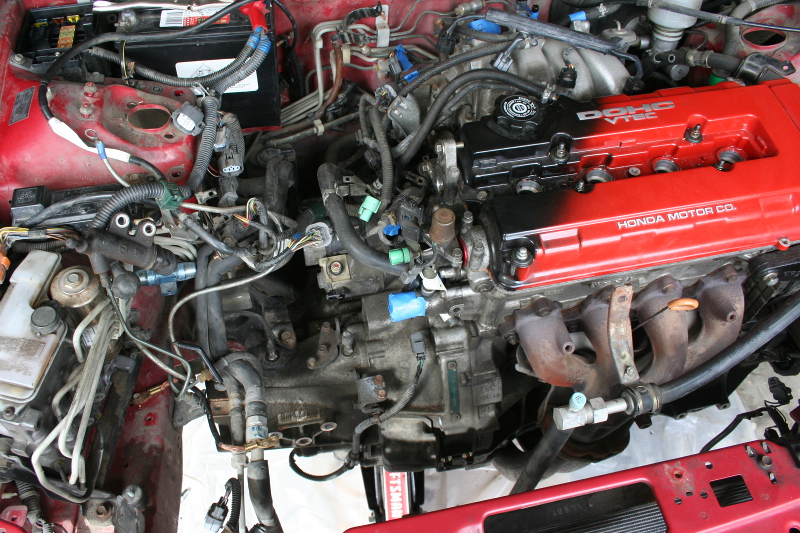
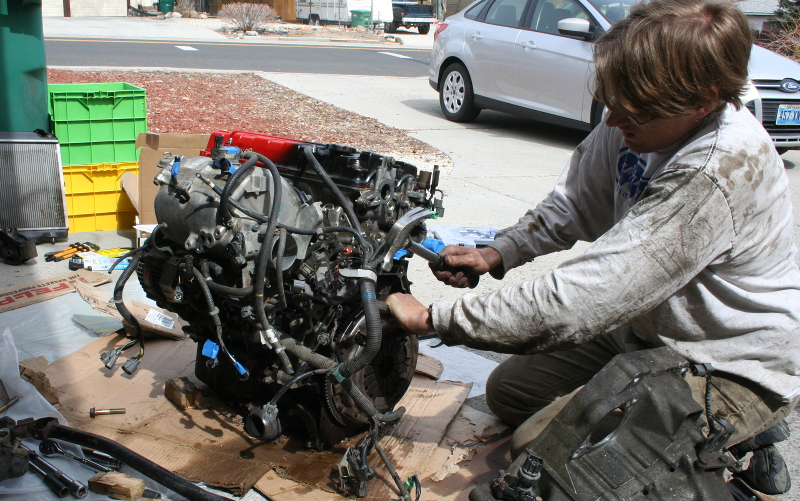
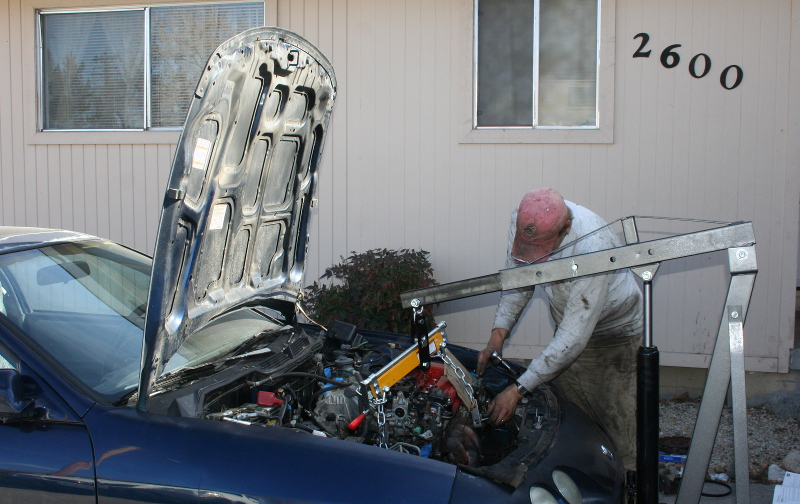
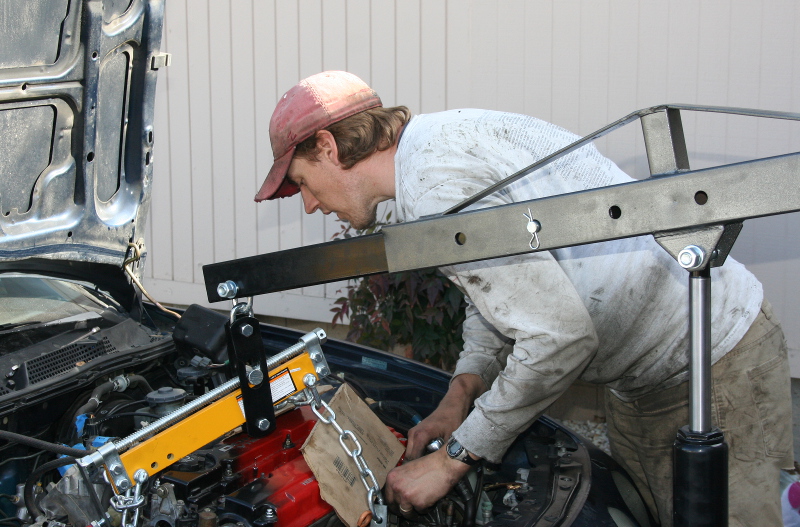
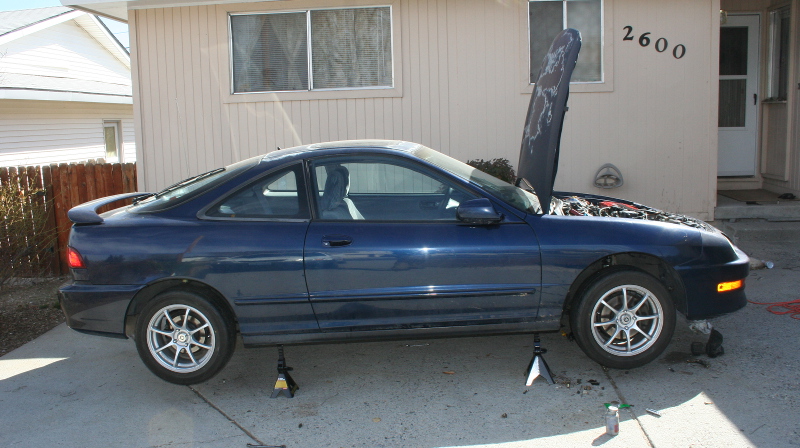
The B18C1 has to come out of the old car! We thought it might be easier to pull the engine with the transmission off, so we tried for the longest time to get them separated. However, I failed to realize that the starter had to come off for the transmission to come off, so we struggled for the longest time.
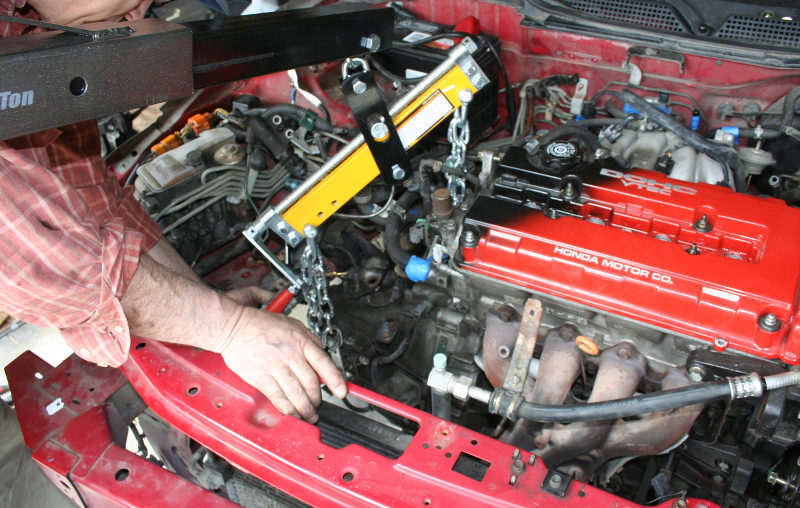
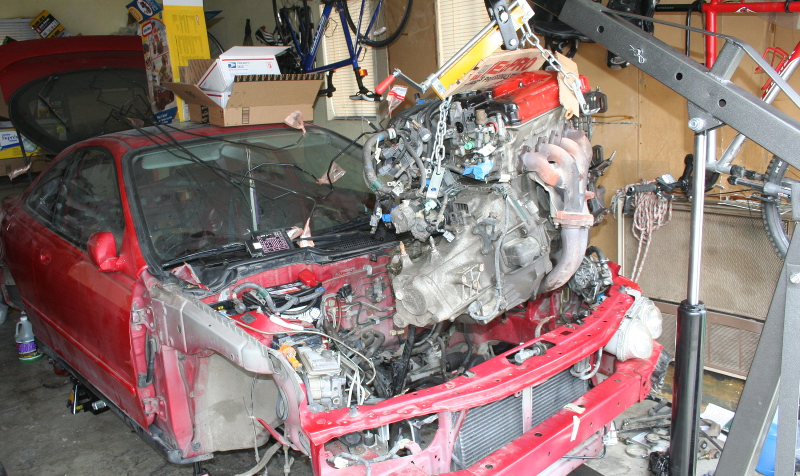
Finally, we decided to just pull the engine and transmission together and deal with the transmission later.
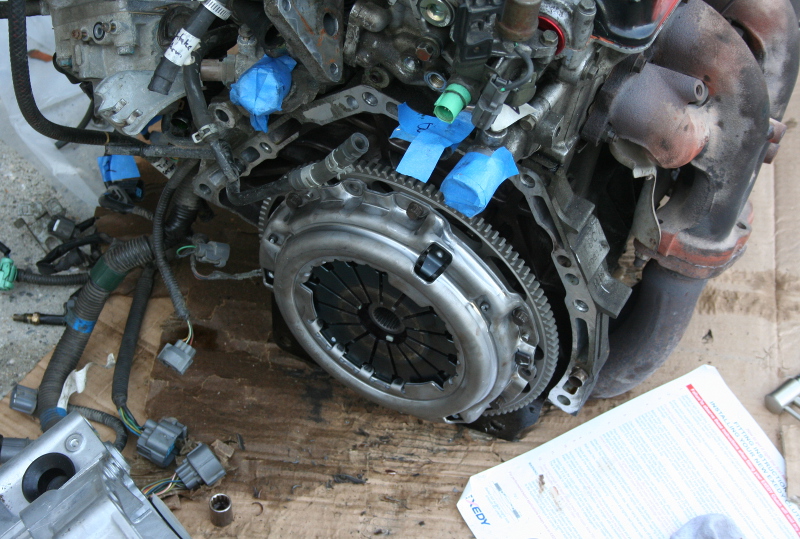
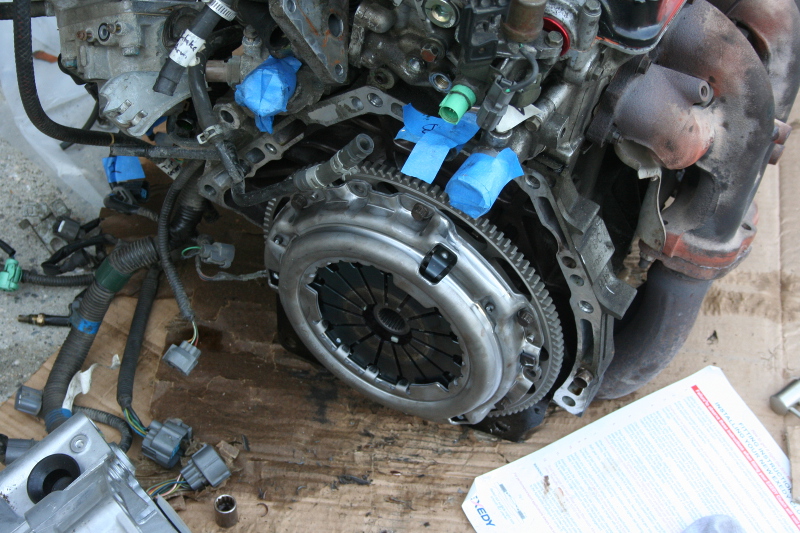
With the engine on the ground, it was no trouble removing the GS-R transmission (not pictured). At this point Steve had to get ready to go back home, so I'm working on everything myself from now one. My first task is to replace the clutch and flywheel. Here's me using a makeshift impact wrench to loosen the clutch bolts:
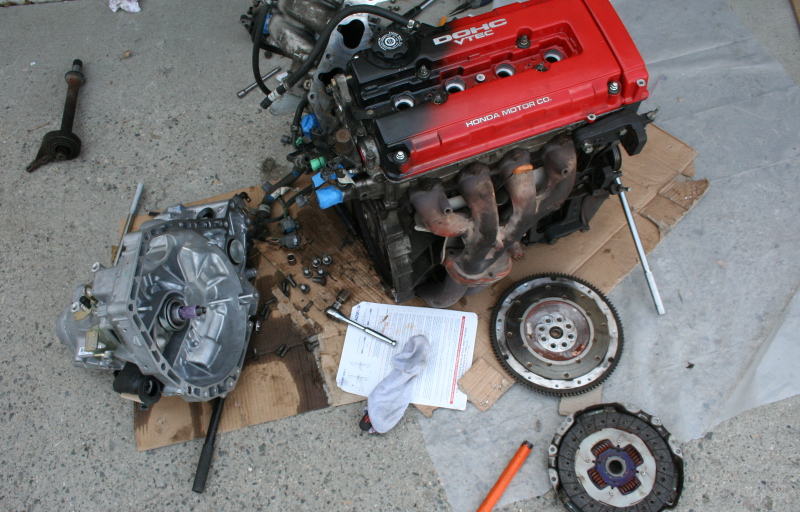
The clutch and flywheel are off, and the new transmission is greased up and ready to be installed.
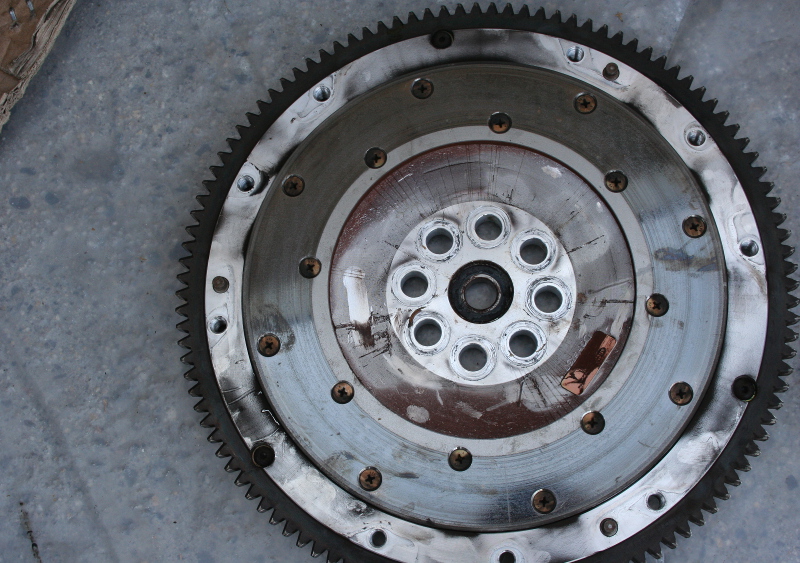
I couldn't believe how good the old Fidanza flywheel looked. No glazing, even wear, no signs of warpage, and very little wear overall! It made me wish I had just kept it on! But I'm saving a lot of trouble down the road.
Here's the new Exedy flywheel ready to be installed:

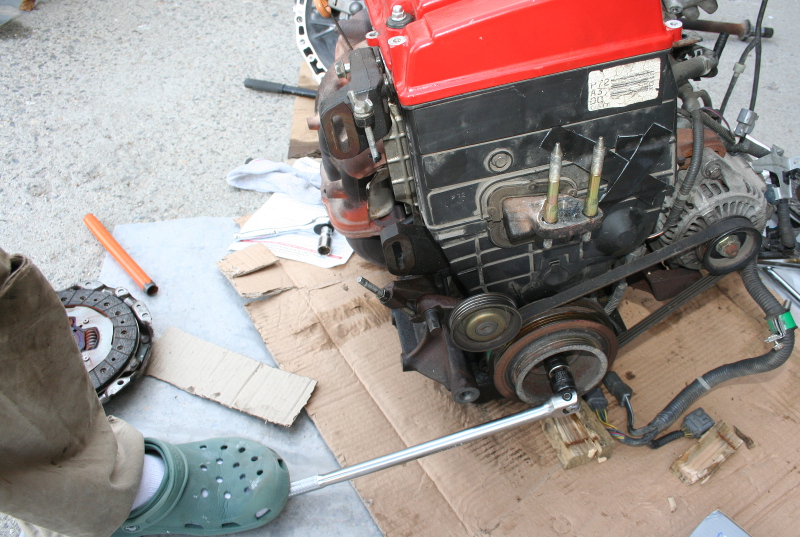
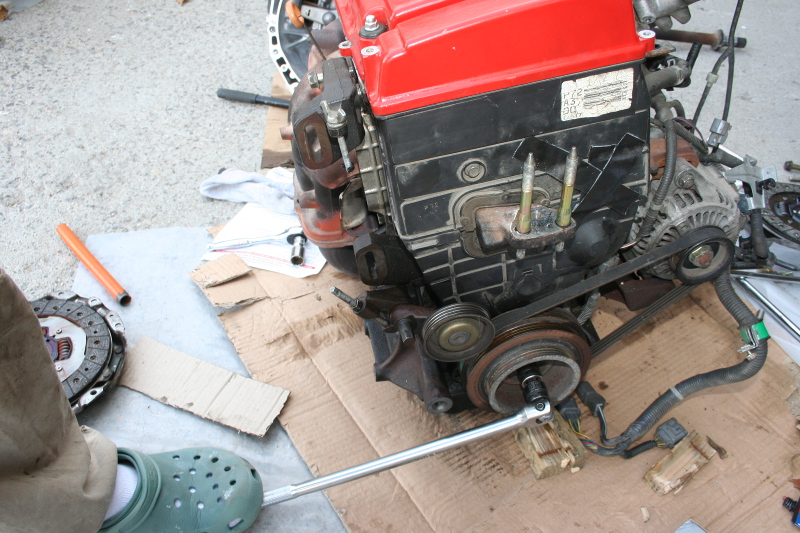
If anyone is curious, it's not necessary to buy an expensive flywheel holder if you want to remove the (60 ft-lb) flywheel bolts with the engine on the ground. You can just attach a breaker bar to the crankshaft bolt, and use that to hold the engine while you loosen/tighten the flywheel bolts. It's possible to lever the weight of the engine against the bar, and do this yourself. However, it's easier if you have someone to stand on it. In this case, my wife stood on the bar while I worked the bolts (my foot is pictured! -- although I am wearing my wife's Crocs).
Here is a picture of the clutch also installed. I wanted a Stage 1, but since I'm trying to save money, and because my wife is DD-ing this car at the moment, I went with an Exedy OEM clutch (for an ITR). The ITR clutch has the same diaphragm spring but stiffer damping springs, so takeup is a little quicker. We'll see how it works!
At this point, I reinstalled the transmission -- by myself. This is theoretically impossible, so there are no pictures of it. Plus it's non-theoretically, non-figuratively, absolutely impossible to take pictures of yourself doing it, so there DEFINITELY aren't pictures.
The best way to do this is to pick the clutch an inch or so off the ground, and hold it there for 45 minutes while you curse a f*ckton and shake the **** out of the transmission until it takes pity on you and mounts the driveshaft splines. Once it's the tiniest bit on, you sequentially tighten some of the mounting bolts to help press it into place. When I finished I was so tired, I forgot to take pictures of the finished work! But it's there!
OK, here's the starting point for today: An empty LS engine bay, soon to receive a B18C1 with an ITR transmission.
But first...
The B18C1 has to come out of the old car! We thought it might be easier to pull the engine with the transmission off, so we tried for the longest time to get them separated. However, I failed to realize that the starter had to come off for the transmission to come off, so we struggled for the longest time.
Finally, we decided to just pull the engine and transmission together and deal with the transmission later.
With the engine on the ground, it was no trouble removing the GS-R transmission (not pictured). At this point Steve had to get ready to go back home, so I'm working on everything myself from now one. My first task is to replace the clutch and flywheel. Here's me using a makeshift impact wrench to loosen the clutch bolts:
The clutch and flywheel are off, and the new transmission is greased up and ready to be installed.
I couldn't believe how good the old Fidanza flywheel looked. No glazing, even wear, no signs of warpage, and very little wear overall! It made me wish I had just kept it on! But I'm saving a lot of trouble down the road.
Here's the new Exedy flywheel ready to be installed:
If anyone is curious, it's not necessary to buy an expensive flywheel holder if you want to remove the (60 ft-lb) flywheel bolts with the engine on the ground. You can just attach a breaker bar to the crankshaft bolt, and use that to hold the engine while you loosen/tighten the flywheel bolts. It's possible to lever the weight of the engine against the bar, and do this yourself. However, it's easier if you have someone to stand on it. In this case, my wife stood on the bar while I worked the bolts (my foot is pictured! -- although I am wearing my wife's Crocs).
Here is a picture of the clutch also installed. I wanted a Stage 1, but since I'm trying to save money, and because my wife is DD-ing this car at the moment, I went with an Exedy OEM clutch (for an ITR). The ITR clutch has the same diaphragm spring but stiffer damping springs, so takeup is a little quicker. We'll see how it works!
At this point, I reinstalled the transmission -- by myself. This is theoretically impossible, so there are no pictures of it. Plus it's non-theoretically, non-figuratively, absolutely impossible to take pictures of yourself doing it, so there DEFINITELY aren't pictures.
The best way to do this is to pick the clutch an inch or so off the ground, and hold it there for 45 minutes while you curse a f*ckton and shake the **** out of the transmission until it takes pity on you and mounts the driveshaft splines. Once it's the tiniest bit on, you sequentially tighten some of the mounting bolts to help press it into place. When I finished I was so tired, I forgot to take pictures of the finished work! But it's there!
 09-08-2013, 07:48 AM
#303
Honda-Tech Member
iTrader: (1)

Join Date: Feb 2012
Location: RVA
Posts: 22
Likes: 0
Received 0 Likes
on
0 Posts
Stumbled on your thread while doing my Progress CSII/Sway bar install. You've got me planning on doing all my bushings down the road! Though I will definitely be doing it with an impact wrench. Thanks for the inspiration!
Oh and love the build thread, keep up the good work! Love your attention to detail!
Oh and love the build thread, keep up the good work! Love your attention to detail!
03-11-2014, 06:54 PM
#307
A good question! I finished it up and got the car running, and then had to stop for a year to focus on work. I'm back in the saddle, so to speak, so updates are coming.
03-12-2014, 03:10 PM
#308
Honda-Tech Member
Join Date: Aug 2010
Location: Maryland
Posts: 2,686
Likes: 0
Received 0 Likes
on
0 Posts
Oh cool. I was following this thread back when you were keeping it updated and then it sort of went out of sight out of mind. I saw you posting again a couple days ago so figured I'd bump this to see what came of it.
03-20-2014, 08:43 AM
#310
Wtf those look like crowder cams to me. Do you know what brand they are Jesus . What happened
this car of yours strongly reminds me of the history of my gsr.
first, i bought it, had to get the feathers

then i decide an engine build would be fun. one small problem came up

now i'm pissed and order a JDM ITR engine and some rays 17s to trade on and off with the feathers

it dawns on me no one has gunmetal feathers so the new corvette cyber grey is used
koni/gc naturally comes next

i sell the rays 17s and feathers and go buy two sets of 15s. one with kumho xs and the other with hankook icebears

itr brake upgrade also took place BIG improvement
the LSD and icebears are great in the snow and forest trails

corbeau cr1 seats, a nice exhaust, fidanza flywheel, garage paint job, system and quite a few other things came along.
appears that your car is going a similar route
first, i bought it, had to get the feathers
then i decide an engine build would be fun. one small problem came up
now i'm pissed and order a JDM ITR engine and some rays 17s to trade on and off with the feathers
it dawns on me no one has gunmetal feathers so the new corvette cyber grey is used
koni/gc naturally comes next
i sell the rays 17s and feathers and go buy two sets of 15s. one with kumho xs and the other with hankook icebears
itr brake upgrade also took place BIG improvement
the LSD and icebears are great in the snow and forest trails
corbeau cr1 seats, a nice exhaust, fidanza flywheel, garage paint job, system and quite a few other things came along.
appears that your car is going a similar route
03-20-2014, 09:19 AM
#311
Honda-Tech Member

Join Date: Mar 2014
Location: Highland Park, IL
Posts: 4
Likes: 0
Received 0 Likes
on
0 Posts
 05-05-2014, 12:58 PM
#313
OK updates as promised! I got pretty swamped with work, and then a bunch of moves, but I'm finally able to start updating this thread again.
First, I'm going to take a trip back in time and finish my swap thread as though no time has elapsed... and now, back to March of 2013...
::: swirly visual effect ::::
Getting the flywheel off is a PITA unless you have a good way to hold the crankshaft still while you work on the flywheel bolts. These bolts (not pictured) are 12-pt but VERY shallow and it is extremely easy to strip them if you are not careful. I had my wife stand on a breaker bar while I loosened/tightened the bolts (my foot pictured).
Here is the flywheel and new clutch on. For the record I like the Exedy flywheel but I really wish I had gone with a Stage 1 rather than OEM clutch. Saving money FTMFL.
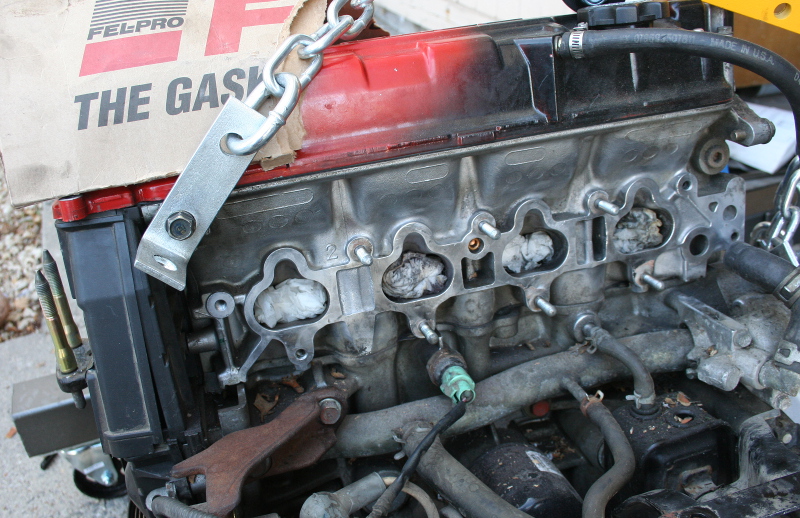
The intake manifold mounting surface needed a good cleaning. Getting all the old gasket off took lots of the following: time, razorblades, and carb cleaner. But a good IM seal is worth it.
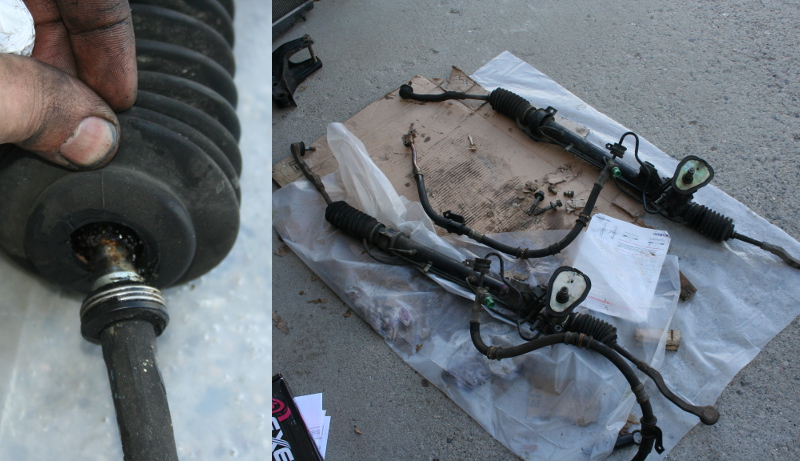
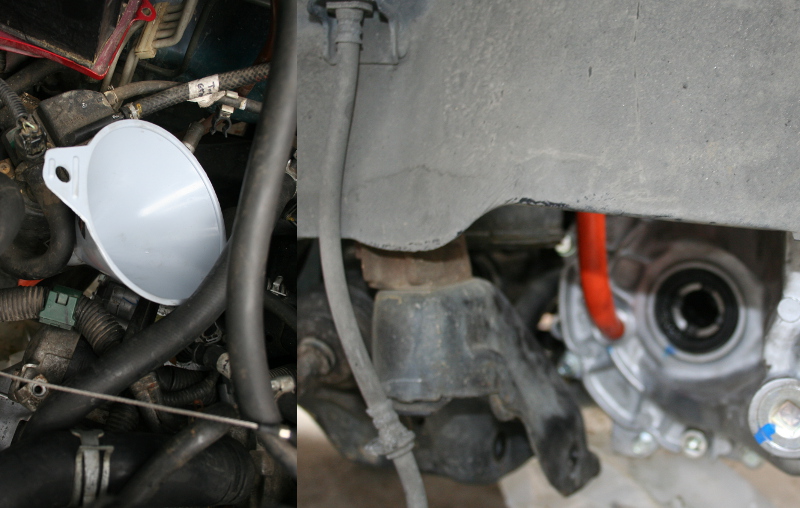
The steering rack bellows on my 98 was torn, so the bellows from the 96 is going on instead. I couldn't get the tie rod loose so looks like a rack swap is in order (why did I think this would be easier?)
I should mention that at this point I am working alone again (my father in law had to return home and my wife is working).
The next thing that had to happen was mounting the new transmission to the engine. I did this by myself. It took about 2 hours. It sucked complete *****. I don't have any photo proof but I can tell you it involved a lot of kicking and cursing and my back was pretty tired afterwards. The problem is that it fits pretty tightly and is fussy about how it mounts to the crankshaft splines. It's really hard if you don't have someone to 1) hold the engine still and 2) help you lift the transmission (ca. 100 lbs.). But it's do-able. I took a long break afterwards...
Moving on...
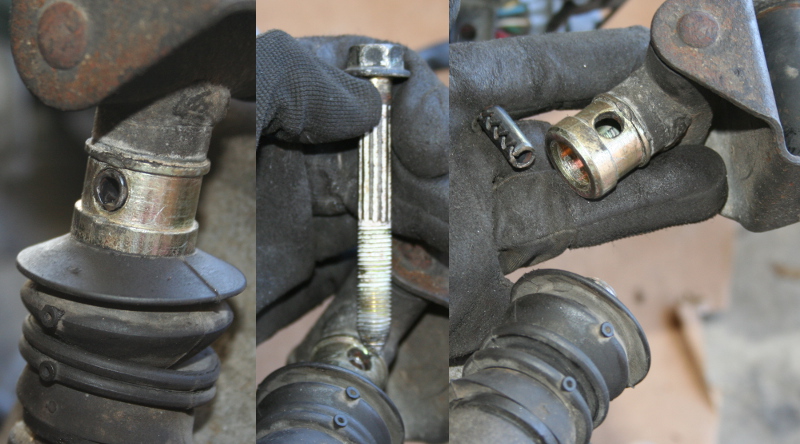
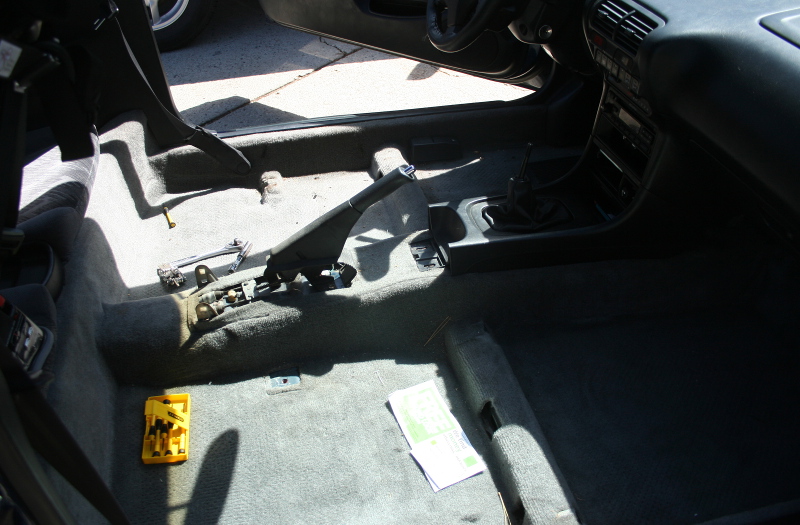
For the new ITR transmission to go in I also needed to separate the shift linkage from the transmission. This is easy except for one thing: the aptly named b*tch pin.
Fortunately, I have a method that works pretty well, provided you have old suspension bolts laying around. LCA bolts have a tapered tip that is just the right size to fit in the pin. You can move the pin about 1/8" by hammering on the suspension bolt. After that, it is much easier to hammer out with either a smaller bolt or a punch. The first couple mm are the hardest part. Time: 5 min.
With the steering rack replaced and the shift linkage removed, the engine is ready to go in!
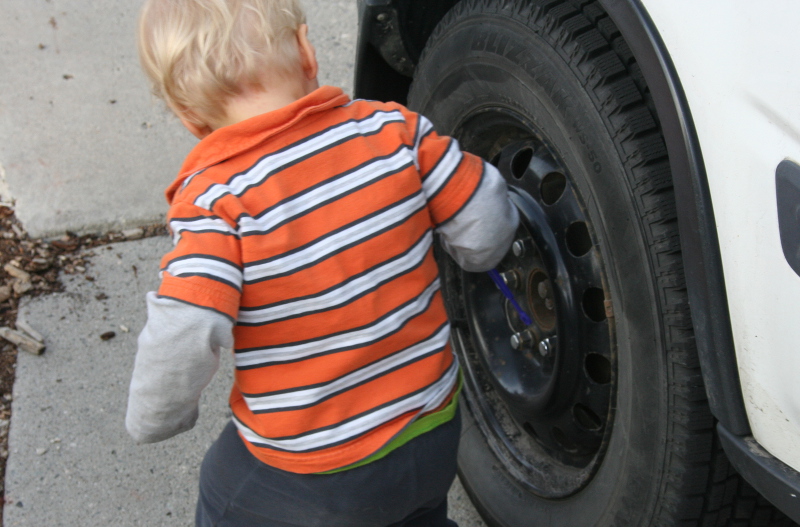
While I was doing all this, my wife and son were getting the summer wheels on the CRV.
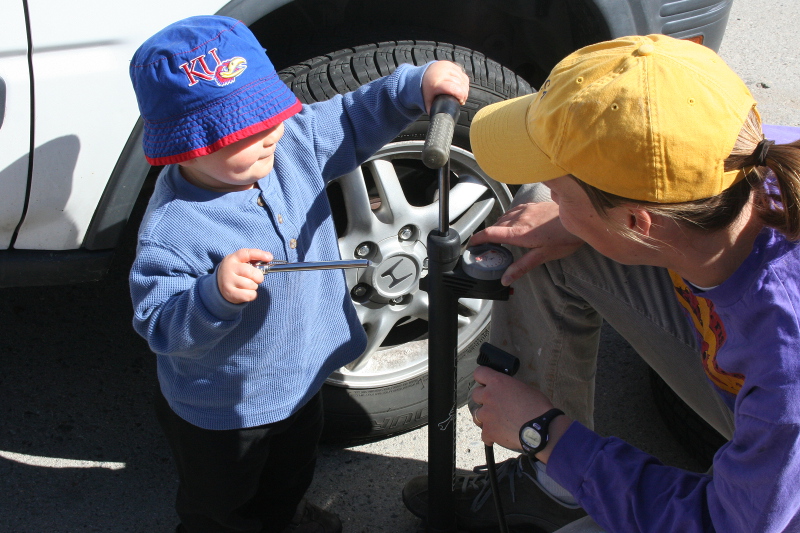
I bet you didn't know you could jimmy a lock and loosen lug nuts with a bubble wand. Did I raise a mechanic or a hustler? Or both?

First, I'm going to take a trip back in time and finish my swap thread as though no time has elapsed... and now, back to March of 2013...
::: swirly visual effect ::::
Getting the flywheel off is a PITA unless you have a good way to hold the crankshaft still while you work on the flywheel bolts. These bolts (not pictured) are 12-pt but VERY shallow and it is extremely easy to strip them if you are not careful. I had my wife stand on a breaker bar while I loosened/tightened the bolts (my foot pictured).
Here is the flywheel and new clutch on. For the record I like the Exedy flywheel but I really wish I had gone with a Stage 1 rather than OEM clutch. Saving money FTMFL.
The intake manifold mounting surface needed a good cleaning. Getting all the old gasket off took lots of the following: time, razorblades, and carb cleaner. But a good IM seal is worth it.
The steering rack bellows on my 98 was torn, so the bellows from the 96 is going on instead. I couldn't get the tie rod loose so looks like a rack swap is in order (why did I think this would be easier?)
I should mention that at this point I am working alone again (my father in law had to return home and my wife is working).
The next thing that had to happen was mounting the new transmission to the engine. I did this by myself. It took about 2 hours. It sucked complete *****. I don't have any photo proof but I can tell you it involved a lot of kicking and cursing and my back was pretty tired afterwards. The problem is that it fits pretty tightly and is fussy about how it mounts to the crankshaft splines. It's really hard if you don't have someone to 1) hold the engine still and 2) help you lift the transmission (ca. 100 lbs.). But it's do-able. I took a long break afterwards...
Moving on...
For the new ITR transmission to go in I also needed to separate the shift linkage from the transmission. This is easy except for one thing: the aptly named b*tch pin.
Fortunately, I have a method that works pretty well, provided you have old suspension bolts laying around. LCA bolts have a tapered tip that is just the right size to fit in the pin. You can move the pin about 1/8" by hammering on the suspension bolt. After that, it is much easier to hammer out with either a smaller bolt or a punch. The first couple mm are the hardest part. Time: 5 min.
With the steering rack replaced and the shift linkage removed, the engine is ready to go in!
While I was doing all this, my wife and son were getting the summer wheels on the CRV.
I bet you didn't know you could jimmy a lock and loosen lug nuts with a bubble wand. Did I raise a mechanic or a hustler? Or both?
Last edited by GagnarTheUnruly; 05-05-2014 at 01:33 PM.
05-05-2014, 01:29 PM
#314
In real life, a day has now passed. I managed to get the engine ready to install but ran out of time for the actual installation. Today will be dedicated to that:
Pay no attention to the man with the mullet. It's not actually a mullet -- he just needs a haircut very badly. History has repeated for his future self, who also looks like an idiot as he types this. Believe it or not this be-mulletted man also has a Ph.D. Don't judge a book by it's cover.
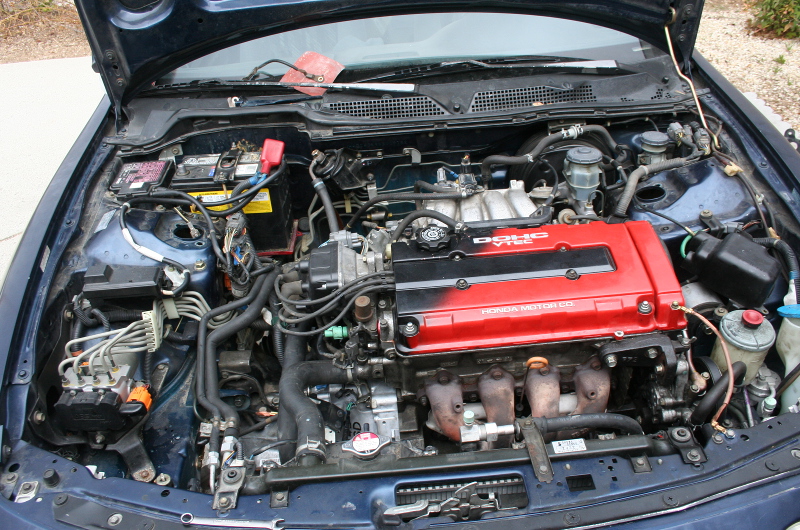
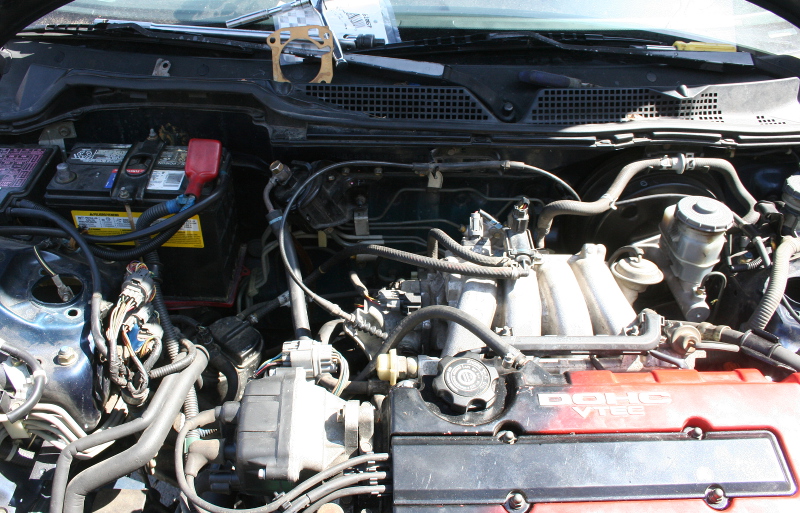
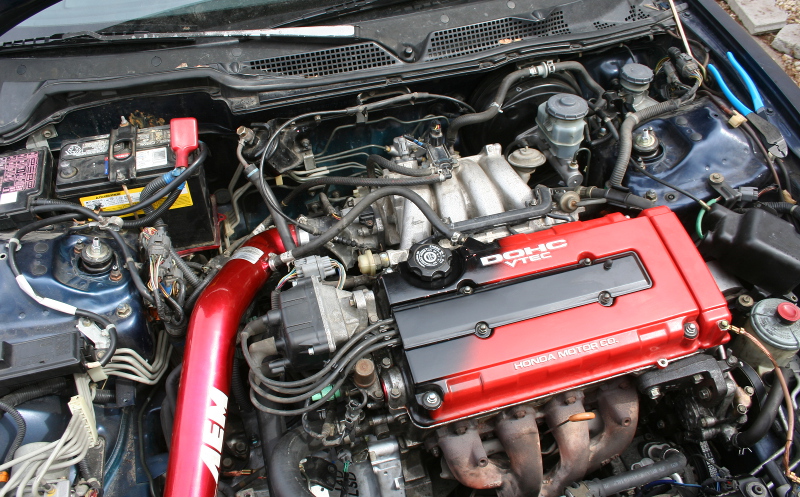
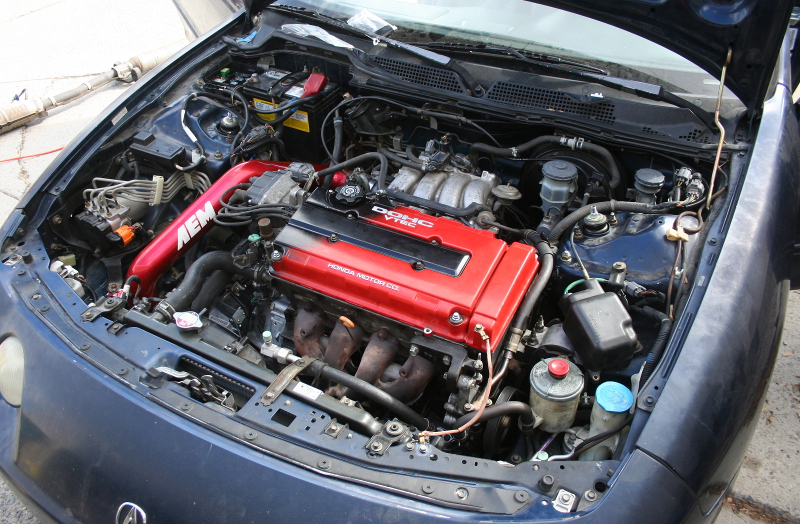
Aaaand the engine is in place! The red VC clashed in the red car, but it looks quite nice against blue, IMO.
Getting the engine physically mounted was not hard. It slides right into place and bolts in relatively easily. Of course the radiator had to come out and the transmission was a little bit hard to get around the passenger side mount. I think the frame damage to the old car actually made removal easier.
The battery in the 98 leaked badly at some point in it's life. I cleaned this up and replaced the battery pan, which was completely shot. This is the only milano red part to pass from the 96 to the 98
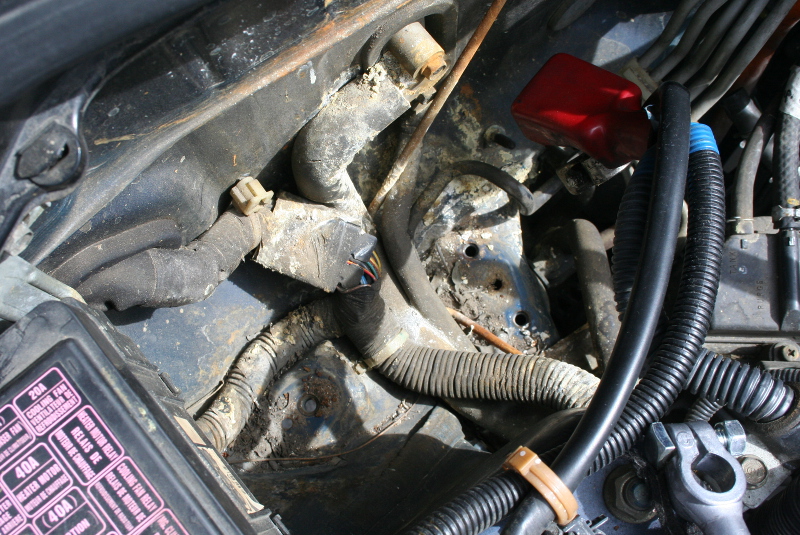
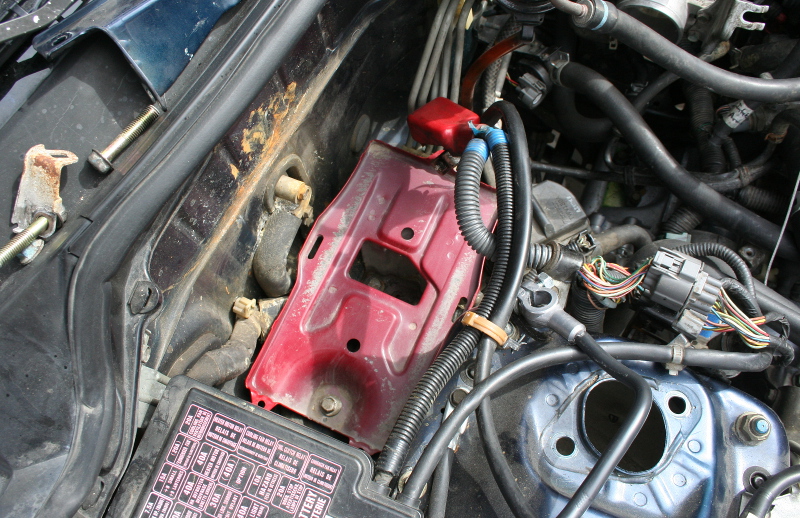
Here is the difference between a car that lived in the desert vs. one that did not.
Next it is time to get some fluid in the new ITR transmission. AC Delco friction modified syncrhomesh fluid is all she will ever see.
All installed and all electronics reconnected. I still need to rewire the car for VTEC and the other minor differences between B18Cs and Bs.
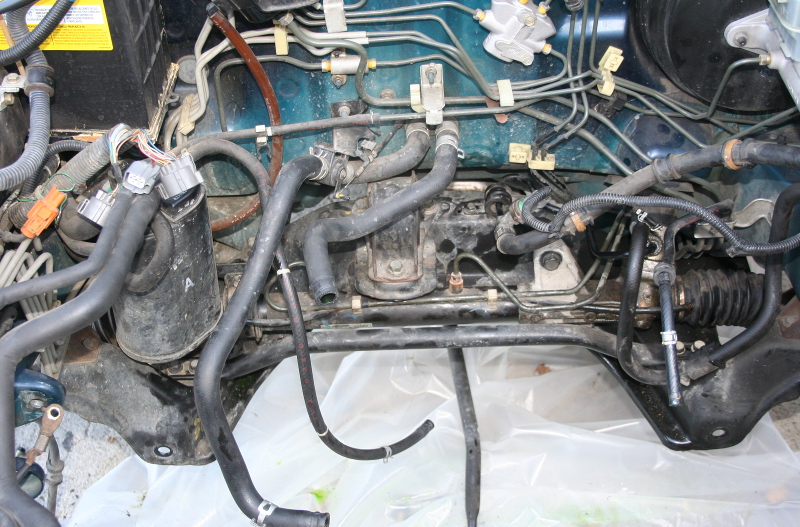
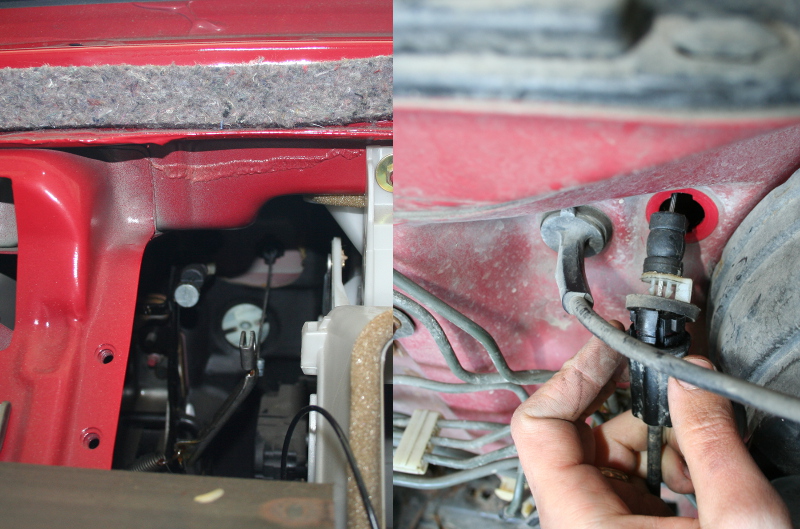
Next it's time to swap throttle cables. This was actually kind of a huge pain. They are not that easy to get out of the firewall. It was much easier on the donor car that lacked a dashboard!
Pay no attention to the man with the mullet. It's not actually a mullet -- he just needs a haircut very badly. History has repeated for his future self, who also looks like an idiot as he types this. Believe it or not this be-mulletted man also has a Ph.D. Don't judge a book by it's cover.
Aaaand the engine is in place! The red VC clashed in the red car, but it looks quite nice against blue, IMO.
Getting the engine physically mounted was not hard. It slides right into place and bolts in relatively easily. Of course the radiator had to come out and the transmission was a little bit hard to get around the passenger side mount. I think the frame damage to the old car actually made removal easier.
The battery in the 98 leaked badly at some point in it's life. I cleaned this up and replaced the battery pan, which was completely shot. This is the only milano red part to pass from the 96 to the 98
Here is the difference between a car that lived in the desert vs. one that did not.
Next it is time to get some fluid in the new ITR transmission. AC Delco friction modified syncrhomesh fluid is all she will ever see.
All installed and all electronics reconnected. I still need to rewire the car for VTEC and the other minor differences between B18Cs and Bs.
Next it's time to swap throttle cables. This was actually kind of a huge pain. They are not that easy to get out of the firewall. It was much easier on the donor car that lacked a dashboard!
05-05-2014, 05:27 PM
#315
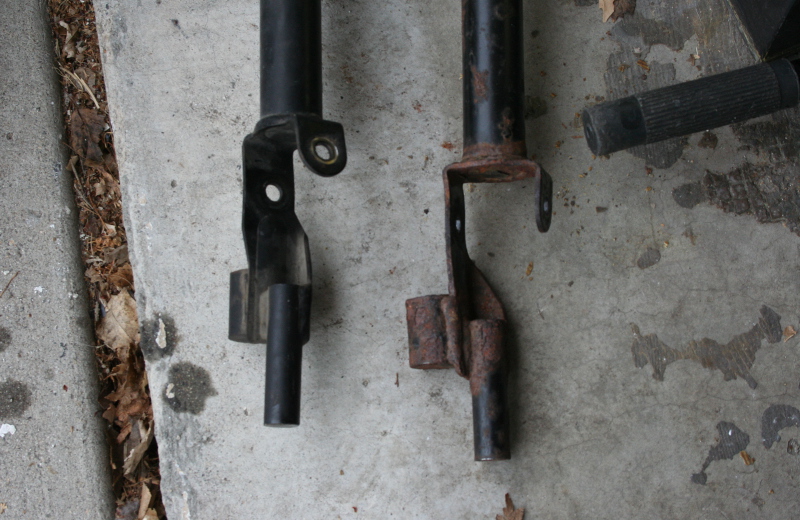
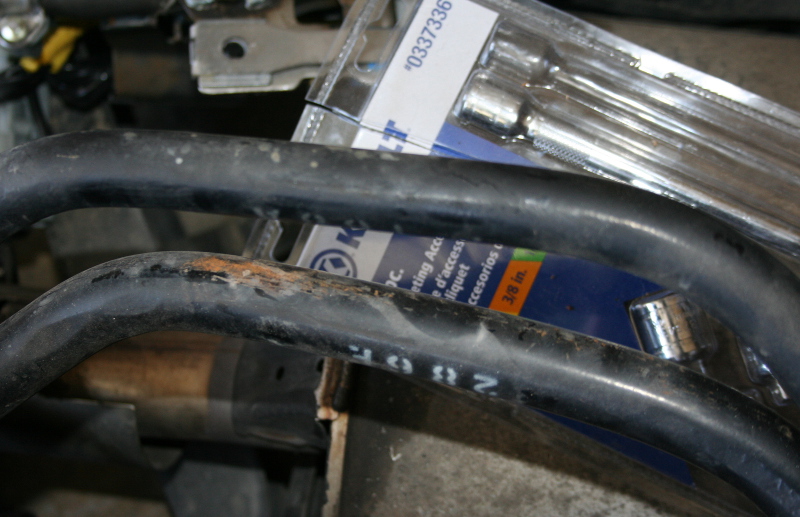
Now that the engine is in it's time to put in the front sway bar. There is a small difference between the LS and GS-R sway bars (22mm vs 24mm). For a more rear-biased setup I opted for the 22mm bar in front. You can see there is a small difference in thickness (GS-R on top).
The more noticeable difference is in the endlink style. I prefer the LS-style which has no ball joint. I find the ball joints on the GS-R style can be troublesome. I have no idea whether there is a performance difference.
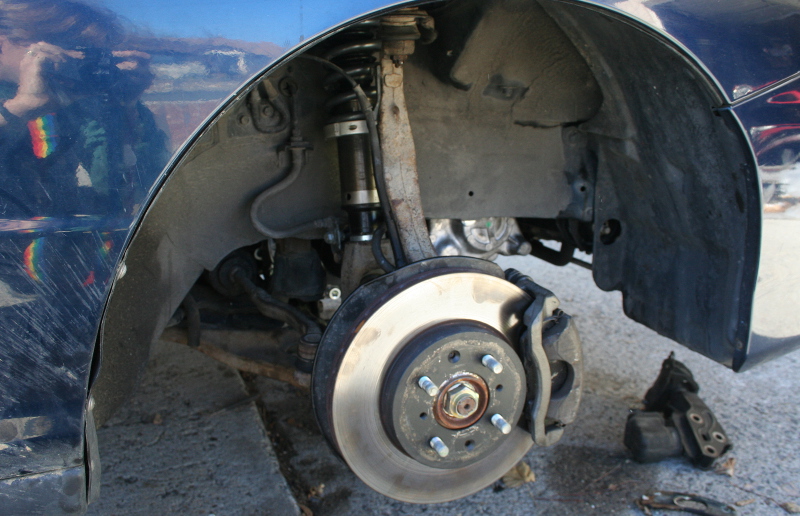
Here's the sway bar waiting for a knuckle to mount to:
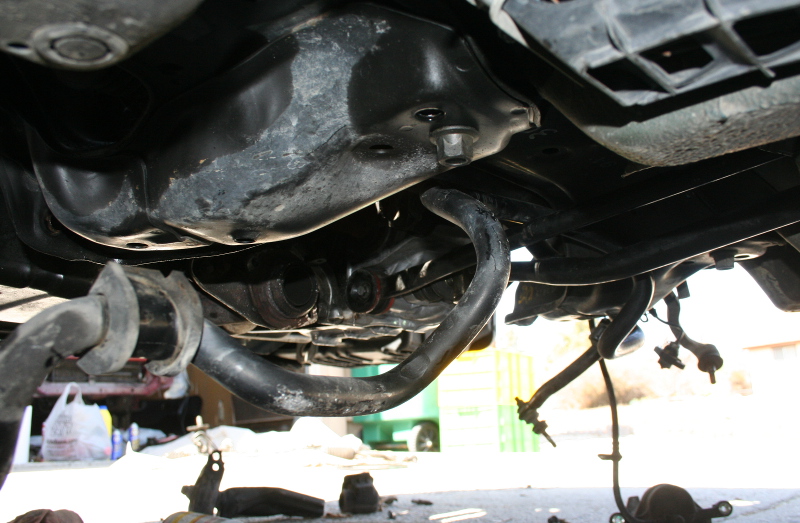
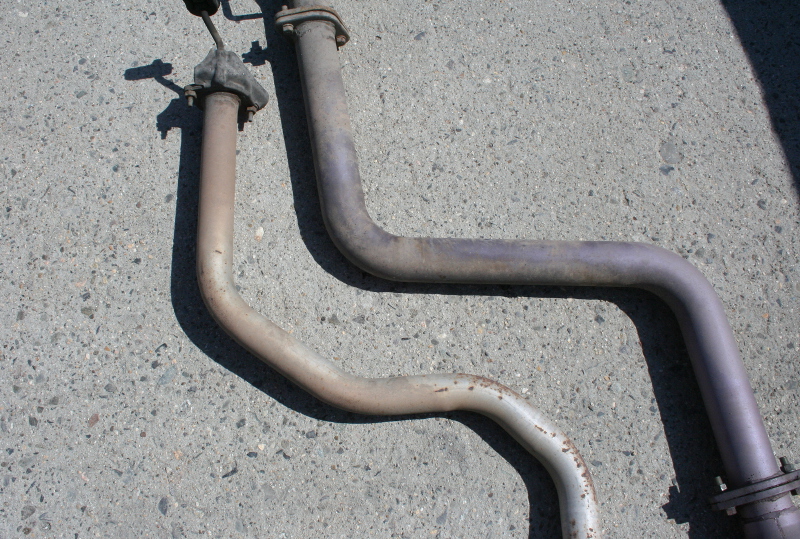
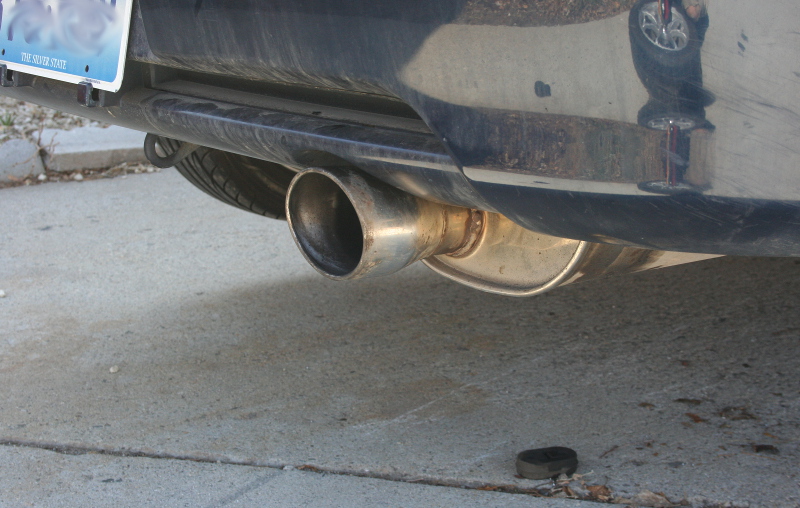
Next up: exhaust system. I'm reusing my old Apexi WS2. Classic catback. Note the size difference vs the LS:
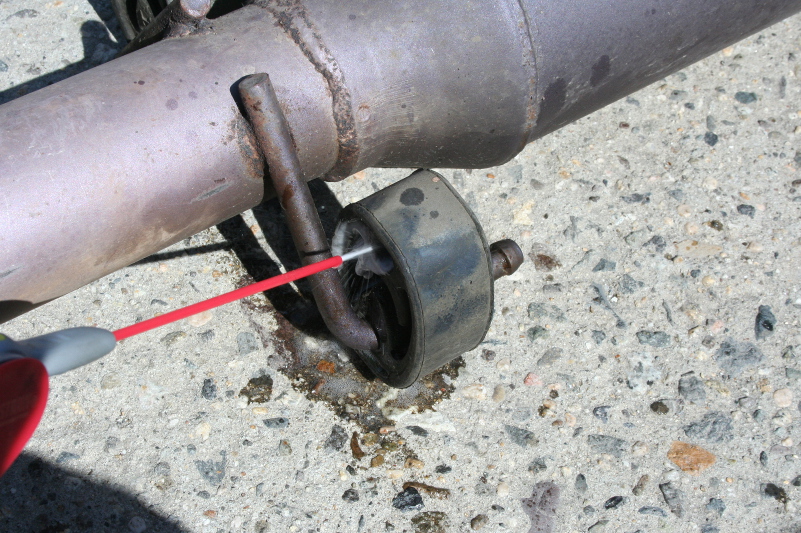
A little lube and a lot of lifting (and no small amount of cursing) and it's on. Hanging an exhaust by yourself = no fun.
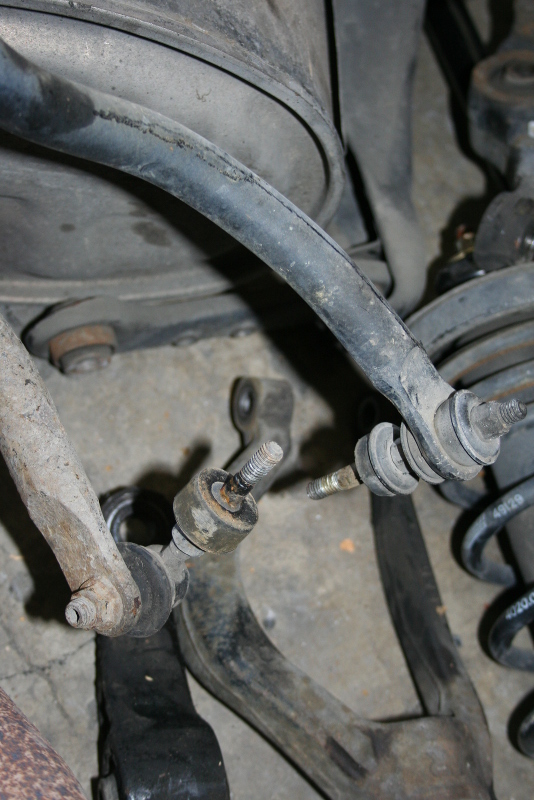
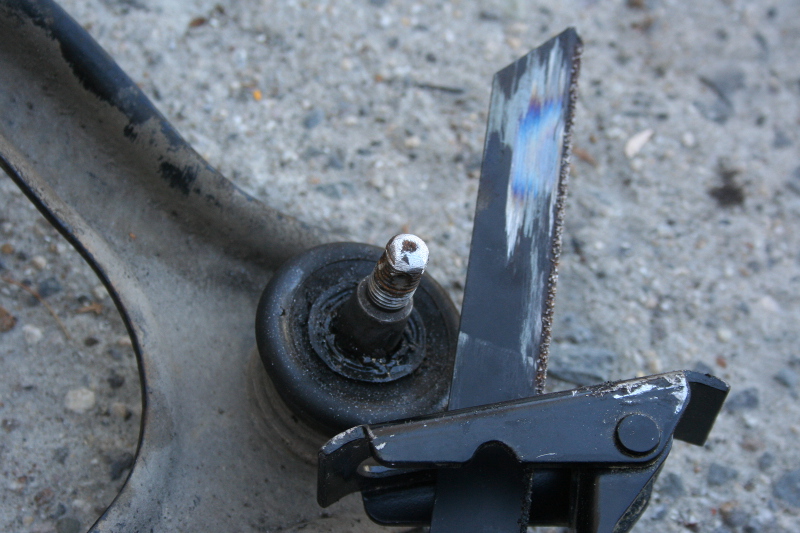
I was an idiot when I broke loose the ball joints on my knuckle. I hammered them on the threaded stud to loosen up, and it wound up destroying all the lower threads on the ball joint studs. If the nut can't thread onto the ball joint easily, the joint will just spin in place rather than accept the nut. So I had to break out the reciprocal saw to remove the bad threads.
Finally, the knuckle is mounted, and the wheels back on. The car is almost ready to drop!
The more noticeable difference is in the endlink style. I prefer the LS-style which has no ball joint. I find the ball joints on the GS-R style can be troublesome. I have no idea whether there is a performance difference.
Here's the sway bar waiting for a knuckle to mount to:
Next up: exhaust system. I'm reusing my old Apexi WS2. Classic catback. Note the size difference vs the LS:
A little lube and a lot of lifting (and no small amount of cursing) and it's on. Hanging an exhaust by yourself = no fun.
I was an idiot when I broke loose the ball joints on my knuckle. I hammered them on the threaded stud to loosen up, and it wound up destroying all the lower threads on the ball joint studs. If the nut can't thread onto the ball joint easily, the joint will just spin in place rather than accept the nut. So I had to break out the reciprocal saw to remove the bad threads.
Finally, the knuckle is mounted, and the wheels back on. The car is almost ready to drop!
05-05-2014, 06:00 PM
#316
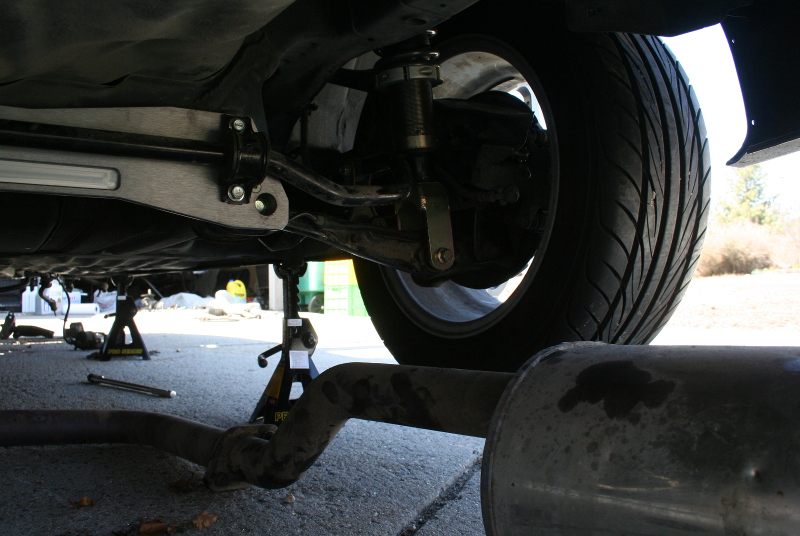
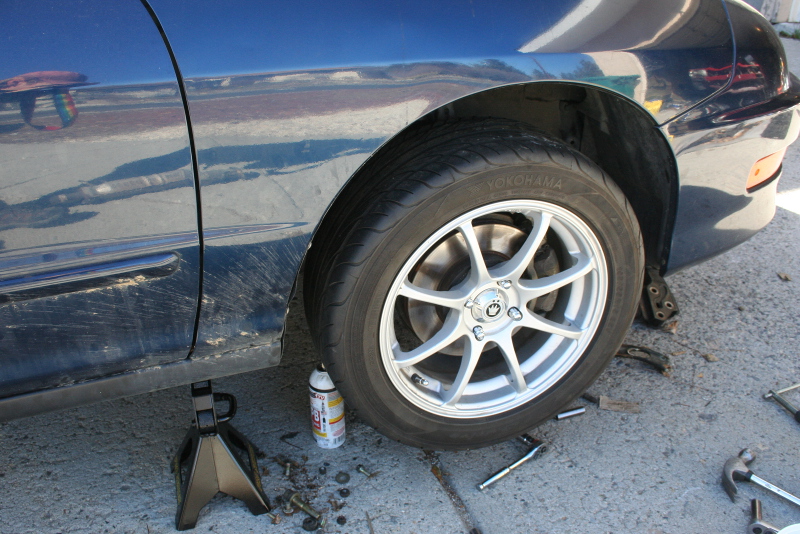
Last moments of Indy being in the air. Notice the lack of droop on the Progress coils. It's handy for car work (you don't have to raise the car much to get the wheels off) but it means the wheels pick up off the ground pretty easily while cornering/hitting bumps. A penalty of the lower shock length.
And down she goes! Indy could use a new paint job but I have the pride of knowing I basically rebuilt her from the ground up.
Now it's time to wire that VTEC beauty. Let's see if we can get it without a CEL on the first try...
The motto for this build is "do it right the first time," so I am re-pinning rather than splicing whenever possible and ALWAYS using solder, heat shrink, split loom, and high quality electrical tape.
Rewiring a 98 LS for a 96 VTEC engine is pretty easy, even if the engine wire harness and chassis harness are different years. The first step is to pry the white shields off of the Molex harnesses that need to be re-pinned.
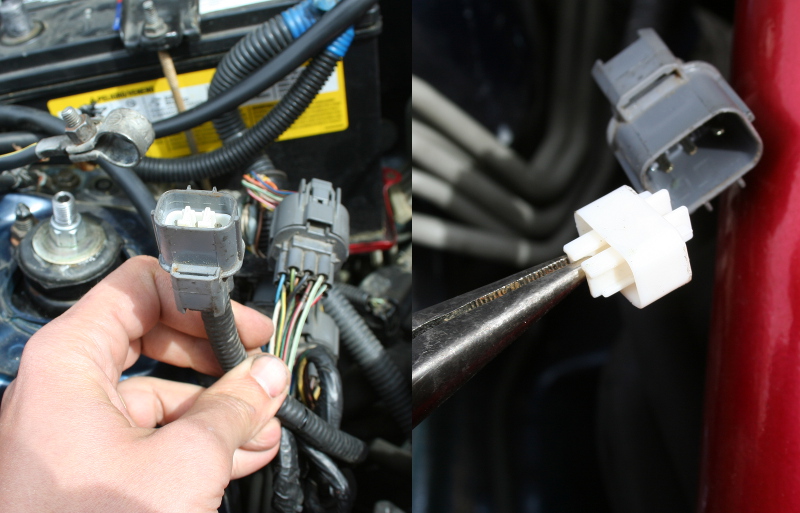
Some wires can be re-pinned, and others don't have a "spot" in the LS chassis harness (IAB, VTEC, etc.). These need to be spliced onto new wires and run directly into the cockpit.

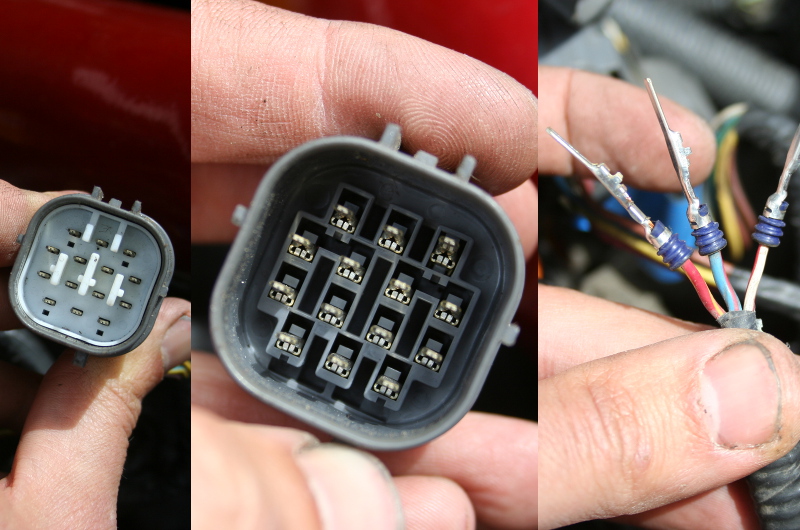
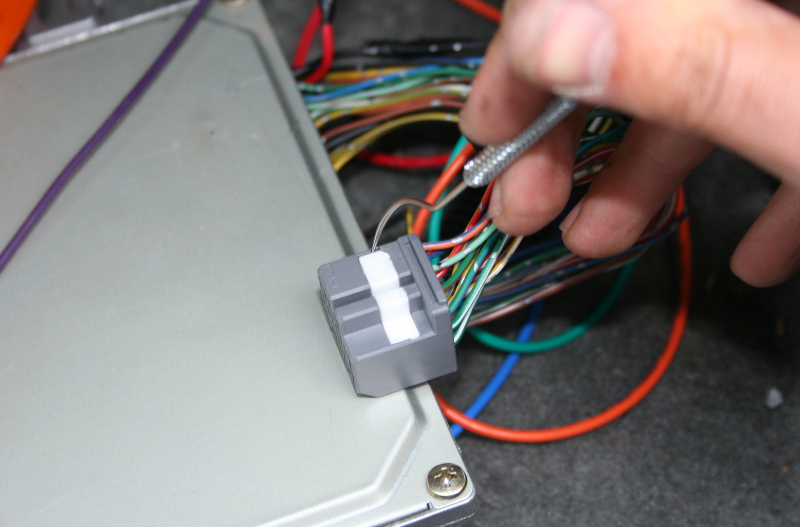
I cut up an old harness and grabbed pins of that harness to use for re-pinning the ECU so I could get the signals into the ECU.

Re-pinning the ECU harnesses is a bit of a pain. The white protector on the plugs needs to be pried off and this is not exactly easily done. I guess Honda really didn't want these wires going anywhere. Compounding the difficulty is the fact that the pins I am using are not a perfect fit.
And down she goes! Indy could use a new paint job but I have the pride of knowing I basically rebuilt her from the ground up.
Now it's time to wire that VTEC beauty. Let's see if we can get it without a CEL on the first try...
The motto for this build is "do it right the first time," so I am re-pinning rather than splicing whenever possible and ALWAYS using solder, heat shrink, split loom, and high quality electrical tape.
Rewiring a 98 LS for a 96 VTEC engine is pretty easy, even if the engine wire harness and chassis harness are different years. The first step is to pry the white shields off of the Molex harnesses that need to be re-pinned.
Some wires can be re-pinned, and others don't have a "spot" in the LS chassis harness (IAB, VTEC, etc.). These need to be spliced onto new wires and run directly into the cockpit.
I cut up an old harness and grabbed pins of that harness to use for re-pinning the ECU so I could get the signals into the ECU.
Re-pinning the ECU harnesses is a bit of a pain. The white protector on the plugs needs to be pried off and this is not exactly easily done. I guess Honda really didn't want these wires going anywhere. Compounding the difficulty is the fact that the pins I am using are not a perfect fit.
05-05-2014, 06:16 PM
#317
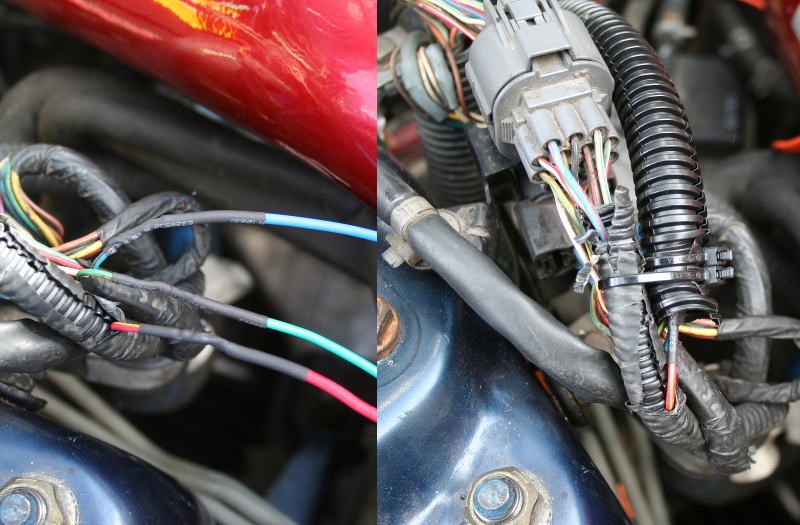
This is what the wiring looks like on the passenger side:

... and on the driver side:
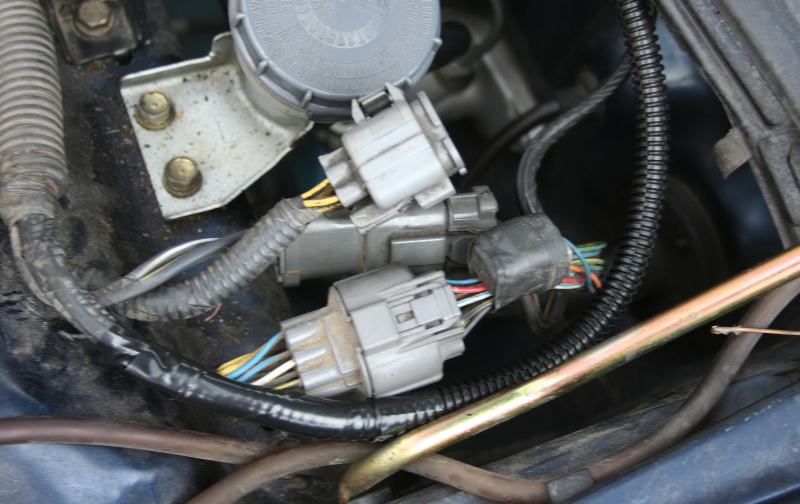
To anyone other than an expert, once it picks up some dirt it will look 100% stock.
But, the big question is -- are there any CELs?????
NOPE! Got it right the FIRST TIME!!!
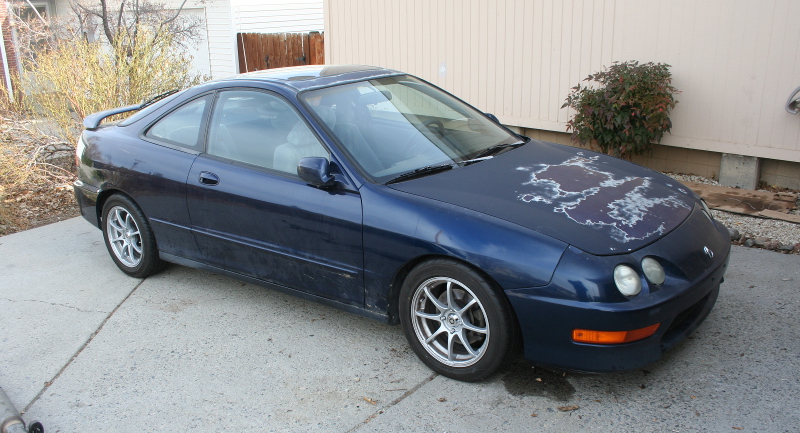
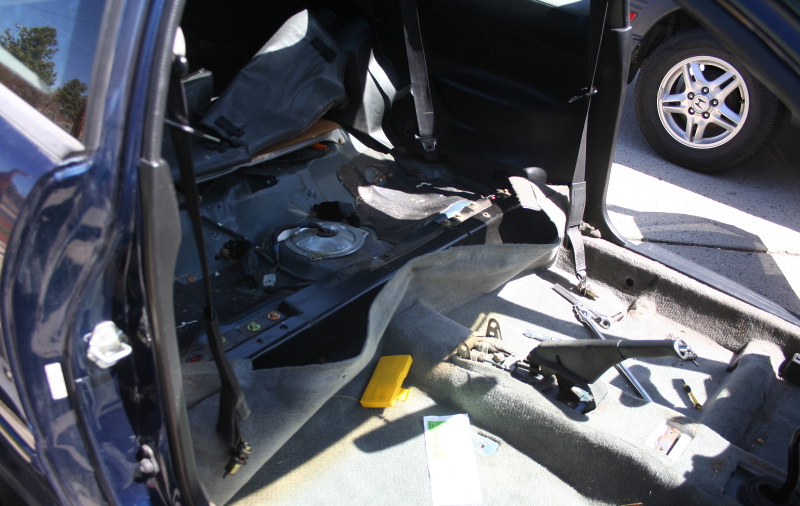
Here is what the old GS-R looks like now:
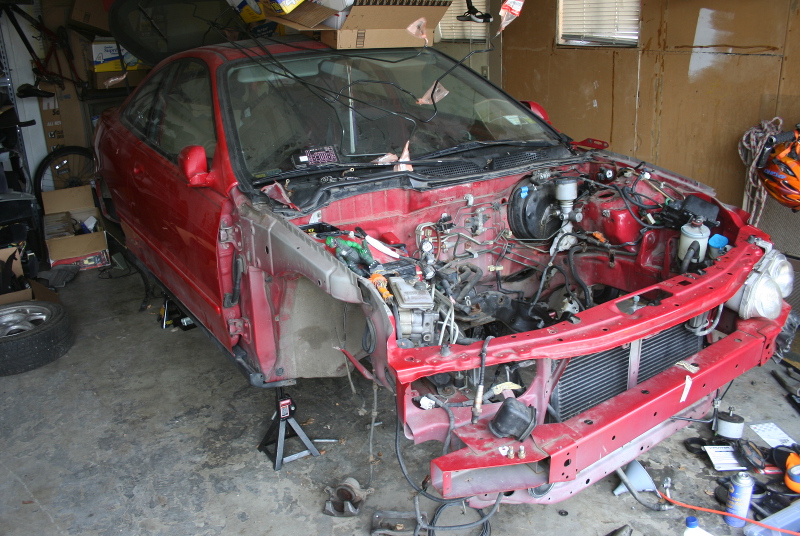
RIP "The Integra"
Good riddance to you:
The next step is to put all these guys in the car.
Thanks to my wife for helping me clean them up:

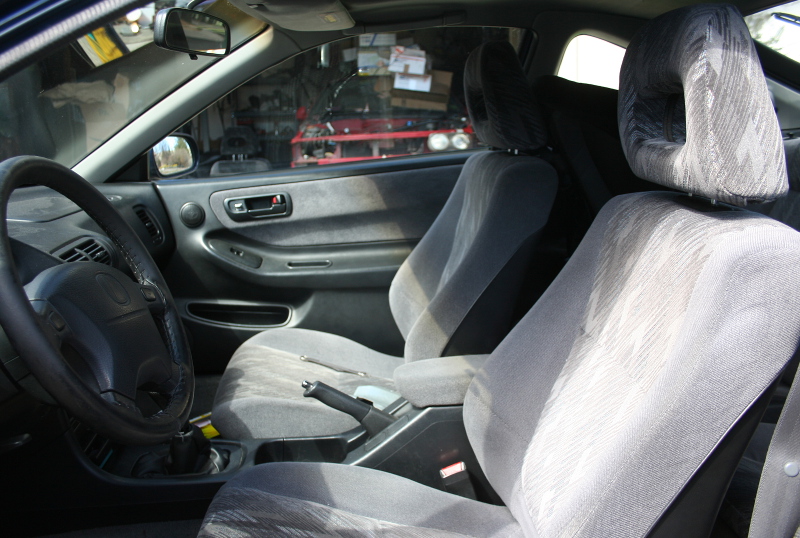
Here is the interior that is about to get the boot.
... and on the driver side:
To anyone other than an expert, once it picks up some dirt it will look 100% stock.
But, the big question is -- are there any CELs?????
NOPE! Got it right the FIRST TIME!!!
Here is what the old GS-R looks like now:
RIP "The Integra"
Good riddance to you:
The next step is to put all these guys in the car.
Thanks to my wife for helping me clean them up:
Here is the interior that is about to get the boot.
05-06-2014, 11:00 AM
#318
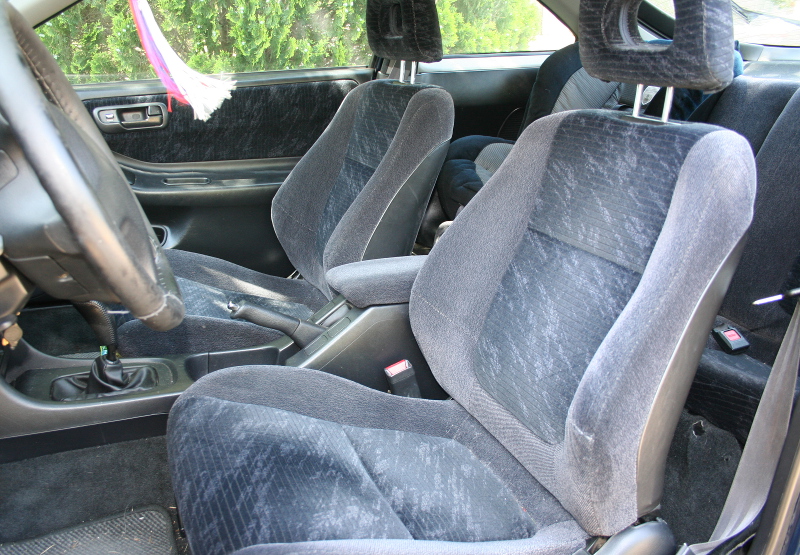
Unfortunately, I had to really hurry with the interior swap, so I didn't take too many pictures along the way. I took out all the grey LS seats, door panels, and carpets and replaced with the charcoal 96 GS-R seats. I also swapped the headliner and visors as the first owner of the LS smoked and there was some staining.
Here is the new interior. The improvement is not as dramatic in pictures as it is in person:
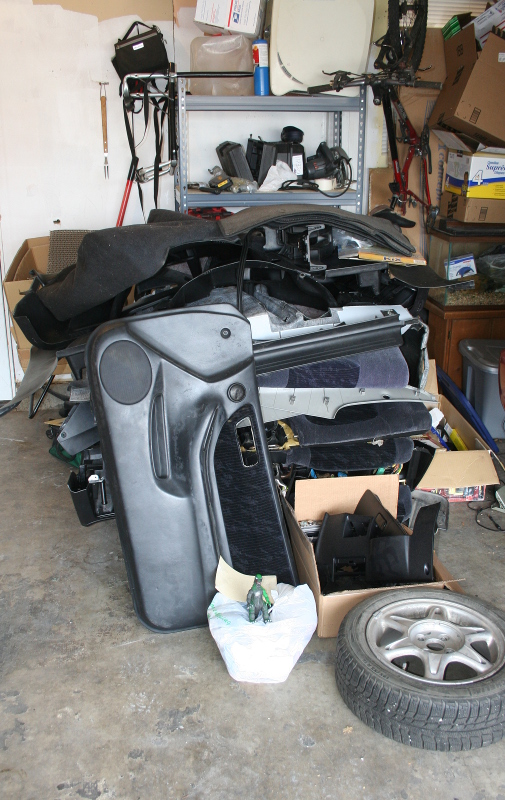
Of course, all of this left a rather large pile of parts to try to sell (more on that, later):
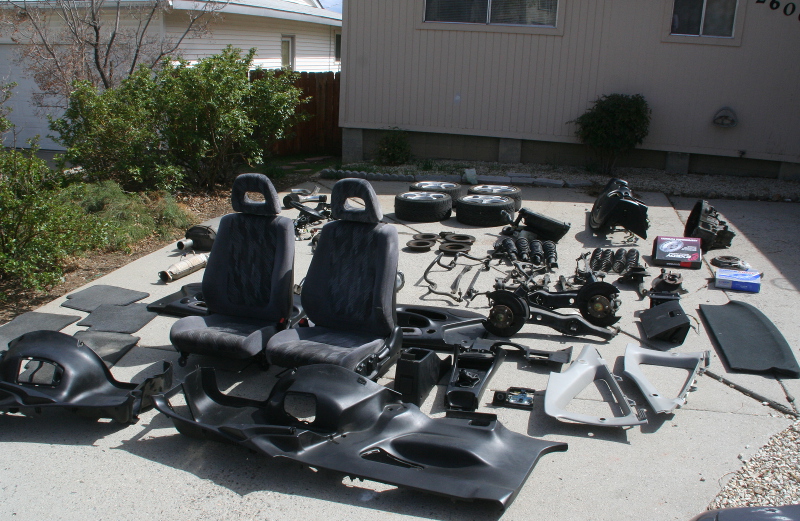
With the swap finished, I took a 96 grey cloth interior LS and added the following:
-1996 B18C1 with Blox A cams and AEM V1 intake arm
-brand new ITR transmission
-Exedy 9 lb flyhweel
-Exedy OEM replacement clutch
-Apexi WS2 exhaust
-Progress CSII coilovers
-ITR rear sway bar
-OE suspension arms with full PIC/SUJA1 bushings
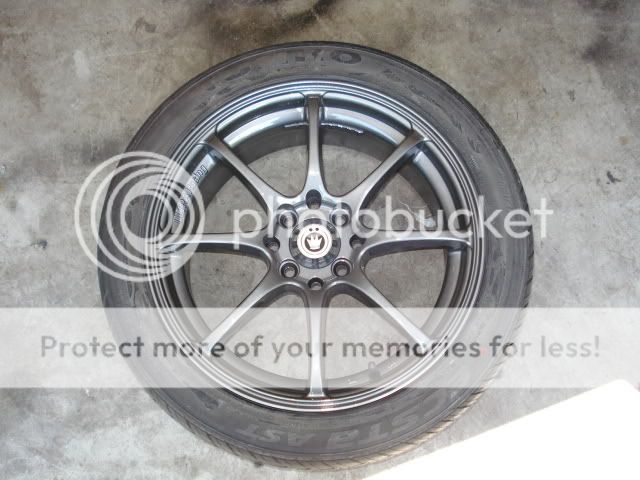
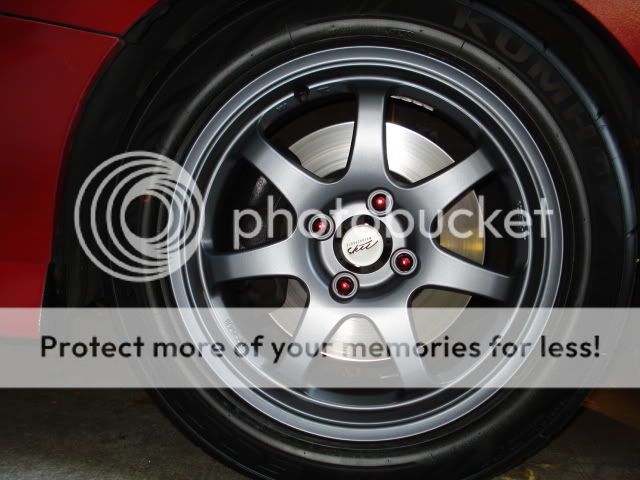
-Konig Feather 12 lb. wheels with Yoko s.drive tires
-full 1996 GS-R charcoal interior (front and rear seats, A-pillars, headliner, carpet
For the time being, the car was running a stock 1996 GS-R ECU. The car will actually pass smog on the 98 LS ECU. Several months later I made time to add my Neptune RTP (no redline runs until then).
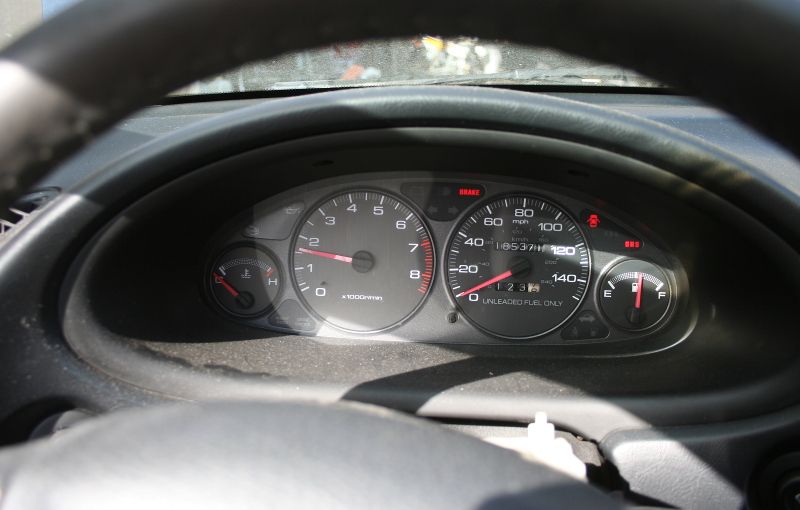
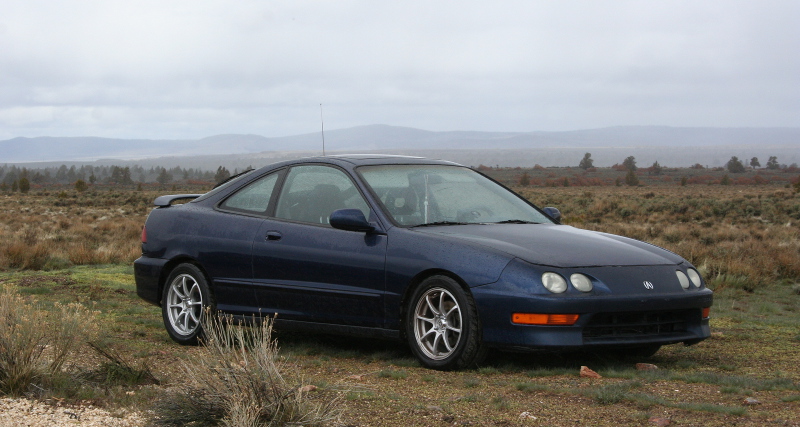
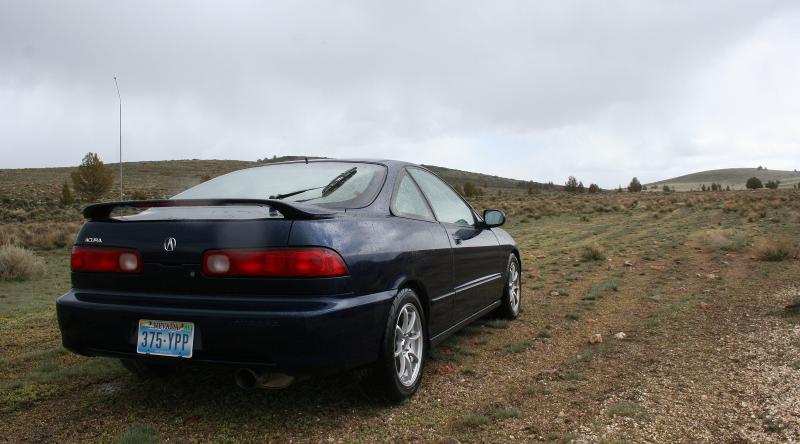
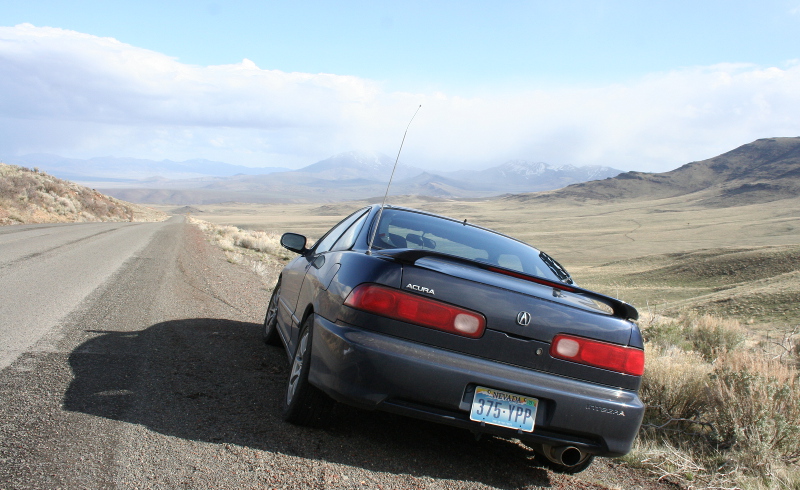
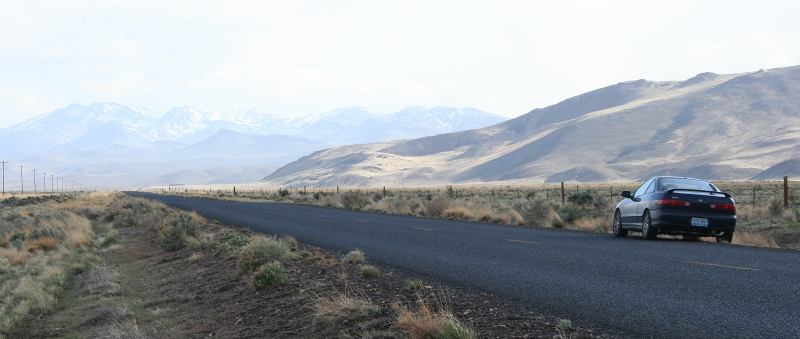
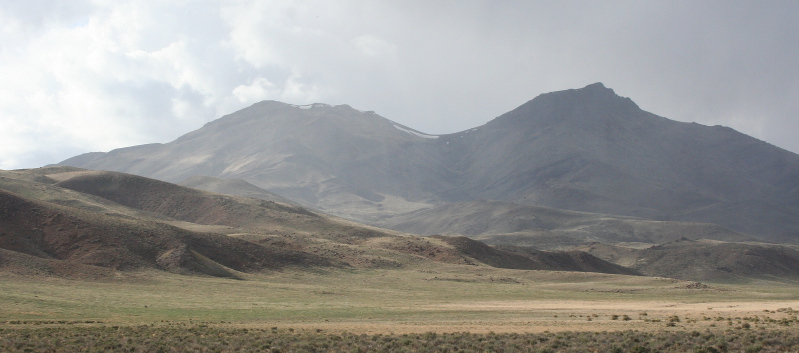
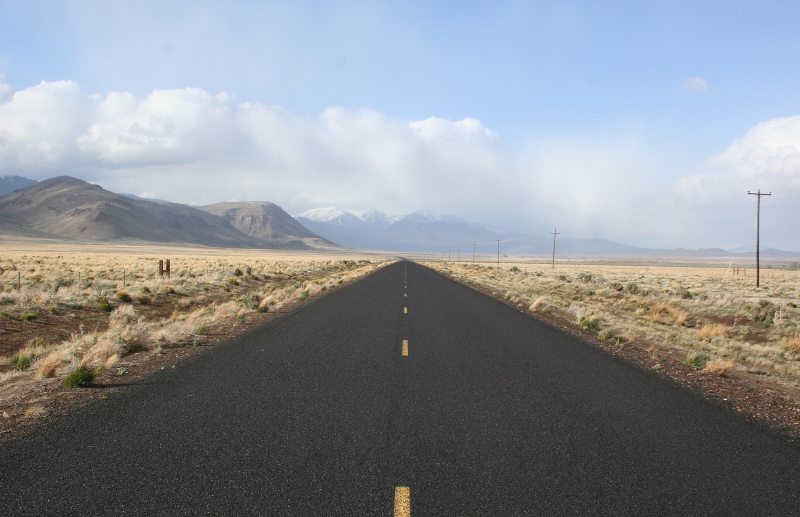
Indy did awesome after the swap. There were literally zero issues (literally, zero) and she drove like a champ. Shortly after the swap I went on a 16 hour drive around Northern Nevada and SE Oregon looking for field sites for work (I study rangeland plant invasions). She did great and got 30+ mpg.
Thus concludes the LS/GS-R swap.
Here is the new interior. The improvement is not as dramatic in pictures as it is in person:
Of course, all of this left a rather large pile of parts to try to sell (more on that, later):
With the swap finished, I took a 96 grey cloth interior LS and added the following:
-1996 B18C1 with Blox A cams and AEM V1 intake arm
-brand new ITR transmission
-Exedy 9 lb flyhweel
-Exedy OEM replacement clutch
-Apexi WS2 exhaust
-Progress CSII coilovers
-ITR rear sway bar
-OE suspension arms with full PIC/SUJA1 bushings
-Konig Feather 12 lb. wheels with Yoko s.drive tires
-full 1996 GS-R charcoal interior (front and rear seats, A-pillars, headliner, carpet
For the time being, the car was running a stock 1996 GS-R ECU. The car will actually pass smog on the 98 LS ECU. Several months later I made time to add my Neptune RTP (no redline runs until then).
Indy did awesome after the swap. There were literally zero issues (literally, zero) and she drove like a champ. Shortly after the swap I went on a 16 hour drive around Northern Nevada and SE Oregon looking for field sites for work (I study rangeland plant invasions). She did great and got 30+ mpg.
Thus concludes the LS/GS-R swap.
 05-07-2014, 01:18 PM
#320
Thanks, man! Lots more updates to come! It's hard to know how many people actually see this thread, especially these days now that the forum has quieted down a bit. If you stop by just say "hey" so I know I'm not sending all this stuff into the void!
05-07-2014, 02:19 PM
#321
Honda-Tech Member
Join Date: May 2010
Location: Suburbs of Philadelphia
Posts: 3,706
Likes: 0
Received 2 Likes
on
2 Posts
I must say, you really know what you are doing when it comes to ANYTHING involving working on cars.
And your red teg looks soooo mint right now. Two words come to mind, "remarkable", "exceptional". Oh and one more to make it 3, "beautiful"!
I can't wait to see how the the navy blue teg turns out when it's all said and done. You sir, are an inspiration. I wish more people in the honda community built their cars the way you do. Your attention to every little detail, is amazing. I think everyone should take notes from you.

 05-12-2014, 06:03 AM
#324
Thanks guys. Nice to know people are still getting something out of this thread.
DirtyDA9: Thanks, main. That red Integra is pretty sick. Unfortunately, it's not mine . The really nice looking one is Racebum's old GS-R that he had a while back. Those pics are probably 10 years old. The last integra he had was a white (I think) car with a JDM ITR swap and a bazillion other things. That dude has had some awesome cars (Corvettes, Z-cars, an S2000 I think, and a couple or more Integras as well). I'm hoping the blue car will look like that some day. It's coming along on the inside but the outside is a mess until I finally get a permanent job and can spring for a new paint job.
HondasSuk: to you too. When I first saw your post on my phone the icon didn't load so I lol'd thinking you were trollin!
SiRBranno: Family is #1 above everything. Car is second when I can put it ahead of work!
More updates coming soon...
DirtyDA9: Thanks, main. That red Integra is pretty sick. Unfortunately, it's not mine
. The really nice looking one is Racebum's old GS-R that he had a while back. Those pics are probably 10 years old. The last integra he had was a white (I think) car with a JDM ITR swap and a bazillion other things. That dude has had some awesome cars (Corvettes, Z-cars, an S2000 I think, and a couple or more Integras as well). I'm hoping the blue car will look like that some day. It's coming along on the inside but the outside is a mess until I finally get a permanent job and can spring for a new paint job.HondasSuk:
to you too. When I first saw your post on my phone the icon didn't load so I lol'd thinking you were trollin!SiRBranno: Family is #1 above everything. Car is second when I can put it ahead of work!
More updates coming soon...
05-12-2014, 07:35 AM
#325
Honda-Tech Member
Join Date: Jul 2013
Location: sleeping in a 368k 95 gs-r
Posts: 1,975
Likes: 0
Received 41 Likes
on
41 Posts
did you paint the hood or what?
i did a foam roller rustoleum job on mine.
looks better, far from perfect but not bad for one coat and no sanding.
i bought a cheapo ebay paint gun but since i've started
addressing cosmetic issues the car is already starting to draw
unwanted attention.:unsure: all the newer butt ugly cars
out there arent helping lol. saw a cute gal driving a mint red 95 rs
the other day, really stood out. nice tegs are so fresh! kudos to you sir!:applause: