
Some recent carbon overlay work - Motorcycle Gas Tank
 10-14-2007, 07:36 PM
#1
Thread Starter

Join Date: Oct 2002
Location: Eagle Mountain, UT, USA
Posts: 1,708
Likes: 0
Received 0 Likes
on
0 Posts
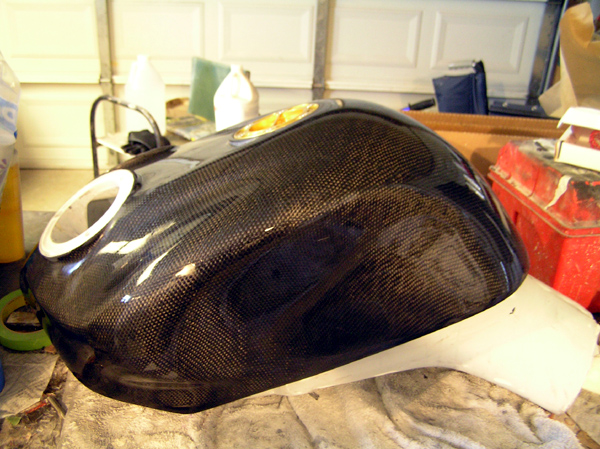
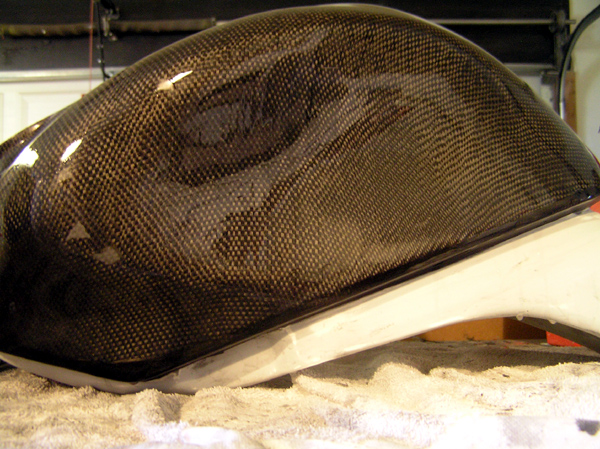
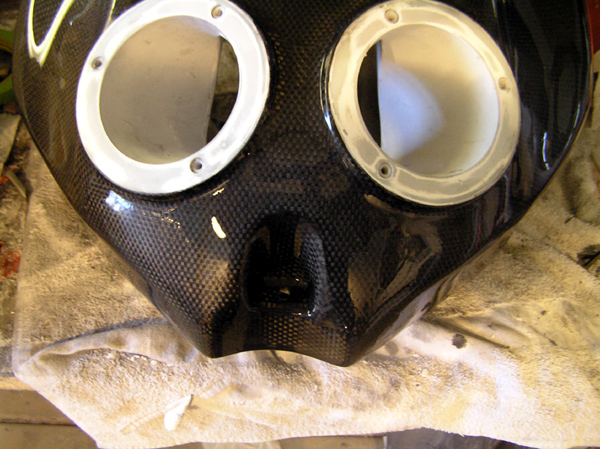
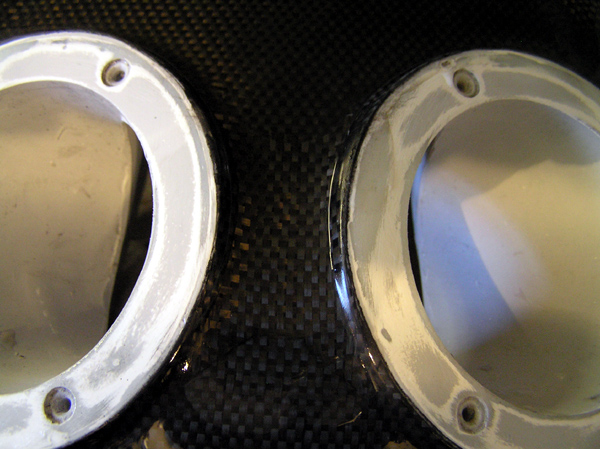
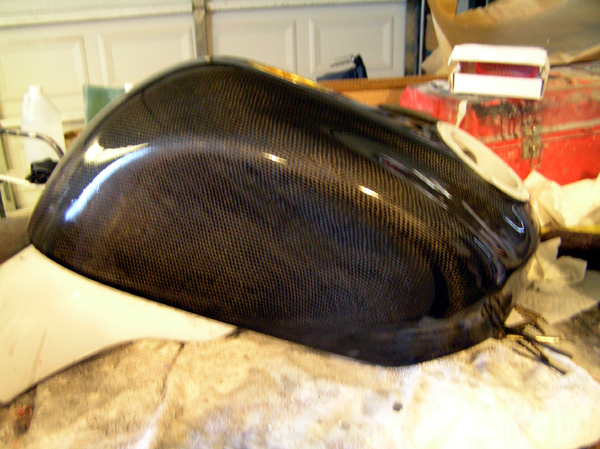
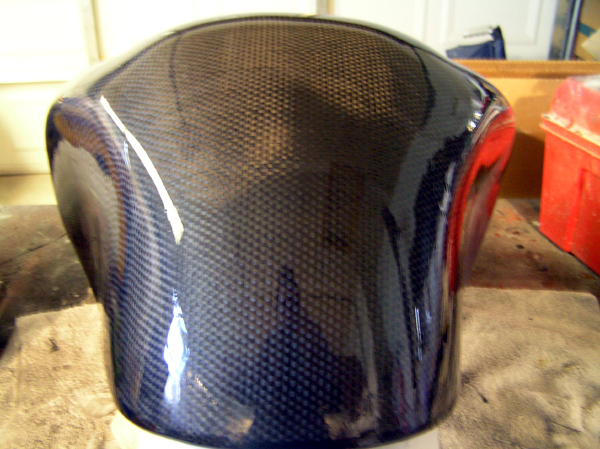
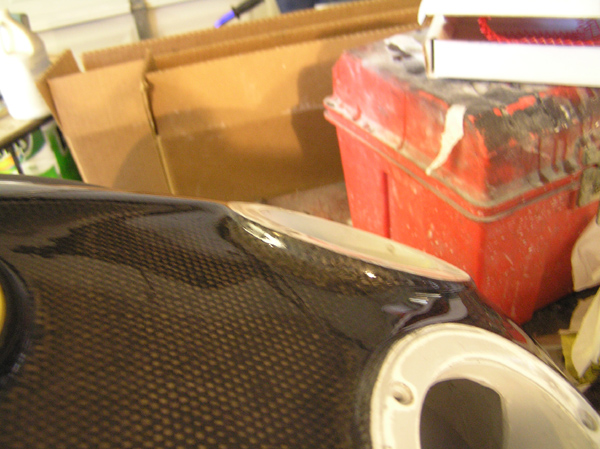
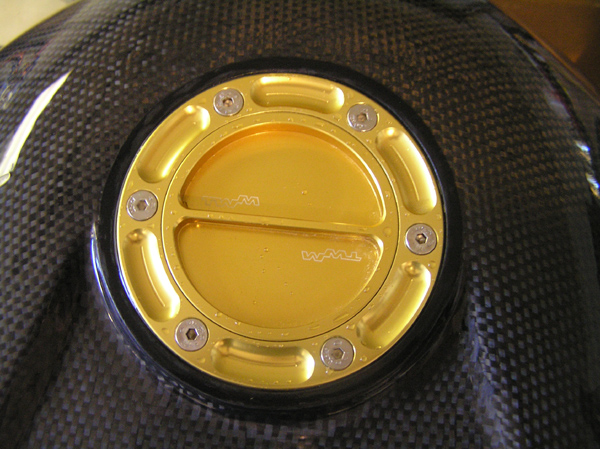
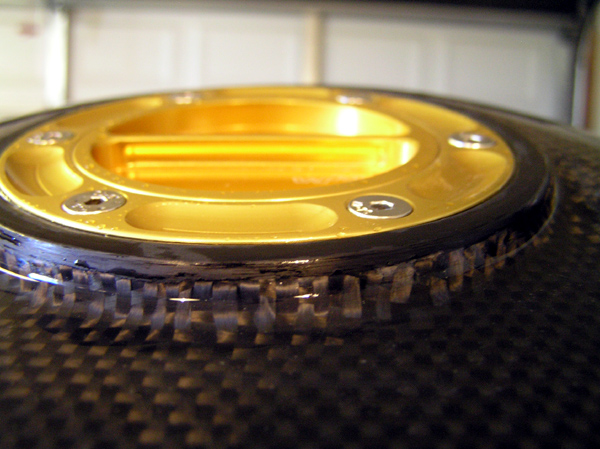
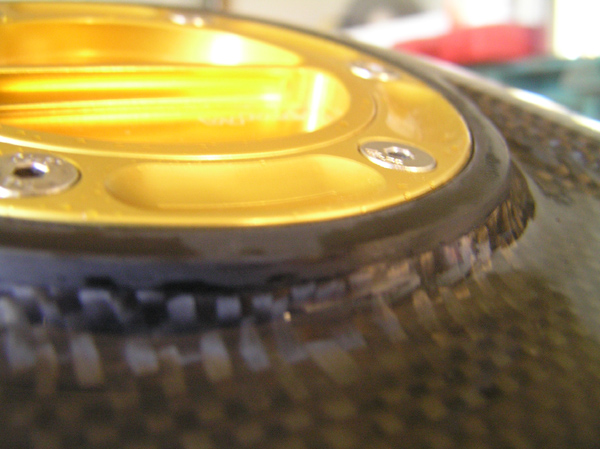
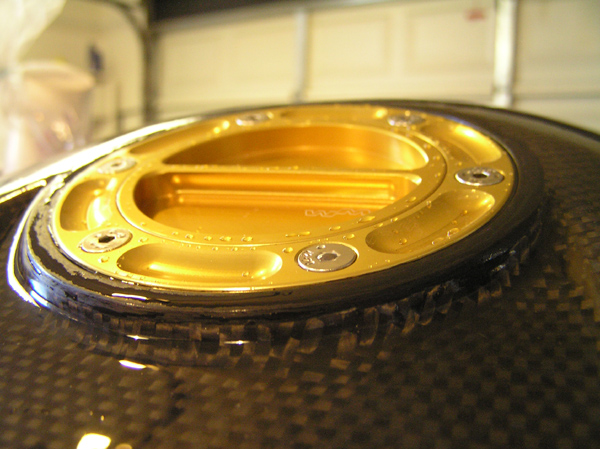
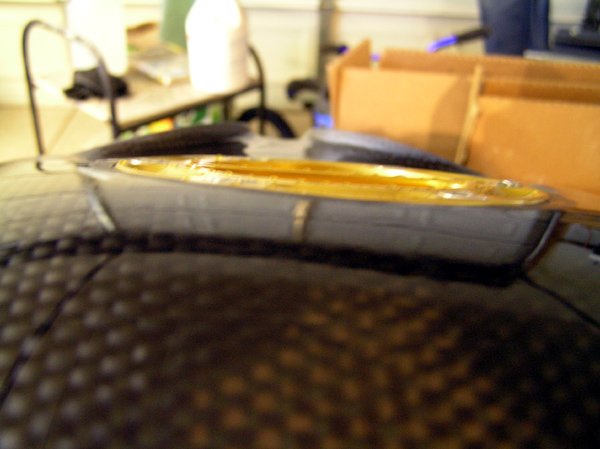
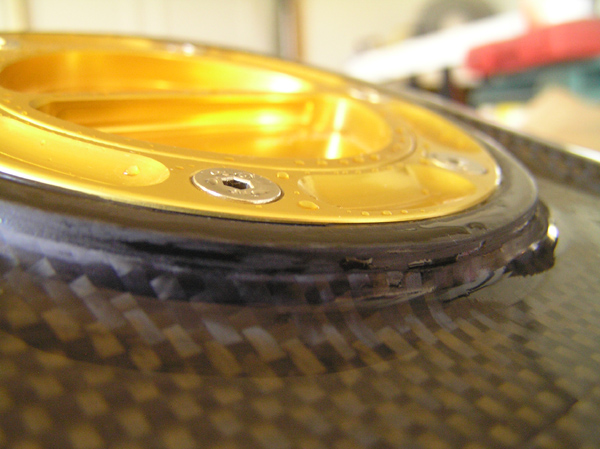
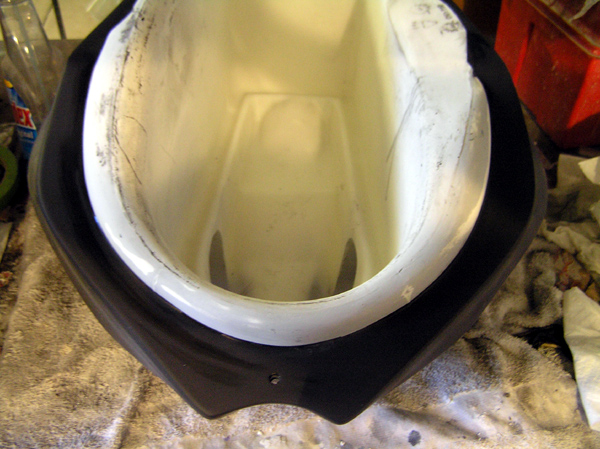
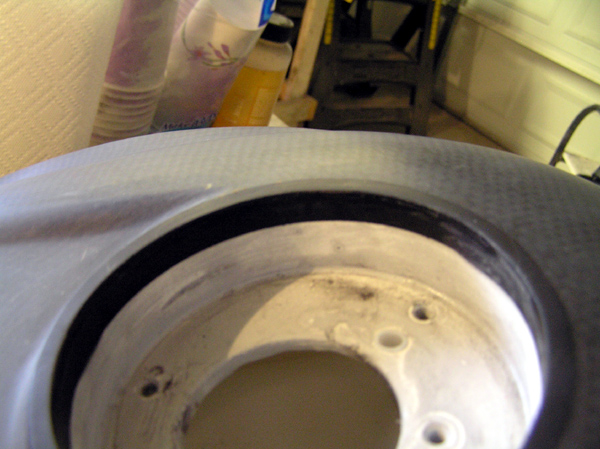
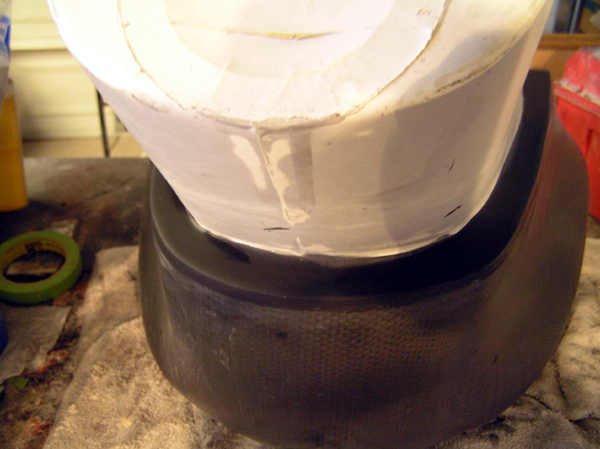
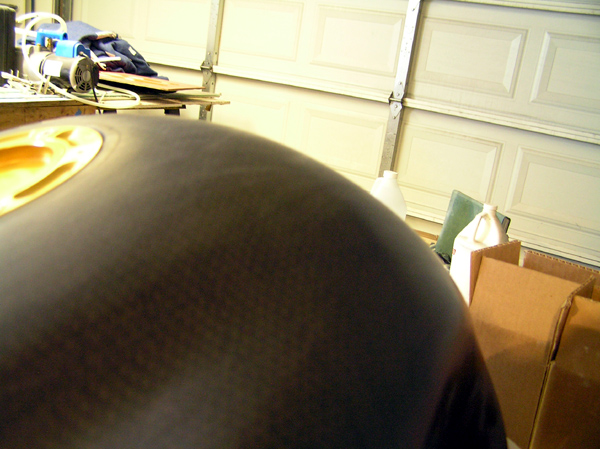
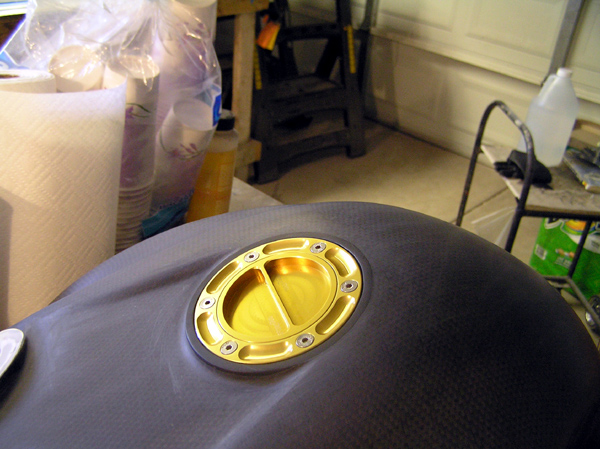
Just thought I would show you guys my latest customer project. This is an overlay of a nylon gas tank for a motorcycle. I tried to keep the seams to a minimum or strategically place them so they are hidden. This overlay was done with 3 major pieces and a couple of tiny pieces of plain weave fabric. I chose plain weave to match other parts on the bike that are plain weave. If I got to choose I would have chosen 2x2 twil in a heartbeat just due to the complexity of the shape. I think this was the most difficult overlay I havetried to date Adhesion tests were performed on the underside of the tank to ensure a good stick. There are several areas where he carbon fabric extends al the way under the tank to ensure nothing ever lifts. You cannot see the strips because they are buried under black resin. The tank hasn't been clear coated yet but these shots were taken with the tank wet which pretty much simulates what thetank will look like with clear. The customer will have it clear coated locally once he decides on decals and some things on the rest of the bike. It was overlaid because a non factory carbon tank was going to be MUCH more expensive with minimal weight loss since the stock tank is pretty light being nylon. The two white rings will be painted black later and another parts covers them anyway so I left them uncovered. Enjoy the pics.
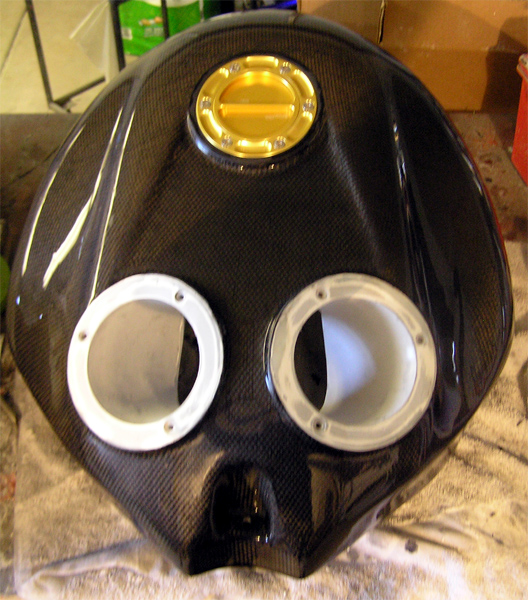

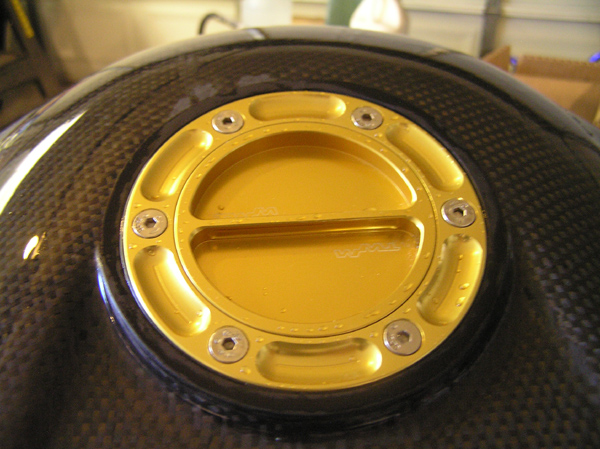
This is how the tank looks dry. It has been wet sanded to 400 grit prior to clear coat paint

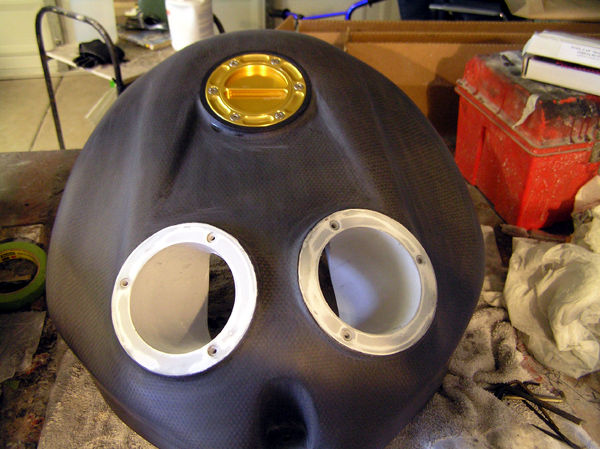
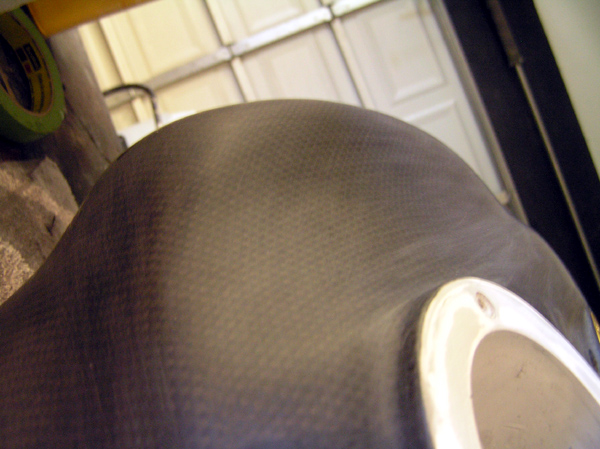
This is how the tank looks dry. It has been wet sanded to 400 grit prior to clear coat paint
 10-14-2007, 07:42 PM
#2
Thread Starter
Join Date: Oct 2002
Location: Eagle Mountain, UT, USA
Posts: 1,708
Likes: 0
Received 0 Likes
on
0 Posts
Oh yah before I forget I usually get a lot of questions on overlay jobs like "what is the benefit or performance gain or whatever"? Of course there is no gains in that area but I think of overlays as fancy paint or chroming a part not as any type of performance mod. Just thought I'd clear that up before the questions came out of the woodwork. When a customer comes to me with a job I just quote it and finish it, I don't ask any questions or make any judgments unless I'm asked for my opinion. I'd be happy to answer any questions about techniques or materials however.


Trending Topics
10-15-2007, 05:34 AM
#9
OG Fabricator
Join Date: Feb 2005
Location: Burlington, Ont., Canada
Posts: 1,864
Likes: 0
Received 1 Like
on
1 Post
awesome work. i want to do some overlay work with some cf i have lying around... i don't know much about it though. after it is clear coated i imagine the gloss finish will look something similar to the first group of pics. is there a special clear coat that needs to be used for cf? what is the shelf life for resins and adhesives used in most fiber glass and cf applications? i have a 5 gallon pail on a shelf, but it is a couple years old now. the stuff i'd be doing with it won't need to look near as pretty as your stuff though because it will be getting walked on... sort of. thanks for any input.
10-15-2007, 10:27 AM
#10
Thread Starter
Join Date: Oct 2002
Location: Eagle Mountain, UT, USA
Posts: 1,708
Likes: 0
Received 0 Likes
on
0 Posts
<TABLE WIDTH="90%" CELLSPACING=0 CELLPADDING=0 ALIGN=CENTER><TR><TD>Quote, originally posted by CSaddict »</TD></TR><TR><TD CLASS="quote">What is customer cost on something like that. I may have some others interested.</TD></TR></TABLE>
It was about $1200 but that was due to the complexity of the shape and the fact I was using plain weave which is much harder to conform. I basically just charge for my time on overlay work. You can easily charge too little on jobs like this due to the amount of time involved. Just to give you an idea I used over 2 gallons of resin on this tank and most of that was sanded off. I bet I only have quart of resin left on the tank. With overlays its more like sculpting I guess, you have to know which grit paper to use and when. Most importantly you can never never sand too much or you'll ruin the look of the part or sand through to the fabric which will look funny, you can't just go back andadd more resin because it won't look the same as the surrounding area. One other tough issue on a shape like this is gravity. The type of resin that works best is fairly low viscosity so it must be brushed on to really get good results, especially the first few coats. The low viscosity resin allows any entrapped air to rise to the surface and escape which is why I use it. The resin is soo thin it tends to run off walls which is tough in this case because you actually have overhangs that go past vertical. Brush on too much and you make more work for yourself. This means you have to keep flipping the tank and letting resin cures, lots of waiting.
It was about $1200 but that was due to the complexity of the shape and the fact I was using plain weave which is much harder to conform. I basically just charge for my time on overlay work. You can easily charge too little on jobs like this due to the amount of time involved. Just to give you an idea I used over 2 gallons of resin on this tank and most of that was sanded off. I bet I only have quart of resin left on the tank. With overlays its more like sculpting I guess, you have to know which grit paper to use and when. Most importantly you can never never sand too much or you'll ruin the look of the part or sand through to the fabric which will look funny, you can't just go back andadd more resin because it won't look the same as the surrounding area. One other tough issue on a shape like this is gravity. The type of resin that works best is fairly low viscosity so it must be brushed on to really get good results, especially the first few coats. The low viscosity resin allows any entrapped air to rise to the surface and escape which is why I use it. The resin is soo thin it tends to run off walls which is tough in this case because you actually have overhangs that go past vertical. Brush on too much and you make more work for yourself. This means you have to keep flipping the tank and letting resin cures, lots of waiting.
10-15-2007, 10:37 AM
#11
Thread Starter
Join Date: Oct 2002
Location: Eagle Mountain, UT, USA
Posts: 1,708
Likes: 0
Received 0 Likes
on
0 Posts
<TABLE WIDTH="90%" CELLSPACING=0 CELLPADDING=0 ALIGN=CENTER><TR><TD>Quote, originally posted by weiRtech »</TD></TR><TR><TD CLASS="quote">awesome work. i want to do some overlay work with some cf i have lying around... i don't know much about it though. after it is clear coated i imagine the gloss finish will look something similar to the first group of pics. is there a special clear coat that needs to be used for cf? what is the shelf life for resins and adhesives used in most fiber glass and cf applications? i have a 5 gallon pail on a shelf, but it is a couple years old now. the stuff i'd be doing with it won't need to look near as pretty as your stuff though because it will be getting walked on... sort of. thanks for any input.</TD></TR></TABLE>
Yah clear coat makes the pattern pop like the wet pics above. No special clear is needed, any good automotive clear is fine. Sometimes there are reactions from the release system but not if you prep the part correctly. Of course you don't even deal with a release chemical on an overlay but it can be an issue building parts from scratch. Shelf life of most "promoted" polyester or vinyl ester resins is about 3-4 months usually. Un-promoted a 5 gallon pail will keep for years. Most small amounts (under 55 gallon) quantities of ester resins are shipped already promoted so the clock is ticking. There are some very nasty chemicals used to promote resin so it's not usually done at the DIY level. Like anything though if you know what to be carefull of you're fine to promote your own. If you have an epoxy resin the resin portion keeps for years properly cared for. Usually it's the hardener portion that goes bad first. Epoxy hardener soaks up moisture from the air if it's not cared for properly. Not sure if your resin is still good but mix up the pail and try to cure a small cup.
Yah clear coat makes the pattern pop like the wet pics above. No special clear is needed, any good automotive clear is fine. Sometimes there are reactions from the release system but not if you prep the part correctly. Of course you don't even deal with a release chemical on an overlay but it can be an issue building parts from scratch. Shelf life of most "promoted" polyester or vinyl ester resins is about 3-4 months usually. Un-promoted a 5 gallon pail will keep for years. Most small amounts (under 55 gallon) quantities of ester resins are shipped already promoted so the clock is ticking. There are some very nasty chemicals used to promote resin so it's not usually done at the DIY level. Like anything though if you know what to be carefull of you're fine to promote your own. If you have an epoxy resin the resin portion keeps for years properly cared for. Usually it's the hardener portion that goes bad first. Epoxy hardener soaks up moisture from the air if it's not cared for properly. Not sure if your resin is still good but mix up the pail and try to cure a small cup.
10-15-2007, 10:38 AM
#12
Thread Starter
Join Date: Oct 2002
Location: Eagle Mountain, UT, USA
Posts: 1,708
Likes: 0
Received 0 Likes
on
0 Posts
<TABLE WIDTH="90%" CELLSPACING=0 CELLPADDING=0 ALIGN=CENTER><TR><TD>Quote, originally posted by tepid1 »</TD></TR><TR><TD CLASS="quote">Perfect.... just like always. 
Looks good buddy.</TD></TR></TABLE>
Thanks Chris!
Looks good buddy.</TD></TR></TABLE>
Thanks Chris!
03-02-2008, 10:22 PM
#15
Honda-Tech Member
Join Date: Mar 2007
Location: freezin' point
Posts: 676
Likes: 0
Received 0 Likes
on
0 Posts
how in the world do you overlay carbon fiber like that?..where can I buy supplies like that?....do you have a how-to?...And of course nice work...!...
03-03-2008, 06:57 AM
#16
Thread Starter
Join Date: Oct 2002
Location: Eagle Mountain, UT, USA
Posts: 1,708
Likes: 0
Received 0 Likes
on
0 Posts
Thanks man, I've been doing it for a while now so you learn a few tricks. I don't have a how to on the gas tank but I have a whole section dedicated to overlays on my composites forum: http://www.racingcomposites.net/unf?id=33 You have to be a member to see it but there are a few how to's over there on the subject.
03-04-2008, 10:16 AM
#20
Thread Starter
Join Date: Oct 2002
Location: Eagle Mountain, UT, USA
Posts: 1,708
Likes: 0
Received 0 Likes
on
0 Posts
<TABLE WIDTH="90%" CELLSPACING=0 CELLPADDING=0 ALIGN=CENTER><TR><TD>Quote, originally posted by Andy R »</TD></TR><TR><TD CLASS="quote">I'm assuming there was some vacuum bagging involved?</TD></TR></TABLE>
Nope, no vacuum was used on this overlay. Believe it or not I decided not to use vacuum to save myself some work. lol
Nope, no vacuum was used on this overlay.
Believe it or not I decided not to use vacuum to save myself some work. lol
03-05-2008, 05:15 AM
#22
Honda-Tech Member
Join Date: Apr 2007
Location: canton, oh
Posts: 253
Likes: 0
Received 0 Likes
on
0 Posts
<TABLE WIDTH="90%" CELLSPACING=0 CELLPADDING=0 ALIGN=CENTER><TR><TD>Quote, originally posted by 4g63powered »</TD></TR><TR><TD CLASS="quote">I don't know why, but I almost like the look of the CF without the clear better.</TD></TR></TABLE>
i agree. it has that old school flat look to it. just raw, carbon. both ways look great though! awesome job.
i agree. it has that old school flat look to it. just raw, carbon. both ways look great though! awesome job.
03-05-2008, 07:39 AM
#23
Honda-Tech Member
Join Date: May 2002
Location: BeLlInGhAm, Wa
Posts: 3,599
Likes: 0
Received 0 Likes
on
0 Posts
badass! looks great.
here's a shot of the molds we have for our FSAE car... I'm just learning about composites. :D your tank looks amazing though.

we made a female mold...and then popped our parts out of our carbon mold.


all to come out looking like this...

here's a shot of the molds we have for our FSAE car... I'm just learning about composites. :D your tank looks amazing though.
we made a female mold...and then popped our parts out of our carbon mold.
all to come out looking like this...
03-05-2008, 11:33 AM
#24
Thread Starter
Join Date: Oct 2002
Location: Eagle Mountain, UT, USA
Posts: 1,708
Likes: 0
Received 0 Likes
on
0 Posts
Wow carbon tooling, very nice. I think your being modest though, infusing tools isn't really for the beginner, lol. I spent a few months learning how to infuse parts before I got it so I know how tricky it can be. I assume you used epoxy to infuse the tool? Did you need to heat the plug to get good flow? Seems like most infusion epoxies still need some heat to flow well.
03-06-2008, 02:47 PM
#25
Honda-Tech Member

<TABLE WIDTH="90%" CELLSPACING=0 CELLPADDING=0 ALIGN=CENTER><TR><TD>Quote, originally posted by crx12 »</TD></TR><TR><TD CLASS="quote">Wow carbon tooling, very nice. I think your being modest though, infusing tools isn't really for the beginner, lol. I spent a few months learning how to infuse parts before I got it so I know how tricky it can be. I assume you used epoxy to infuse the tool? Did you need to heat the plug to get good flow? Seems like most infusion epoxies still need some heat to flow well. </TD></TR></TABLE>
i'm assuming you are saying that in the above pics they effectively injecting the epoxy into the carbon fiber?
i'm assuming you are saying that in the above pics they effectively injecting the epoxy into the carbon fiber?