Honda: How to Paint Rims Using Plasti Dip
Plasti Dip is the easiest way to "paint" your rims. But instead of actual paint, the spray forms a flexible, rubberized coating to the wheels or body of your car. So if you want to get new rims, do it yourself with the help of this guide.
This article applies to the Honda Civic (1992-2000), and Accord (1990-2002).
One of newest ways to upgrade your Honda Civic's rims is to spray them with Plasti Dip. What makes it so special is the "paint" can be easily removed by peeling off the coating. So if you wanted to, you can change the color of your wheels every month. It's an easy and inexpensive DIY project that almost anyone can do, and in no time at all. However, if you want to do it the right way, follow the directions below and have your wheels looking new in no time.

Materials Needed
- Plasti Dip spray cans (one or two 11 oz.)
- Masking tape
Step 1 – Cover up the wheels
Before beginning, make sure you are in a well-ventilated area. You don't want to inhale the strong odor of Plasti Dip paint.
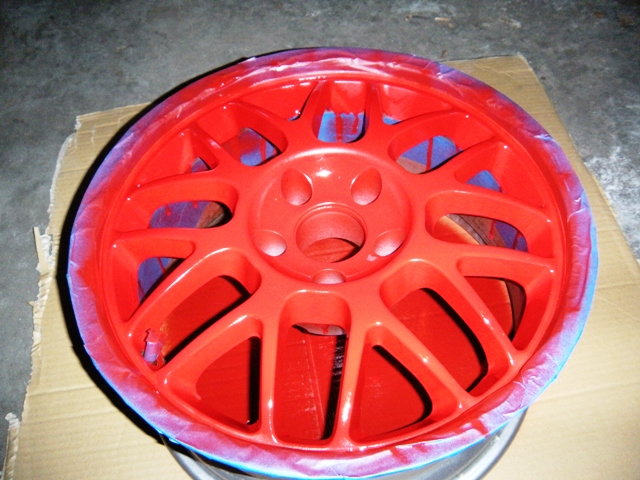
Place your rims on top of cardboard, so the paint doesn't get onto the ground. With the masking tape, completely cover the tires and the inside of your rims. Use as much tape as you need to ensure that no area (besides the face of the rims) is exposed.

Pro Tip
You can Plasti Dip your car without removing the wheels, but it may be more difficult to cover all of the important areas with the tape.
Step 2 – Spray a base coat
With the can of Plasti Dip (about eight to ten inches away from the rim), spray it in an even and steady side-to-side motion. Spray a very light base coat around the entire face of the rim, and allow 10 minutes or more for it to dry. Make sure to paint evenly or the finished product may look blotchy.
Step 3 – Spray the additional and final coats
Apply an additional three to four coats, allowing 10 minutes or more in between each coat to dry. The more layers you add, the more durable the paint will be. Make sure to spray the entire face of the rim with even strokes and layers. After you have applied a final coat, allow the Plasti Dip to dry for at least 30 minutes.
Step 4 – Remove the protective covering
Lightly touch the paint to make sure it has fully dried. Finally, remove the masking tape from the tires and the inside of your rims.

Pro Tip
If necessary, you can also use Plasti Dip to touch up some areas of the paint that have peeled off.
Featured Video: How to Plasti Dip Rims
Related Discussion
- DIY Plasi Dip Rims - Honda-Tech.com