Honda Civic: How to Rewire Power Doors
You've already converted the doors with the proper regulators and electrical accessories. Unfortunately, they are just a bunch of useless buttons until they receive power from the battery. This article will guide you on how to correctly splice and rewire the power door components of your Honda Civic.
This article applies to the Honda Civic (1992-2000).
Until recently, the power window conversion process was considered a pipe dream to many 5th and 6th generation Honda Civic owners. The task in itself is tedious, and requires the installation of two to four power doors onto your vehicle, depending on if it's a sedan or coupe. Not only that, but a ton of rewiring procedures must be done to make the power components work properly. Although it may be a difficult process, wiring the power windows just requires some time and patience. Follow the instructions below to rewire the power doors on your Honda Civic.

Materials Needed
- Complete wire harness from Civic EX or Si (1996-2000)
- Honda Civic (1992-2000) multi-purpose 4-pin relay
- Five 20 amp fuses
- Electrical tape
- Wire cutters
- Small razor blade
- Labels and a pen
This article assumes you have already installed power door lock actuators, window regulators, or power mirrors. The following steps demonstrate how to properly rewire the harnesses that supply power to those door units.
Step 1 – Collect the wire harnesses
- From a donor Honda Civic EX or Si (1996-2000) with power doors, locate the wire harnesses in the driver's and passenger's side foot wells. These wire harnesses run though the interior cabin floor, and connect to the under-dash fuse box.
- Locate the plugs that connect to the hinged end of the driver's and passenger's side doors. These plugs snake through the grommets and firewalls in the foot wells.
- From there, you should see that the power door wire harnesses are weaved together inside wire looms.
- Unplug the wire harnesses for the doors and fuse box.
- Remove the wire harnesses from the donor Civic.
Step 2 – Separate the passenger's side wire harness
- Lay out the wire harnesses in an open work space.
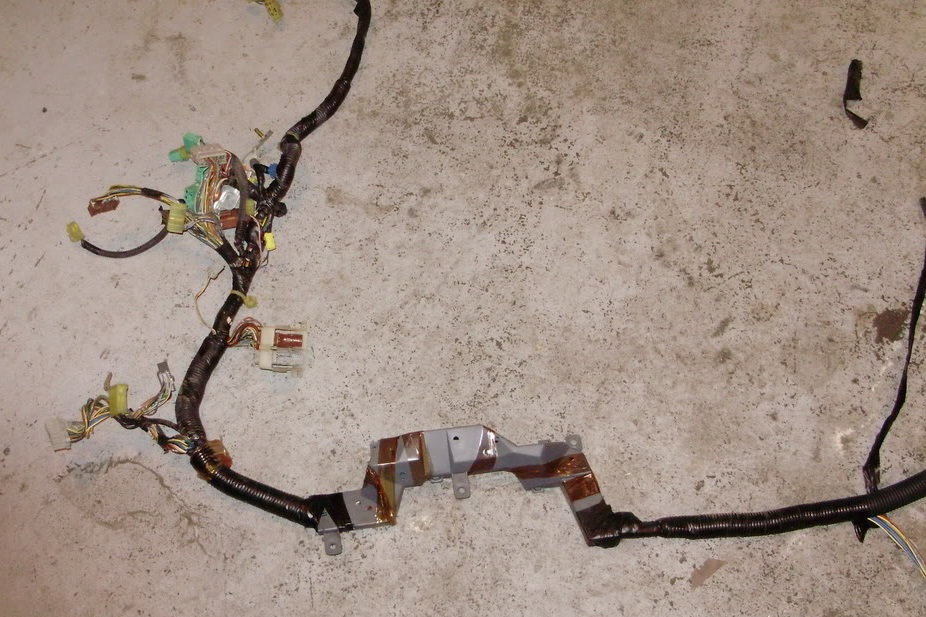
- Use a small razor blade to carefully slice into the wire loom, and peel off its electrical tape. Doing so will allow you to separate the passenger's side wire harness from the rest of the wires.
- Follow the wires originating from the passenger's side door to a set of three plugs.
- Set aside the light gray plug as it's the only one needed. This plug has eight wires attached, and will be connected to the driver's side wire harness.
- The remaining wires of the main harness will contain the driver's side door harness. Set them aside.

Figure 2. Separate the passenger's side door harness. 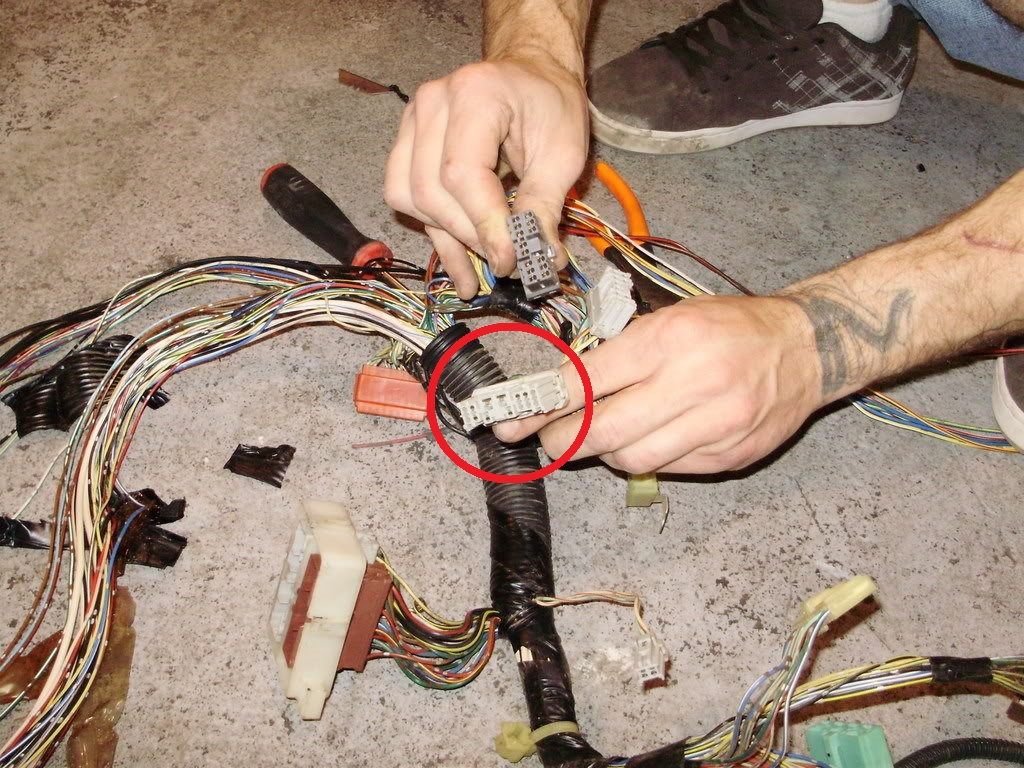
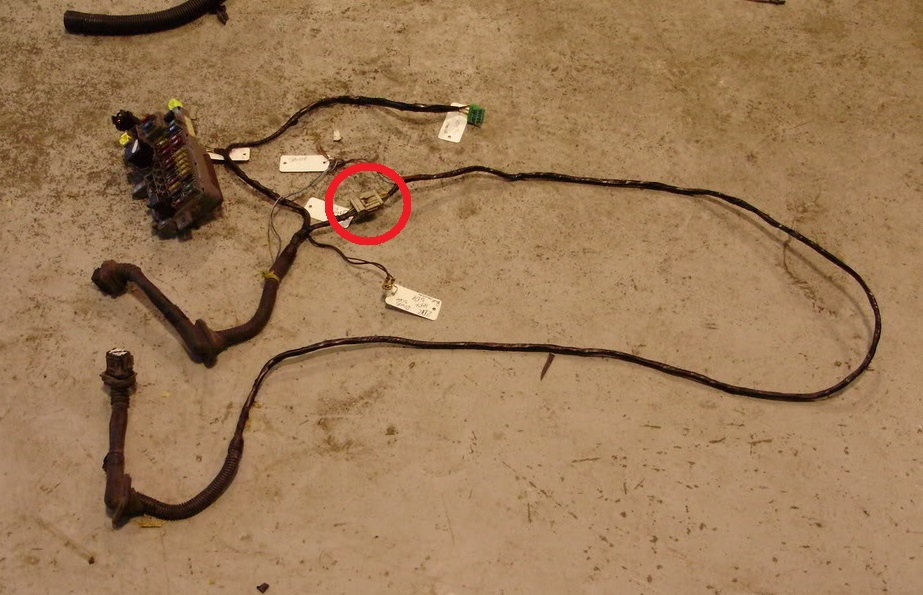
Figure 3. Locate the light gray plug (circled in red).
Step 3 – Remove the wire harness plugs
- With your wire cutters, completely cut off and discard the dark gray plug.
- With the remaining light gray plug, cut and strip the brown/black and red/green tracer wires at the base of the plug. These are the speaker wires.
- Using electrical tape, tape up the passenger's side wire harness along with the speaker wires.
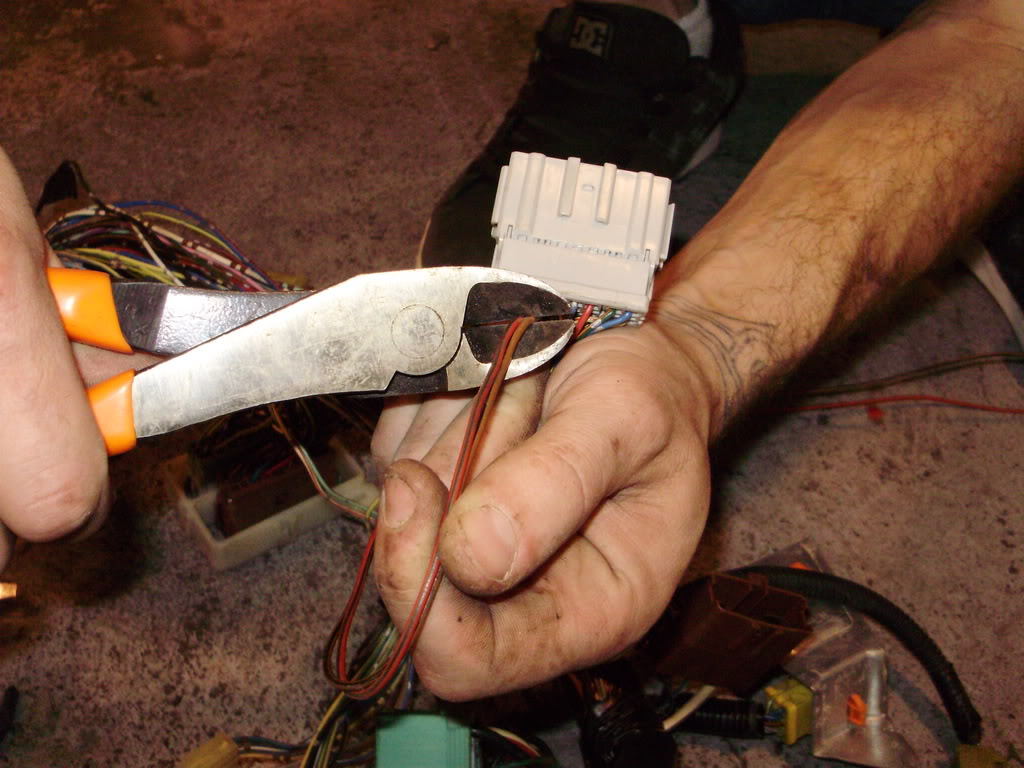
Figure 4. Cut and strip the speaker wires. 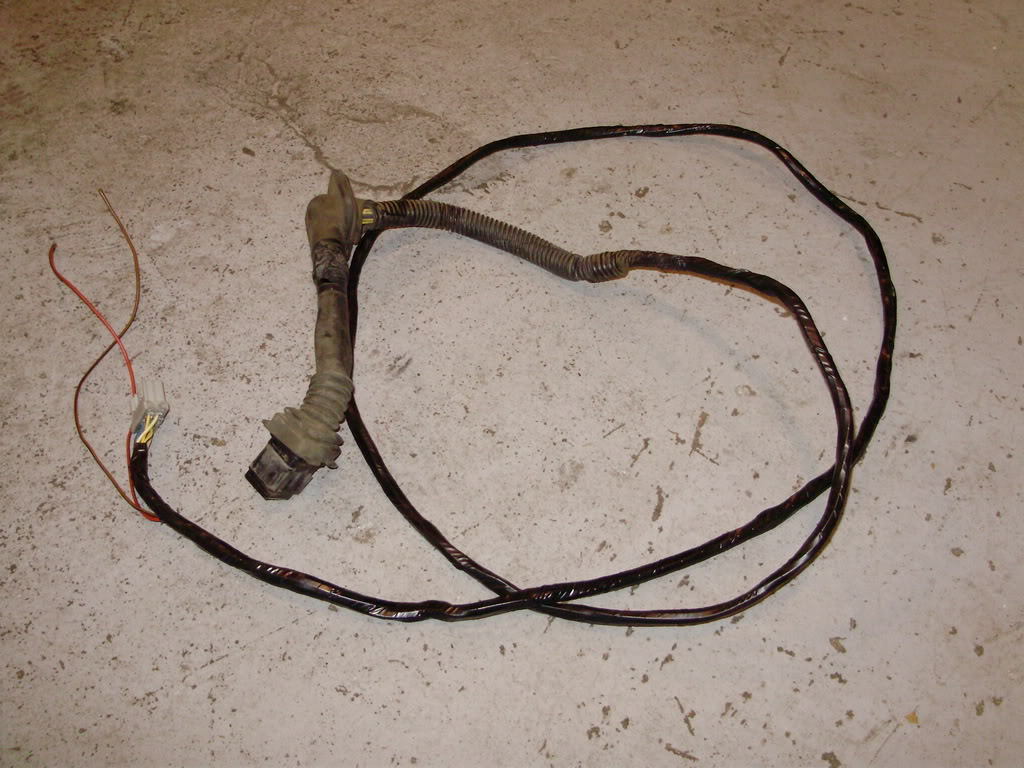
Figure 5. Tape up the passenger's side wire harness.
Step 4 – Separate the driver's side wire harness
Lay out the main harness collected from the donor Civic. Mark the following plugs:
- Fuse box plug (green).
- Driver's side female plug (light gray). From the set of plugs clipped together, keep the smaller one.
- Mirror switch plug (dark green).
- Speaker wires (blue/gray and black/gray).
- Ground wires (black).
With your wire cutters, strip cut and strip the speaker wires at the base of the plug. Separate and discard the remaining plugs.

Figure 6. Mark the green fuse box plug (circled in red). 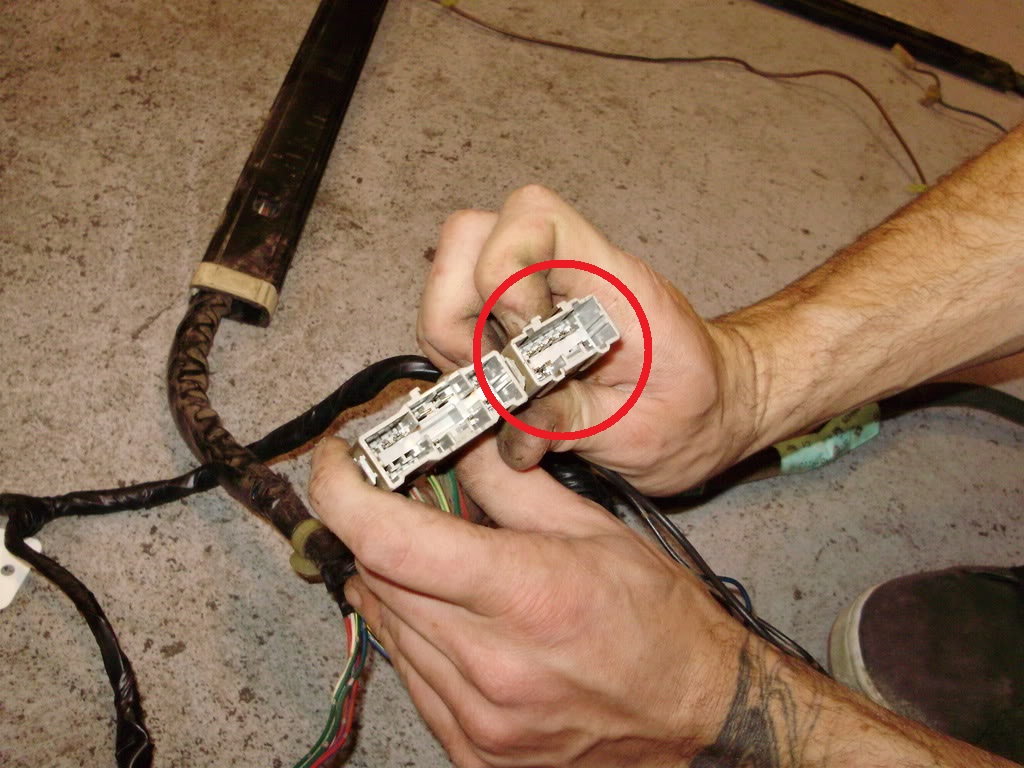
Figure 7. Mark the driver's side female plug (circled in red). 
Figure 8. Mark the mirror switch plug. 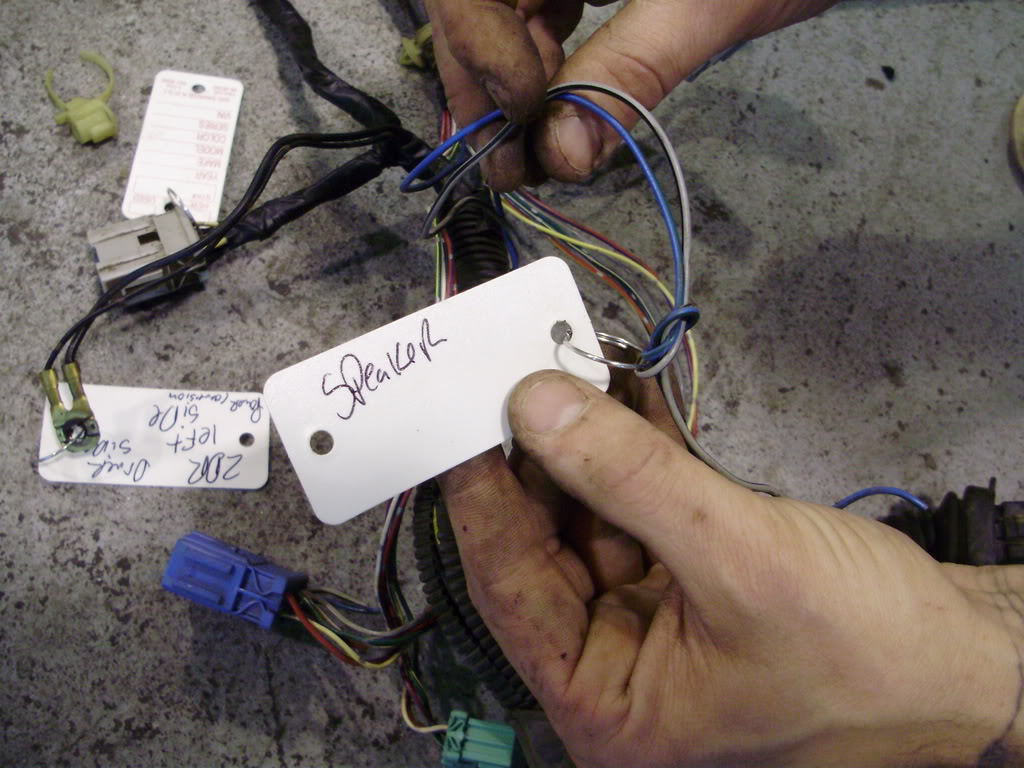
Figure 9. Mark the speaker wires. 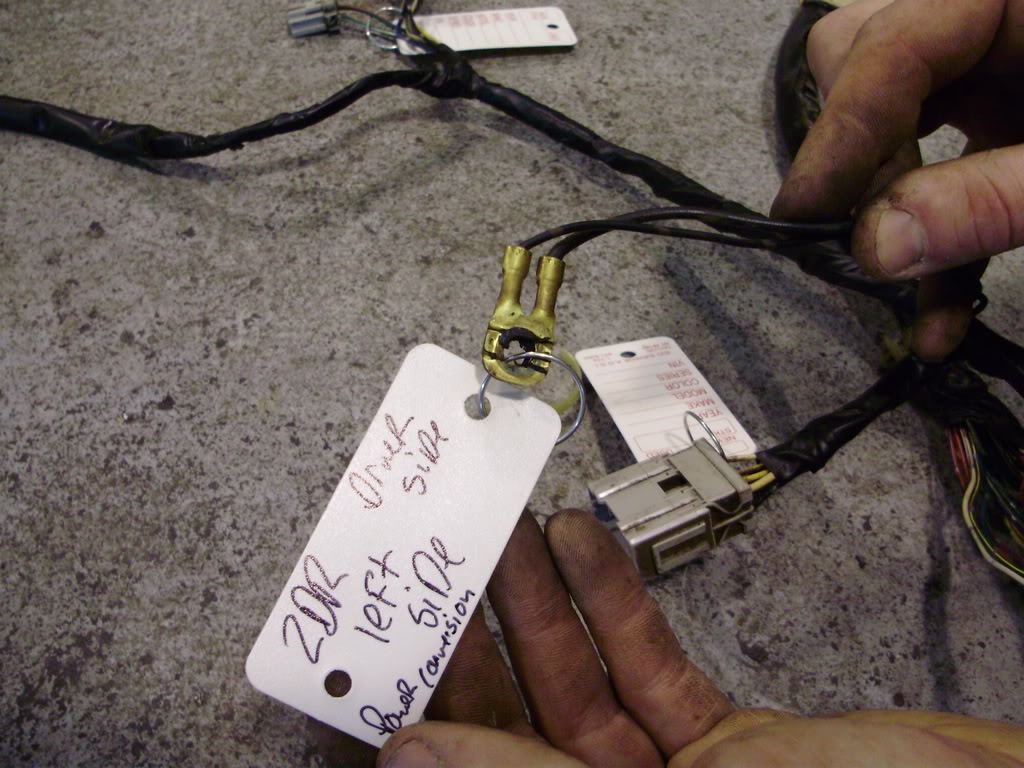
Figure 10. Mark the ground wires.
Step 5 – Connect the wire harnesses
- Connect the male light gray plug of the passenger's side wire harness to the female plug of the driver's side wire harness.
- Tie up the set of speaker wires coming from the driver's and passenger's wire harnesses.
- Set the fuse box plug, mirror switch plug, and ground wires aside.
Step 6 – Assemble the fuse box
For the diagrams in this step, the fuse box is removed from the car for demonstration purposes only. You will connect the appropriate plugs into the Civic's under-dash fuse box.
- Disconnect the negative (black) terminal of the battery.
- Connect the fuse box plug to the back of the fuse box (on the bottom left corner). Refer to Figure 13.
- Connect a multi-purpose 4-pin relay to the 4-pin socket located on the front of the fuse box.
- Insert five 20 amp fuses into slots four through eight on the front of the fuse box.
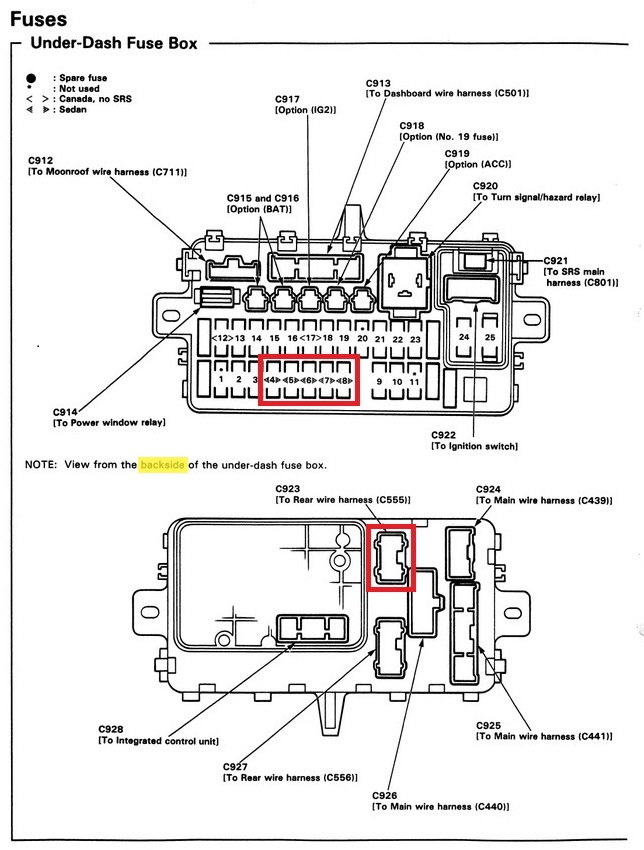
Figure 12. Diagram of under-dash fuse box. 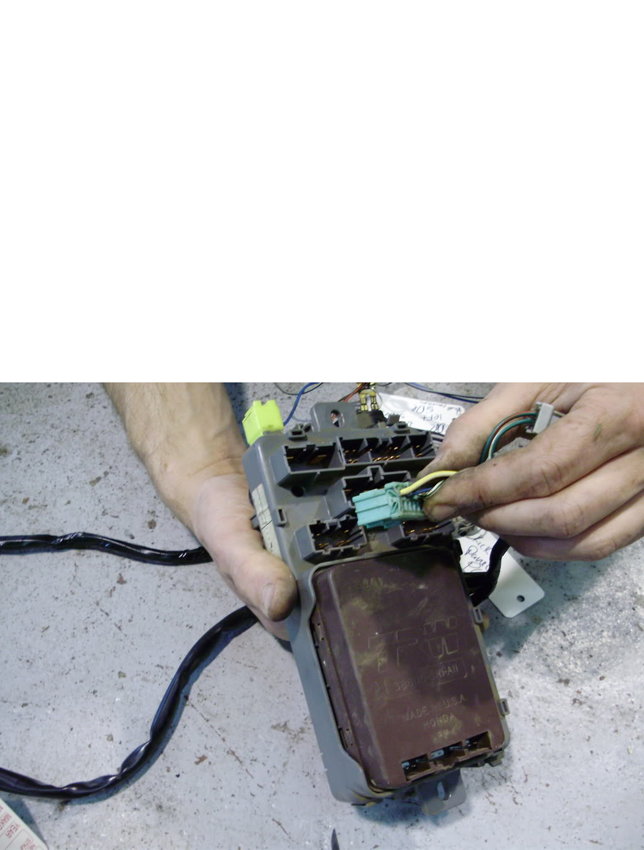
Figure 13. Insert plug onto the fuse box. 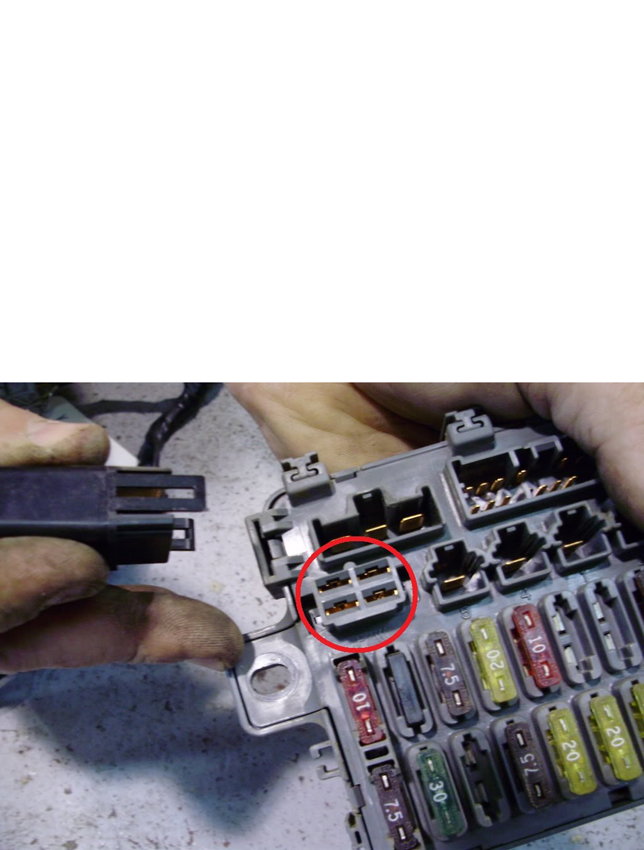
Figure 14. Insert a new 4-pin relay (circled in red). 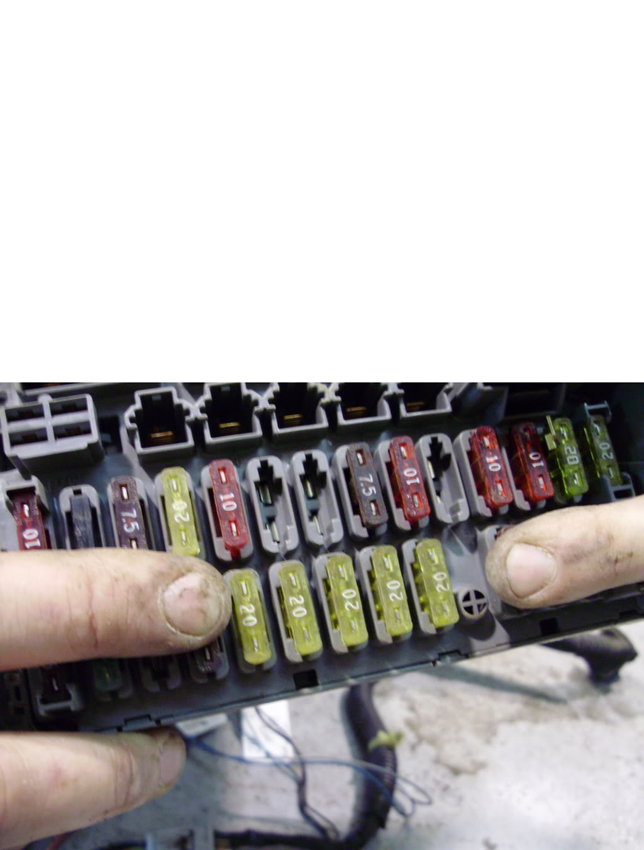
Figure 15. Insert five new 20 amp fuses.
Step 7 – Test the power doors
- Conceal the wires under the dash.
- Reconnect the negative (black) terminal of the battery.
- Turn on the car to test the power doors (door actuators, window regulators, or/and power windows).
Related Discussion
- 1992-1995 Civic Power Door Conversion the Right Way - Honda-Tech.com