Honda Accord: How to Replace Timing Belt, Timing Balancer, and Water Pump
As per Honda, your timing belt needs to be serviced every 50,000 to 80,000 miles. While you're in there, there are a few other important things to address like the timing balancer and the water pump. This article will guide you through the process of replacing the timing belt, timing balancer, and the water pump on your Accord.
This article applies to the Honda Accord (1990-2002).
Timing belts and water pumps are wear items. They need regular servicing, and are critical components to the longevity of your vehicle. One controls how the motor stays in sync under operation, while the other one controls how effectively the motor is cooled. They are equally important, and require special attention that requires advanced mechanical knowledge. But fear not weekend DIY-ers, this article will help you perform this crucial job on your own.

Materials Needed
- 1/4” drive ratchet, 3" extension, 6pt metric sockets and deep sockets (8mm-12mm)
- 3/8” drive ratchet, 3", 6" extensions, 6pt metric sockets and deep sockets (10mm-19mm)
- 1/2” drive ratchet, 18" breaker bar, 19mm 6pt socket, and 20" extension
- Metric combination wrenches (8mm-17mm) (optional)
- Crankshaft pulley holding tool
- Torque wrench (able to torque to 181 ft/lbs.)
- P1 Phillips head screwdriver
- P2 Phillips head screwdriver
- Small slotted screwdriver
- Large slotted screwdriver
- Regular pliers
- Needle nose pliers
- Floor jack
- Jack stands
- Block of wood
- 5’ steel pipe
- 18” steel pipe
- Funnel
Parts Needed
- Timing belt 14400-p7j-004
- Tensioner 14510-p30-003
- Belt adjuster spring 14516-pr4-a00
- Water pump 19200-p75-003
- Valve cover gasket set 0611-pr4-030
- Cam seal plug BLOX 3 ring from e-Bay ($9.95) or an OEM 12513-p72-003
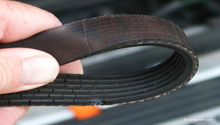
- Accessory belts (ac/alt/ps)
- 1 gallon antifreeze (50/50)
Step 1 – Prepare vehicle for service
Before tearing into this job, you want to make sure it's positioned and ready.
- Disconnect the negative (black) terminal on the battery.
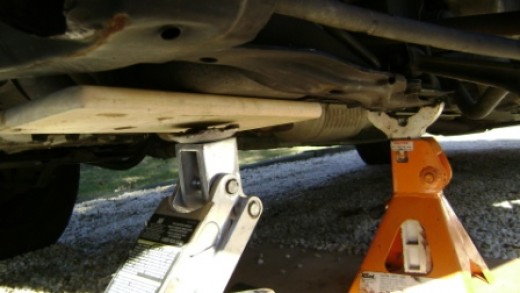
- Jack car up using hydraulic jack and jack stands.
- Remove the splash cover (seven bolts and push clip).
- Remove the front wheels.
- Secure the e-brake, and chock rear wheels.
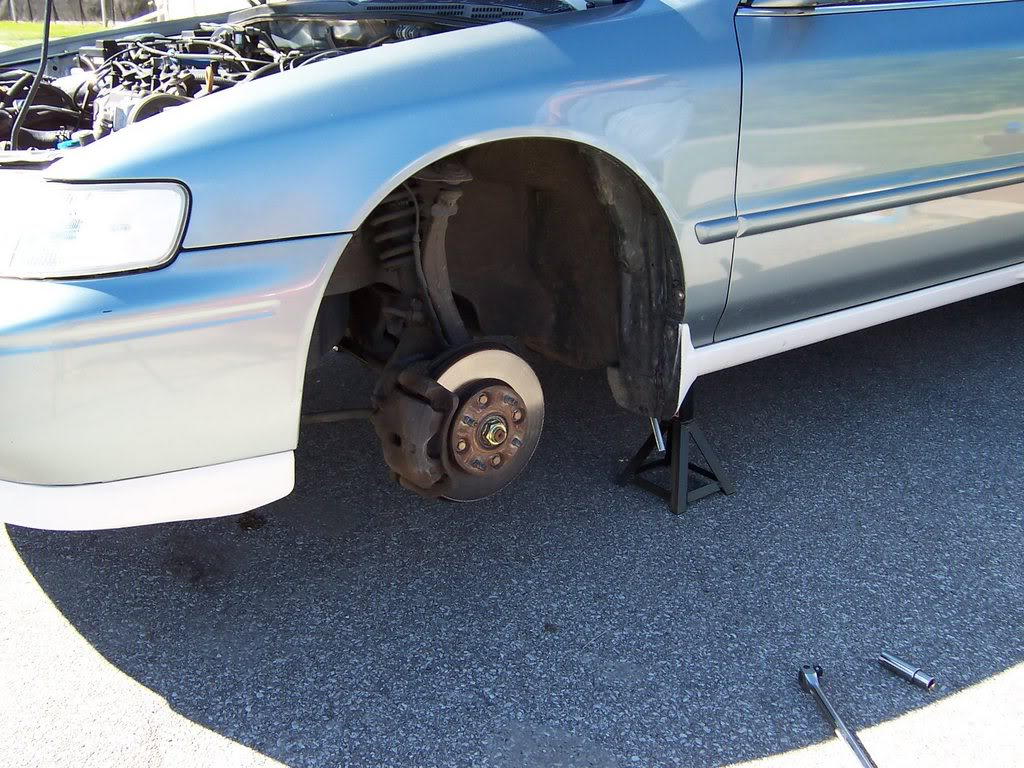
Figure 1. Vehicle secured on stands. 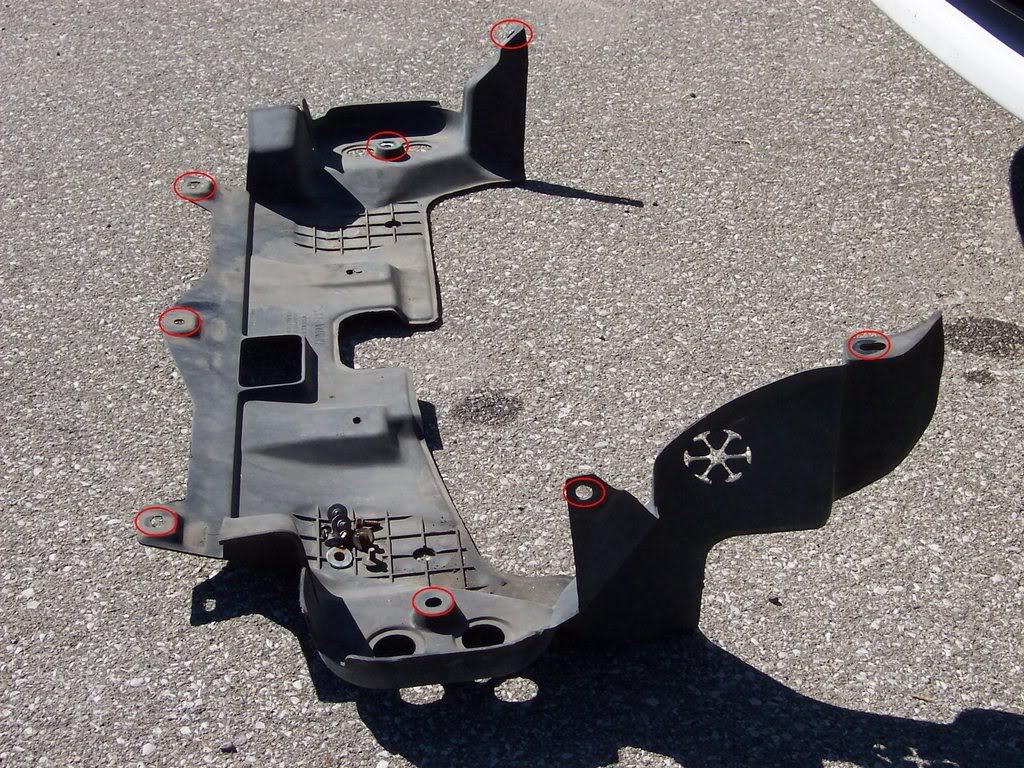
Figure 2. Undertray removed.
(Related Article: How to Jack Up Your Accord - Honda-Tech.com)
Step 2 – Remove power steering belt
In order to begin this job, start by removing one of the belts.
- Loosen the adjusting bolt.
- Remove the mounting nuts.
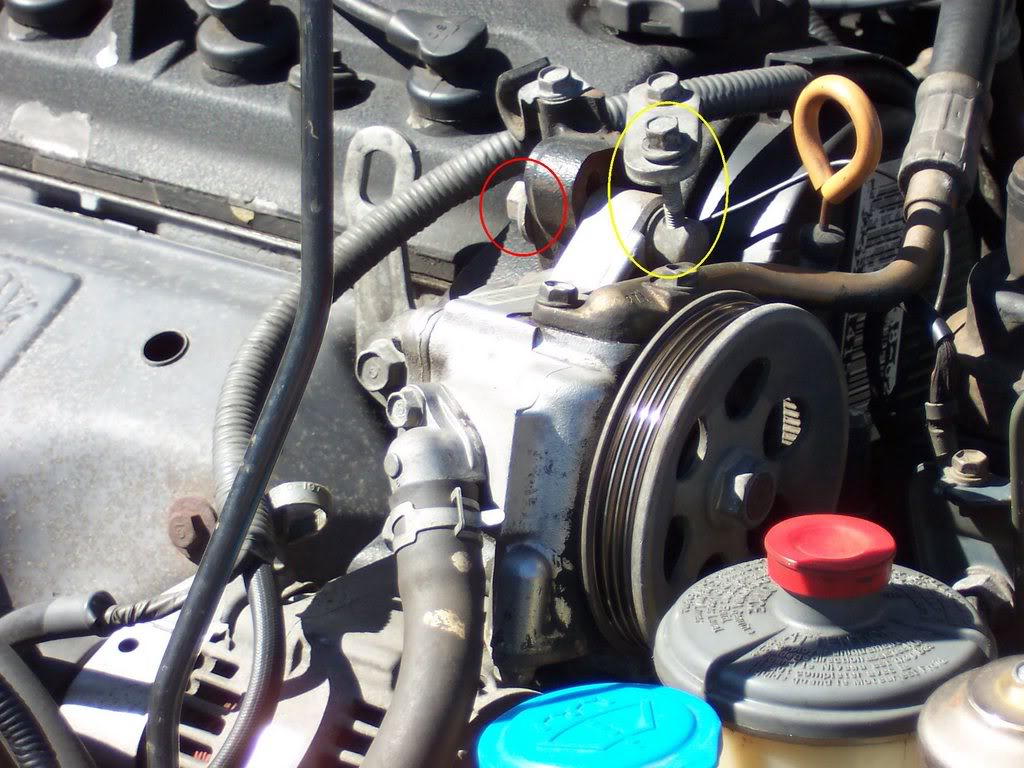
Pro Tip
The power steering pump can be removed from its bracket to gain more room. The hoses do not need to come off.
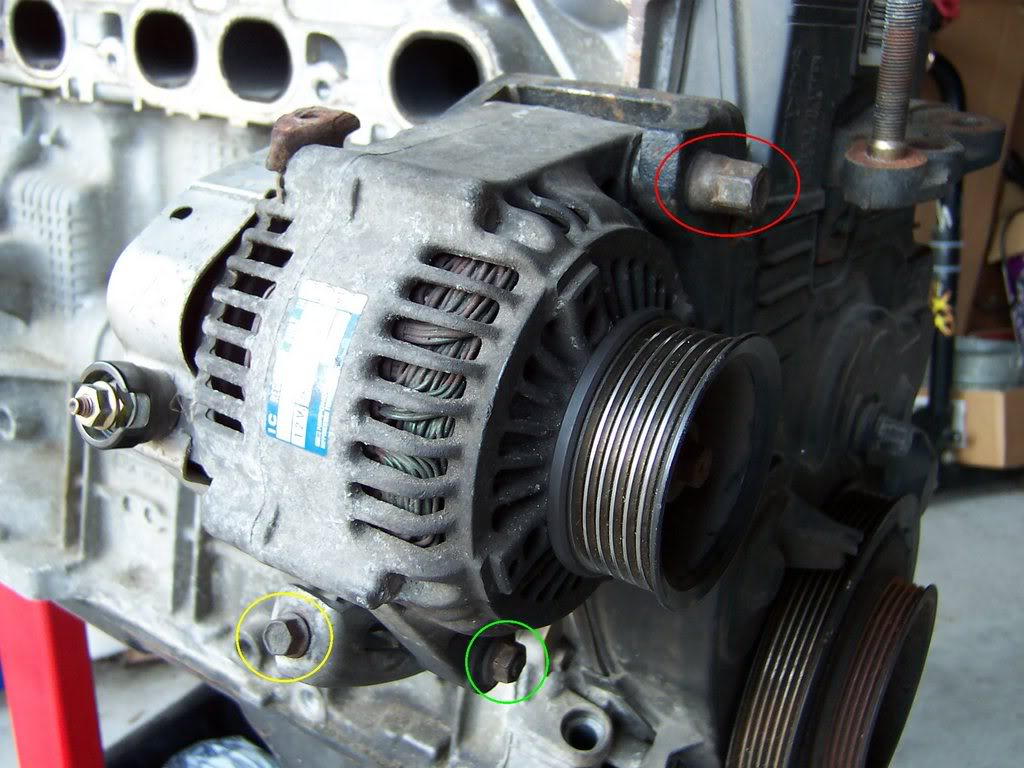
Step 3 – Remove the alternator
The alternator as well as its related belt will need to come off in order to gain more clearance to the timing belt and water pump.
- Loosen the adjusting bolt (yellow).
- Remove the lock nut (green).
- Remove the mounting bolt (red).
- Remove the alternator belt.
- Remove the alternator terminal and wires. Move them to the side.
Step 4 – Remove driver's side engine mount
To gain more clearance, this mount will need to be removed.
- Secure the oil pan with the block of wood, and jack.
- Remove the bolt, and remove the engine mount.
- Remove the oil dipstick and tube.
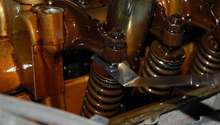
Step 5 – Remove valve cover
This is another necessary step in order to ensure the motor is timed correctly after the belt and pump are replaced.
- Remove the spark plug wires, and set aside.
- Remove the cruise control cable from the clips on the valve cover (green).
- Remove the PCV from the valve cover (yellow).
- Remove the hose from the valve cover to the intake tube (blue).
- Remove the five bolts from the valve cover, and remove (red).

Step 6 – Remove crank pulley and bolt
This is one of the last components of the drive train that needs to come in order to remove the last belt.
- Use a crankshaft pulley holding tool to remove the the crankshaft pulley bolt.

Pro Tip
Using a breaker bar and a large pipe can provide the leverage needed to break the bolt loose.
Step 7 – Remove upper and lower covers
To access the timing belt and dampener, these covers will need to come off.
- Remove the bolts (red).
- Remove the adjusting nut (yellow).

Figure 8. Upper timing cover. 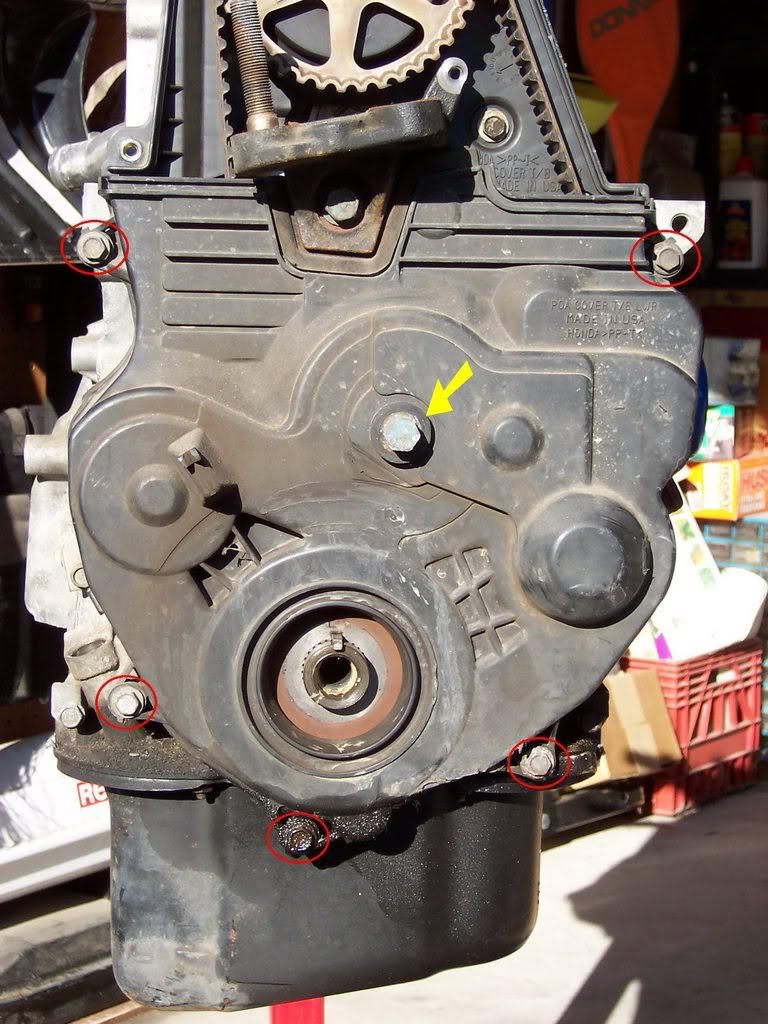
Figure 9. Lower timing cover.
Pro Tip
Be sure to keep the seal around the adjusting nut (yellow).
Step 8 – Remove timing balancer tensioner and belt
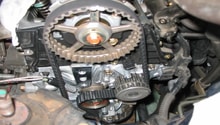
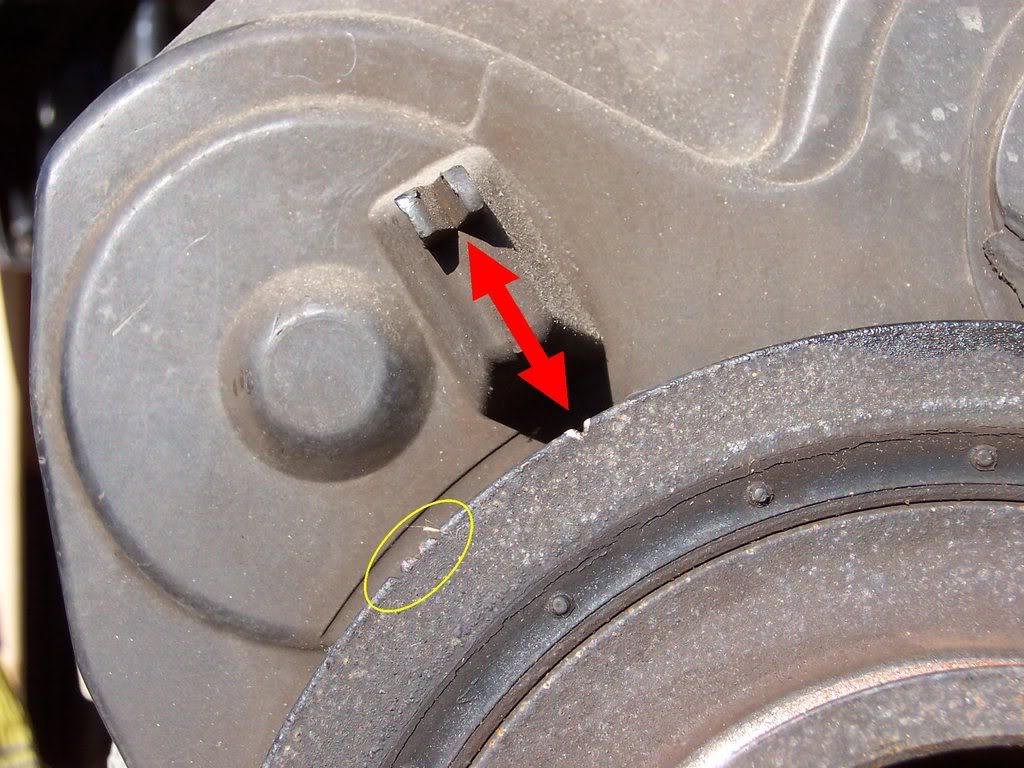
Now that the timing belt and balancer are exposed, you'll want to ensure the TDC. Make your marks (if necessary), then remove the belt and balancer.
- Ensure the TDC. The green arrow points to the plastic cover, which lines up with the "up mark" in yellow. TDC marks are in red (Figure 10).
- Loosen the adjusting nut in red (Figure 11).
- Push belt tensioner down. The yellow in Figure 11.
- Tighten the adjusting nut, and remove the timing belt.
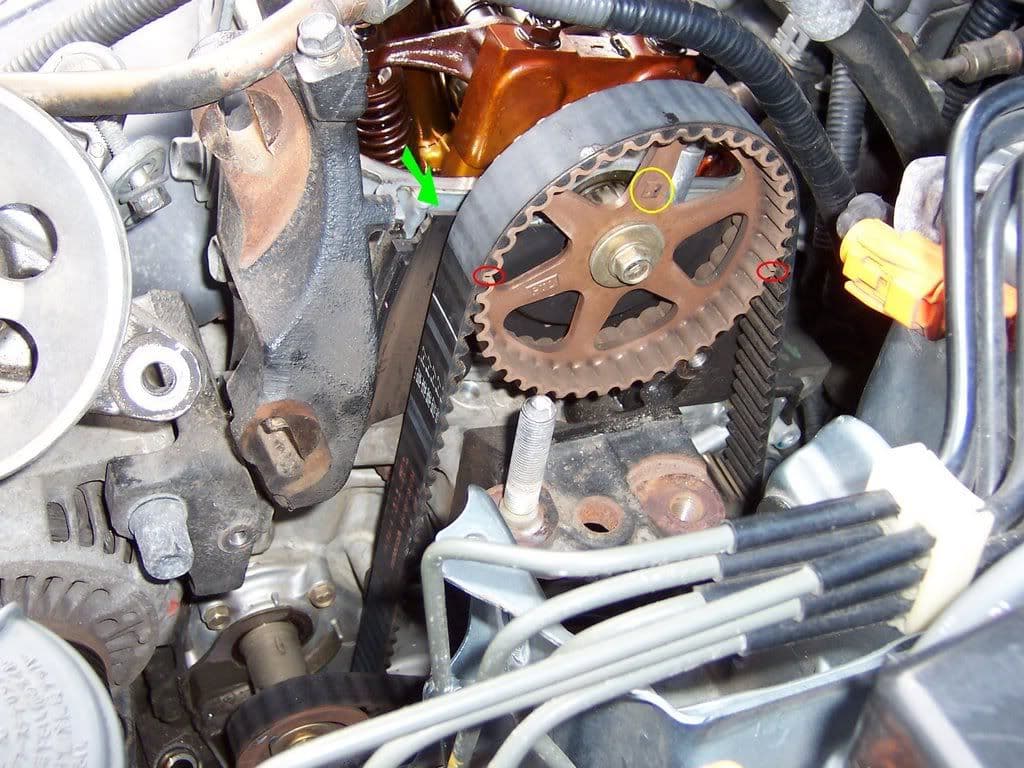
Figure 10. Timing belt TDC marks. 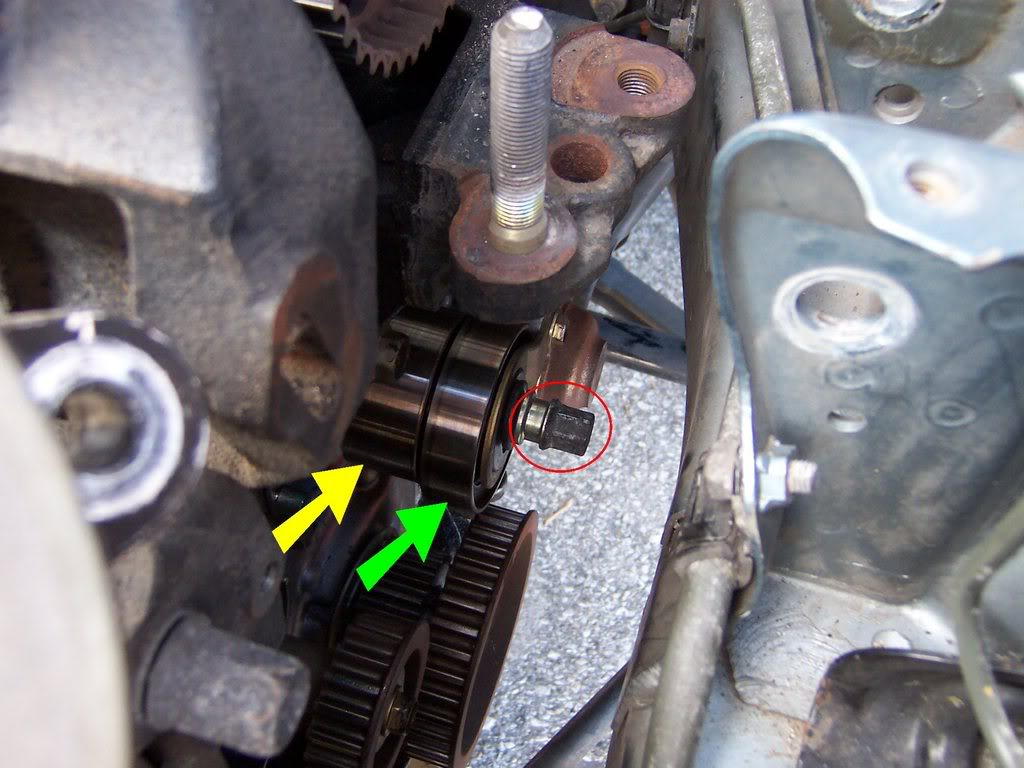
Figure 11. Timing tensioner.
Pro Tip
Before moving on to the next step, it's wise to drain the coolant. Place a pan under the car, and turn the petcock on the bottom of the radiator to release.
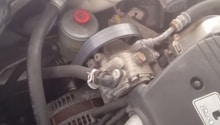
Step 9 – Remove water pump
Now that the coolant has been drained and the timing belt as well as the balancer have been removed, the water pump can come out.
- Remove the bolts in red (Figure 12).
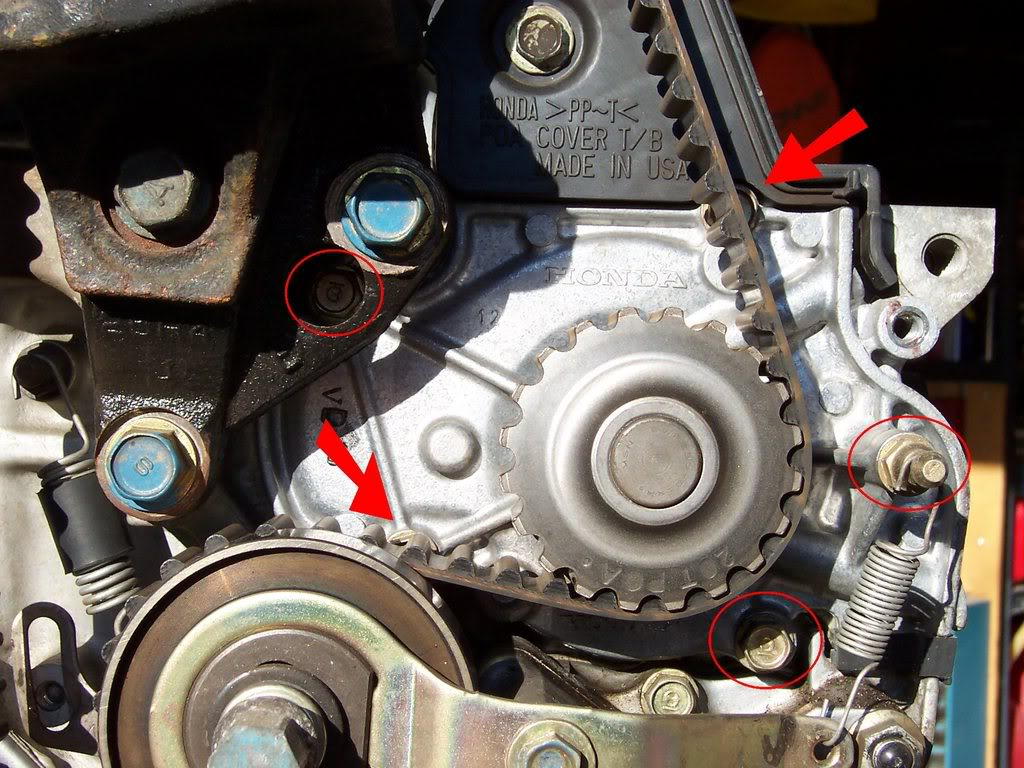
Figure 12. Water pump cover. 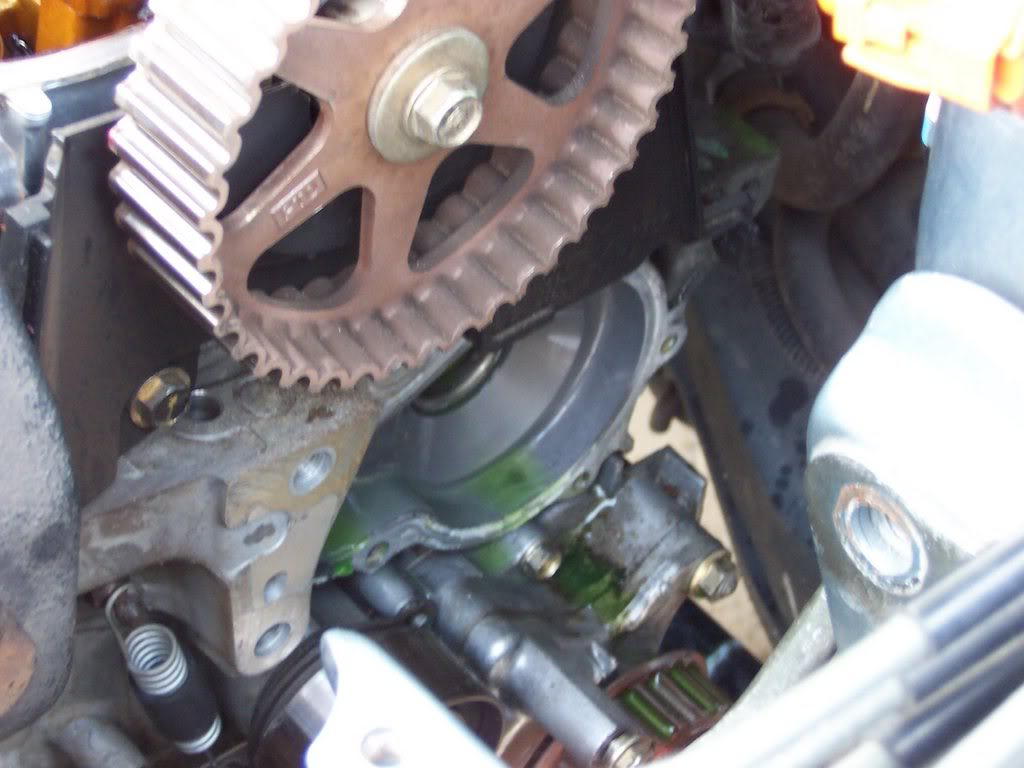
Figure 13. Water pump removed.
Pro Tip
Be mindful of the spring hooked to one of the bolts as it is connected to timing balancer belt tensioner.
Step 10 – Installation is reverse of removal
Now that all the wear components have been fully removed, the new components can be installed. Careful consideration should be taken when installing the components because you will need to ensure timing is set correctly (as previously marked).
- Install the new water pump with the gasket.
- Ensure TDC is at Position 1 at the crank.
- Install the timing belt drive pulley.
- Install the tensioner.
- Install the water pump pulley.
- Install the camshaft pulley.
- Loosen and tighten the adjusting nut to tighten the tensioner belt.
- Install the timing balancer belt pulley and lower cover. Then, tighten the bolts.
- Install the crank pulley and bolt.
- Rotate the crank pulley 5-6 revolutions counterclockwise, and ensure TDC marks are still in line.
- Install the upper cover and tighten bolts.
- Install valve cover and tighten bolts.
- Reconnect PCV and hose to intake tube.
- Re-install spark plug wires.
- Torque everything to spec.
- Refill the coolant.
- With cap off, run the car until it reaches operating temperatures.
- Re-install the radiator cap, and run the car again to observe any leaks.
Related Discussions
- Replace Timing Belt and Water Pump - Honda-Tech.com
- Oil Pump With Timing Belt - Honda-Tech.com
- When to Change Timing Belt - Honda-Tech.com