Honda Accord: How to Install Fog Light Assembly
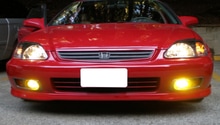
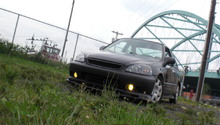
Fog lights are a great way to improve your visibility at night, while adding a little flair to the front end of your Honda Accord. Read on for proper fog light installation instructions.
This article applies to the Honda Accord 6th Generation (1998-2002).
Fog lights are an excellent upgrade for any car. Not only do they enhance road visibility, but they look just plain cool. Unfortunately, finding a stock 6th generation Honda Accord with OEM fog lights is nearly impossible. But still, not all hope is lost. You can manage to find these fog lights online or at a junkyard to retrofit them into your stock bumper. All that's required are a few cuts here and there, some extra automotive tools, as well as a couple hours of your time. The cost for OEM fog lights is relatively inexpensive, and you may even be able to install aftermarket fog lights at nearly the same price. Regardless of which you opt for, here are the proper directions to install fog lights on your 6th generation Honda Accord.

Materials Needed
- Honda Accord OEM fog lights (with template, wire harnesses, relays, and brackets)
- Small hacksaw
- 10mm socket and ratchet
- Flat head and Phillips screwdrivers
- Rotary tool kit
- Drill and 7mm drill bit
- Cable tie mounts
Pro Tip
This how-to installation guide is for OEM specific fog lights. Some aftermarket fog light installations may differ.
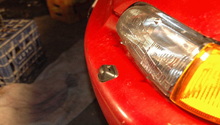
Step 1 – Cut housings for the fog light assemblies
Stock bumpers do not have the pre-drilled holes for mounting the fog lights. Each side of the bumper grille must be properly cut out.
- Locate a set of four dimples on each end of the bumper grille.
- Drill holes into each hole with a 7mm drill bit.
- Place a fog light template in the bumper, and measure the area required to tightly house the fog light.
- Use a hacksaw to carefully cut the fog light outlines.
- Use a rotary tool to smooth the edges of the bumper's fog light housings.

Figure 1. Outline proper fog light fitment on the bumper.
Step 2 – Route wire harness B
Three wire harnesses are required to power and control the fog lights. Refer to Figure 2 for the proper harness locations.
- Disconnect the negative terminal (black) of the battery.
- Remove the coolant reservoir from its bracket.
- Remove the air intake box.
- Remove the left headlight housing.
- Plug the 4-pin connector of wire harness "B" into relay "A."
- Mount relay "A," the 1-pin connector, and fuse case to the relay bracket.
- Connect the fusible link of harness B to the positive battery cable.
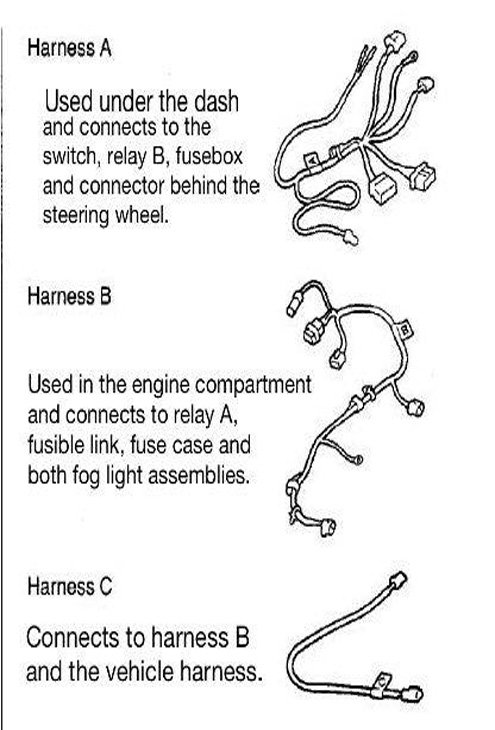
Figure 2. Proper connections of wire harness A, B, and C. 
Figure 3. Remove the intake box. 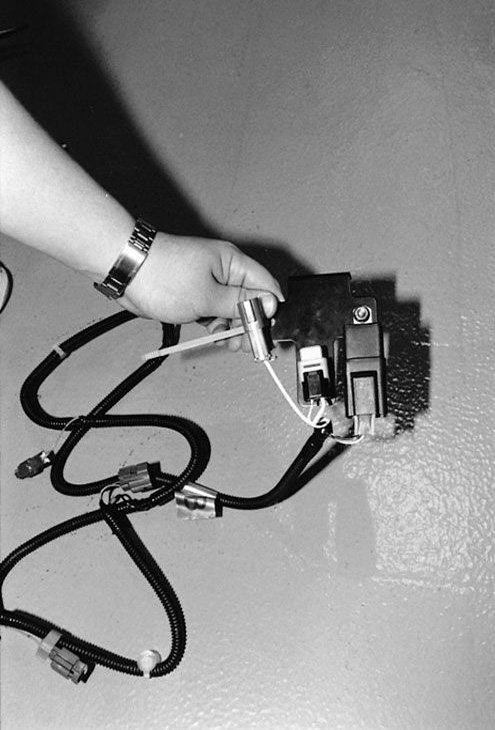
Figure 4. Attach relay "A," fusible link, and fuse case to the relay bracket. 
Figure 5. Attach the fusible link to the positive battery lead.
- Attach the relay bracket to the battery holder stud.
- Connect the 1-pin connector of harness "B" to the fusible link.
- Route harness "B" through the hole located on the right bulkhead of the inside front bumper.
- Route the end of harness "B" through the bumper grille, and connect it to both both fog light assemblies.
- Screw the fog light brackets into the four drilled holes.
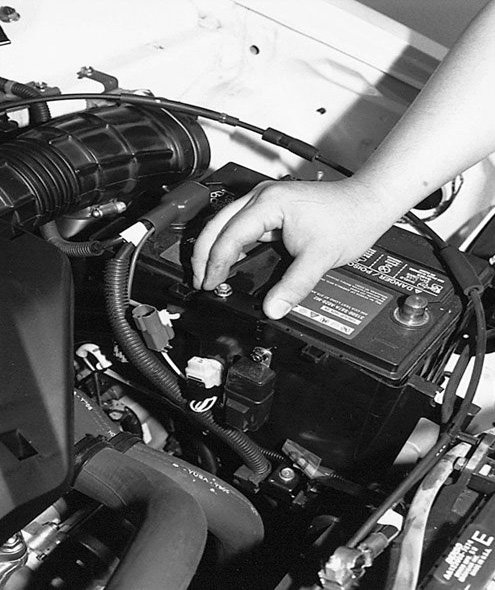
Figure 6. Attach the relay bracket to the battery holder stud. 
Figure 7. Route harness "A" to each end of the bumper grille. 
Figure 8. Attach fog light connector to the 2-pin connector.
Step 3 – Route wire harness C
- Free the vehicle's 1-pin connector from under the air cleaner intake pipe.
- Plug one end of harness "C" into the 1-pin connector.
- Route the other end of harness "C" throughout the bumper.
- Connect harness "C" to Harness "B."
- Appropriately secure and conceal both harnesses using cable tie mounts.

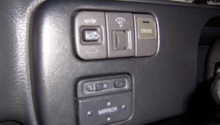
Step 4 – Remove the dashboard panels
- With a flat head screwdriver, remove the center console cover by gently prying off its four retaining clips.
- Remove two Phillips screws from the ashtray, and free it from the center console bracket.
- Disconnect the cigarette lighter plug.
- Remove the left fuse box cover and the driver's side lower dash panel.
- Remove the screws securing the upper and lower plastic steering wheel covers together.
- Remove the steering wheel covers.
- Remove driver's side kick panel.
- Unscrew the left air duct from the dashboard.

Figure 10. Remove the center console cover. 
Figure 11. Remove the lower dash panel.
Step 5 – Route wire harness A
- Connect the two single wires from wire harness "A" to the 14-pin connector behind the steering wheel.
- Replace the 18-pin connector located underneath the steering wheel with the 18-pin connector on harness "A."
- Install relay "B" under the dash, and connect it to harness "A."
- Route the grounds from harness "A" behind the kick panel.
- Route the 8-pin connector of harness "A" through the vacant accessory button slot on the left air duct panel.
- Plug in the fog light switch into harness "A," and place it in the switch panel.
- Secure the wire harnesses to the chassis.
- Re-install all removed interior and engine components.
- Reconnect the battery, and test the fog lights.

Figure 12. Plug harness "A" wires into the 14-pin connector. 
Figure 13. Replace vehicle's 18-pin connector with the harness "A's" 18-pin connector. 
Figure 14. Connect harness "A" to the 4-pin fog light switch.
How to Install Fog Light Assembly
Related Discussion, and Sites
- 98-02 OEM Fog Light Kit Install Help - Honda-Tech.com
- Honda Accord Fog Light Installation - HandA-Accessories.com
-
New Foglights From Honda - Superstreet.com