
The Same Old H2B Civic H22 swap
 08-24-2007, 11:55 AM
#1
Honda-Tech Member
Thread Starter
Join Date: May 2006
Location: NB, Canada
Posts: 2,788
Likes: 0
Received 0 Likes
on
0 Posts
I've never actually out-right said it in the 7+ pages this is now, but if you have any questions about something that hasn't been mentioned in this thread, feel free to PM me, i should be able to get back to you within a couple days.
Ok, the thread never started out as an H2B how-to, but I'll see what i can do to make it a bit easier to navigate
Things to consider before/during the swap
1. Crank pulley side of the engine
There are a few H2B kits available, but IMHO, the QSD kit is the kit that makes the most sense for the EF/DA H2B guys. Stock B-swap mounts, stock B flywheel, and they send you a new engine mount that bolts onto the block that connects to an unmodified B-swap mount.
While you have the engine out, you might as well change the timing belt, water pump, and do a manual tensioner conversion - http://www.collectiveracing.ne...c=9.0
You can also block off your balance shafts if you want -
http://www.kaizenspeed.com/det...50&NM=
The stock timing belt cover will clear the frame rail (with a small dent)
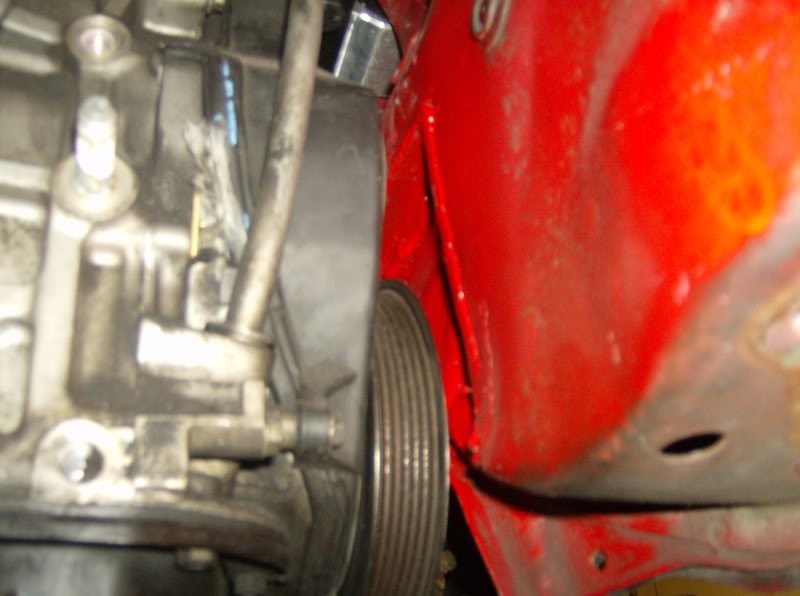
BUT....the crank pulley. *sigh*. The crank pulley is a huge pain in the dick. As far as I've seen, the only REAL way of making clearance for the thing is to run a single belt pulley and cut a pocket into your frame rail. It sucks, but you need the room.
2. Front of the engine
Alternator. This I'm still working on. You can do 1 of I *think* 3 things. 1 is to run one of ESP's alt brackets. http://www.explicitspeedperfor....html
2 is to just make your own like I did. Seriously, It wasn't hard.
3rd, is what I'm looking for input on right now. The stock bracket seems to fit too high and be in the way of the actual headlight if you were to put the alternator in there. I'm waiting for any proof that this is a possibility.
Header! 3 main things can be done.
1 is to run the stock downpipe and just heat and bend it (thats what I did)
2 is to buy camp 1320's H22 header, but I've heard horror stories about fitment
3 is to just turbo the car and make your own downpipe.
These seem to be only the most prominent of the possibilities for the exhaust.
3. Top of engine
Get a fuel rail off of an accord, so that it's on the right side for your fuel line (if you're running stock lines)
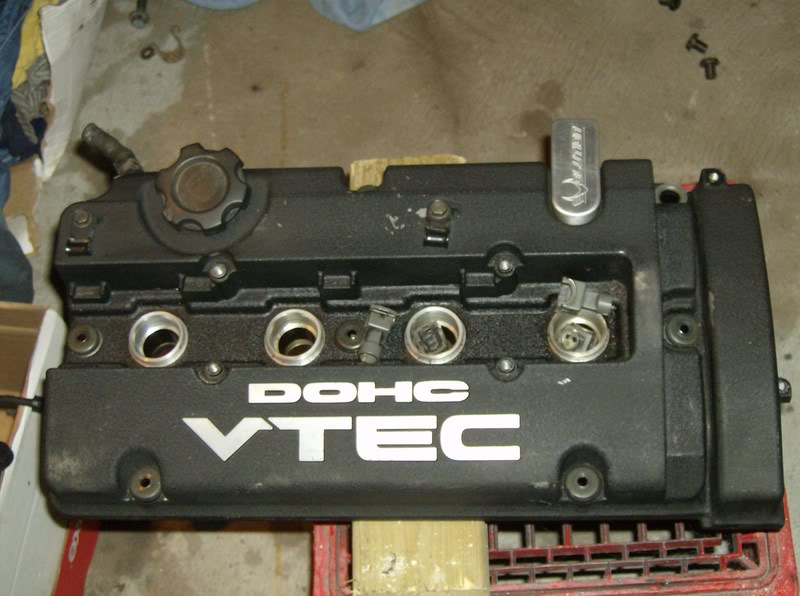
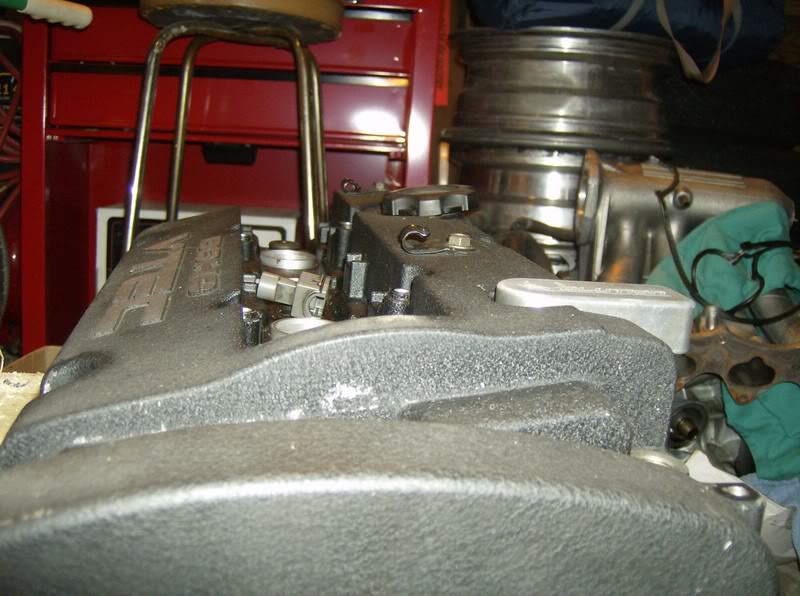
If you want hood clearance, remove your IAB plate, it saves like 1 1/2" of space.
There are different approaches to hood clearance. Mine is probably the slackest of them all (just cut a hole and fiberglass over it). I like AK_CRX's method WAY better.
https://honda-tech.com/zero...age=1
You can also cut up your valvecover and reweld it, but that's not for everyone either
4. Front of car
It's completely possible to use a stock crossmember. All you have to do is remove the tabs where the front mount was, and depending on your alt. bracket, cut a small pocket for the bottom of the bracket. Thats it.
My rad setup is probably over-complicated and very ugly, but this is by no means a show car. I am using a stock rad, with a stock fan. The bottom hose almost fits already, but the top rad house is a bastard. If you look deeper, you'll see that i ended up using about 5 pieces of different hose with hose clamps to "make" my own rad hose. Yeah, it looks like ****, it looks haggard, but guess what, I can't exactly go buy H2B rad hose now can I?
As far as the battery, you might as well do a relocation to the trunk, it's a small job compared to the engine you're shoving in.
__________________________________________________ _____________________________________
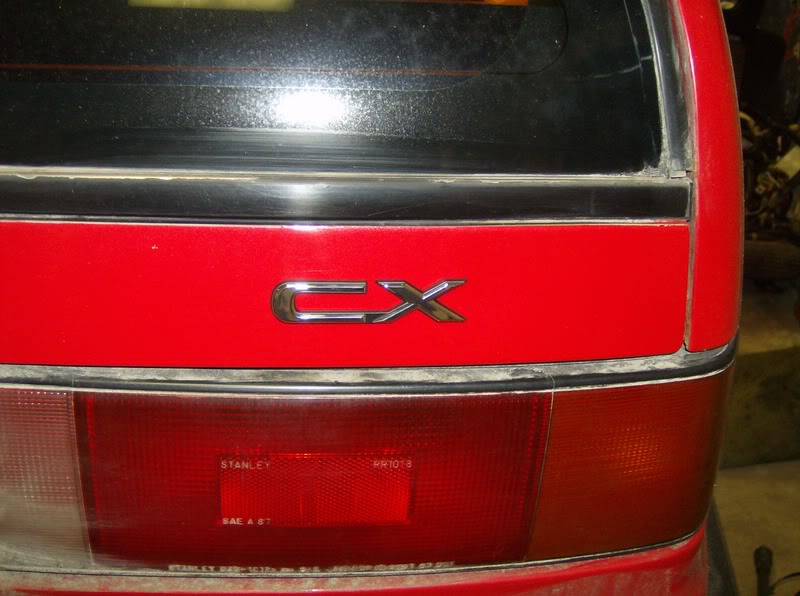
The car was bought by myself and my father several years ago before i had my license, as a father/son rebuilt project. It was a 200K, kinda rusty, 1991 aujamatic CX with.......you guess it, a dualpoint! The engine and trans was rebuilt buy ourselves, and the car had the bodywork fixed and was painted. Some tint, and a goofy set of wheels, and you have a teenagers best friend.
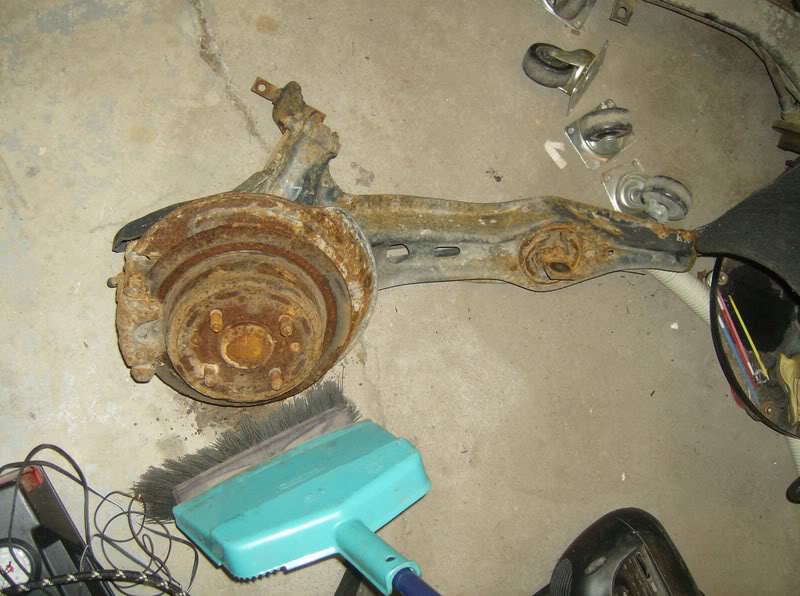
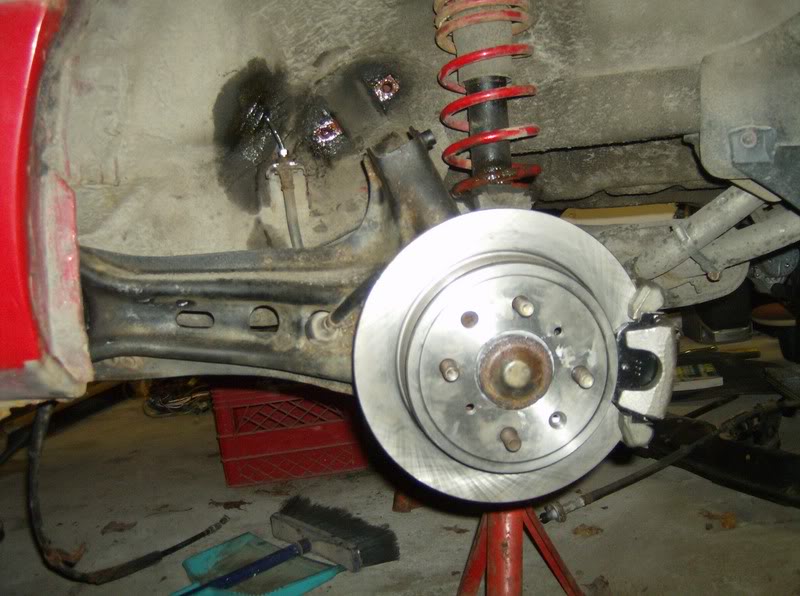
I was getting itchy for a B16 swap, so I went ahead and ordered a longblock, and bought an LS transmission (Yeah, i actually planned on using them together, i didn't know any better at the time). Had the head rebuilt, some dual valve springs, etc. I got my hands on a teg parts car, so along with the shift linkage, pedal assembly, and gauge cluster, i hauled out the engine. Booya, LS/VTEC time. Ordered a buttload of parts, and before I could finish it, had to sell pretty much everything for school In the meantime, I did a DA rear disc swap with matching 4040. Gotta love the fact that teg rear trailing arms are a direct bolt in.
Once I parked the car, i started into my MPFI wiring. I used this write-up.
http://www.50mod.com/fourthgenhatch/mpfi.html
I dropped the D, put the car on stands, and took out the rear brakes.

Once I started to have a cash flow again, I was trying to get my hands on a GSR bottom end from a friend, as I had plans to do an N/A Poorman's type R. When that didn't pan out, I was already sitting on a couple grand, so It was time to buy shizat. I needed something to bolt to my rebuilt YS1. This is the tech part.
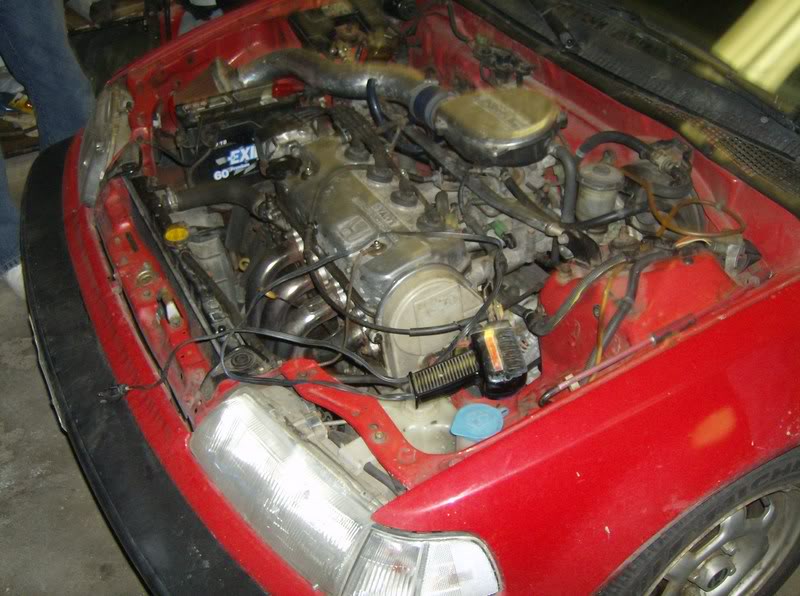
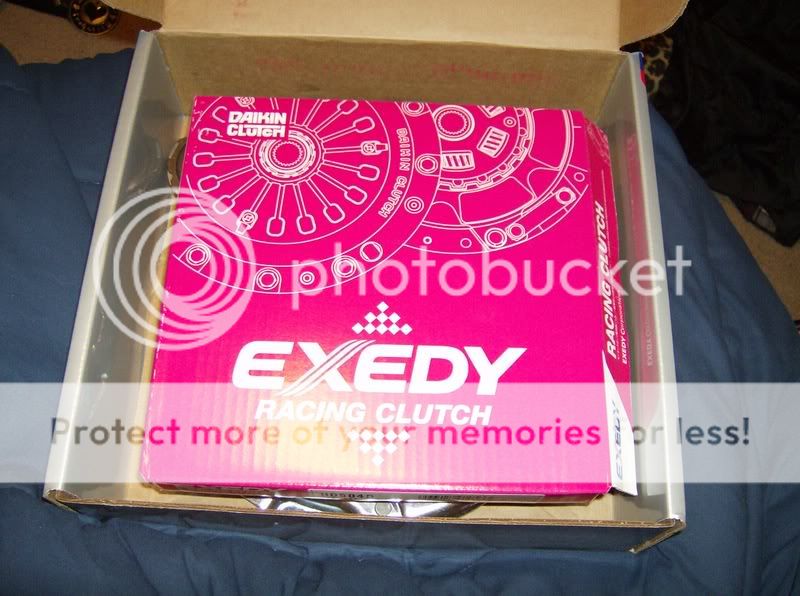
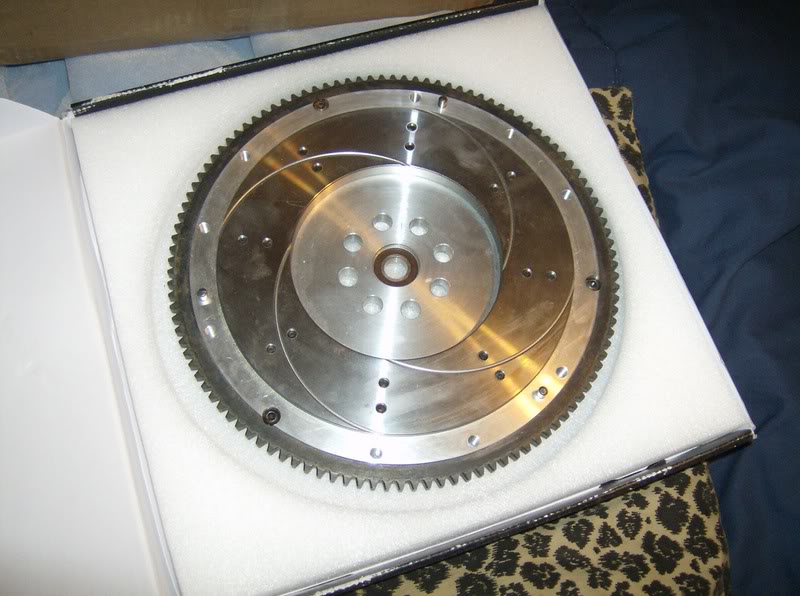
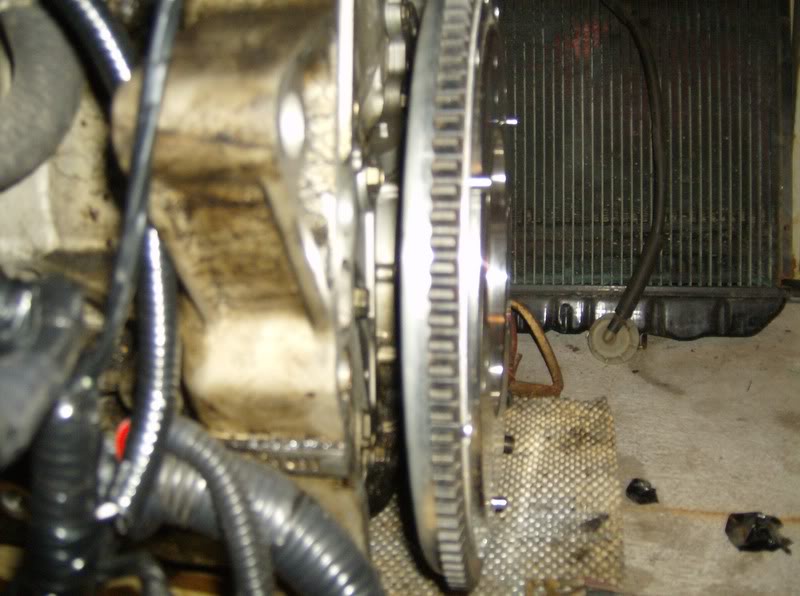
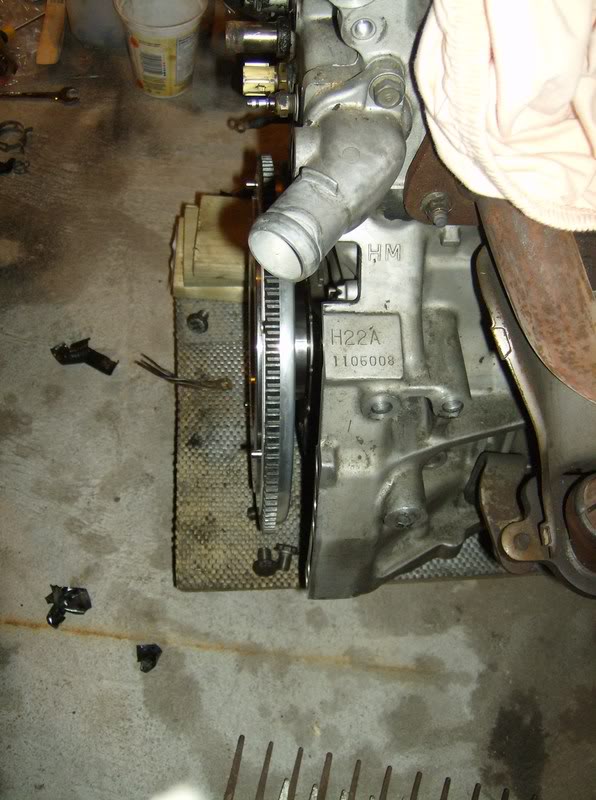
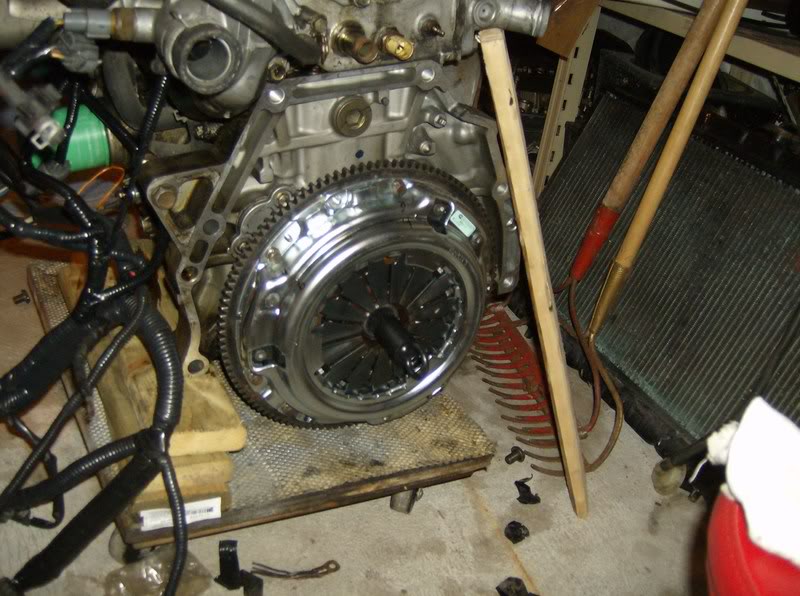
An H22 is not THAT big of an engine. No, it doesn't way 75 pounds more than a B, so shut your face hole. I went with QSD's kit. Fast shipping, great to deal with honestly. Exedy racing clutch with an Evolution Industries flywheel. Rebuilt 93 YS1, and that pretty much ties it up
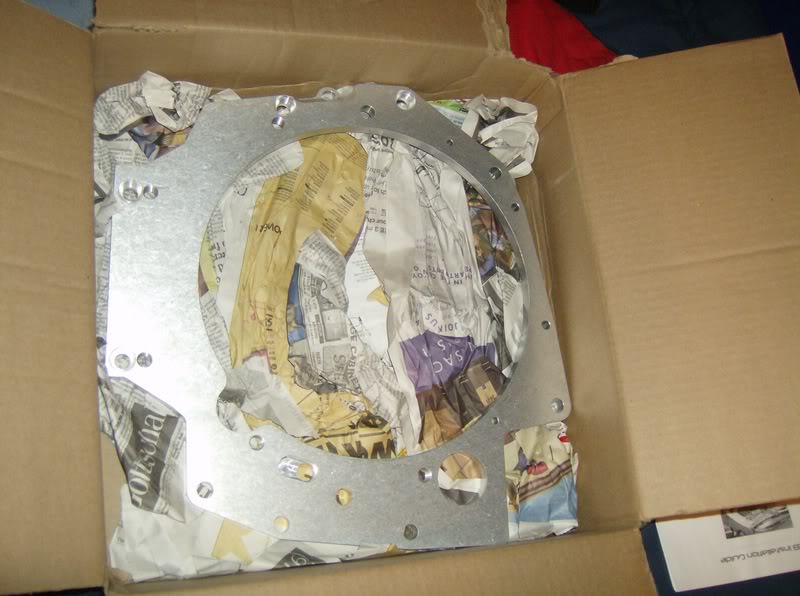
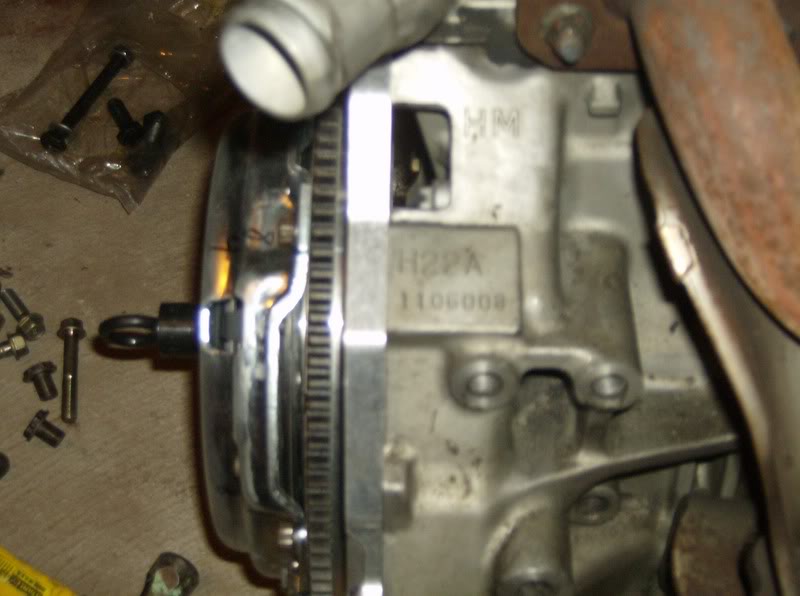
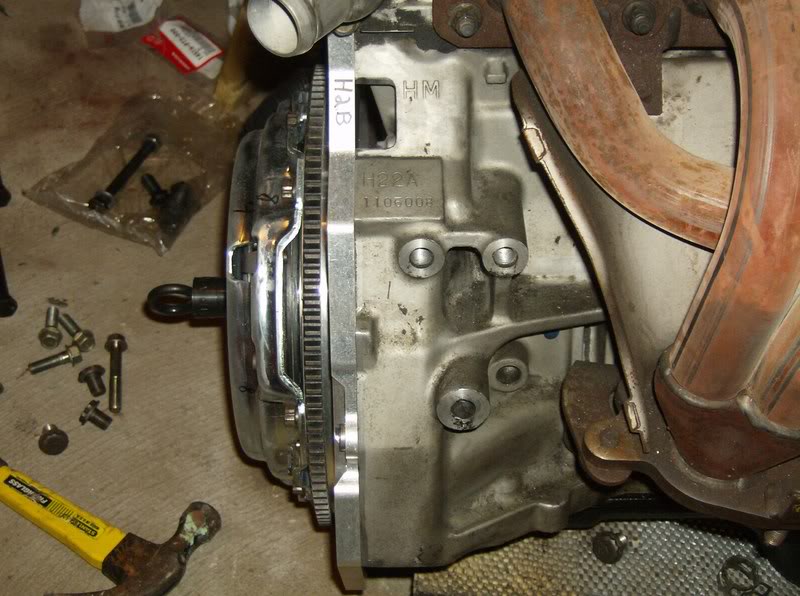
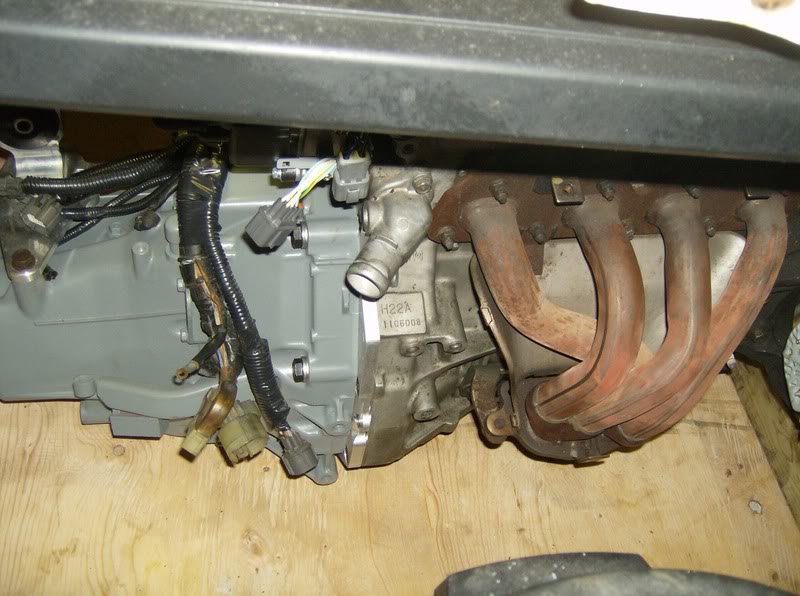
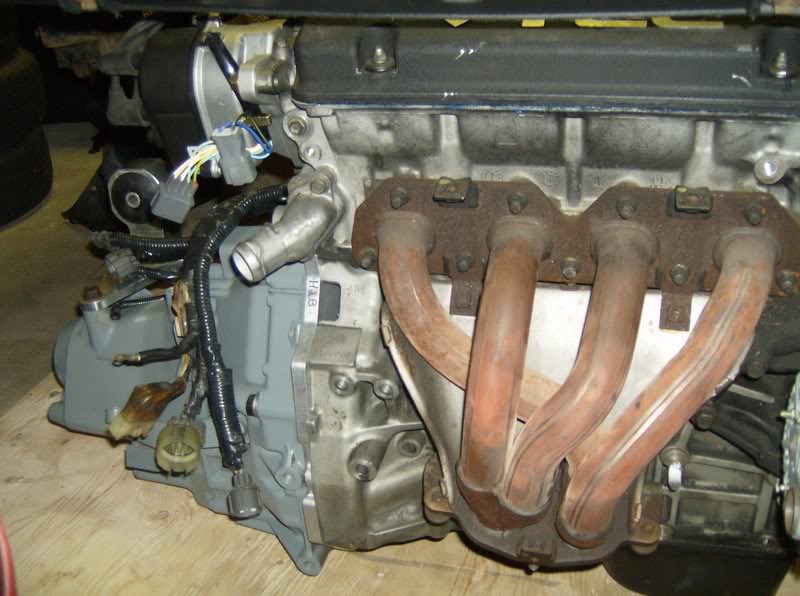
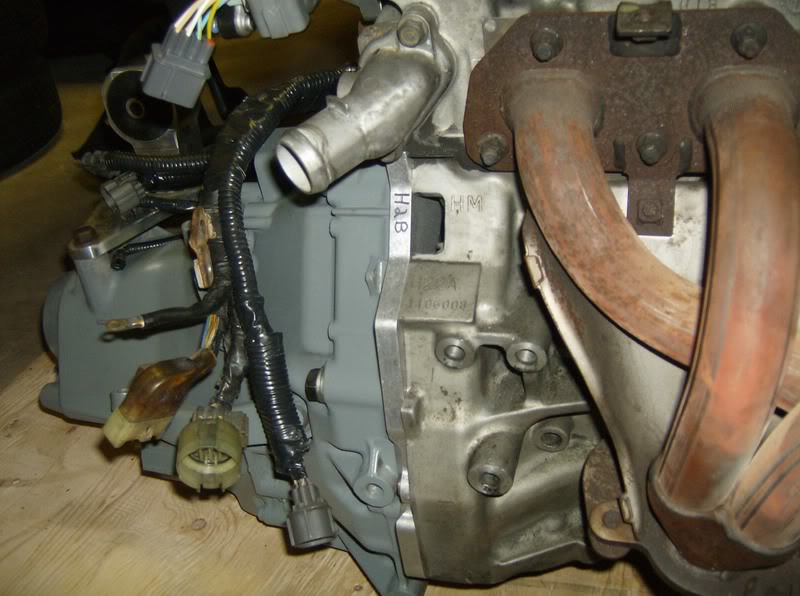
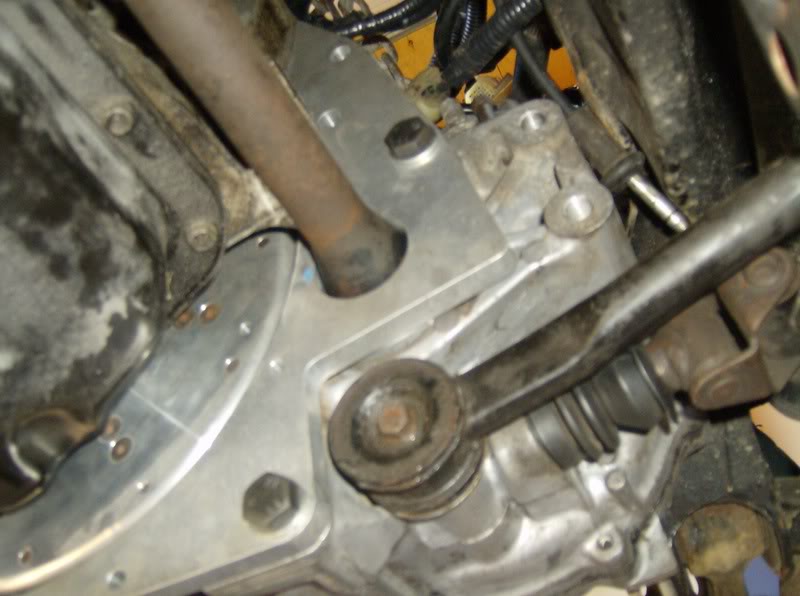
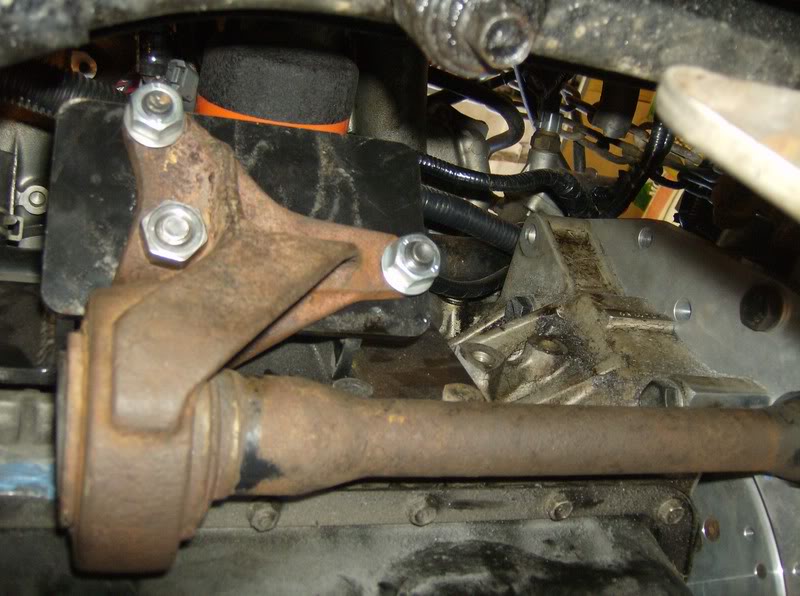
QSD sends you an driver side engine bracket that is used with an unmodified B series swap mount. I have billet aluminum B series mounts from Innovative, with upgraded inserts. Installation is really straightforward for the plate, it comes with a writeup for everything, plus ARP hardware
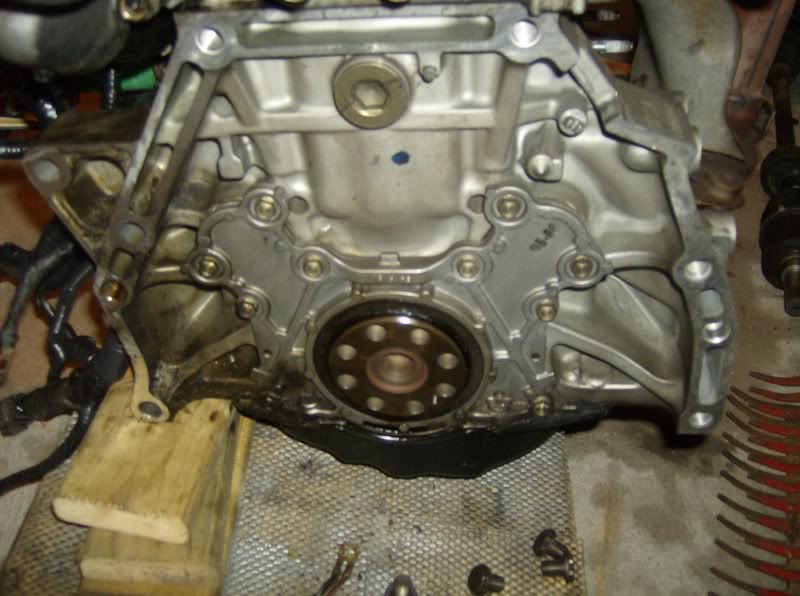
Before Flywheel spacer
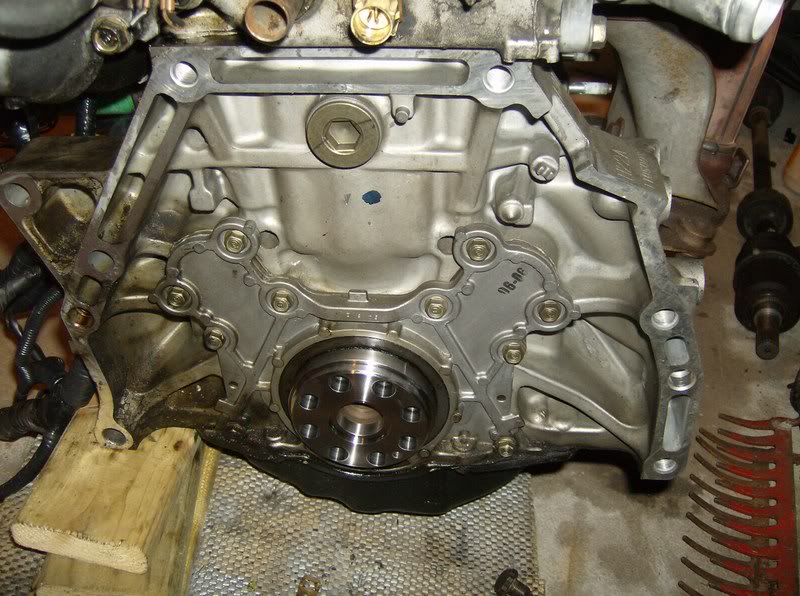
After
I also went ahead and ordered evolutions PCV relocater. Contact Alchemist.
https://honda-tech.com/zerothread?id=1806590
The plate goes on with a couple bolts and some stock alignment dowels.
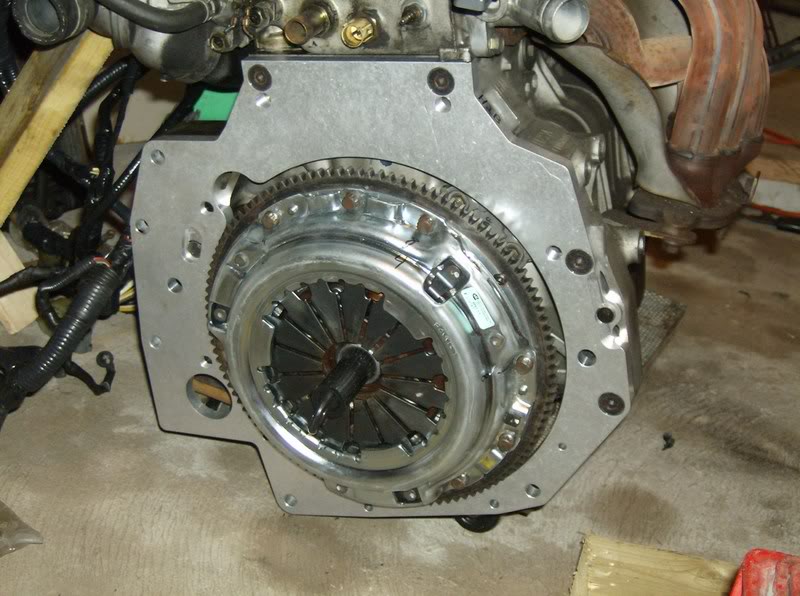
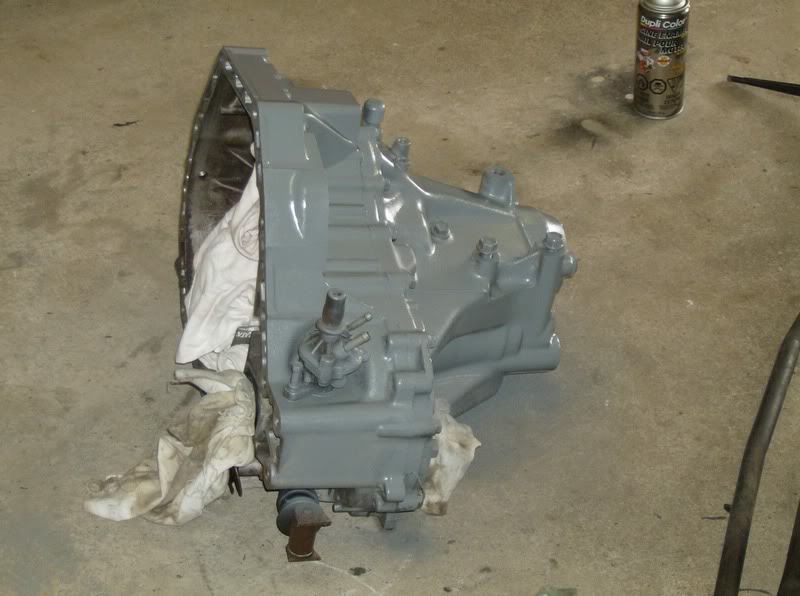
Cut shiftlinkage, and my tranny. Trans is a mildly rebuilt YS1, just new blocker rings and bearings. Open diff FTL. Stock 5th FTL as well.
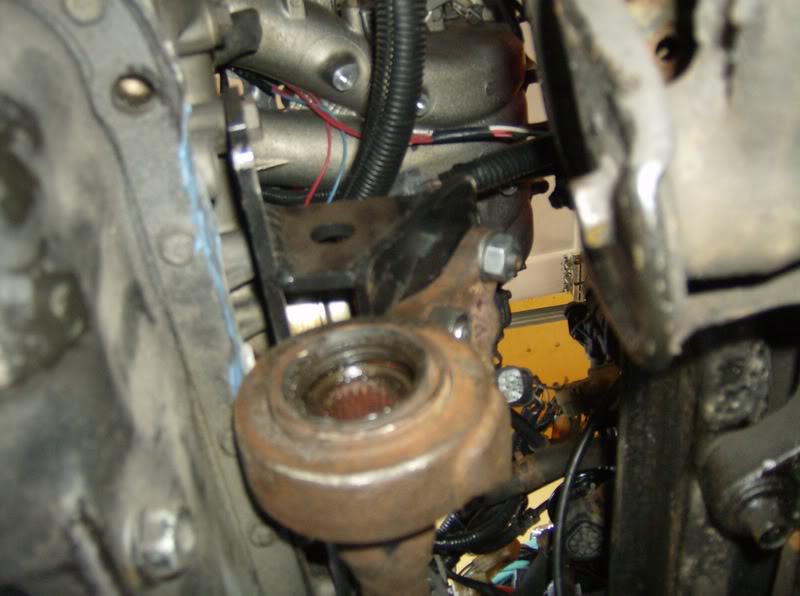
Said engine mount
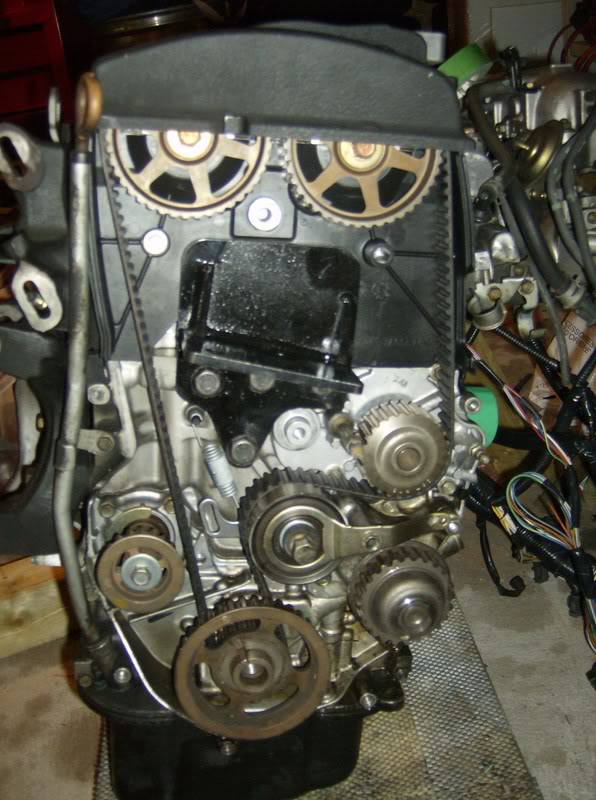
If you have the opportunity, do the manual tensioner conversion, and get a new timing belt
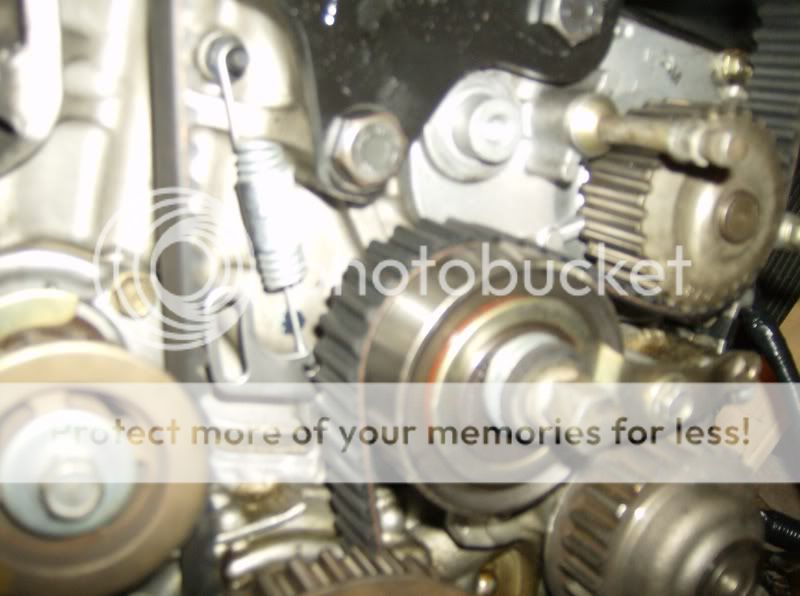
http://www.collectiveracing.ne...c=9.0
I didn't buy absolutely everything, because I took the belt off of my balance shafts.
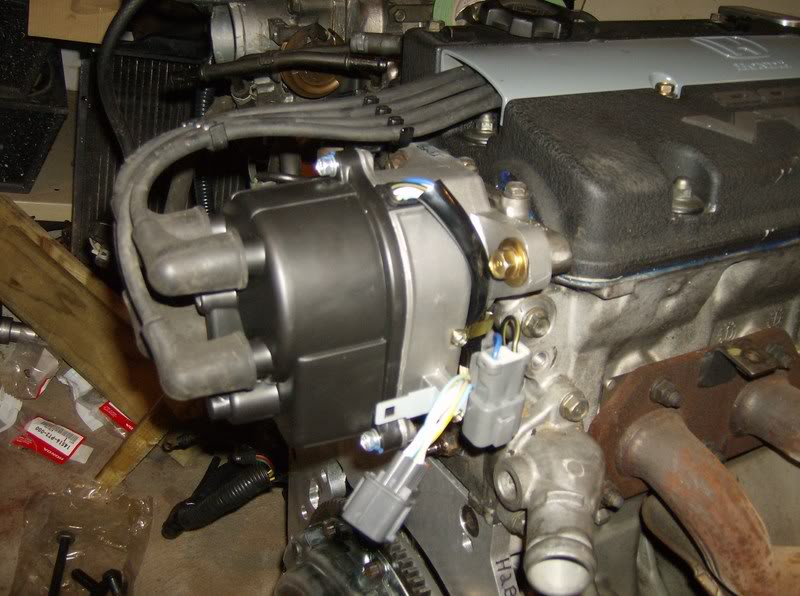
A new dizzy, and things are starting to look promising.
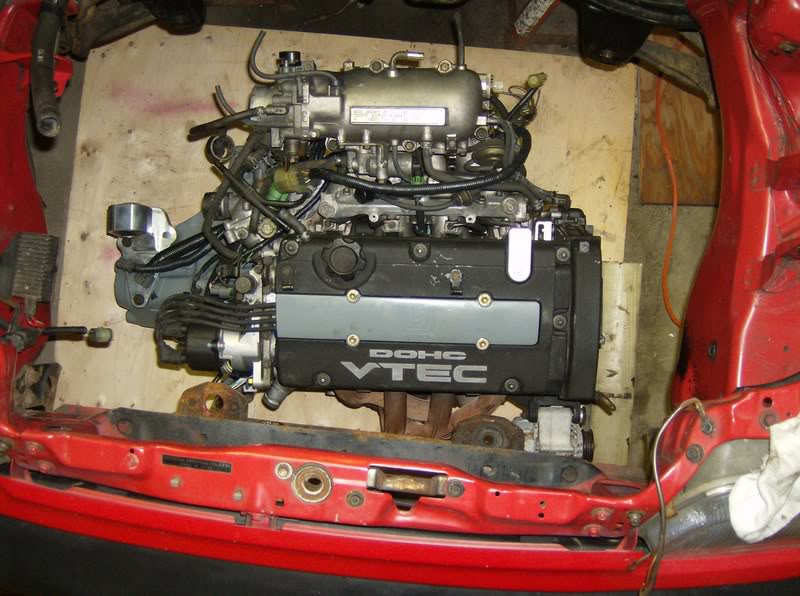

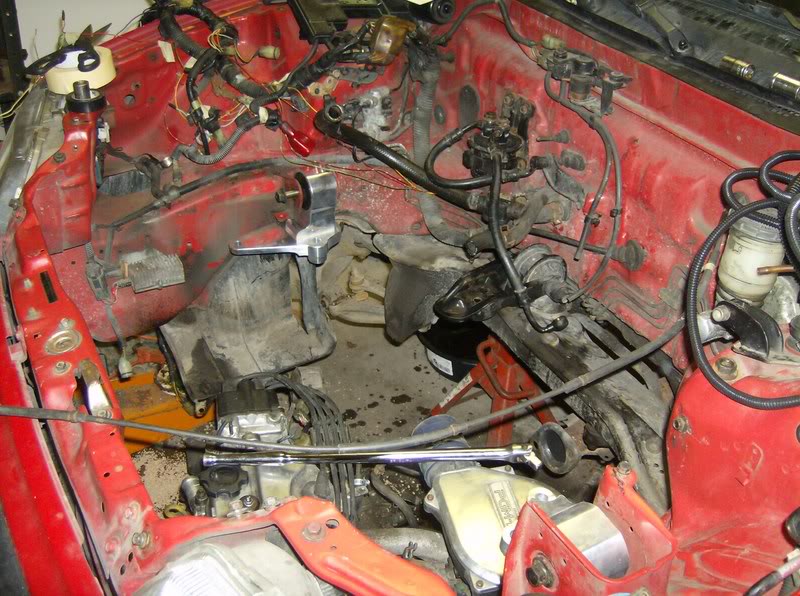
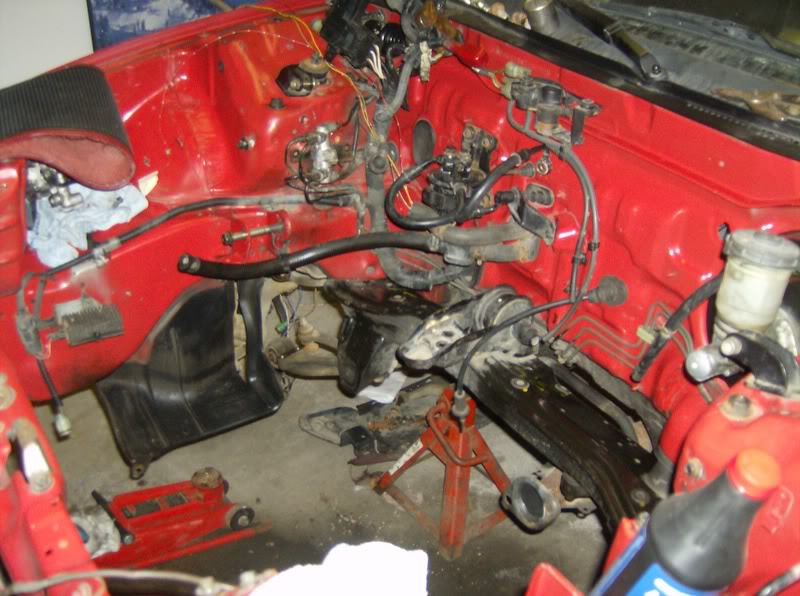
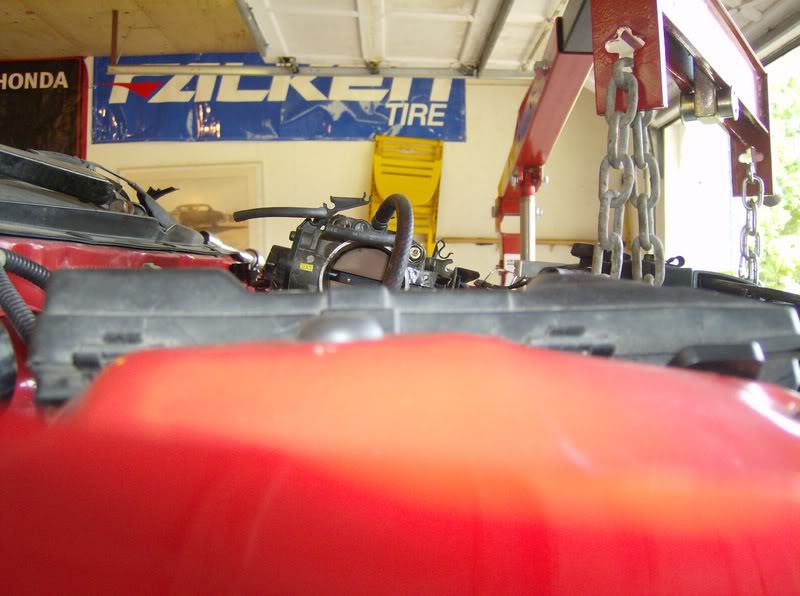
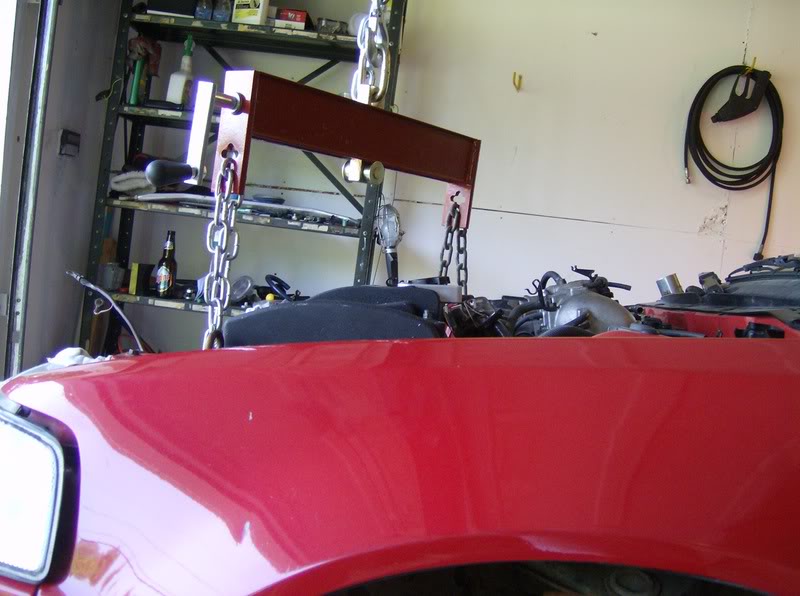
Once you get the engine in the car is where the problems start. GET A HOIST. You WILL have the engine in and out of the bay SEVERAL times. Trust me. I did this with no rad or front crossmemeber. Do the same.
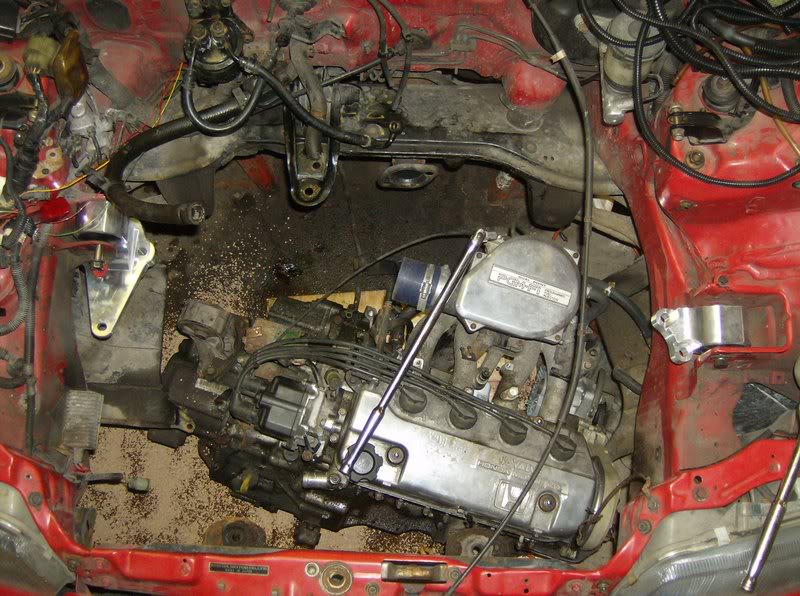
First, the transmission needed just a brush with a flap wheel to fit.
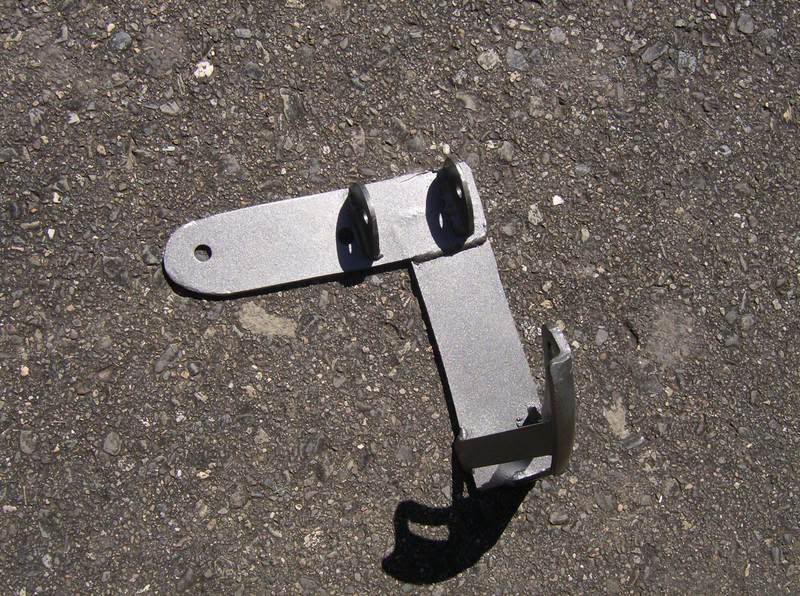
Alternater! I'm using a 3 rib D series alternater, as it would be impossible to use a 6 rib. Plus I had a 3 month old D alt. so I was going to try to use it anyways. Regardless, the stock mount wont cut it, know why?
I just made my on alt bracket instead of buying that $90 piece of steel. It now hugs the oil pan. I'll take pix.
The reason why it would be impossible to use a 6 rib alt, is because with QSD's kit, the transmission doesn't move at all. But the engine does, and not only is it a bit wider than a D or a B, it's 3/4" closer to the driver side frame rail because of the plate. I remember reading a couple threads about how to remedy the Pulley problem, and this was my method.
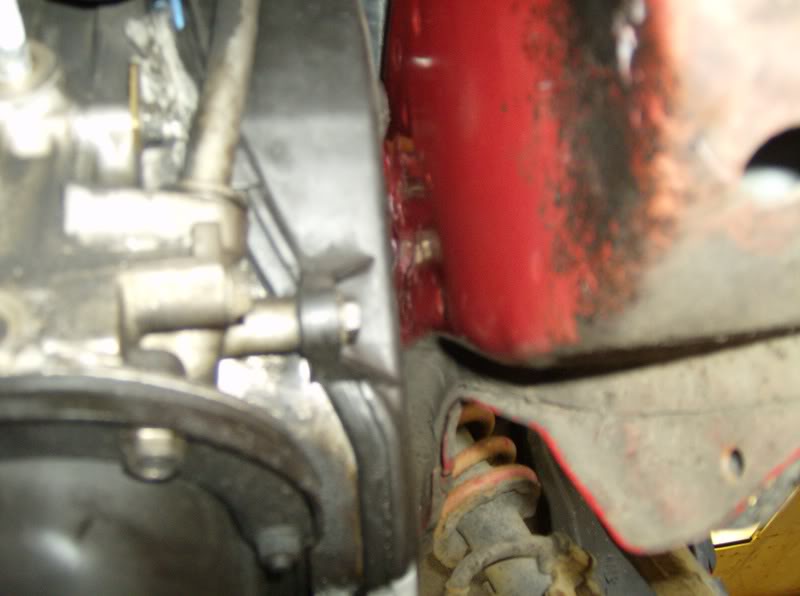
Since I wanted to keep the stock timing belt cover, I took my pulley into work and had the PS ribs machined off. Then marked on the rail where the pulley was going to sit, and took a zip cut to 'er. Took the plate, set it "into" the rail, and tacked it in place. Test fit, everything cleared, so I tacked on a top and two sides, and took it to work and tigged it full of stainless. Brought it home, welded it in, and painted it.
Yeah, it's not as strong as the stock rail, I'm putting myself in danger if ever in an accident, blah blah blah, I accept responsibility if anything goes wrong. Anyways.


I had to cut a piece out of the lower belt cover where the intake side balance shaft is. Had I cut my pocket just a bit wider, I wouldn't of had to do that. Oh well.
Another thing about QSD's kit, which I think I mentioned, is that the transmission doesn't move in any other direction. So the trans and axles are in the same location that any other B swap would be in. The also give you a small bracket to move the Int. shaft, which requires small grinding on the back of the block, including the oil pan lip. I dun't have any pictures right now, but I'ma take some. I just siliconed the **** out of the part I ground on.
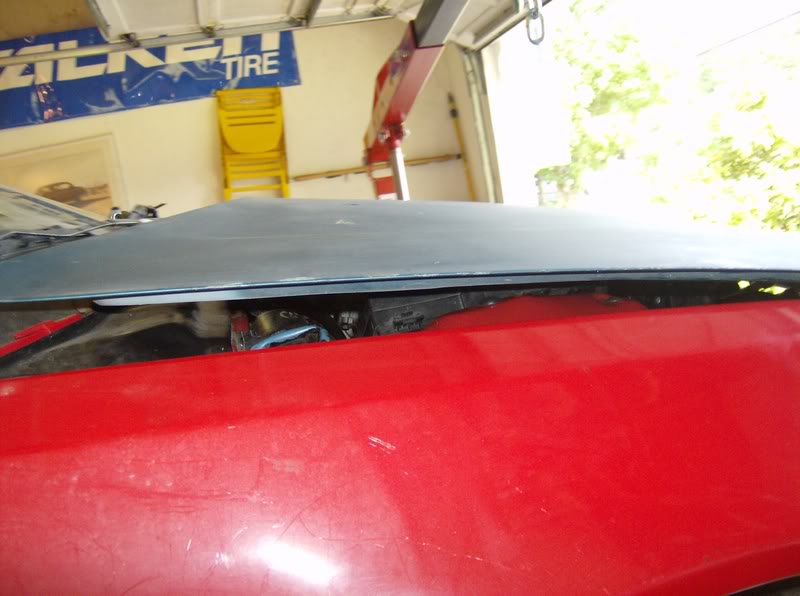
So that's it, right? Not quite. Remember how I said the trans moves but the engine doesn't? The engine now sits WAY too high for even spacers on a stock hood. At the same time I'm also doing a battery relocation for room.
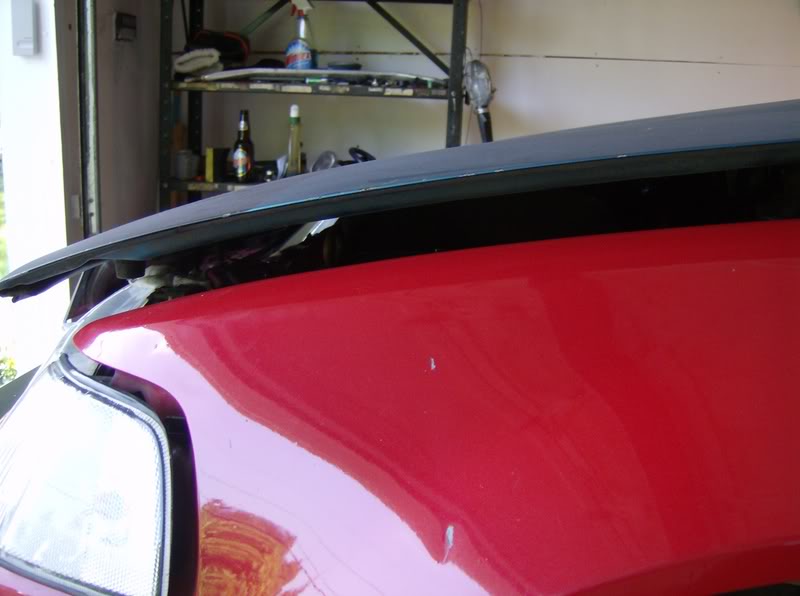
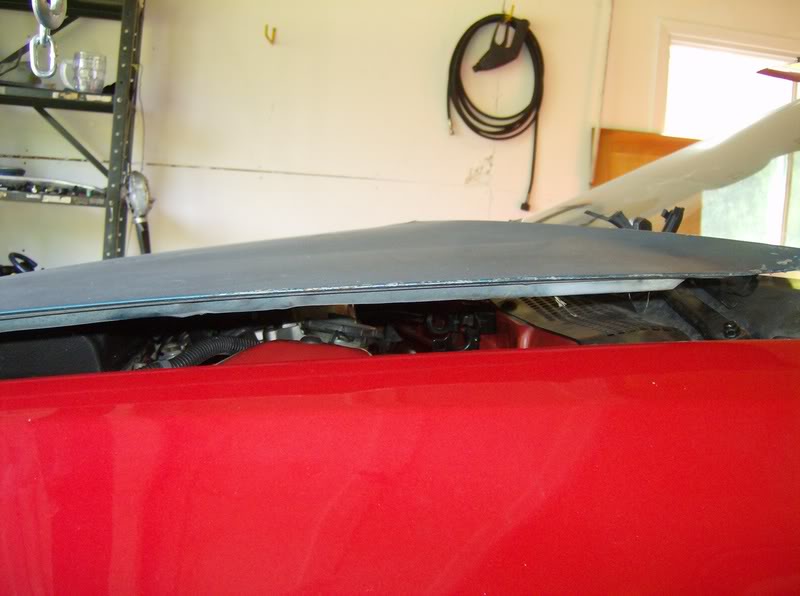
So right now, my biggest hurtle is trying to make some sort of cowl hood without making it look gawdy or obvious, wish me luck on that.
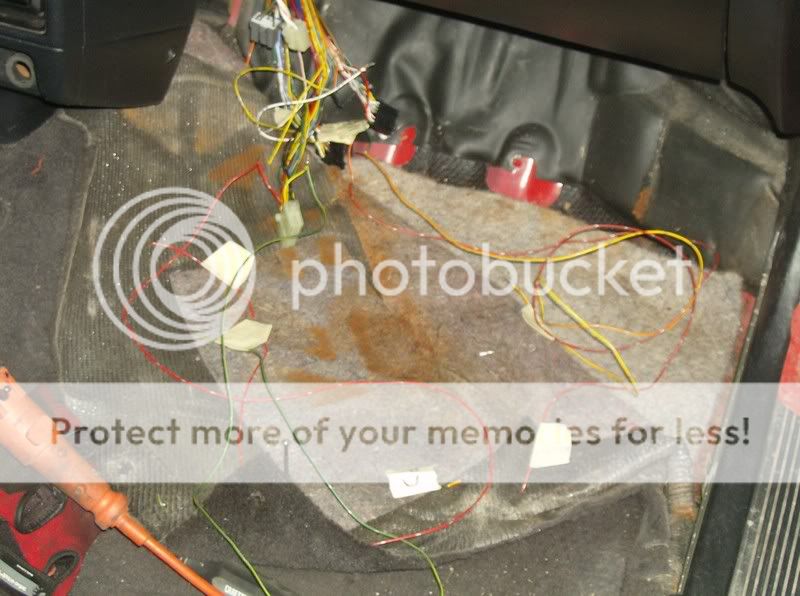
I have yet to finish figuring out rad hoses, plus I still have to find an Alt. belt that fits. I'm also picking up a 2 month old header from a friend of mine. I'm anticipating custom exhaust work. As of right now, the car is still on stands, but the engine is in place for good now. The remaining axles need to be put in, and I need to loom my ecu harness. Remember that parts teg I had? It was a 92, so i pulled the dash harness, and made my own OBD1 conversion. I have all of my ECU chipping components, it's just a matter of putting them in. It's an obd1 PR4.
This is what I have been doing for the past couple months, which I feel is moderate progess considering I've been working 8-4 mon-fri.
There will be more updates this week coming, as I am on vacation.
Modified by gibsanez at 8:48 PM 3/20/2008
Modified by gibsanez at 8:48 PM 3/20/2008
Modified by gibsanez at 10:28 AM 3/22/2008
Ok, the thread never started out as an H2B how-to, but I'll see what i can do to make it a bit easier to navigate
Things to consider before/during the swap
1. Crank pulley side of the engine
There are a few H2B kits available, but IMHO, the QSD kit is the kit that makes the most sense for the EF/DA H2B guys. Stock B-swap mounts, stock B flywheel, and they send you a new engine mount that bolts onto the block that connects to an unmodified B-swap mount.
While you have the engine out, you might as well change the timing belt, water pump, and do a manual tensioner conversion - http://www.collectiveracing.ne...c=9.0
You can also block off your balance shafts if you want -
http://www.kaizenspeed.com/det...50&NM=
The stock timing belt cover will clear the frame rail (with a small dent)
BUT....the crank pulley. *sigh*. The crank pulley is a huge pain in the dick. As far as I've seen, the only REAL way of making clearance for the thing is to run a single belt pulley and cut a pocket into your frame rail. It sucks, but you need the room.
2. Front of the engine
Alternator. This I'm still working on. You can do 1 of I *think* 3 things. 1 is to run one of ESP's alt brackets. http://www.explicitspeedperfor....html
2 is to just make your own like I did. Seriously, It wasn't hard.
3rd, is what I'm looking for input on right now. The stock bracket seems to fit too high and be in the way of the actual headlight if you were to put the alternator in there. I'm waiting for any proof that this is a possibility.
Header! 3 main things can be done.
1 is to run the stock downpipe and just heat and bend it (thats what I did)
2 is to buy camp 1320's H22 header, but I've heard horror stories about fitment
3 is to just turbo the car and make your own downpipe.
These seem to be only the most prominent of the possibilities for the exhaust.
3. Top of engine
Get a fuel rail off of an accord, so that it's on the right side for your fuel line
(if you're running stock lines)If you want hood clearance, remove your IAB plate, it saves like 1 1/2" of space.
There are different approaches to hood clearance. Mine is probably the slackest of them all (just cut a hole and fiberglass over it). I like AK_CRX's method WAY better.
https://honda-tech.com/zero...age=1
You can also cut up your valvecover and reweld it, but that's not for everyone either
4. Front of car
It's completely possible to use a stock crossmember. All you have to do is remove the tabs where the front mount was, and depending on your alt. bracket, cut a small pocket for the bottom of the bracket. Thats it.
My rad setup is probably over-complicated and very ugly, but this is by no means a show car. I am using a stock rad, with a stock fan. The bottom hose almost fits already, but the top rad house is a bastard. If you look deeper, you'll see that i ended up using about 5 pieces of different hose with hose clamps to "make" my own rad hose. Yeah, it looks like ****, it looks haggard, but guess what, I can't exactly go buy H2B rad hose now can I?
As far as the battery, you might as well do a relocation to the trunk, it's a small job compared to the engine you're shoving in.
__________________________________________________ _____________________________________
The car was bought by myself and my father several years ago before i had my license, as a father/son rebuilt project. It was a 200K, kinda rusty, 1991 aujamatic CX with.......you guess it, a dualpoint! The engine and trans was rebuilt buy ourselves, and the car had the bodywork fixed and was painted. Some tint, and a goofy set of wheels, and you have a teenagers best friend.
I was getting itchy for a B16 swap, so I went ahead and ordered a longblock, and bought an LS transmission (Yeah, i actually planned on using them together, i didn't know any better at the time). Had the head rebuilt, some dual valve springs, etc. I got my hands on a teg parts car, so along with the shift linkage, pedal assembly, and gauge cluster, i hauled out the engine. Booya, LS/VTEC time. Ordered a buttload of parts, and before I could finish it, had to sell pretty much everything for school
In the meantime, I did a DA rear disc swap with matching 4040. Gotta love the fact that teg rear trailing arms are a direct bolt in.Once I parked the car, i started into my MPFI wiring. I used this write-up.
http://www.50mod.com/fourthgenhatch/mpfi.html
I dropped the D, put the car on stands, and took out the rear brakes.
Once I started to have a cash flow again, I was trying to get my hands on a GSR bottom end from a friend, as I had plans to do an N/A Poorman's type R. When that didn't pan out, I was already sitting on a couple grand, so It was time to buy shizat. I needed something to bolt to my rebuilt YS1. This is the tech part
. An H22 is not THAT big of an engine. No, it doesn't way 75 pounds more than a B, so shut your face hole. I went with QSD's kit. Fast shipping, great to deal with honestly. Exedy racing clutch with an Evolution Industries flywheel. Rebuilt 93 YS1, and that pretty much ties it up
QSD sends you an driver side engine bracket that is used with an unmodified B series swap mount. I have billet aluminum B series mounts from Innovative, with upgraded inserts. Installation is really straightforward for the plate, it comes with a writeup for everything, plus ARP hardware
Before Flywheel spacer
After
I also went ahead and ordered evolutions PCV relocater. Contact Alchemist.
https://honda-tech.com/zerothread?id=1806590
The plate goes on with a couple bolts and some stock alignment dowels.
Cut shiftlinkage, and my tranny. Trans is a mildly rebuilt YS1, just new blocker rings and bearings. Open diff FTL. Stock 5th FTL as well.
Said engine mount
If you have the opportunity, do the manual tensioner conversion, and get a new timing belt
http://www.collectiveracing.ne...c=9.0
I didn't buy absolutely everything, because I took the belt off of my balance shafts.
A new dizzy, and things are starting to look promising.
Once you get the engine in the car is where the problems start. GET A HOIST. You WILL have the engine in and out of the bay SEVERAL times. Trust me. I did this with no rad or front crossmemeber. Do the same.
First, the transmission needed just a brush with a flap wheel to fit.
Alternater! I'm using a 3 rib D series alternater, as it would be impossible to use a 6 rib. Plus I had a 3 month old D alt. so I was going to try to use it anyways. Regardless, the stock mount wont cut it, know why?
I just made my on alt bracket instead of buying that $90 piece of steel. It now hugs the oil pan. I'll take pix.
The reason why it would be impossible to use a 6 rib alt, is because with QSD's kit, the transmission doesn't move at all. But the engine does, and not only is it a bit wider than a D or a B, it's 3/4" closer to the driver side frame rail because of the plate. I remember reading a couple threads about how to remedy the Pulley problem, and this was my method.
Since I wanted to keep the stock timing belt cover, I took my pulley into work and had the PS ribs machined off. Then marked on the rail where the pulley was going to sit, and took a zip cut to 'er. Took the plate, set it "into" the rail, and tacked it in place. Test fit, everything cleared, so I tacked on a top and two sides, and took it to work and tigged it full of stainless. Brought it home, welded it in, and painted it.
Yeah, it's not as strong as the stock rail, I'm putting myself in danger if ever in an accident, blah blah blah, I accept responsibility if anything goes wrong. Anyways.
I had to cut a piece out of the lower belt cover where the intake side balance shaft is. Had I cut my pocket just a bit wider, I wouldn't of had to do that. Oh well.
Another thing about QSD's kit, which I think I mentioned, is that the transmission doesn't move in any other direction. So the trans and axles are in the same location that any other B swap would be in. The also give you a small bracket to move the Int. shaft, which requires small grinding on the back of the block, including the oil pan lip. I dun't have any pictures right now, but I'ma take some. I just siliconed the **** out of the part I ground on.
So that's it, right? Not quite. Remember how I said the trans moves but the engine doesn't? The engine now sits WAY too high for even spacers on a stock hood. At the same time I'm also doing a battery relocation for room.
So right now, my biggest hurtle is trying to make some sort of cowl hood without making it look gawdy or obvious, wish me luck on that.
I have yet to finish figuring out rad hoses, plus I still have to find an Alt. belt that fits. I'm also picking up a 2 month old header from a friend of mine. I'm anticipating custom exhaust work. As of right now, the car is still on stands, but the engine is in place for good now. The remaining axles need to be put in, and I need to loom my ecu harness. Remember that parts teg I had? It was a 92, so i pulled the dash harness, and made my own OBD1 conversion. I have all of my ECU chipping components, it's just a matter of putting them in. It's an obd1 PR4.
This is what I have been doing for the past couple months, which I feel is moderate progess considering I've been working 8-4 mon-fri.
There will be more updates this week coming, as I am on vacation.
Modified by gibsanez at 8:48 PM 3/20/2008
Modified by gibsanez at 8:48 PM 3/20/2008
Modified by gibsanez at 10:28 AM 3/22/2008
 08-24-2007, 12:55 PM
#4
Honda-Tech Member
Thread Starter
Join Date: May 2006
Location: NB, Canada
Posts: 2,788
Likes: 0
Received 0 Likes
on
0 Posts
<TABLE WIDTH="90%" CELLSPACING=0 CELLPADDING=0 ALIGN=CENTER><TR><TD>Quote, originally posted by dem0nk1d »</TD></TR><TR><TD CLASS="quote">looks like you might need some kind of washers to lower the motor down a bit.
</TD></TR></TABLE>
I could, but I want to keep the axle angle as minimal as possible, plus I want to maximize ground clearance.
<TABLE WIDTH="90%" CELLSPACING=0 CELLPADDING=0 ALIGN=CENTER><TR><TD>Quote, originally posted by Pee Wee »</TD></TR><TR><TD CLASS="quote">hunt down an old bullfrog hood. </TD></TR></TABLE>
Upon a quick browse of their site, and ebay, it looks like this WILL be a hunt.
08-24-2007, 07:34 PM
#6
EFB055
<TABLE WIDTH="90%" CELLSPACING=0 CELLPADDING=0 ALIGN=CENTER><TR><TD>Quote, originally posted by I CRX I »</TD></TR><TR><TD CLASS="quote">wow, this thread has been stickied already!! great thread buddy, very good pics!we need more people like you on this site</TD></TR></TABLE>
? No it hasnt?
? No it hasnt?
08-24-2007, 07:43 PM
#7
Honda-Tech Member
Join Date: Oct 2006
Posts: 1,376
Likes: 0
Received 0 Likes
on
0 Posts
<TABLE WIDTH="90%" CELLSPACING=0 CELLPADDING=0 ALIGN=CENTER><TR><TD>Quote, originally posted by ~sp33~ »</TD></TR><TR><TD CLASS="quote">
? No it hasnt?</TD></TR></TABLE>FAQ's/enigines and swap/H series/h2b
? No it hasnt?</TD></TR></TABLE>FAQ's/enigines and swap/H series/h2b
Trending Topics
 08-27-2007, 06:55 PM
#13
Honda-Tech Member
Thread Starter
Join Date: May 2006
Location: NB, Canada
Posts: 2,788
Likes: 0
Received 0 Likes
on
0 Posts
Thanks for the compliments, I'll be updating this week with progress on the exhaust work, and also some pictures of my slutty alt. bracket. Also take some pictures of my Si's that I'm repainting the insides of.
08-28-2007, 05:16 AM
#16
Honda-Tech Member
Join Date: Apr 2005
Location: Where the wild things are in, NY, United States of America
Posts: 2,679
Likes: 0
Received 1 Like
on
1 Post
a 240 horse h22 with an ITR tranny is about as close to god as you can get. I wish i had the time or ambition of modifying / finding a hood that would allow a reasonable clearange (i.e. not that ridiculous gap where anyone can just reach in the engine bay)
08-28-2007, 10:44 AM
#18
Honda-Tech Member
Thread Starter
Join Date: May 2006
Location: NB, Canada
Posts: 2,788
Likes: 0
Received 0 Likes
on
0 Posts
<TABLE WIDTH="90%" CELLSPACING=0 CELLPADDING=0 ALIGN=CENTER><TR><TD>Quote, originally posted by nihad »</TD></TR><TR><TD CLASS="quote">yeh put like some big washers on the driver side mount and fab the chassis to fit it allittle better</TD></TR></TABLE>
I could, but I want to keep my axle angles as minimal as possible, especially because I'm forcing 200hp through stock integra axles. And if by "fab the chassis" you mean cut up the hood, I already have an extra hood to bastardize.
I took some pictures of my Alt. bracket that i'll be posting either today or tommorow. I'm having some trouble squeezing my int. shaft into place, but i'll be updating soon with pictures of the oilpan and bracket and all that jazz.
So far today I just finished my reverse lights wiring, and re-painted and cleared the insides of my Si wheels.
08-29-2007, 12:36 PM
#19
Honda-Tech Member
Thread Starter
Join Date: May 2006
Location: NB, Canada
Posts: 2,788
Likes: 0
Received 0 Likes
on
0 Posts
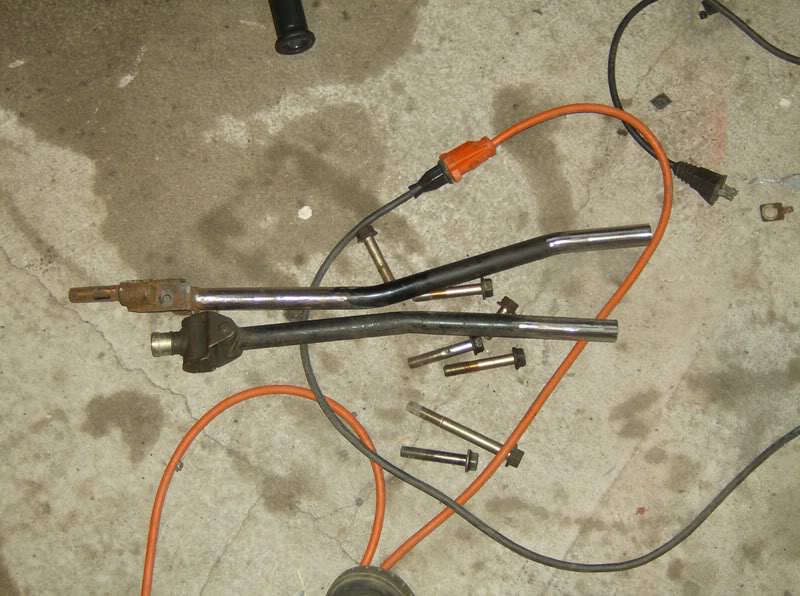
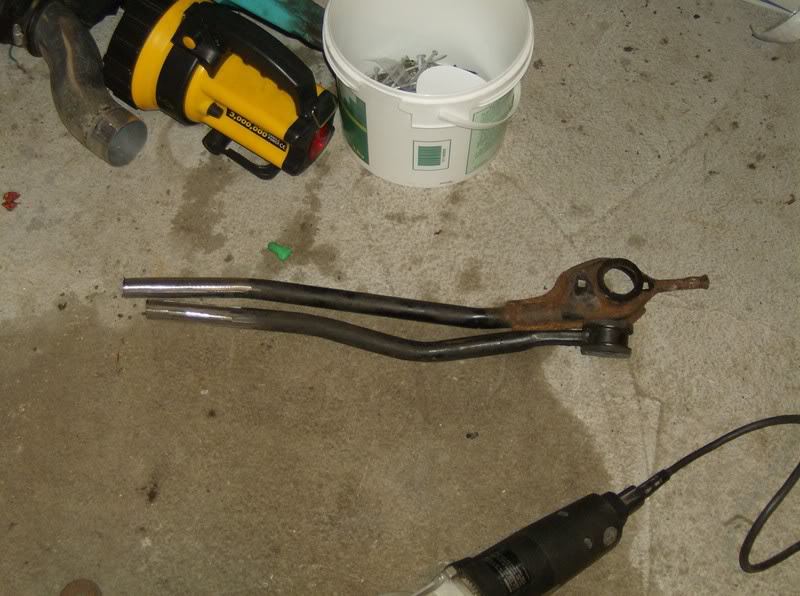
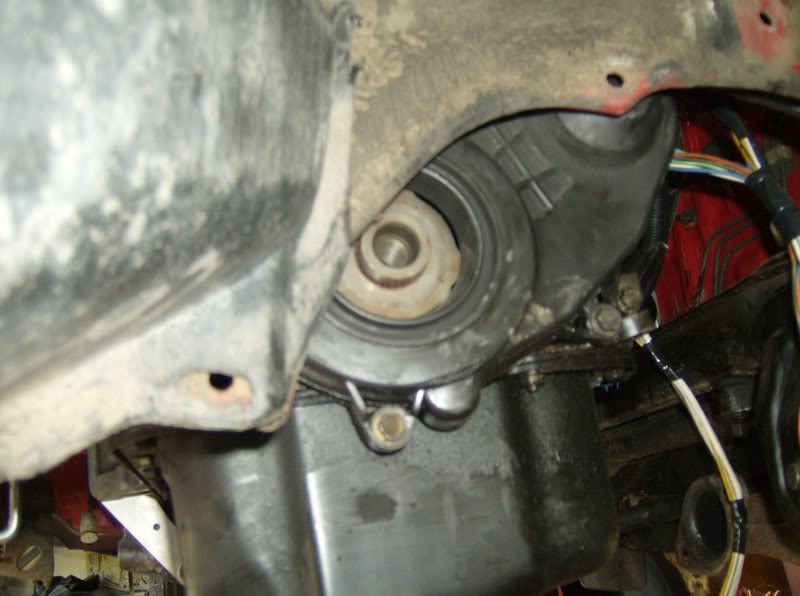
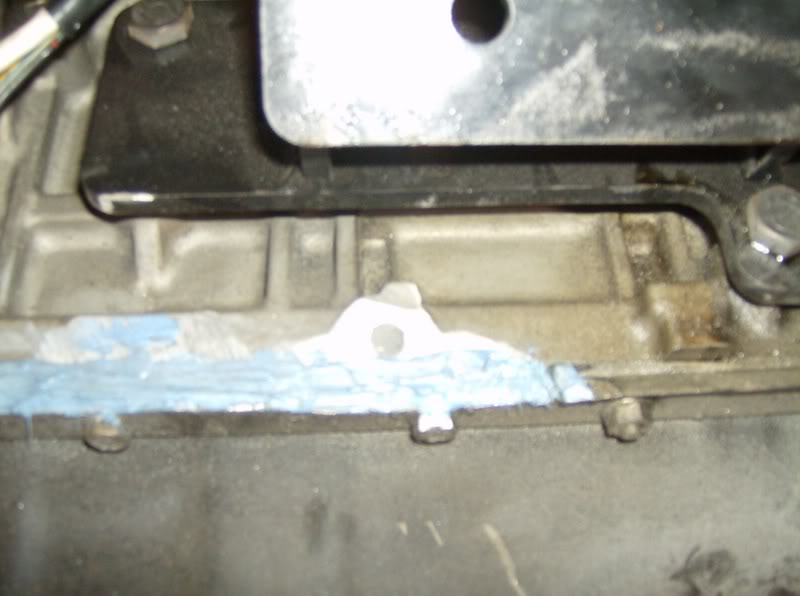
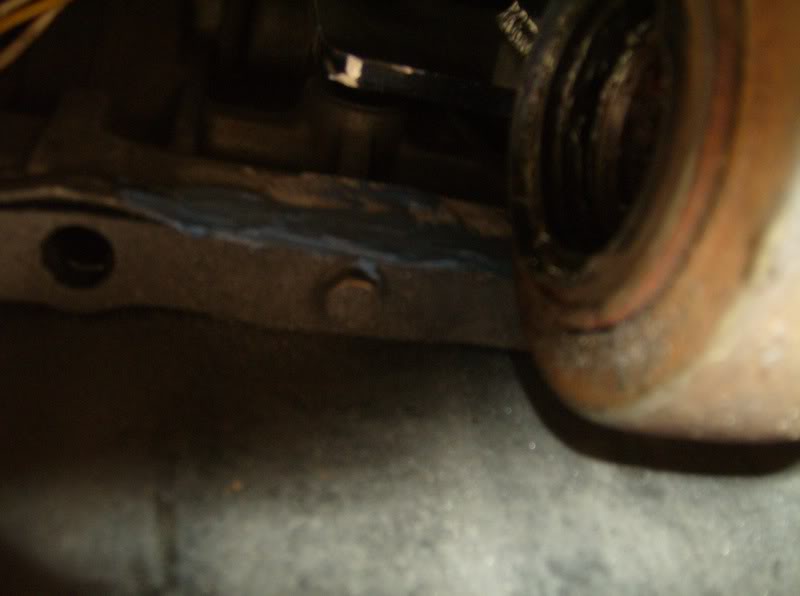
Here is the spot where you have to grind on the oil pan and the block to make room for the int. shaft. Silicone the **** out of it.
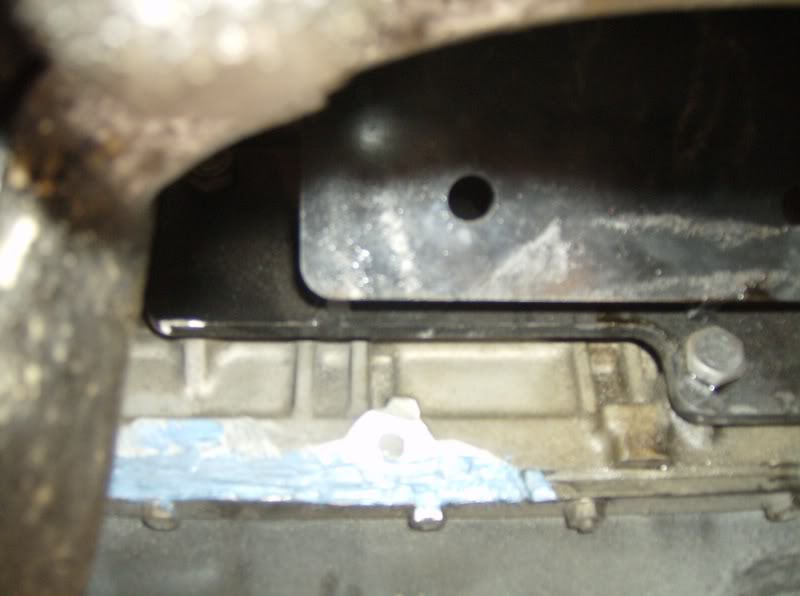
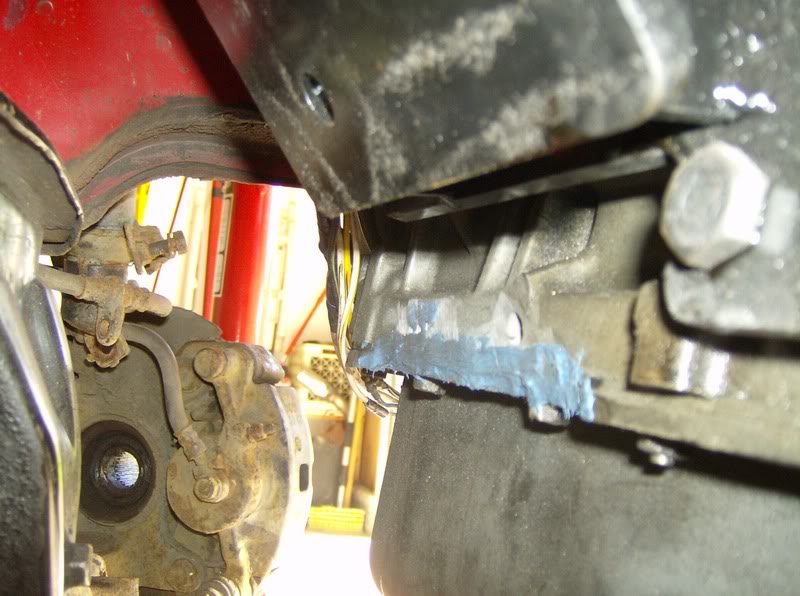
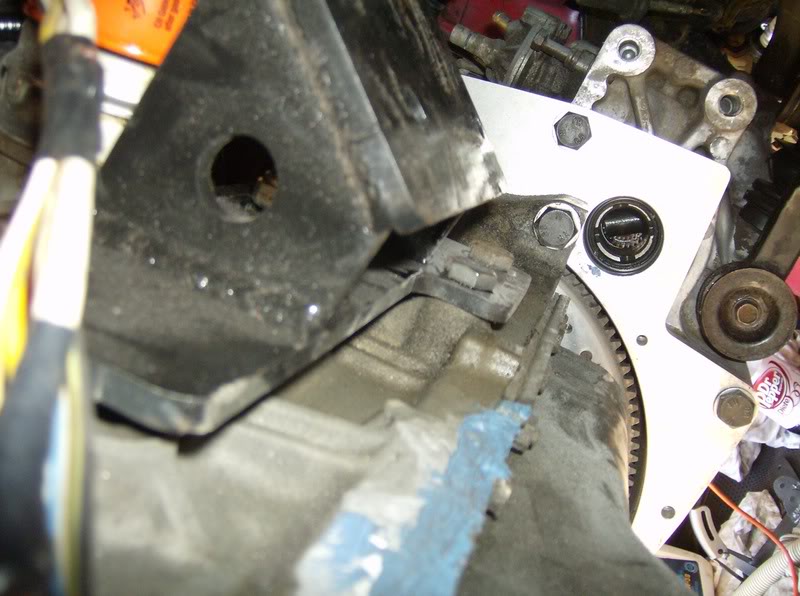
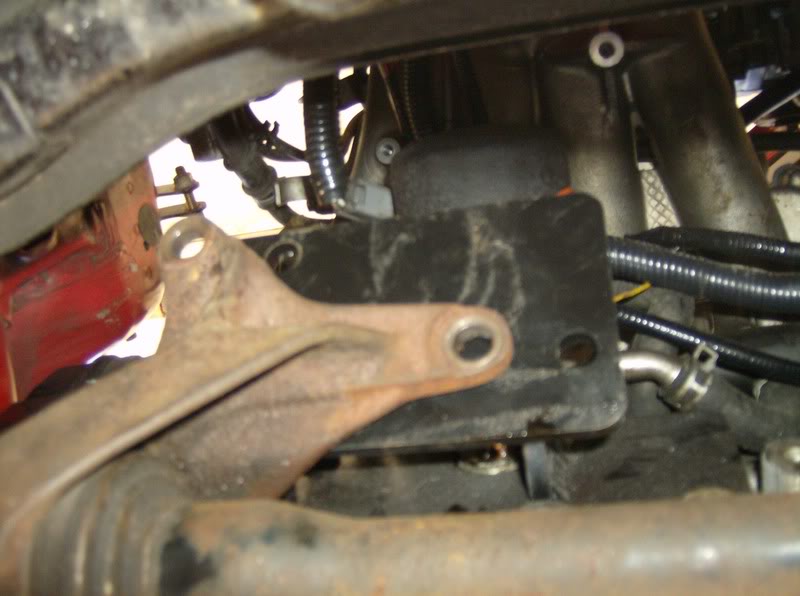

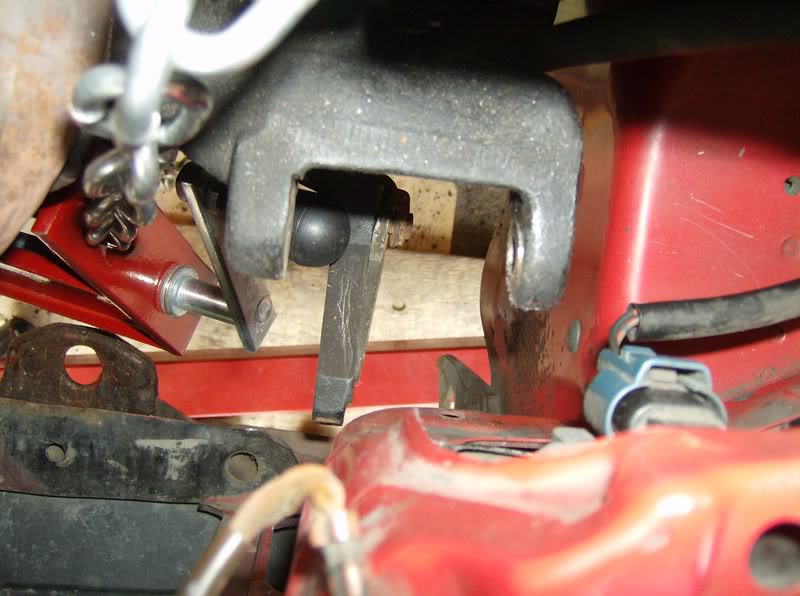
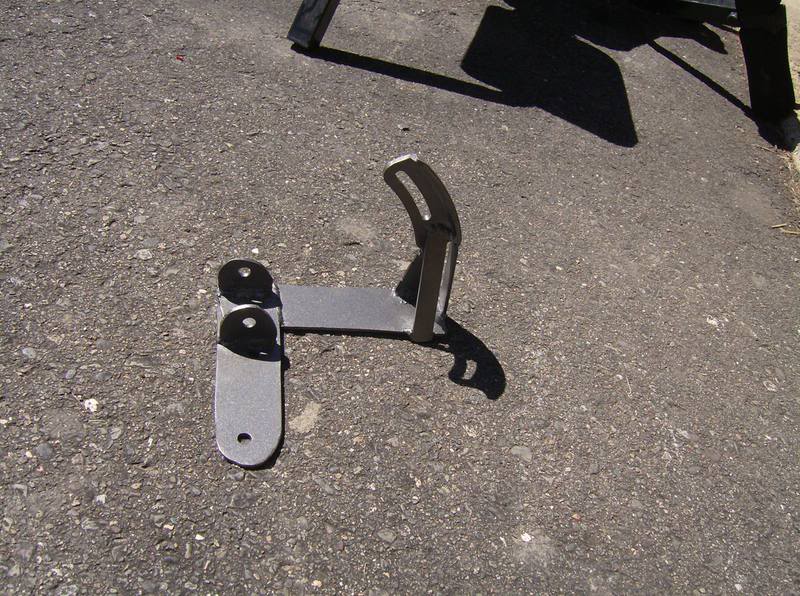
Here is my DIY alt. bracket that I made by eye. It works, and didn't cost me $115 like the explicit speed lower bracket. There is a small bump on the frame I have to flatten out to make room for the pulley, but other then that, it fits like a glove. Nevermind the fact that I'll actually have to loosen the engine mounts to wiggle the new belt over the crank pulley.

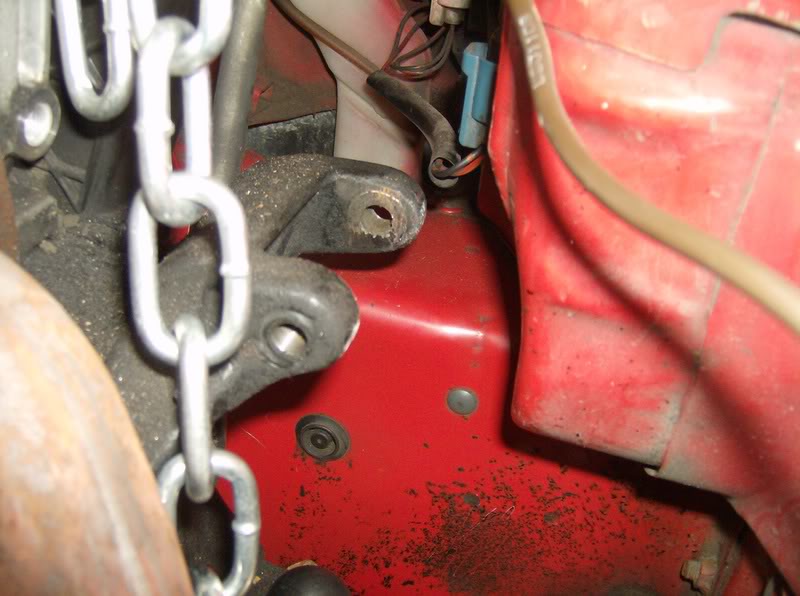
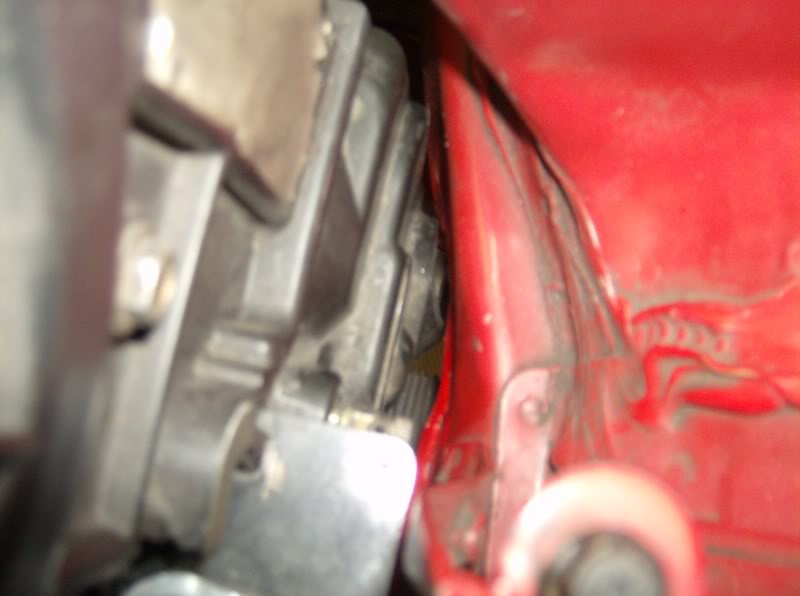
And here is the troublesome location on the frame, the bump right beside the tow hook.

Here is my DIY alt. bracket that I made by eye. It works, and didn't cost me $115 like the explicit speed lower bracket. There is a small bump on the frame I have to flatten out to make room for the pulley, but other then that, it fits like a glove. Nevermind the fact that I'll actually have to loosen the engine mounts to wiggle the new belt over the crank pulley.
And here is the troublesome location on the frame, the bump right beside the tow hook.
08-29-2007, 02:07 PM
#21
Honda-Tech Member
Thread Starter
Join Date: May 2006
Location: NB, Canada
Posts: 2,788
Likes: 0
Received 0 Likes
on
0 Posts
<TABLE WIDTH="90%" CELLSPACING=0 CELLPADDING=0 ALIGN=CENTER><TR><TD>Quote, originally posted by wiZCo »</TD></TR><TR><TD CLASS="quote">Great build, i love how you're not cutting corners like so many other people are resigned to.
 </TD></TR></TABLE>
thanks for the compliments and the
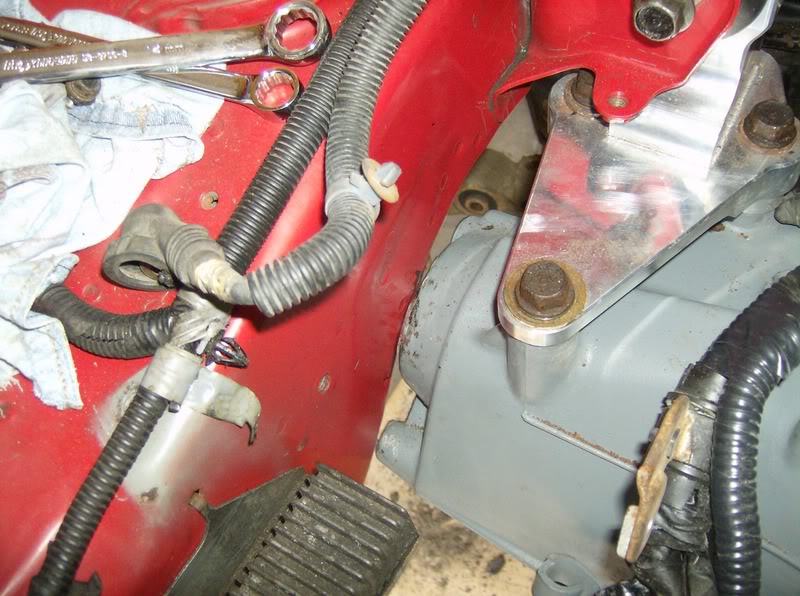
Another thing I'll be updating about tomorrow, is the stock throttle location will not cut it for an integra throttle cable. I don't know if the H's use a shorter cable, but i've already started making my own throttle cable bracket out of the stock one, that still mounts on the manifold.
</TD></TR></TABLE>thanks for the compliments and the
Another thing I'll be updating about tomorrow, is the stock throttle location will not cut it for an integra throttle cable. I don't know if the H's use a shorter cable, but i've already started making my own throttle cable bracket out of the stock one, that still mounts on the manifold.
08-30-2007, 08:03 AM
#22
Honda-Tech Member
Join Date: Aug 2002
Location: NOR CAL
Posts: 12,464
Likes: 0
Received 0 Likes
on
0 Posts
<TABLE WIDTH="90%" CELLSPACING=0 CELLPADDING=0 ALIGN=CENTER><TR><TD>Quote, originally posted by gibsanez »</TD></TR><TR><TD CLASS="quote">
thanks for the compliments and the
Another thing I'll be updating about tomorrow, is the stock throttle location will not cut it for an integra throttle cable. I don't know if the H's use a shorter cable, but i've already started making my own throttle cable bracket out of the stock one, that still mounts on the manifold.</TD></TR></TABLE>
Lookin good man.
The stock Teg cable worked fine for me with the H22 throttle cable bracket. I may have flipped the throttle bracket around, anyway here is a pic.
08-30-2007, 08:25 AM
#23
Honda-Tech Member
Thread Starter
Join Date: May 2006
Location: NB, Canada
Posts: 2,788
Likes: 0
Received 0 Likes
on
0 Posts
<TABLE WIDTH="90%" CELLSPACING=0 CELLPADDING=0 ALIGN=CENTER><TR><TD>Quote, originally posted by skunked »</TD></TR><TR><TD CLASS="quote">
Lookin good man.
The stock Teg cable worked fine for me with the H22 throttle cable bracket. I may have flipped the throttle bracket around, anyway here is a pic.
</TD></TR></TABLE>
Kinda weird, I think it just may be where the pedal is located in the civics, but when I used the stock location, I had about 4 inches too much cable past the pedal.
08-30-2007, 08:33 AM
#24
Honda-Tech Member
Join Date: Aug 2002
Location: NOR CAL
Posts: 12,464
Likes: 0
Received 0 Likes
on
0 Posts
<TABLE WIDTH="90%" CELLSPACING=0 CELLPADDING=0 ALIGN=CENTER><TR><TD>Quote, originally posted by gibsanez »</TD></TR><TR><TD CLASS="quote">
Kinda weird, I think it just may be where the pedal is located in the civics, but when I used the stock location, I had about 4 inches too much cable past the pedal.</TD></TR></TABLE>
yeah it may have something to do with that. I would find out what cable the EF guys use with a B swap and that cable should work fine for you.