
Freeman's Build Thread


 12-18-2013, 08:27 AM
#77
Hope you can figure out that code 9, at least the car still runs well with it. The welds don't look half bad, especially for just starting! Keep at it and you'll develop a feel for it.
Was the traction bar a difficult install? Did it mess with you alignment or change the feel of the car at all?
Was the traction bar a difficult install? Did it mess with you alignment or change the feel of the car at all?
The welds aren't the worst I've ever seen. But it's Flux core. I can definitely improve.
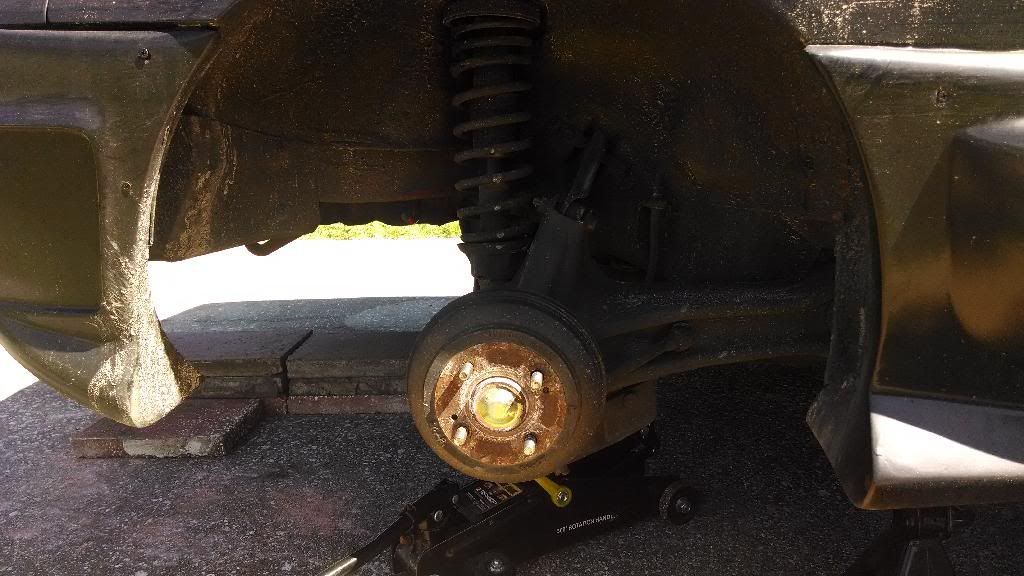
Traction bar was easy. The picture where I used the factory jack to move it into position is key though. That and making sure both sides are the same length. I suggest measure the knuckle in relation to the wheel well. You can't count on the length of the radius rod because the traction bar doesn't sit in the same spot as the factory cross member.
I felt no difference in the car really. I am having an axle problem though. I don't drive very fast, i.e floor it. The passenger axle is wrong or something. It's causing a weird binding that no one has experience with, go figure. So I'm replacing that. I ordered one and they sent me the wrong side and year. 90-93 passenger side and 94-01 driver side are not the same. One has a male end and one has a female end.
Anyways, I'm having my own issues. I just figure them out myself more often than not. A lot of people make threads, but I rarely find any usuable advice on these boards. Then again, people say I post too much nonsense here myself. So I'm cutting back on my posting around here.
I'll probably just finish boosting it and call it a day. Maybe get some neons to make it look ricey-er. Maybe a big wing. A nice fast and the furious paint job. Then I'll post it all over HT just to irritate everyone because it's not clean, slammed, or JDM. It's ricey and fast. And I really only care about it being fast and reliable.
12-22-2013, 09:41 AM
#78
Honda-Tech Member
Join Date: Jan 2013
Location: Baytown Tx
Posts: 51
Likes: 0
Received 0 Likes
on
0 Posts
Your flux core welding could look just as good as welding with gas. I bagged and made all my suspension mods to my Courier with my machine. Lincoln 110v machine using flux core. I would grind of the galvanize coating prior to welding pipe. What is difficult I think about flux core is your puddle is a bit more violent than if you were welding with gas. It's harder To tell What's Going On. Just make sure you prepare the area first before welding. Good luck
12-23-2013, 02:50 AM
#79
Thanks, I didn't grind down the steel first for that shot. I'm still learning and finding out what I do best. I wish I could step down my tint in my helmet. It's a shade 10 and I really can't make out much during the weld because the Flux Core doesn't sit in one area. And controlling the puddle is a little different with flux. I'll get it down before too long.
02-28-2014, 11:25 AM
#80
Just a verbal update. It's been a few months. I boosted the car, tuned with crome free. Hated the hell out of it. Went back to NA. Saved up and bought NepTune RTP Demon. SOOOOOOOOOOOOOOOOOOOOOOOOOOOOOOOOOOOOOOOOOOOOOOOOO OOOOOOOOOOOOOOOOOOOOOOOOOOOOOOOOOOO much better. My god. It's amazing. My datalogging before was horrible. Now it's spot on, easy, click and go. So I will be going back to boost soon, hopefully.
I had my daughter in January also. So my build progress will be slow.
I ordered my 3" Thermal catback exhaust and it came in. I should have my 3" to 2.5" adapter today and I'll get it all up and connected to the B16A header.
I ordered some Progress CSII coilovers. Those guys at progress are amzing. So easy to work with, honestly.
I read through my whole thread and it made me giggle. I started out with an OBD0 B16A that I just wanted to swap. Now I'm all over the place, turning this into a drag car. How the times have changed. The car should be pretty quick. Only thing I have left to do is either sorce a rebuilt B16 trans with LSD, or install my own. Not sure on that one yet. I've heard it isn't that bad, so I may install one myself.
I am hoping to make some NA passes on the strip soon. After I install the exhaust and coilovers, I'll give it a go. Then I'll run it after I boost it just for comparison. Should be interesting. Hoping for 14s NA. Should be possible.
Last edited by Freemananana; 02-28-2014 at 12:15 PM.
03-01-2014, 02:02 AM
#81
Steve at Heart
The 3" n/a on b16 may be a little too much flow but should be ok. 14 second quarter miles are doable in EF chassis with a B16. Not real difficult either. Also the suspension will probably help tremedously.
03-01-2014, 04:18 PM
#82
I also need to rewire the plugs on the distributor. I found some OBD1 plugs. I have OBD0 plugs on the engine harness side still. Makes swapping distributors troublesome.
03-03-2014, 03:06 AM
#83
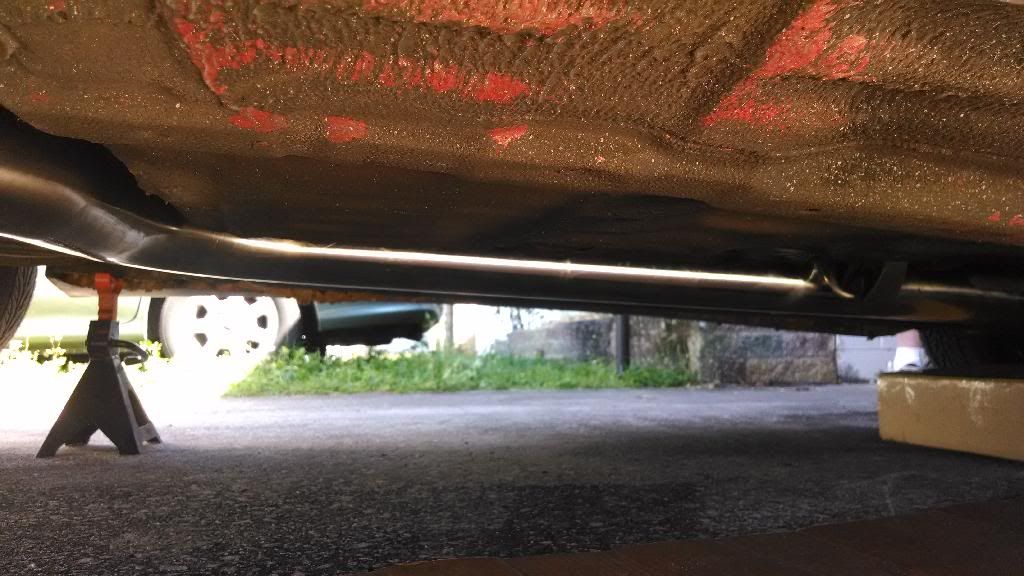
Here we go. I put on my Thermal Exhaust this weekend. This is the 3" Turbo exhaust from Thermal. I'm pretty pleased with it. My welding, not so much. This is what happens when you are a novice and you take a 3 month break.
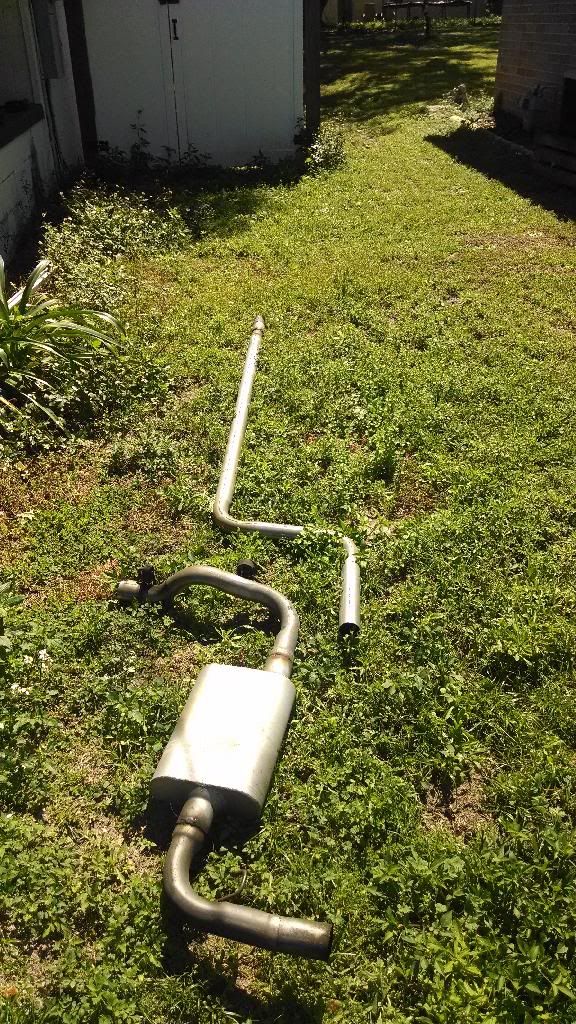
Jacked the car up, cut the current exhaust, and pulled it off of the car.
2.25" crushbent header back exhaust with flowmaster muffler for sale.
I needed some help to get the rubber grommets on the Thermal kit. The hangers are much larger.

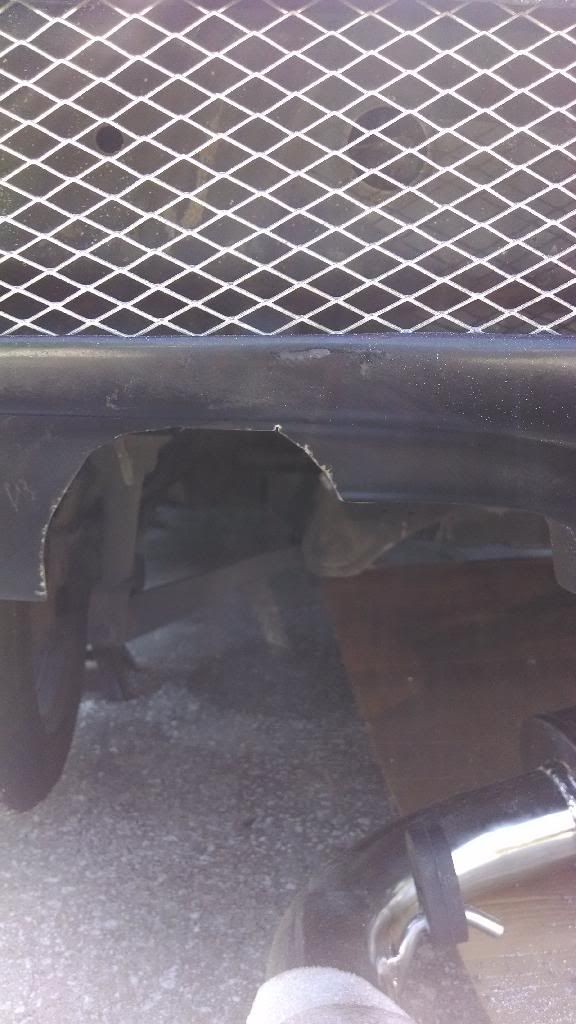
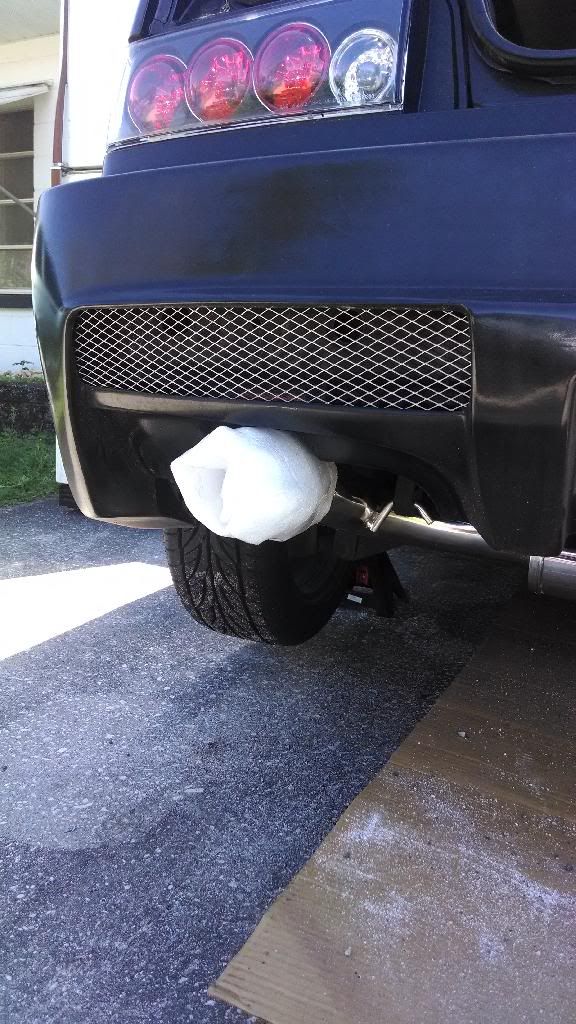
Had to cut my bumper too. I'll clean this up eventually. Not sure how, but I will.
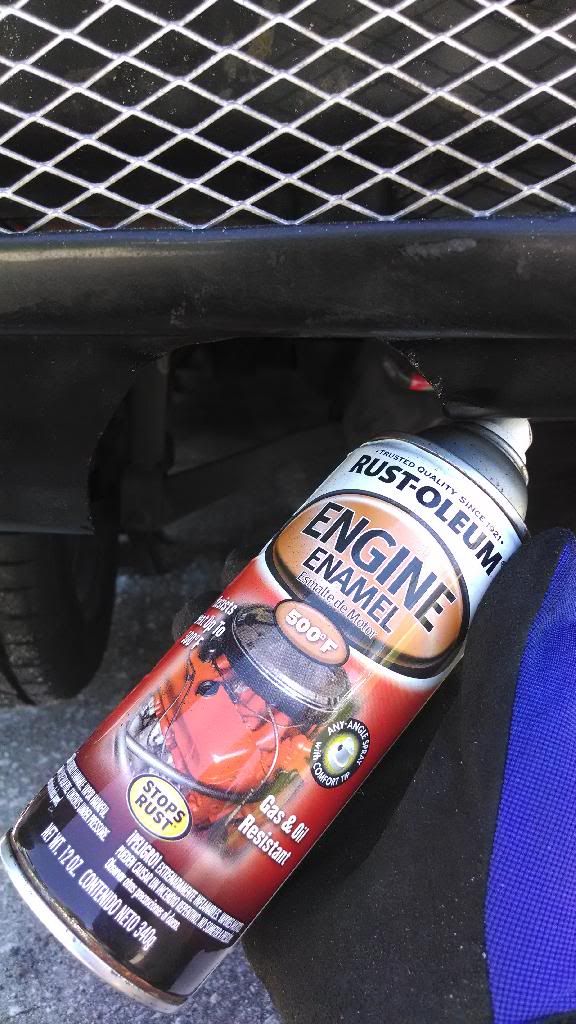
Painted it so there wasn't fiberglass exposed.
Hanging it was pretty easy.

Connected the B pipe
Hung it up
And here is my gap
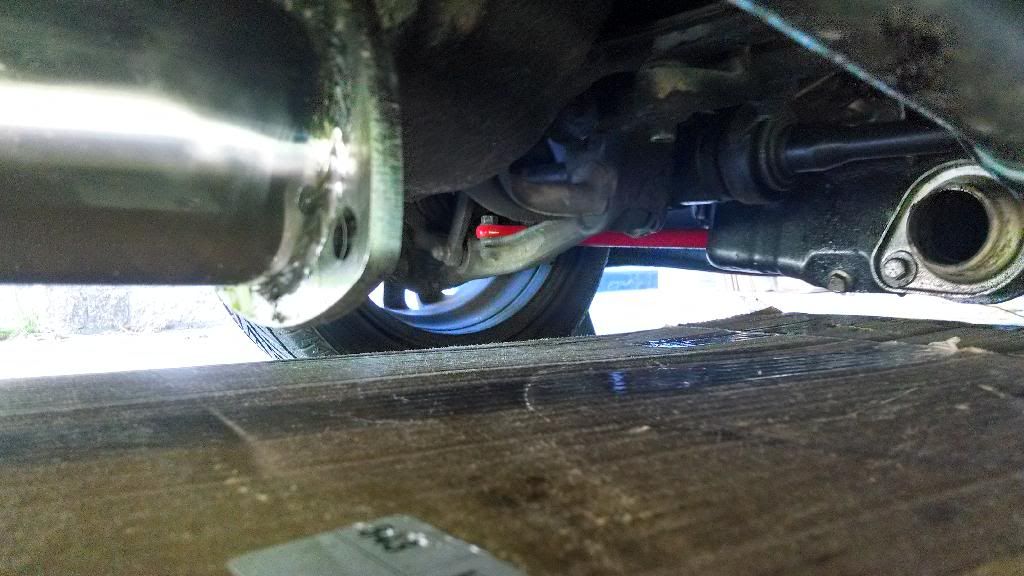
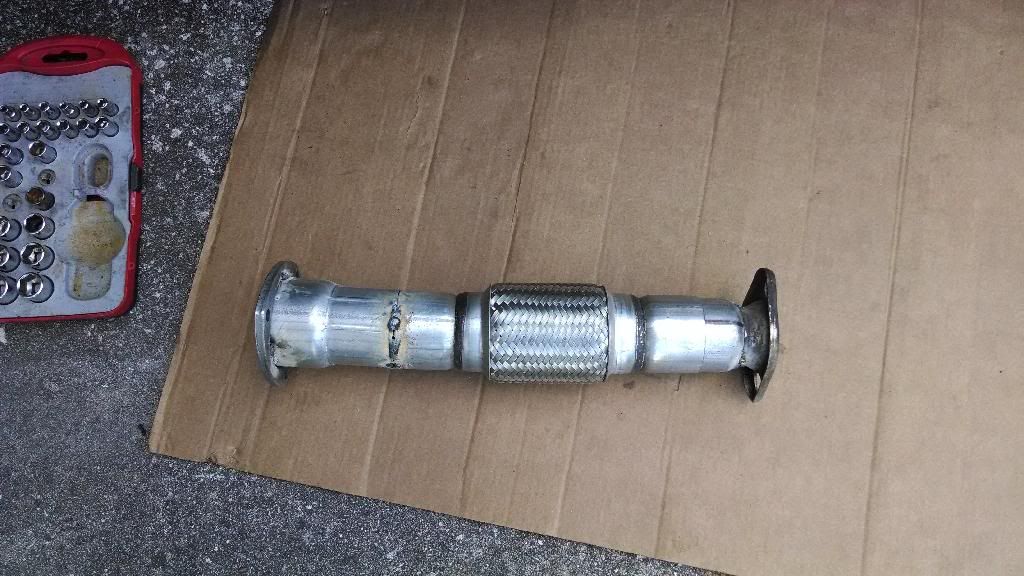
Time to fabricate something.
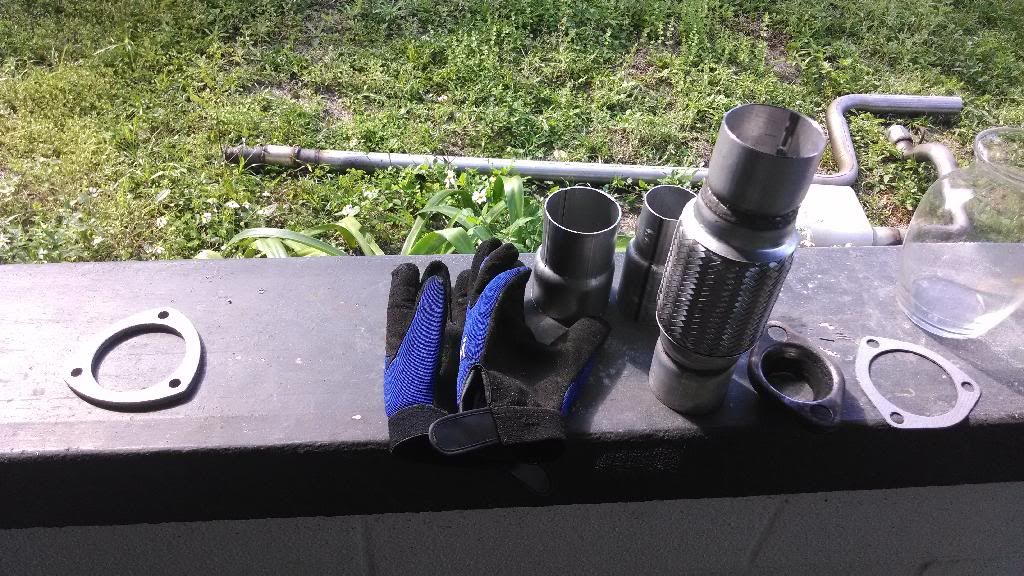
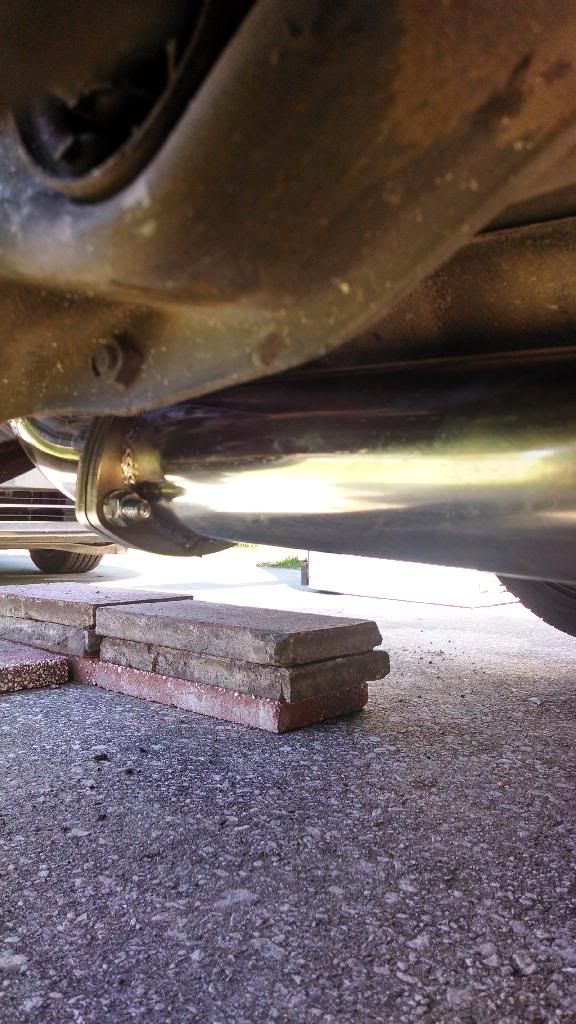
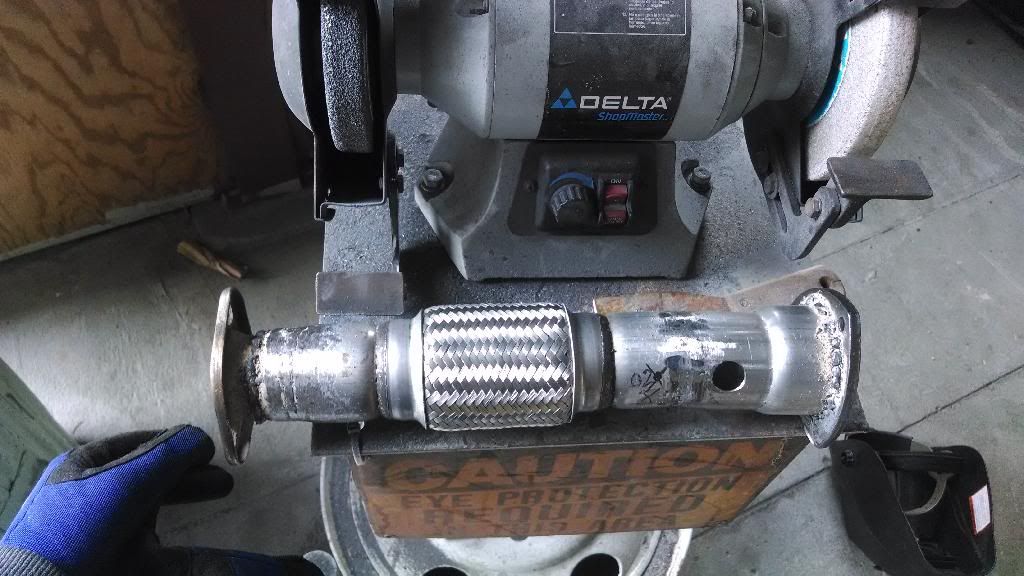
Sizing it up, going to cut it. As you can see this piece slipped into the other. It makes for an easier weld. It also means it can adjust. So I cut it short and pulled the pipe out to get the exhaust size. I also rotated the flange to make it all match up while under the car.
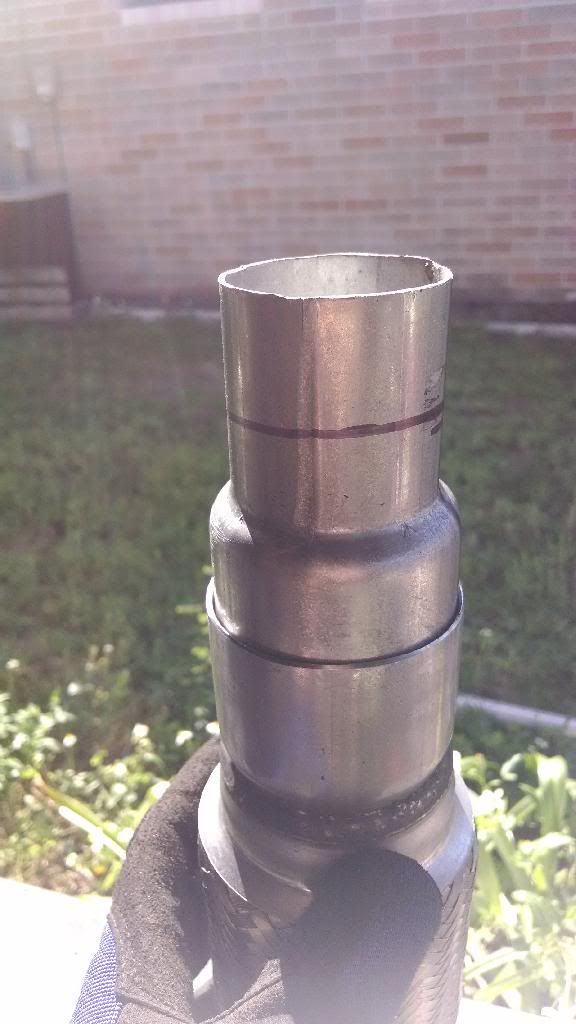
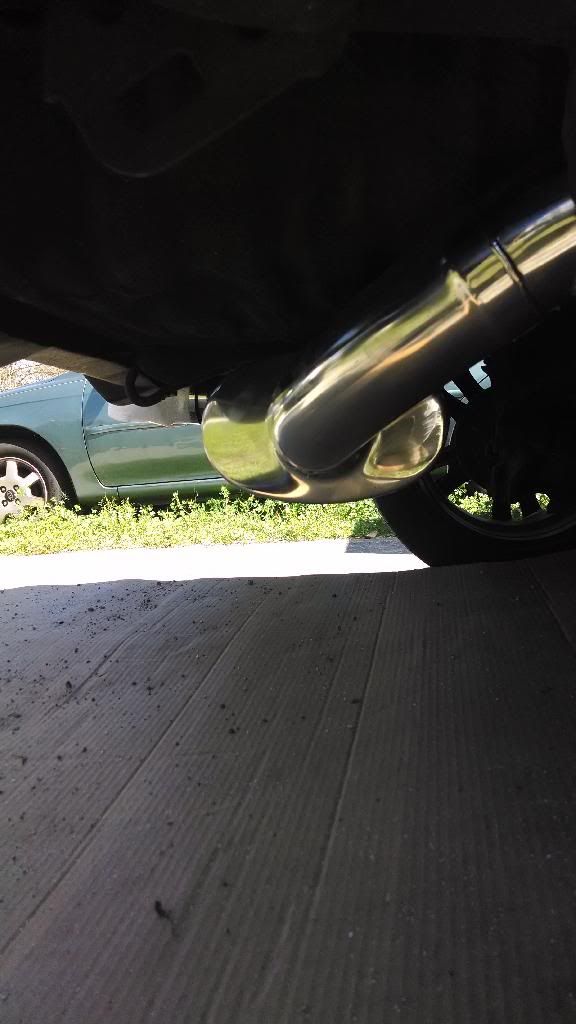
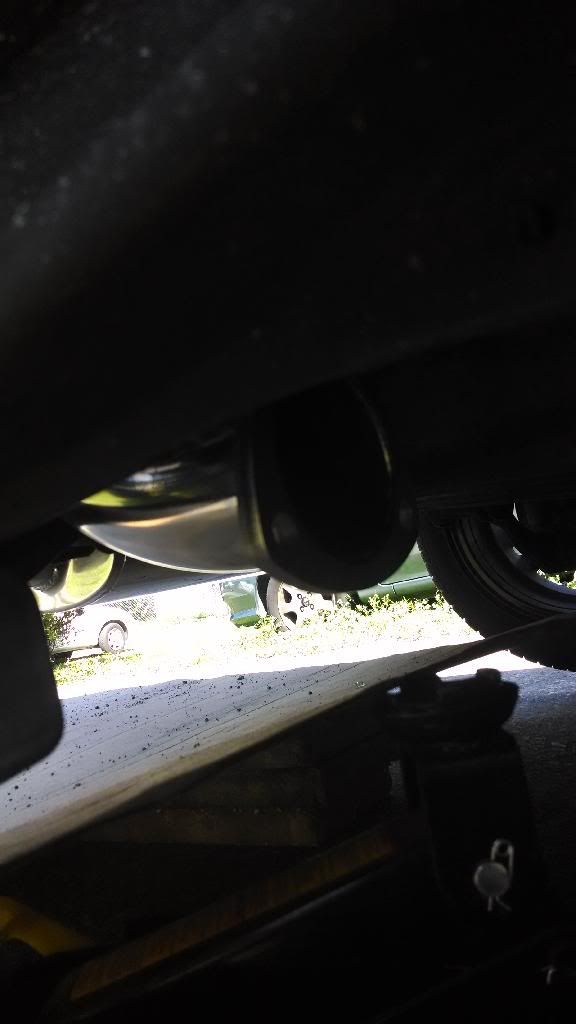
Here it is after the test fit
Here it is on the car.
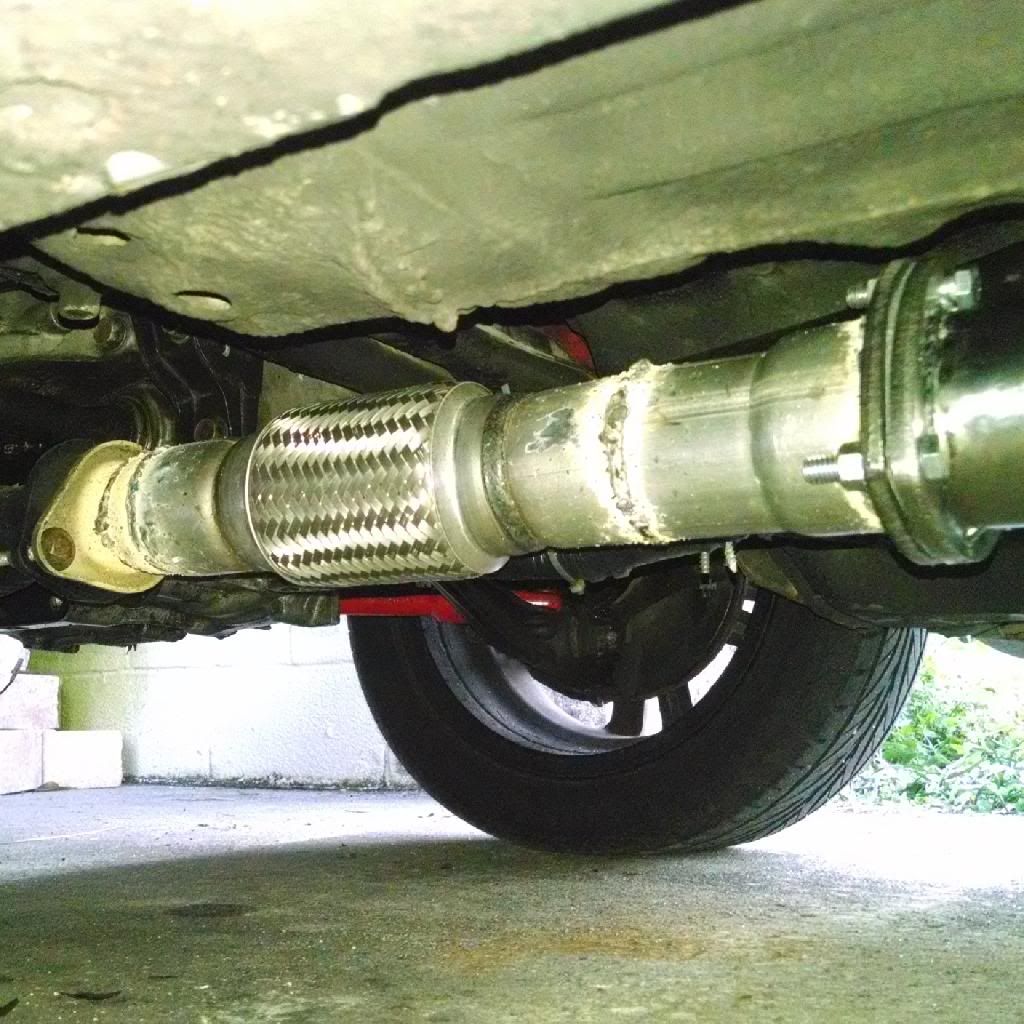
That's fully welded up. I gave it the old sound test and it doesn't sound like there are any large leaks. But I'm going to grind back the welds (to look for holes) and run them again just to be safe. I have a video, but I'll have to upload it another time and post it here.
All in all. I'm happy with it. I am taking it back off like I said. I have to paint it and install my O2 bung for my wideband.
Jacked the car up, cut the current exhaust, and pulled it off of the car.

2.25" crushbent header back exhaust with flowmaster muffler for sale.

I needed some help to get the rubber grommets on the Thermal kit. The hangers are much larger.

Had to cut my bumper too. I'll clean this up eventually. Not sure how, but I will.

Painted it so there wasn't fiberglass exposed.

Hanging it was pretty easy.


Connected the B pipe

Hung it up

And here is my gap

Time to fabricate something.

Sizing it up, going to cut it. As you can see this piece slipped into the other. It makes for an easier weld. It also means it can adjust. So I cut it short and pulled the pipe out to get the exhaust size. I also rotated the flange to make it all match up while under the car.

Here it is after the test fit

Here it is on the car.

That's fully welded up. I gave it the old sound test and it doesn't sound like there are any large leaks. But I'm going to grind back the welds (to look for holes) and run them again just to be safe. I have a video, but I'll have to upload it another time and post it here.
All in all. I'm happy with it. I am taking it back off like I said. I have to paint it and install my O2 bung for my wideband.
03-04-2014, 10:31 AM
#84
So, even with the baby, I got a couple things done. I should finish the exhaust this afternoon.

I drilled my O2 bung hole
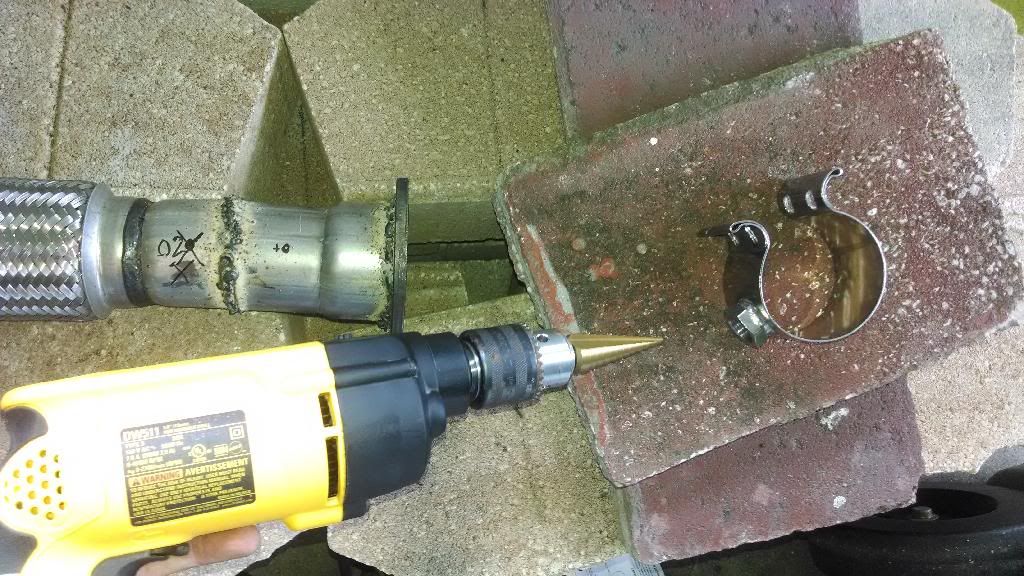
It fits, I have to clean up the crap welds (which I have done) and it will be fine. I am using the AEM no-weld O2 bung. I will do a review on it, but I'm pretty sure I'll be pleased. I can weld, obviously, but no one really has a review on this on hondatech so I decided I'd use it.
Cleaned up the welds on lunch at work. The transformer shop has a bench grinder, much better than my angle grinder at home.
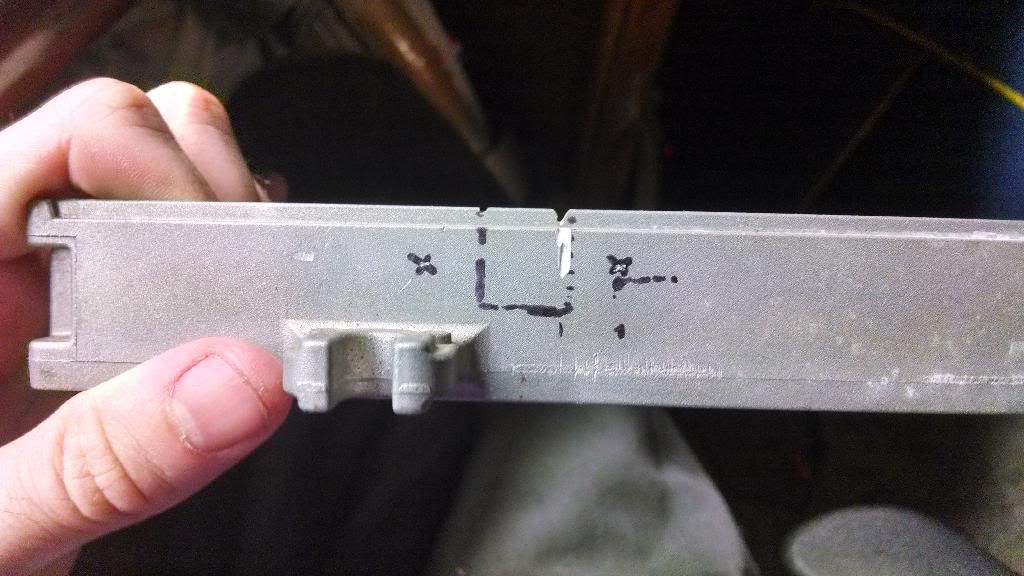
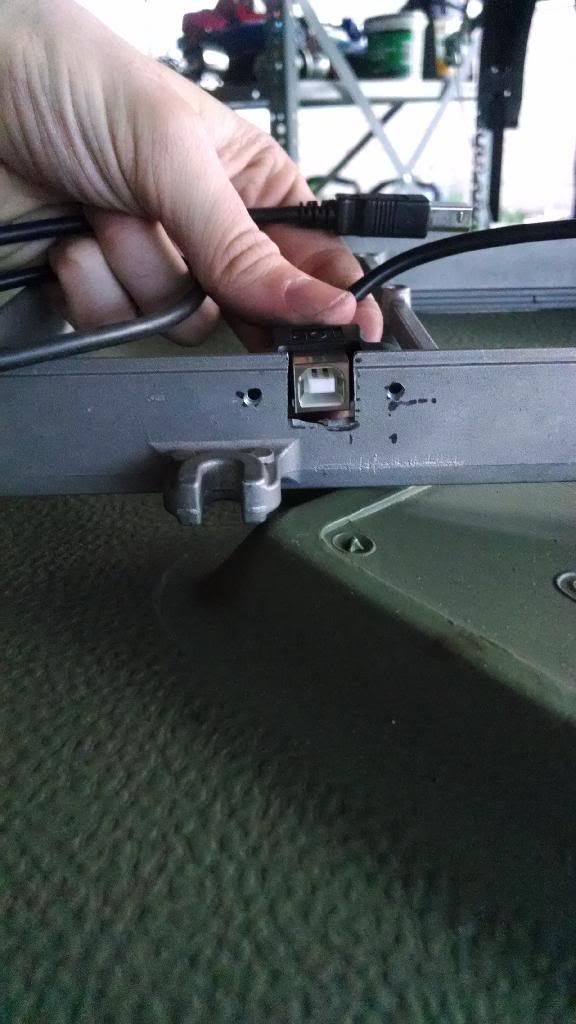
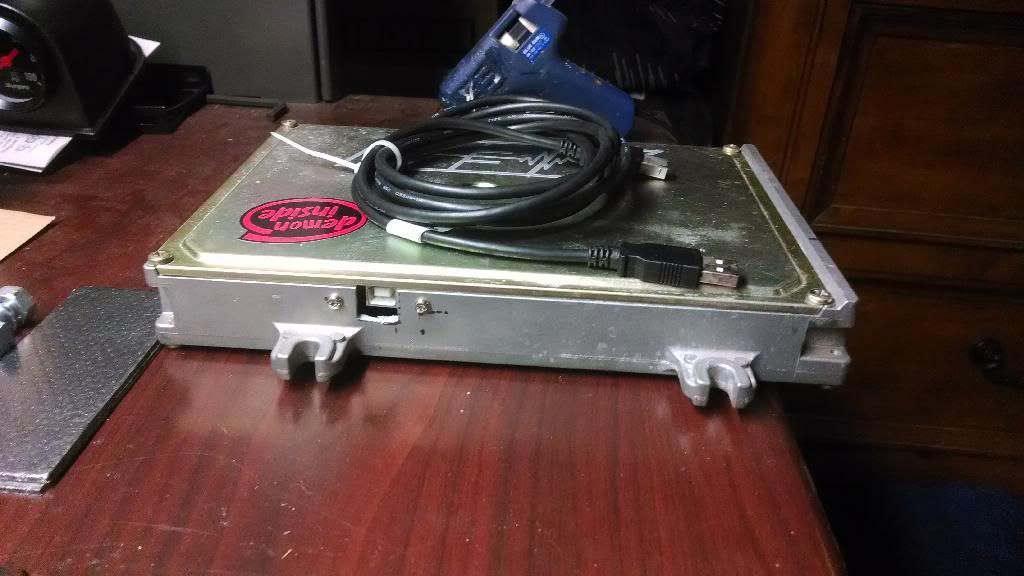
Back inside the car, we have my ECU case. I marked it out to cut, but my dremel wasn't working. So I have to bust out the big guns for a small project.
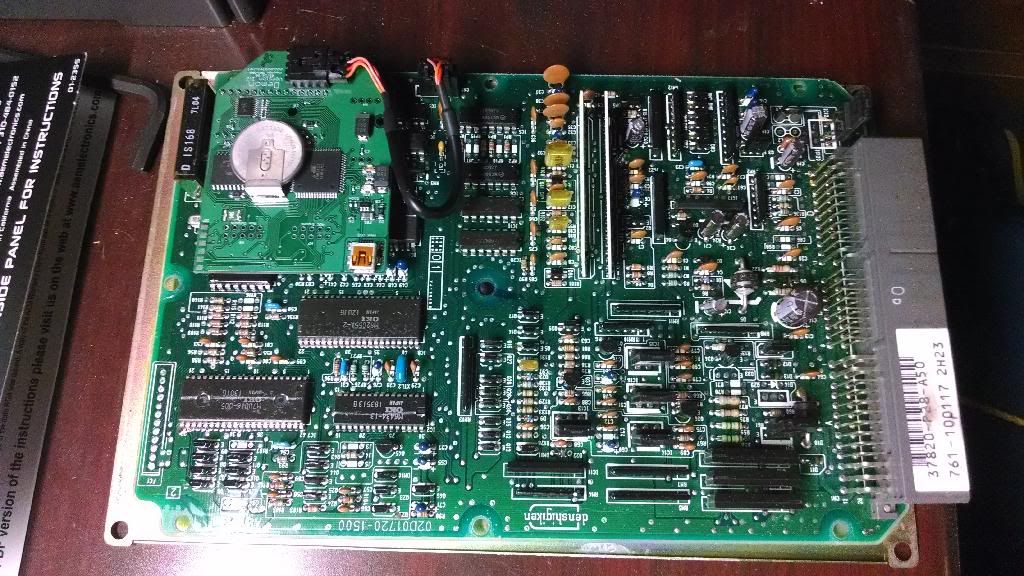
ECU chilling
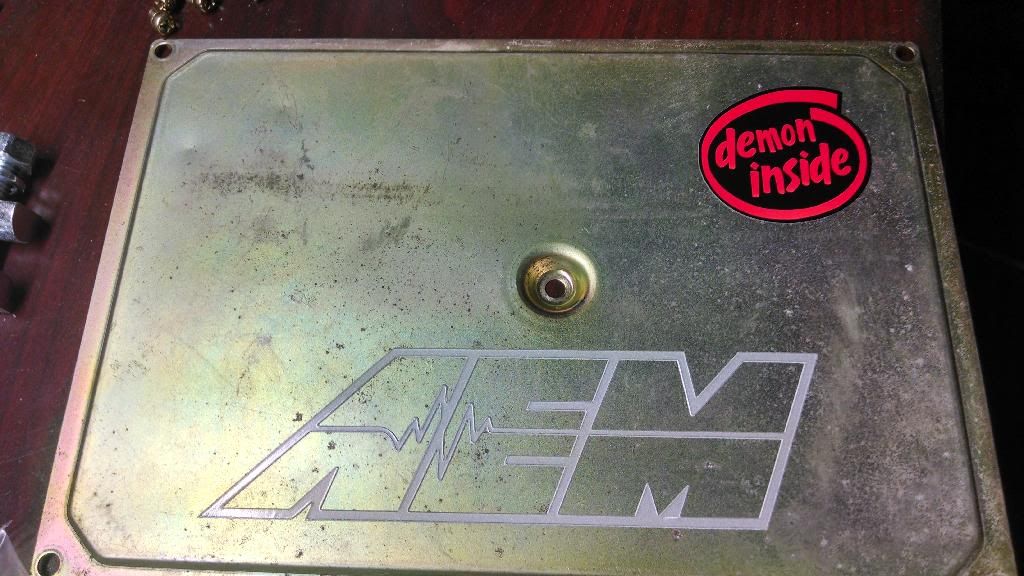
I like stickers... and I hate stickers. So I stuck em where I can't see em.
The 'ol work station. I hate having to work in the morning. This is where I ended last night.

I should have the ECU and the exhaust done today.

I drilled my O2 bung hole

It fits, I have to clean up the crap welds (which I have done) and it will be fine. I am using the AEM no-weld O2 bung. I will do a review on it, but I'm pretty sure I'll be pleased. I can weld, obviously, but no one really has a review on this on hondatech so I decided I'd use it.

Cleaned up the welds on lunch at work. The transformer shop has a bench grinder, much better than my angle grinder at home.

Back inside the car, we have my ECU case. I marked it out to cut, but my dremel wasn't working. So I have to bust out the big guns for a small project.

ECU chilling

I like stickers... and I hate stickers. So I stuck em where I can't see em.

The 'ol work station. I hate having to work in the morning. This is where I ended last night.

I should have the ECU and the exhaust done today.
03-04-2014, 04:14 PM
#85
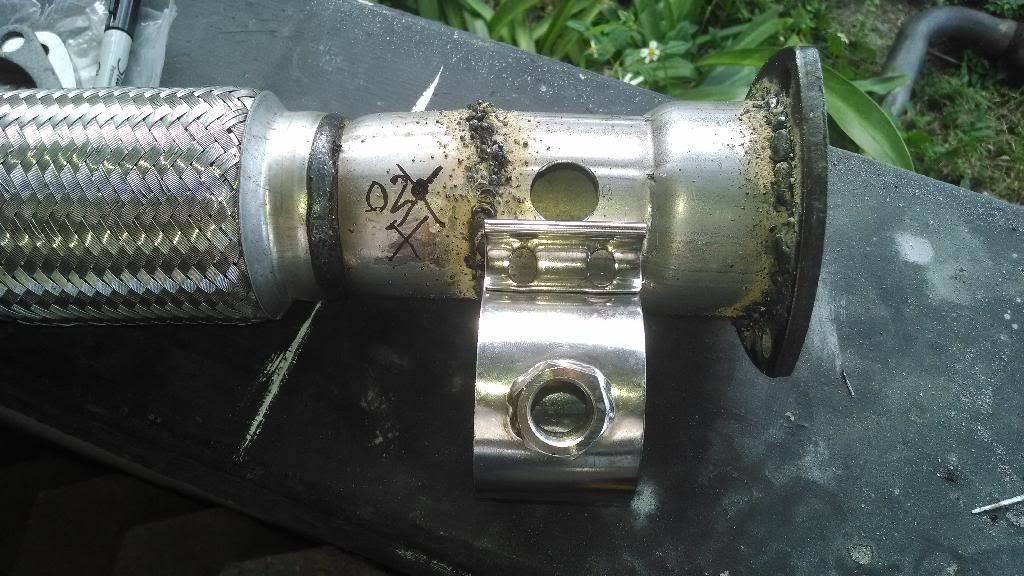
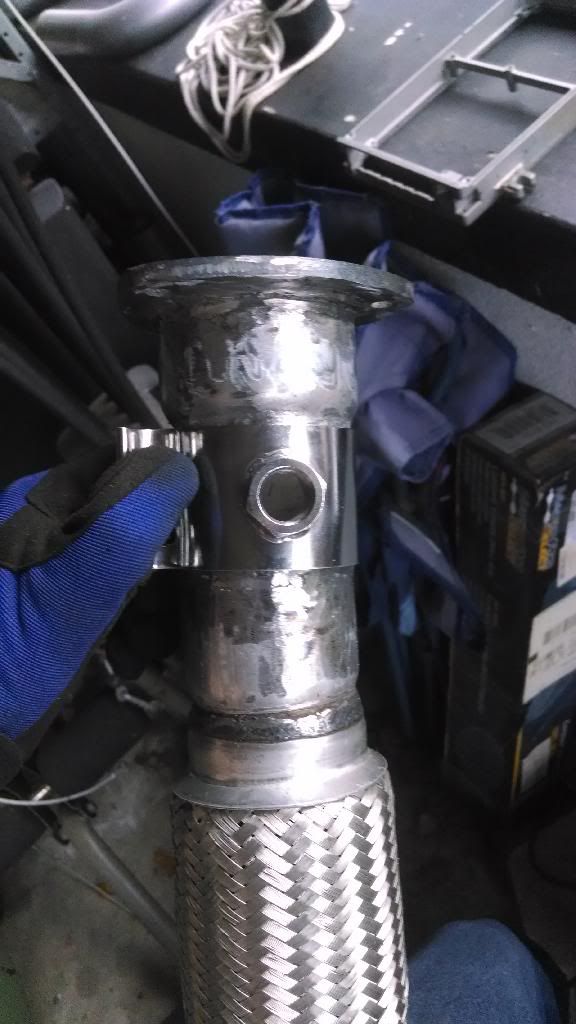
So the exhaust is turning out pretty good. Here is a shot of the clamp fitting.
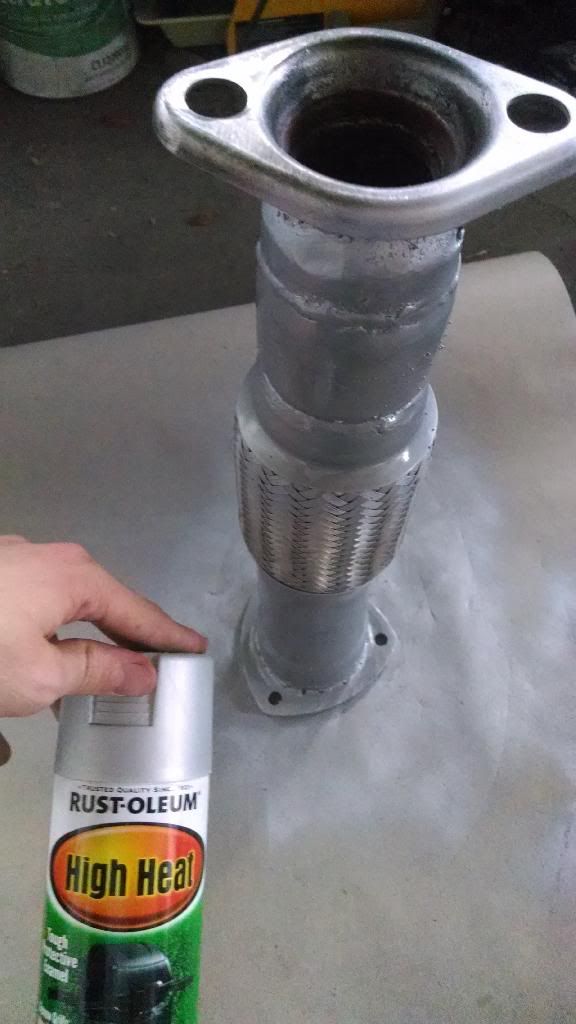
Just some silver high temp paint
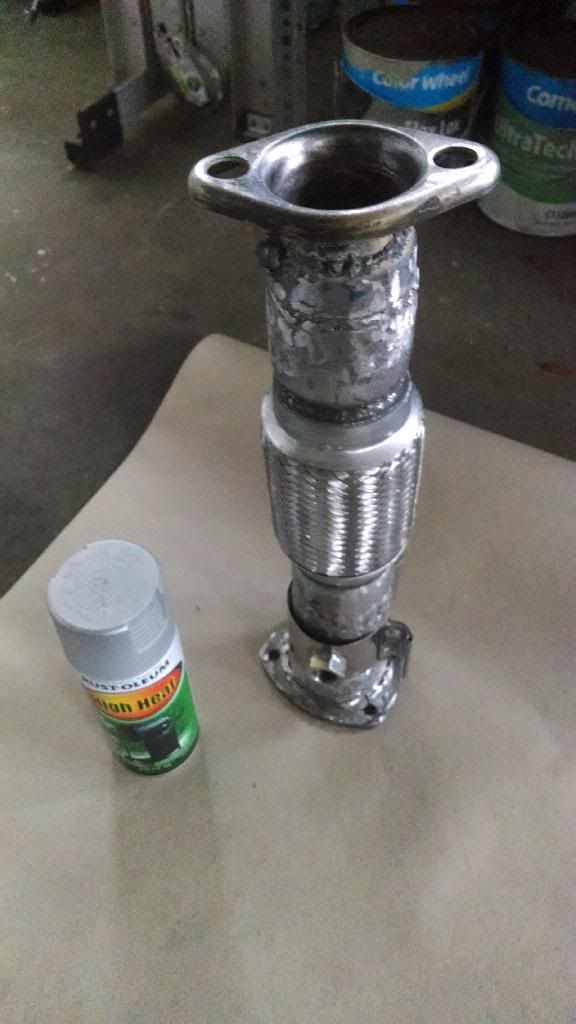
Spraying it.
Moving on to the ECU. I have it notched and drilled
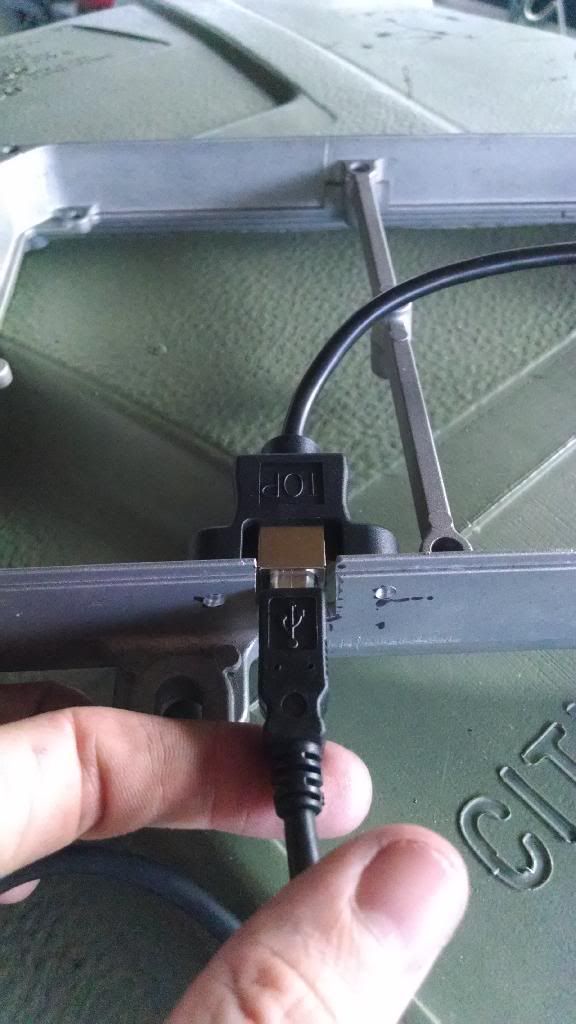
Screwed it together and put it all back inside. Ready to be put in the car.
Tomorrow I get my Progress CSII in the mail. I'll also hook the exhaust up for the last time and wire in the wideband again. I have to do some work to mount the gauge pod that I plan on using. I also need to rerun some wires/lines. But all in all, tomorrow I should be able to do some datalogging with AFRs and such through the Demon Board.
EDIT: I wonder how many people actually look at this thread. Anyone can post anything... it'd be nice to just have some feedback. Even if it wasn't overly positive. "Those welds look mediocre." That's fine with me. Anything is better than nothing.

Just some silver high temp paint

Spraying it.

Moving on to the ECU. I have it notched and drilled


Screwed it together and put it all back inside. Ready to be put in the car.

Tomorrow I get my Progress CSII in the mail. I'll also hook the exhaust up for the last time and wire in the wideband again. I have to do some work to mount the gauge pod that I plan on using. I also need to rerun some wires/lines. But all in all, tomorrow I should be able to do some datalogging with AFRs and such through the Demon Board.
EDIT: I wonder how many people actually look at this thread. Anyone can post anything... it'd be nice to just have some feedback. Even if it wasn't overly positive. "Those welds look mediocre." That's fine with me. Anything is better than nothing.
03-04-2014, 05:31 PM
#86
Youd be surprised how many people lurk bud. You do really good wiring and electronics work from what I can tell.
That 02 sensor clamp thing is a bad idea though. Paint is always a good idea on fluxcore and low qual steel but when it comes to an exhaust and you want it to last, has to be high ceramic paint. VHT Flameproof is the only off the shelf brand that works and lasts on exhausts especially near the front of the car, its like $10 a can but its the best aerosol and $5 bucks extra well spent
You need to turn the heat up on your fluxcore welder to, or dial back the feed rate and move slower. I love fluxcore, but you can tell your not dragging/pushing a puddle in alot of your pics
03-05-2014, 02:55 AM
#87
Youd be surprised how many people lurk bud. You do really good wiring and electronics work from what I can tell.
That 02 sensor clamp thing is a bad idea though. Paint is always a good idea on fluxcore and low qual steel but when it comes to an exhaust and you want it to last, has to be high ceramic paint. VHT Flameproof is the only off the shelf brand that works and lasts on exhausts especially near the front of the car, its like $10 a can but its the best aerosol and $5 bucks extra well spent
You need to turn the heat up on your fluxcore welder to, or dial back the feed rate and move slower. I love fluxcore, but you can tell your not dragging/pushing a puddle in alot of your pics
That 02 sensor clamp thing is a bad idea though. Paint is always a good idea on fluxcore and low qual steel but when it comes to an exhaust and you want it to last, has to be high ceramic paint. VHT Flameproof is the only off the shelf brand that works and lasts on exhausts especially near the front of the car, its like $10 a can but its the best aerosol and $5 bucks extra well spent
You need to turn the heat up on your fluxcore welder to, or dial back the feed rate and move slower. I love fluxcore, but you can tell your not dragging/pushing a puddle in alot of your pics
I forgot what the VHT stuff was. I'll get some at autozone. I forgot about it. I knew I used something on my valve cover that worked wonders. I'll pick some up.
As for the welding. I was having issues with burning threw. You can definitely tell it wasn't the most consistant. But I ended up grinding it down a couple times and doing it again. I looked on the inside, it appears to have penetrated through. But as far as the surface, it doesn't look good. It seals though. So for now, I'm happy.
I will go to the store and grab some different paint today. VHT Flameproof. That's right!
Today is an easy day for me. Just wiring up some gauges. I'll go by Autozone and get a spring compressor tool (rental) and VHT Flameproof and be on my way. Do I need to sand this down before I paint it with the good stuff?
03-05-2014, 10:44 AM
#88
The 02 clamp is just a big leak and more janky than it needs to be, a weldable 02 bung is only a few bucks and you coulda have welded it permanent no chance of leak, the hardest part is drilling the hole and it looks like you had the proper tool and did a great job on that
I wouldnt bother with repainting the flexpipe, the paint would need to be removed completely, just keep it on hand for the next project.
I use the flameproof flat aluminum on my downpipe and wastegate dumptube and it still looks new, I follow the cure procedure pretty closely to.
I wouldnt bother with repainting the flexpipe, the paint would need to be removed completely, just keep it on hand for the next project.
I use the flameproof flat aluminum on my downpipe and wastegate dumptube and it still looks new, I follow the cure procedure pretty closely to.
03-05-2014, 12:53 PM
#89
The 02 clamp is just a big leak and more janky than it needs to be, a weldable 02 bung is only a few bucks and you coulda have welded it permanent no chance of leak, the hardest part is drilling the hole and it looks like you had the proper tool and did a great job on that
I wouldnt bother with repainting the flexpipe, the paint would need to be removed completely, just keep it on hand for the next project.
I use the flameproof flat aluminum on my downpipe and wastegate dumptube and it still looks new, I follow the cure procedure pretty closely to.
I wouldnt bother with repainting the flexpipe, the paint would need to be removed completely, just keep it on hand for the next project.
I use the flameproof flat aluminum on my downpipe and wastegate dumptube and it still looks new, I follow the cure procedure pretty closely to.
03-06-2014, 04:14 AM
#90
First off. This thing is crap
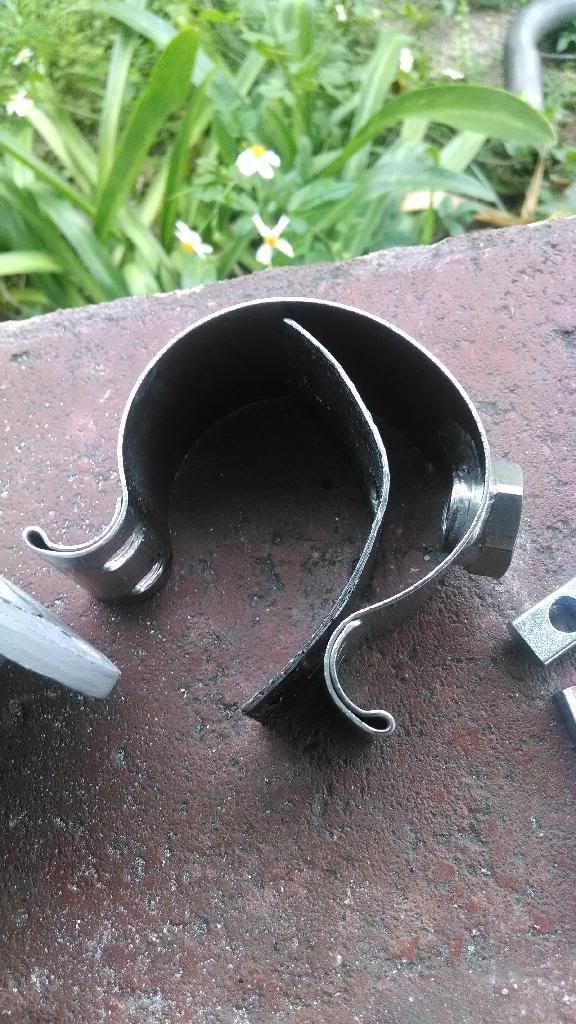
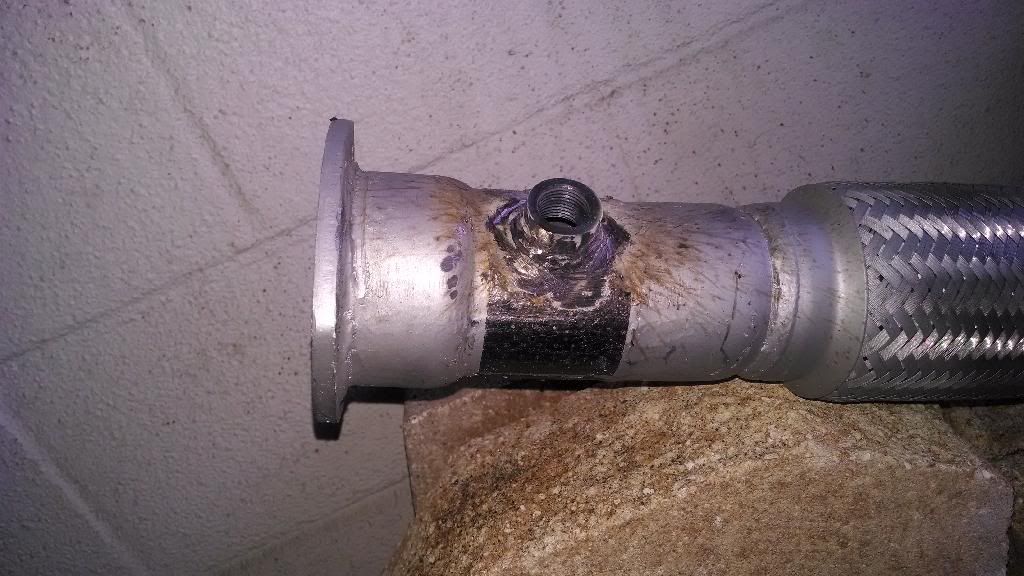
The gasket came apart while installing it. It didn't fit over 2.5" pipe (the size it says it fits). I couldn't get the bolt to go through both sides to tighten it. Overall, just a pain in the butt and it didn't work.
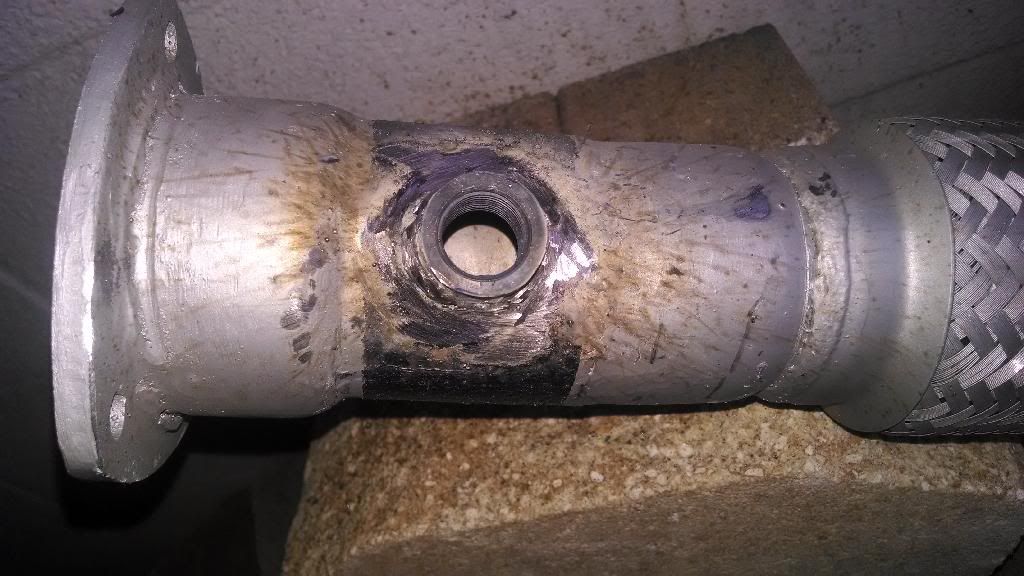
So I took the grinder to it
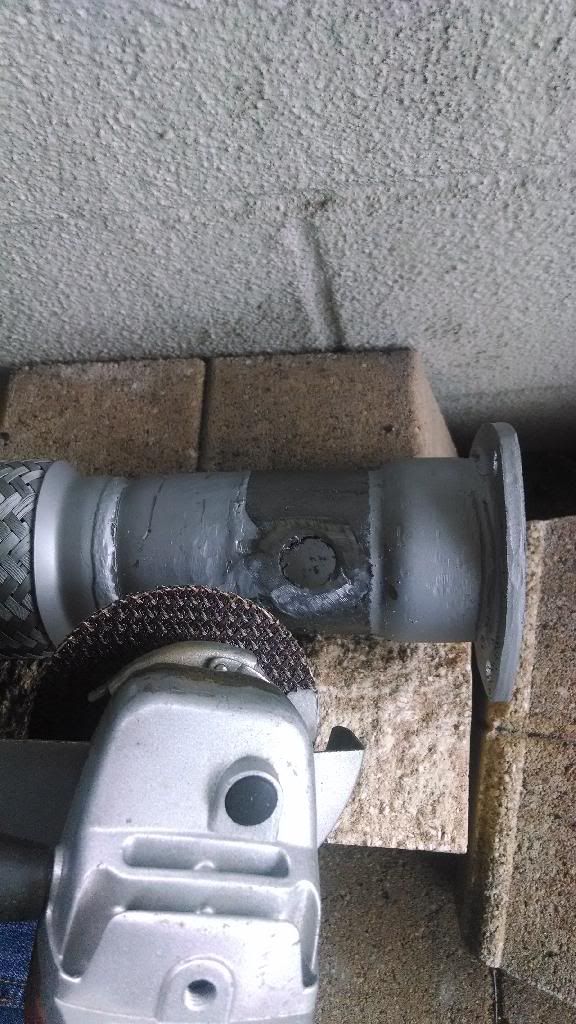
And just welded a bung on anyways.
Taped off the threads and painted it
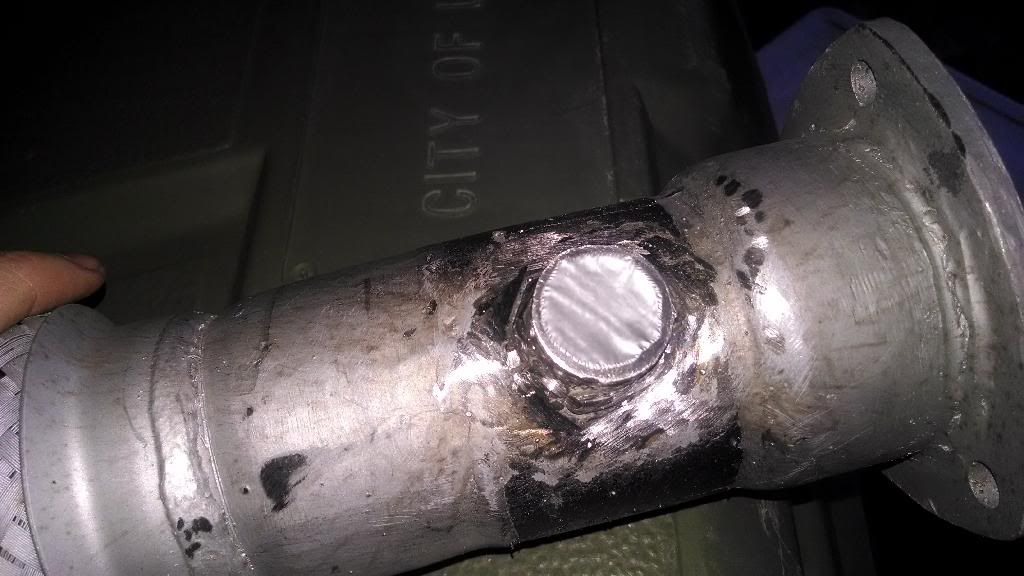
I can't tell you all how pissed I was. The bolts weren't long enough for this pipe and the gasket fell apart. I'm going to try and return it. Definitely a pain. The bung that I welded on took like 10 minutes to do and it looks cleaner. Don't use this product. That's my review.
I was at autozone or whatever, I have a $50 gift card. So I was looking at stuff.
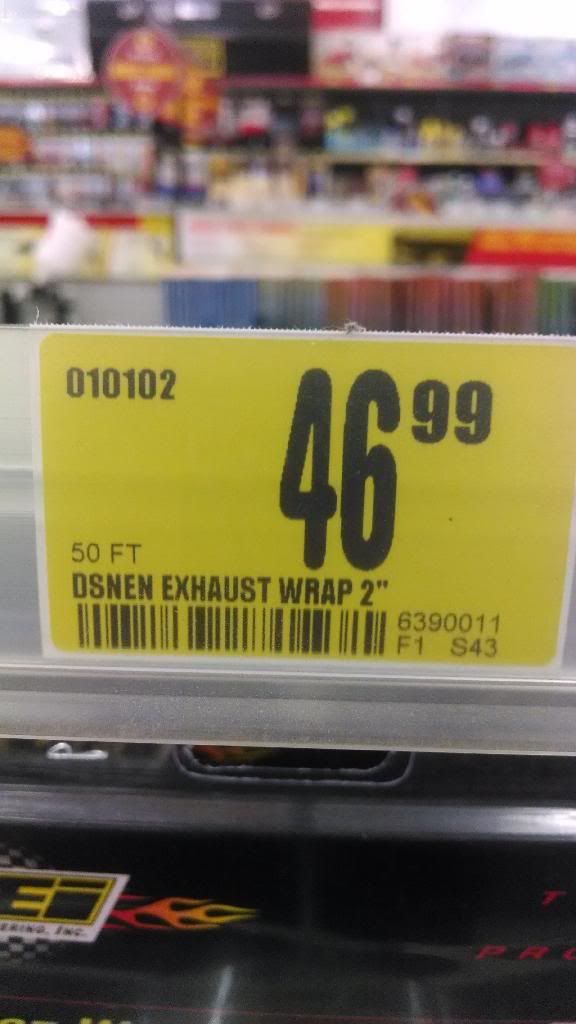
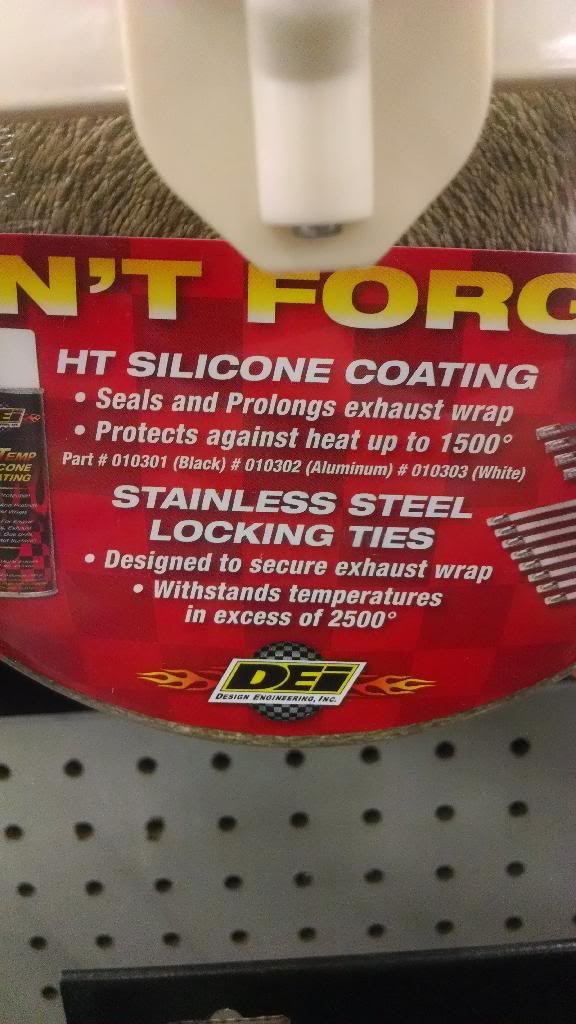
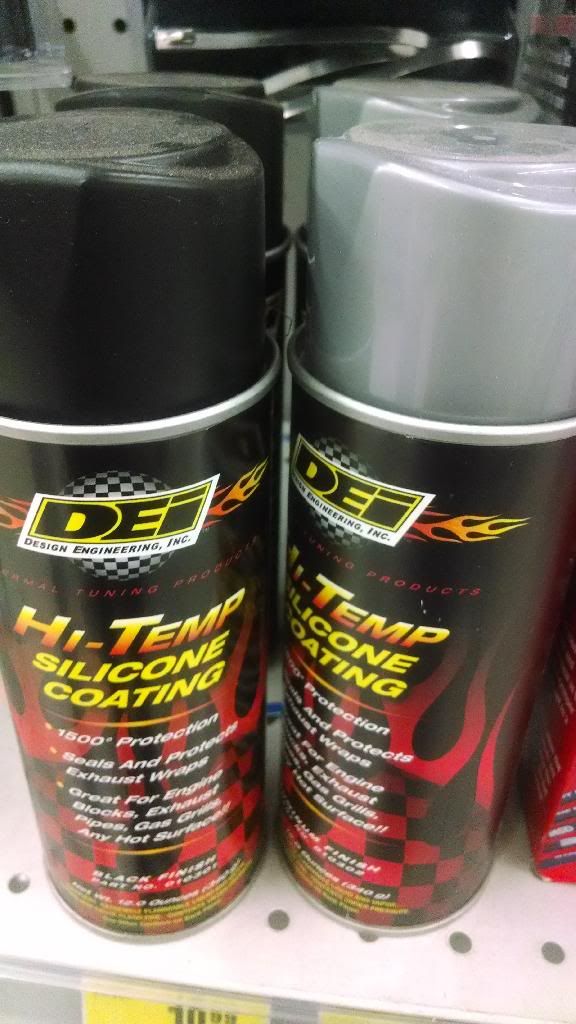
DEI wrap and spray. Anyone know how much I'd need to wrap a 2.5" downpipe? And does everyone use the spray with the wrap?
Also, got my coilovers in the mail.

Should be on this weekend. I have to trim up my gauge pod and a couple other things, but it will be 'done' ish in NA form. At least, I'll be able to go to the track hopefully. I'm not really excited about being so low though. A 2" drop is going to be a lot, for me at least. There are a lot of steep hills where I live, don't want to nose into them. I also have to trim my bumper up some more to fit the exhaust tip. It touches the bumper and vibrates the crap out of it.

The gasket came apart while installing it. It didn't fit over 2.5" pipe (the size it says it fits). I couldn't get the bolt to go through both sides to tighten it. Overall, just a pain in the butt and it didn't work.
So I took the grinder to it

And just welded a bung on anyways.


Taped off the threads and painted it

I can't tell you all how pissed I was. The bolts weren't long enough for this pipe and the gasket fell apart. I'm going to try and return it. Definitely a pain. The bung that I welded on took like 10 minutes to do and it looks cleaner. Don't use this product. That's my review.
I was at autozone or whatever, I have a $50 gift card. So I was looking at stuff.


DEI wrap and spray. Anyone know how much I'd need to wrap a 2.5" downpipe? And does everyone use the spray with the wrap?
Also, got my coilovers in the mail.

Should be on this weekend. I have to trim up my gauge pod and a couple other things, but it will be 'done' ish in NA form. At least, I'll be able to go to the track hopefully. I'm not really excited about being so low though. A 2" drop is going to be a lot, for me at least. There are a lot of steep hills where I live, don't want to nose into them. I also have to trim my bumper up some more to fit the exhaust tip. It touches the bumper and vibrates the crap out of it.
03-06-2014, 04:59 AM
#91
The wrap is really dependant of how much overlap you do. You would use the entire 50' roll on a downpipe to test pipe though. I think it uses about 10" per wrap around the pipe, think how fast it would go. And the spray is no good.
I personally buy wrap off ebay, $30 for 100', holds up fine, just no big name behind it, I tend to change it, or setups, but never have a problem with it, works just the same.
I personally buy wrap off ebay, $30 for 100', holds up fine, just no big name behind it, I tend to change it, or setups, but never have a problem with it, works just the same.
03-06-2014, 05:22 AM
#92
I have to find this eBay wrap everyone talks about. I haven't seen it priced that well during my search. I was just glancing around autozone because I have some cash to spend there. And I got a spring compressor tool there for use this weekend.
I'm sure my set up will be changing within a year or so.
I'm sure my set up will be changing within a year or so.
03-06-2014, 07:19 AM
#93
Honda-Tech Member
Your welds look better than my welds ha ha...
Where's the shot of fitment around the shifter? i think it'll fit well, but it's good to be sure. 1st and 2nd gear would make my shifter hit the exhaust... but it was some shitty exhaust that someone pieced together.
There is such a thing as BBQ paint. It is used for painting BBQ's. If that doesn't put up with the heat, I don't know what will!
Looks good so far.
03-06-2014, 08:39 AM
#95
Your welds look better than my welds ha ha...
Where's the shot of fitment around the shifter? i think it'll fit well, but it's good to be sure. 1st and 2nd gear would make my shifter hit the exhaust... but it was some shitty exhaust that someone pieced together.
There is such a thing as BBQ paint. It is used for painting BBQ's. If that doesn't put up with the heat, I don't know what will!
Looks good so far.
Where's the shot of fitment around the shifter? i think it'll fit well, but it's good to be sure. 1st and 2nd gear would make my shifter hit the exhaust... but it was some shitty exhaust that someone pieced together.
There is such a thing as BBQ paint. It is used for painting BBQ's. If that doesn't put up with the heat, I don't know what will!
Looks good so far.
I'll get a shot of it installed tomorrow. It's pouring today, so no working on the car. I think it clears the shifter though.
I used BBQ paint pretty much. It had a picture of the BBQ on it.
Thanks!
Gotcha. I'll look for the 100' of 2" wrap on eBay and go for that. I still have to fix up my downpipe and tap it for an EGT probe. Just cause.
03-07-2014, 06:01 AM
#96
Here ya go, I buy from this seller aswell, cant beat $32 shipped for 100' , he sells alot of other cool random shlt I always end up buying to
http://www.ebay.com/itm/2-X-100-Fiberglass-Exhaust-Header-Wrap-Black-/191089193902?pt=Motors_Car_Truck_Parts_Accessories&hash=item2c7dcdb3ae
http://www.ebay.com/itm/2-X-100-Fiberglass-Exhaust-Header-Wrap-Black-/191089193902?pt=Motors_Car_Truck_Parts_Accessories&hash=item2c7dcdb3ae
03-07-2014, 06:53 AM
#97
He does have some cool stuff. I've venting my catch can right now and I think I may get one of those AN to barbed fittings. Just drill and tap some threads, then put the vent on. Easy peasy.
On catch cans, aside from SS braided lines, what can I use to route to the catch can? I'm going to google it myself. But if anyone has experience, that'd be nice.
On catch cans, aside from SS braided lines, what can I use to route to the catch can? I'm going to google it myself. But if anyone has experience, that'd be nice.
03-07-2014, 07:12 AM
#98
Power steering fluid return line is about the best thing you can use. Most places only stock it up to 1/2" ID though (which is more than enough), about $2/foot, rated for oil and high heat, never let ya down
Try and use regular hose and it falls apart and "sweats" the oil
Try and use regular hose and it falls apart and "sweats" the oil
03-07-2014, 07:30 AM
#99
Power steering fluid return line is about the best thing you can use. Most places only stock it up to 1/2" ID though (which is more than enough), about $2/foot, rated for oil and high heat, never let ya down
Try and use regular hose and it falls apart and "sweats" the oil
Try and use regular hose and it falls apart and "sweats" the oil
03-07-2014, 08:14 AM
#100
Fuel line doesnt go to 1/2" I dont think, and isnt rated for oil and will sweat and degrade much faster with oil/oil vapour going through it. Been there done that.
Gotta say "power steering return line" though, feed lines are totally different
Gotta say "power steering return line" though, feed lines are totally different