
DIY: H.I.D Retrofit using OEM parts into USDM Headlights
 11-28-2009, 09:16 PM
#1
Honda-Tech Member
Thread Starter
Join Date: Jul 2005
Location: Vancity, BC
Posts: 270
Likes: 0
Received 0 Likes
on
0 Posts
This DIY has been taken from my Build Thread located here> https://honda-tech.com/forums/appearance-build-threads-122/boosted-crx-turbod-ed7-build-timeline-2679776/
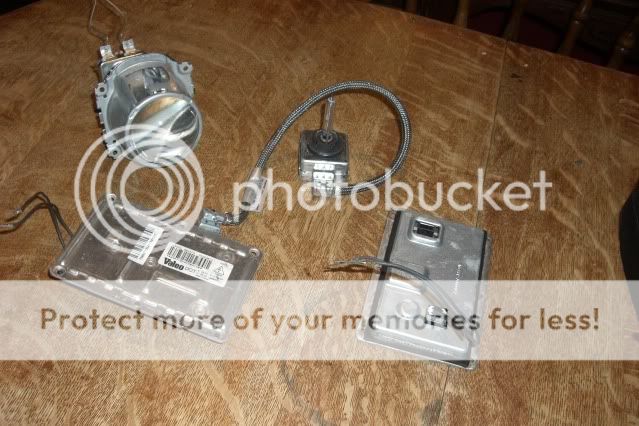
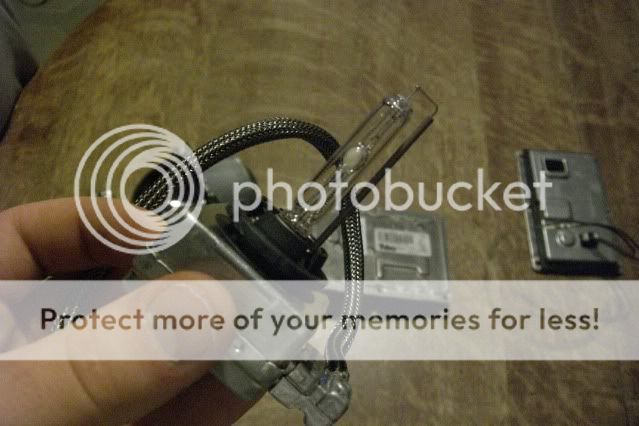
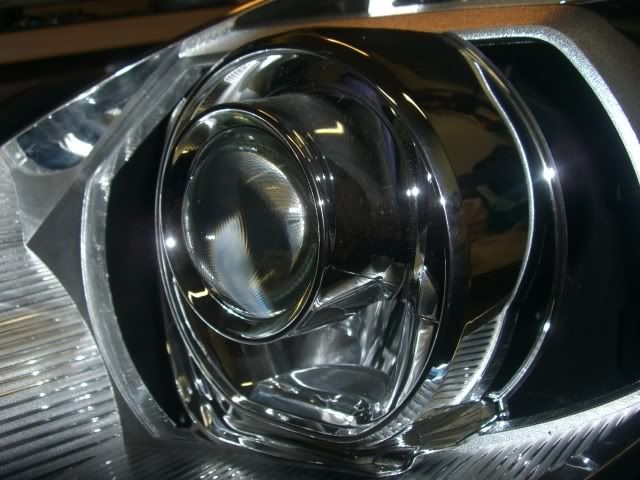
So over the last couple days I've been messing with these HID parts I took out of a set of 300C headlights (FREEBIE, score!) So here's the start of a DIY.
If you can manage to find a set of these headlights, first throw them in the oven or destruct them in any other fun way without damaging the projectors/ballasts so that all you have left are the projectors, bulbs, ballasts like so.
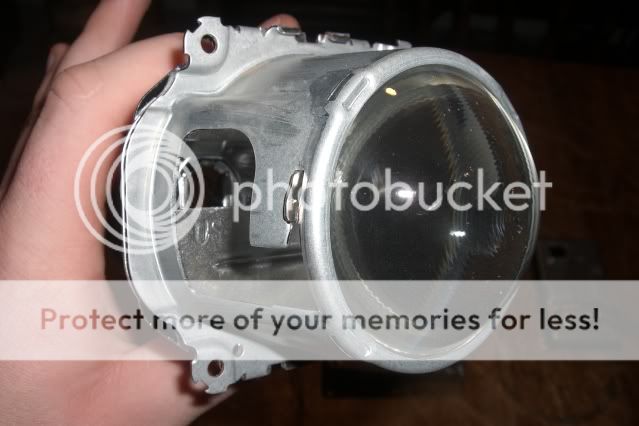
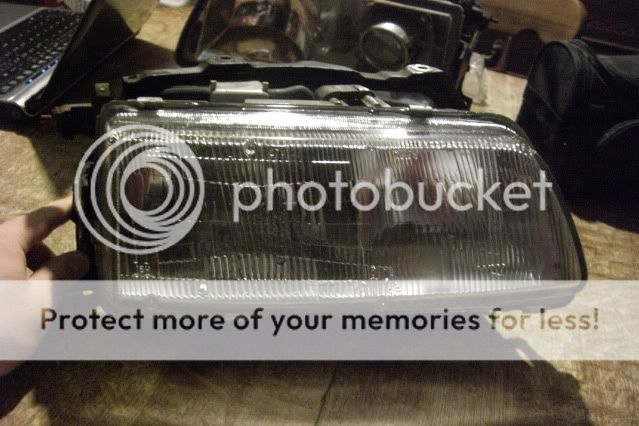
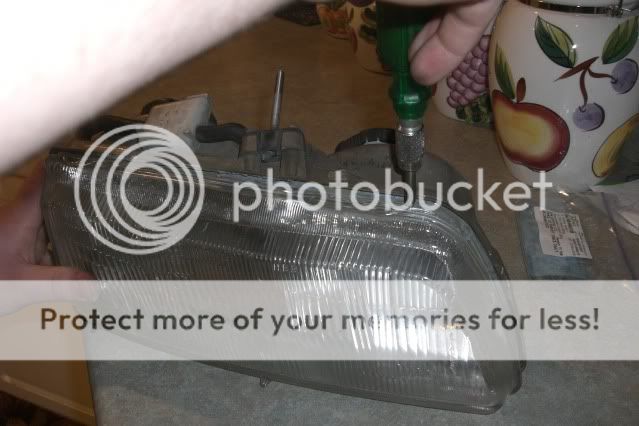
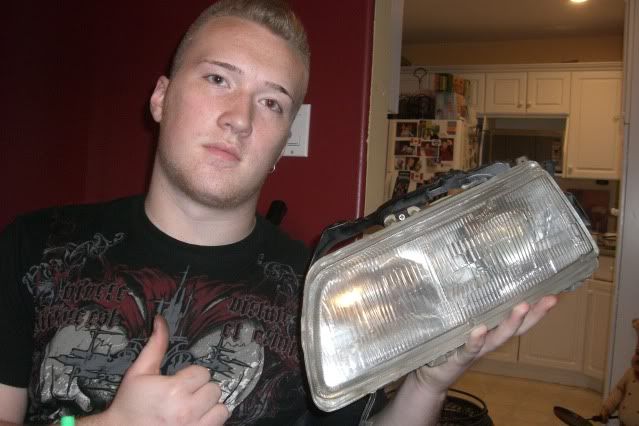
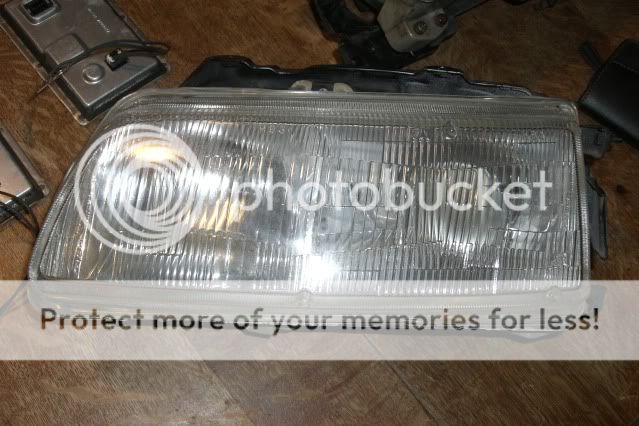
Now all you have to do is put them into these! Stock EF headlight in all it's glory. I'm assuming you all know how to remove your headlights, if not then I wouldn't attempt this DIY.
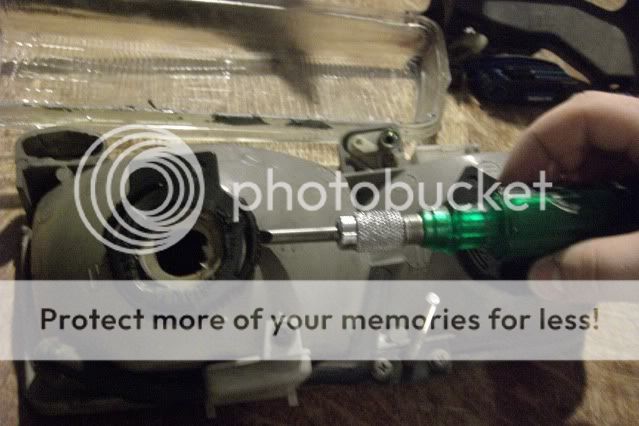
Now flip it over and remove all the phillips screws holding the headlight bracket onto the headlight.
Take a flathead and pry off the stock bulb lock. Don't worry about breaking these as you will be cutting where it mounts completely off the back of the headlight anyways.
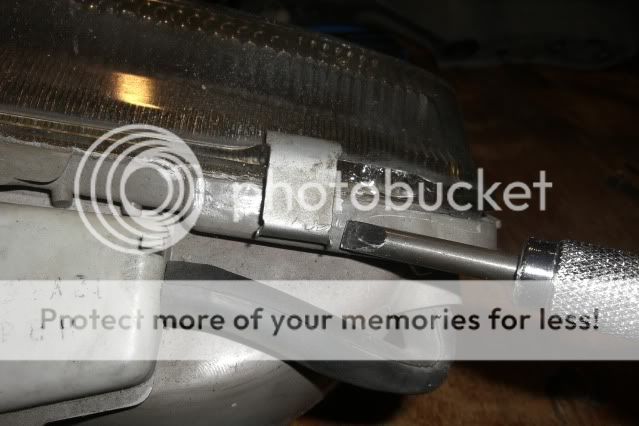
Now carefully, I said CAREFULLY wiggle these bastard clips off of the headlight with gentle precision. If your not careful you'll shatter the glass where it mounts to, hopefully not in your face and eyes like I did. Eye protection would be a great idea.
Now pre-heat your (moms) oven to 350 and throw this bad boy in there. Set the timer for 5 mins.
Now slide your flatty in between the glass and the plastic and carefully spread them apart, they should separate easily, if not try another 60 secs at a time until they split open.
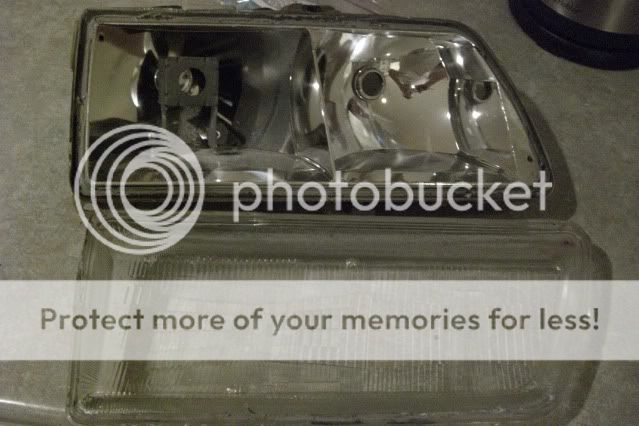
This is what you will have when you're done, put the glass in a safe place.
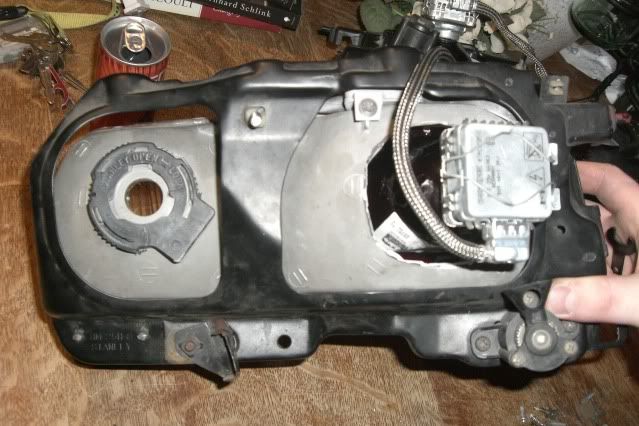
Grab a phillips and remove the two screws that hold the headlight shroud onto the housing.
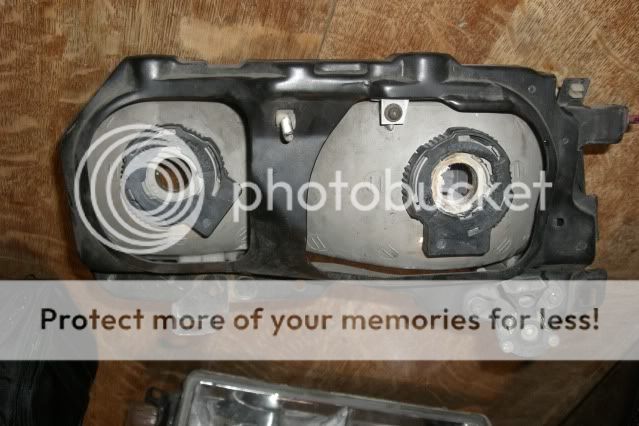
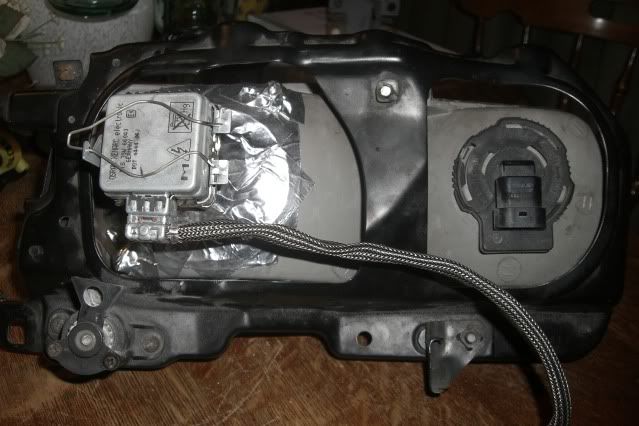
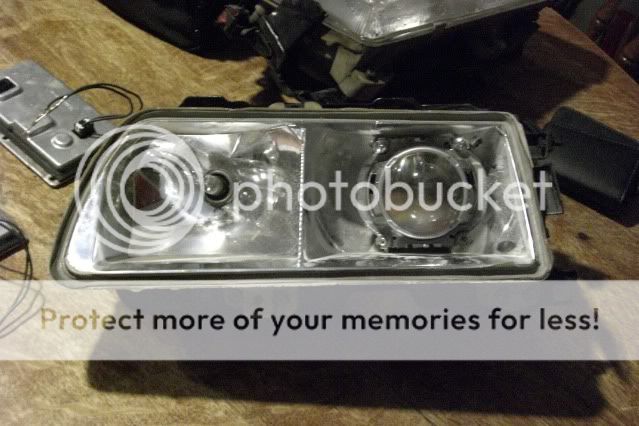
This is what you are left with once you've stripped the headlight bare.

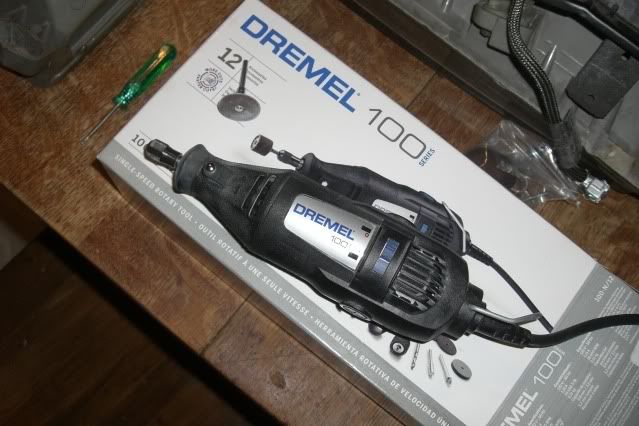
Now bust your Dremel out. If you don't have one of these I suggest you invest in one, I got this unit for $50 brand new and I'm always finding a reason to use it.
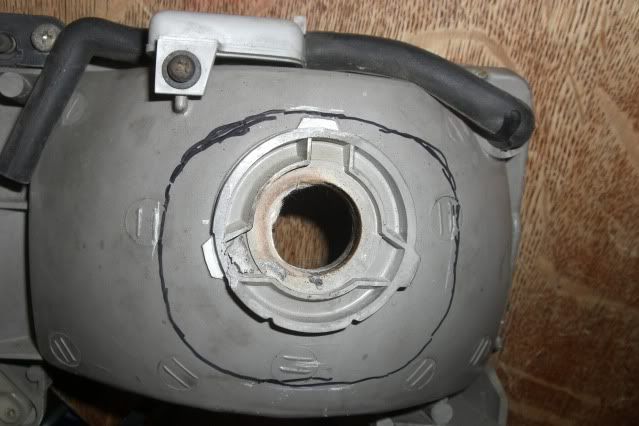
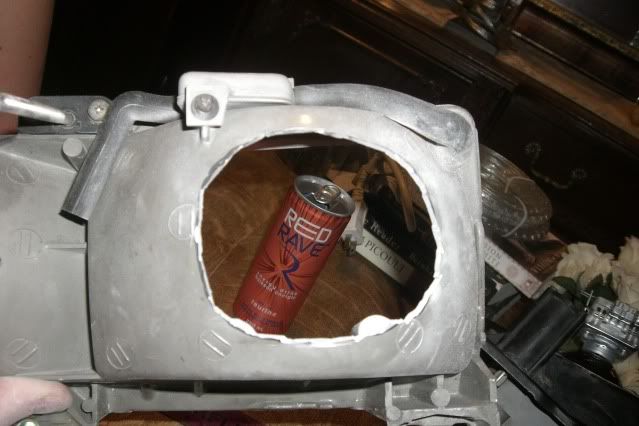
Now flip your bare housing over and draw with a Sharpie where you'll need to cut. Start out smaller then you think it needs to be. You can always cut more but you cant add any if you cut too much.
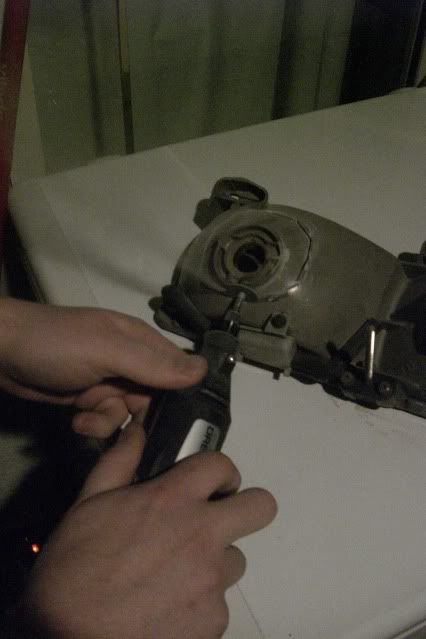
Plug your Dremel in, put a cutting disk on 'er and throw on some eye protection then start cutting away.
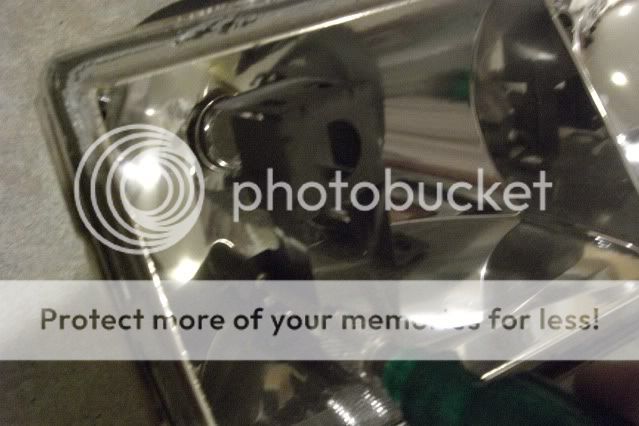
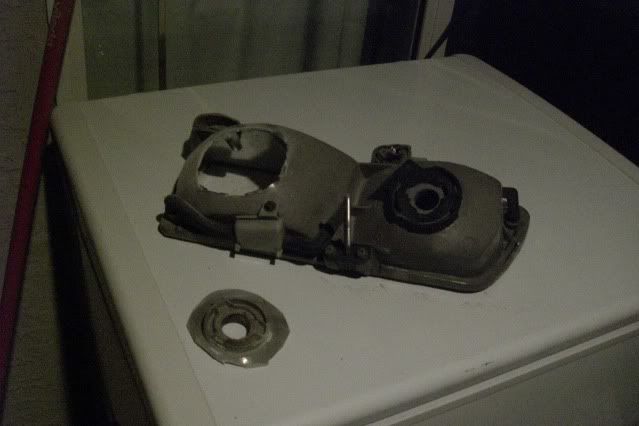
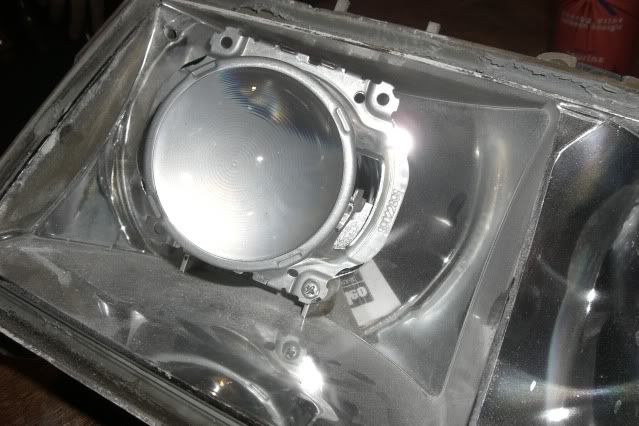
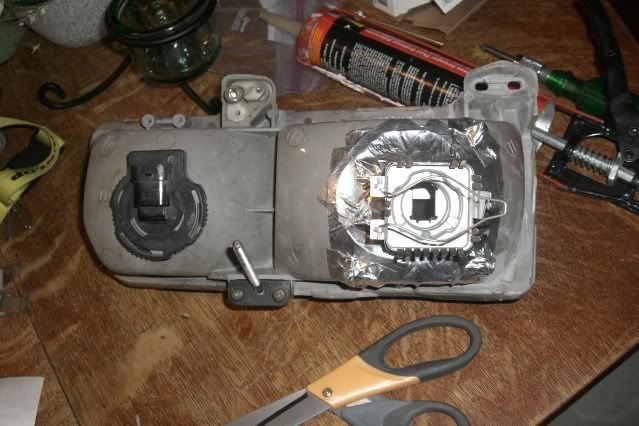
Ta-da! The hole is gonna be rough at this stage, don't worry. Test fit your projector in there and cut more little by little until it barely fits.
Then you can take a sanding drum on your Dremel and smooth out the hole.
Now take one of the OEM screws from where the old low beam shroud was mounted and put it through the projector and into the inner hole, screw er in about 3/4 of the way so you have a bit of adjustment but it holds itself in there without moving too much.
Flip it over again and put the bracket back on so you can test fit it in the car.
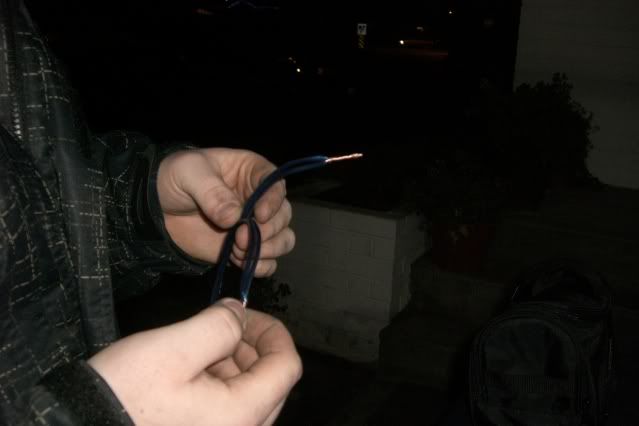
Here's what I made to get power to the ballast so I could aim them. Take two pieces of heavy gauge speaker wire and twist the ends on one side together like so.
Set your wires aside and bolt in the headlights as straight as possible. Here's where it feels like we're making some progress.
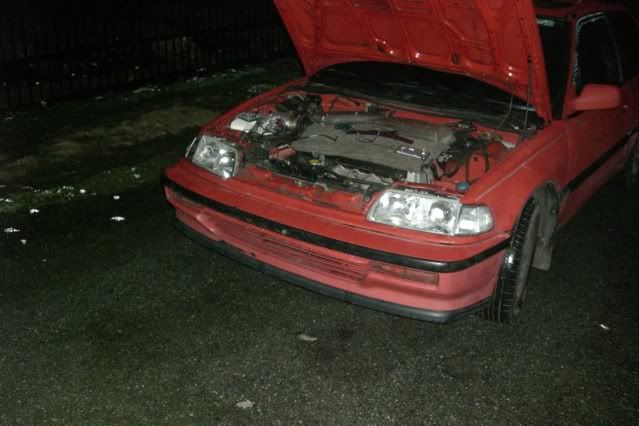
It will look bigtime crooked without the glass, that's okay.

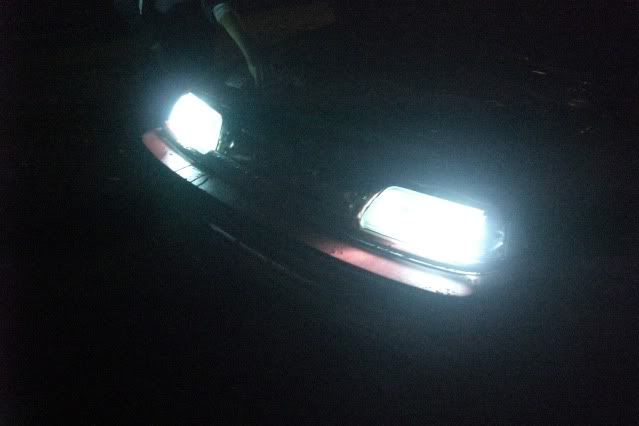
Hook up the ballasts to the two ends of speaker wire, then attach the twisted ends to the battery terminals and bam! They are alive!
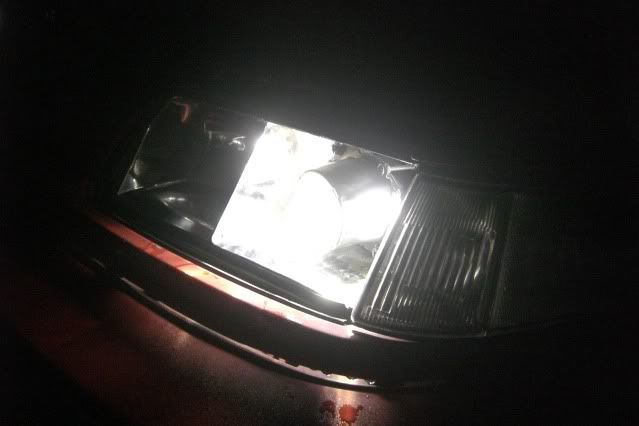
A head on shot, look at all those lumens! Nice colour too.
Now park the car a few feet behind a closed garage door (or some other makeshift flat surface) to aim them on and adjust them so they look like so, such a nice cutoff without the glass on there. Do this by moving the projector by hand, then tighten that one screw so the projector stays in place.
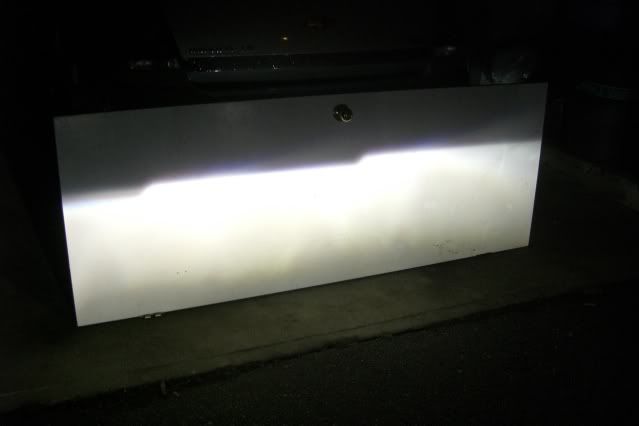
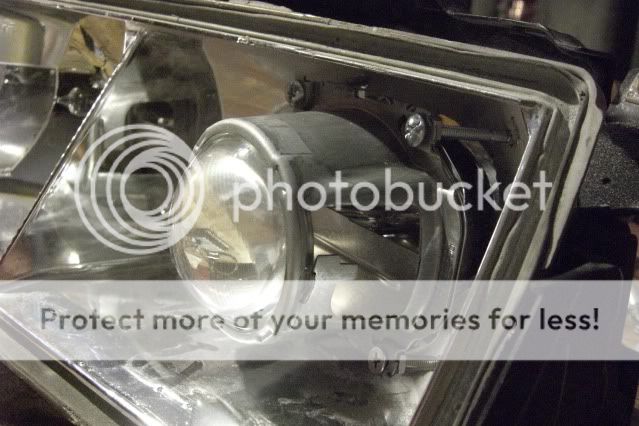
...and here's with the glass on there. Still decent but obviously distorted thanks to the stupid fluted glass.

Give yourself a pat on the back then uninstall the lights and bring them and your cold *** inside. Mark on the back of the housing where you need to drill your three holes.
[picture of holes marked]
Next take your Dremel, this time with a drill bit and go to town.
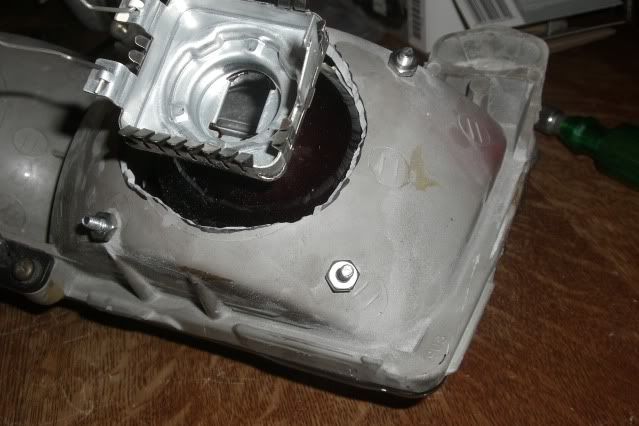
[picture of holes drilled]
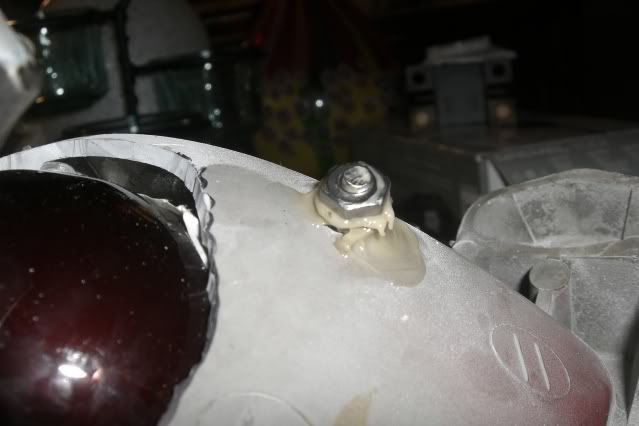
After your holes are drilled, take 3 machine screws and put them through the holes in the corner of the projector, through the housing, then put a nut on the back.
*Now would be a good time to make sure your lights are still aimed correctly.*
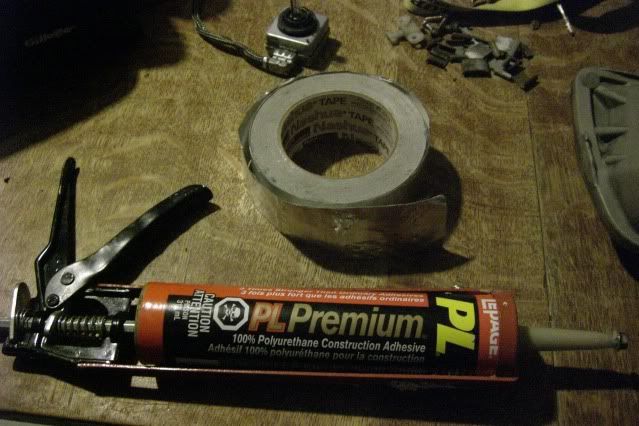
Now for this next part you will need a tube of high strength polyurethane available at Home Depot/Rona/Lowes etc, and a roll of Aluminum tape.
Take the bracket off one more time so you have good access to the nuts
Now shoot some of your poly in the hole and all over the threads.
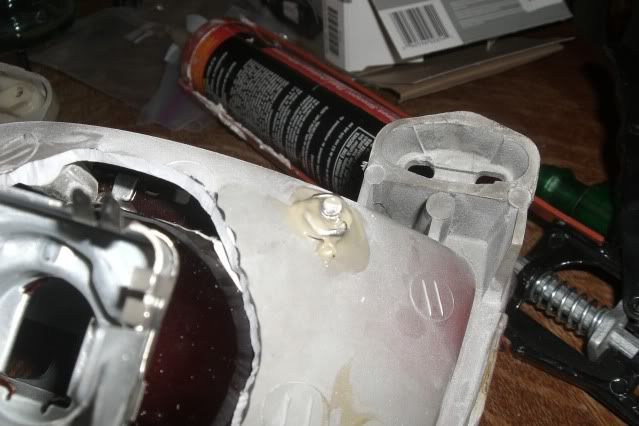
Take a second nut while the poly is still wet and tighten it down.
Once all those are tight, cut up a bunch of different size pieces of your Al tape. I stick about 3 layers to the back of my lights to make sure it's nice and sealed.

Now install the bracket one last time (you'll have mastered this by now I promise you)
Last but not least, run a bead of sealant around the headlight housing.
[picture of housing with sealant]
Slide the clips back on ever so carefully and put them somewhere to dry.
[picture of clip reinstalled]
And that my friends is it. There you have it, you've officially added OEM quality HID's into your clean looking stock headlights. I have yet to drive with them but I can't wait.
Here's some random pics.

So over the last couple days I've been messing with these HID parts I took out of a set of 300C headlights (FREEBIE, score!) So here's the start of a DIY.
If you can manage to find a set of these headlights, first throw them in the oven or destruct them in any other fun way without damaging the projectors/ballasts so that all you have left are the projectors, bulbs, ballasts like so.
Now all you have to do is put them into these! Stock EF headlight in all it's glory. I'm assuming you all know how to remove your headlights, if not then I wouldn't attempt this DIY.
Now flip it over and remove all the phillips screws holding the headlight bracket onto the headlight.
Take a flathead and pry off the stock bulb lock. Don't worry about breaking these as you will be cutting where it mounts completely off the back of the headlight anyways.
Now carefully, I said CAREFULLY wiggle these bastard clips off of the headlight with gentle precision. If your not careful you'll shatter the glass where it mounts to, hopefully not in your face and eyes like I did. Eye protection would be a great idea.
Now pre-heat your (moms) oven to 350 and throw this bad boy in there. Set the timer for 5 mins.
Now slide your flatty in between the glass and the plastic and carefully spread them apart, they should separate easily, if not try another 60 secs at a time until they split open.
This is what you will have when you're done, put the glass in a safe place.
Grab a phillips and remove the two screws that hold the headlight shroud onto the housing.
This is what you are left with once you've stripped the headlight bare.
Now bust your Dremel out. If you don't have one of these I suggest you invest in one, I got this unit for $50 brand new and I'm always finding a reason to use it.
Now flip your bare housing over and draw with a Sharpie where you'll need to cut. Start out smaller then you think it needs to be. You can always cut more but you cant add any if you cut too much.
Plug your Dremel in, put a cutting disk on 'er and throw on some eye protection then start cutting away.
Ta-da! The hole is gonna be rough at this stage, don't worry. Test fit your projector in there and cut more little by little until it barely fits.
Then you can take a sanding drum on your Dremel and smooth out the hole.
Now take one of the OEM screws from where the old low beam shroud was mounted and put it through the projector and into the inner hole, screw er in about 3/4 of the way so you have a bit of adjustment but it holds itself in there without moving too much.
Flip it over again and put the bracket back on so you can test fit it in the car.
Here's what I made to get power to the ballast so I could aim them. Take two pieces of heavy gauge speaker wire and twist the ends on one side together like so.
Set your wires aside and bolt in the headlights as straight as possible. Here's where it feels like we're making some progress.
It will look bigtime crooked without the glass, that's okay.
Hook up the ballasts to the two ends of speaker wire, then attach the twisted ends to the battery terminals and bam! They are alive!
A head on shot, look at all those lumens! Nice colour too.
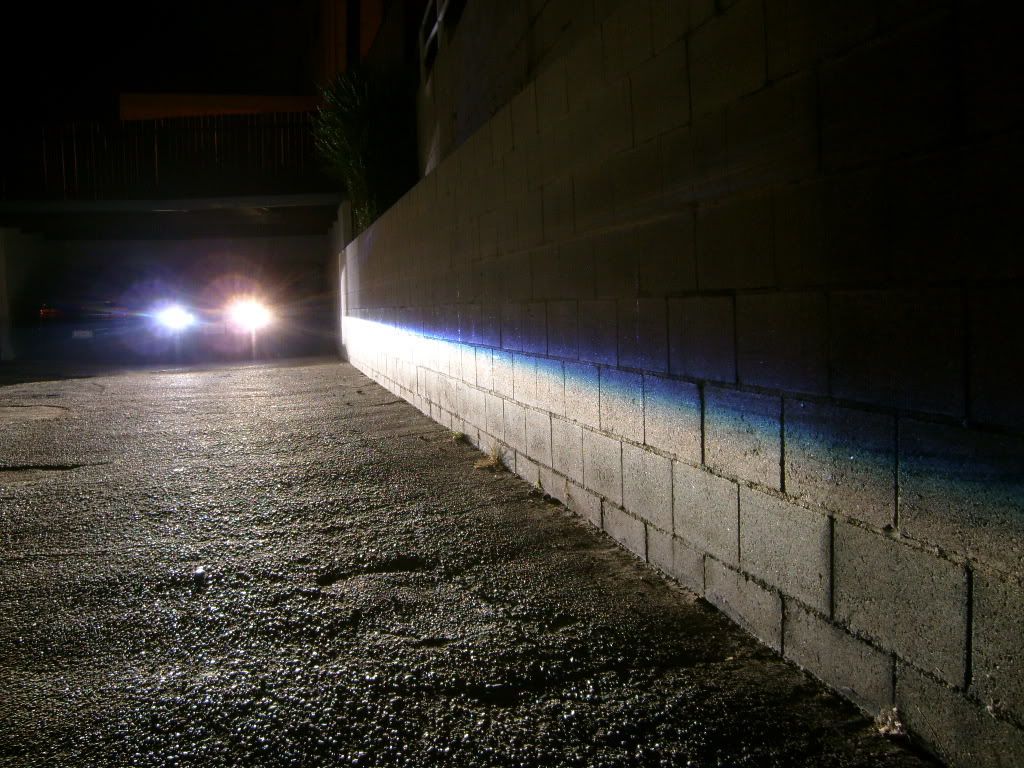
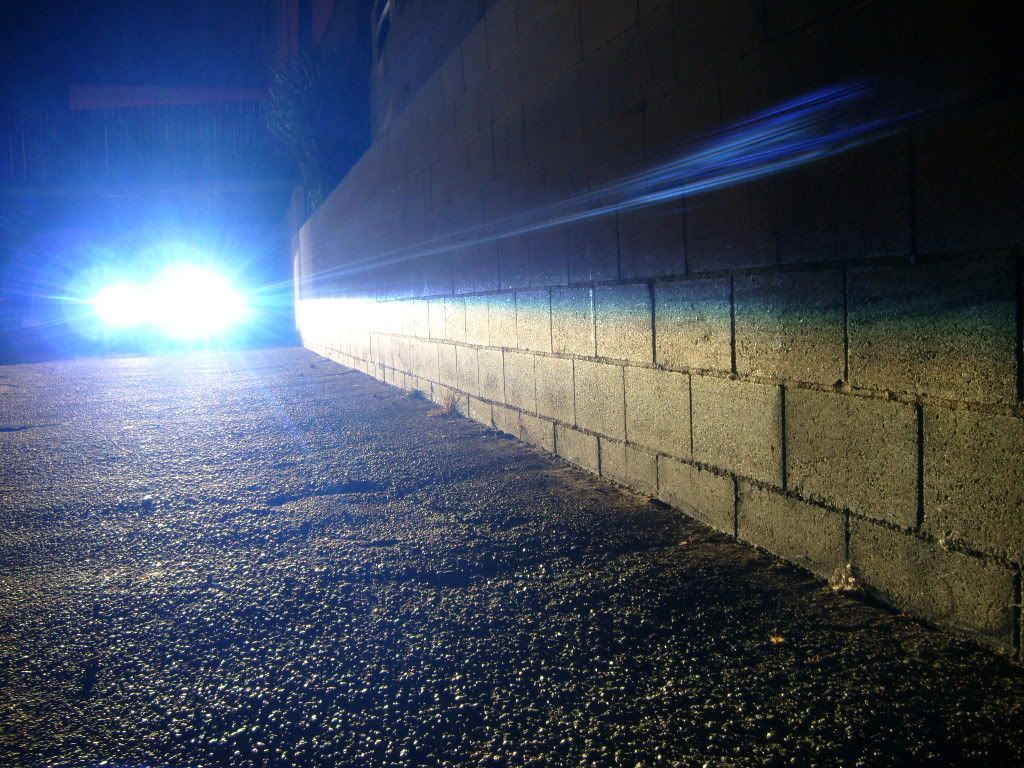
Now park the car a few feet behind a closed garage door (or some other makeshift flat surface) to aim them on and adjust them so they look like so, such a nice cutoff without the glass on there. Do this by moving the projector by hand, then tighten that one screw so the projector stays in place.
...and here's with the glass on there. Still decent but obviously distorted thanks to the stupid fluted glass.
Give yourself a pat on the back then uninstall the lights and bring them and your cold *** inside. Mark on the back of the housing where you need to drill your three holes.
[picture of holes marked]
Next take your Dremel, this time with a drill bit and go to town.
[picture of holes drilled]
After your holes are drilled, take 3 machine screws and put them through the holes in the corner of the projector, through the housing, then put a nut on the back.
*Now would be a good time to make sure your lights are still aimed correctly.*
Now for this next part you will need a tube of high strength polyurethane available at Home Depot/Rona/Lowes etc, and a roll of Aluminum tape.
Take the bracket off one more time so you have good access to the nuts
Now shoot some of your poly in the hole and all over the threads.
Take a second nut while the poly is still wet and tighten it down.
Once all those are tight, cut up a bunch of different size pieces of your Al tape. I stick about 3 layers to the back of my lights to make sure it's nice and sealed.
Now install the bracket one last time (you'll have mastered this by now I promise you)
Last but not least, run a bead of sealant around the headlight housing.
[picture of housing with sealant]
Slide the clips back on ever so carefully and put them somewhere to dry.
[picture of clip reinstalled]
And that my friends is it. There you have it, you've officially added OEM quality HID's into your clean looking stock headlights. I have yet to drive with them but I can't wait.
Here's some random pics.
Last edited by boosted.CRX; 04-18-2011 at 08:19 PM.
 11-28-2009, 09:34 PM
#2
Honda-Tech Member
i'm going to be hella jealous if you can get that stuff to work correctly, i made a pair of projector retrofits and the beam pointed strait at the ground, and i couldn't see ****, even with them pointed all the way back. so please, lmk how that works out for you
11-28-2009, 09:49 PM
#5
Honda-Tech Member
Thread Starter
Join Date: Jul 2005
Location: Vancity, BC
Posts: 270
Likes: 0
Received 0 Likes
on
0 Posts
I've actually already installed the one that's finished in the car and got the cutoff perfectly level and by only modifying the housing I can still fine tune the cutoff with the OEM headlight adjusters. I would show you the pics but I don't wanna ruin the ending The fluted glass lens doesn't even ruin the beam that bad, all it does is make the cutoff a little fuzzy, I was stoaked.
The fluted glass lens doesn't even ruin the beam that bad, all it does is make the cutoff a little fuzzy, I was stoaked.
11-28-2009, 10:03 PM
#6
Honda-Tech Member
ok, i know you wanna keep it a secret but can you just answer a quick question? does your cut off look better than this? these are stock LS projectors with a plug n play hid kit on EF8 headlights.
11-28-2009, 10:14 PM
#7
Honda-Tech Member
Thread Starter
Join Date: Jul 2005
Location: Vancity, BC
Posts: 270
Likes: 0
Received 0 Likes
on
0 Posts
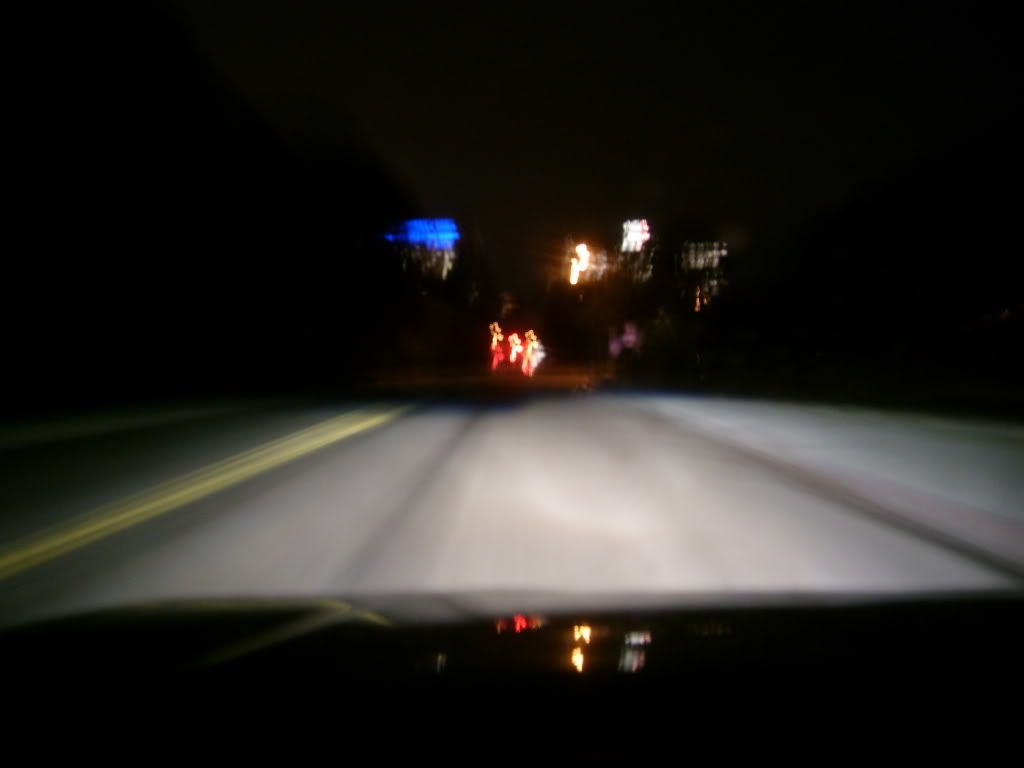
Hmm, hard to say, I think the cutoff might be a bit better but my pics are in the pitch black and and pointed at the back of an 08 Impala because I didn't have a flat surface to aim them on (the back of my carport is open into the back yard), and I think the EF8 lenses don't distort the light quite as much as the ED ones do (you could grate cheese in these *****!). I would have to say I think the amount of light under the cutoff is less with the LS projectors though. I came across your DIY before I did mine, great job by the way, that's a pretty decent final product for the cost of all the parts considering Teggy projectors are everywhere.
Trending Topics
 to u man
12-01-2009, 05:54 PM
to u man
12-01-2009, 05:54 PM
#11
Honda-Tech Member
Join Date: Nov 2009
Location: Albany, NY
Posts: 54
Likes: 0
Received 0 Likes
on
0 Posts
Looks good!
Did you just cut the stock low beam harness and run power from that, or a separate relay?
Did you just cut the stock low beam harness and run power from that, or a separate relay?
12-01-2009, 08:26 PM
#12
Honda-Tech Member
Thread Starter
Join Date: Jul 2005
Location: Vancity, BC
Posts: 270
Likes: 0
Received 0 Likes
on
0 Posts
I haven't wired them in yet since I want to tuck the entire engine bay wiring but I'm going to get two male 9006 plugs, wire the lowbeam circuit to a relay and run some 10ga wire straight to the battery. That way everything can be reverted back to stock easily.
12-01-2009, 11:46 PM
#13
Junior Member
Join Date: Jan 2005
Location: kelowna, bc, canada
Posts: 54
Likes: 0
Received 0 Likes
on
0 Posts
Those look dope man! I did not find any oem hid kit so I had to rig up my own. Im glad to see more people rockin' these though. I am very happy with the out come of mine and have had a hand full of people wanting to purchase these tasty treats! Keep up the good work.
https://honda-tech.com/forums/honda-crx-ef-civic-1988-1991-3/hid-projector-retro-fit-2582221/
PS ...must be a BC thing lol
https://honda-tech.com/forums/honda-crx-ef-civic-1988-1991-3/hid-projector-retro-fit-2582221/
PS ...must be a BC thing lol
12-02-2009, 01:39 PM
#14
Honda-Tech Member
Thread Starter
Join Date: Jul 2005
Location: Vancity, BC
Posts: 270
Likes: 0
Received 0 Likes
on
0 Posts
BC is where it's at my friend. Those look great, I like how you painted yours black, I'll have to debate on doing that to mind, if you don't mind me stealing your idea haha
12-02-2009, 05:38 PM
#15
Junior Member
Join Date: Jan 2005
Location: kelowna, bc, canada
Posts: 54
Likes: 0
Received 0 Likes
on
0 Posts
 ...but yeah the only reason i did that was so there wasn't so much stray light bouncing around. keep rocking man!
12-03-2009, 09:19 PM
...but yeah the only reason i did that was so there wasn't so much stray light bouncing around. keep rocking man!
12-03-2009, 09:19 PM
#17
Honda-Tech Member
iTrader: (1)
Join Date: Jun 2009
Location: Evil Empire,CA
Posts: 9,673
Likes: 0
Received 0 Likes
on
0 Posts
crazy writeup but im just curious since you look very similar to Nick from the Backstreet Boys but with shorter hair

12-04-2009, 11:03 PM
#18
Honda-Tech Member
Thread Starter
Join Date: Jul 2005
Location: Vancity, BC
Posts: 270
Likes: 0
Received 0 Likes
on
0 Posts
Hahaha that's good Chorizo, he must be a sweed to, we all look the ****in same.
What's so ghetto Clipsed? Ghetto is throwing a set of $89 ching-chang-chong HID's in a set of halogen housings and having the beam blind every oncoming vehicle.
What's so ghetto Clipsed? Ghetto is throwing a set of $89 ching-chang-chong HID's in a set of halogen housings and having the beam blind every oncoming vehicle.
12-05-2009, 12:08 AM
#19
Honda-Tech Member
Join Date: Mar 2007
Location: Calgary, AB, Canada
Posts: 197
Likes: 0
Received 0 Likes
on
0 Posts
12-05-2009, 05:43 PM
#20
Junior Member
Join Date: Jan 2005
Location: kelowna, bc, canada
Posts: 54
Likes: 0
Received 0 Likes
on
0 Posts
I would have to agree. It is really too bad that the internet is full of nut sacks like him. I get nothing but comments about this and they are all good. Hey Clipsed ...find a bridge to jump off of and or stay out of positive threads!
12-05-2009, 08:51 PM
#21
Honda-Tech Member
iTrader: (2)
Join Date: Nov 2007
Location: Pasadena, CA, USA
Posts: 7,217
Likes: 0
Received 0 Likes
on
0 Posts
I have bi-xenons meaning high and low beam pal...
Get on my level before you come at me **** head.
compliments about what lolz, if they saw how mickey mouse you put them back together, they'd laugh at you! So would all the people I know in the retro business!
12-05-2009, 10:06 PM
#22
Honda-Tech Member
Thread Starter
Join Date: Jul 2005
Location: Vancity, BC
Posts: 270
Likes: 0
Received 0 Likes
on
0 Posts
Well how would you have sealed the back? Share some expert advise. I used what I got for free, I didn't spend a cent, I wasn't gonna throw $500 worth of HID's in a $1000 EF's headlights that are just gonna distort them anyways. Instead of telling us how good your expensive light's are maybe provide some input on how to make mine better because your post didn't help anyone.
 09-08-2010, 05:09 AM
#25
Honda-Tech Member

Join Date: Aug 2010
Posts: 21
Likes: 0
Received 0 Likes
on
0 Posts
What's ghetto? The way he supposedly "finished" his retro, it could have been done a lot better to seal off the projector housing, but he opted to use some tape... That's what is ghetto.
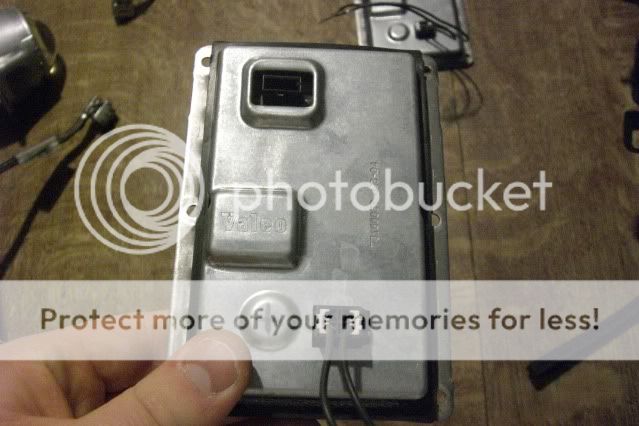
Jealous of his ballin HID's? I think my custom projectors are worth more than his entire set up, and his are the cheapest e55 single xenon Valeo projectors. I know my **** bud when it comes to retros, know some of the bigger names in the business, I've been doing it for a few years now, so stfu, kthx! But if you want some BALLIN single xenon projectors, here you go, try and fit them on an EF...
I have bi-xenons meaning high and low beam pal...
Get on my level before you come at me **** head.
compliments about what lolz, if they saw how mickey mouse you put them back together, they'd laugh at you! So would all the people I know in the retro business!
You tell us you have been in the game a while, then why are your headlights not even adjusted to the same height? They make the adjusting bracket for a reason sir.