
DIY: Brightening Gauge Cluster Lights. PICS
 03-01-2006, 01:34 PM
#1
Honda-Tech Member
Thread Starter
Join Date: Jan 2006
Location: Tallahassee, Fl
Posts: 1,119
Likes: 0
Received 0 Likes
on
0 Posts
Many of us Crx and Civic owners have been annoyed by the very dim gauge lights.
This is a VERY easy modification, and is 100% safe for your car, so don't worry.
Tools required:
Small Flat <u>AND</u> Phillips head screwdrivers.(not quite eye-glass small)
*Optional- normal size Phillips-head screwdriver
There are 4 screws holding the gauge cover on.
Here are the locations
Now on to the work.
1. Take your small Flat-head screwdriver and gently pry the screw access cover up.
Then, push the small tabs inward(toward windshield) and then up and out they go.

2. Set those screws/covers aside and unscrew the bottom screws.

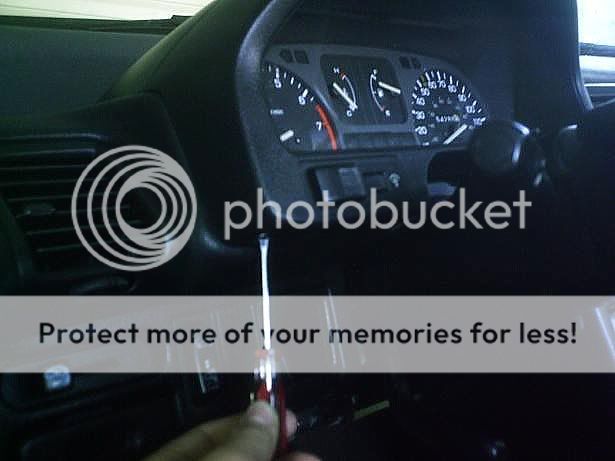
Now your Gauge cover is loose. Set these screws aside.
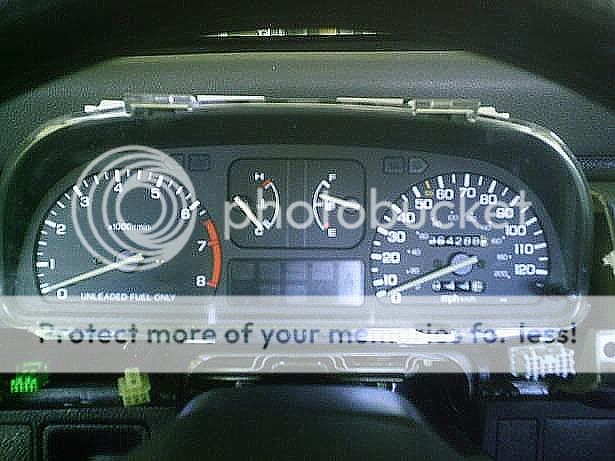
3. Start to gently pull the cover off, but keep in mind that there are 3 groups of wires you will need to pull out before you can pull it completely out.
There are 2 groups of wires on the left side(defrost and light dimming), and 1 one the right(Hazard). Unplug these clips and continue to carefully remove the gauge cover. UP, to the Right, and out.
4. On the top of the gauge cluster you will see a white plastic piece, held on my two brass screws on either end. Unscrew these screws and set them aside.
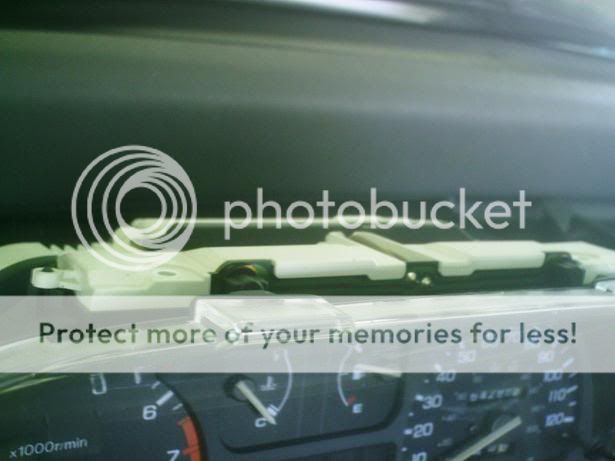
Now gently pry the cover up with the small Flat-head screwdriver, via the ends by the screw hole.
This is what it should look like when you tilt the front upward.
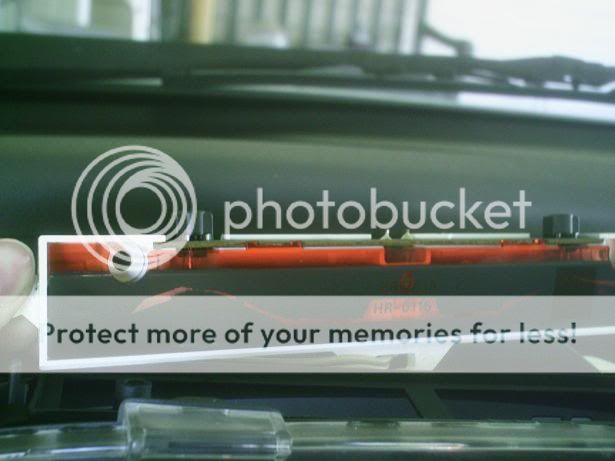
Now take your small flat-head and get the orange divider out.
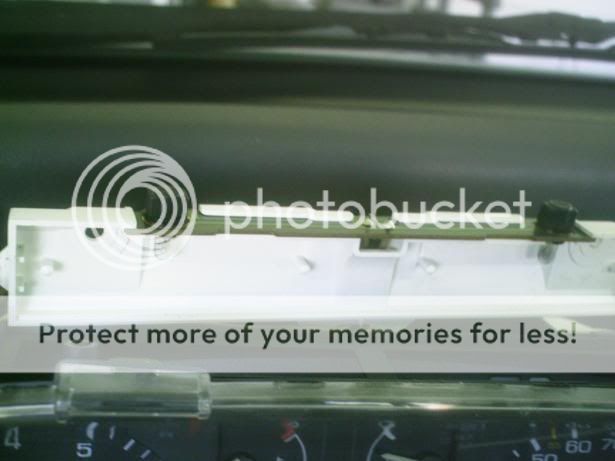
*Note: Some cars have a thin rubber lining on the bulbs. My '91 Crx Si did not. if you desire, go ahead and pull the lining off of the bulbs.
5. Place the white cover down and screw it back in with the 2 brass screws.
6. Carefully slide the Gauge Cover back almost in place(leave room to connect wires).
7. Connect wires, slide cover back into place
8. Screw the 4 screws back into PLACE .
9. Pop the upper screw covers back in.
And thats it.
Comments are welcome.
-Andrew
This is a VERY easy modification, and is 100% safe for your car, so don't worry.
Tools required:
Small Flat <u>AND</u> Phillips head screwdrivers.(not quite eye-glass small)
*Optional- normal size Phillips-head screwdriver
There are 4 screws holding the gauge cover on.
Here are the locations
Now on to the work.
1. Take your small Flat-head screwdriver and gently pry the screw access cover up.
Then, push the small tabs inward(toward windshield) and then up and out they go.
2. Set those screws/covers aside and unscrew the bottom screws.
Now your Gauge cover is loose. Set these screws aside.
3. Start to gently pull the cover off, but keep in mind that there are 3 groups of wires you will need to pull out before you can pull it completely out.
There are 2 groups of wires on the left side(defrost and light dimming), and 1 one the right(Hazard). Unplug these clips and continue to carefully remove the gauge cover. UP, to the Right, and out.
4. On the top of the gauge cluster you will see a white plastic piece, held on my two brass screws on either end. Unscrew these screws and set them aside.
Now gently pry the cover up with the small Flat-head screwdriver, via the ends by the screw hole.
This is what it should look like when you tilt the front upward.
Now take your small flat-head and get the orange divider out.
*Note: Some cars have a thin rubber lining on the bulbs. My '91 Crx Si did not. if you desire, go ahead and pull the lining off of the bulbs.
5. Place the white cover down and screw it back in with the 2 brass screws.
6. Carefully slide the Gauge Cover back almost in place(leave room to connect wires).
7. Connect wires, slide cover back into place
8. Screw the 4 screws back into PLACE .
9. Pop the upper screw covers back in.
And thats it.
Comments are welcome.
-Andrew
 03-01-2006, 03:30 PM
#6
Honda-Tech Member
Join Date: Jul 2004
Location: where knowledge is horsepower
Posts: 1,813
Likes: 0
Received 0 Likes
on
0 Posts
<TABLE WIDTH="90%" CELLSPACING=0 CELLPADDING=0 ALIGN=CENTER><TR><TD>Quote, originally posted by doitdub »</TD></TR><TR><TD CLASS="quote">Cool - that'd help. I wonder why Honda put the orange piece in there...</TD></TR></TABLE> I turns the gauge needles into performance amber at night ha ha
Trending Topics
03-01-2006, 04:52 PM
#10
Honda-Tech Member
Join Date: Sep 2004
Location: Ontario, Canada
Posts: 339
Likes: 0
Received 0 Likes
on
0 Posts
I've seen it done similar, the only difference is you replace the EF's Orange divider with the DA's Blue one.
03-01-2006, 04:56 PM
#12
Honda-Tech Member
Join Date: Oct 2003
Location: Sin City, NV
Posts: 2,903
Likes: 0
Received 0 Likes
on
0 Posts
yea i remember that one also. i wondered what it would look like at night if there was no divider in there at all. after you post up the night pics post a link to this thread in the "how-to" thread that is stickied at the top of the page.
03-01-2006, 05:26 PM
#14
Junior Member
Join Date: Mar 2005
Posts: 203
Likes: 0
Received 0 Likes
on
0 Posts
I didn't think my dash lights were THAT dim cept when its still a little bit light outside. However there is always room for improvement I can't wait for the night pics 
03-01-2006, 05:30 PM
#15
not to bump off subject but what is the best paint for the corner lenses (ex. autozone - advanced autoparts)
03-01-2006, 05:35 PM
#16
Junior Member
Join Date: Aug 2005
Location: Lisbon, Lisbon, Portugal
Posts: 131
Likes: 0
Received 0 Likes
on
0 Posts
Done that to my EF some about a year ago. The lighting looked like **** after. Only lasted a month or so until i feed up with it and decided do go back to stock config.
My next mod on the EE9 cluster will be amber lights with Amber Lumineedles.
http://www.lumineedles.com/88-91_lumineedles.html
My next mod on the EE9 cluster will be amber lights with Amber Lumineedles.
http://www.lumineedles.com/88-91_lumineedles.html
03-01-2006, 06:14 PM
#19
Honda-Tech Member
Thread Starter
Join Date: Jan 2006
Location: Tallahassee, Fl
Posts: 1,119
Likes: 0
Received 0 Likes
on
0 Posts
I'm sorry guys. I went to take pics just now and my gay cam isnt picking up the light. The pics are coming out black, and if i turn the flash on, it also does no good! 
Really sorry guys, but I have an idea:
Turn your lights on, and dim them to 1/4 'power', via the spinning '****' to the left of the steering wheel. thats about the difference.
Trust me, it's such a simple and quick mod, go ahead and try it. you can't hurt anything, and you can put it IN as easily as you took it out.
-Andrew
03-01-2006, 08:23 PM
#20
Honda-Tech Member
Those needles look great. I have the white inserts which light up blue. But the needles are not lit, so those would be great. Do they just pop off and on?
03-01-2006, 08:42 PM
#21
Junior Member
Join Date: Oct 2005
Location: Niskayuna, NY, 12309
Posts: 507
Likes: 0
Received 0 Likes
on
0 Posts
<TABLE WIDTH="90%" CELLSPACING=0 CELLPADDING=0 ALIGN=CENTER><TR><TD>Quote, originally posted by GreedyPT »</TD></TR><TR><TD CLASS="quote">Done that to my EF some about a year ago. The lighting looked like **** after. Only lasted a month or so until i feed up with it and decided do go back to stock config.
My next mod on the EE9 cluster will be amber lights with Amber Lumineedles.
http://www.lumineedles.com/88-91_lumineedles.html</TD></TR></TABLE>
those look like stock needles just painted different colors
and they cost 60 euro's which is like 60$
http://www.lumineedles.de/?id=...88-91
bump for night pics
the integra blue thing looked great!
03-02-2006, 04:39 AM
#23
Junior Member
Join Date: Aug 2005
Location: Lisbon, Lisbon, Portugal
Posts: 131
Likes: 0
Received 0 Likes
on
0 Posts
<TABLE WIDTH="90%" CELLSPACING=0 CELLPADDING=0 ALIGN=CENTER><TR><TD>Quote, originally posted by Vovchandr »</TD></TR><TR><TD CLASS="quote">those look like stock needles just painted different colors
and they cost 60 euro's which is like 60$
http://www.lumineedles.de/?id=...88-91
bump for night pics
the integra blue thing looked great!</TD></TR></TABLE>
The good thing about this nedlees is the fact that they are UV sensitive, that means that you wount have that awfull amber glare around the custer due to the upper lighting for the stock needles.
 03-02-2006, 05:35 AM
#25
Honda-Tech Member
Join Date: Jul 2003
Location: Central Texas
Posts: 1,264
Likes: 0
Received 0 Likes
on
0 Posts
Removing the orange plastic is going to make it a little brighter. Still looks like *** though. For some people, this will be enough. The ease/cost is going to appeal to some.
I've got a set of the lumin needles...they are a better solution if you don't mind spending $50.
I've got a set of the lumin needles...they are a better solution if you don't mind spending $50.