
[CRX B20v JRSC Build]


 02-10-2013, 09:25 PM
#52
Honda-Tech Member
Thread Starter
We all know this kind of work is a pain in the **** to do, each and every damn step of the way.
Stay tuned for updates!
02-10-2013, 09:55 PM
#53
Honda-Tech Member
Thread Starter
Okay! Here we go AGAIN!
Weekend is over and this is my final sunday night update before another long week of toiling away in the hot sun to fund this whole mindfart. Probably won't see much through the week because you can't post pictures of sitting at a computer studying forums and doing the legwork to pull this off. BRB list of parts to order is currently 32 items long..
Ufck the foreplay, on to the pictures.
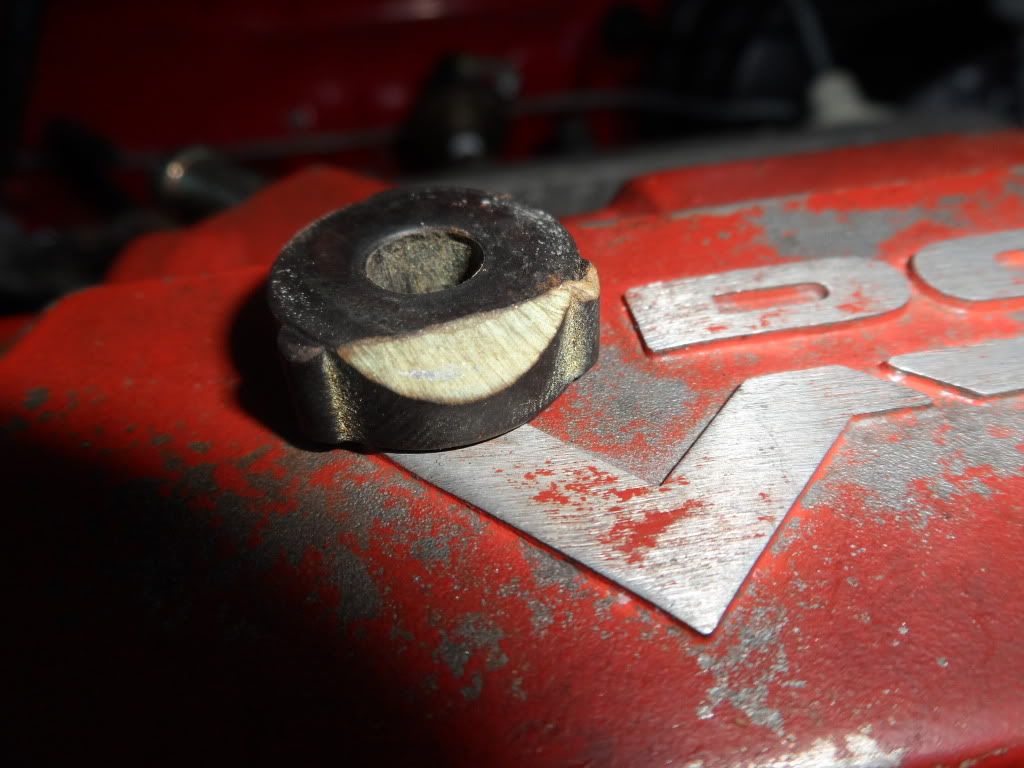
Poor quality image but the fuel rail doesn't fit. The spacer pieces (to stop the steel stud from galling the aluminum rail I assume) hit the manifold and require modification. So does the rail. The rail fits on the studs, but won't slide down onto the shafts - the threads are thinner than the studs, so I have to ream out the holes.
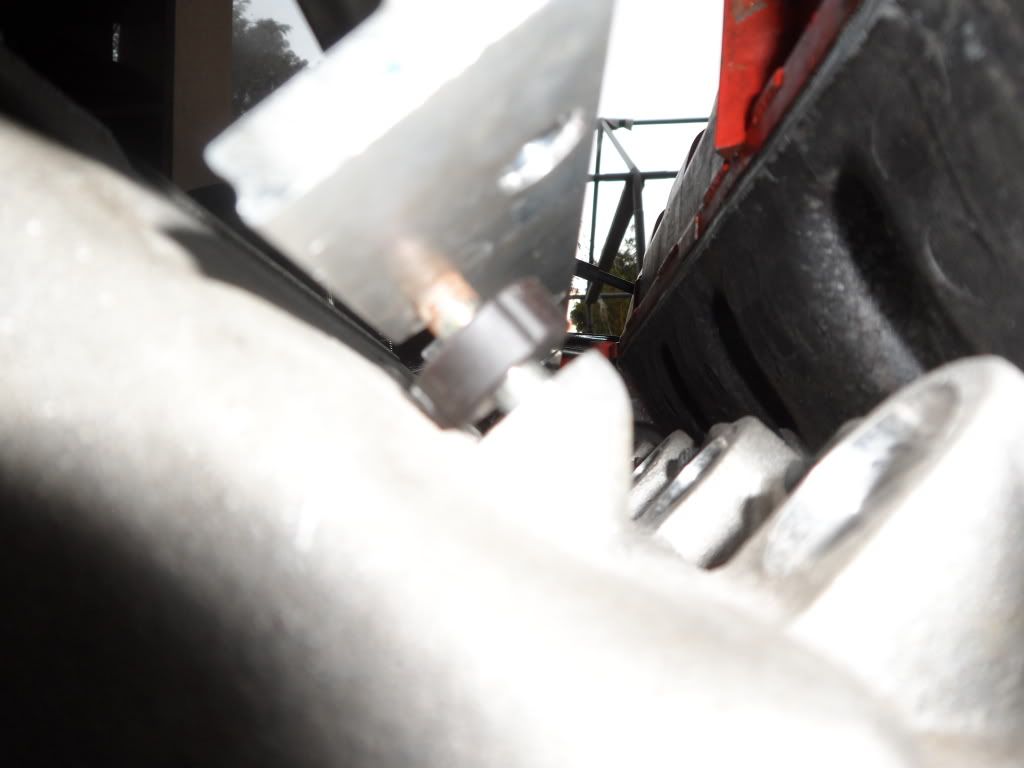
A bit of filing on the bench vice and things are getting closer but not perfect.
Liek dis!
Studs are too thick. BRB drillering bigger holeses.

Holes aren't big enough. And the rail had a larger hole for the middle stud which is odd.
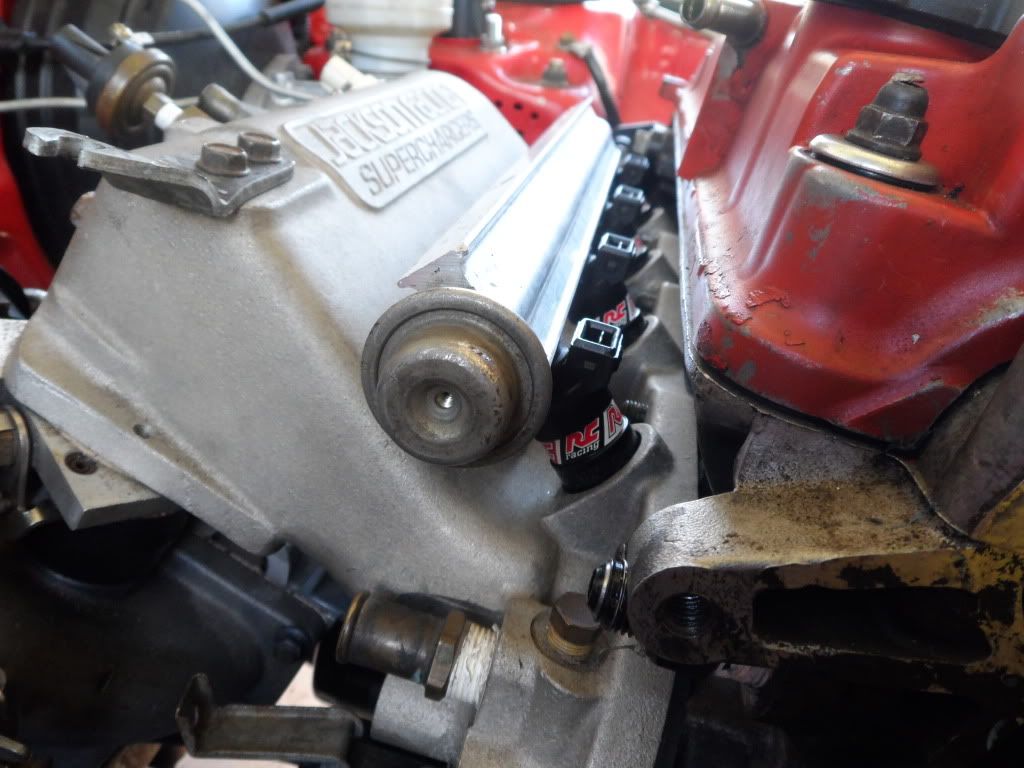
RC 440cc/min mounted on rail.
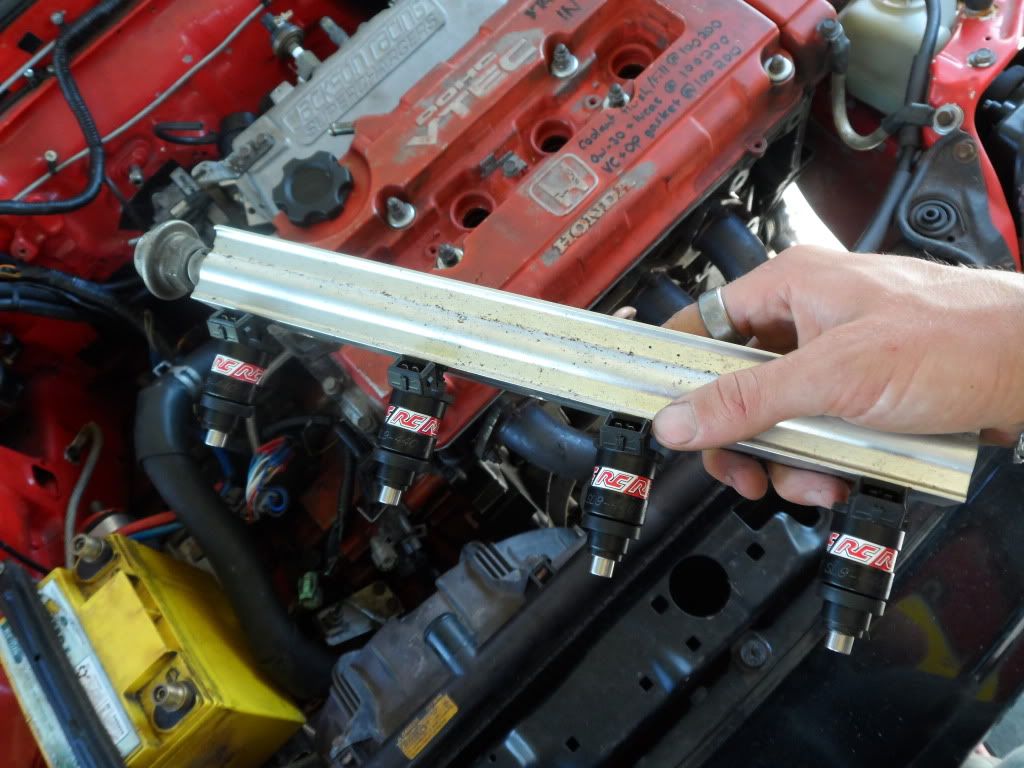
DONE! 2 hours later.
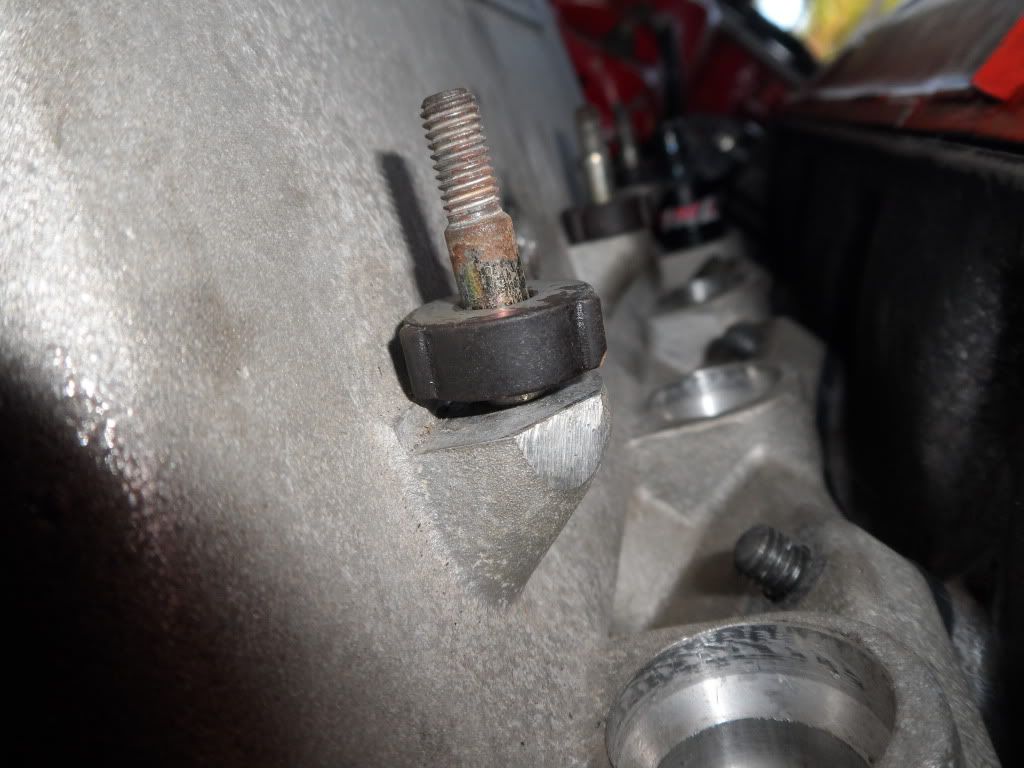
But now my studs are too long and the nuts won't tighten the rail to the manifold before the threads bottom out. Looks like I need to buy some washers. Parts-to-buy-list just got one item longer.
Cleaning up old mistakes.
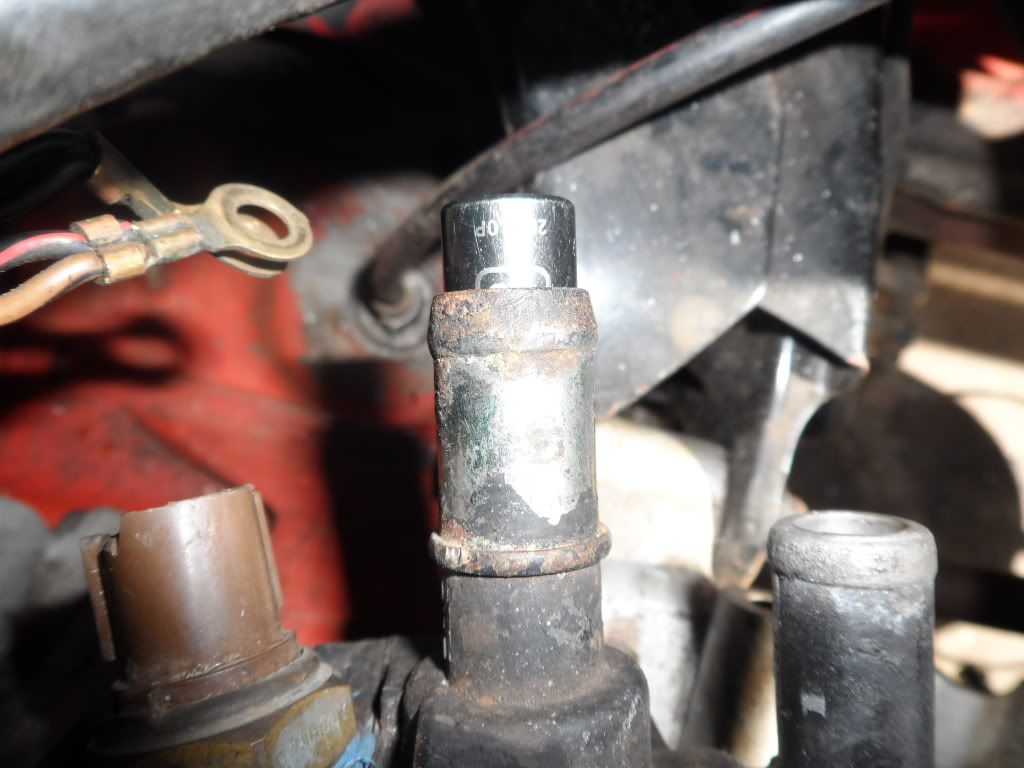
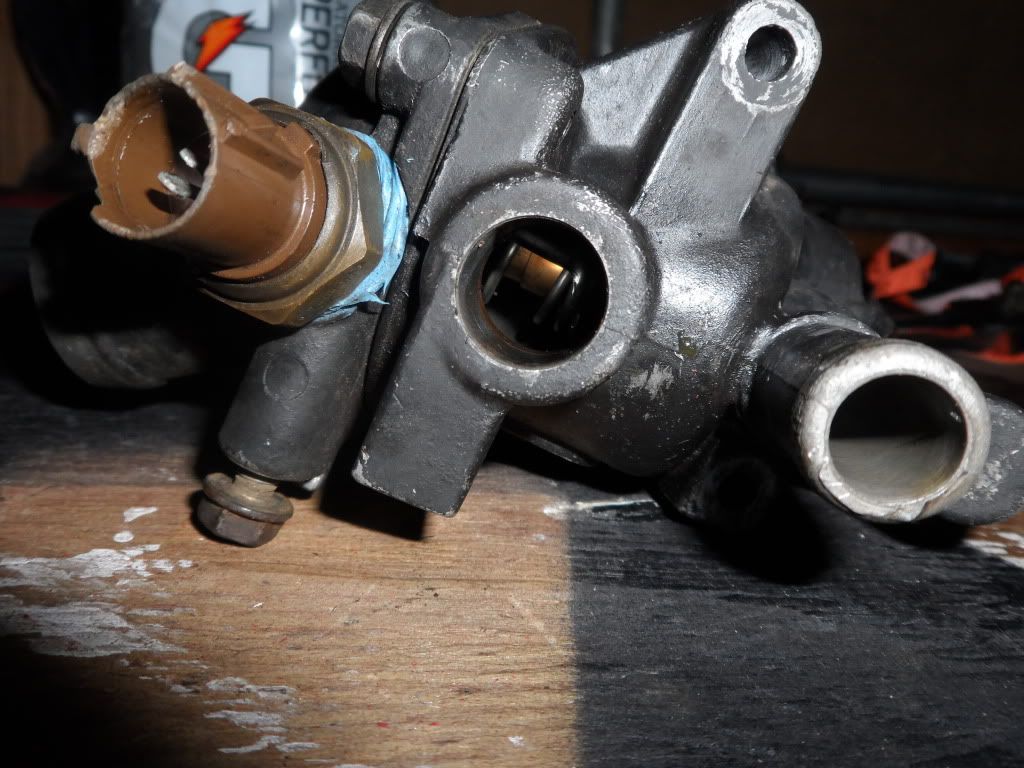
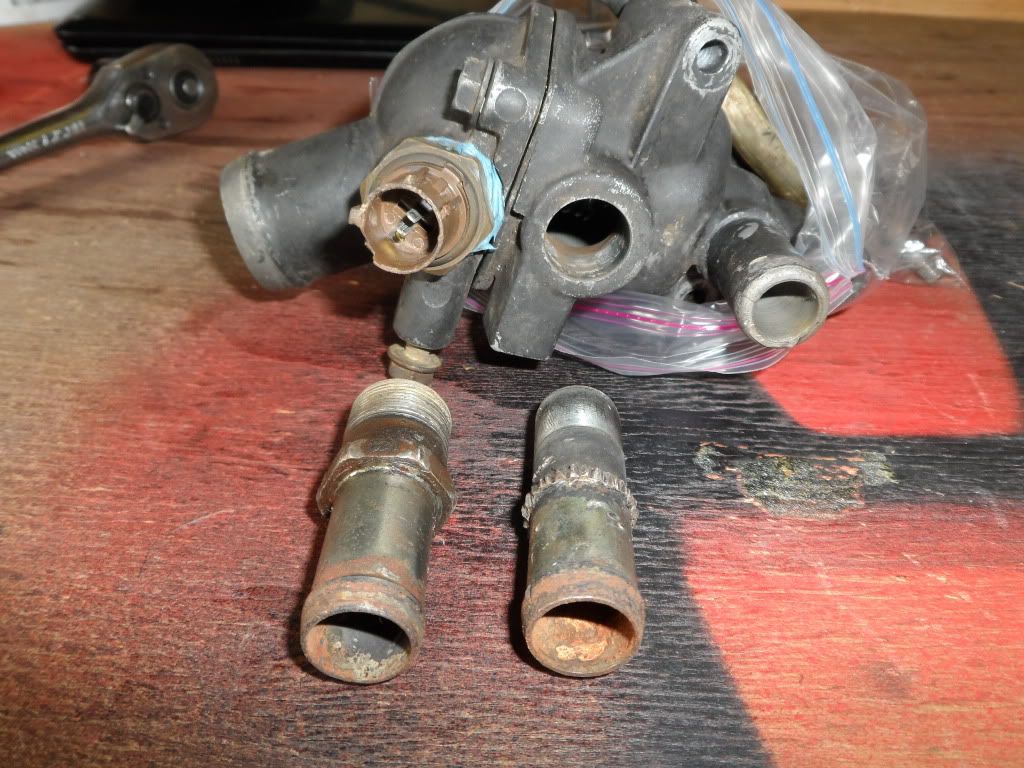
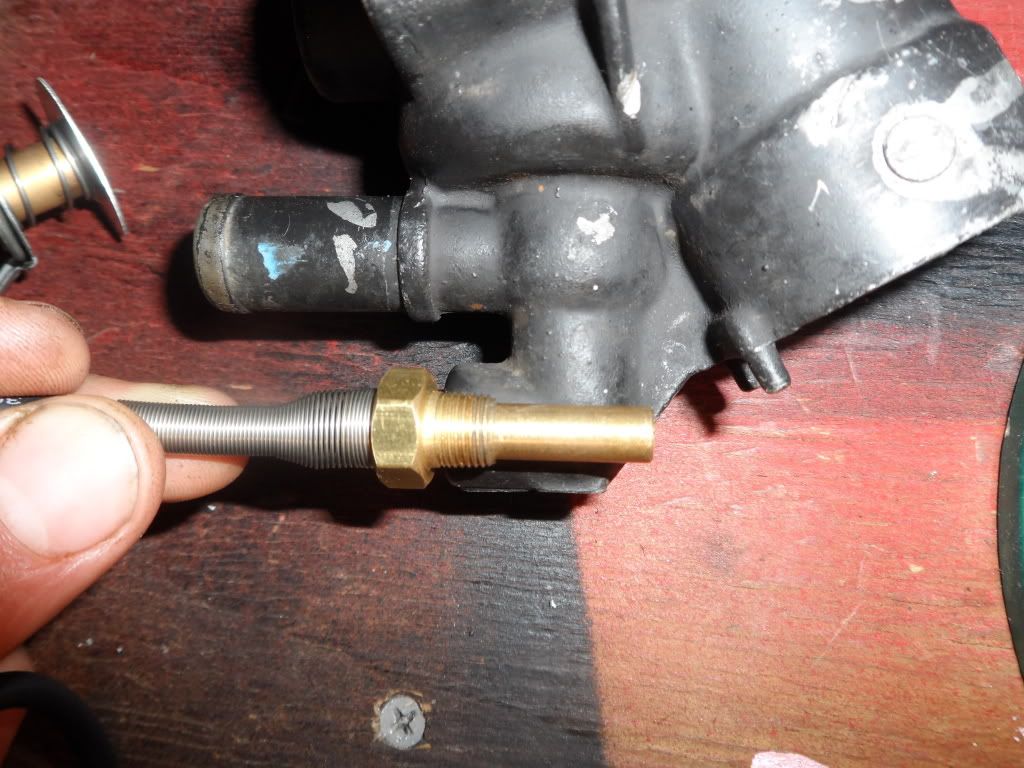
Picture of the heater-core nubbin on the thermostat housing. I have to plug it because I'm not running a heater on this car - but I don't want to make a hose with a plug because that could create a hot-spot in the thermostat housing so I'm going to remove the coolant barb, tap the hole, and thread in a pipe plug to seal it up tight. I put a socket in the hole before I squeezed the pliers down to unthread it - this keeps me from collapsing the arterial walls of the coolant barb. Mad scientist hard at work.
The middle one.. Trying to unthread it.
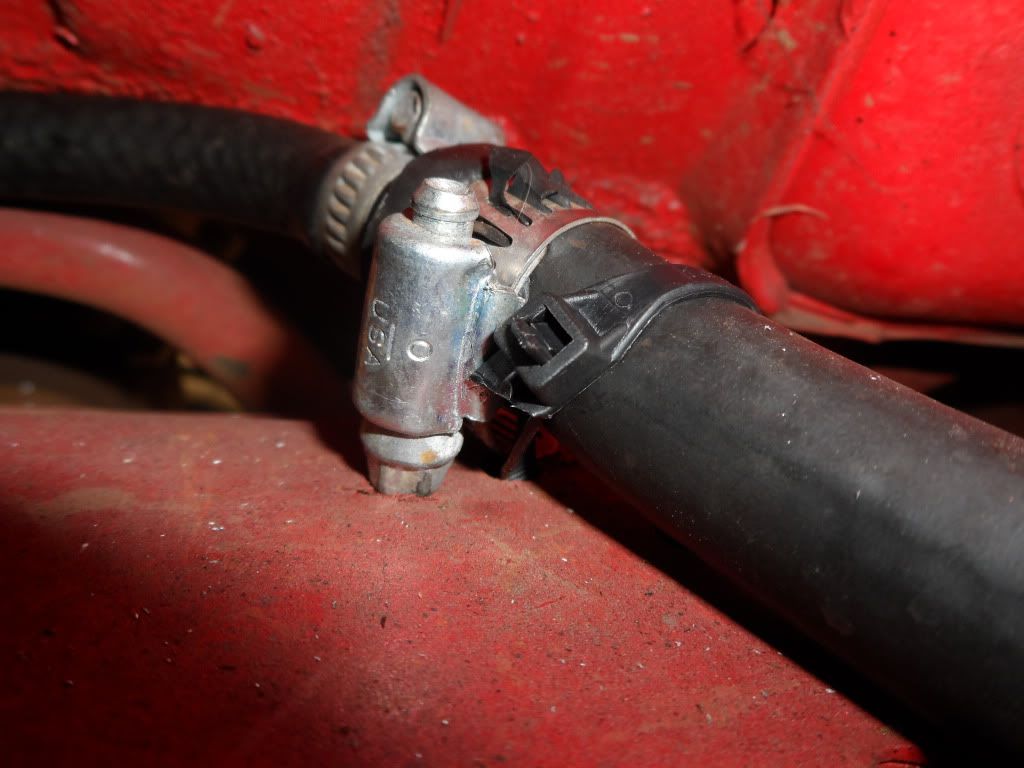
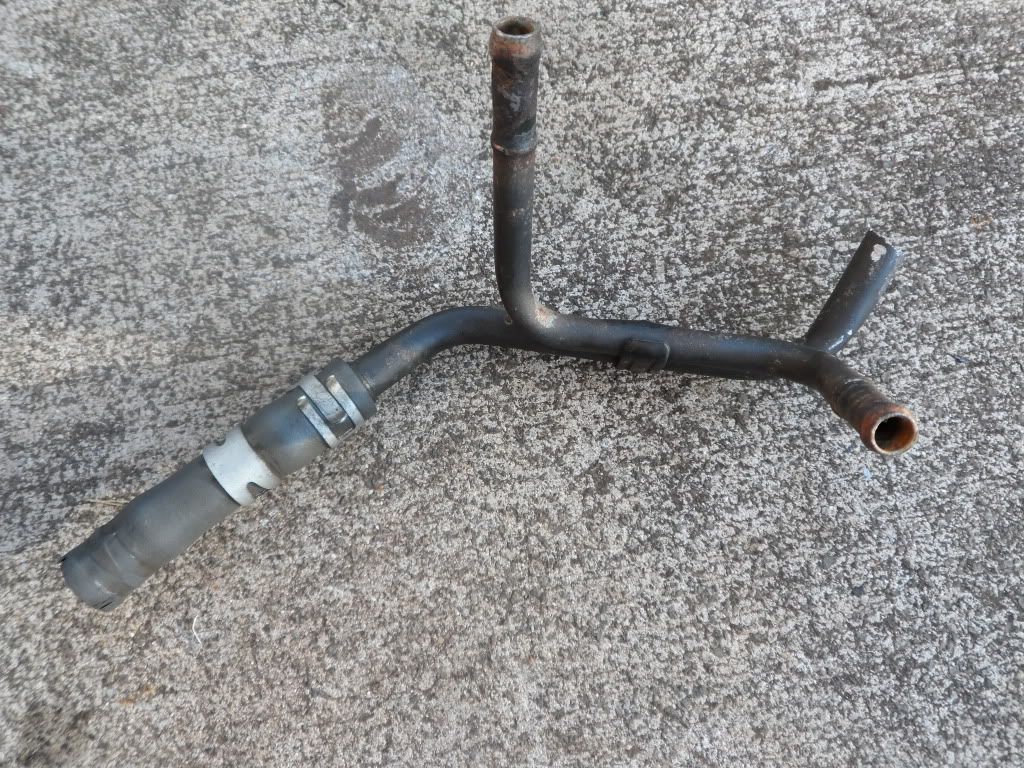
Cleaning up the PCV system lines. Those are prelude freeze plugs threaded into the block with barbs for cooling lines. PM me if you need part numbers - it's the easiest way to install a PCV retrofit system on a b20b/z block.
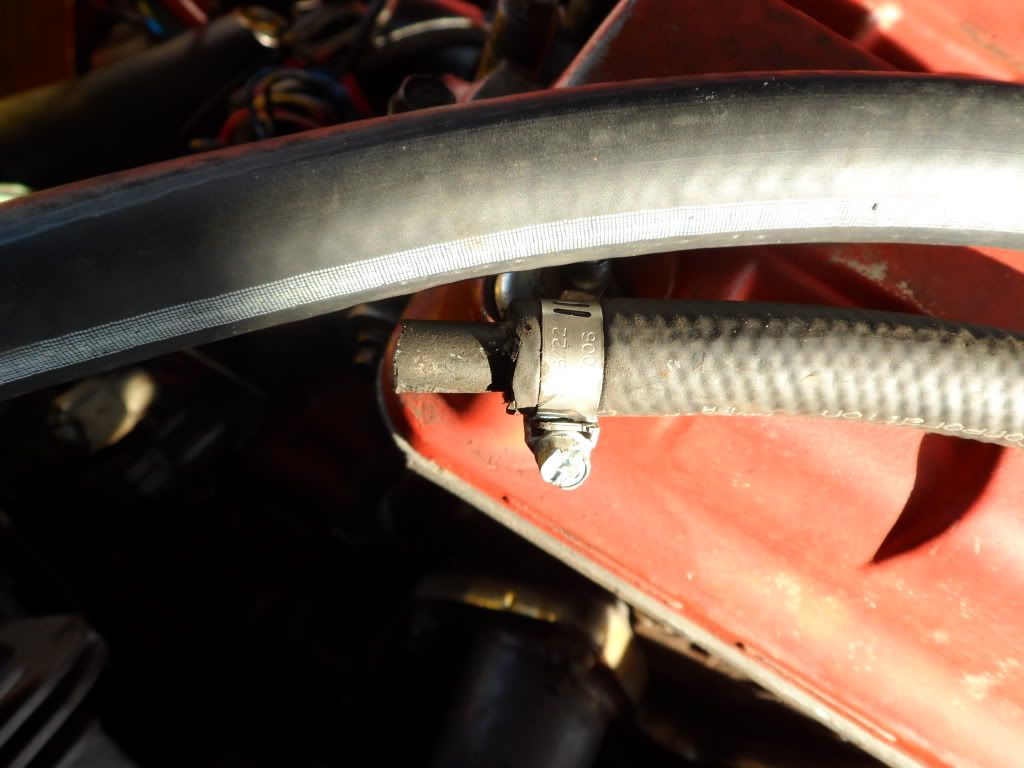
Cable tied through the rear crossmember oem holes.
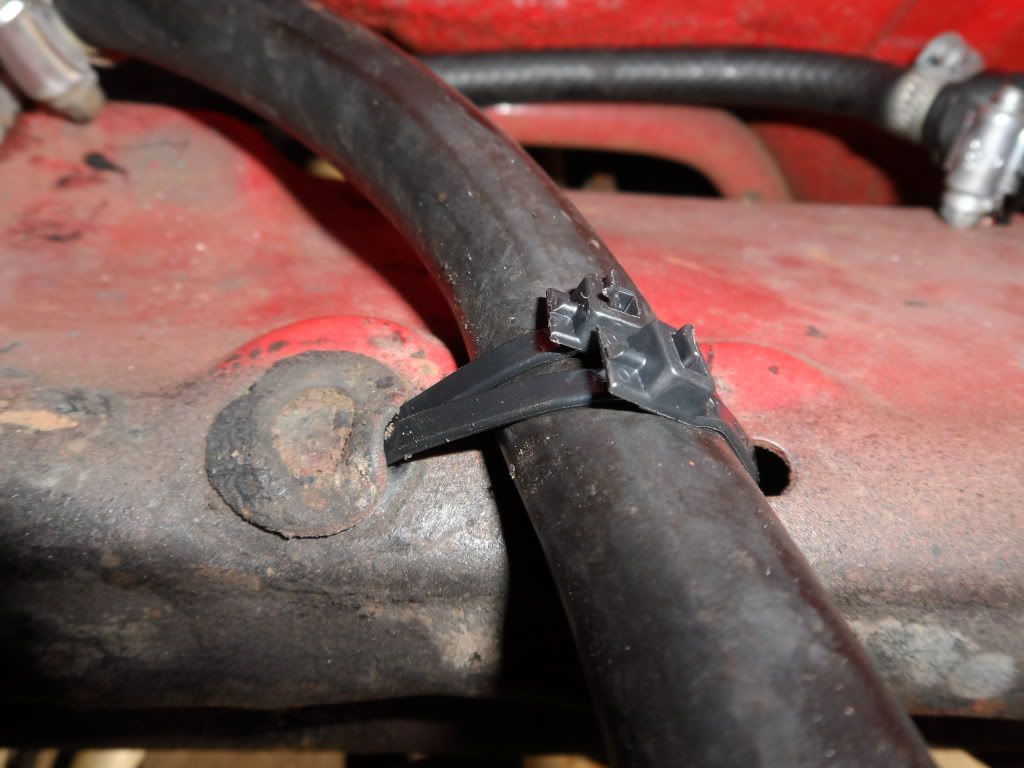
I installed a second cable tie after I took the pic. One and done? NO. Two for you.
Seeing as I won't need FITV or IACV - I decided to hack up this piece for 'couplings' because the hoses I had weren't long enough.
I could have saved myself a lot of work if I just bought longer hoses, but that's not in the budget. DIY and save money FTW.
TIGHT and functional for the 3/8" barb on my ebay catch can. Remind me to invest in a better vented breather tank when my current cheap ebay one stops working perfectly... oh wait... see what I did thur?

Cap off the IACV feed line... SHHHH don't tell anyone how I ghetto rigged it under the blower where no one will see it. Functionality trumps form, especially when form = money.
And SURPRISE! The coolant barb I finally 'unthreaded' wasn't threaded at all. It was a piece of brass, pressed into the thermostat housing. Now I'm super-ufcked.. I suppose I could 'press' an interference fit plug into the hole if I had access to the resources - but I DON'T. Looks like I have to tap some threads for a pipe taper thread into the thermostat housing and thread a plug in tightly. Looks doable. BRB 'part list' is getting longer. FUUU
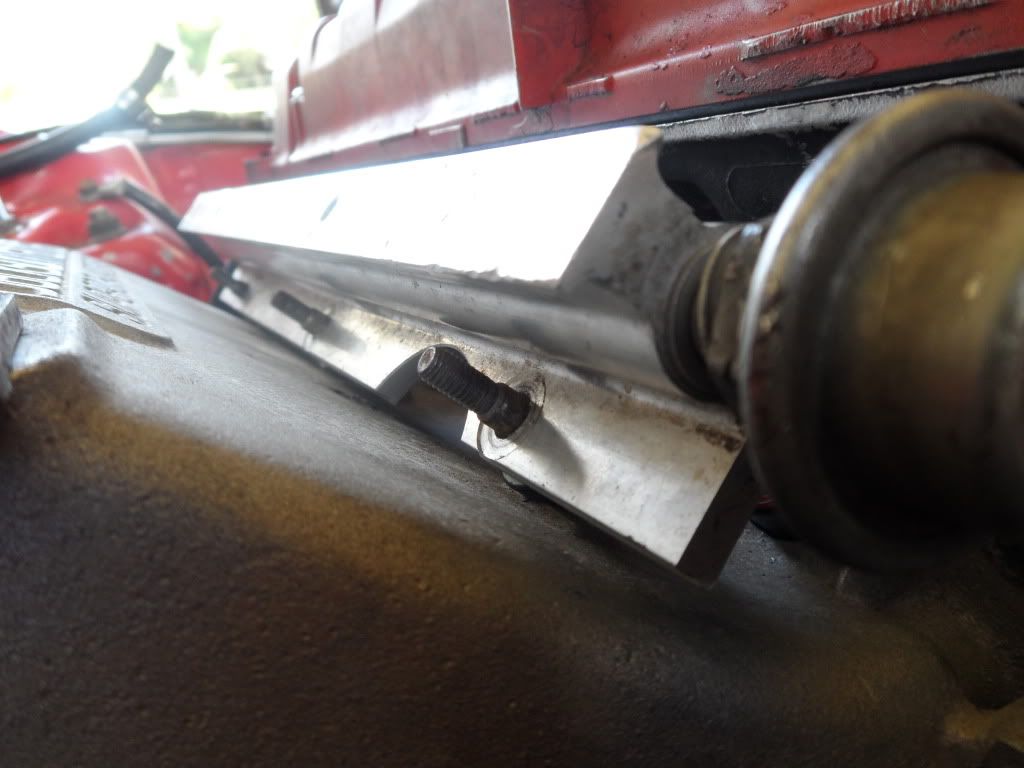
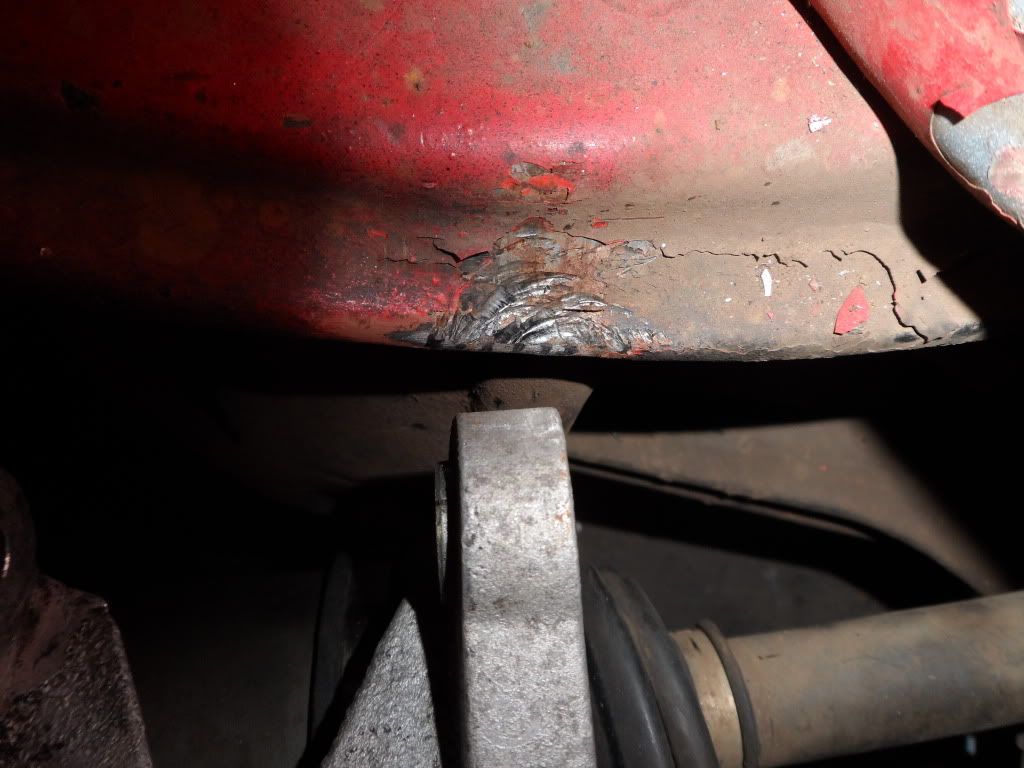
After a little more 'massaging' with a 2ft 1/2" extension and 5lb mallet I have folded the rail of the rear crossmember down out of the way so it doesn't hit my alternator bracket that came with the JRSC kit.
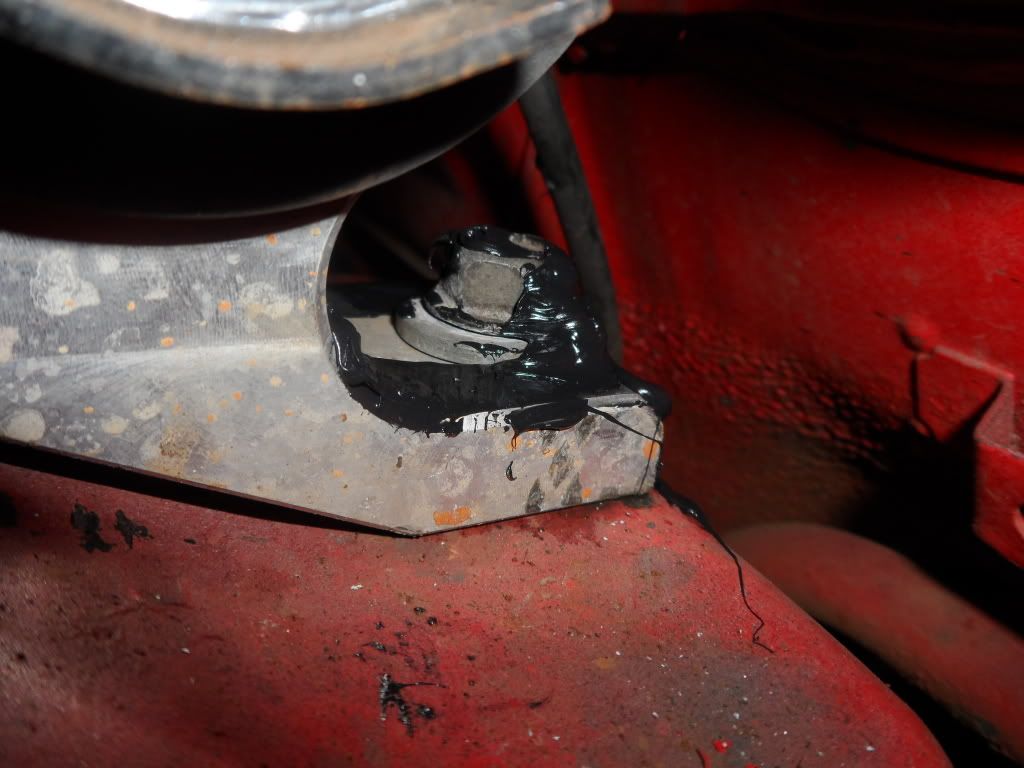
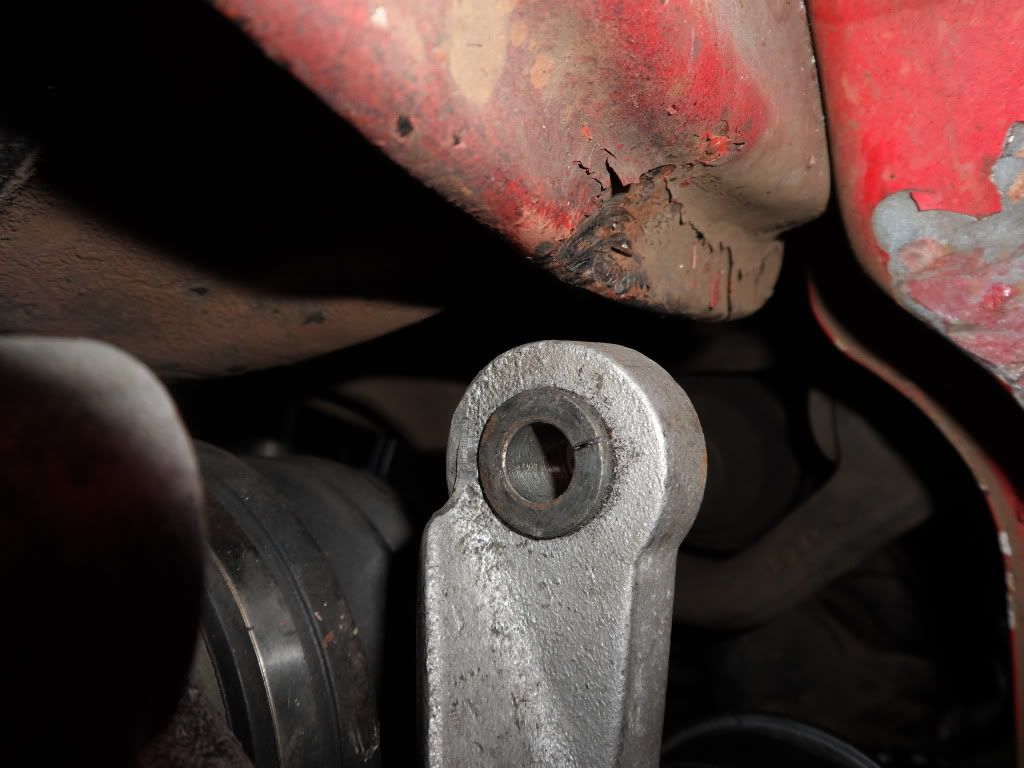
BEFORE - 1/4" was too close for comfort, even with stiff 90a mounts. I can snap kick the engine and it doesn't move more than a 1/16"... these mounts are TIGHT. My rearview mirror is unusable because it vibrates too much to make out the shape of the cars behind me. I hate 90a mounts, but they must stay for obvious reasons. If the motor shifts ever so slightly on a hard WOT shift, it will bang around on everything (brake lines) and cause catastrophic failure.
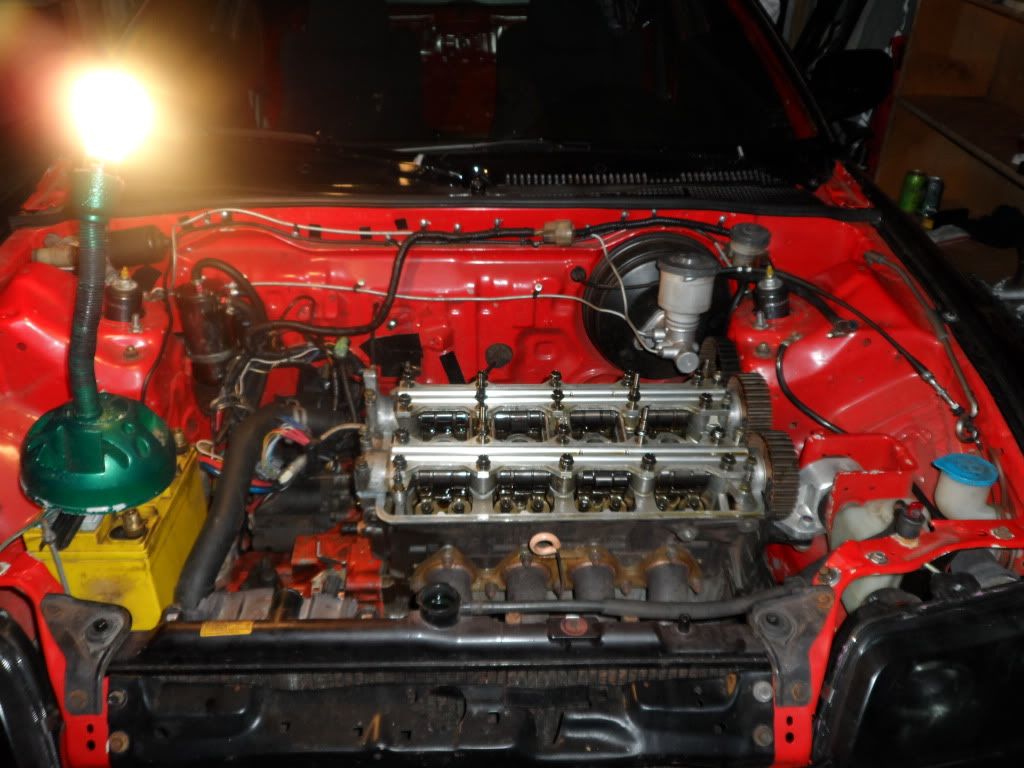
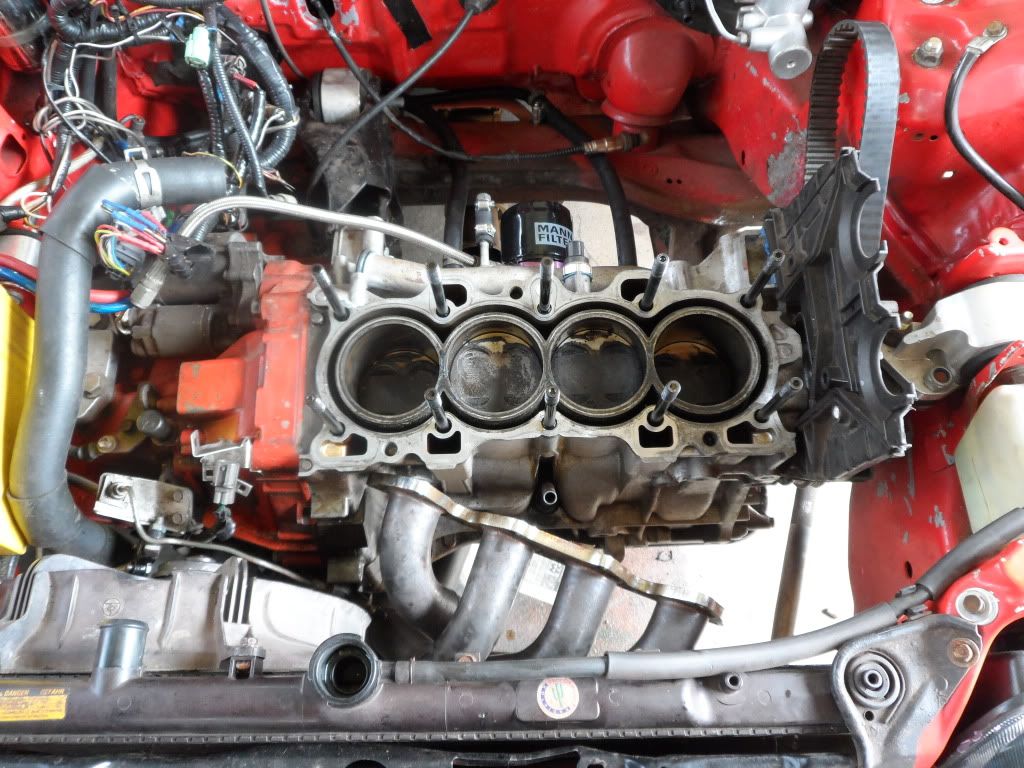
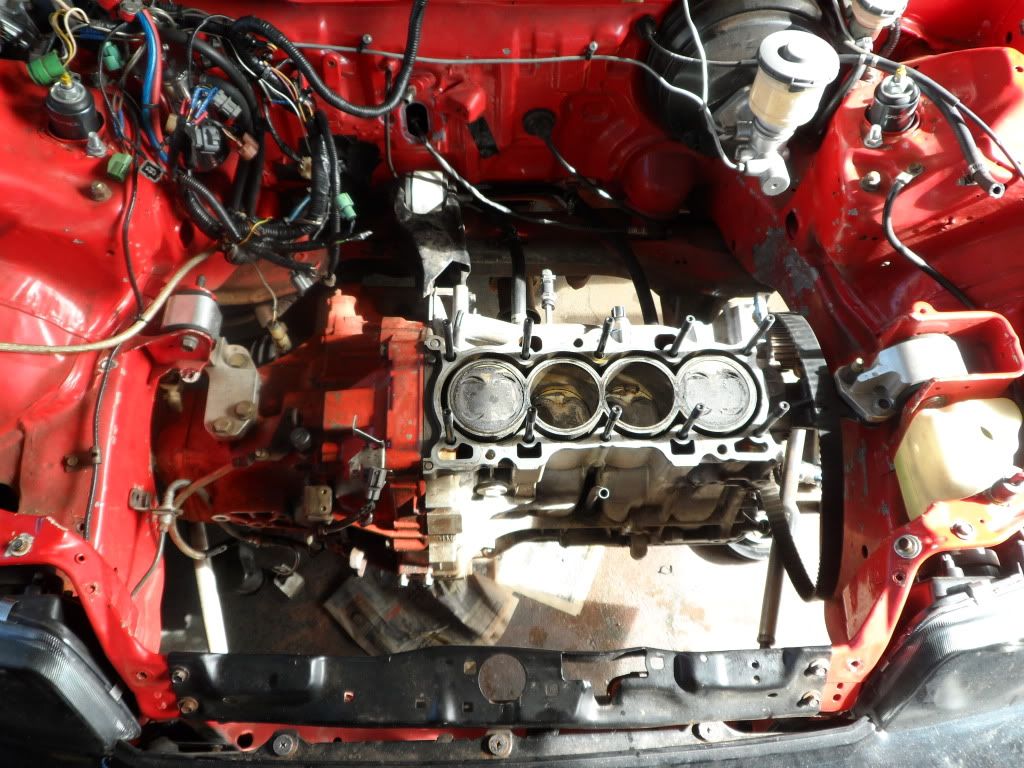
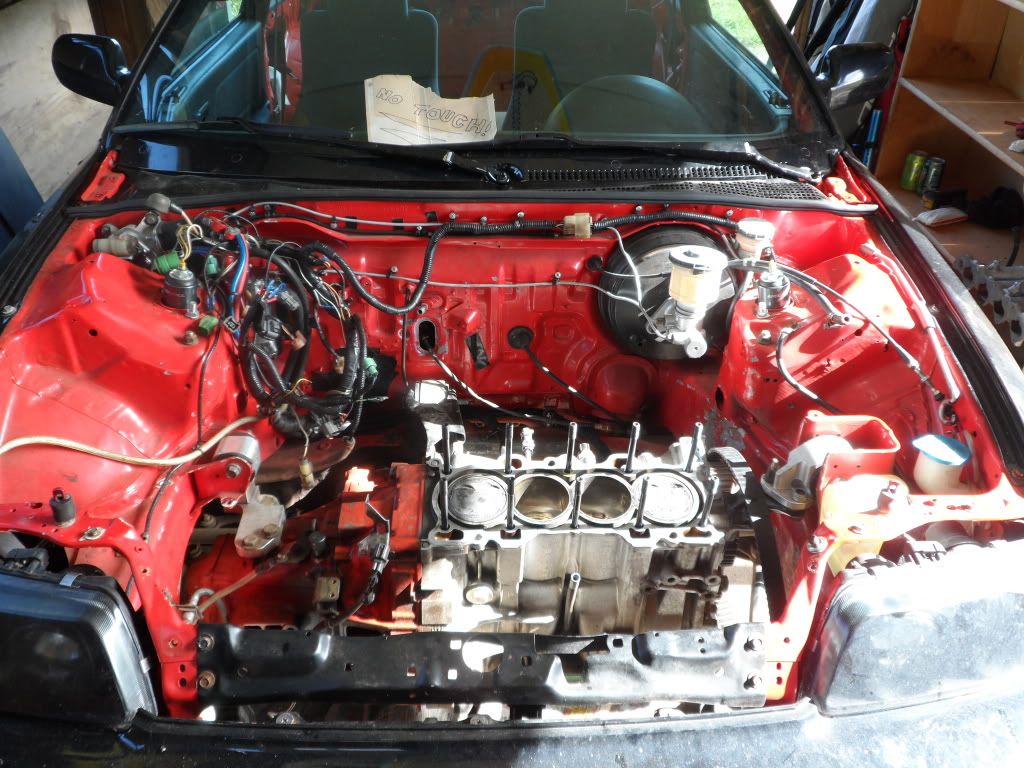
Get out the lights, we are pulling the cylinder head.
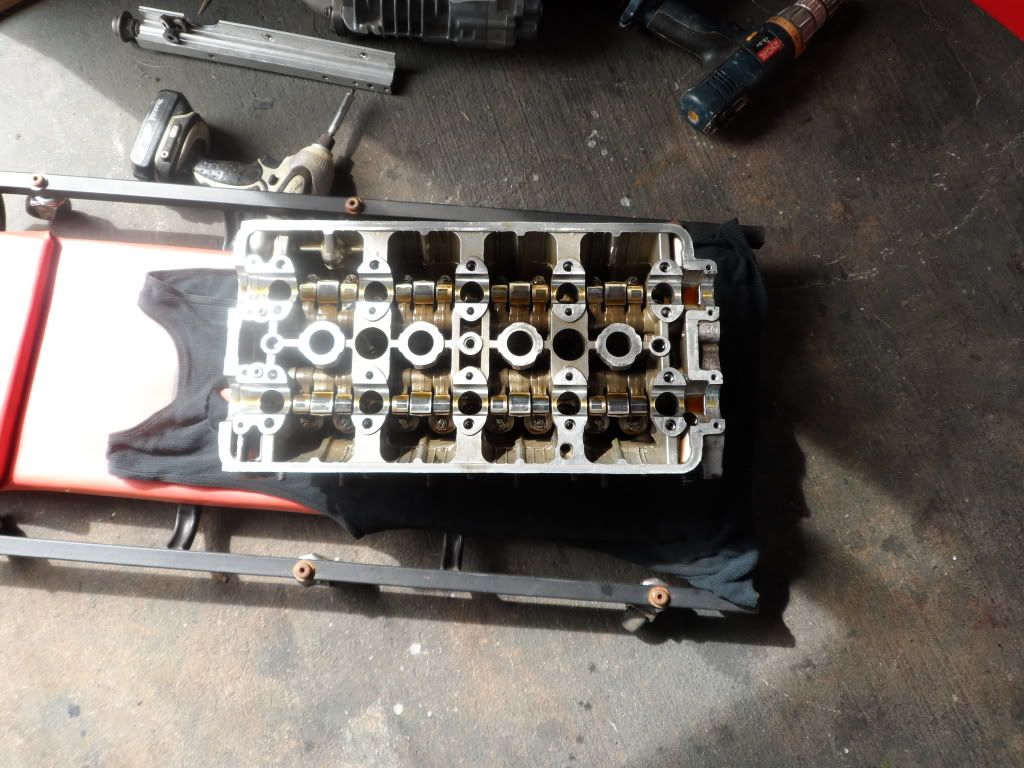
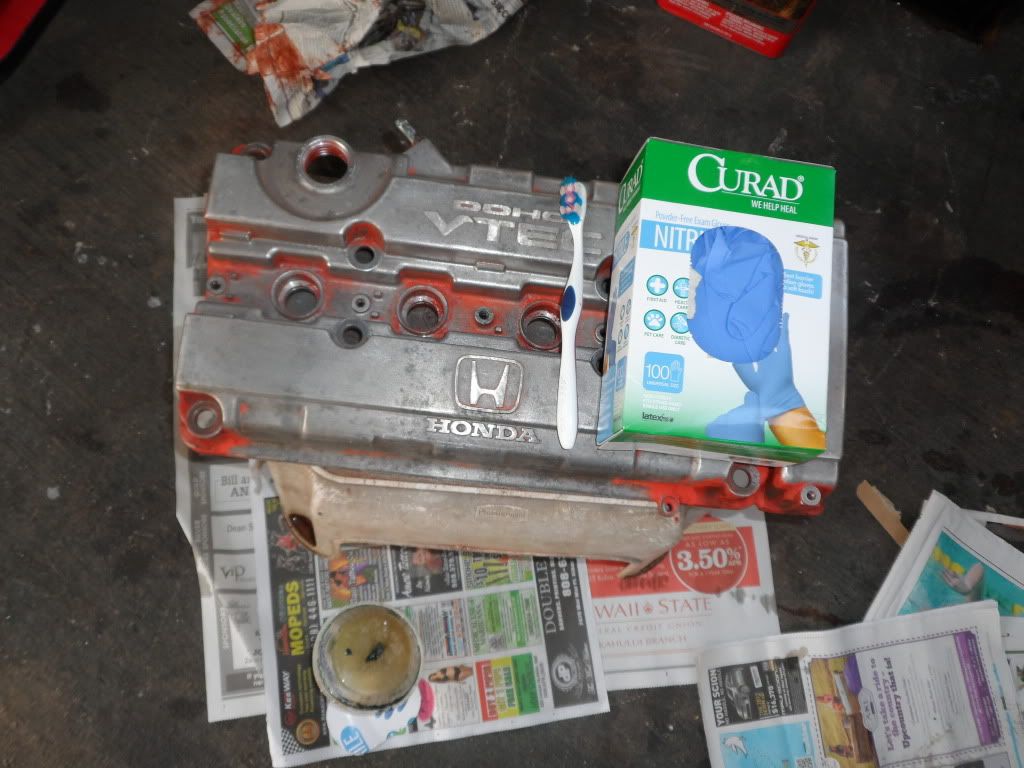
Valve cover and cam caps at 9pm... No rest for the wicked.
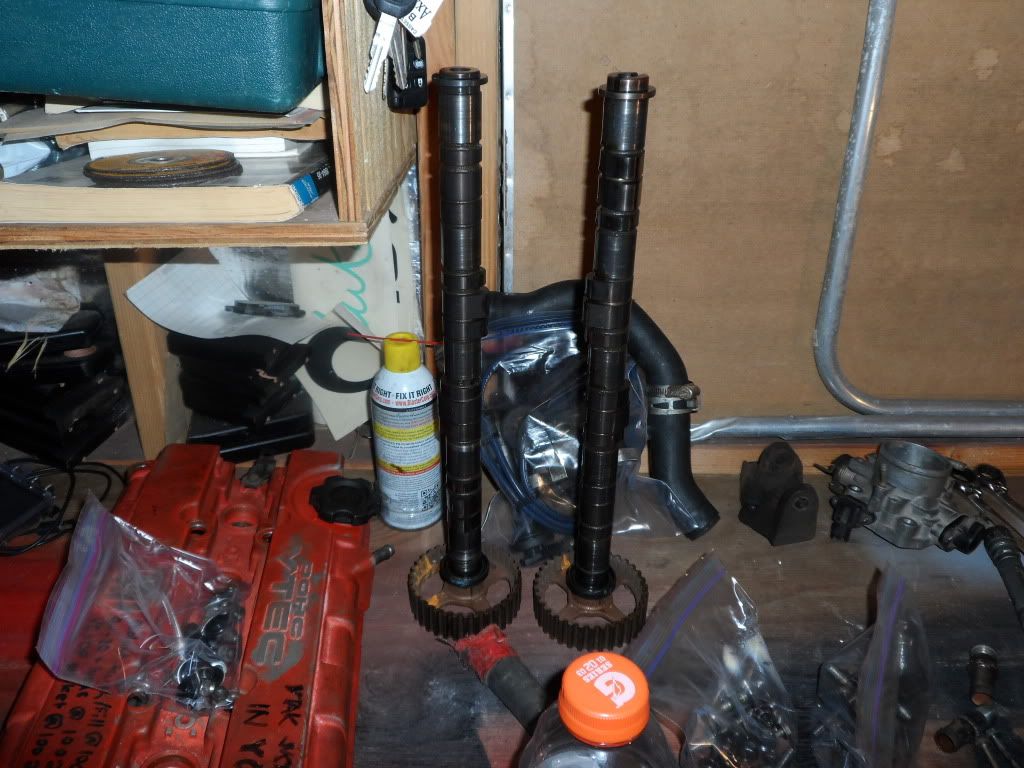
Goodnight camshafts, caps, and rails.

Always store your camshafts in this position - laying them horizontally with cam gears attached will warp your camshafts. Take NOTES muthaufckas!
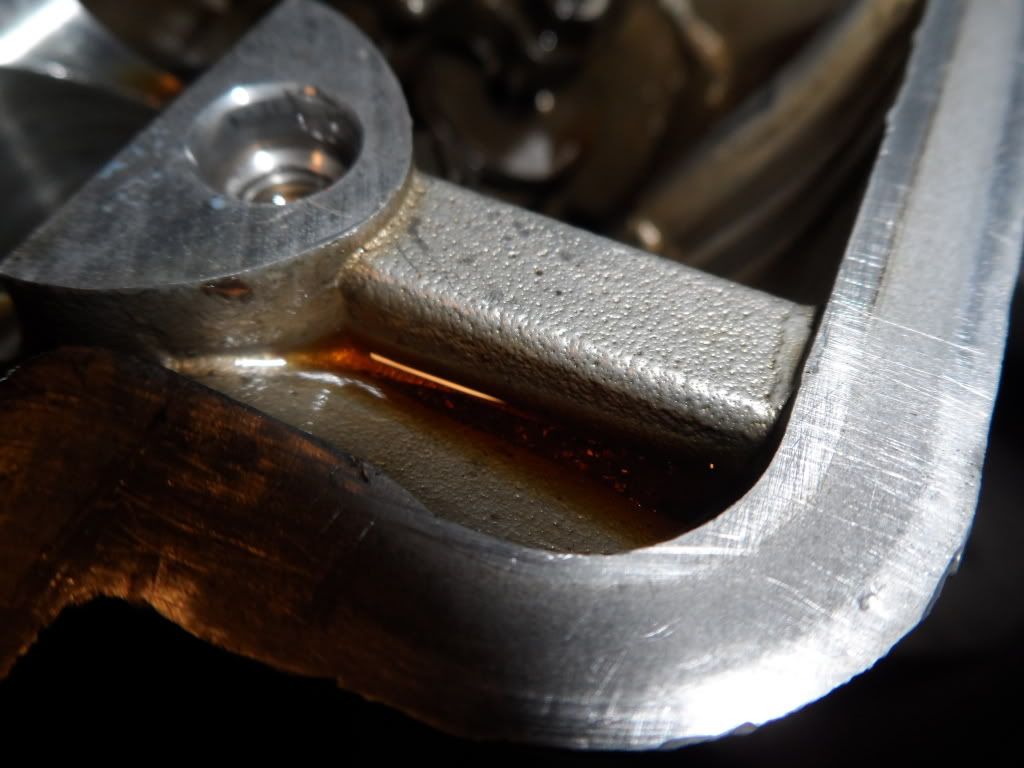
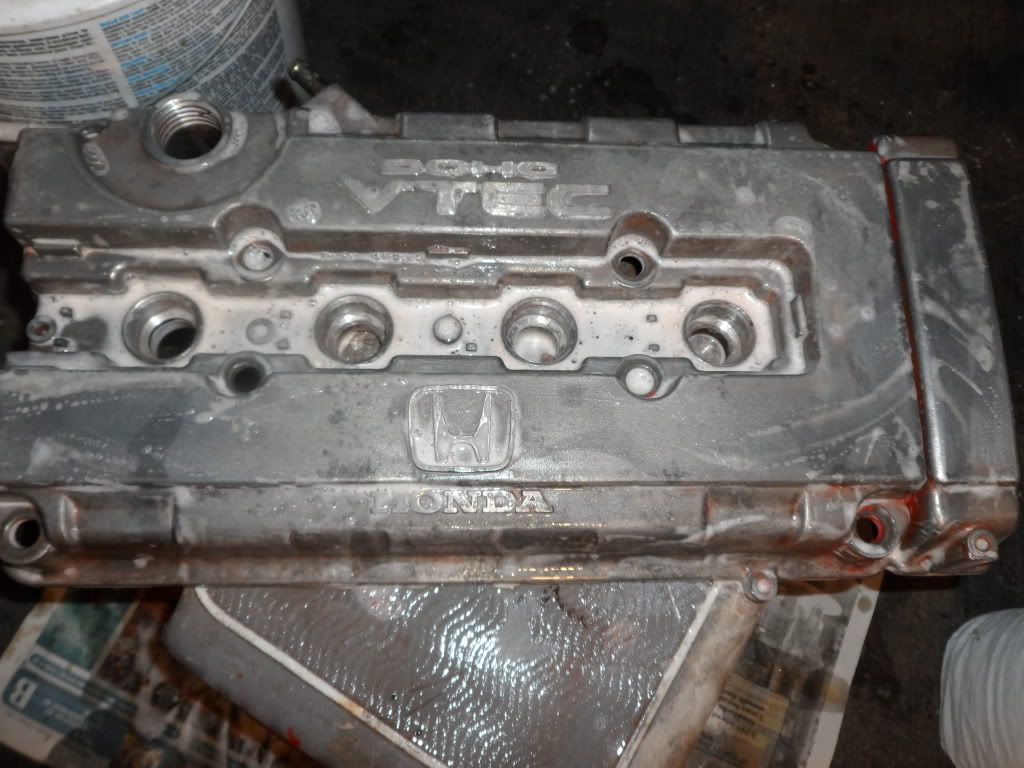
I won't be using this head - but now would be the time to clean up all the metal shavings in the oil that have settled into the low spots of the head. Hard to see in the picture (oil is too reflective to get a 'penetrating' picture) but there is a few mm of metal shaving and particulate settled down in that oil puddle.
And good night for now. That's as much work as I can manage at this time on a sunday night. Don't want to **** off the homeowners in the residential neighborhood where my shop is located. I forget that ppl keep normal hours and sleep when the sun sets. BRB just getting started. ONWARDS toward knowledge. ONWARDS toward research.
Stay tuned for updates!
Weekend is over and this is my final sunday night update before another long week of toiling away in the hot sun to fund this whole mindfart. Probably won't see much through the week because you can't post pictures of sitting at a computer studying forums and doing the legwork to pull this off. BRB list of parts to order is currently 32 items long..
Ufck the foreplay, on to the pictures.
Poor quality image but the fuel rail doesn't fit. The spacer pieces (to stop the steel stud from galling the aluminum rail I assume) hit the manifold and require modification. So does the rail. The rail fits on the studs, but won't slide down onto the shafts - the threads are thinner than the studs, so I have to ream out the holes.
A bit of filing on the bench vice and things are getting closer but not perfect.
Liek dis!
Studs are too thick. BRB drillering bigger holeses.
Holes aren't big enough. And the rail had a larger hole for the middle stud which is odd.
RC 440cc/min mounted on rail.
DONE! 2 hours later.
But now my studs are too long and the nuts won't tighten the rail to the manifold before the threads bottom out. Looks like I need to buy some washers. Parts-to-buy-list just got one item longer.
Cleaning up old mistakes.
Picture of the heater-core nubbin on the thermostat housing. I have to plug it because I'm not running a heater on this car - but I don't want to make a hose with a plug because that could create a hot-spot in the thermostat housing so I'm going to remove the coolant barb, tap the hole, and thread in a pipe plug to seal it up tight. I put a socket in the hole before I squeezed the pliers down to unthread it - this keeps me from collapsing the arterial walls of the coolant barb. Mad scientist hard at work.
The middle one.. Trying to unthread it.
Cleaning up the PCV system lines. Those are prelude freeze plugs threaded into the block with barbs for cooling lines. PM me if you need part numbers - it's the easiest way to install a PCV retrofit system on a b20b/z block.
Cable tied through the rear crossmember oem holes.
I installed a second cable tie after I took the pic. One and done? NO. Two for you.
Seeing as I won't need FITV or IACV - I decided to hack up this piece for 'couplings' because the hoses I had weren't long enough.
I could have saved myself a lot of work if I just bought longer hoses, but that's not in the budget. DIY and save money FTW.
TIGHT and functional for the 3/8" barb on my ebay catch can. Remind me to invest in a better vented breather tank when my current cheap ebay one stops working perfectly... oh wait... see what I did thur?
Cap off the IACV feed line... SHHHH don't tell anyone how I ghetto rigged it under the blower where no one will see it. Functionality trumps form, especially when form = money.
And SURPRISE! The coolant barb I finally 'unthreaded' wasn't threaded at all. It was a piece of brass, pressed into the thermostat housing. Now I'm super-ufcked.. I suppose I could 'press' an interference fit plug into the hole if I had access to the resources - but I DON'T. Looks like I have to tap some threads for a pipe taper thread into the thermostat housing and thread a plug in tightly. Looks doable. BRB 'part list' is getting longer. FUUU
After a little more 'massaging' with a 2ft 1/2" extension and 5lb mallet I have folded the rail of the rear crossmember down out of the way so it doesn't hit my alternator bracket that came with the JRSC kit.
BEFORE - 1/4" was too close for comfort, even with stiff 90a mounts. I can snap kick the engine and it doesn't move more than a 1/16"... these mounts are TIGHT. My rearview mirror is unusable because it vibrates too much to make out the shape of the cars behind me. I hate 90a mounts, but they must stay for obvious reasons. If the motor shifts ever so slightly on a hard WOT shift, it will bang around on everything (brake lines) and cause catastrophic failure.
Get out the lights, we are pulling the cylinder head.
Valve cover and cam caps at 9pm... No rest for the wicked.
Goodnight camshafts, caps, and rails.
Always store your camshafts in this position - laying them horizontally with cam gears attached will warp your camshafts. Take NOTES muthaufckas!
I won't be using this head - but now would be the time to clean up all the metal shavings in the oil that have settled into the low spots of the head. Hard to see in the picture (oil is too reflective to get a 'penetrating' picture) but there is a few mm of metal shaving and particulate settled down in that oil puddle.
And good night for now. That's as much work as I can manage at this time on a sunday night. Don't want to **** off the homeowners in the residential neighborhood where my shop is located. I forget that ppl keep normal hours and sleep when the sun sets. BRB just getting started. ONWARDS toward knowledge. ONWARDS toward research.
Stay tuned for updates!
02-11-2013, 04:13 PM
#54
Honda-Tech Member

Join Date: Mar 2012
Posts: 29
Likes: 0
Received 0 Likes
on
0 Posts
Thanks dude - that's exactly why I go to all this length and do all the work to digitize this and put it online - I want to INSPIRE other people to do stuff like this. I want to uplift the ppls who can't make it happen for whatever personal reasons, and I want to help detail EXACTLY what must be done to accomplish a project like this one. Hell man - if I had pictures one TENTH as good to work with, this build would be ufckin EASY. But most people who build these cars aren't tech savvy and can't be ufcked with thinking about it after they put the wrenches down and leave the shop.
We all know this kind of work is a pain in the **** to do, each and every damn step of the way.
Stay tuned for updates!
We all know this kind of work is a pain in the **** to do, each and every damn step of the way.
Stay tuned for updates!
02-11-2013, 09:44 PM
#56
Honda-Tech Member
Thread Starter
Took a day off work to get a little more done. These personal projects are quite important to me 
We have potholes in hawaii. This is why I'm monster trucking..
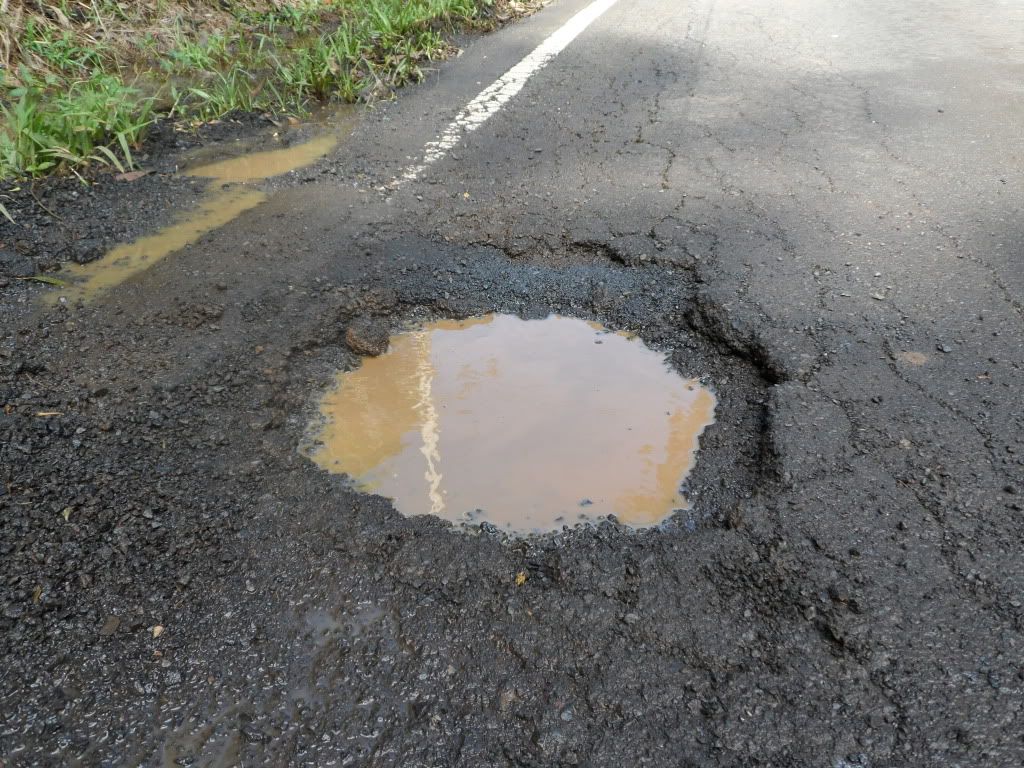
Deep.
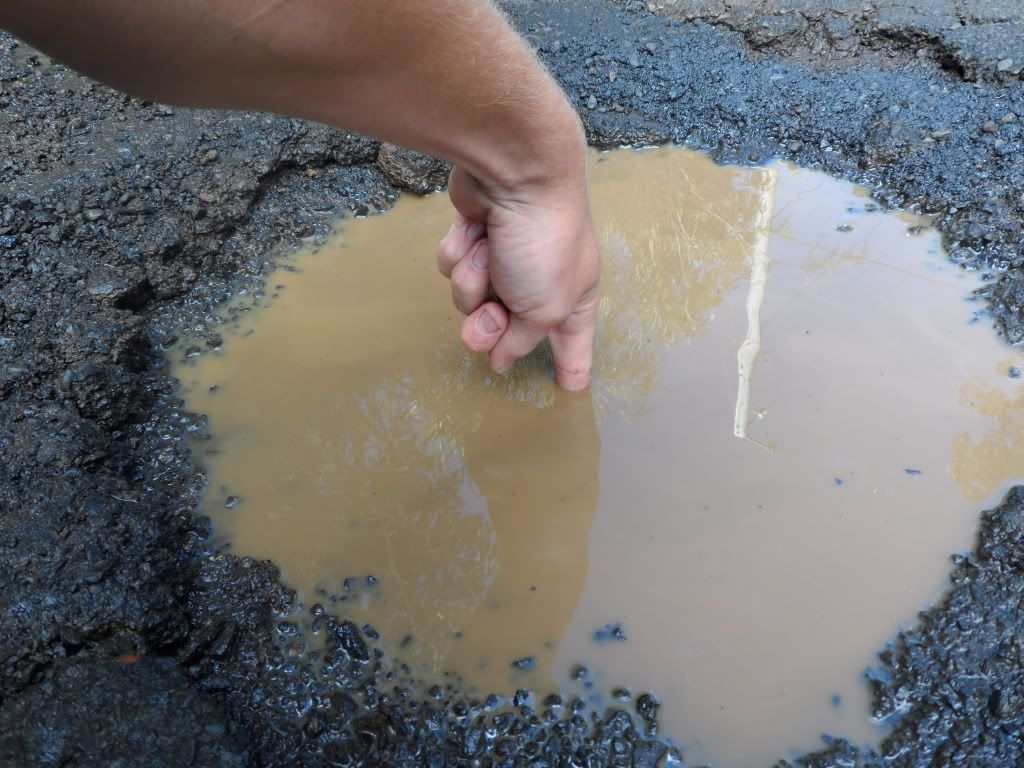
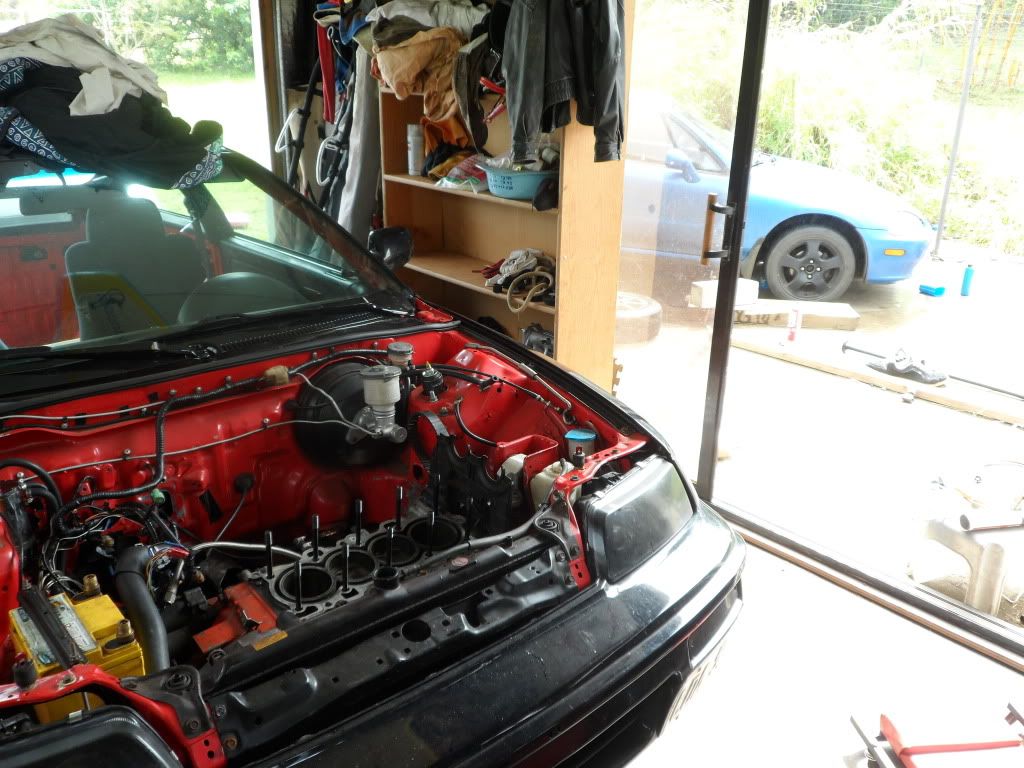
I pulled the cylinder head and notice the z6 del slo in the background getting a little TLC. And I lifted it an inch in the rear to even out the stance and provide puddle clearance.
Don't build a b20v without ARP head studs.
Time for inspection on the creeper.
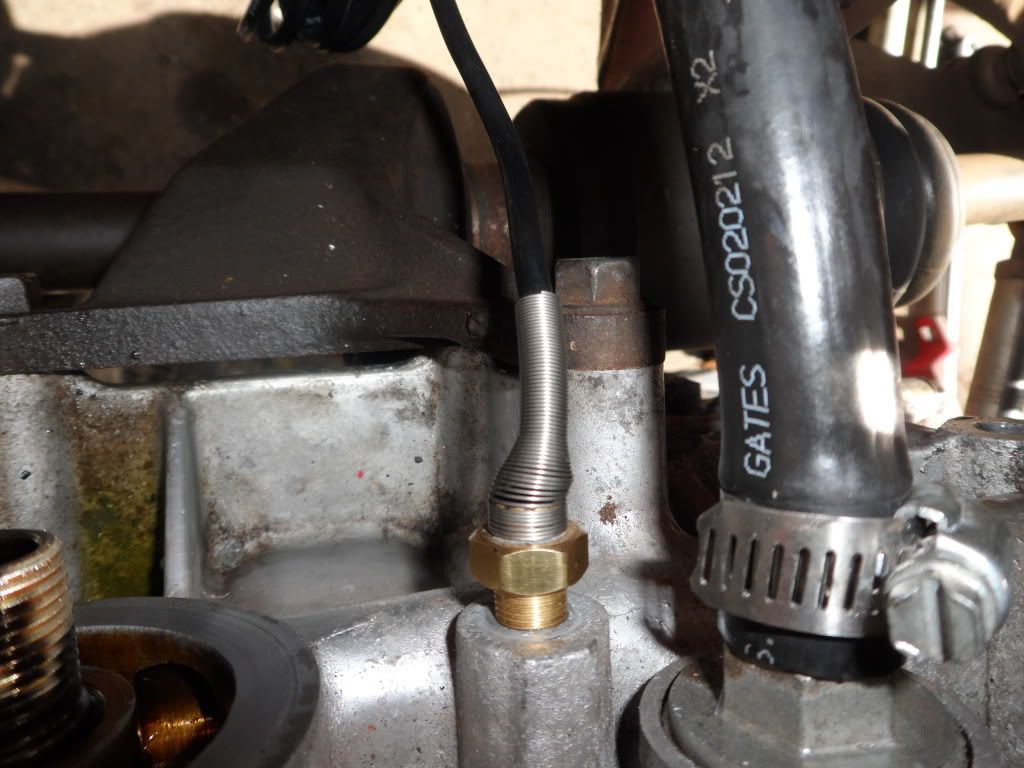
I'll pick up my oil temp and pressure in this area..
Looking just a wee bit cleaner in there.
Starter delete is the latest cool thing. I've installed a kick starter and a pull-cord like my honda lawn mower. I also installed VTACK on my mower today. The baby screams through that grass. Wait, it's time to mow again.
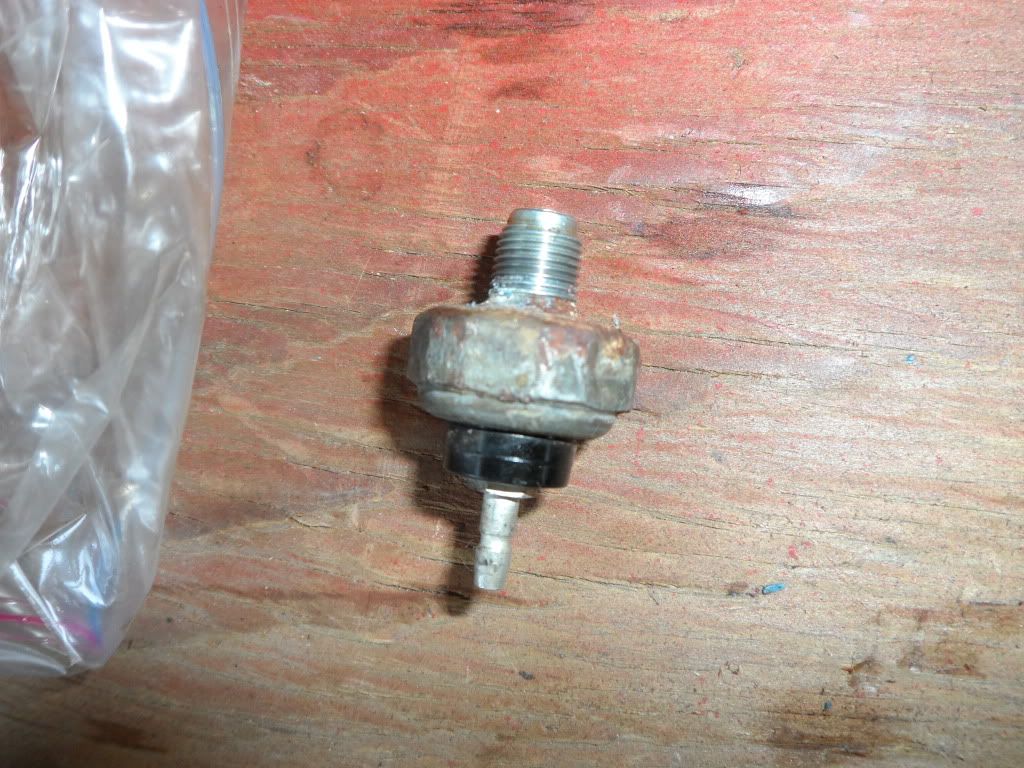
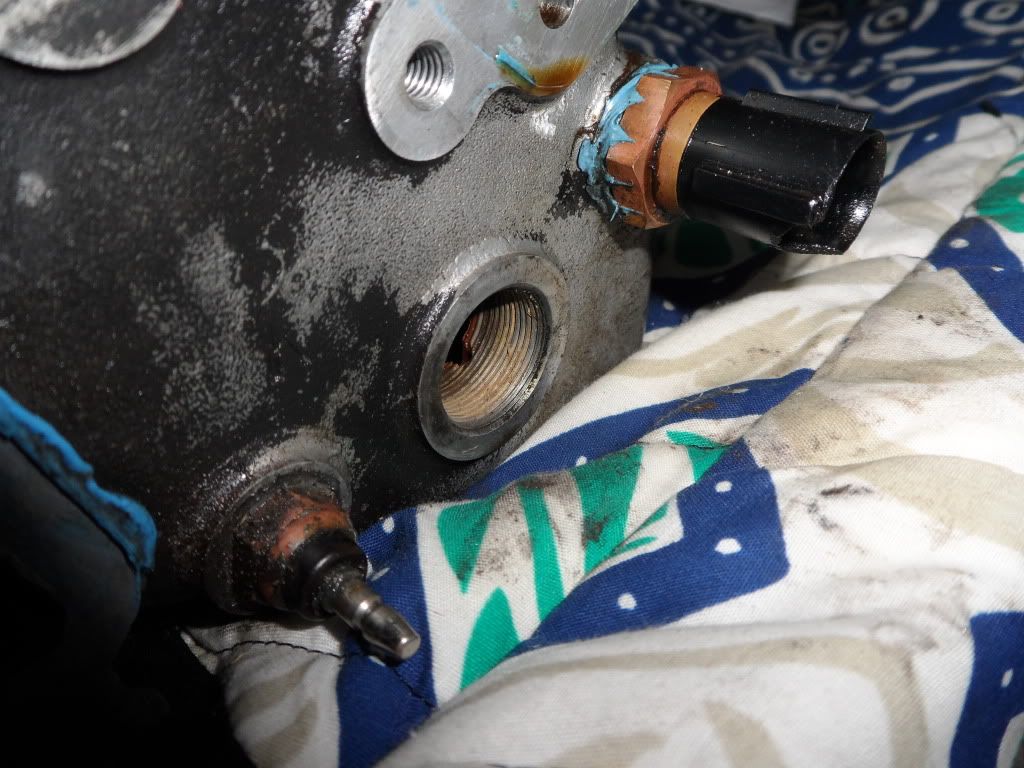
Probe in original pressure switch location.
She threads, but I still have to verify thread pitch etc before I call this done. This is currently my life.
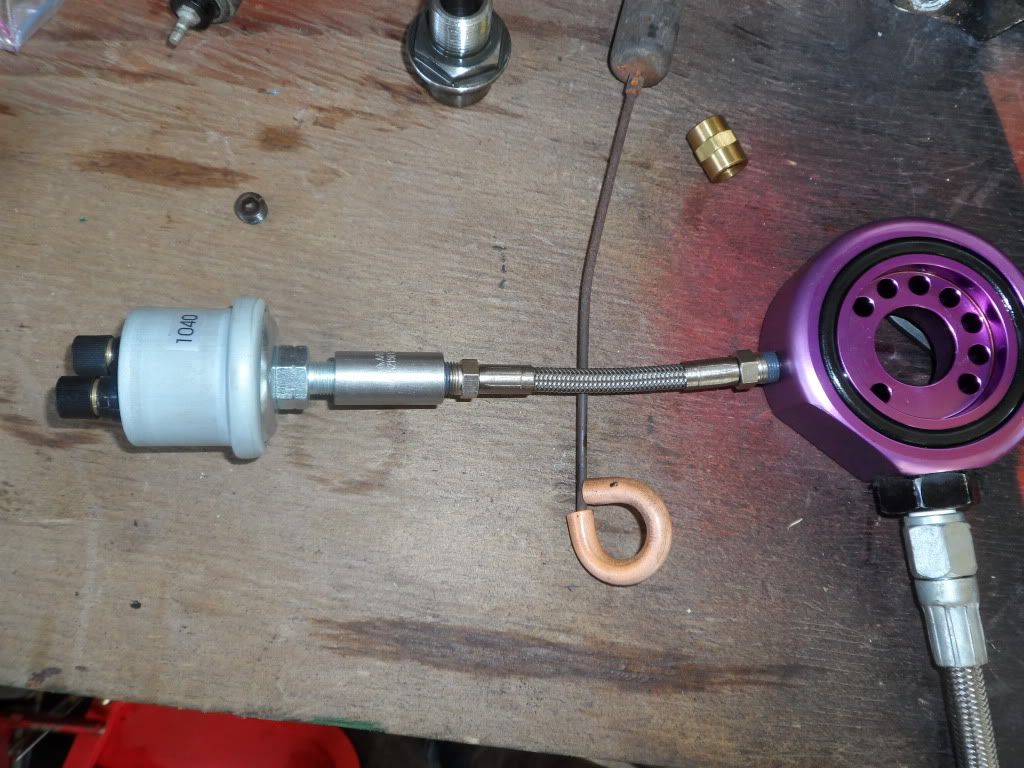
Pressure sending unit mounted on vibration absorbing braided line. I may or may not tap and install the oem idiot light sensor in this sandwich plate as well.
I suspect BSPT MIP NPT NPTT AND MNPT are all different. FUUUU
And that's it for now. Other projects called my attention away from this build for the later half of the day.
Stay tuned for updates!
We have potholes in hawaii. This is why I'm monster trucking..
Deep.
I pulled the cylinder head and notice the z6 del slo in the background getting a little TLC. And I lifted it an inch in the rear to even out the stance and provide puddle clearance.
Don't build a b20v without ARP head studs.
Time for inspection on the creeper.
I'll pick up my oil temp and pressure in this area..
Looking just a wee bit cleaner in there.
Starter delete is the latest cool thing. I've installed a kick starter and a pull-cord like my honda lawn mower. I also installed VTACK on my mower today. The baby screams through that grass. Wait, it's time to mow again.
Probe in original pressure switch location.
She threads, but I still have to verify thread pitch etc before I call this done. This is currently my life.
Pressure sending unit mounted on vibration absorbing braided line. I may or may not tap and install the oem idiot light sensor in this sandwich plate as well.
I suspect BSPT MIP NPT NPTT AND MNPT are all different. FUUUU
And that's it for now. Other projects called my attention away from this build for the later half of the day.
Stay tuned for updates!
02-16-2013, 10:07 PM
#57
Honda-Tech Member
Thread Starter
Okay here we go again. Another weekend bit of progress.
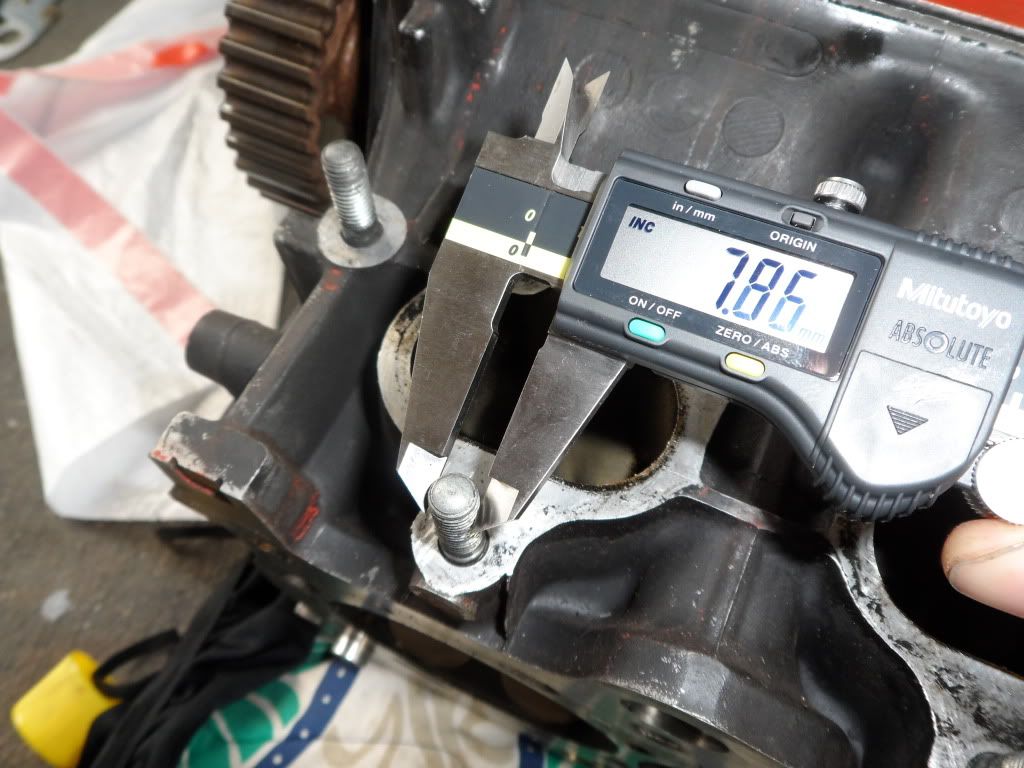
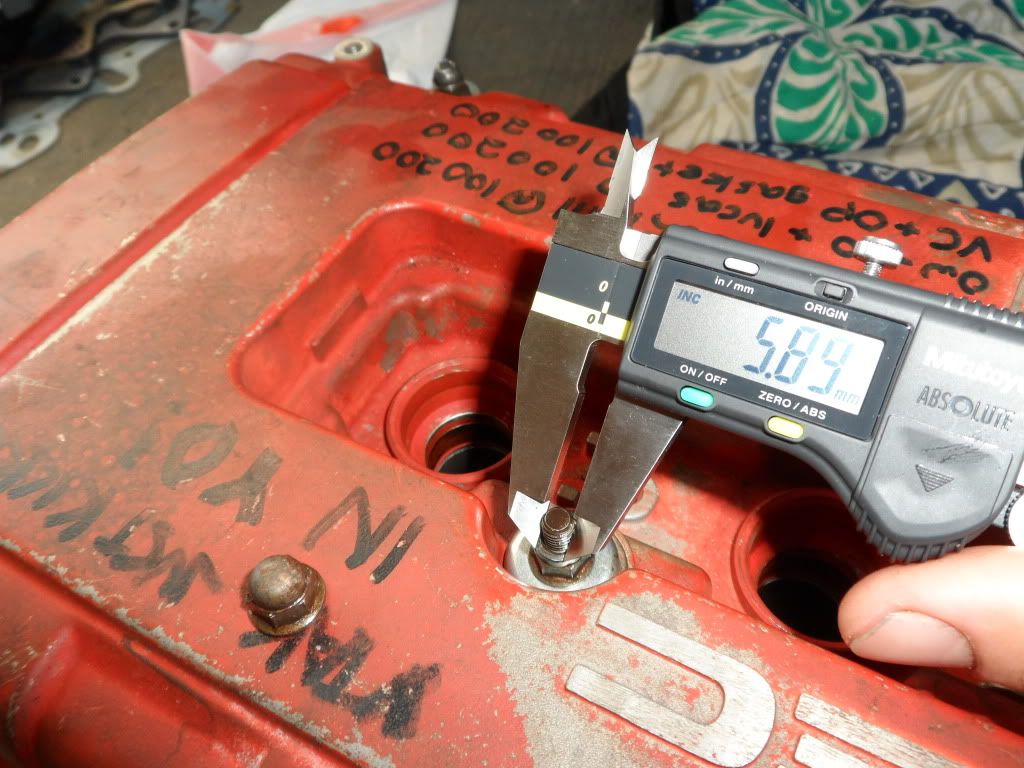
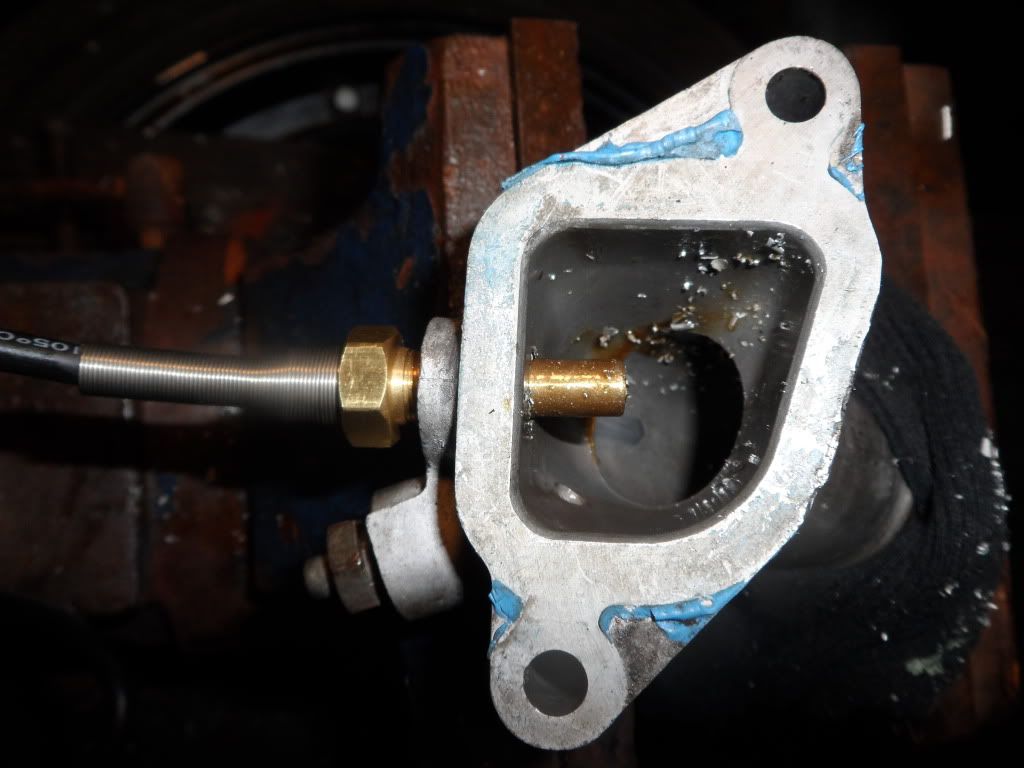
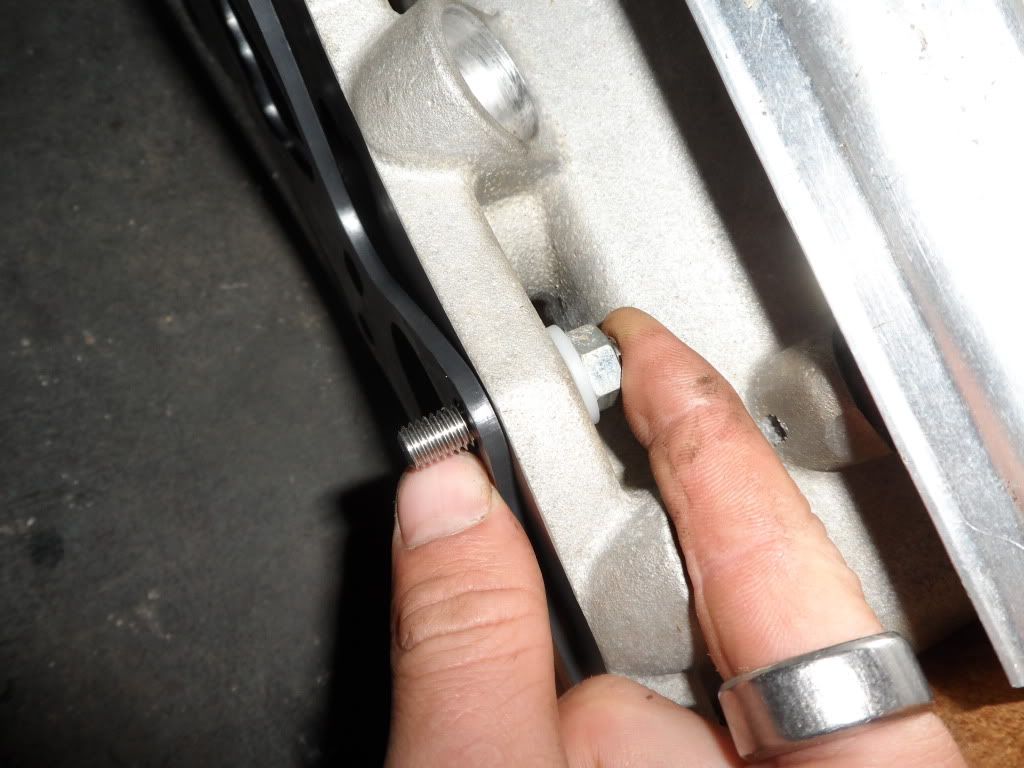
I want to replace the oem studs for the intake manifold because I am missing one of them and I just want to use new parts for a few more bucks. Sparing no expense. Build it once, build it right. The p30 manifold is pictured..

The JR manifold is just a titch bigger, and I ordered studs 2mm longer for other reasons.
A quick visit to mcmastercarr and I've ordered replacements for all this. Nylon washers as well, I'll post part numbers when they show up. Don't waste 50 bucks on the king motorsports extended studs kit.. all the parts total up to about 30 bucks shipped.
Might as well replace the acorn nuts as well. Some aren't too pretty.
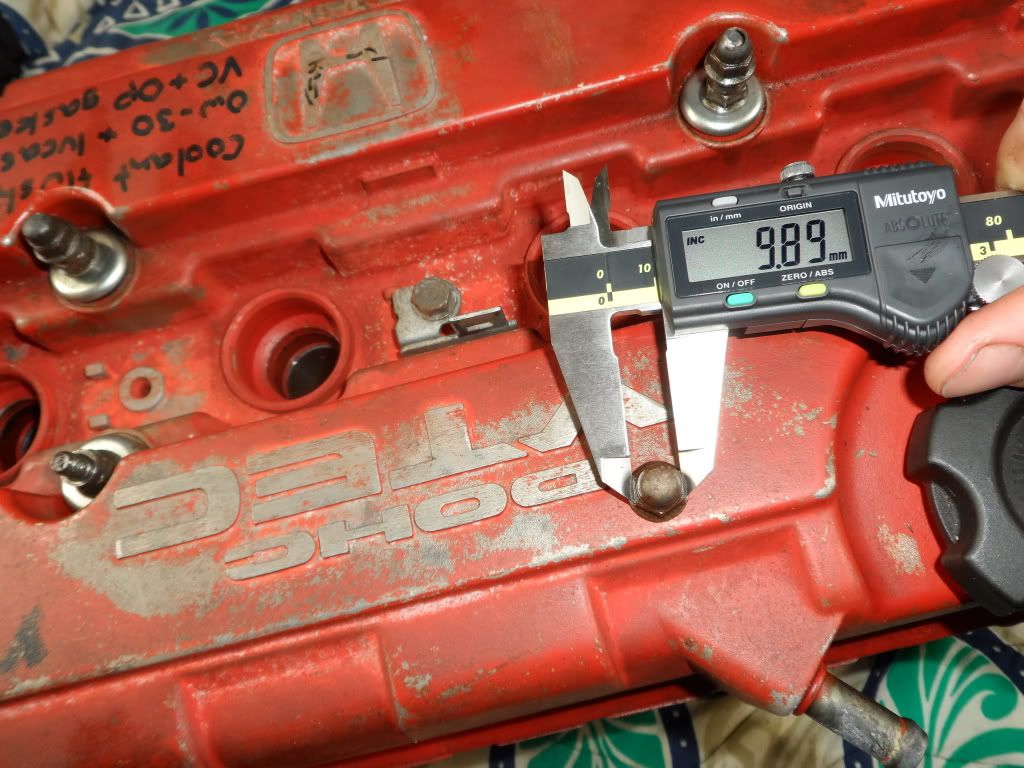
I am a man of data - factual and statistical hard evidence of reality. A man of details.
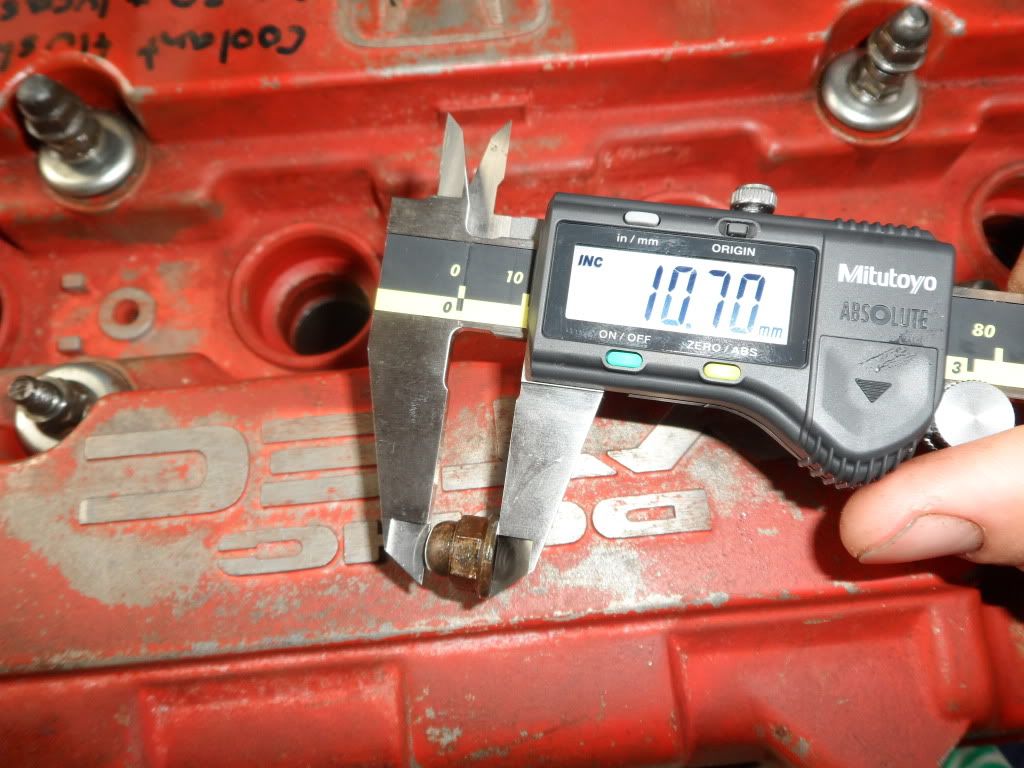
Measure twice, order once.
I really want to run my 62mm b16 throttle body, but I might have to get the 68mm LHT one if I can't figure out which throttle cable..
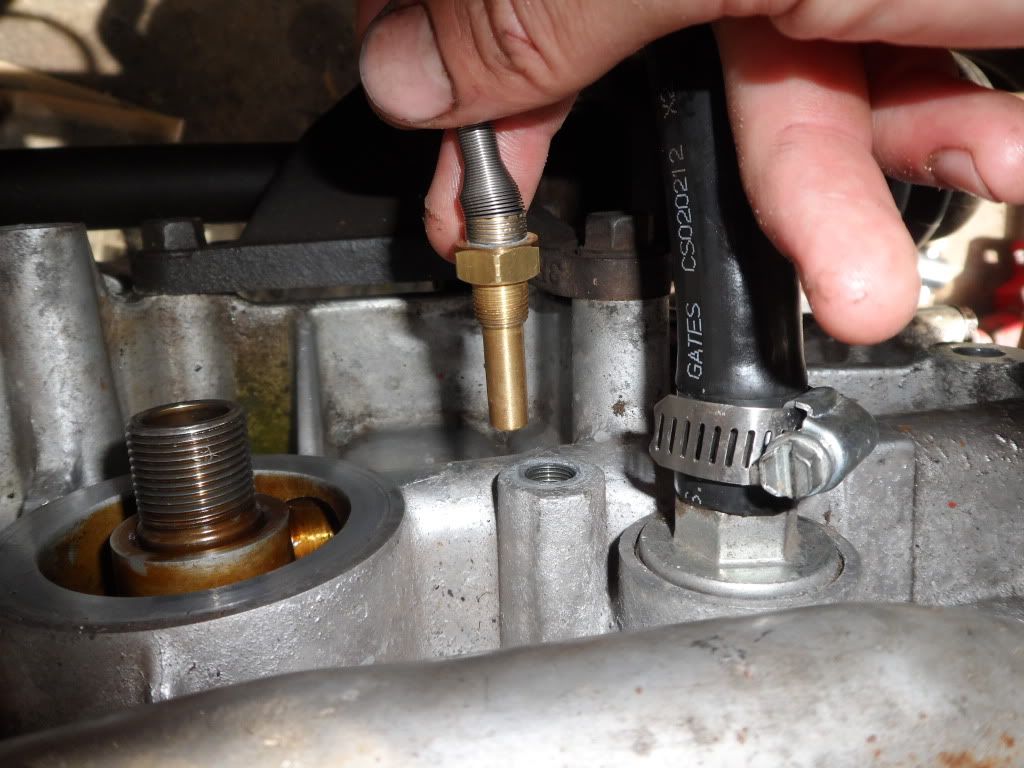
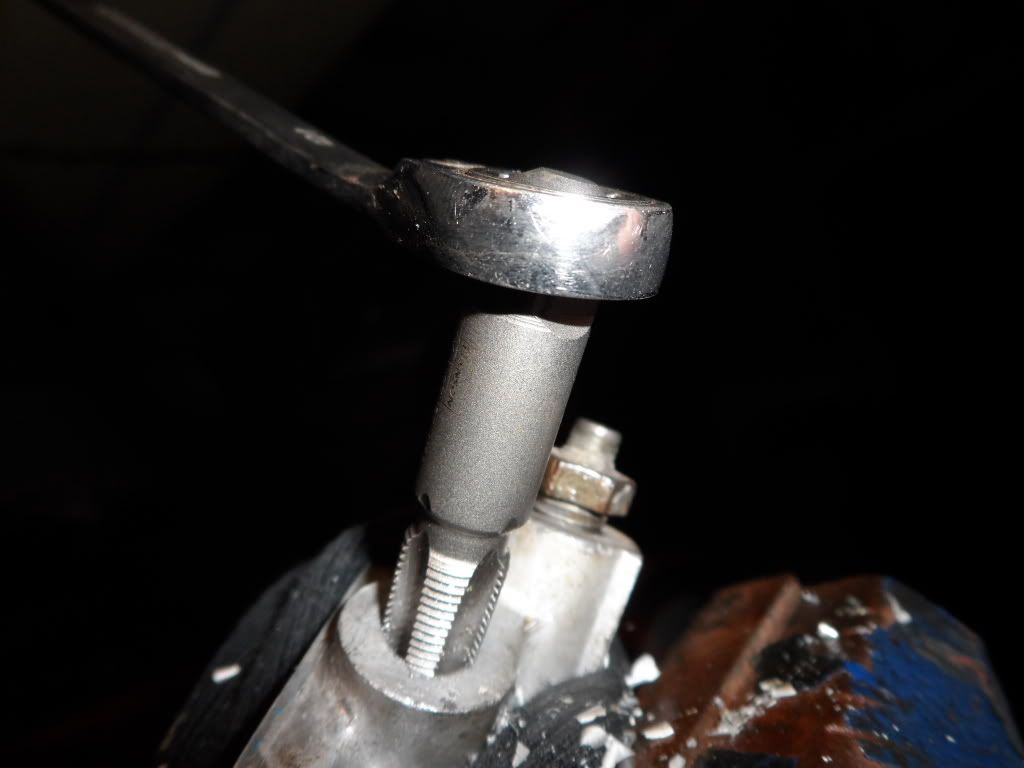
The clock strikes 3pm as I turn my attention to the first hands-on project of the day. I have to plug this hole.. I assumed the coolant barb was threaded, but after I got it out, it appears to be a straight pipe (non-tapered) that was pressed into the thermostat housing. FUUUUU
And the coolant barb for the heater hose dingus on the head needs to be plugged. Good luck deciphering the thread angle/pitch TPI etc..
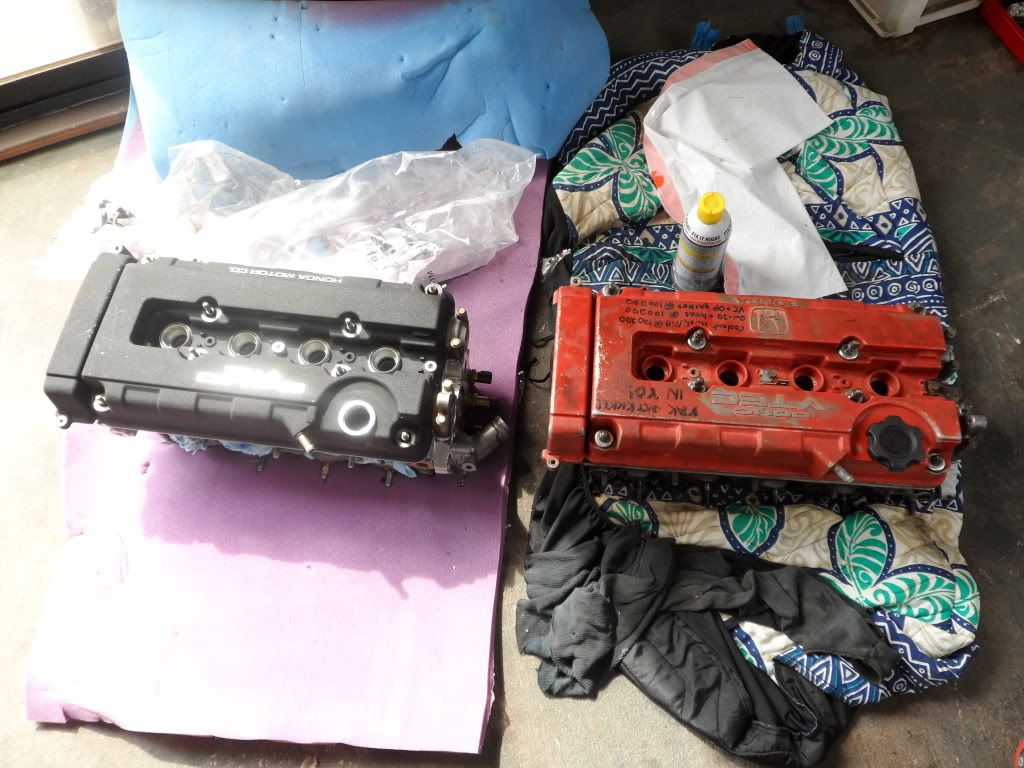
Removed from my old head which I'm doing all my test fitment on.
Still installed on my new pr3 head which is much cleaner. I will never paint another head/block/trans again. The paint acts as a jacket that insulates heat, gets dirty, washes off when parts cleaner contacts the paint.. No more paint crew for me.
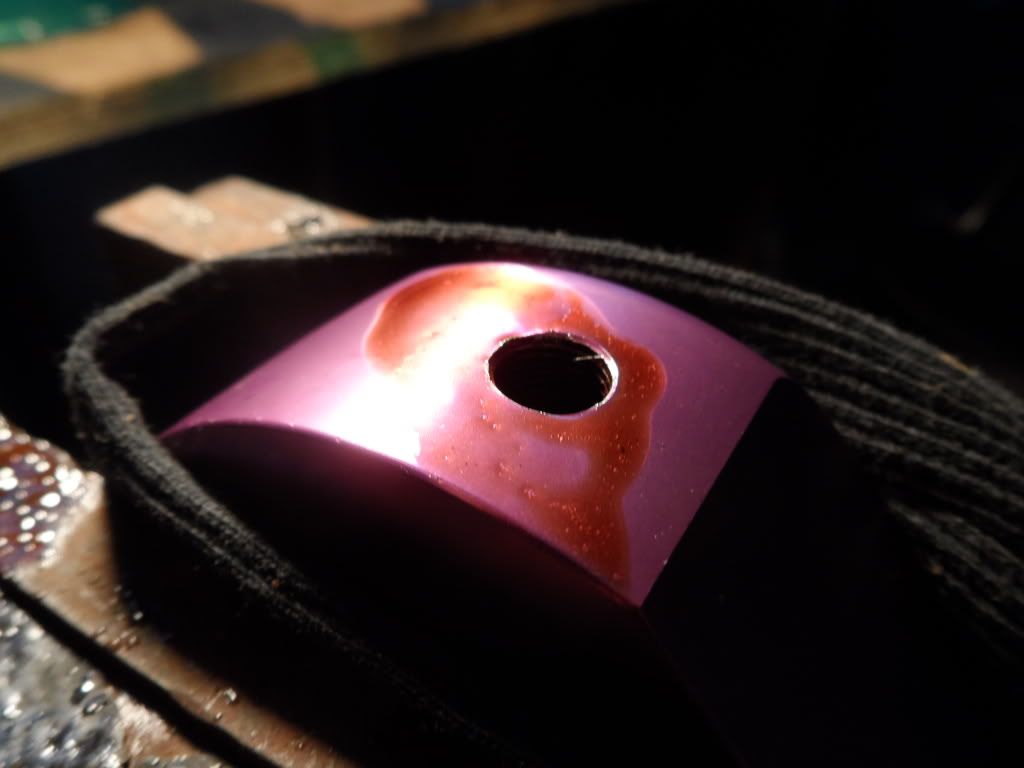
Notice anything different?
This took atleast a half-hour. It's all about the DETAILS. That centerline looks orange but it's quite red. Camera flash messed with the lighting. Yes that is micron-thin steel pin striping. Polished to a mirror sheen. I can see my reflection if I look into it closely.
Cylinder heads swapping stories about the good old days.
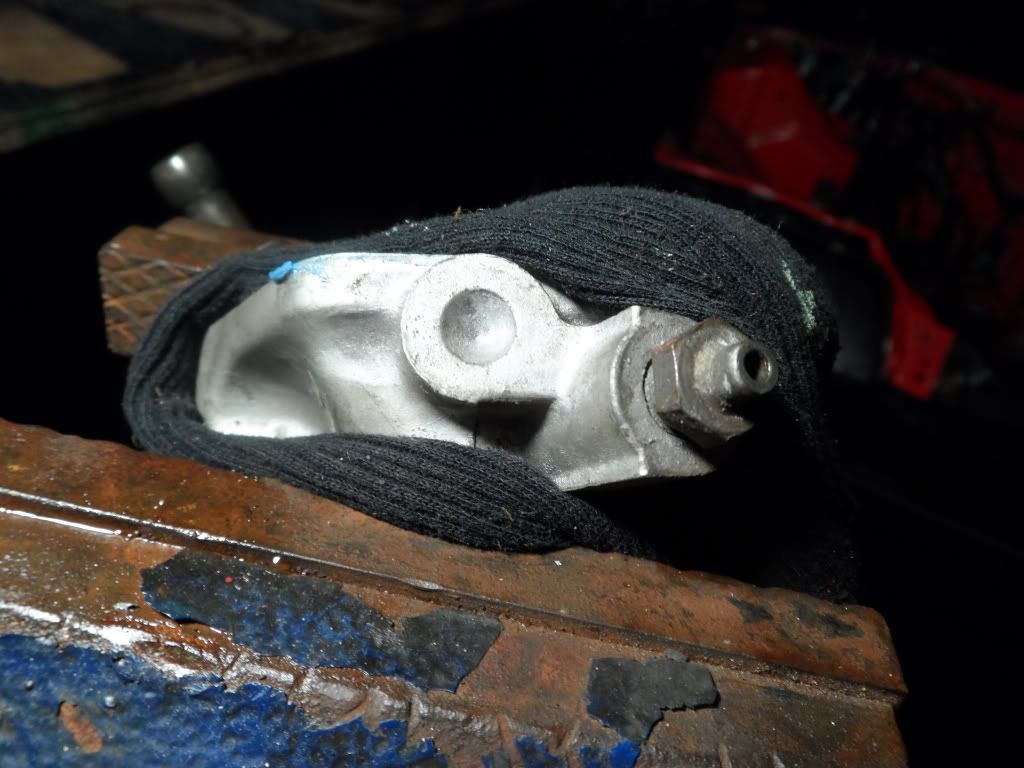
TAKE NOTES! This is how we plug that coolant barb. We steal a rocker arm plug off the spare head - identical TPI and pitch. She threads right in.. The old switcharoo..
I spent six hours sitting here on my spare rims ordering up parts. Parts ordered include...
-oem oil pump
-oem water pump
-brand new oem ITR exhaust cam
-valve cover acorn nuts
-intake manifold studs and nylon heat-insulating washers
-gates racing GSR blue timing belt
-oem p30 modified headgasket for b20v
-stepped dowel pins
-tap and plug for oil passage in head
-carbon fiber spark plug cover
-replacement 1" MC w/appropriate hardline locations
-corbeau seat rails with sliders
-custom cam cap plug (you're gonna love this)
-felpro exhaust manifold gasket (don't buy anything but felpro or oem gaskets)
-FITV blockoff plate from KMS
-oem cylinder head cowling to be cut to expose cam gears
-about 6 other things I'm forgetting..
After wasting the afternoon driving around town looking for an appropriate tap, drillbit, plug I came home with 2/3. This island might as well be the the third world when you are looking for little parts like these.. Everything is special order, everything is brought in through air freight with a 2 week delivery time... it's a real pain.

SIR! The patient is ready! The operating room is prepared! Commence surgery on my mark! Starting in 5, 4, 3...
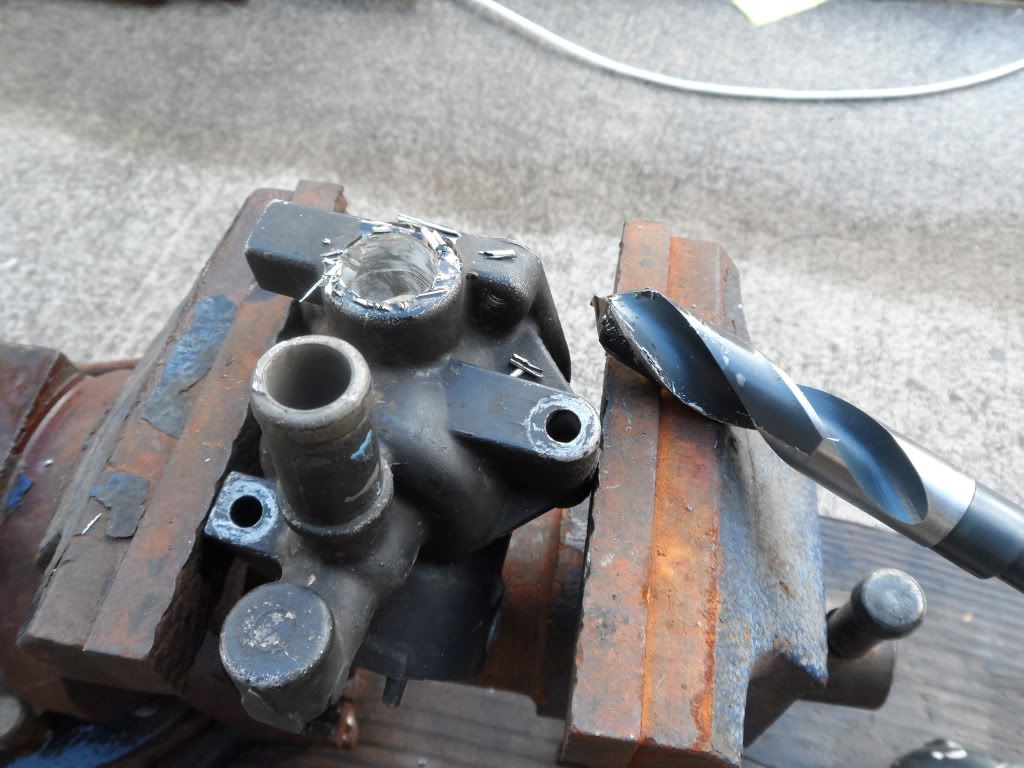
First we driller out the hole to the proper size for the tap. Use low RPM, light pressure, clean your drillerbit often, and use LOTS of cutting oil. Motor oil works fine if you use a lot. In other words - drill in one hand, oil bottle in the other pouring a constant stream on the cutting surface.
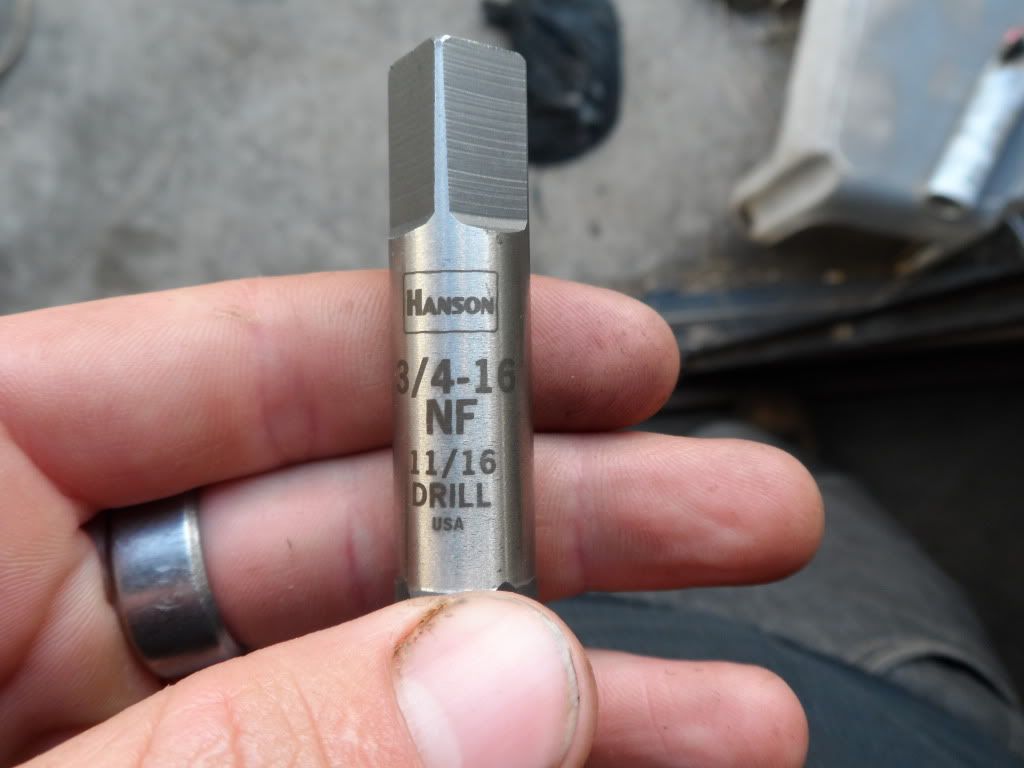
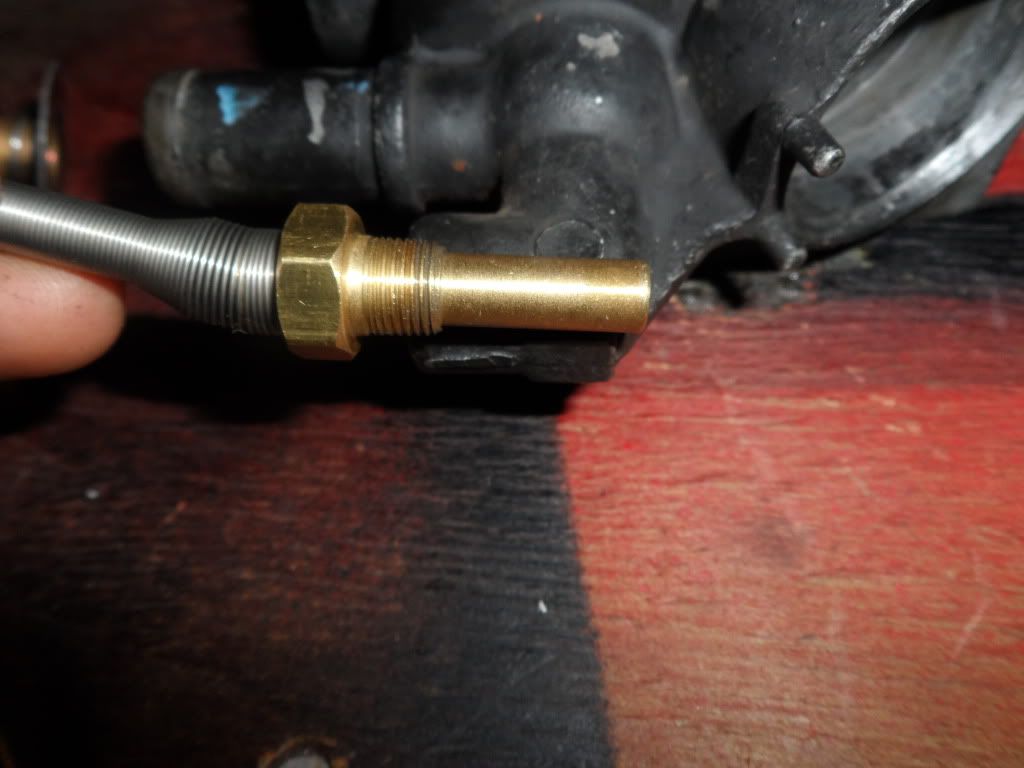
I checked every store on the island and this is the best I could come up with. The thread isn't as fine as I'd like, but it should seal up tightly with the appropriate pipe taper plug that I still have to order.
This tap is NOT tapered - but an appropriate TAPERED plug should seal the hole with teflon. I'm looking for a recessed-head allen plug in BRASS. Do NOT use a steel plug - the metallurgy is all screwy and not only will the steel plug gall the naked aluminum and leak, but steel and aluminum are greatly different when it comes to heat expansion/contraction. A steel plug in aluminum won't expand as much as the surrounding aluminum when the parts heat up to 205*F (coolant "hot" temp) - and the first time the car cools down the aluminum will cool/contract more quickly, causing the steel plug to crack the aluminum and leak. Simple physics, isn't it? I need to find a periodic table of the elements to post on my wall and memorize..

Not exactly the best tap holder, but it works if you start her straight and swing her along the right horizontal axis to the part. You can't ufck this up, you only have one shot before you need to replace the whole part you are modifying..

The rumblefish inspects the CV boots and clarifies that AC Delco OEM DA integra axles are sufficient for 300whp, as long as you don't run slicks or drag race every weekend.
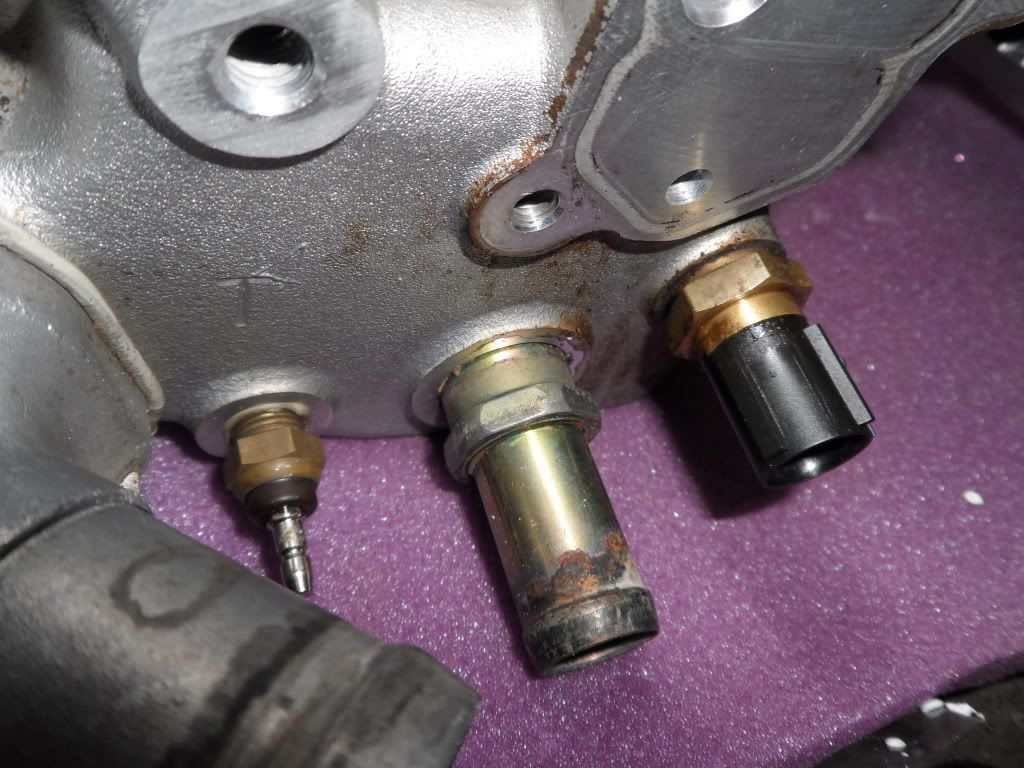
Sweet! Now I REALLY want to run my ECT sensor gauge probe at the end of that little tunnel but I don't think the probe will fit.
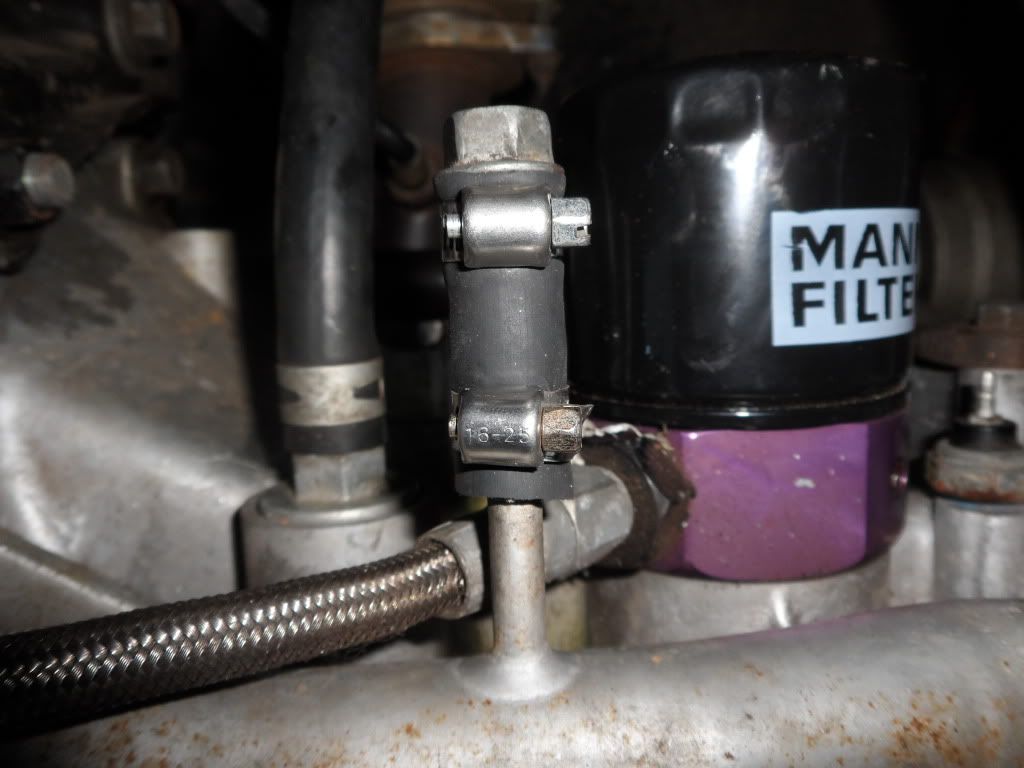
Time to open up the sandwich plate for the oil pressure sending unit gauge probe.
Back to the ECT gauge coolant probe... it won't fit where I want to put it next to the oem sensor... the thermocouple on the probe is too long.
It's a shame I can't tap it in here... it would be perfect... but this build is about compromises. You can't have your cake and eat it too..
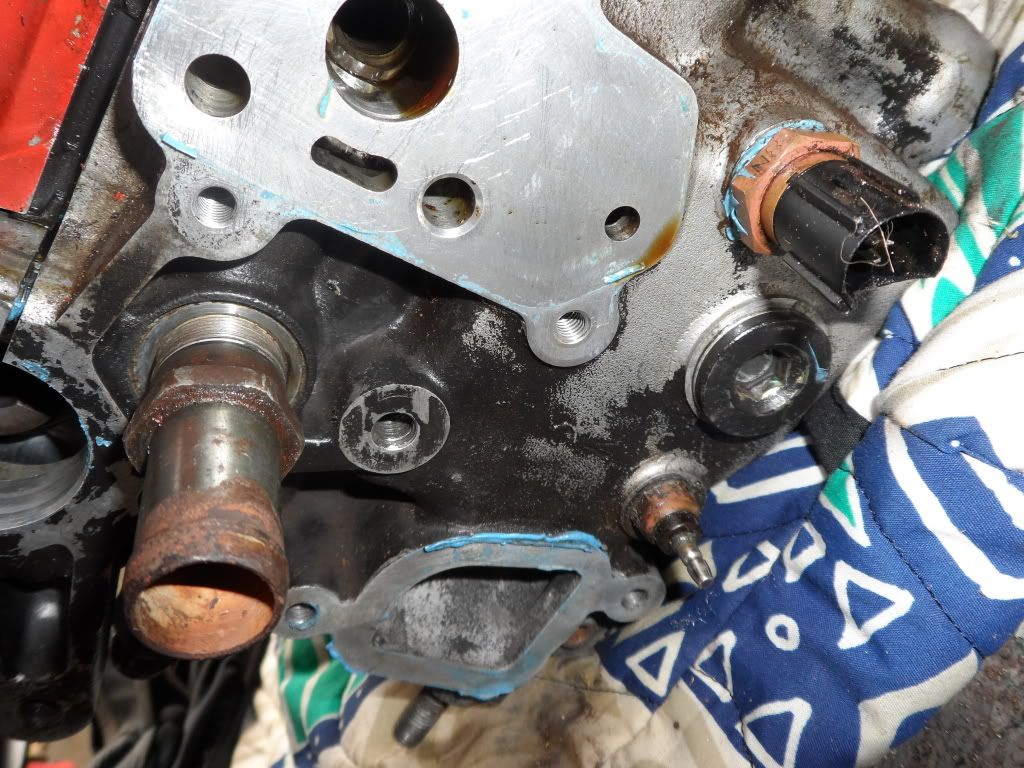
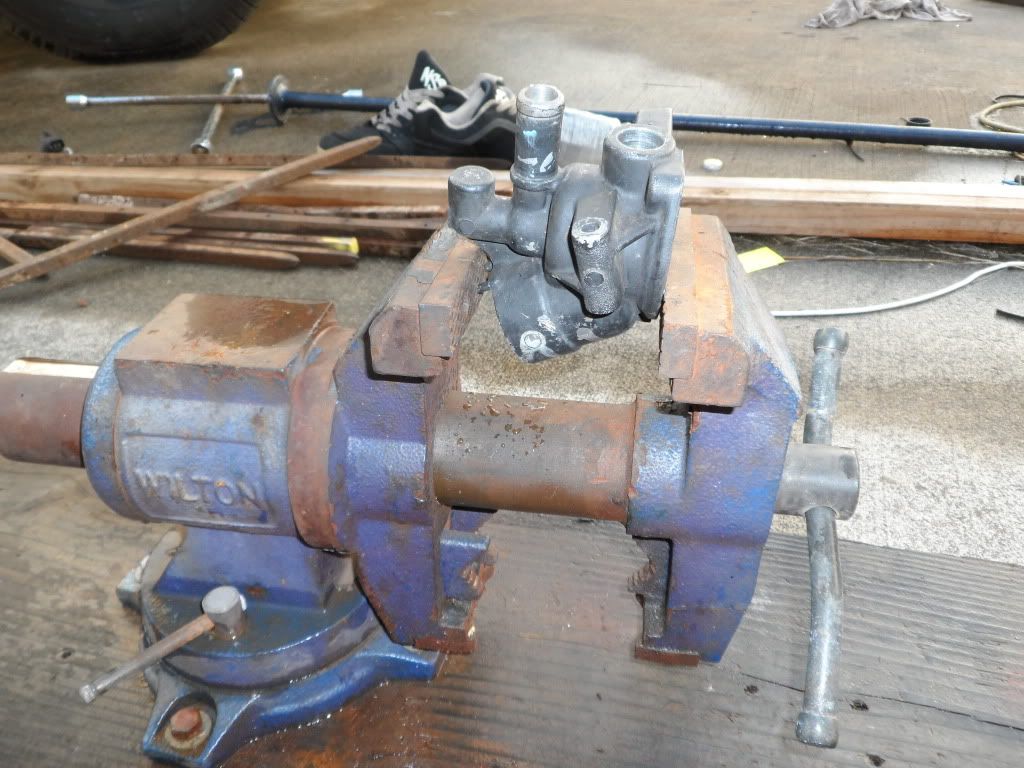
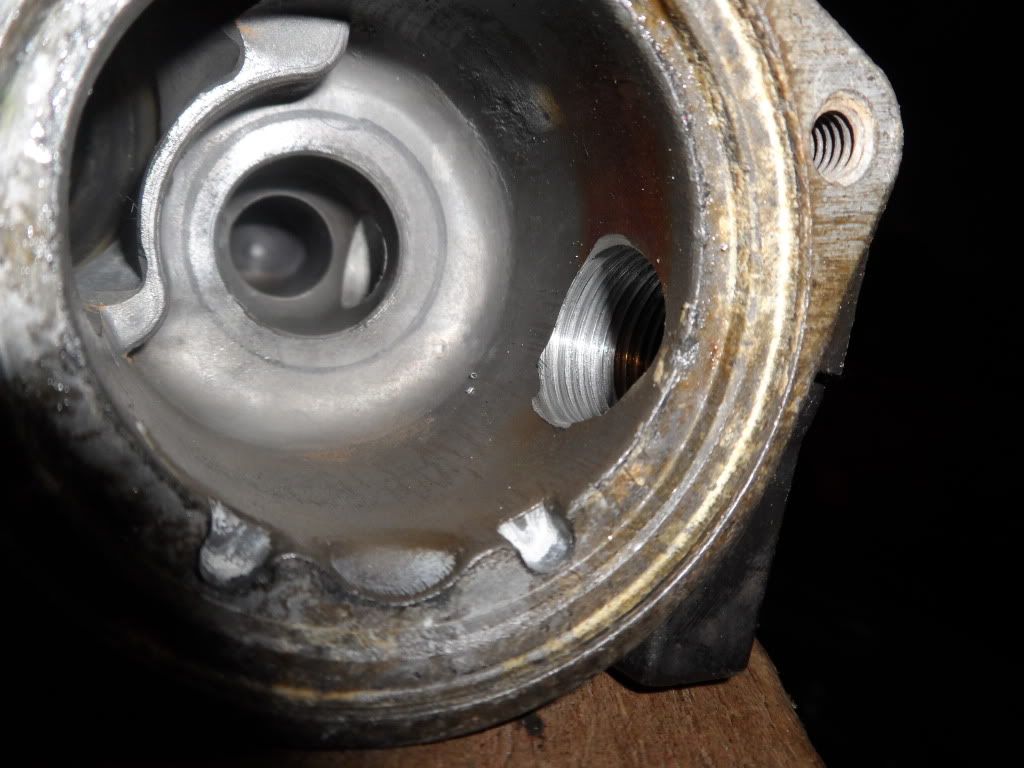
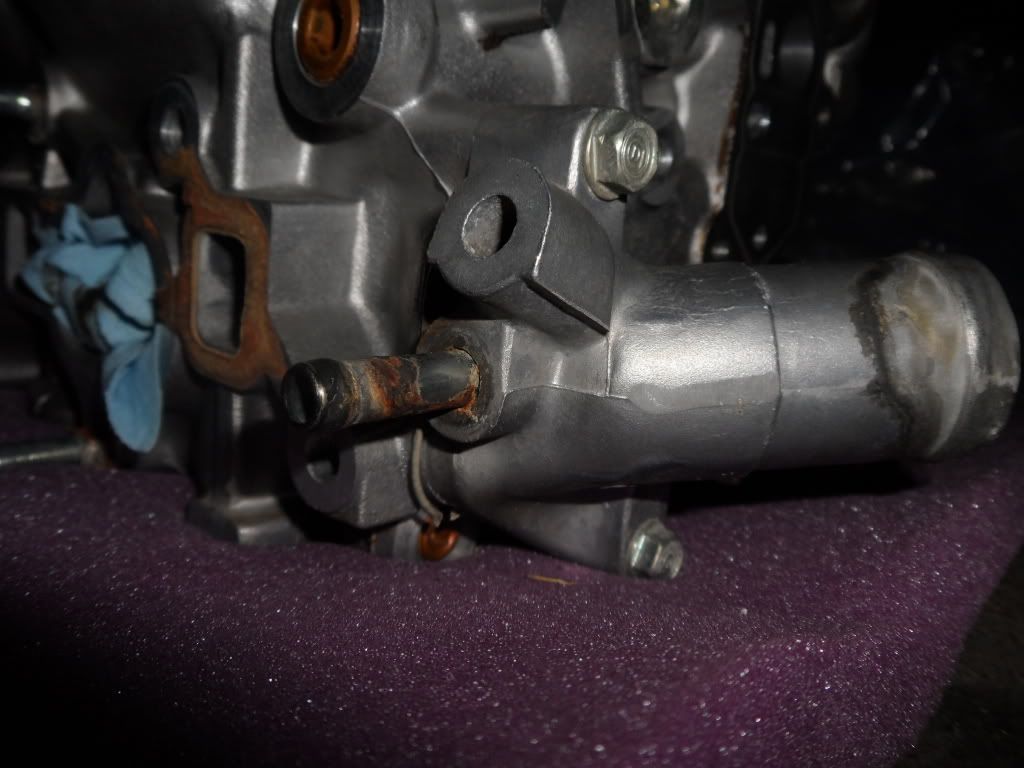
Another specimen, locked and loaded on the operating table. My old p30 coolant neck had a little indentation here..
And the one I got on my new head has a hose barb installed/pressed in. Hmmm, I wonder what that was for. IACV pre-heater maybe? Who cares, I'm not using it.
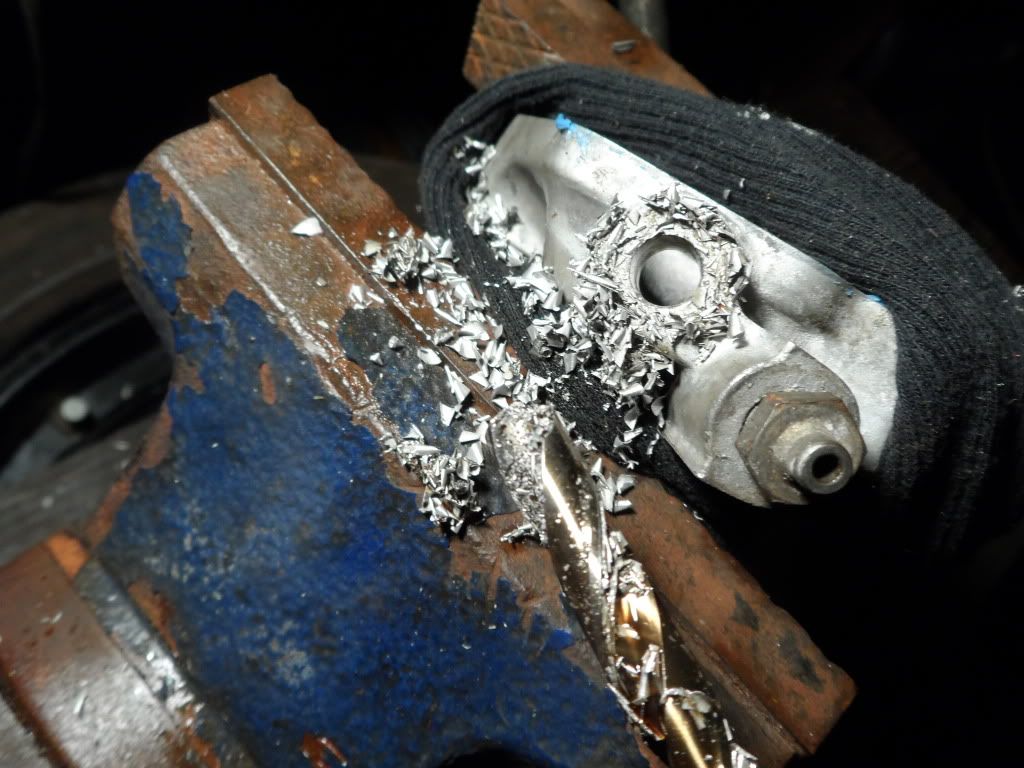
Oh god! What kind of hacker is this? Give a man a drill bit, and he'll ask for a drill. Give a man a drill bit and a drill, and he'll ruin oem honda parts until his bit gets dull.
Cutting oil is my middle name. Tapping for 1/8" NPT that is national pipe TAPER.
Test fit - I can live with this. Only problem with putting the probe here instead of the thermostat housing (like the oem ECT sensor) -- is that putting the probe here will read coolant temps 10-20% higher than what the ECU sees. The coolant leaving the head here is the hottest on the motor - remind me to program my gauges accordingly. 205*F = hot, 220*F is overheating (at the thermostat - temps read higher when you put the probe where I did.)
That's all for now. You can't exactly post pictures of yourself ordering parts, and that's what I did for most of the day.
Stay tuned for updates.
I want to replace the oem studs for the intake manifold because I am missing one of them and I just want to use new parts for a few more bucks. Sparing no expense. Build it once, build it right. The p30 manifold is pictured..
The JR manifold is just a titch bigger, and I ordered studs 2mm longer for other reasons.
A quick visit to mcmastercarr and I've ordered replacements for all this. Nylon washers as well, I'll post part numbers when they show up. Don't waste 50 bucks on the king motorsports extended studs kit.. all the parts total up to about 30 bucks shipped.
Might as well replace the acorn nuts as well. Some aren't too pretty.
I am a man of data - factual and statistical hard evidence of reality. A man of details.
Measure twice, order once.
I really want to run my 62mm b16 throttle body, but I might have to get the 68mm LHT one if I can't figure out which throttle cable..
The clock strikes 3pm as I turn my attention to the first hands-on project of the day. I have to plug this hole.. I assumed the coolant barb was threaded, but after I got it out, it appears to be a straight pipe (non-tapered) that was pressed into the thermostat housing. FUUUUU
And the coolant barb for the heater hose dingus on the head needs to be plugged. Good luck deciphering the thread angle/pitch TPI etc..
Removed from my old head which I'm doing all my test fitment on.
Still installed on my new pr3 head which is much cleaner. I will never paint another head/block/trans again. The paint acts as a jacket that insulates heat, gets dirty, washes off when parts cleaner contacts the paint.. No more paint crew for me.
Notice anything different?
This took atleast a half-hour. It's all about the DETAILS. That centerline looks orange but it's quite red. Camera flash messed with the lighting. Yes that is micron-thin steel pin striping. Polished to a mirror sheen. I can see my reflection if I look into it closely.
Cylinder heads swapping stories about the good old days.
TAKE NOTES! This is how we plug that coolant barb. We steal a rocker arm plug off the spare head - identical TPI and pitch. She threads right in.. The old switcharoo..
I spent six hours sitting here on my spare rims ordering up parts. Parts ordered include...
-oem oil pump
-oem water pump
-brand new oem ITR exhaust cam
-valve cover acorn nuts
-intake manifold studs and nylon heat-insulating washers
-gates racing GSR blue timing belt
-oem p30 modified headgasket for b20v
-stepped dowel pins
-tap and plug for oil passage in head
-carbon fiber spark plug cover
-replacement 1" MC w/appropriate hardline locations
-corbeau seat rails with sliders
-custom cam cap plug (you're gonna love this)
-felpro exhaust manifold gasket (don't buy anything but felpro or oem gaskets)
-FITV blockoff plate from KMS
-oem cylinder head cowling to be cut to expose cam gears
-about 6 other things I'm forgetting..
After wasting the afternoon driving around town looking for an appropriate tap, drillbit, plug I came home with 2/3. This island might as well be the the third world when you are looking for little parts like these.. Everything is special order, everything is brought in through air freight with a 2 week delivery time... it's a real pain.
SIR! The patient is ready! The operating room is prepared! Commence surgery on my mark! Starting in 5, 4, 3...
First we driller out the hole to the proper size for the tap. Use low RPM, light pressure, clean your drillerbit often, and use LOTS of cutting oil. Motor oil works fine if you use a lot. In other words - drill in one hand, oil bottle in the other pouring a constant stream on the cutting surface.
I checked every store on the island and this is the best I could come up with. The thread isn't as fine as I'd like, but it should seal up tightly with the appropriate pipe taper plug that I still have to order.
This tap is NOT tapered - but an appropriate TAPERED plug should seal the hole with teflon. I'm looking for a recessed-head allen plug in BRASS. Do NOT use a steel plug - the metallurgy is all screwy and not only will the steel plug gall the naked aluminum and leak, but steel and aluminum are greatly different when it comes to heat expansion/contraction. A steel plug in aluminum won't expand as much as the surrounding aluminum when the parts heat up to 205*F (coolant "hot" temp) - and the first time the car cools down the aluminum will cool/contract more quickly, causing the steel plug to crack the aluminum and leak. Simple physics, isn't it? I need to find a periodic table of the elements to post on my wall and memorize..
Not exactly the best tap holder, but it works if you start her straight and swing her along the right horizontal axis to the part. You can't ufck this up, you only have one shot before you need to replace the whole part you are modifying..
The rumblefish inspects the CV boots and clarifies that AC Delco OEM DA integra axles are sufficient for 300whp, as long as you don't run slicks or drag race every weekend.
Sweet! Now I REALLY want to run my ECT sensor gauge probe at the end of that little tunnel but I don't think the probe will fit.
Time to open up the sandwich plate for the oil pressure sending unit gauge probe.
Back to the ECT gauge coolant probe... it won't fit where I want to put it next to the oem sensor... the thermocouple on the probe is too long.
It's a shame I can't tap it in here... it would be perfect... but this build is about compromises. You can't have your cake and eat it too..
Another specimen, locked and loaded on the operating table. My old p30 coolant neck had a little indentation here..
And the one I got on my new head has a hose barb installed/pressed in. Hmmm, I wonder what that was for. IACV pre-heater maybe? Who cares, I'm not using it.
Oh god! What kind of hacker is this? Give a man a drill bit, and he'll ask for a drill. Give a man a drill bit and a drill, and he'll ruin oem honda parts until his bit gets dull.
Cutting oil is my middle name. Tapping for 1/8" NPT that is national pipe TAPER.
Test fit - I can live with this. Only problem with putting the probe here instead of the thermostat housing (like the oem ECT sensor) -- is that putting the probe here will read coolant temps 10-20% higher than what the ECU sees. The coolant leaving the head here is the hottest on the motor - remind me to program my gauges accordingly. 205*F = hot, 220*F is overheating (at the thermostat - temps read higher when you put the probe where I did.)
That's all for now. You can't exactly post pictures of yourself ordering parts, and that's what I did for most of the day.
Stay tuned for updates.
02-17-2013, 08:20 PM
#60
Honda-Tech Member
Thread Starter
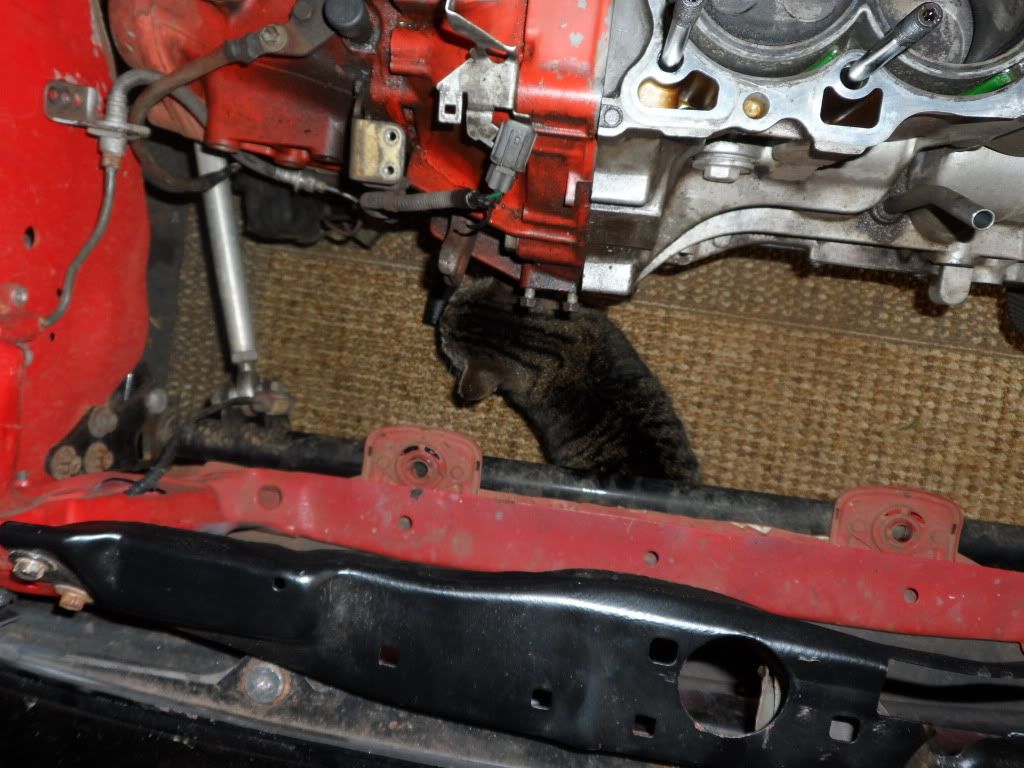
Don't make the same mistake everyone else does upon initial contact - he even fooled me. The truth of the matter is that he is not in fact a cat, he is a purebred rumblefish.
02-17-2013, 08:30 PM
#61
Honda-Tech Member
Thread Starter
Okay not much went down today, another day of running around tying up loose ends so I can move all this forward.
Creeper stool makes a perfect head trolley.
Self-explanatory..
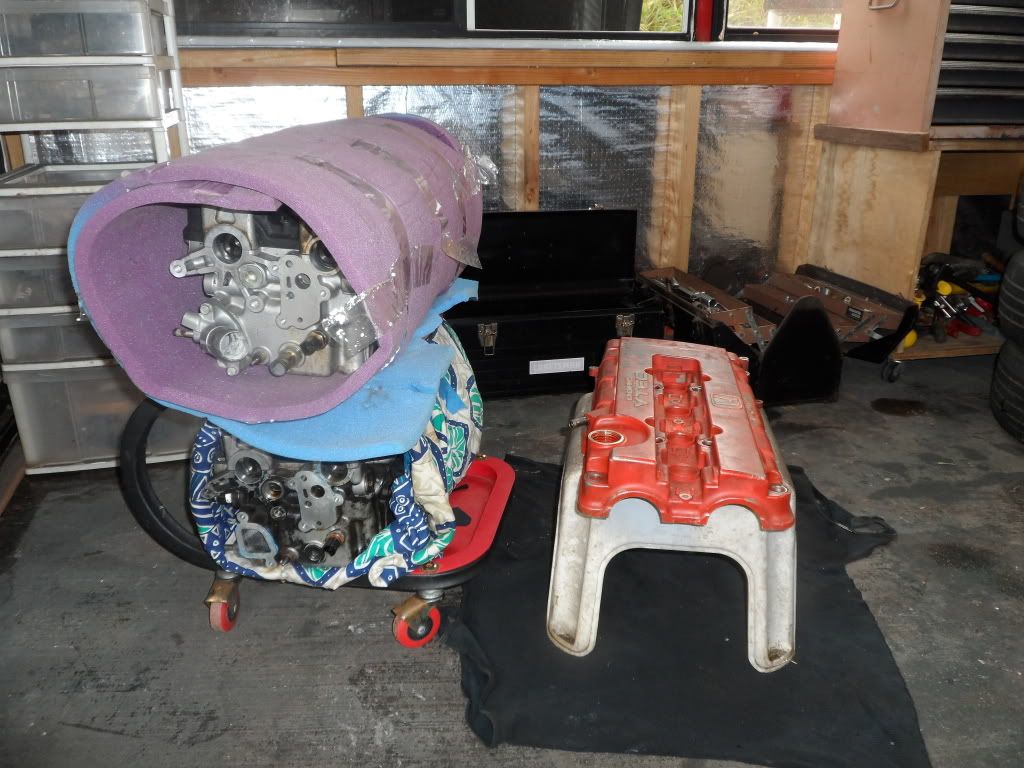
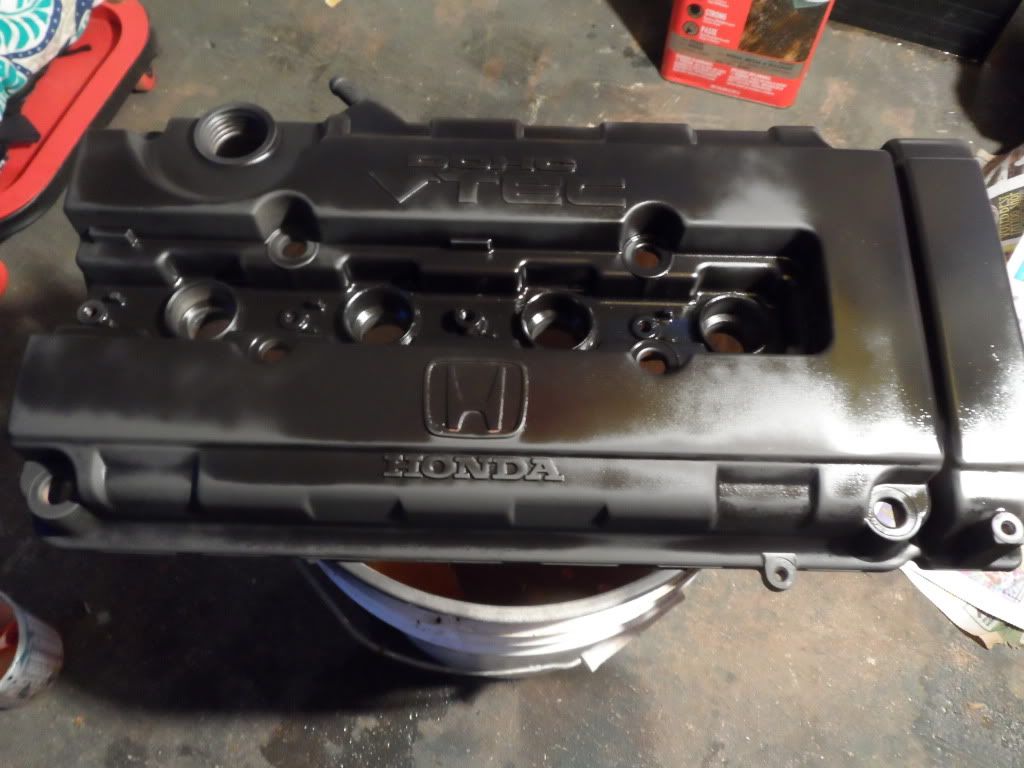
The progress cracks me up... the valve cover said "oil change at XX, VC gasket at XX, Oil pan gasket at XXX..." I should have written "Supercharger and methanol injection at XX"
Lots of work and a few chemical burns later.
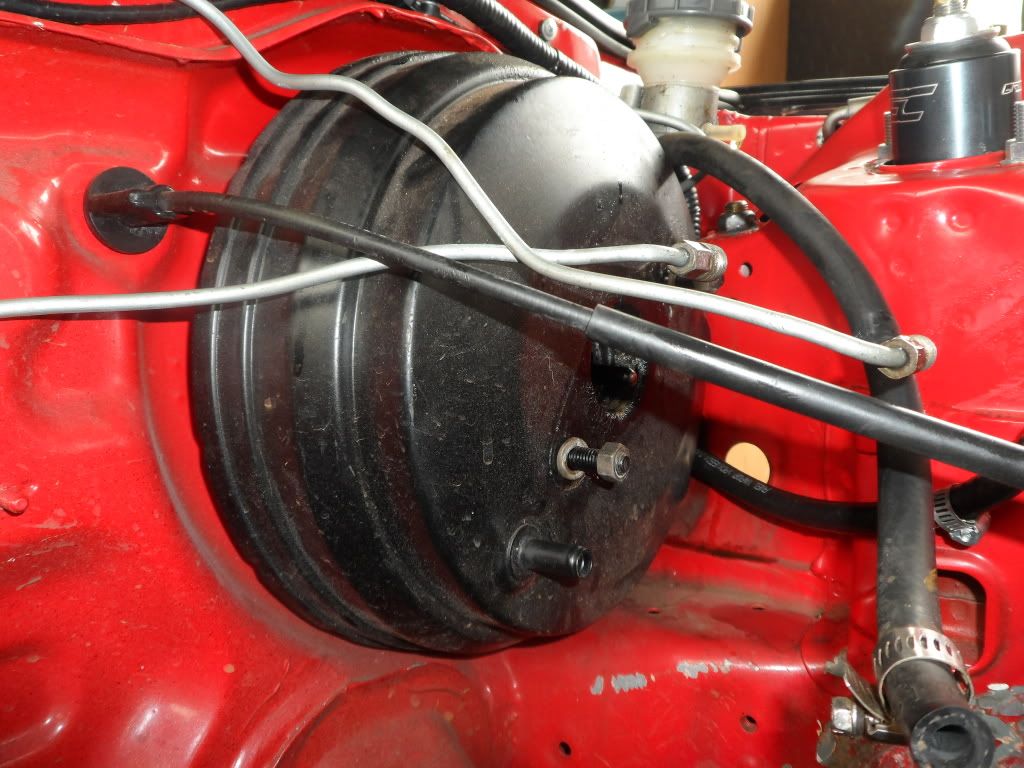
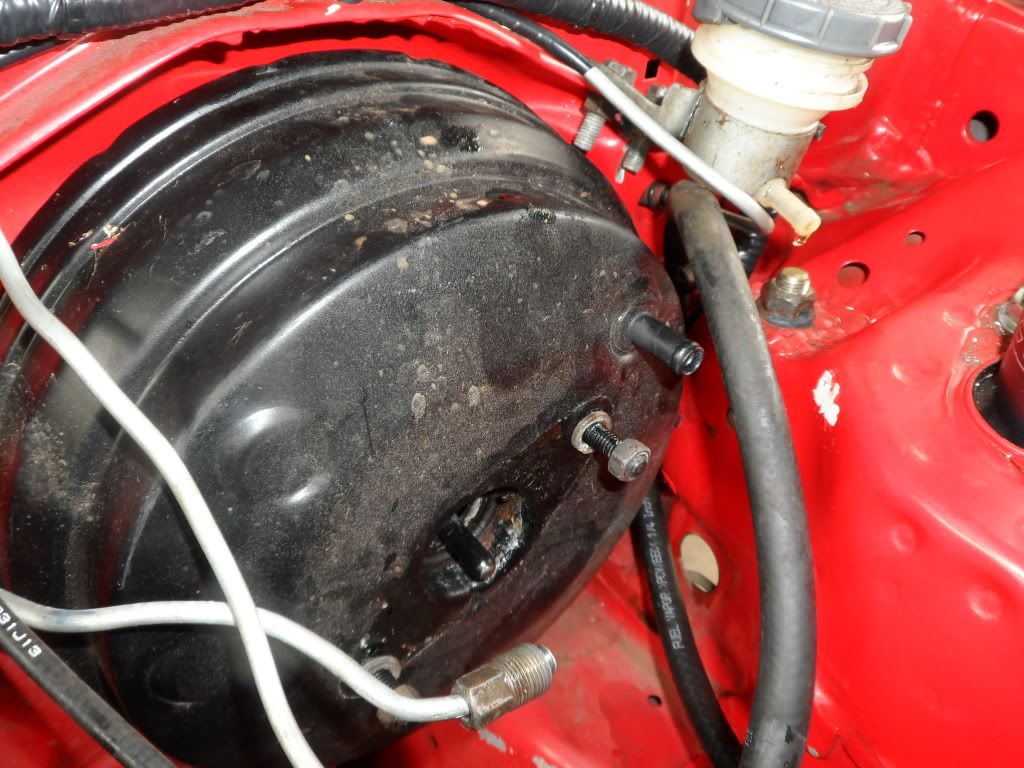
I'd previously been running a 180* flipped booster to put the vacuum barb underneat the booster for a cleaner look. That won't work anymore.
Many curse words and minutes contorted under the dashboard later... 1" MC also came off for the new one that's coming in the mail.
Picked up a few specialty tools to make the job less caustic and flesh eating.
Muuch much later..

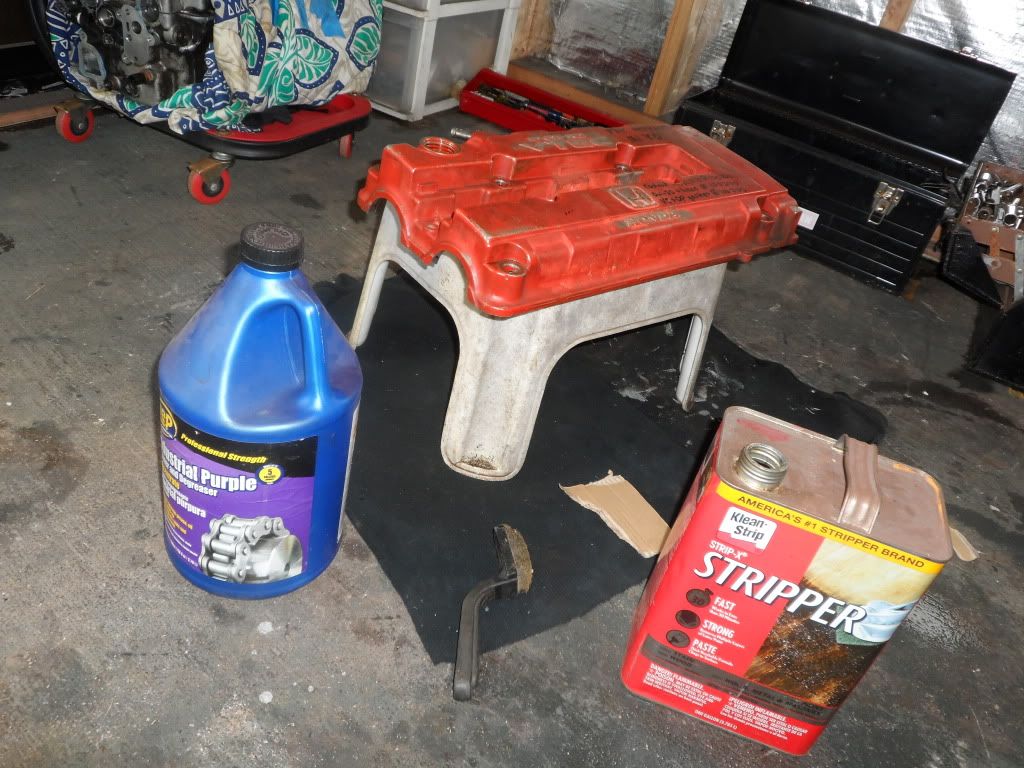
Degrease to remove any stripper and paint residue before paint.
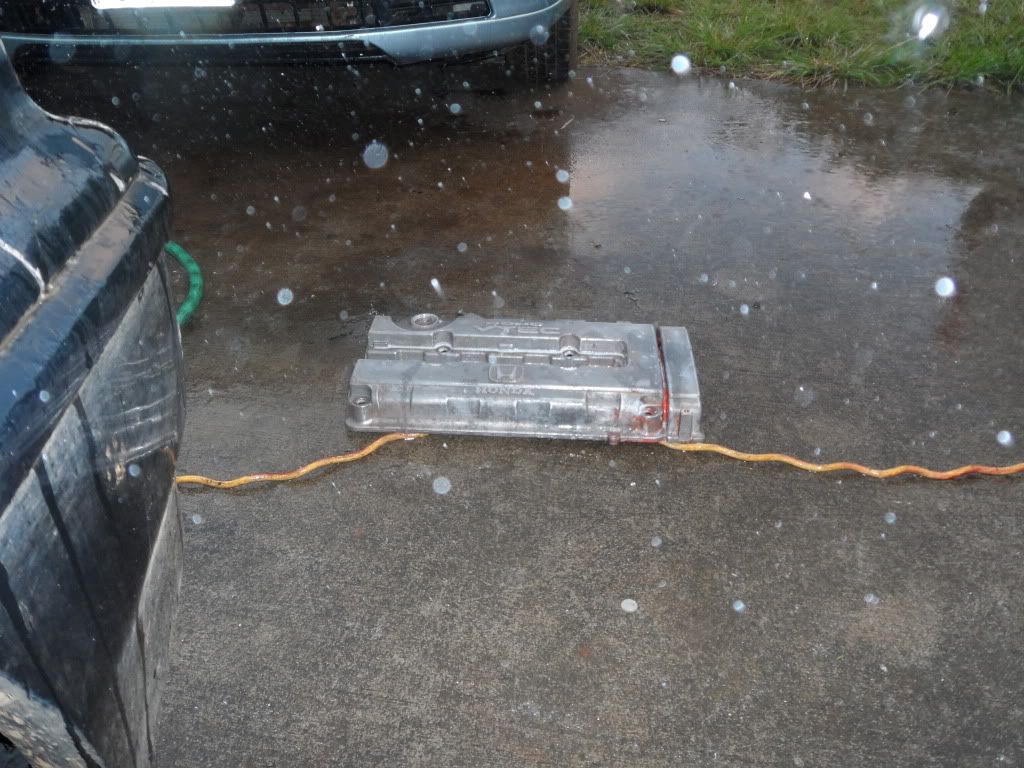
Tried to capture the angle of the rain drops coming down. BRB monsoon.
Look! Raindrops!
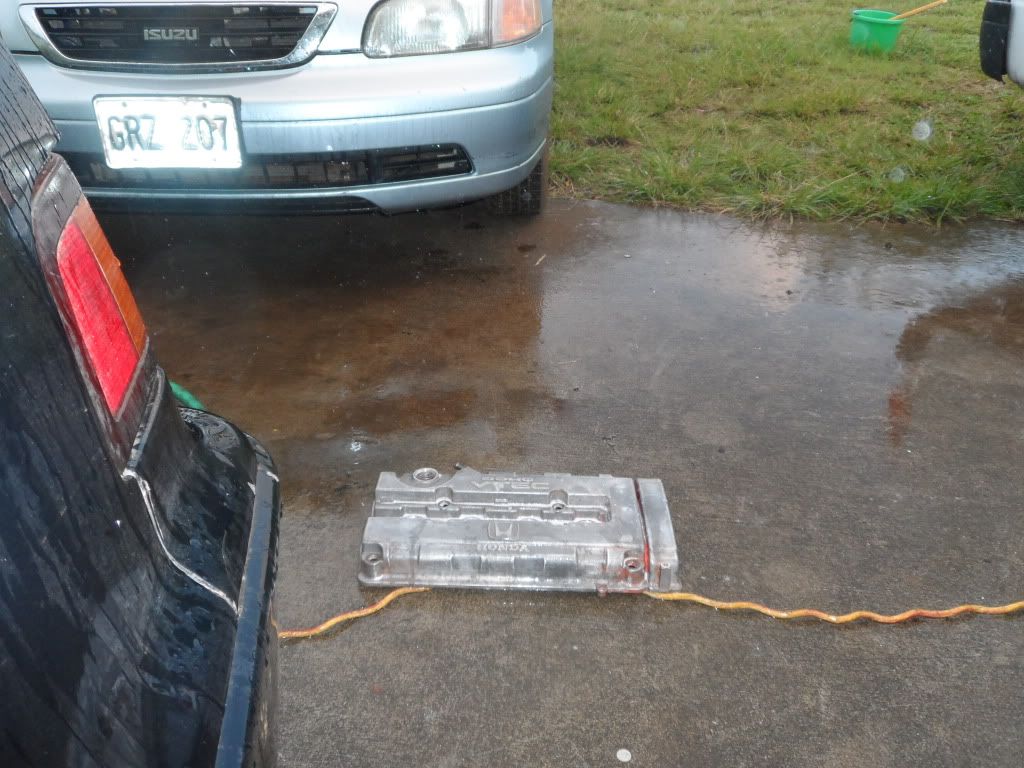
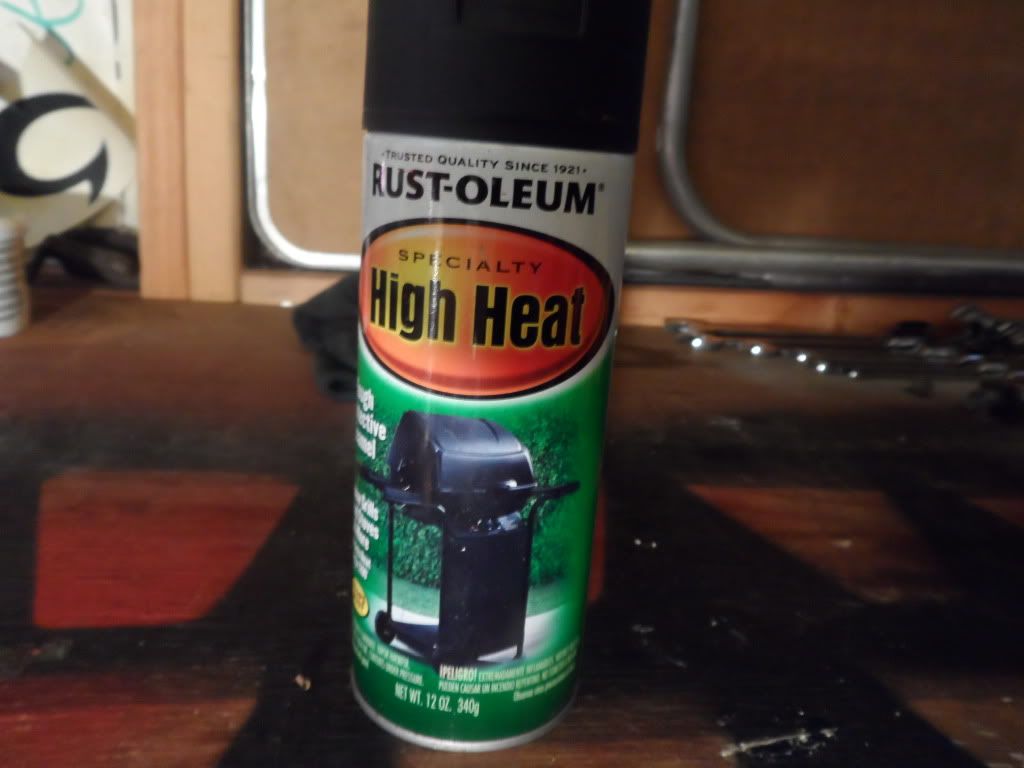
Stripped and cleaned bare raw aluminum. Paint it quick before it oxidizes and resists paint requiring more cleaning.
After a light coat it flashes off. Damnit where is my heat gun.
Nothing opalescent or chameleon or light-bending here. The simple stuff works.
That's all for now. Work in the morning cuts my progress short. The carbon fiber spark plug cover should look nice with some thick NGK red 8.5mm spark plug wires.
Stay tuned!
Creeper stool makes a perfect head trolley.
Self-explanatory..
The progress cracks me up... the valve cover said "oil change at XX, VC gasket at XX, Oil pan gasket at XXX..." I should have written "Supercharger and methanol injection at XX"
Lots of work and a few chemical burns later.
I'd previously been running a 180* flipped booster to put the vacuum barb underneat the booster for a cleaner look. That won't work anymore.
Many curse words and minutes contorted under the dashboard later... 1" MC also came off for the new one that's coming in the mail.
Picked up a few specialty tools to make the job less caustic and flesh eating.
Muuch much later..
Degrease to remove any stripper and paint residue before paint.
Tried to capture the angle of the rain drops coming down. BRB monsoon.
Look! Raindrops!
Stripped and cleaned bare raw aluminum. Paint it quick before it oxidizes and resists paint requiring more cleaning.
After a light coat it flashes off. Damnit where is my heat gun.
Nothing opalescent or chameleon or light-bending here. The simple stuff works.
That's all for now. Work in the morning cuts my progress short. The carbon fiber spark plug cover should look nice with some thick NGK red 8.5mm spark plug wires.
Stay tuned!
02-18-2013, 09:02 PM
#62
Honda-Tech Member
Thread Starter
Not much to show for my hour in the shop.
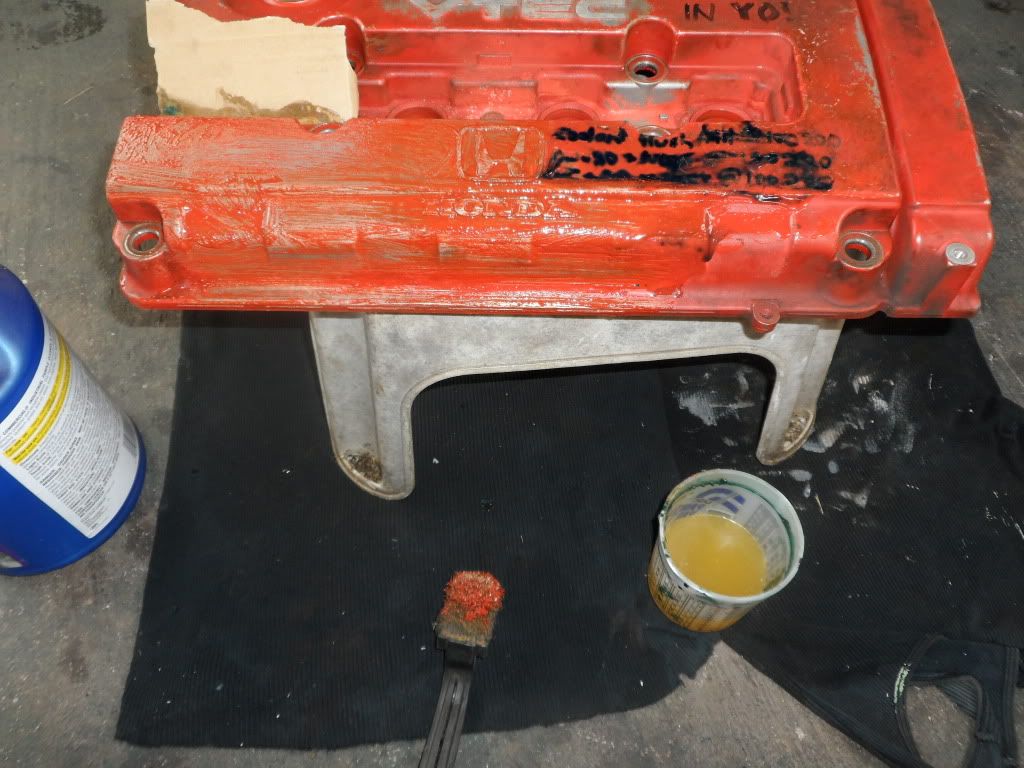
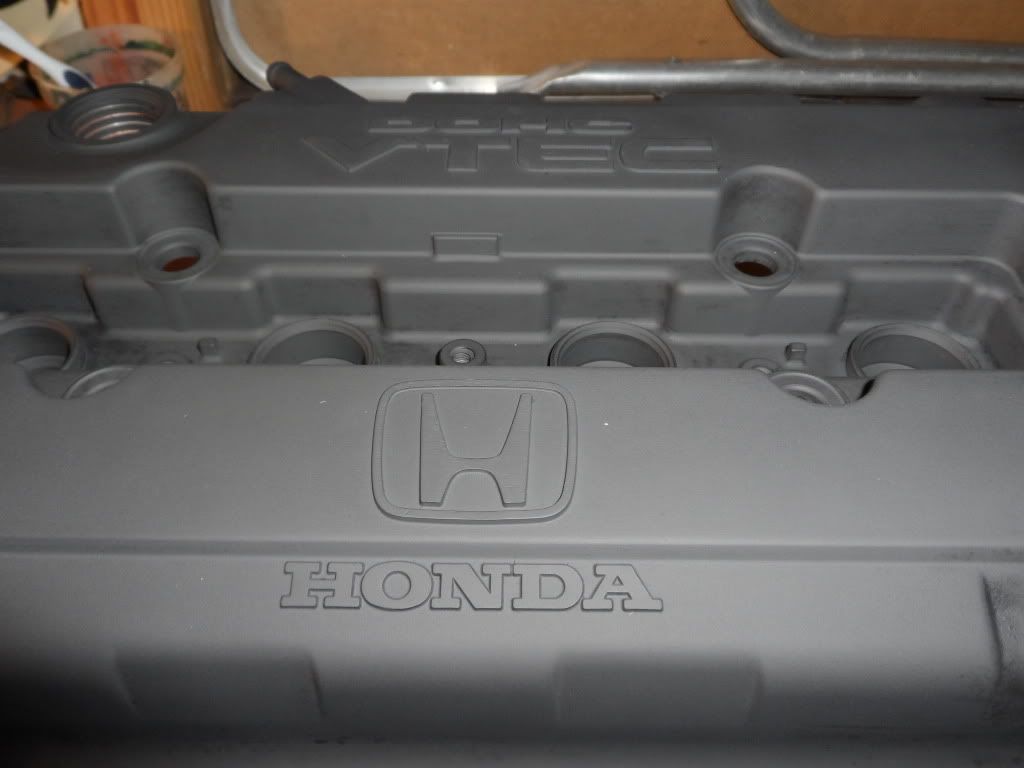
The paint dried! Now for those pesky logos..
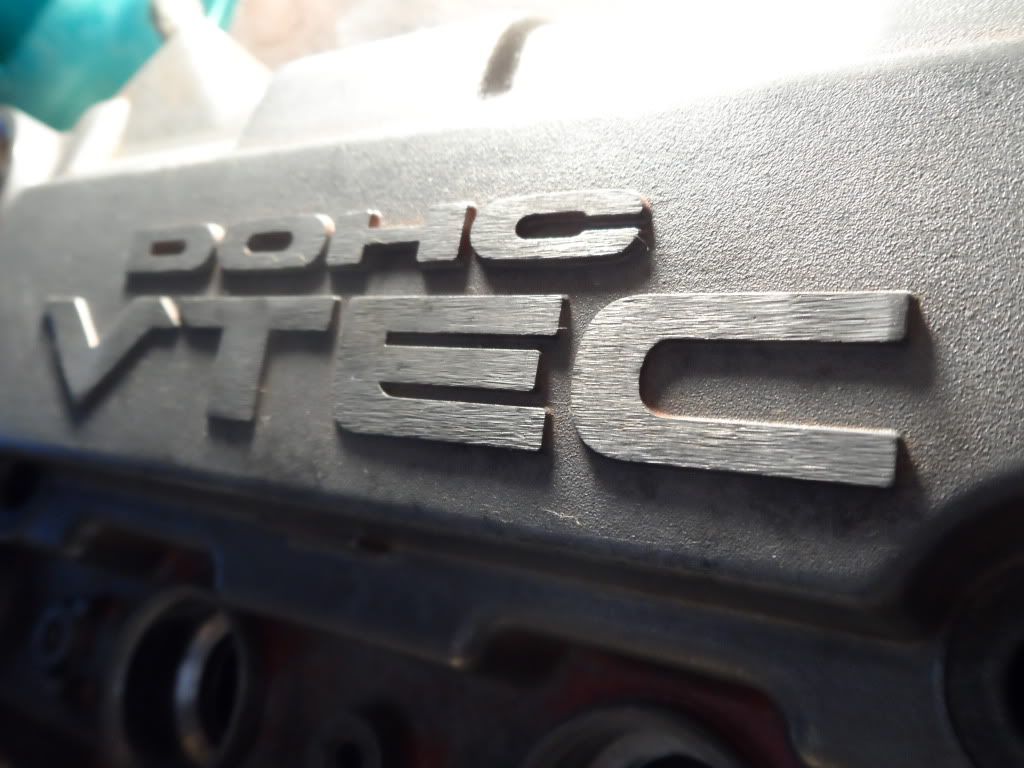
Last time around I used a beltsander and it was far from perfect. Maybe a block of wood with sandpaper on it..
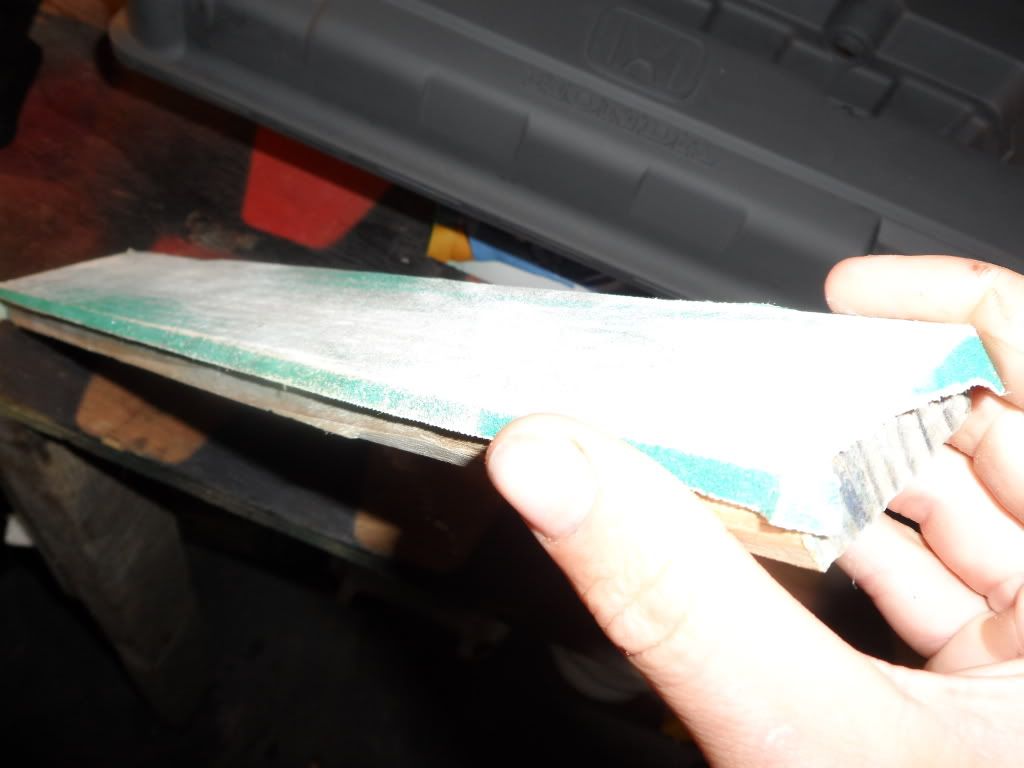
Better chance of not screwing up with a tiny piece of sandpaper.
Like this! But oh wait I accidentally hit the other side of the VC. Time to start again.
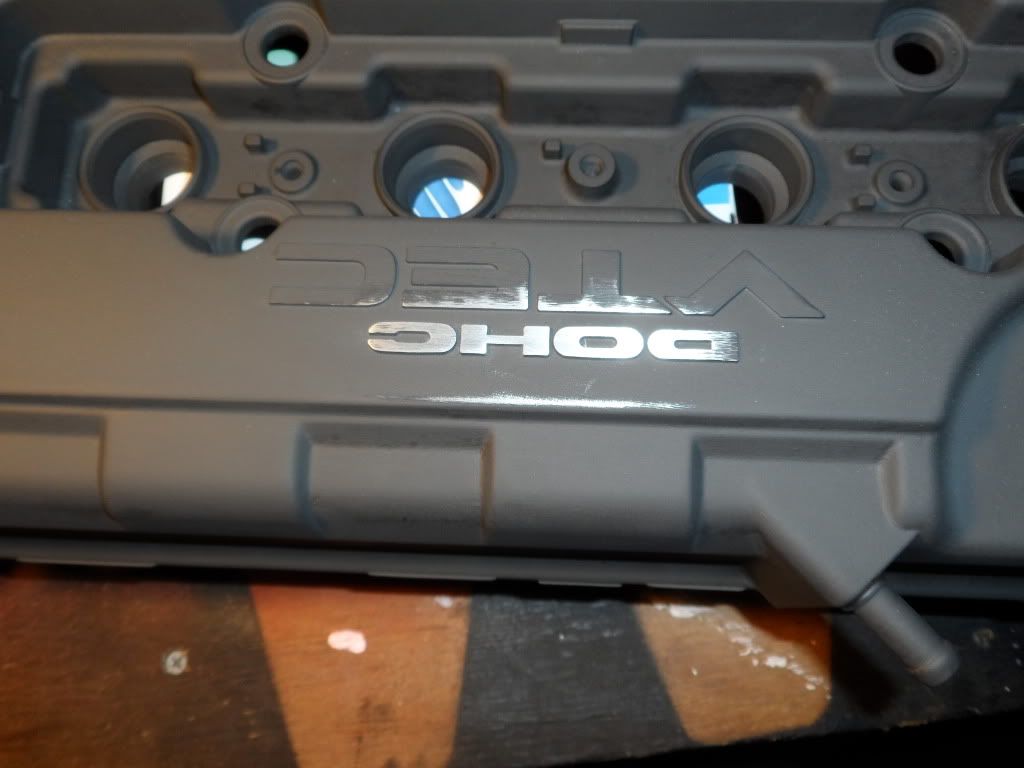
Repaint for try #2
Like this... Ignore the finger oils..

Picked up a 50' roll of 10awg for the fuel pump wiring and this little fuse for the 10amps of gauges I am running.

That's all for now. I'm thinking that maybe I'll just respray the VC and then use silver (or red) paint and a tiny paint brush to do the logos. This sanding is a pain in the ****.
Stay tuned!
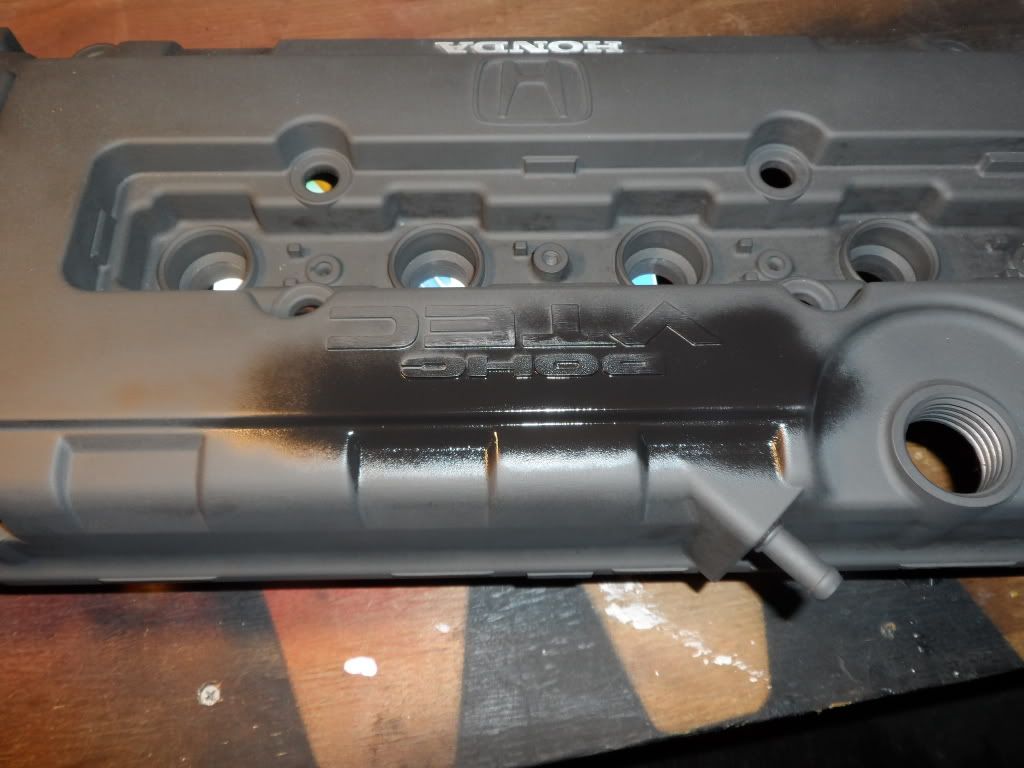
The paint dried! Now for those pesky logos..
Last time around I used a beltsander and it was far from perfect. Maybe a block of wood with sandpaper on it..
Better chance of not screwing up with a tiny piece of sandpaper.
Like this! But oh wait I accidentally hit the other side of the VC. Time to start again.
Repaint for try #2
Like this... Ignore the finger oils..
Picked up a 50' roll of 10awg for the fuel pump wiring and this little fuse for the 10amps of gauges I am running.
That's all for now. I'm thinking that maybe I'll just respray the VC and then use silver (or red) paint and a tiny paint brush to do the logos. This sanding is a pain in the ****.
Stay tuned!
02-18-2013, 11:51 PM
#63
Honda-Tech Member
if i may suggest, cruise to your local walmart and pick up a sanding block (if you don't already have one) it makes sanding the vc so much easier
02-19-2013, 08:19 AM
#64
Honda-Tech Member
Join Date: Apr 2007
Location: Louisiana, U.S.A.
Posts: 271
Likes: 0
Received 0 Likes
on
0 Posts
I know you have done a lot of research, but I'm wondering about your MAP sensor, are you planning on using the stock one on your throttle body(this won't work), or are you just using it to plug the hole in your throttle body.
The MAP sensor will need to see boost so you will need to run a hose from a MAP sensor to one of the nipples on the manifold after the supercharger. If you did know this then good, but someone reading this at some point later may not be aware.
Good luck with the build.
The MAP sensor will need to see boost so you will need to run a hose from a MAP sensor to one of the nipples on the manifold after the supercharger. If you did know this then good, but someone reading this at some point later may not be aware.
Good luck with the build.
02-19-2013, 08:32 PM
#65
Honda-Tech Member
Thread Starter
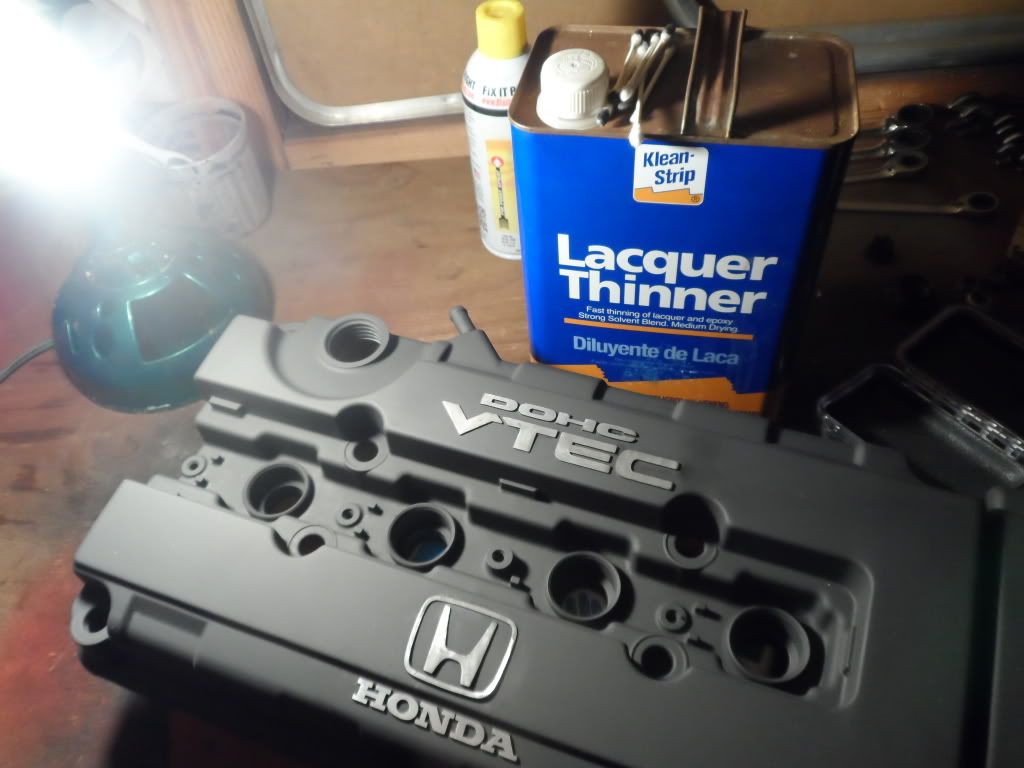
I'm thinking q-tips and lacquer thinner..
A belt sander is not a precision tool. Hey, it was weight reduction removing that extra metal!
Good to see you up in my latest thread again. Stay tuned, home-skillet.
02-19-2013, 08:35 PM
#66
Honda-Tech Member
Thread Starter
I know you have done a lot of research, but I'm wondering about your MAP sensor, are you planning on using the stock one on your throttle body(this won't work), or are you just using it to plug the hole in your throttle body.
The MAP sensor will need to see boost so you will need to run a hose from a MAP sensor to one of the nipples on the manifold after the supercharger. If you did know this then good, but someone reading this at some point later may not be aware.
Good luck with the build.
The MAP sensor will need to see boost so you will need to run a hose from a MAP sensor to one of the nipples on the manifold after the supercharger. If you did know this then good, but someone reading this at some point later may not be aware.
Good luck with the build.
I'm having my machinist run me up a custom aluminum blockoff plate for the map on the TB.
Not sure where I'll put the map though yet - I have lots of questions like that in the future but now is not the time. I'm not that far along yet. I'll work out those details when the motor is assembled, installed, and ready to fire up.
For example I have no idea how the booster vacuum line used to run negative pressure (NA p30 manifold) and now JR wants me to hook it up to the positive pressure port on the manifold... but I'm not that far along yet.
Thanks for you help and stay tuned. Dude I'm just getting started with this build you have no idea.
02-19-2013, 08:50 PM
#67
Honda-Tech Member
Thread Starter
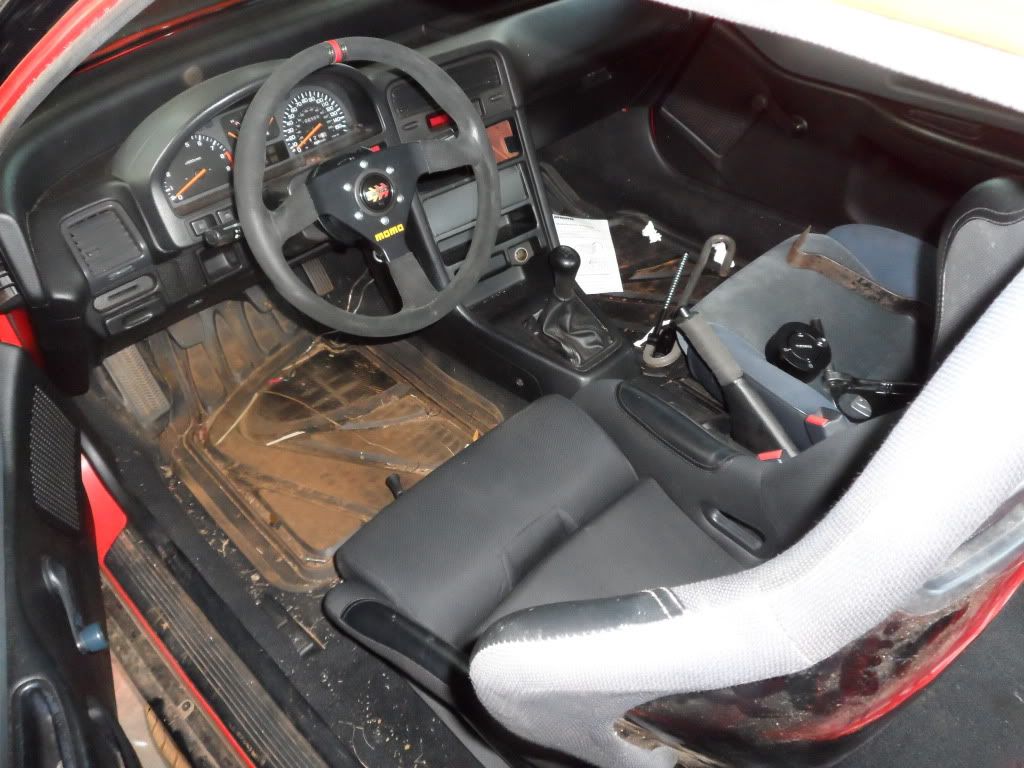
Alright here we go again. Seat slider brackets from corbeau showed up today and I had a minute to test fit.
Welds look good, so does the paint.

These must have been pre made in stock, because the paint is old -it's not fresh and tells me the brackets were painted some time ago.
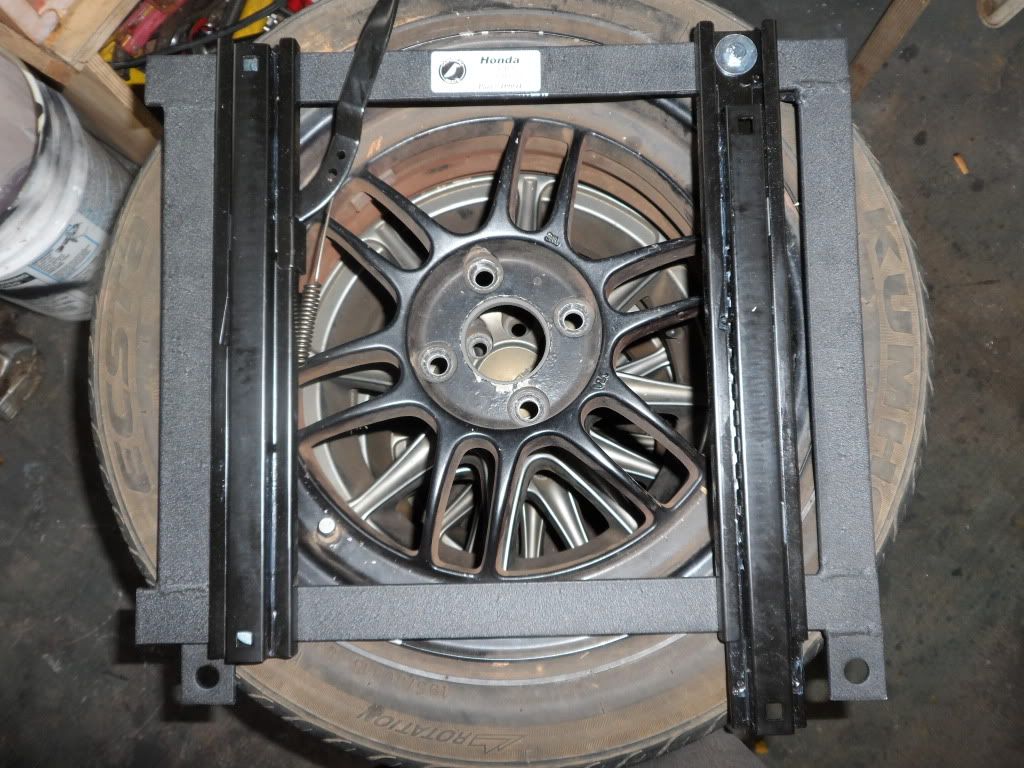
Time for a test fit. The fitment is HORRIBLE! Look at the centerline on the wheel and compare it to the position of the seat. The b!tch is atleast 2 inches off center from the wheel!
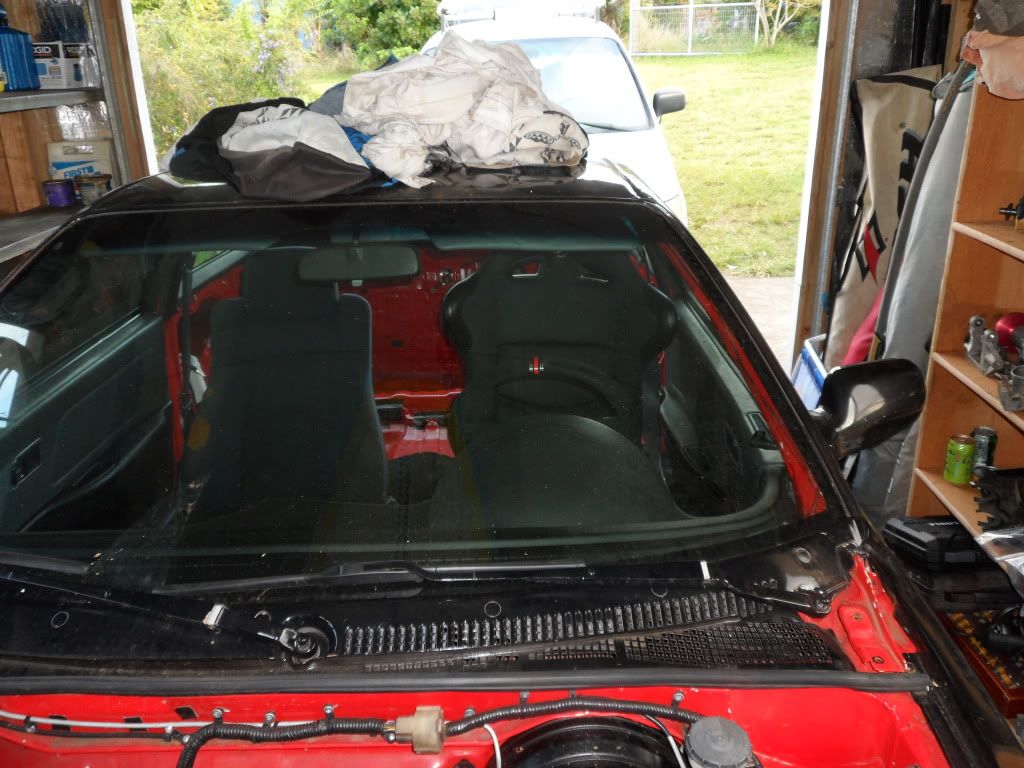
It also causes the seat to hit the door! It closes, but it's rubbing.
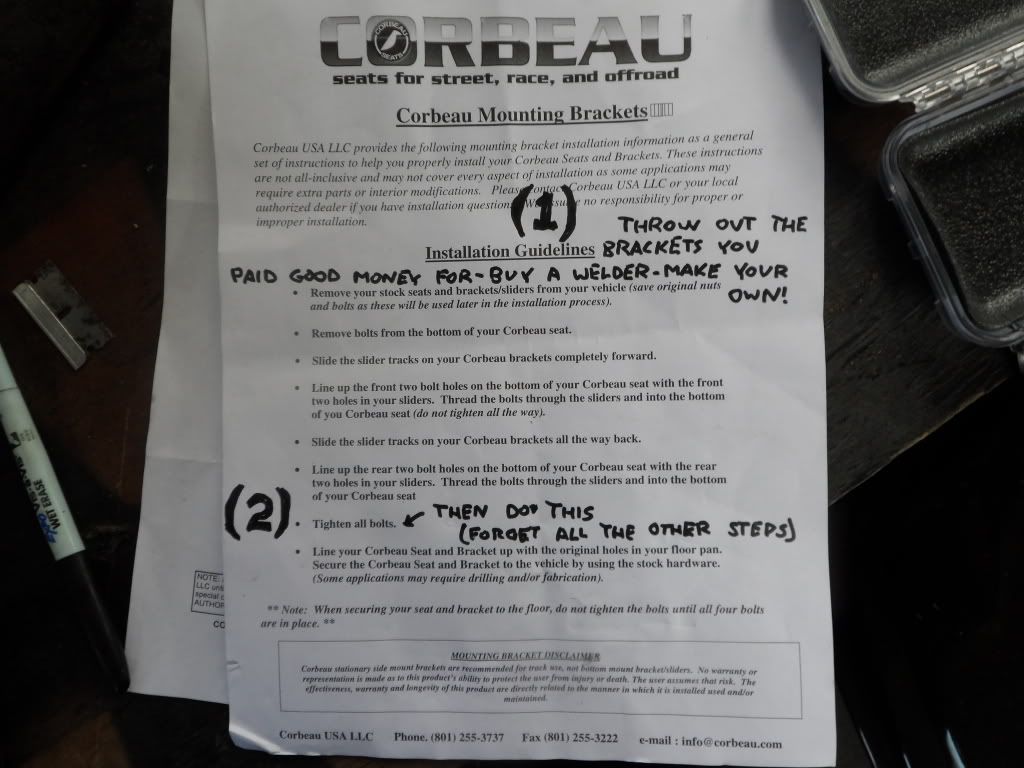
I 'amended' the provided instructions into two simple steps.
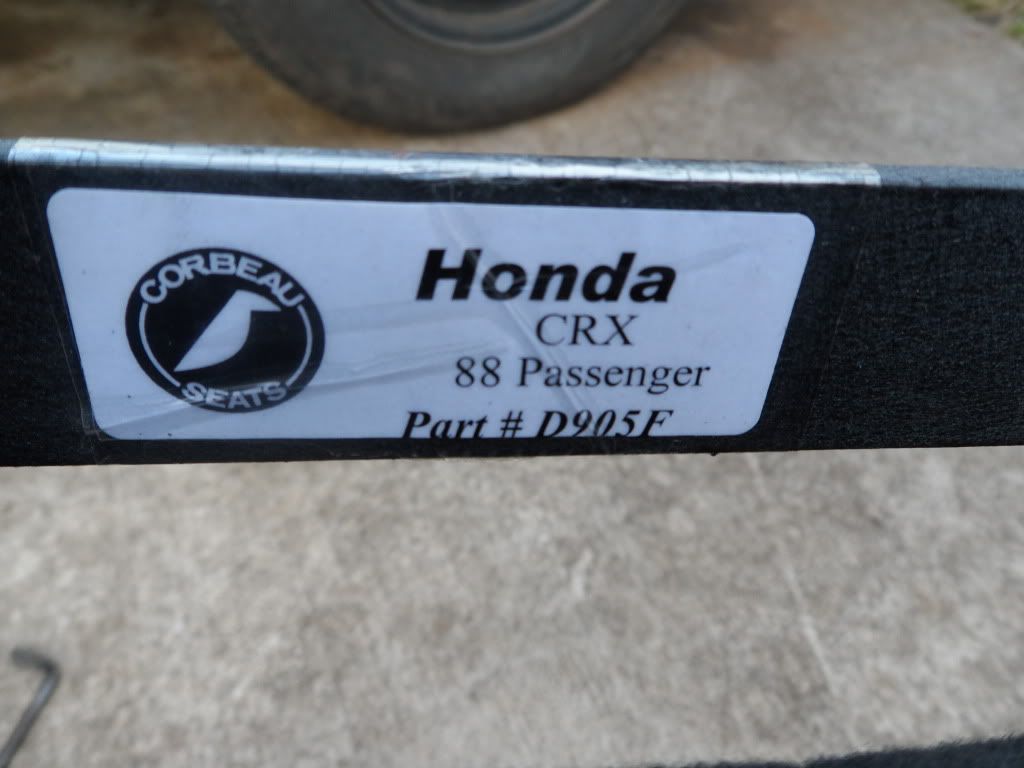
Oh wait... if the seat is 'installed' and this is the piece sitting on my spare rims... uhhhh wait what's going on here.
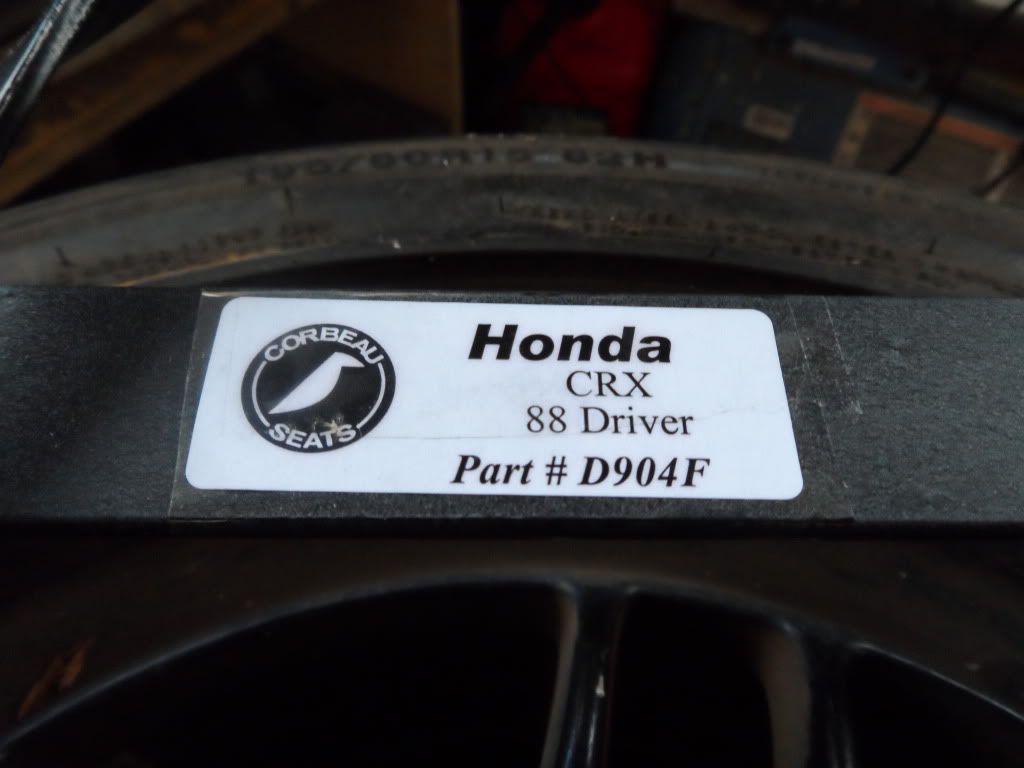
Wait wait, hold up... This is the seat bracket I used to install the driver seat.... Uhhhh whoops wrong bracket. Hey! it's a been a long day, cut me some slack. And NOWHERE in the instructions does it say that the driver side bracket goes on the driver side seat.. cut me some slack here. Actually I didn't read the destructions, maybe it DID say that somewhere.
Okay that's better. I had the wrong sliders on the wrong side. The seat is still 1/2" off center from the wheel, and I'll have to modify my floor pans to get things to fit right. The seat also sits slightly out of vertical level - I'll need to use shims to get the seat mounted right. This installation is BY NO MEANS plug and play. The bolt holes on the floor pan from the previous owner are all busted out and ripped away from the chassis. He was a big guy.. 240lbs falling into the seat busted the bolt holes out. I'll have to fix that.
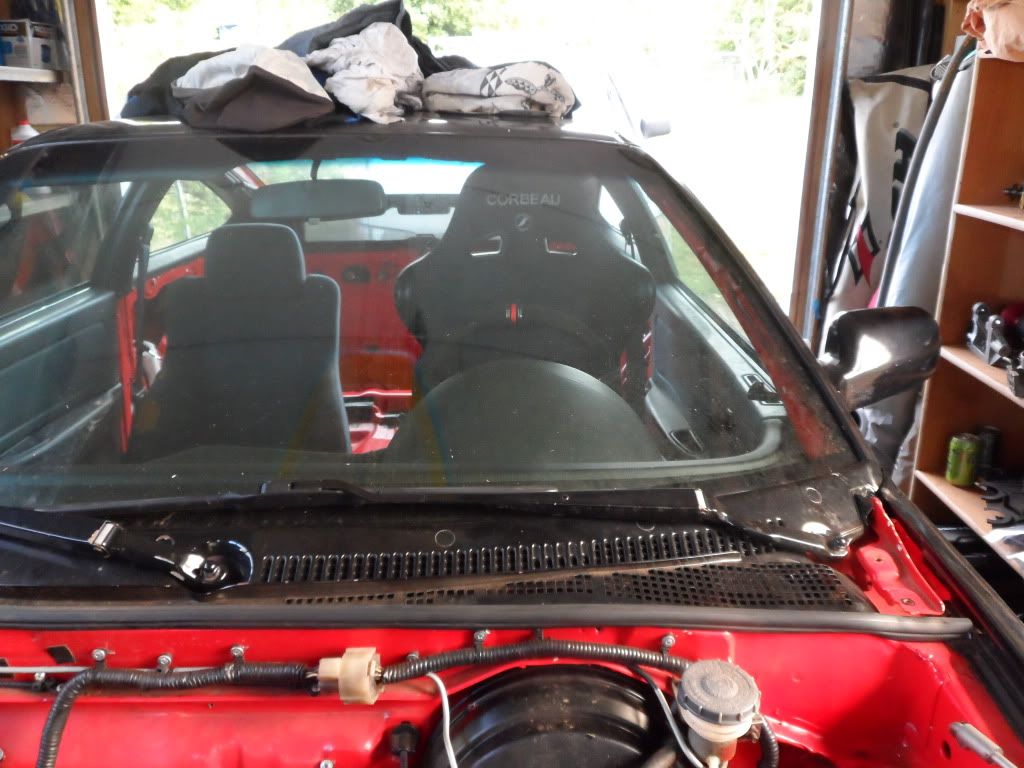
With the proper bracket, the seat clears the door panel with room to spare. The clearance will improve when I relocate the seat toward the center of the chassis.
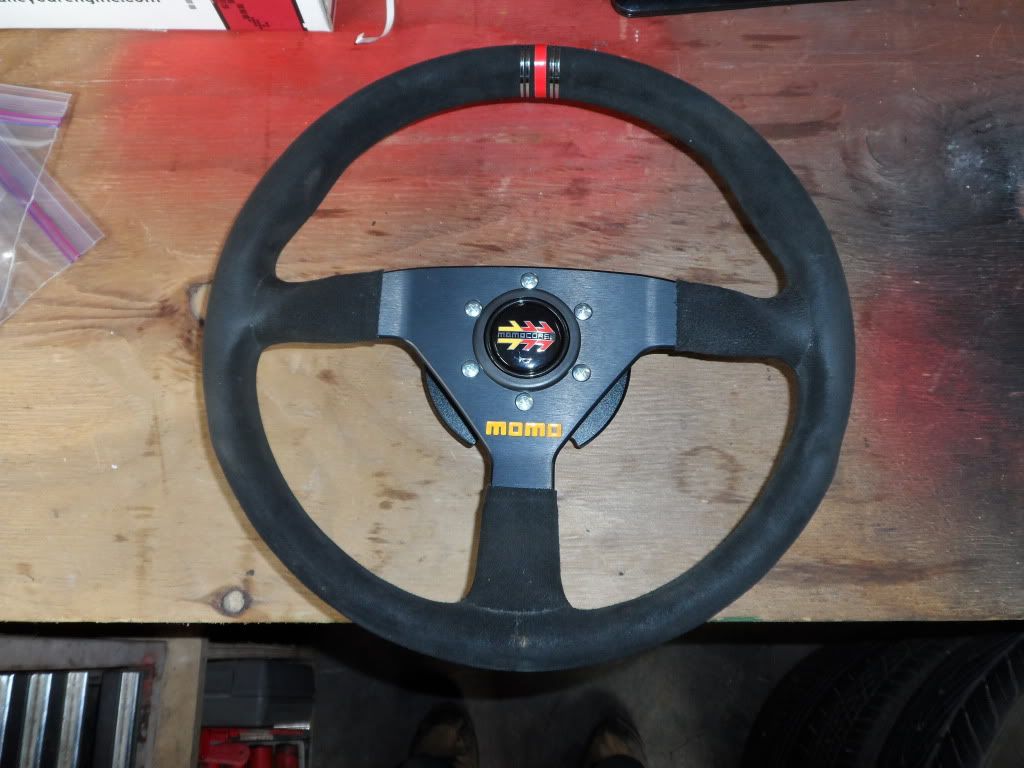
Momo, corbeau, and NRG. They all fit so nicely together. Like peas and carrots.
For now the seat installation is on hold until the motor comes out and the car rolls out of the shop. The way it sits now, I can't open the door more than 8 inches before it hits my shelf and it's not possible to tear out the carpet and move forward until the door can swing fully open.
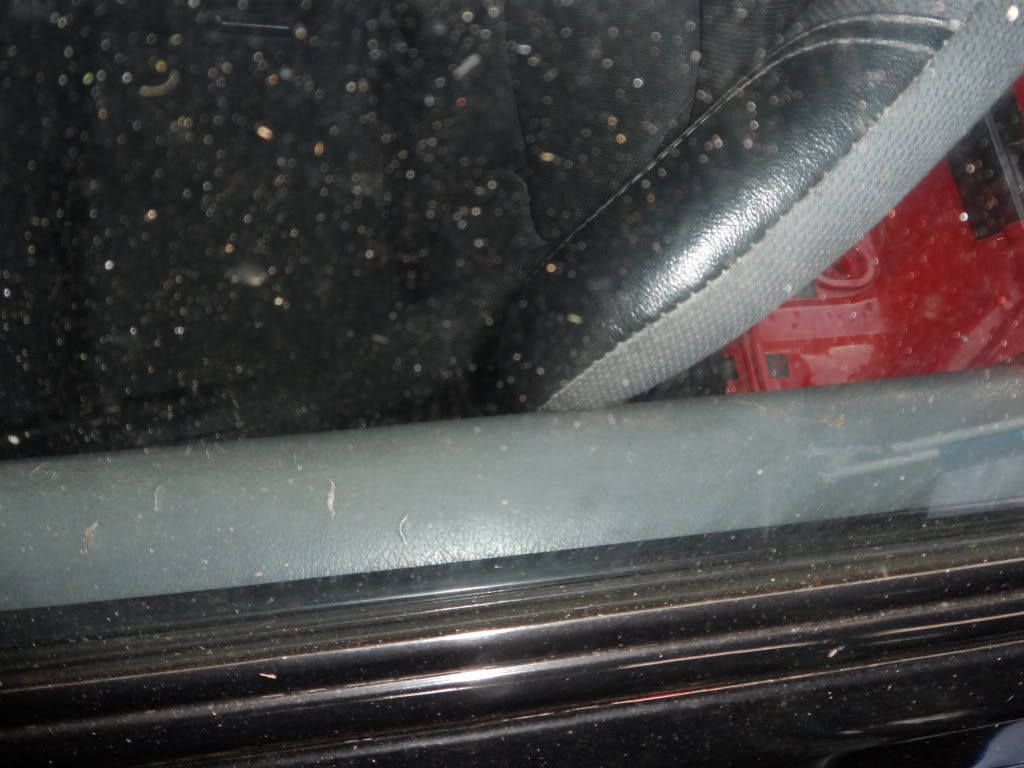
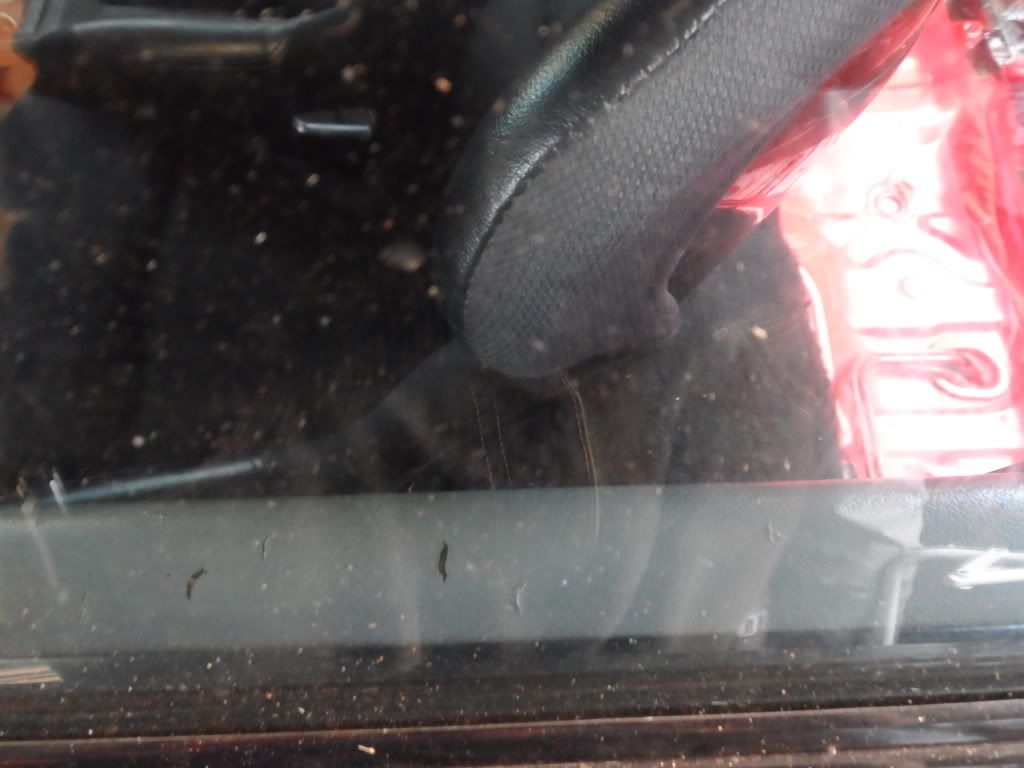
Also having some custom neoprene seat covers made to protect these seats. It's a shame to cover up such nice seats, but thieves don't need to see them and this isn't a show car. Notice the dirty floor mats... this car is DAILY DRIVEN.
Lots of parts in the mail arriving this week, stay tuned for updates.
Welds look good, so does the paint.
These must have been pre made in stock, because the paint is old -it's not fresh and tells me the brackets were painted some time ago.
Time for a test fit. The fitment is HORRIBLE! Look at the centerline on the wheel and compare it to the position of the seat. The b!tch is atleast 2 inches off center from the wheel!
It also causes the seat to hit the door! It closes, but it's rubbing.
I 'amended' the provided instructions into two simple steps.
Oh wait... if the seat is 'installed' and this is the piece sitting on my spare rims... uhhhh wait what's going on here.
Wait wait, hold up... This is the seat bracket I used to install the driver seat.... Uhhhh whoops wrong bracket. Hey! it's a been a long day, cut me some slack. And NOWHERE in the instructions does it say that the driver side bracket goes on the driver side seat.. cut me some slack here. Actually I didn't read the destructions, maybe it DID say that somewhere.
Okay that's better. I had the wrong sliders on the wrong side. The seat is still 1/2" off center from the wheel, and I'll have to modify my floor pans to get things to fit right. The seat also sits slightly out of vertical level - I'll need to use shims to get the seat mounted right. This installation is BY NO MEANS plug and play. The bolt holes on the floor pan from the previous owner are all busted out and ripped away from the chassis. He was a big guy.. 240lbs falling into the seat busted the bolt holes out. I'll have to fix that.
With the proper bracket, the seat clears the door panel with room to spare. The clearance will improve when I relocate the seat toward the center of the chassis.
Momo, corbeau, and NRG. They all fit so nicely together. Like peas and carrots.
For now the seat installation is on hold until the motor comes out and the car rolls out of the shop. The way it sits now, I can't open the door more than 8 inches before it hits my shelf and it's not possible to tear out the carpet and move forward until the door can swing fully open.
Also having some custom neoprene seat covers made to protect these seats. It's a shame to cover up such nice seats, but thieves don't need to see them and this isn't a show car. Notice the dirty floor mats... this car is DAILY DRIVEN.
Lots of parts in the mail arriving this week, stay tuned for updates.
02-20-2013, 08:04 PM
#69
Honda-Tech Member
I have one but the last time around I used a belt sander and took half the aluminum off the raised logos so it's hard to sand without marring the VC itself.
I'm thinking q-tips and lacquer thinner..
A belt sander is not a precision tool. Hey, it was weight reduction removing that extra metal!
Good to see you up in my latest thread again. Stay tuned, home-skillet.
I'm thinking q-tips and lacquer thinner..
A belt sander is not a precision tool. Hey, it was weight reduction removing that extra metal!
Good to see you up in my latest thread again. Stay tuned, home-skillet.
02-20-2013, 08:28 PM
#70
Honda-Tech Member
Thread Starter
02-20-2013, 08:29 PM
#71
Honda-Tech Member
Thread Starter
02-20-2013, 08:42 PM
#72
Honda-Tech Member
Thread Starter
Not much to update. Waiting on parts and busy with work.
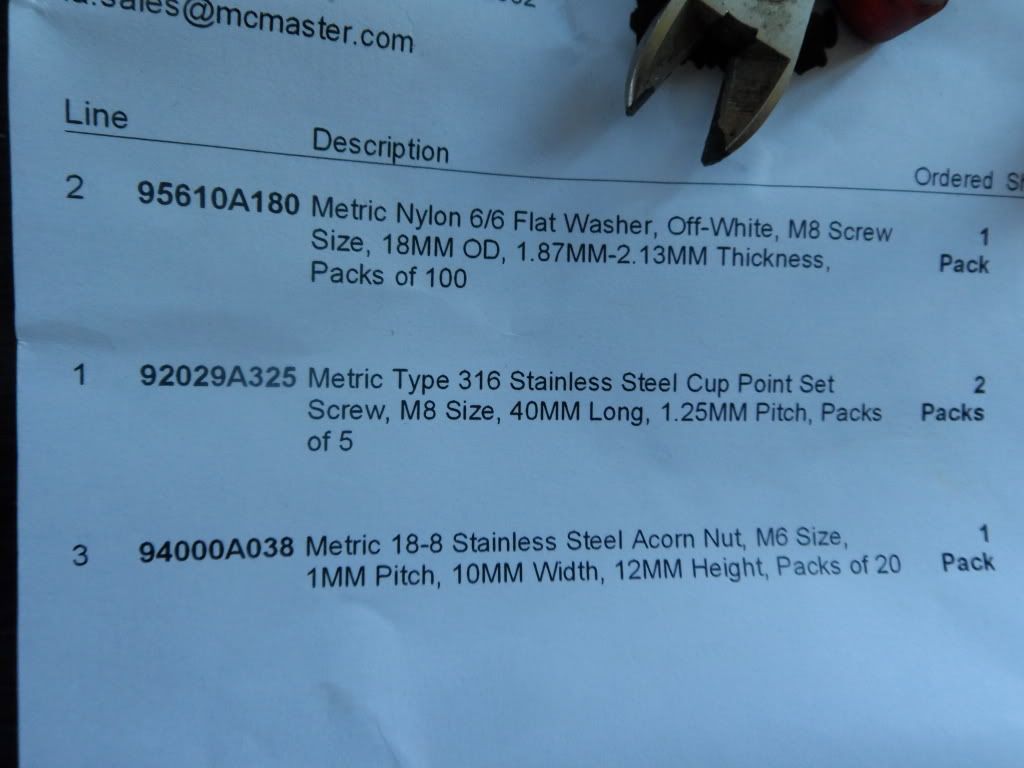
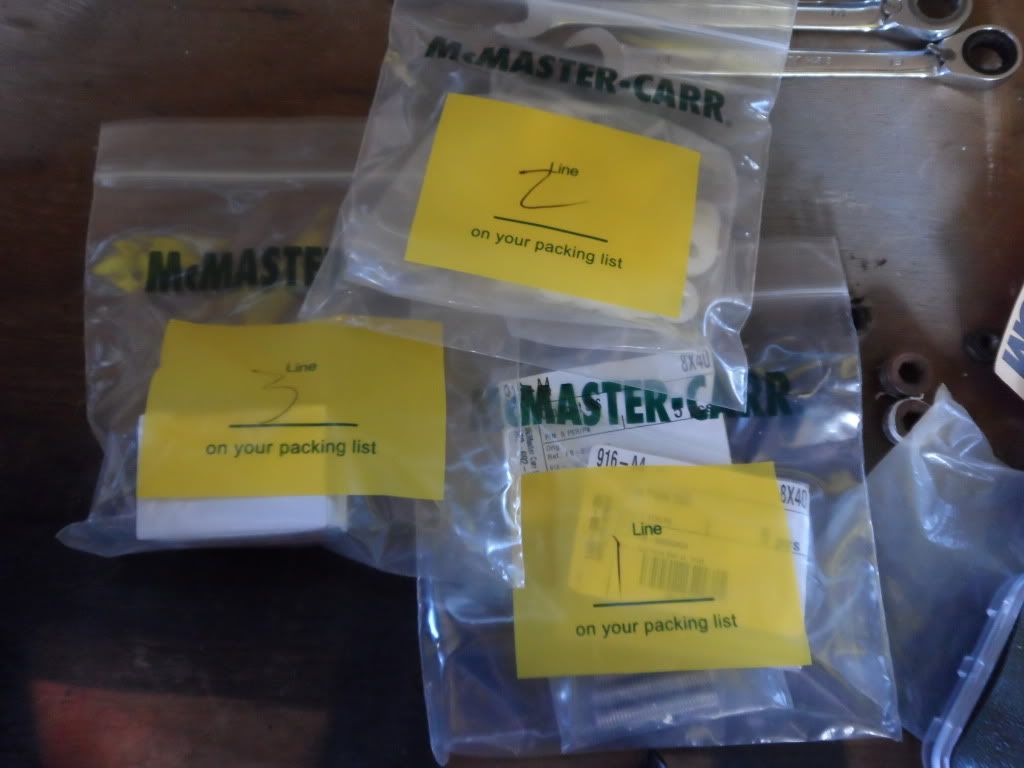
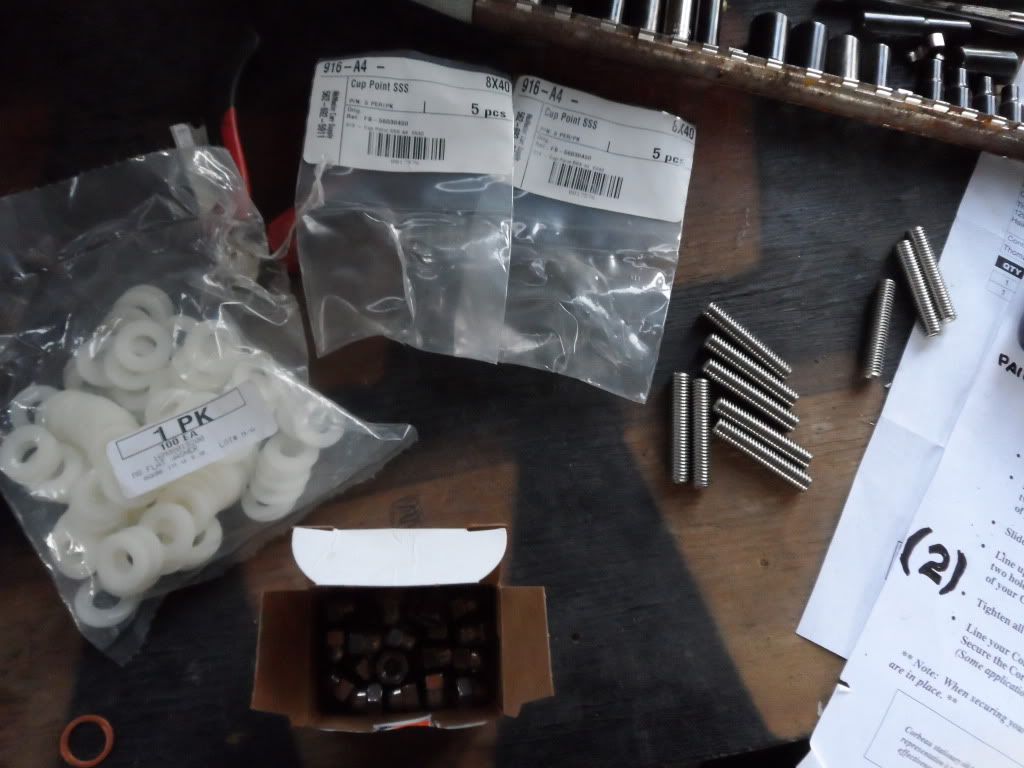
New acorn nuts for valve cover.. new extended studs for the manifold.. and nylon thermal-insulation washer part numbers.
1,2,3..go.
Sweet.
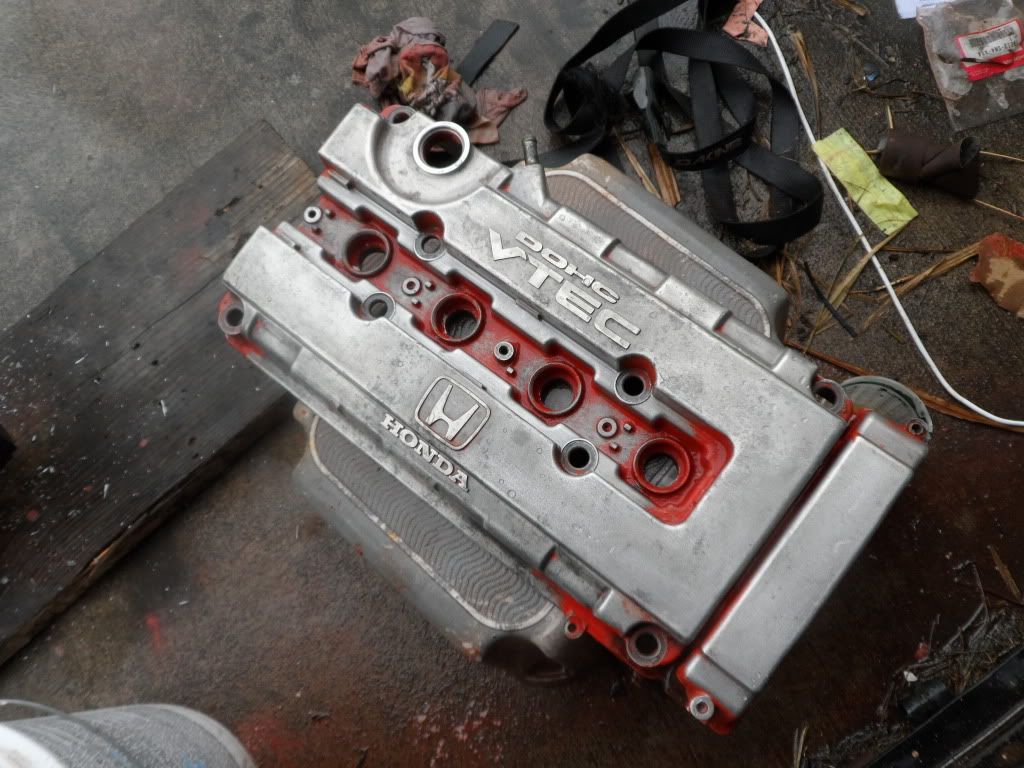
Like this.
q-tips.. the ultimate beauty tool. Done for now. Considering painting a red accent on the VTAK logo to draw your eyes to the center of the bay.. Who knows at this point. Bigger things to think about.
So I brought a corbeau home to sit in while I play forza for the real simulation experience. My demon rumblefish from the depths of hell tears anything I bring home to shreds. Last night I left out a beer box and throughout the course of the evening he turned the cardboard box into confetti. There wasn't a single piece of cardboard larger than one square inch.. I realized that I'd have to hang the seat from the ceiling up out of reach so he couldn't destroy it. After coming back from a shower he had somehow made a new nest in the seat.
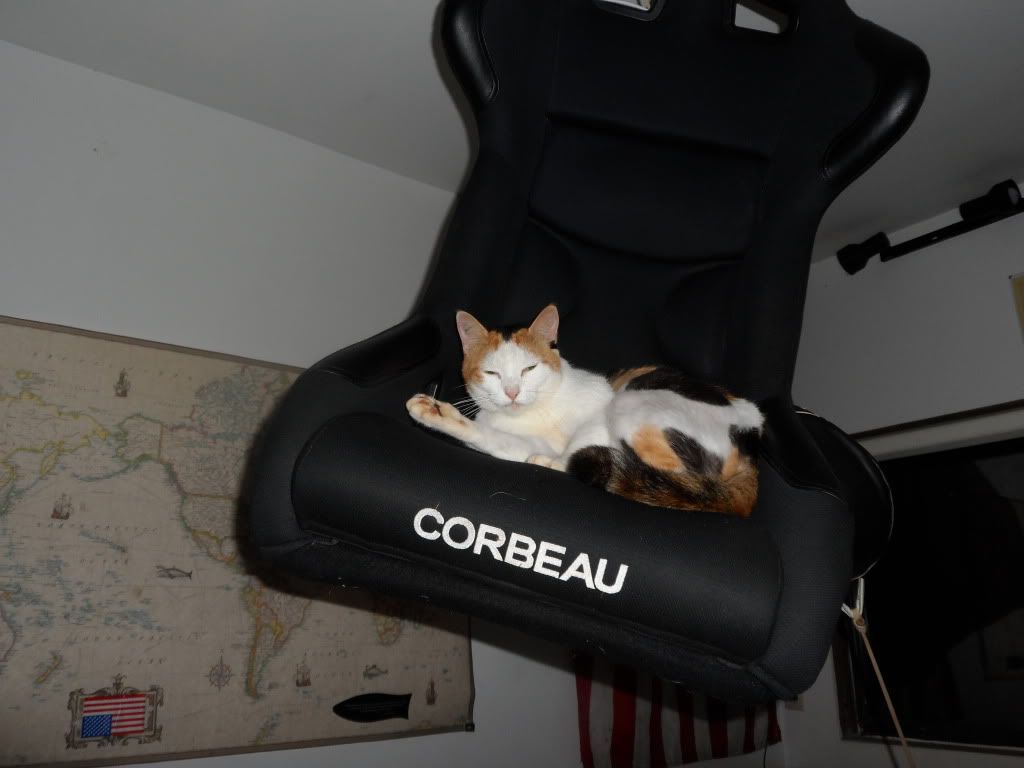
So I put it on the bed and he continued to destroy it. Notice the squinted eyes - he is thoroughly enraged that I have captured his evil essence on film. I fear for my life tonight when I fall asleep. And yea, guess I have to keep the seat locked up in my car outside when I'm not using it. The little bastard is vicious and mean, his talons are sharp and ferocious. He is not the rumblefish with which to be ufcked.
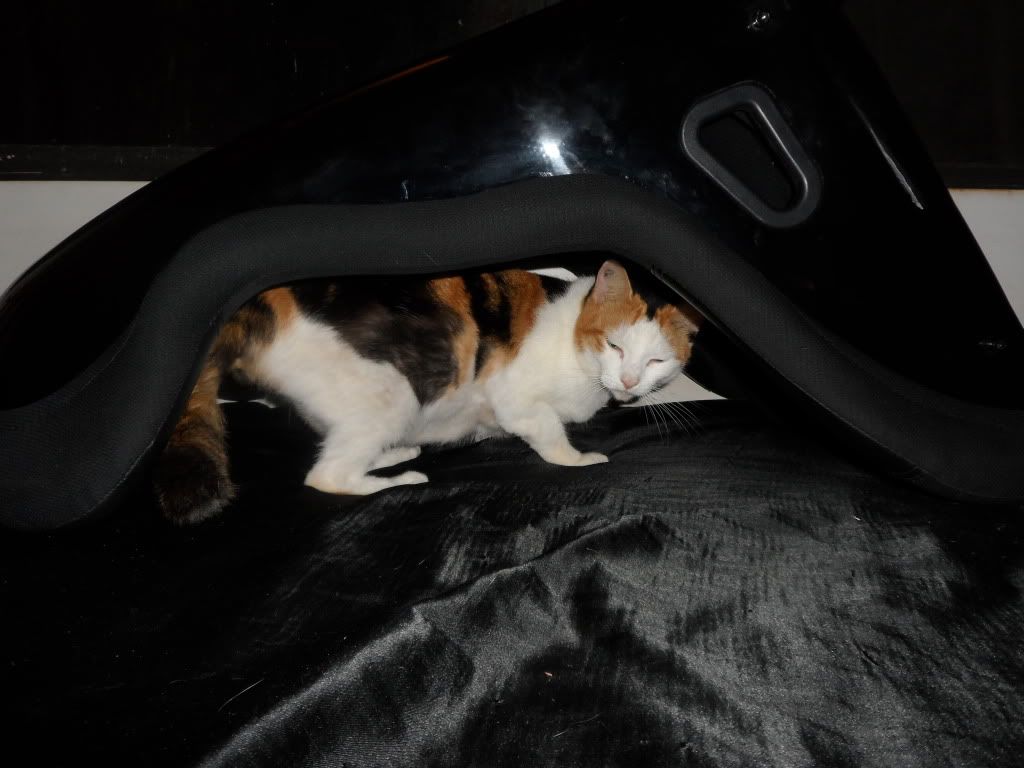
That's it for now.
New acorn nuts for valve cover.. new extended studs for the manifold.. and nylon thermal-insulation washer part numbers.
1,2,3..go.
Sweet.
Like this.
q-tips.. the ultimate beauty tool. Done for now. Considering painting a red accent on the VTAK logo to draw your eyes to the center of the bay.. Who knows at this point. Bigger things to think about.
So I brought a corbeau home to sit in while I play forza for the real simulation experience. My demon rumblefish from the depths of hell tears anything I bring home to shreds. Last night I left out a beer box and throughout the course of the evening he turned the cardboard box into confetti. There wasn't a single piece of cardboard larger than one square inch.. I realized that I'd have to hang the seat from the ceiling up out of reach so he couldn't destroy it. After coming back from a shower he had somehow made a new nest in the seat.
So I put it on the bed and he continued to destroy it. Notice the squinted eyes - he is thoroughly enraged that I have captured his evil essence on film. I fear for my life tonight when I fall asleep. And yea, guess I have to keep the seat locked up in my car outside when I'm not using it. The little bastard is vicious and mean, his talons are sharp and ferocious. He is not the rumblefish with which to be ufcked.
That's it for now.
02-22-2013, 03:42 PM
#74
Honda-Tech Member
Join Date: Mar 2012
Posts: 29
Likes: 0
Received 0 Likes
on
0 Posts
Wikipedia can confirm: "No dinosaur fossils have ever been found in Hawaii". Perhaps because of the rumblefish?
I like the idea of the Vaseline, another option would be tape? No? Could you not paint the red first, tape it, and then paint the grey(which is sick btw)?
I like the idea of the Vaseline, another option would be tape? No? Could you not paint the red first, tape it, and then paint the grey(which is sick btw)?