
DIY GUIDES: CTR Replica Headlights 96-98 EK
 09-14-2008, 01:44 PM
#1
Thread Starter
Join Date: Jan 2008
Location: SD, CA
Posts: 7
Likes: 0
Received 0 Likes
on
0 Posts
<U>DIY Guide: CTR Replica Headlights for 96-98 EK’s</U>
RondatheHondaSI
Supplies
Gun Metal Spray Paint
Grey Primer
Philips Screw Driver
Flat head Screw Driver
Clear Silicon
Kitchen Oven
Plastic Zip Lock bags
Rubbing Alcohol
Towels
Optional Masking Tape.
I used plastic sandwich bags to place all the screws and materials in for the headlights.

Use these steps for both Driver and Passenger headlights, make sure to put them in the oven 1 at a time.
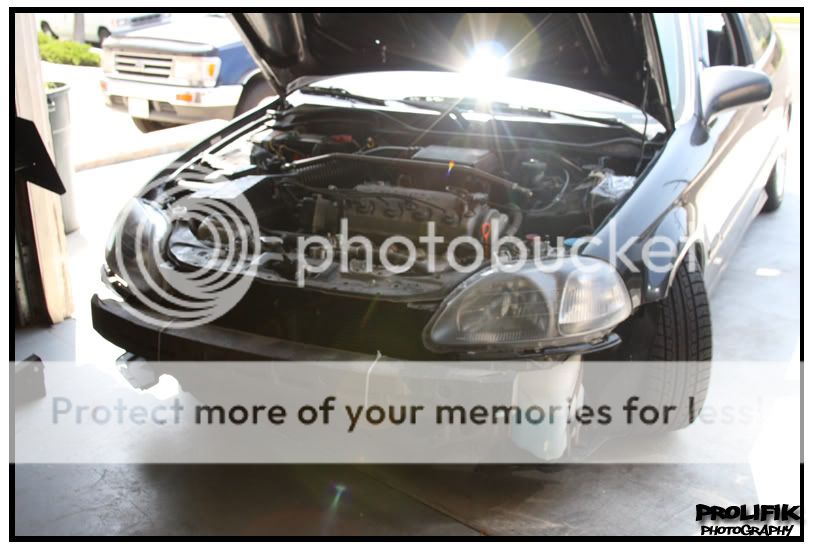
Step 1: Start by removing the bumper from your car, there are 2 Philip Screws on the driver and passenger side holding the bumper to the fender, there are also 2 10mm bolts underneath the bumper and make sure to remove all the clips up top on the bumper and grille.
Step 2: Now that the bumper is off you then remove both headlights, there are 2 10 mm bolts on top 1 on the side towards the fender and 1 towards the center.
Step 3: With you headlights off preheat your oven at 200 degrees. Take a cookie tray and place down some aluminum foil, Place 1 of the 2 headlights on the tray and take the black rubber ventilation tubes off in the back of the headlight.
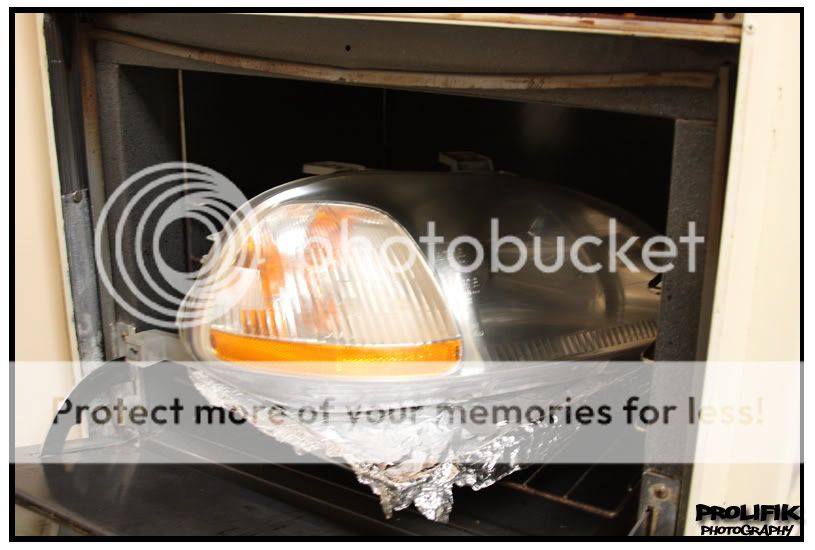
Step 4: Now that everything is set and your oven is warm/hot, place the tray with the first headlight into the oven, make sure no part of the plastic from the headlight touches the oven walls or grill, try and get it to fit as much as possible inside the oven. Leave it there for 8-10 minutes, 12 minutes max.
Step 5: Once the time is up and your ready to take out your headlights be sure to use a pot holder or cloths, take your headlight out and with the flat head screw driver begin prying open the lens cover off of the light. It should begin to slowly come off, if not put it back in the oven for another minute or 2. Be sure to unclip the plastic clips from the headlight to lens cover.
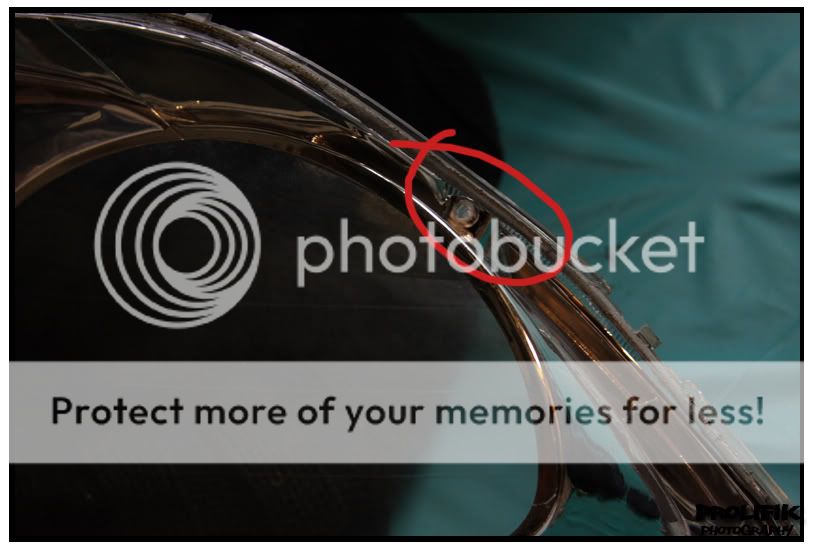
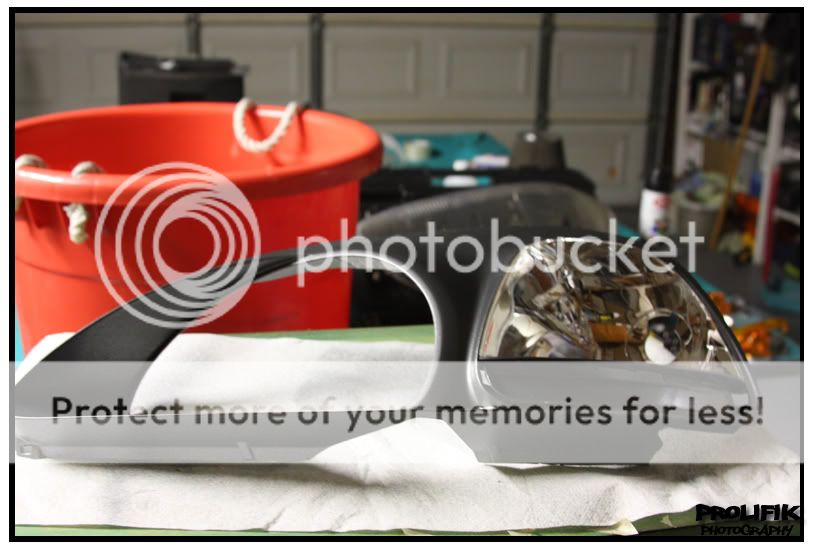
Step 6: With the headlights apart you now want to unscrew the chrome outliner from the actually lens cover. To do so there are 2 screws located on the back of it. Don’t forget to remove the orange reflectors.

Step 7: With that now off you can do 2 things, you can mask off the chrome turn signal reflector and paint the rest of the housing, or you can paint the whole thing, What I did with mine as you can see is masked it off so it matches the low/hi beam headlight lens.
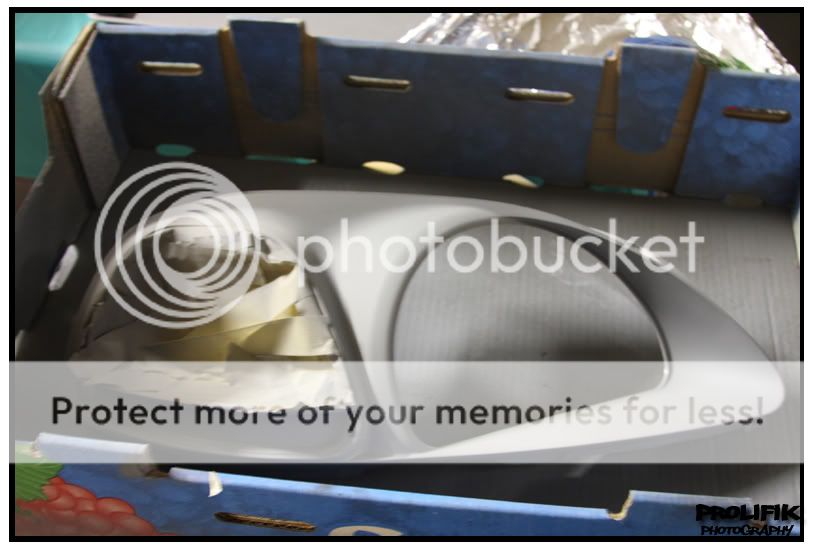
Step 8: After you’ve made your decision from Step 7, place the chrome housing in a box, with the rubbing alcohol and towels clean the housing as best as possible and let it dry completely, you may notice that the chrome might be dissolving off the housing from the alcohol, that’s normal and your gonna paint it anyways.
Step 8: With the primer, begin applying light coats every 5-10 minutes until the housing is evenly covered in primer, make sure its dry before going to step 9
Step 9: Now that the housing is primer, take the Gun Metal Spray paint, I used Duplicolor which can mainly be found at Kragen. Begin to add very light coats of the gun metal, the paint is very oily and overspraying will cause it to run and ruin the housing. So use light coats until it is completely covered and even.
Step 10: Let it dry, I let mine dry for about 6-7 hours before beginning to piece it back together.
Step 11: Now with the housing painted, you can now place the housing back onto the lens cover and put both Philip screws back in place. (Orange Reflectors are optional, I just left mine off for a cleaner look.)
before i baked them
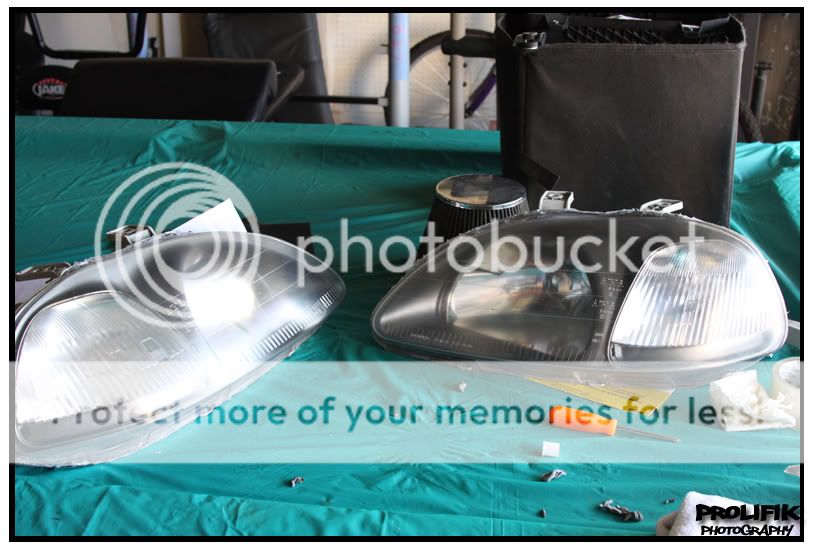
Step 12: Now place the lens cover back with the headlamp and make sure to clip everything back. Preheat your oven back to 200 degrees and 1 at a time place the headlights back into the oven for 8-10 minutes. By doing this it causing the factory silicon to soften again.
Step 13: Once the time is up remove the headlight from the oven with pot holders or something and push on both sides of the headlight as hard as possible, doing this causes the factory silicon to rebind together.
Step 14: Now take your clear silicon and run it on the outer linings of the headlight, make sure not to use too much on one spot, even it out. And let the silicon harden.
Step 15: Put all the rubber vent tubes back on the headlights and put the headlights back on the car, Then put back your bumper and your done. CONGRATS U GOT CTR REPLICA HEADLIGHTS
my final results
Good Luck

RondatheHondaSI
Supplies
Gun Metal Spray Paint
Grey Primer
Philips Screw Driver
Flat head Screw Driver
Clear Silicon
Kitchen Oven
Plastic Zip Lock bags
Rubbing Alcohol
Towels
Optional Masking Tape.
I used plastic sandwich bags to place all the screws and materials in for the headlights.
Use these steps for both Driver and Passenger headlights, make sure to put them in the oven 1 at a time.
Step 1: Start by removing the bumper from your car, there are 2 Philip Screws on the driver and passenger side holding the bumper to the fender, there are also 2 10mm bolts underneath the bumper and make sure to remove all the clips up top on the bumper and grille.
Step 2: Now that the bumper is off you then remove both headlights, there are 2 10 mm bolts on top 1 on the side towards the fender and 1 towards the center.
Step 3: With you headlights off preheat your oven at 200 degrees. Take a cookie tray and place down some aluminum foil, Place 1 of the 2 headlights on the tray and take the black rubber ventilation tubes off in the back of the headlight.
Step 4: Now that everything is set and your oven is warm/hot, place the tray with the first headlight into the oven, make sure no part of the plastic from the headlight touches the oven walls or grill, try and get it to fit as much as possible inside the oven. Leave it there for 8-10 minutes, 12 minutes max.
Step 5: Once the time is up and your ready to take out your headlights be sure to use a pot holder or cloths, take your headlight out and with the flat head screw driver begin prying open the lens cover off of the light. It should begin to slowly come off, if not put it back in the oven for another minute or 2. Be sure to unclip the plastic clips from the headlight to lens cover.
Step 6: With the headlights apart you now want to unscrew the chrome outliner from the actually lens cover. To do so there are 2 screws located on the back of it. Don’t forget to remove the orange reflectors.
Step 7: With that now off you can do 2 things, you can mask off the chrome turn signal reflector and paint the rest of the housing, or you can paint the whole thing, What I did with mine as you can see is masked it off so it matches the low/hi beam headlight lens.
Step 8: After you’ve made your decision from Step 7, place the chrome housing in a box, with the rubbing alcohol and towels clean the housing as best as possible and let it dry completely, you may notice that the chrome might be dissolving off the housing from the alcohol, that’s normal and your gonna paint it anyways.
Step 8: With the primer, begin applying light coats every 5-10 minutes until the housing is evenly covered in primer, make sure its dry before going to step 9
Step 9: Now that the housing is primer, take the Gun Metal Spray paint, I used Duplicolor which can mainly be found at Kragen. Begin to add very light coats of the gun metal, the paint is very oily and overspraying will cause it to run and ruin the housing. So use light coats until it is completely covered and even.
Step 10: Let it dry, I let mine dry for about 6-7 hours before beginning to piece it back together.
Step 11: Now with the housing painted, you can now place the housing back onto the lens cover and put both Philip screws back in place. (Orange Reflectors are optional, I just left mine off for a cleaner look.)
before i baked them
Step 12: Now place the lens cover back with the headlamp and make sure to clip everything back. Preheat your oven back to 200 degrees and 1 at a time place the headlights back into the oven for 8-10 minutes. By doing this it causing the factory silicon to soften again.
Step 13: Once the time is up remove the headlight from the oven with pot holders or something and push on both sides of the headlight as hard as possible, doing this causes the factory silicon to rebind together.
Step 14: Now take your clear silicon and run it on the outer linings of the headlight, make sure not to use too much on one spot, even it out. And let the silicon harden.
Step 15: Put all the rubber vent tubes back on the headlights and put the headlights back on the car, Then put back your bumper and your done. CONGRATS U GOT CTR REPLICA HEADLIGHTS
my final results
Good Luck
 09-14-2008, 01:45 PM
#2
Thread Starter
Join Date: Jan 2008
Location: SD, CA
Posts: 7
Likes: 0
Received 0 Likes
on
0 Posts
unlike other DIY's where the pictures suddenly get deleted and you cant really follow it. these pictures will be up forever 
09-14-2008, 04:02 PM
#3
Honda-Tech Member
Join Date: Jan 2002
Location: Raleigh, NC
Posts: 15,334
Likes: 0
Received 0 Likes
on
0 Posts
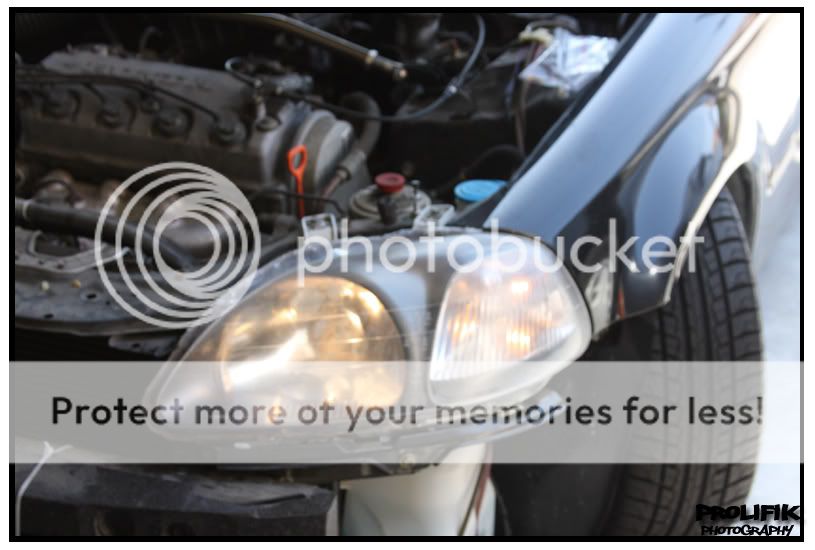
You need to polish your headlights up. They look yellowed from the sun like all of them get over time, but good writeup.
09-14-2008, 04:38 PM
#4
<TABLE WIDTH="90%" CELLSPACING=0 CELLPADDING=0 ALIGN=CENTER><TR><TD>Quote, originally posted by element360 »</TD></TR><TR><TD CLASS="quote">unlike other DIY's where the pictures suddenly get deleted and you cant really follow it. these pictures will be up forever </TD></TR></TABLE>
How? Forever?
<TABLE WIDTH="90%" CELLSPACING=0 CELLPADDING=0 ALIGN=CENTER><TR><TD>Quote, originally posted by Ricey McRicerton »</TD></TR><TR><TD CLASS="quote"> They look yellowed from the sun like all of them get over time, but good writeup. </TD></TR></TABLE>
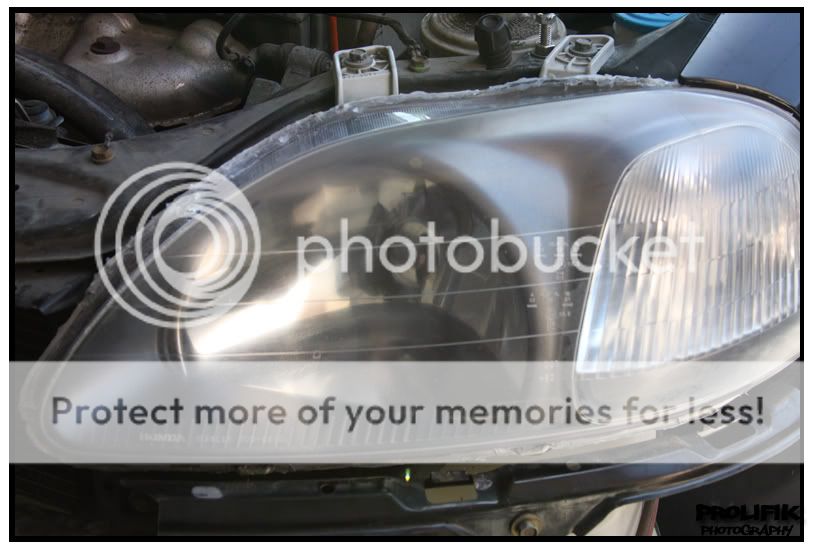
Oxidized/oxidation, Acrylic exposed to oxygen. Silicon layer worn away causes this.
How? Forever?
<TABLE WIDTH="90%" CELLSPACING=0 CELLPADDING=0 ALIGN=CENTER><TR><TD>Quote, originally posted by Ricey McRicerton »</TD></TR><TR><TD CLASS="quote"> They look yellowed from the sun like all of them get over time, but good writeup. </TD></TR></TABLE>
Oxidized/oxidation, Acrylic exposed to oxygen. Silicon layer worn away causes this.
09-14-2008, 04:48 PM
#5
Honda-Tech Member
Join Date: Sep 2004
Location: Morgantown, WV, bewbies
Posts: 4,056
Likes: 0
Received 0 Likes
on
0 Posts
<TABLE WIDTH="90%" CELLSPACING=0 CELLPADDING=0 ALIGN=CENTER><TR><TD>Quote, originally posted by mcvtec »</TD></TR><TR><TD CLASS="quote">
How? Forever?
Oxidized/oxidation, Acrylic exposed to oxygen. Silicon layer worn away causes this.</TD></TR></TABLE>
he is saying he basicly needs to polish them so they are clear agian and not all foggy
How? Forever?
Oxidized/oxidation, Acrylic exposed to oxygen. Silicon layer worn away causes this.</TD></TR></TABLE>
he is saying he basicly needs to polish them so they are clear agian and not all foggy
09-14-2008, 05:56 PM
#7
<TABLE WIDTH="90%" CELLSPACING=0 CELLPADDING=0 ALIGN=CENTER><TR><TD>Quote, originally posted by The Lobster »</TD></TR><TR><TD CLASS="quote">
he is saying he basicly needs to polish them so they are clear agian and not all foggy </TD></TR></TABLE>
Yep VVVV
VVVV
https://honda-tech.com/zerothread?id=2336666
he is saying he basicly needs to polish them so they are clear agian and not all foggy </TD></TR></TABLE>
Yep
VVVVhttps://honda-tech.com/zerothread?id=2336666
Trending Topics
09-14-2008, 05:58 PM
#8
Honda-Tech Member
Join Date: Jan 2002
Location: Raleigh, NC
Posts: 15,334
Likes: 0
Received 0 Likes
on
0 Posts
<TABLE WIDTH="90%" CELLSPACING=0 CELLPADDING=0 ALIGN=CENTER><TR><TD>Quote, originally posted by The Lobster »</TD></TR><TR><TD CLASS="quote">
he is saying he basicly needs to polish them so they are clear agian and not all foggy </TD></TR></TABLE>
Yeah that. Unfortunately they have to be re-done every few years or they fog back up.
he is saying he basicly needs to polish them so they are clear agian and not all foggy </TD></TR></TABLE>
Yeah that. Unfortunately they have to be re-done every few years or they fog back up.


Thread
Thread Starter
Forum
Replies
Last Post
dom93hatch
Acura Integra
9
02-20-2008 01:45 PM