
1990 Accord, A/C Retrofit time *With pics*
 07-21-2011, 03:30 PM
#1
Honda-Tech Member
Thread Starter
Join Date: Jul 2011
Posts: 37
Likes: 0
Received 0 Likes
on
0 Posts
Hello again, next project on my mothballed 90 Accord DX is the A/C.
Far as I can tell (which isn't a whole lot) I assume that it has NOT been retrofitted for R-134a. The last time it blew cold air was back in 1997. Since it's been 100+ degrees the past few days, it could use the upgrade. I called local shops and the CHEAPEST i could find was $500 for the conversion and service.
It's blown hot air for years (since late 90's), so I assume the R-12 is totally gone, is that right? I took some pics of my engine to see what condition it's in and what ports are where. Right now I have no idea which is even the high side and which is the low side. What parts will I need, and, is it possible to do myself? Thanks again!!
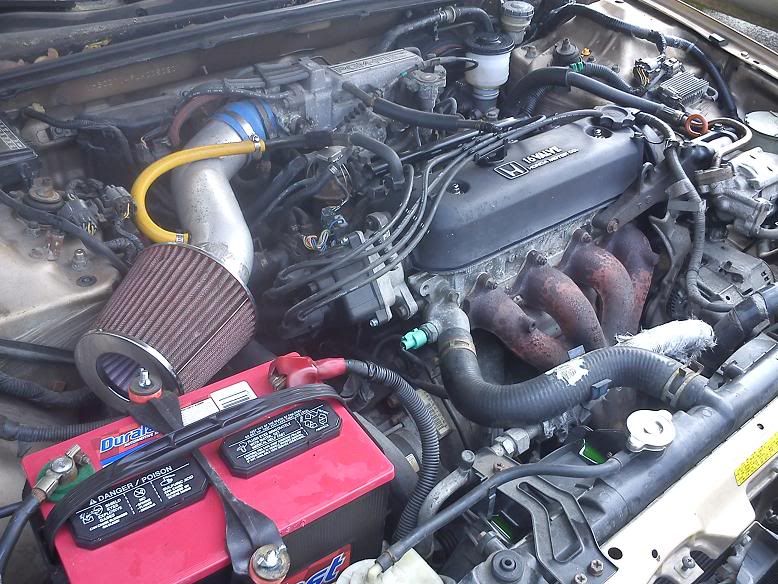
Overview:
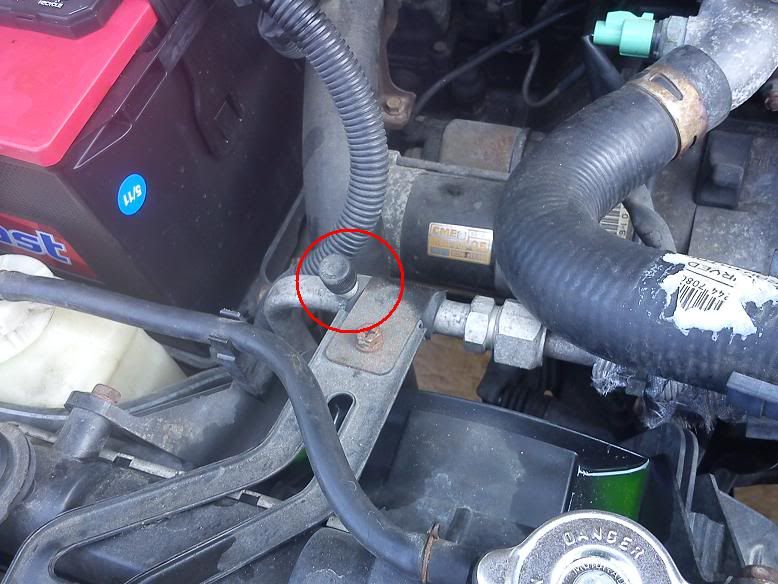
Valve near the battery (it continues in front of the header and is insulated):
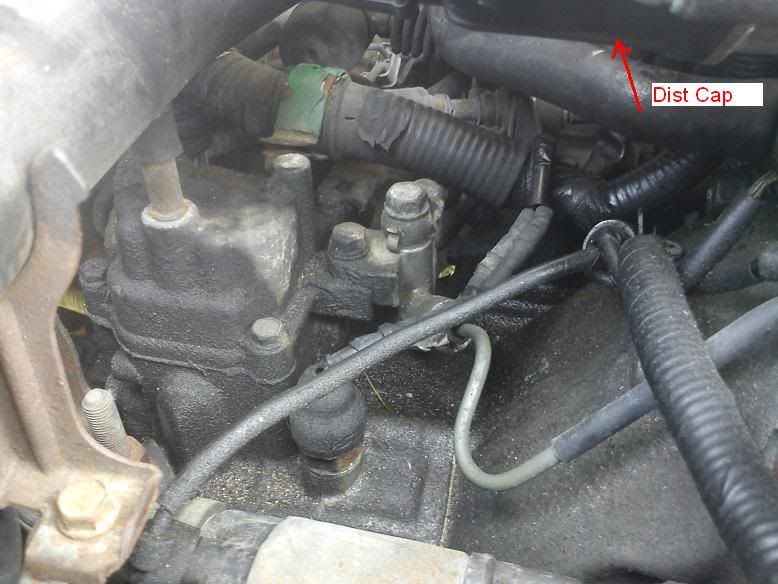
A/C parts? Covered in oil residue?....?
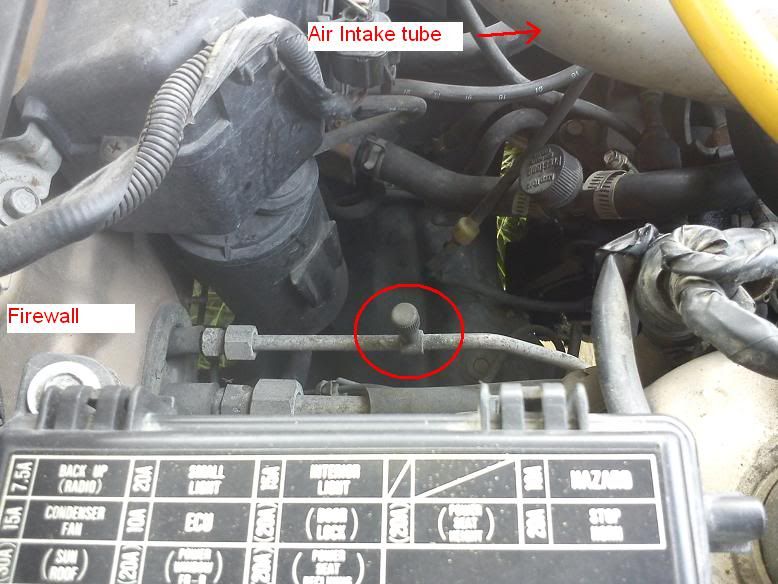
Valve near fusebox:
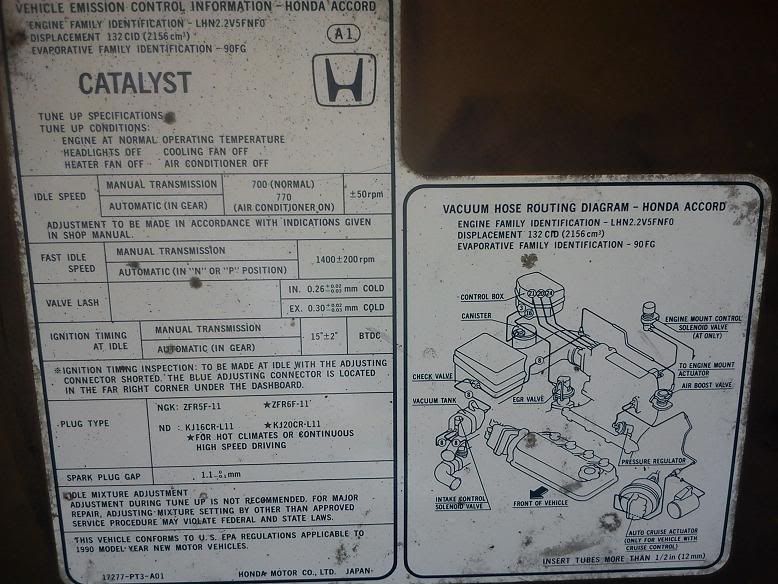
Specs from hood:
Far as I can tell (which isn't a whole lot) I assume that it has NOT been retrofitted for R-134a. The last time it blew cold air was back in 1997. Since it's been 100+ degrees the past few days, it could use the upgrade. I called local shops and the CHEAPEST i could find was $500 for the conversion and service.
It's blown hot air for years (since late 90's), so I assume the R-12 is totally gone, is that right? I took some pics of my engine to see what condition it's in and what ports are where. Right now I have no idea which is even the high side and which is the low side. What parts will I need, and, is it possible to do myself? Thanks again!!
Overview:
Valve near the battery (it continues in front of the header and is insulated):
A/C parts? Covered in oil residue?....?
Valve near fusebox:
Specs from hood:
 07-21-2011, 04:07 PM
#2

Those are not A/C parts covered in oil.
IMO most DIY A/C conversions are a waste of money because most people don't have the tools to do it right
IMO most DIY A/C conversions are a waste of money because most people don't have the tools to do it right
07-21-2011, 06:10 PM
#3
Honda-Tech Member
Thread Starter
Join Date: Jul 2011
Posts: 37
Likes: 0
Received 0 Likes
on
0 Posts
07-21-2011, 06:58 PM
#4
Honda-Tech Member

Join Date: May 2010
Location: Baltimore, MD
Posts: 33
Likes: 0
Received 0 Likes
on
0 Posts
OP, the low side is the one close to the battery. Make sure you put a can of ester oil in it before you put the R134 in it.
07-22-2011, 12:00 AM
#5
Conversion is easy, just buy a kit from autozone and do it yourself. You can rent an evacuation pump from them as well and do it in their parking lot if you want, but I'd recommend replacing the receiver dryer at the same time and orifice tube if you've got one. Here's what I'd do if I were in your position...
- Run down to local radiator store and pick up receiver drier ($40ish), o-ring kit ($5), and orifice tube if it's got one ($5).
- Replace ALL the seals that you can in the system, it's really not that difficult. Two 10mm bolts on the top of the compressor to remove the lines and you swap out two o-rings, then put the lines back on. Two 10mm bolts on the receiver drier to remove the lines and replace the two tiny o-rings as well as the receiver drier itself. Two 10mm bolts on the condensor (it's that radiator lookin thing in front of your radiator), remove two lines and replace two tiny o-rings.
-You'll see a big hardline and a little one near your firewall. If you unscrew the giant nut on the little hardline, there'll sometimes be a little filter thingy inside that's just sort of shoved in there; that's the orifice tube. Replace that if your car has one.
- The R134a conversion kit will come with two fittings that'll screw right onto your existing R12 fittings. This is sort of self explanatory, so screw em on all the way.
- Next thing I'd do is run down to a mechanic shop and ask them to flush your a/c system. I have the tools to do this, but if you don't I'd pay someone to do it rather than tool up for something you're only going to do once or twice. So... the mechanic shop runs a chemical through your entire a/c system to clean out any dirt and debris that may have built up over the past 14 years of non-use.
- Once it comes back from cleaning, you can remove a 10mm bolt and take off the a/c line to your compressor, then pour a little bit of pag oil inside (you'll have to look up the proper amount). Reinstall the line after you've added oil and now you're ready to charge the system.
- Run down to autozone and rent their evacuation pump. This is an electric pump that connects to the low side (bigger a/c line). Hook the pump up and plug it in, then leave it vaccuuming your system for about 20 minutes, then remove the pump.
- Start your car and turn the a/c on.
- Take the charge line and supplied gauge that was included in your r134a retrofit kit and attach it to the low side port, then charge the system with your first can. At this point you're going to watch your compressor to make sure the clutch is engaging and not making any funny noises. Also make sure that the cooling fans both turn on once the compressor clutch engages. If the fans don't turn on then stop what you're doing and inspect the problem. If the clutch doesn't engage, then you'll have to diagnose that problem.
- If all is well on the previous step, proceed to the next can of freon. Keep in mind that A/C systems don't just stop working, they only stop if there's a problem, so if the clutch engages, compressor doesn't make noise, cooling fans turn on... this means a leak is most likely the culprit as to why the a/c stopped working in the first place. So for the second can I'd use R134a + UV dye instead of the regular old R134a can. It's the same price, but this can has a yellow dye in it that's supposed to only be seen under a blacklight, but you can usually see it in regular light.
- Two cans in now, I'm guessing the pressure gauge is reading around 22-23psi, I'd add a third can and stop it once the pressure reaches 30-35psi.
Your retrofit kit does not come with a gauge to read the high side pressure (high side is usually 180-220psi), so at this point you should run down to a mechanic shop and ask them if your a/c system pressures are where they should be. A lot of places will do this check for free because they assume you're going to have them repair any problems if the pressures aren't where they should be. So the mechanic will check your high and low side pressures and if something's amiss, I'd just pay that guy to fix it, but if you did everything correctly you should be good.
If the a/c starts getting warmer later on down the road due to a pressure drop, then I would look around all the lines to see if you can spot any of that yellow dye, then fix whatever is leaking. If you can't spot a leak, then run down to a mechanic shop and ask if they can find the leak for you with their black light.
Kind of a long winded post,I hope that helps.

Thread
Thread Starter
Forum
Replies
Last Post
young_90_dx
Honda CRX / EF Civic (1988 - 1991)
2
12-15-2003 12:51 PM