When you click on links to various merchants on this site and make a purchase, this can result in this site earning a commission. Affiliate programs and affiliations include, but are not limited to, the eBay Partner Network.
The Misadventures of My 1999 Civic DX Hatchback Build
I've lurked on these boards a long time, and haven't really started participating until a year or so ago. I am addicted to watching people's builds progress, so I thought I'd make my own thread and hopefully it will serve to entertain and inform.
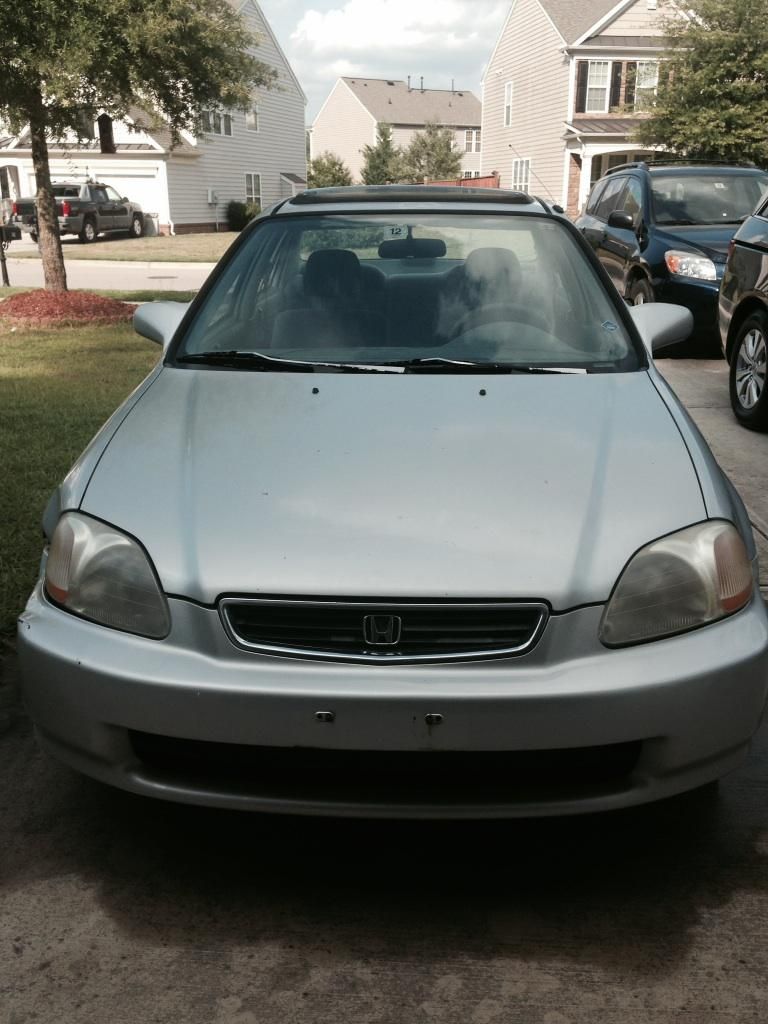
Let's get right into it. I bought this car back in May of 2013. I searched for a long time for a stock, black, 99-00 civic hatch with working AC and a straight body. After months of scouring the interwebz, I found this:
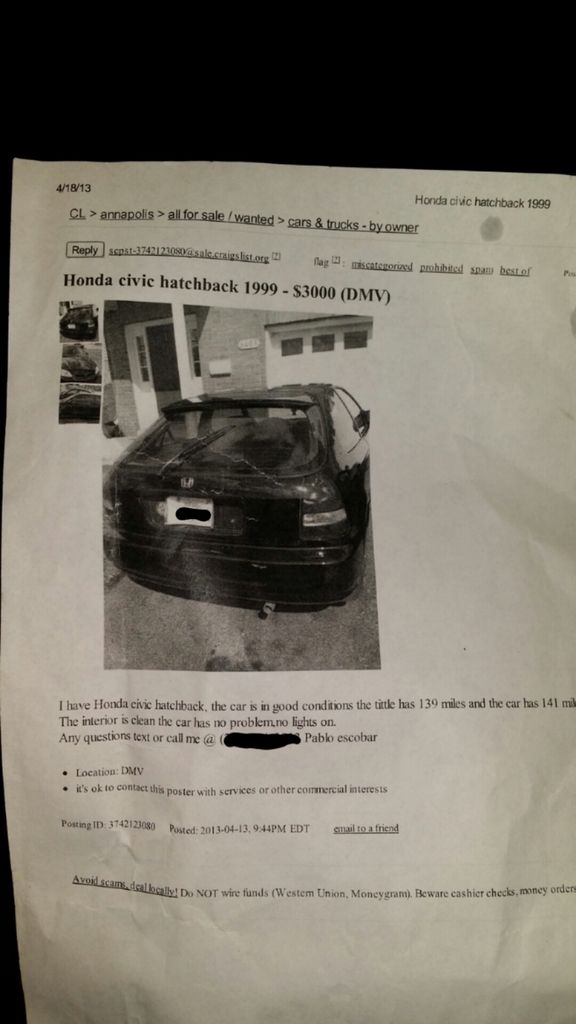
It was in Maryland, and I'm in NC. The owner was San Salvadorian (or some kind of Hispanic, I'm not sure) and while he didn't speak english, his girlfriend did. Only problem is that she didn't know anything about cars. So I'm having to ask her these technical questions and she has to try to translate words she's never heard of, like "rack and pinion", "OEM" "What's the compression?", etc. So needless to say, all I really got out of her was that the car was "stock", paint was original, and it either had a leaking power steering rack or a leaking pineapple. I was more inclined to believe the latter.
Interesting story about getting the car: I took the train to DC where they were going to pick me up and I was going to check out the car. I had pretty much had my heart set on it when I saw the ad, but you never know until you really check the car out. I get there, they pick me up at the station, and we drive to their place where the car is. 30 seconds after seeing the car and I could tell it had been repainted. After looking for issues, I found bondo marks on the passenger side rear quarter panel, and after pointing it out to the guy, all I could get from him is "ees good, ees, good!" And I'm like "no ************ ees NOT good!!" I didn't want a banged up body, and there is no telling what else could be wrong since they lied about that. Little did I know...
So the body still wasn't that bad and the paint DID look ok...besides the busted windshield, leaking power steering boot, a spare on one wheel, and unknown lowered suspension...plus I was REALLY was tired of looking for cars, so I decided to go ahead and get it. I talked him down to $2200. After slapping my old plates on it and making it official, I drove across the street and had a new wheel and tire put on and drove it back to NC. After having to stop and replace the power steering fluid like 6 times, I finally got it home.
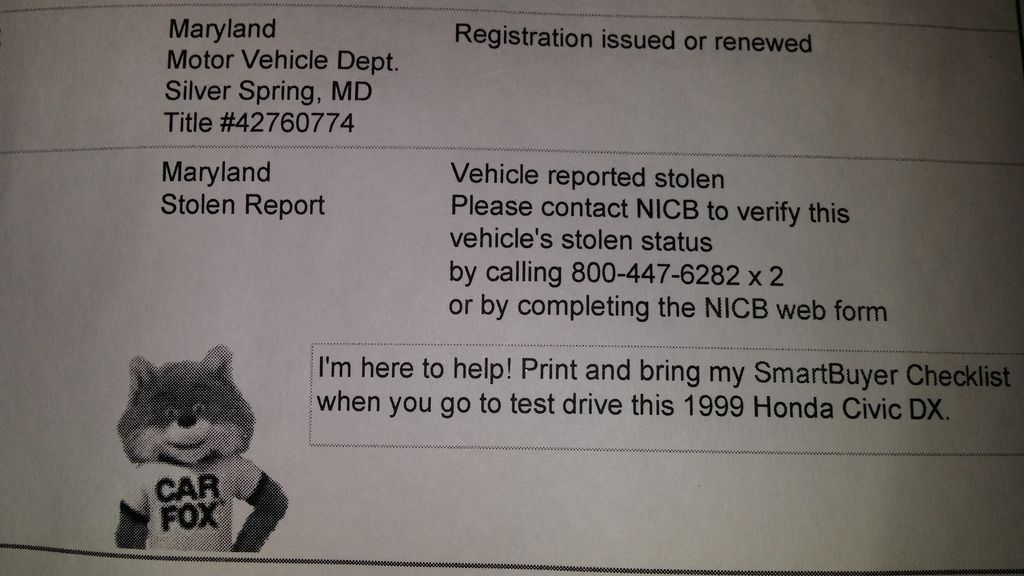
Went into work the next day and a guy I work with said that he had a friend who worked at a dealership and could get me a carfax for free. I wanted to know what had happened to the car, so I said hell yeah, let me know. I then found this out:
So of course I'm beyond pissed, I'm ready to catch another train up to Maryland and body that ****** who sold it to me, but can't figure out how it could be stolen when the dude's name was on the title. After calling the police and waiting a few days we figured out what happened. Officially, the car was stolen and the ******** recovered it but forgot to report it as found. Unofficially, considering the hidden damage to the car and the broken windshield right where the driver's head would hit, I believe the dumbass was driving drunk, wrecked it, bailed, and reported it stolen. Then the next day went and got it and didn't tell anyone. Well, it all got worked out, but thinking back on it, I could have gotten into a lot of trouble driving a "stolen" vehicle with fictitious plates across state lines.
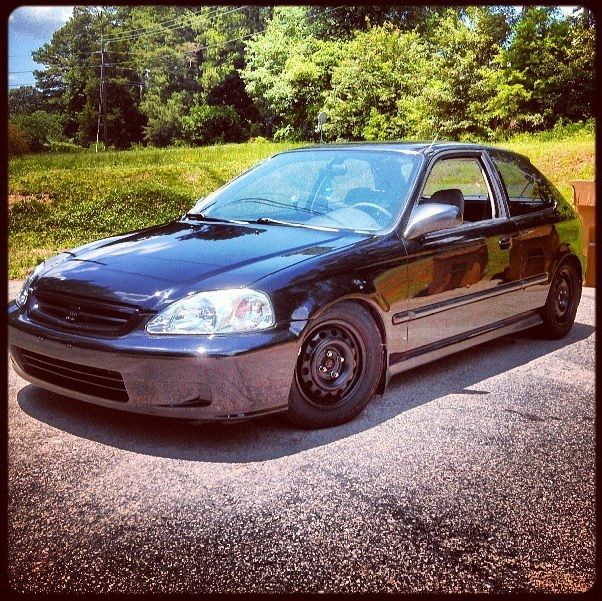
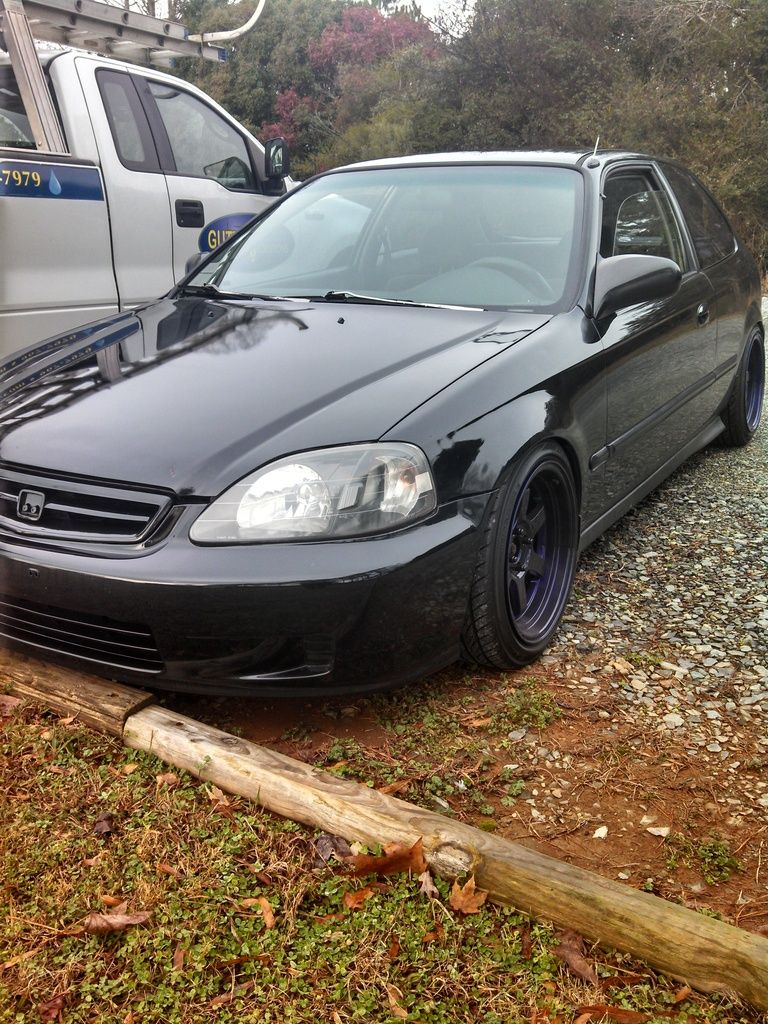
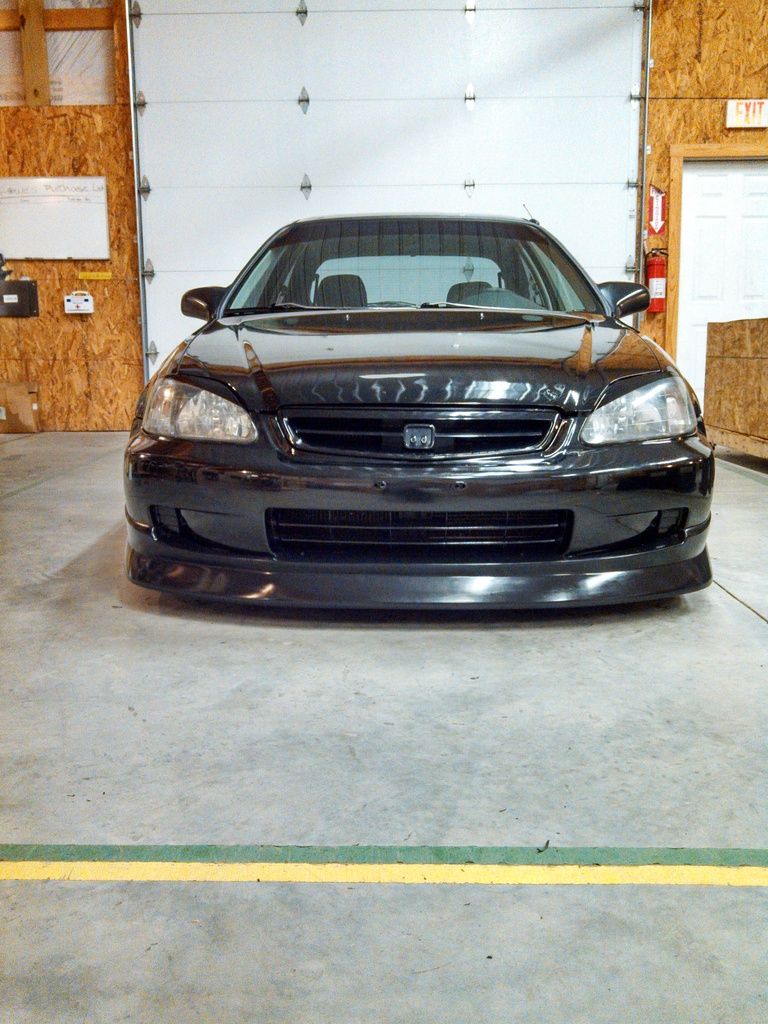
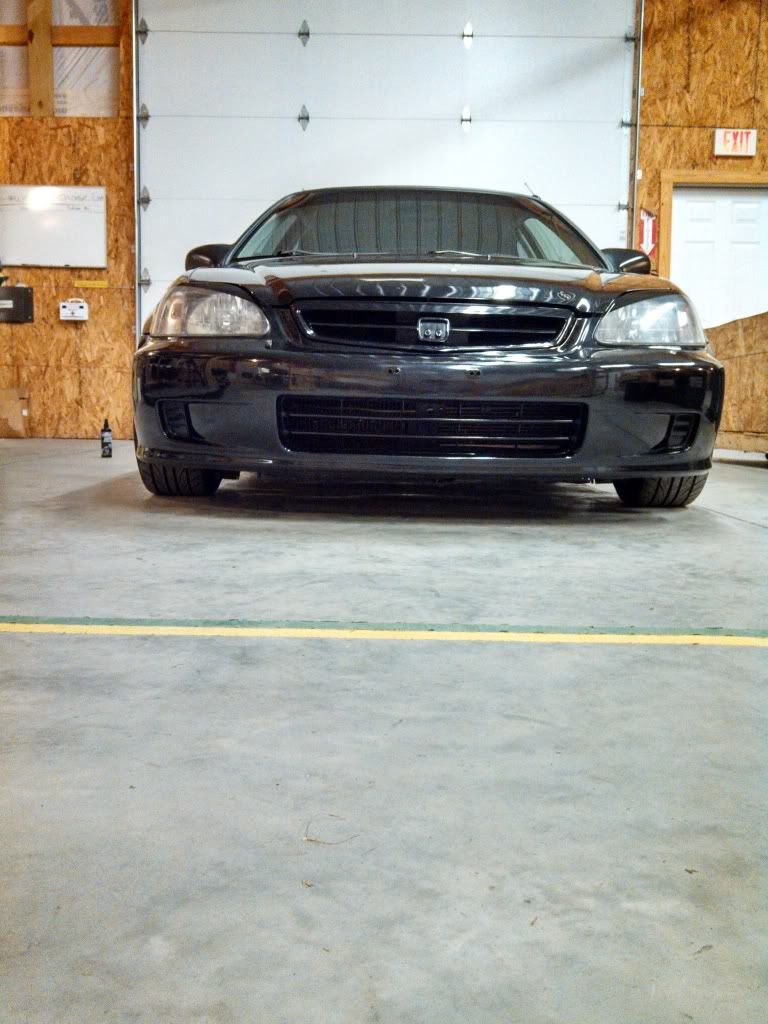
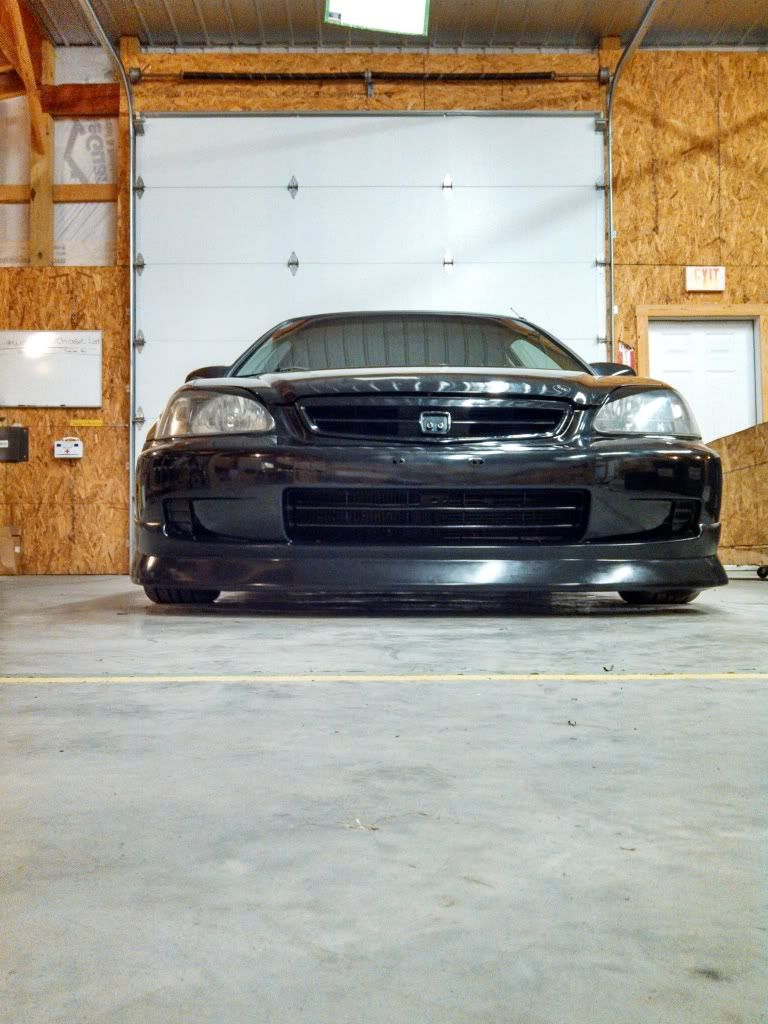
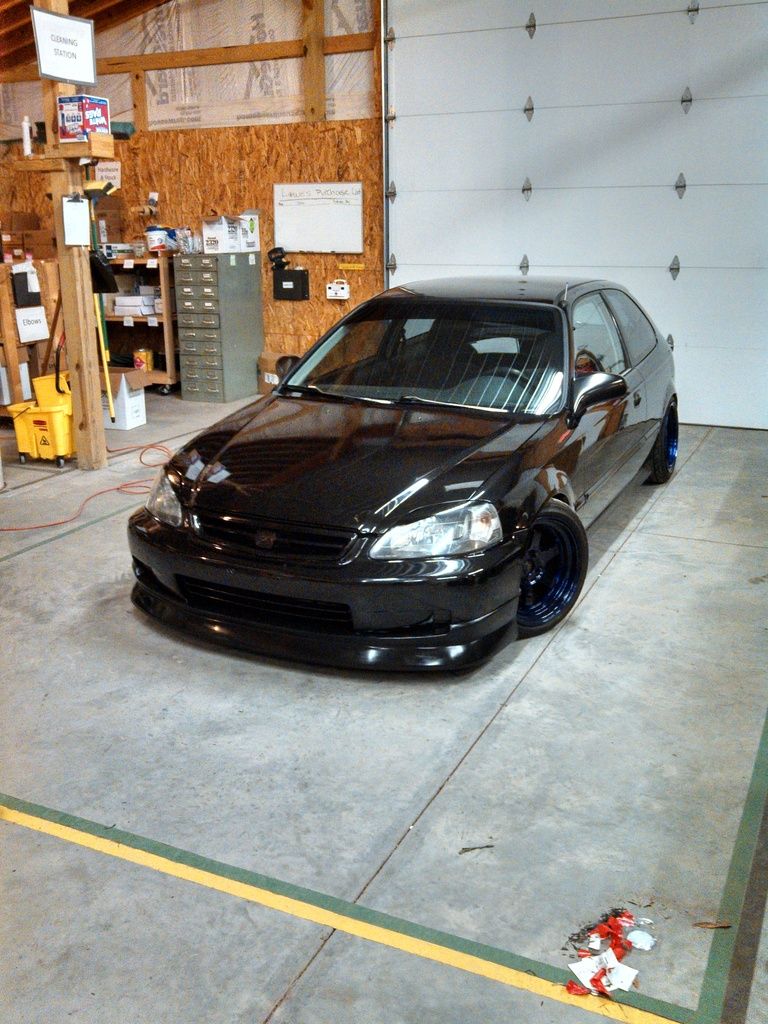
Here she is a few weeks after I got all the paperwork straightened out and after a bath and a wax, sorry for instagram quality:
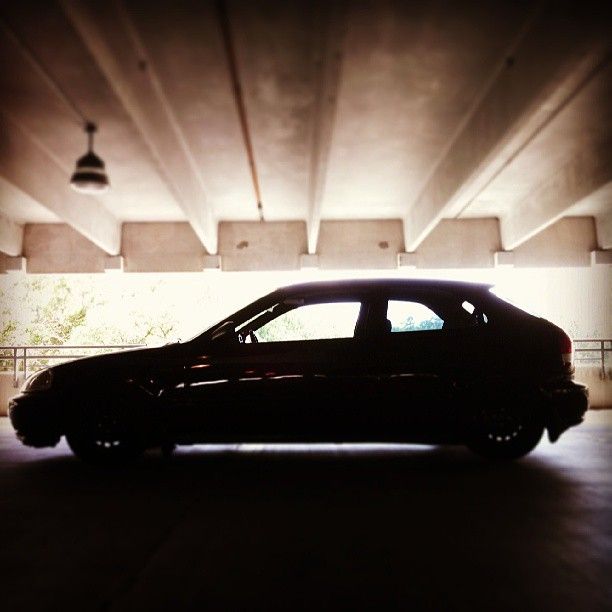
Here's an "artsy" photo I took, wanting to capture the lines of the car:
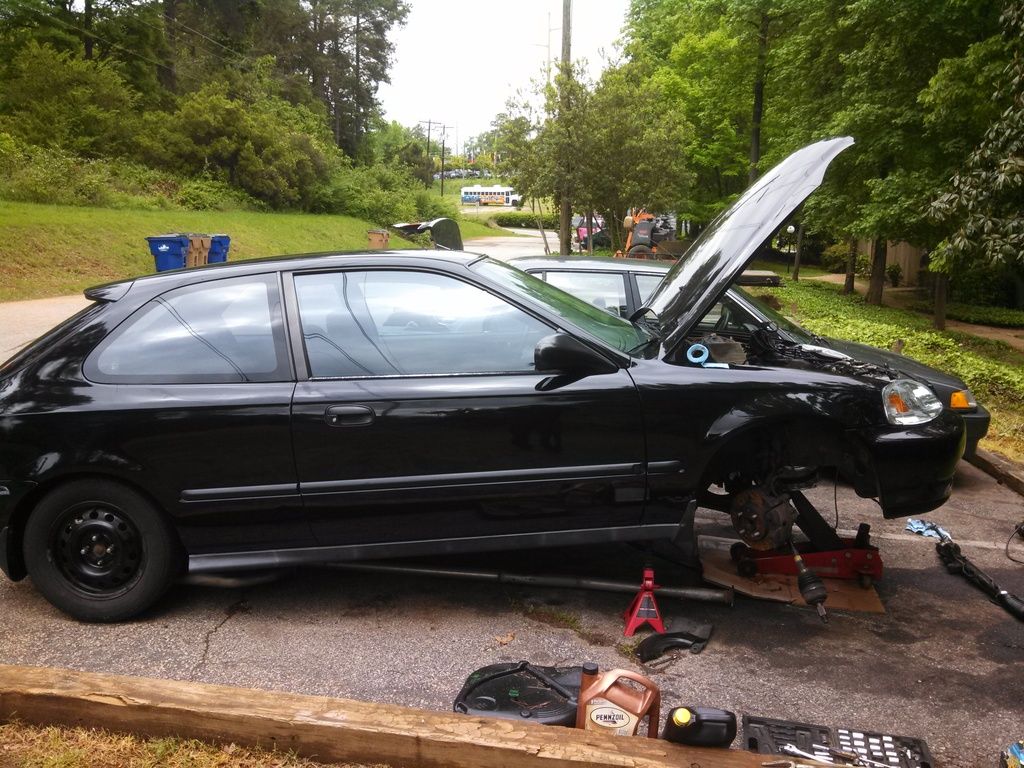
My plans for the car were just to make it a nice luxury ride (my previous car was a 1990 Civic hatch with a B16, no power steering, no AC, and open header...NOT a great DD) I knew it needed a lot of work, the throw-out bearing was making noise, (or so I thought) the power steering was leaking copiously, and the AC wasn't working. So I decided that THIS car would not get any shitty parts on it, only good stuff for my baby! So I embarked on a mission to fix everything that was wrong with the car.
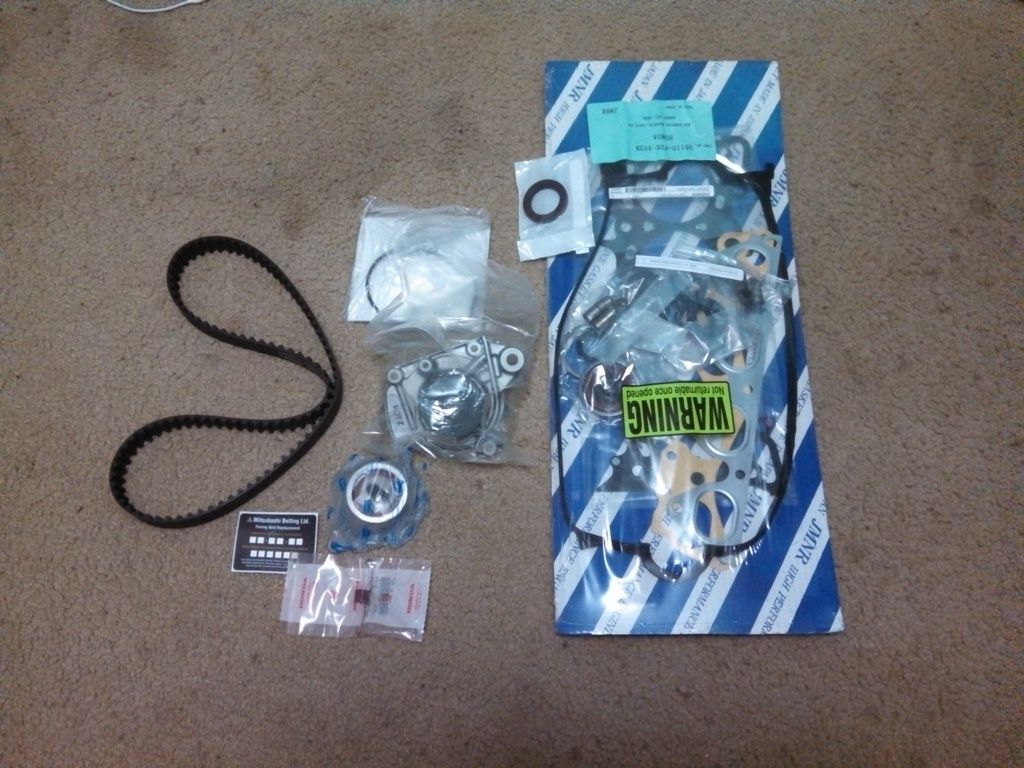
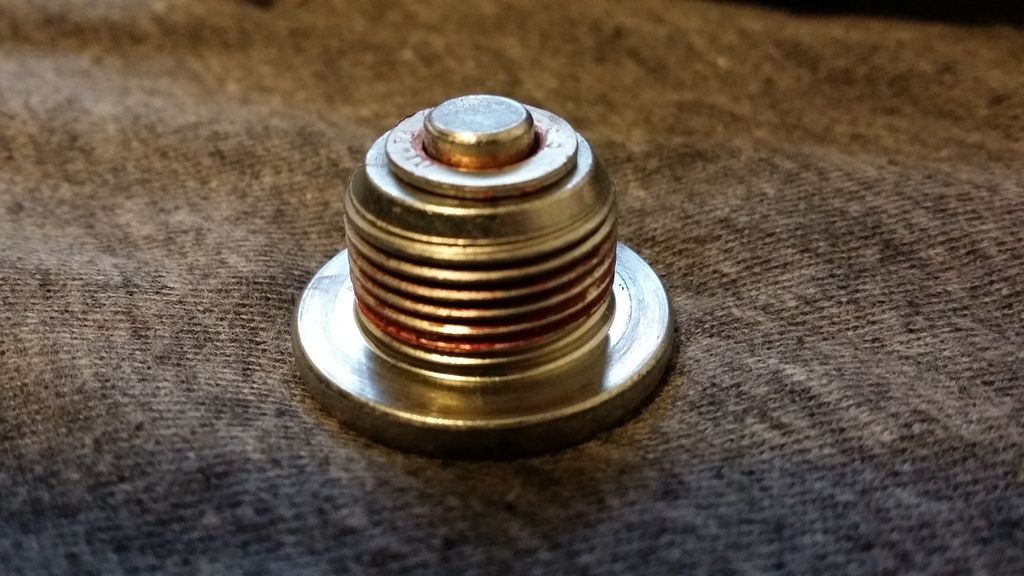
First up, a Gates timing belt, water pump, NTK tensioner pulley, and NOC crank seal, along with lots a various seals and gaskets:
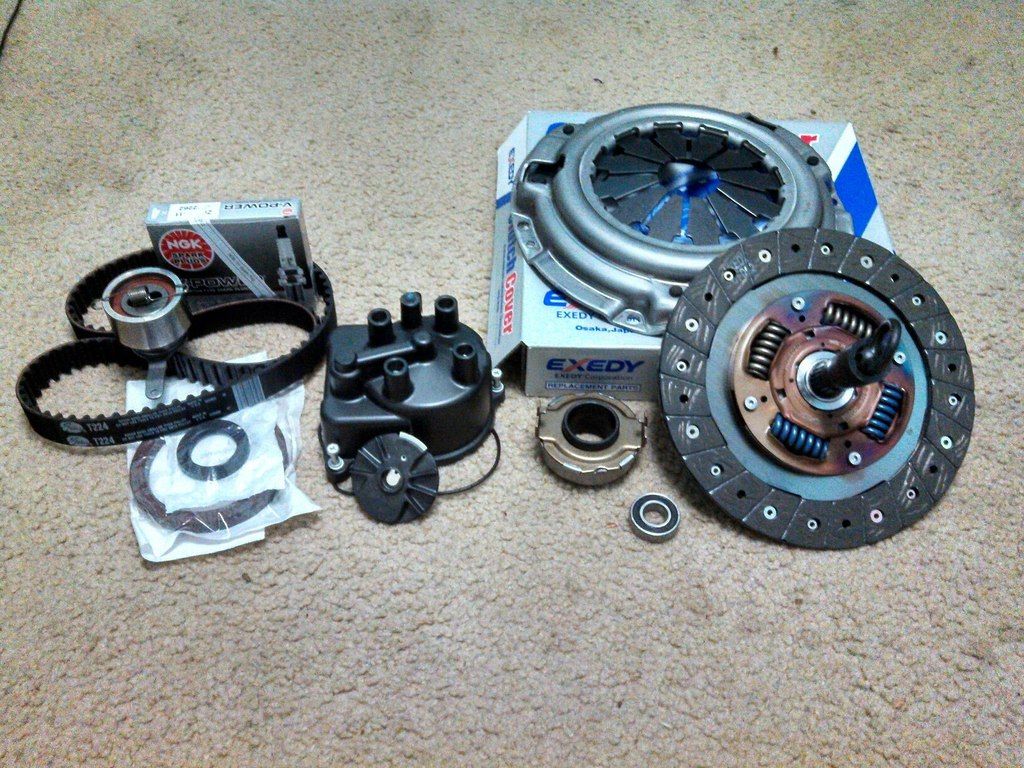
I also changed the clutch to an OEM Exedy with a new throw-out bearing and a rear main seal while I was at it:
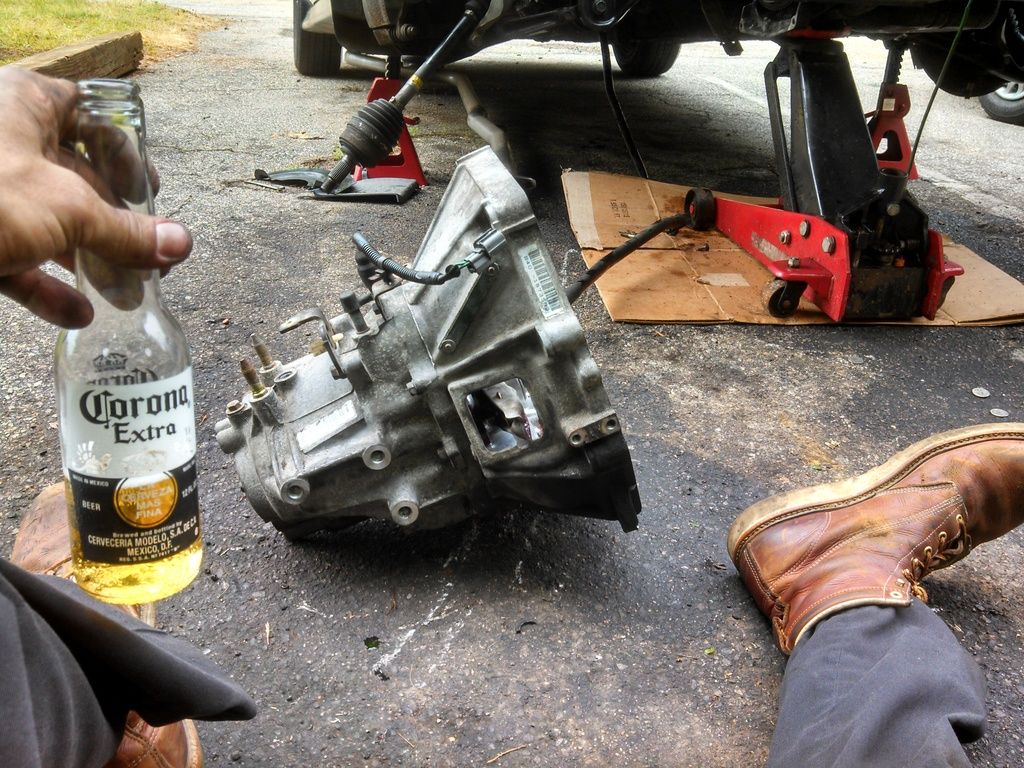
When the transmission comes out, it's ALWAYS beer-thirty! "You can have any beer in the house...as long as it's a Corona."
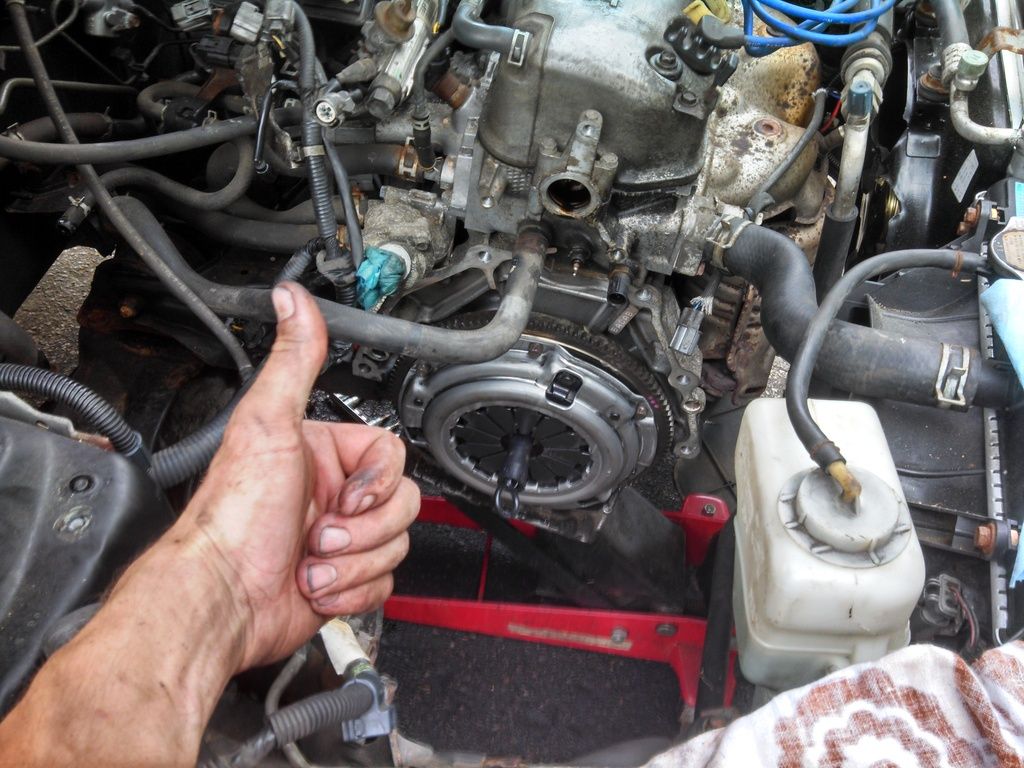
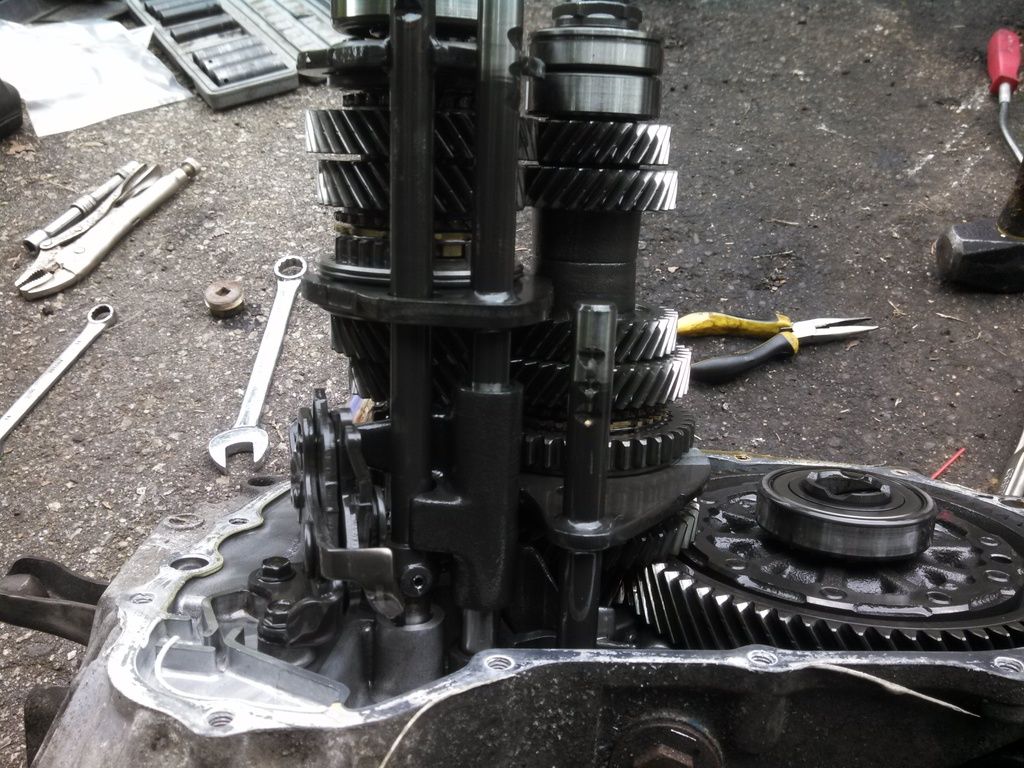
After putting everything back together again, I went to drive the car, only to discover that the bearing noise I had originally attributed to the throw-out bearing going bad was STILL there. After some research that I SHOULD have done earlier, I narrowed it down to a bad input shaft bearing. Remember, boys and girls: if the noise happens with the clutch IN, it’s a throw-out bearing. If it happens with the clutch OUT, and goes away when you press the clutch in, it’s an INPUT SHAFT BEARING. So I tore everything down again:
This scared the hell out of me…I don’t like messing with transmissions. But I have gotten pretty decent over the years as I’ve had to do them more. I went ahead and replaced the output shaft bearing as well to be on the safe side.
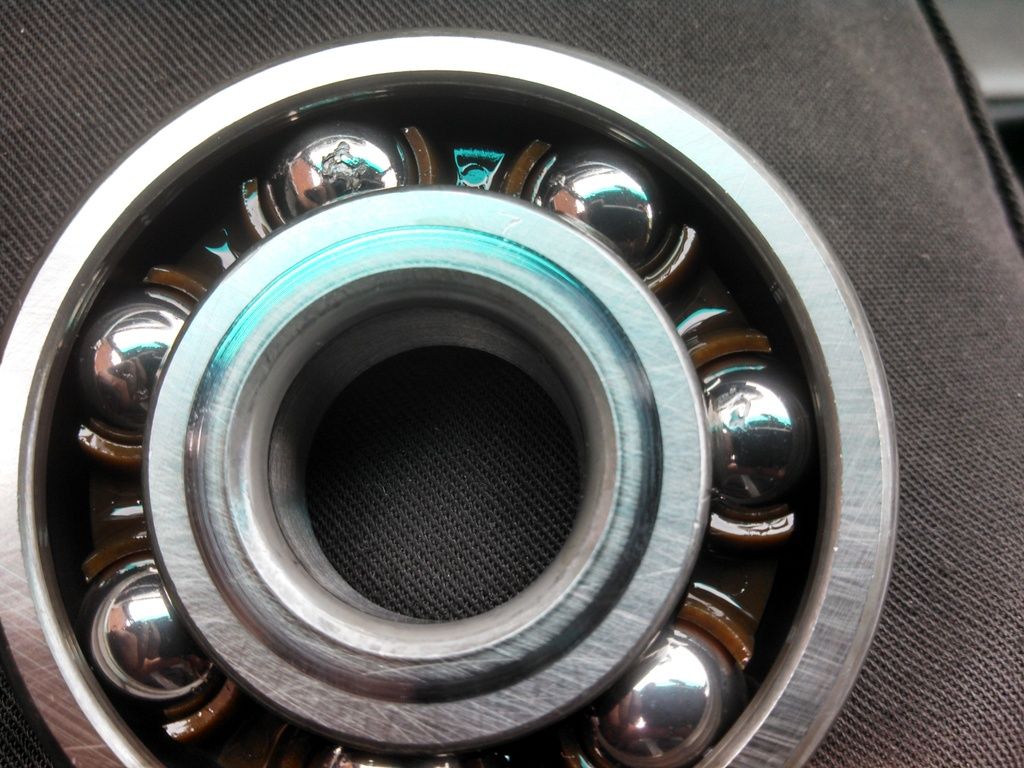
You can see the damage on some of the ball bearings, especially the top left one:
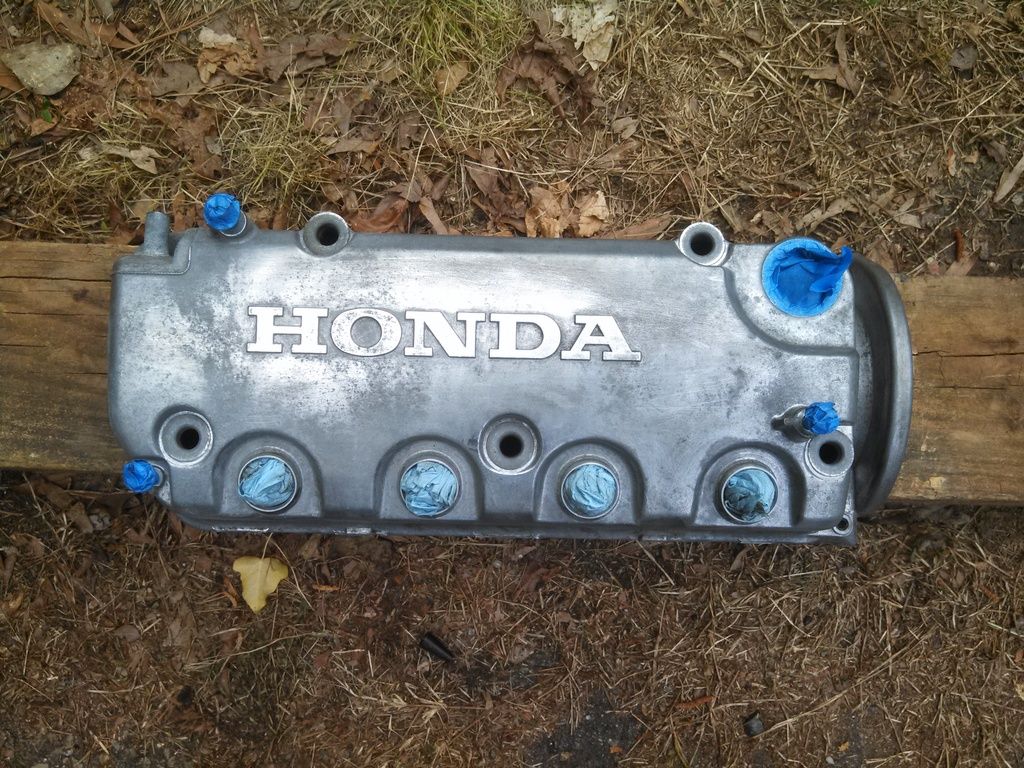
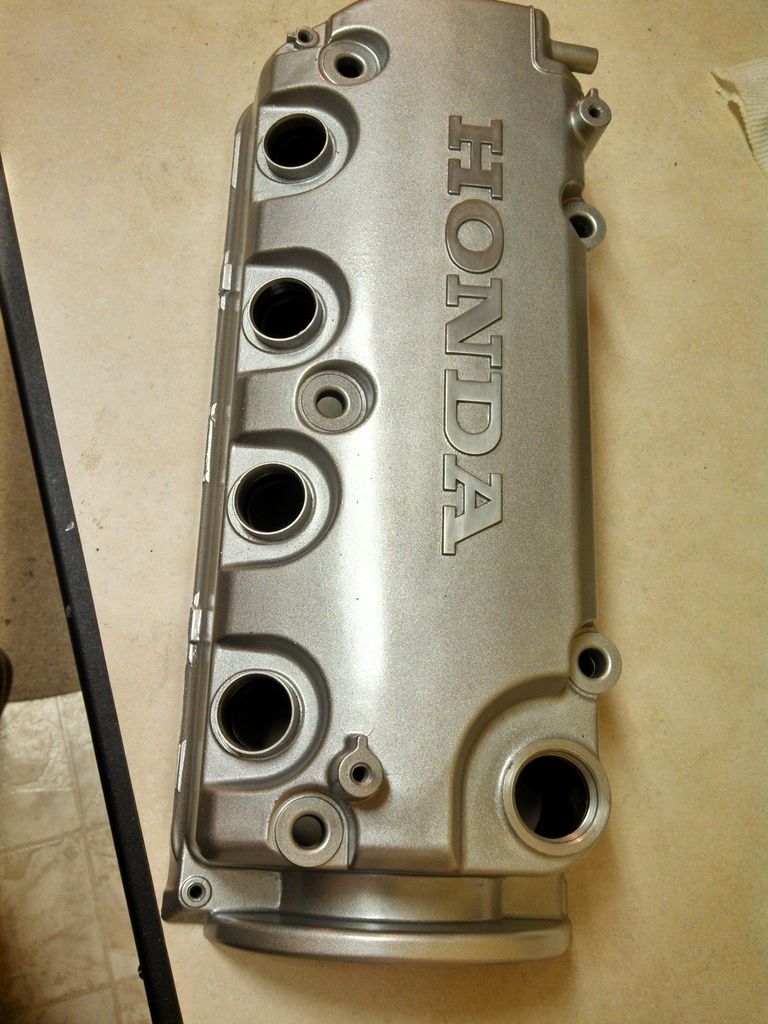
I also decided to clean and paint the valve cover since I hate a dirty, corroded valve cover.
Before:
After:
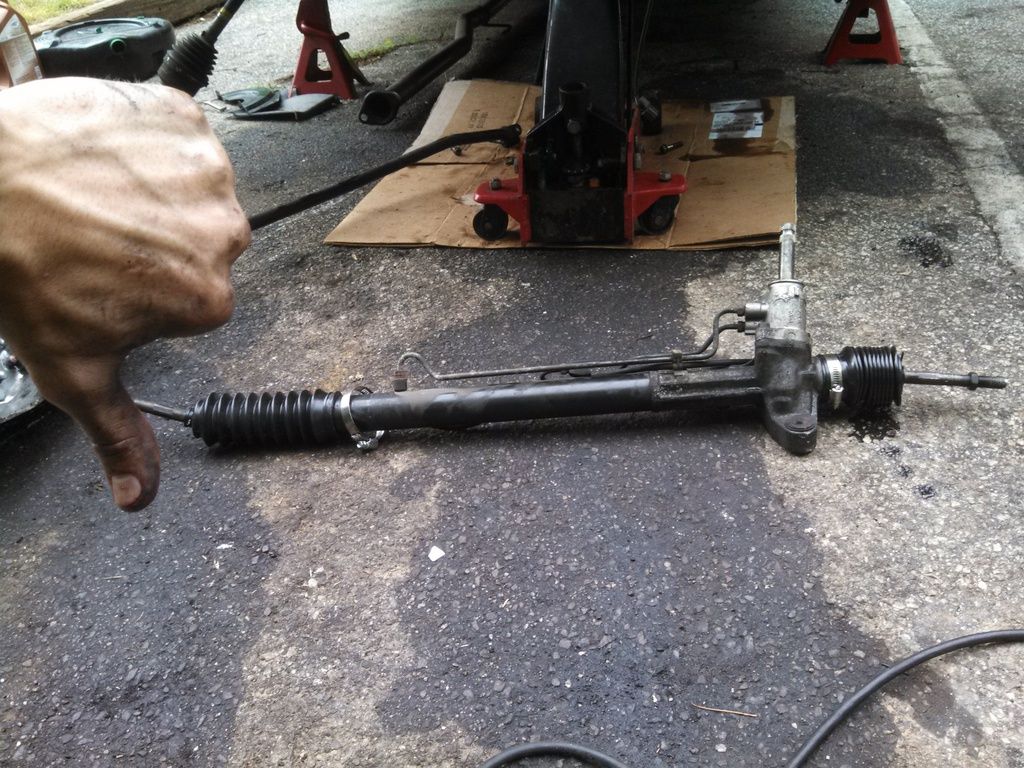
So as it turned out, if the power steering boots are leaking power steering fluid, you don’t need a new boot, you need a new power steering rack. SMH
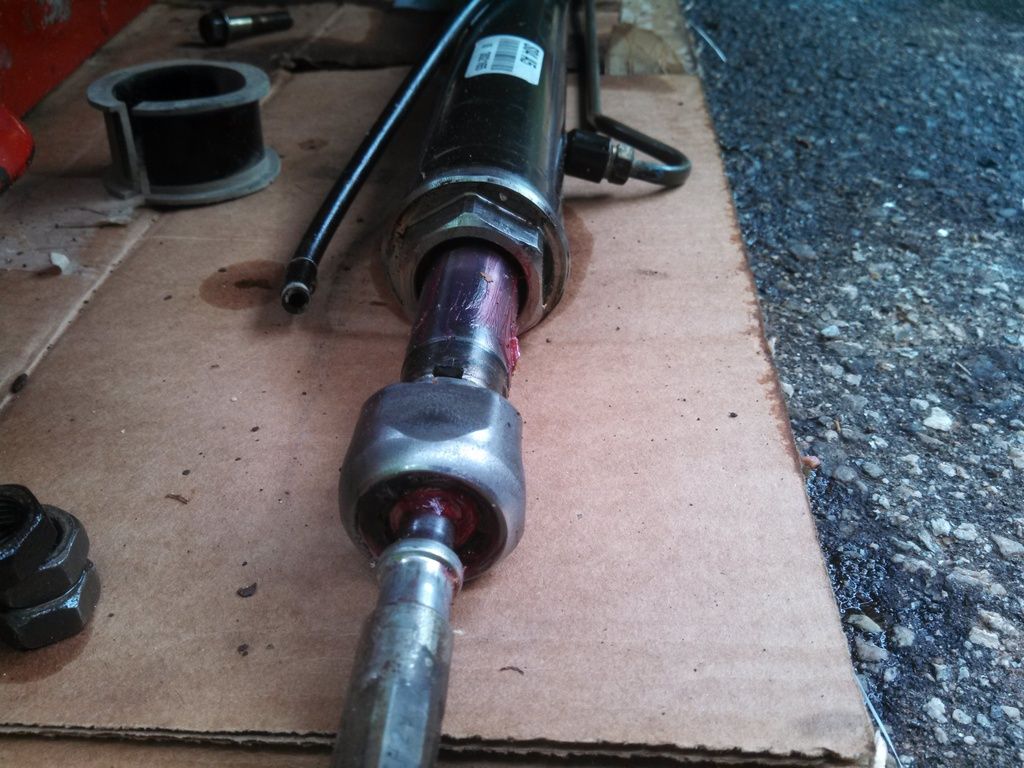
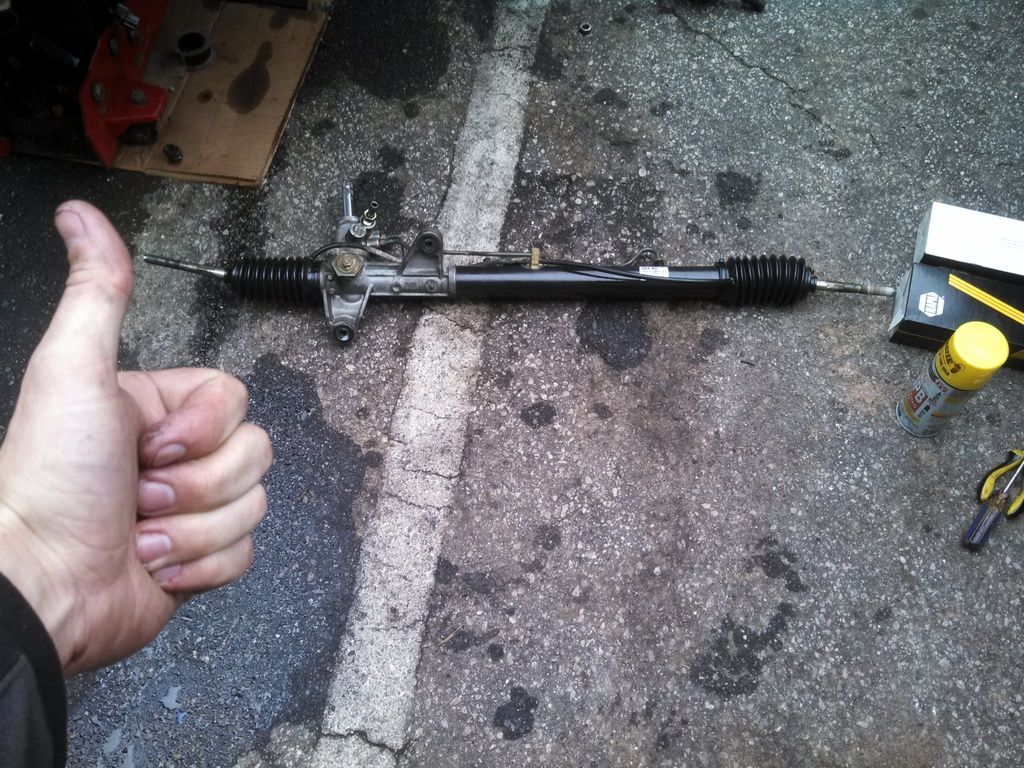
I ended up getting a low mileage one from an EM1, cleaned it up, regreased the rack and pinion, got new boots for it and put it in. This was my first power steering rack swap and it was kind of a bitch getting the rack out and then back in again.
Out with the old:
In with the new!
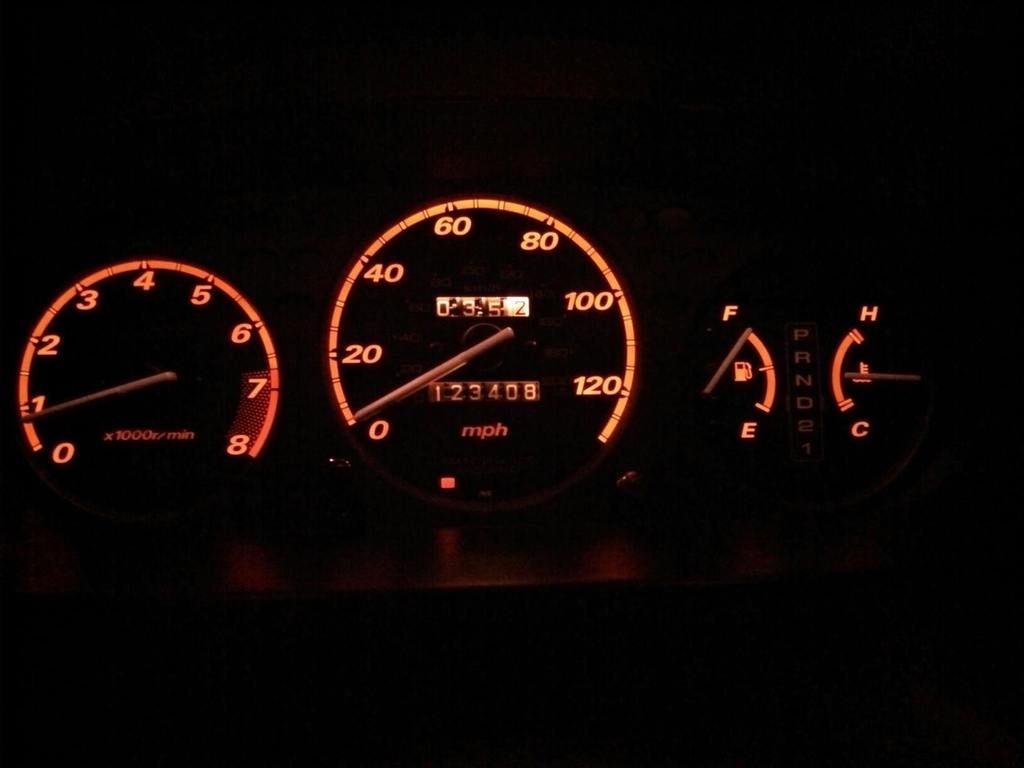
The old instrument cluster didn’t have a tach, so I found a decent cluster at the junkyard and swapped them out.
Later on I got a CRV cluster and swapped that in instead so everything lights up amber. I’m planning on getting either an Si cluster or doing an S2000 swap in the future.
I will continue this later, there is a LOT more that I’ve done to the car. This details up to about 1 month after I got it.
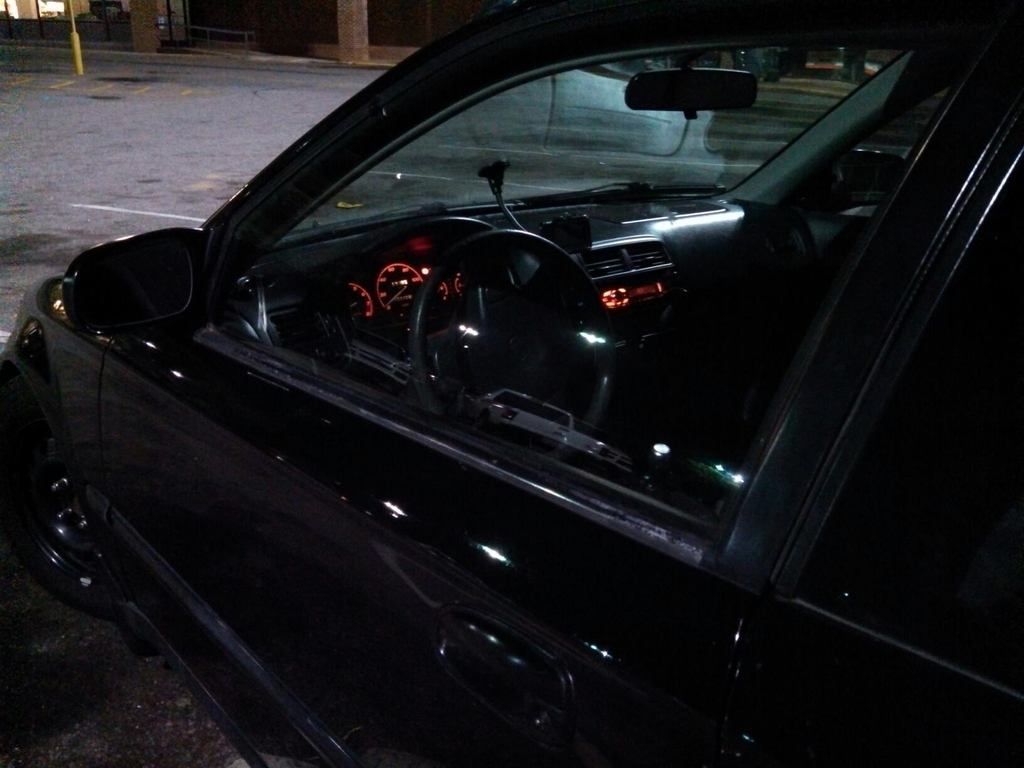
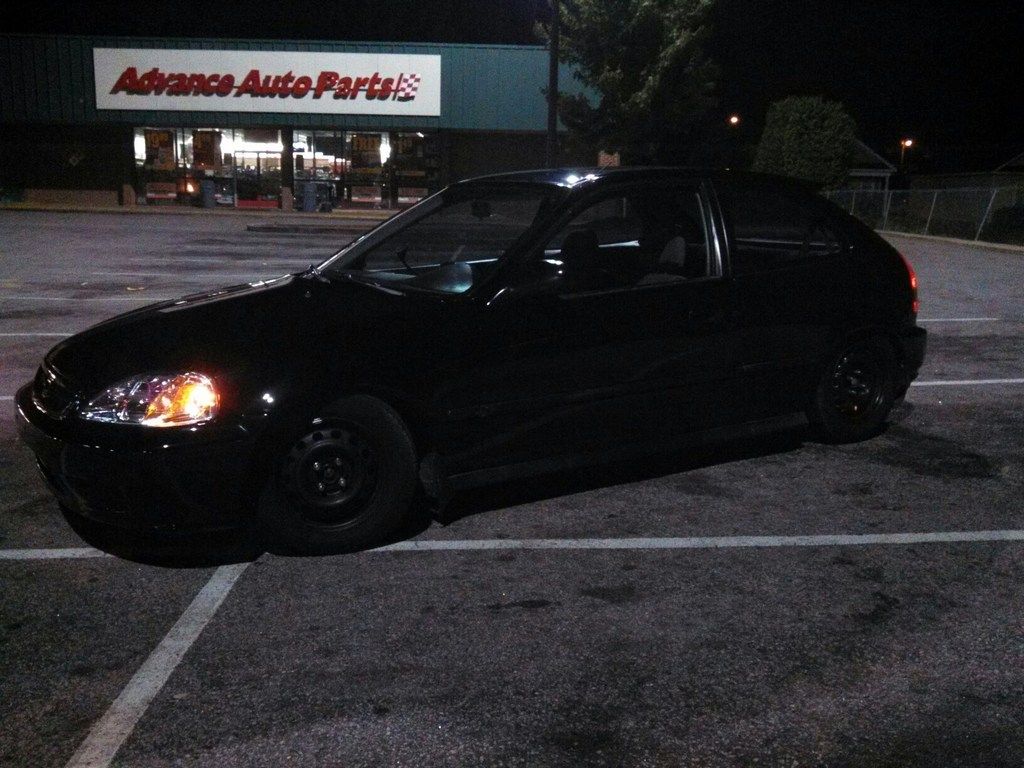
Here are a few more pictures of right around this time period:
I love the CRV amber lighting, it matches my head unit:
Here it sits in its natural enviroment, the auto parts store:
Re: The Misadventures of My 1999 Civic DX Hatchback Build
I think the problem begins when you bought that car from a guy named Pablo Escobar
http://en.wikipedia.org/wiki/Pablo_Escobar
Might be more than a spare tire in that hatch?..lol
Re: The Misadventures of My 1999 Civic DX Hatchback Build
Lesson learn here, carfax before buying the car. If there are any signs of body damage and the owner can't explain the situation than its not worth it.
Ok, here goes for the next few things I did.
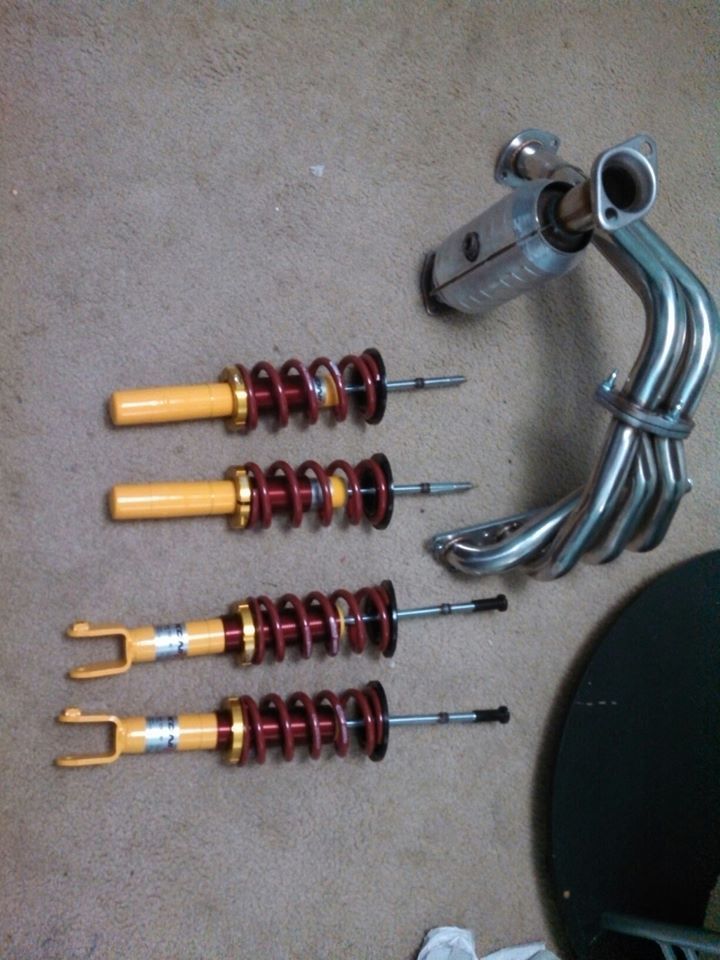
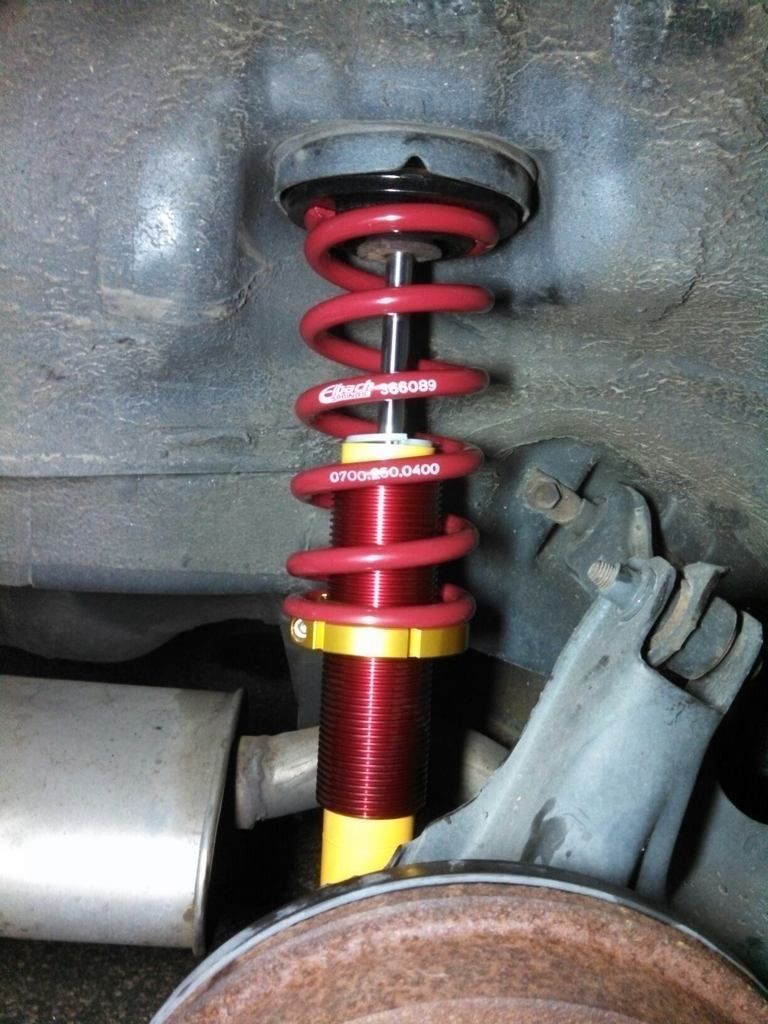
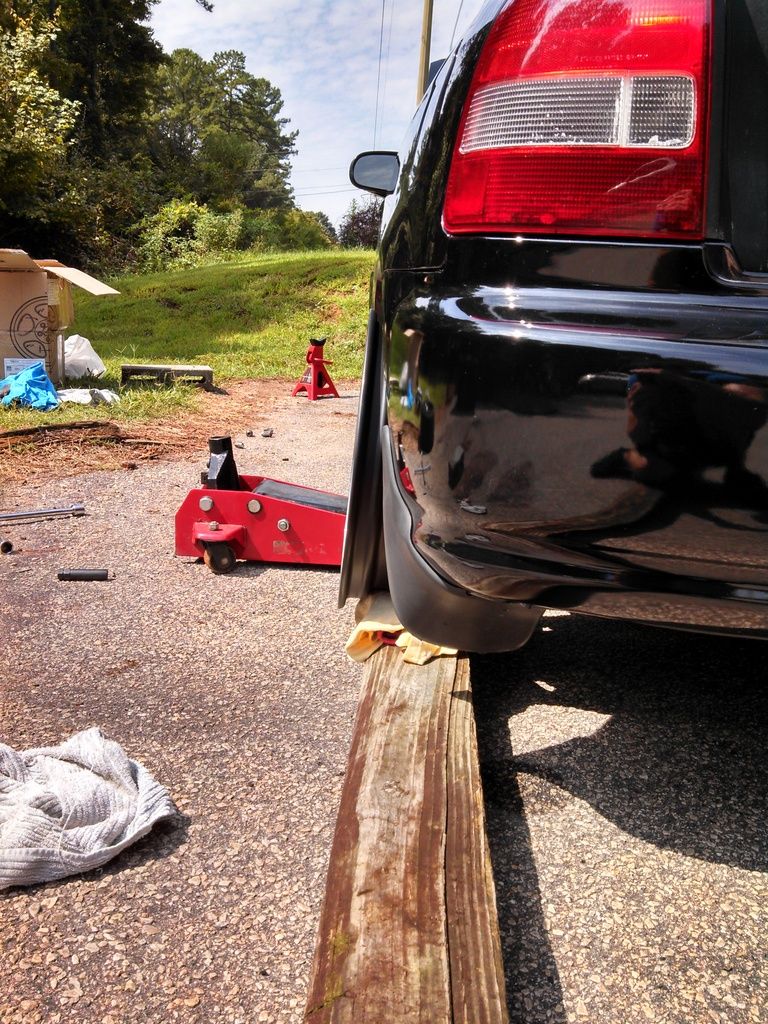
I did a lot of research as I always do when deciding on what parts to buy, and everything seemed to point towards Ground Control coilovers paired with Koni Sport shocks. I agonized over what stiffness of springs to get, and finally decided on 500 lbs/in front and 400 lbs/in for the rear. I figured if 500 was too stiff I could use the ones from the rear in the front and only be out what it cost to buy two replacement springs. I Seafoamed the car with the 1/3, 1/3, 1/3 method and I guess my catalytic convertor must have been on its way out because it threw a “below threshold” code for that that wouldn’t go away no matter how many times I cleared it, lol. So since I hated the rusty DX manifold anyway, I figured I would convert to an EX-style setup with the cat under the car…you know, like a normal vehicle. I purchased a cheap eBay header (remember, not going for power here, just wanted to change the header style) so the cat would fit. BTW, I highly recommend the Koni/GC combo, I’ve had nothing but good experiences with it. It rides smooth unless it’s choppy pavement, that’s the only time it gets a little harsh. And it seems to handle pretty well.
At this point, my goals for the car were simple: try to get 40mpg, look good, and have AC in the summer. This would change later on, as you will see…
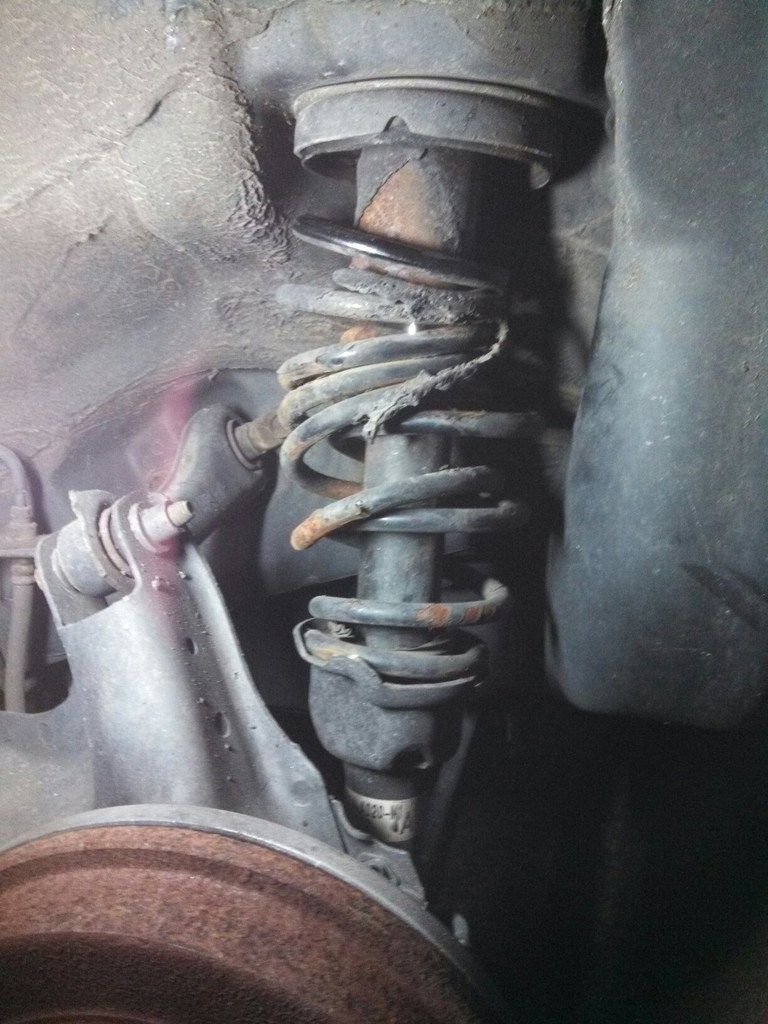
When I got the wheels off to put the new suspension on and I saw the super legit suspension setup that it already had:
That’s right, ladies and gents, the ultra-MDM (Mexican Domestic Motors) and super rare, rice flavored Blowtorched Springs with Stock Shocks combo! As you might imagine, I was bummed that MY suspension setup would obviously be a downgrade, but as always, I soldiered on somehow! This was the worst one, the spring had actually snapped in half and was just dangling, leaving me riding on only a blown shock. No wonder the car handled like complete and utter poop.
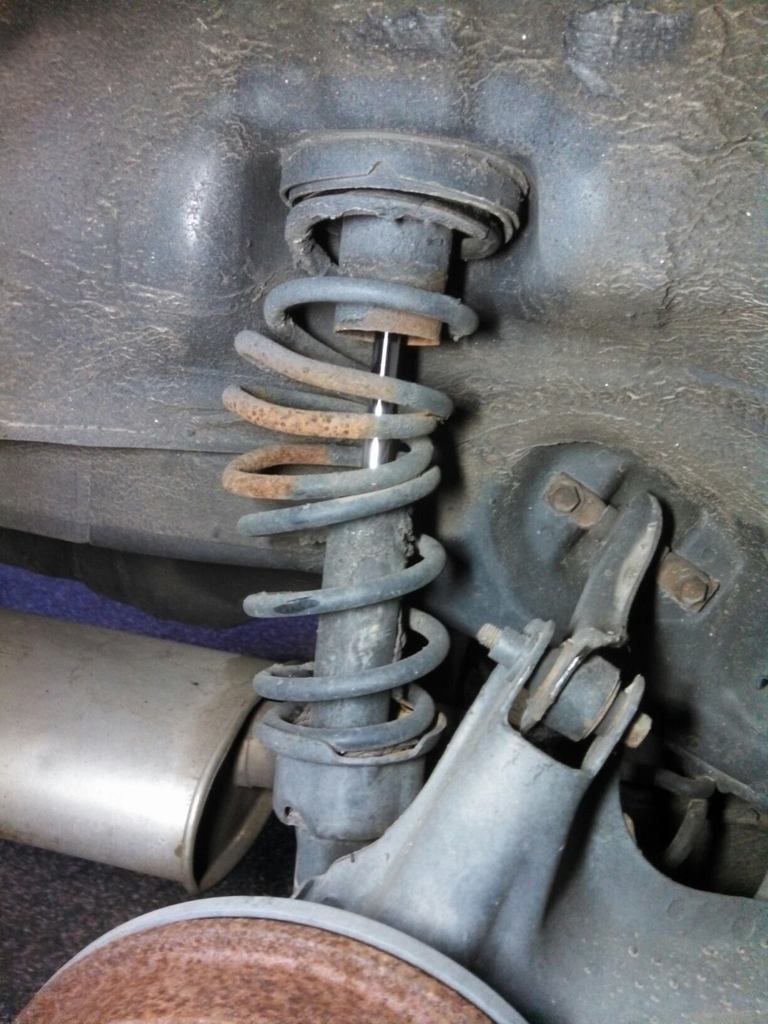
Here’s the other side, before:
Here’s how it looked after:
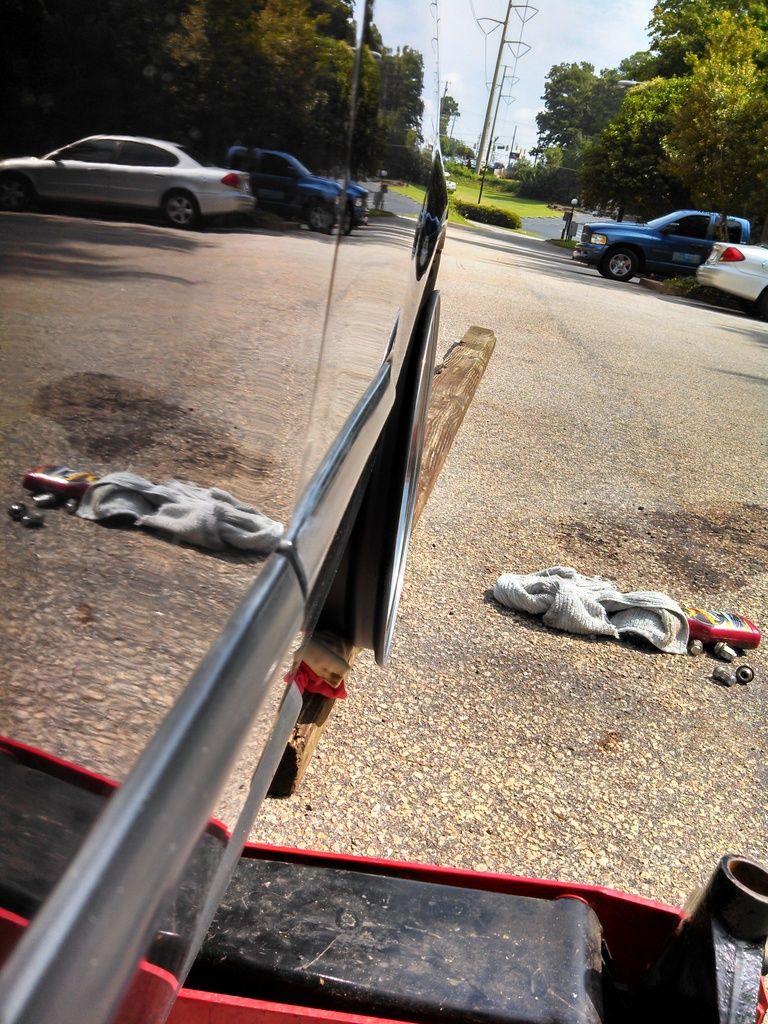
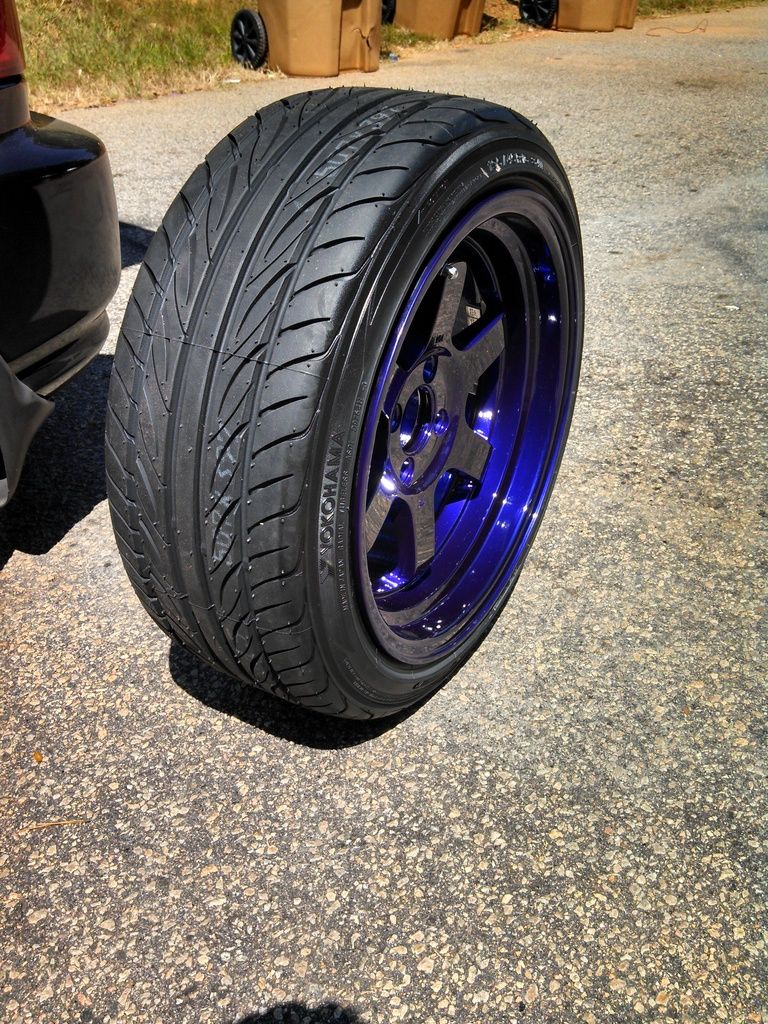
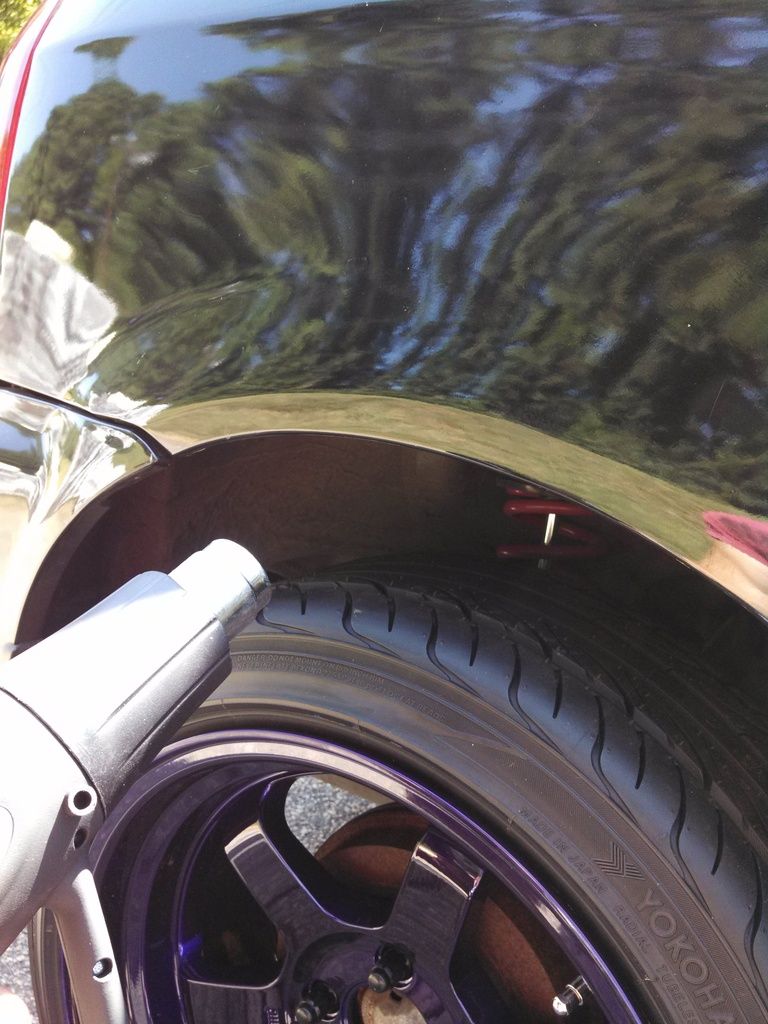
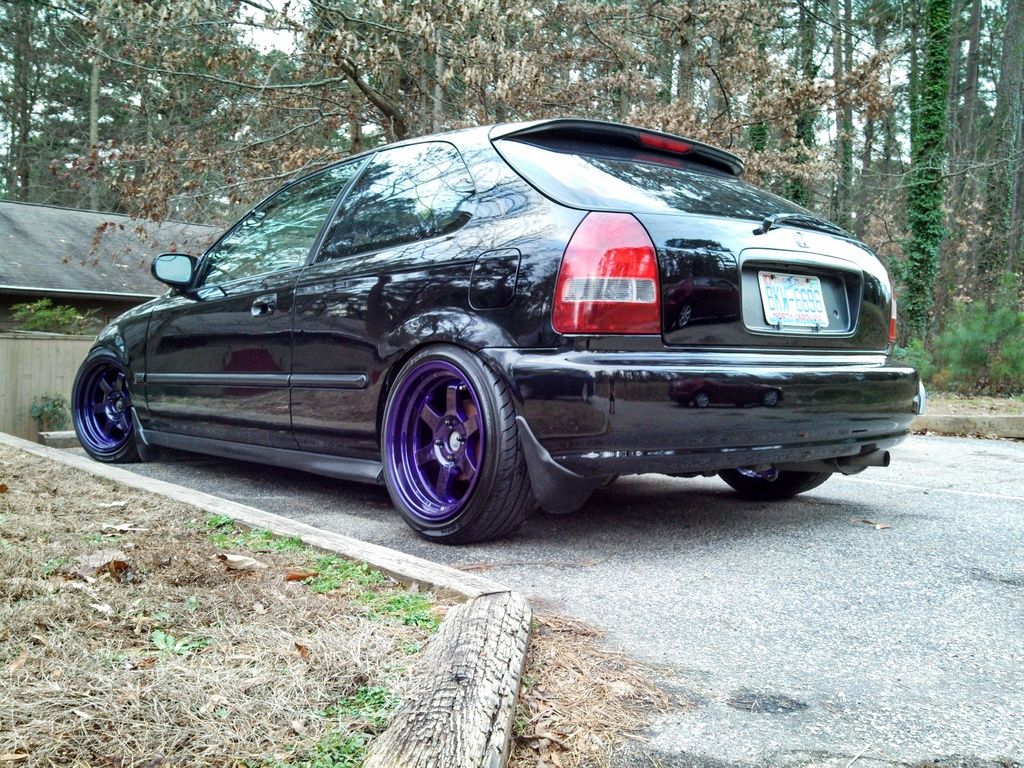
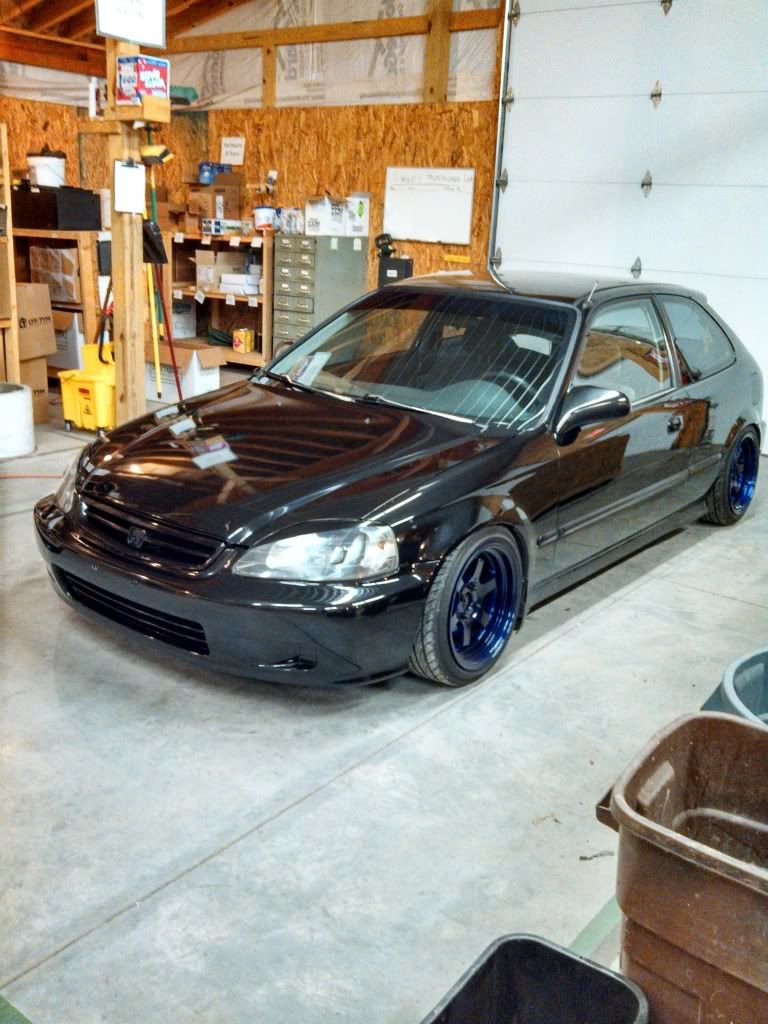
Now that the suspension was settling in, I needed some wheels. Can’t just roll lowered on stock steelies, no sir! So I ordered 4 Rota wheels in a Grid-V flavor, the color didn’t matter to me as you’ll see in a moment. The specs on the wheels are 16x8 +20. I decided to go with 16’s as I have driven a very low car before and it’s really just a pain to have to watch out for bottoming out your header and whatnot, but I DID want to fill the wheel arches and have a bit of a “stanced” look. Not stanced to the point of undriveability, just to the point where it looks good but is functional. I call this “Function Flush”.
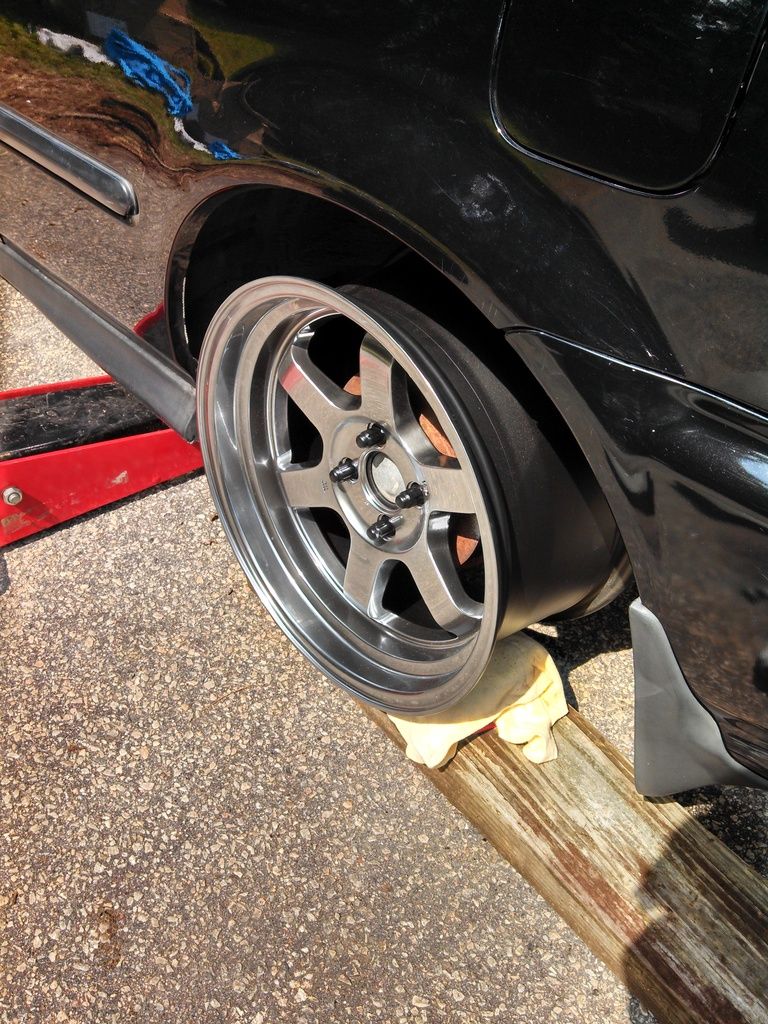
Here I am test fitting the wheels:
Looks pretty dead-on to me! I was happy with the fitment for sure. Now I just needed to make sure there wasn’t going to be anything getting on the way of the new wheels and tires, so I banged that inner lip flat on all four corners:
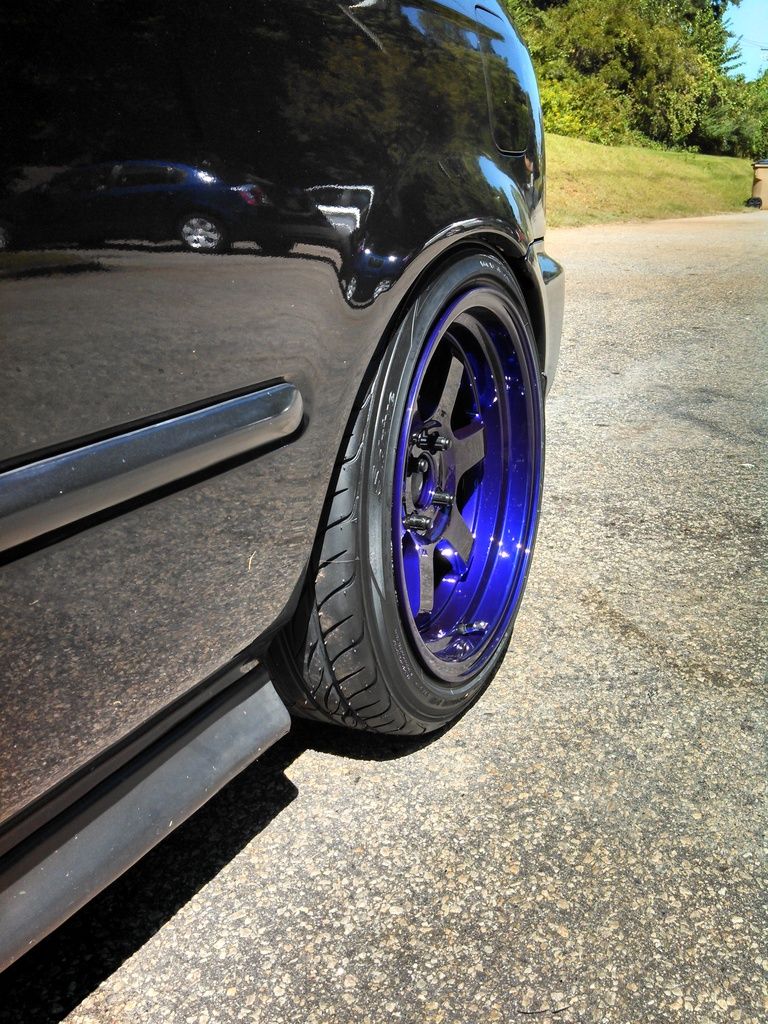
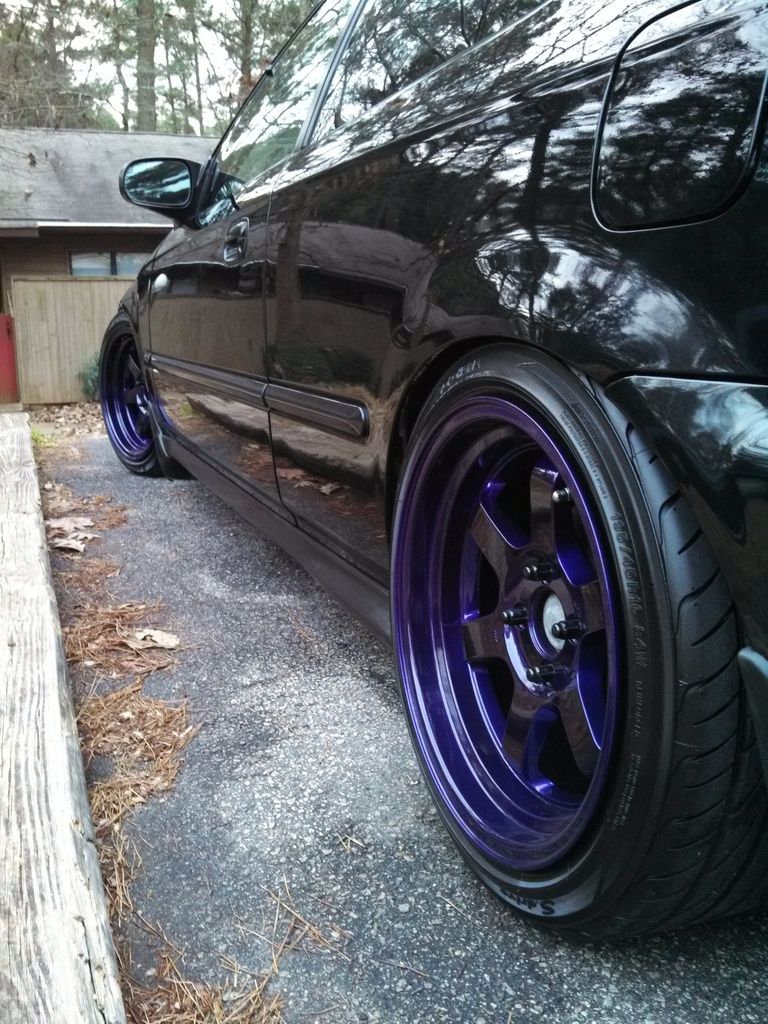
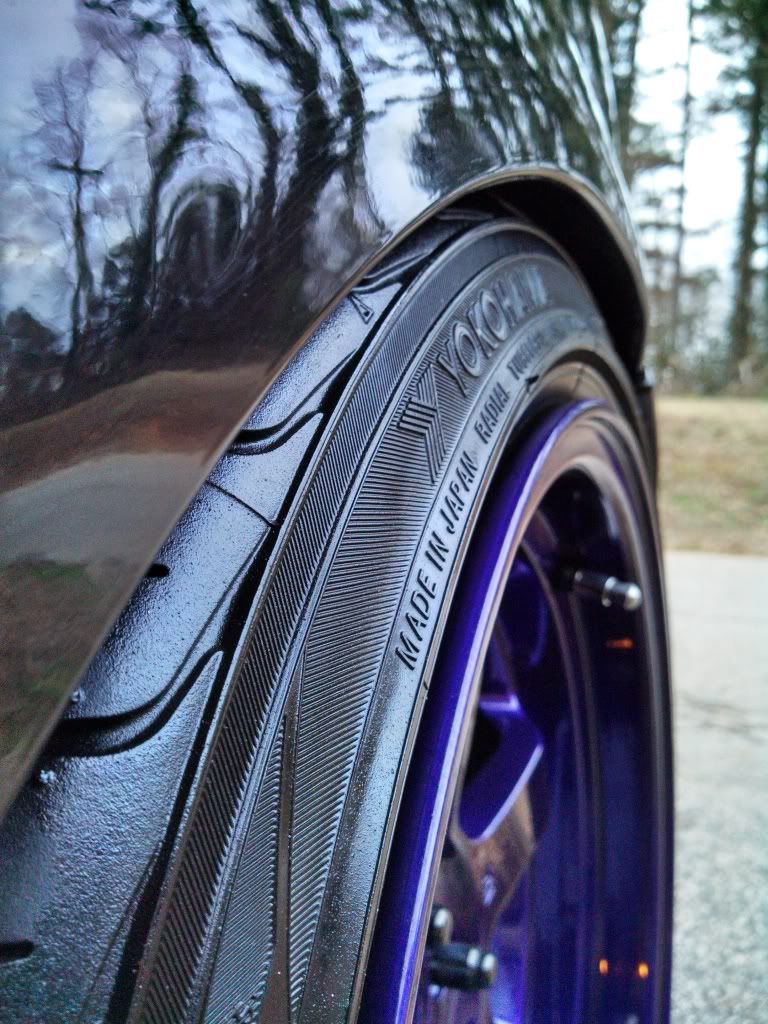
Now I just needed to get them powder coated the color that I really really wanted…Candy Purple! I know it looks kind of blue, its actually really hard to get the purple to show in pictures for some reason, it always looks blue-ish. Either way, they came out great I think. The tires I went with are Yokahoma S.Drive 195/40/R16. They are literally like the only tires I can get in that size, but they stick really well, last a decent while, and aren’t too pricey.
Of course to get them to fit perfectly, I had to roll and pull the fenders just a bit, remember kids, ALWAYS USE A HEAT GUN FOR ROLLING FENDERS! If you don’t, the paint will definitely crack. I found this out the hard way, luckily it was only the paint on the inner lip that started cracking before I decided to go and buy the heat gun. I rolled them with the baseball bat method, if you take your time it works great and won’t mess up your fenders.
Here they are in their final resting place…although the way I drive they don’t get a lot of rest, lol.
I’m not a huge fan of the Rota center caps, I ended up taking them out.
I am not a photographer, but I try to capture the essence of stuff.
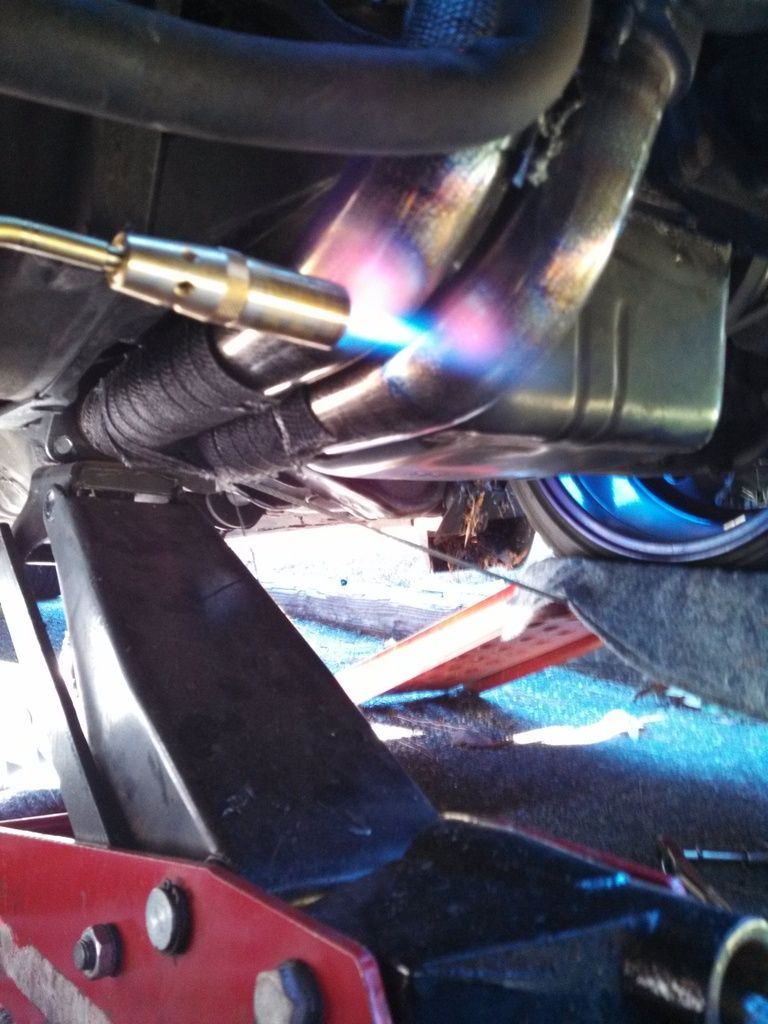
So I mentioned earlier about how I changed the header and cat to an EX style. I wanted to wrap the header in heat wrap and spray it with the black silicone spray to keep everything under the hood low-key. Here is where I ran into issues: if you buy an ebay header, you get what you pay for. “How can they screw up a bunch of tubing?” I hear you ask. Fitment. Fitment is how they can screw up a bunch of tubing. When I bolted it on, it cleared the oil pan well, too well in fact. At the junction where it does a 90* bend to go under the oil pan, it actually goes to like a 100* bend and drooped down and made the rest of the exhaust connect at an angle. At the same time, it twisted a little to the passenger side. This can be solved with MAPP gas, a come-along, a solid anchor point, a jack, and ingenuity. Bolt the header up, wrap the come-along around the exit tube, put pressure on it with a jack from the bottom, thread the other end of the come-along out to the anchor point, (I used my brother’s truck) and start heating it up with the MAPP gas. Propane won’t work, it doesn’t get hot enough.
Heat that mother up while ratcheting the come-along and keeping tension on the jack pushing up…after the metal heats up enough, it will start to bend to where you want it.
Like a GLOOOVE.
I’ve been looking back to try to find some before and after pictures, because it looked DAMN good, but all I have are the before, so **** it. Rest assured, it looked very clean, not ghetto at all as this may have made it sound. Remember, I’m writing this almost two years after the fact, I know I took pictures but I can’t find them anywhere. I will update more later, it takes a long time to find these pictures and try to put everything in chronological order.
Re: The Misadventures of My 1999 Civic DX Hatchback Build
Looking nice. IMO I don't think you overpaid too much (maybe a few hundred over) for a low mileage (16 years old) hatchback. Should last you a long time if you don't rag on the engine too much.
Re: The Misadventures of My 1999 Civic DX Hatchback Build
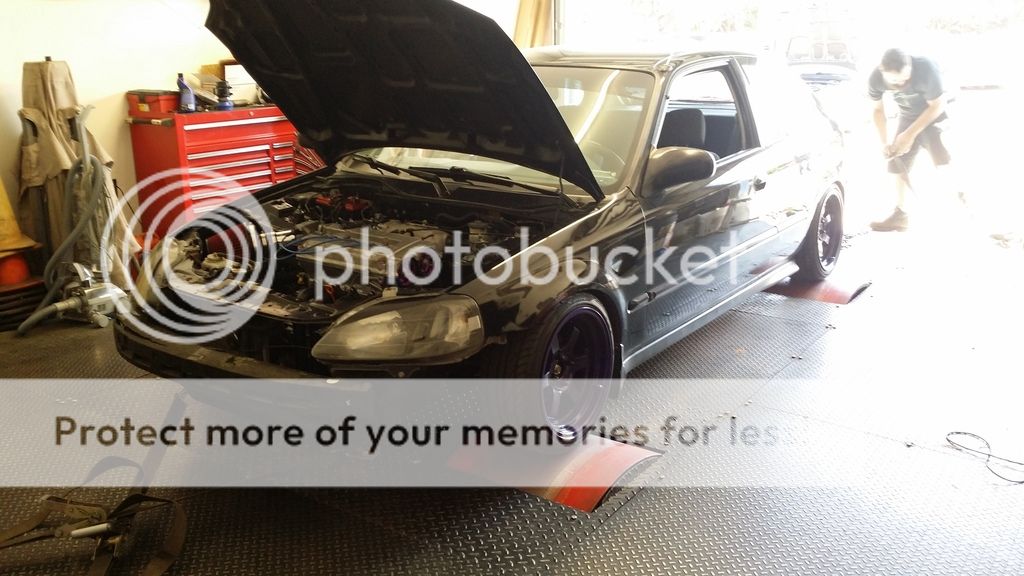
Thanks for the comments, guys, I appreciate the sentiments! Yeah, Jimi...don't get your hopes up, lol. There are still updates to come to bring this build up to how the car sits today.
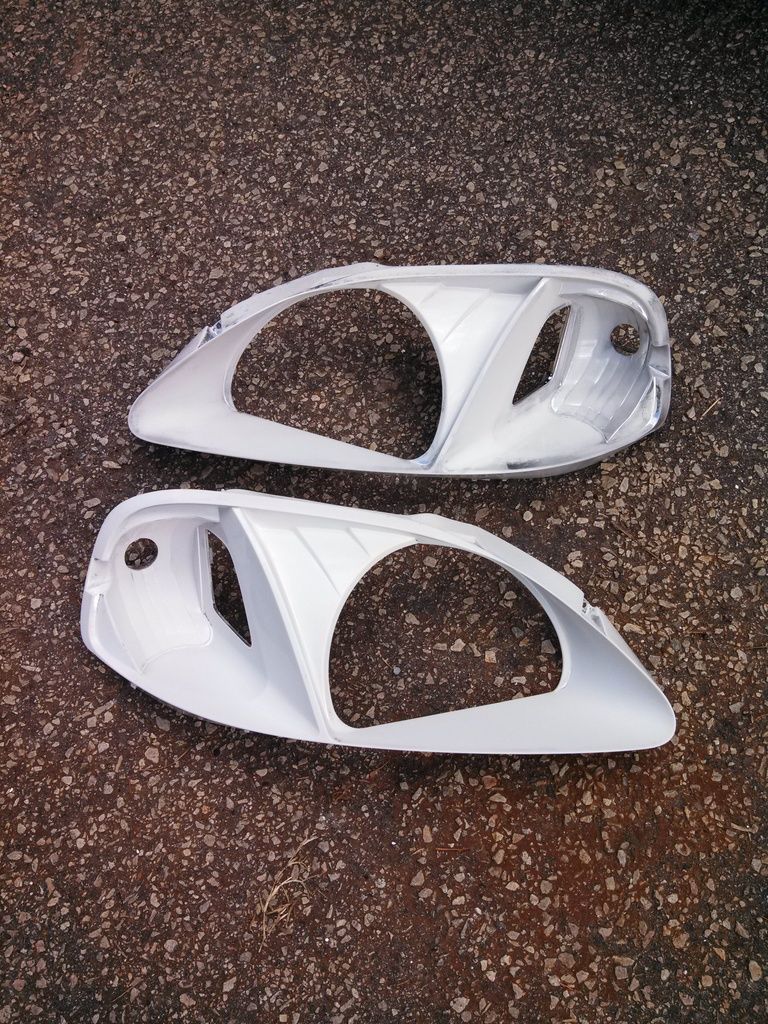
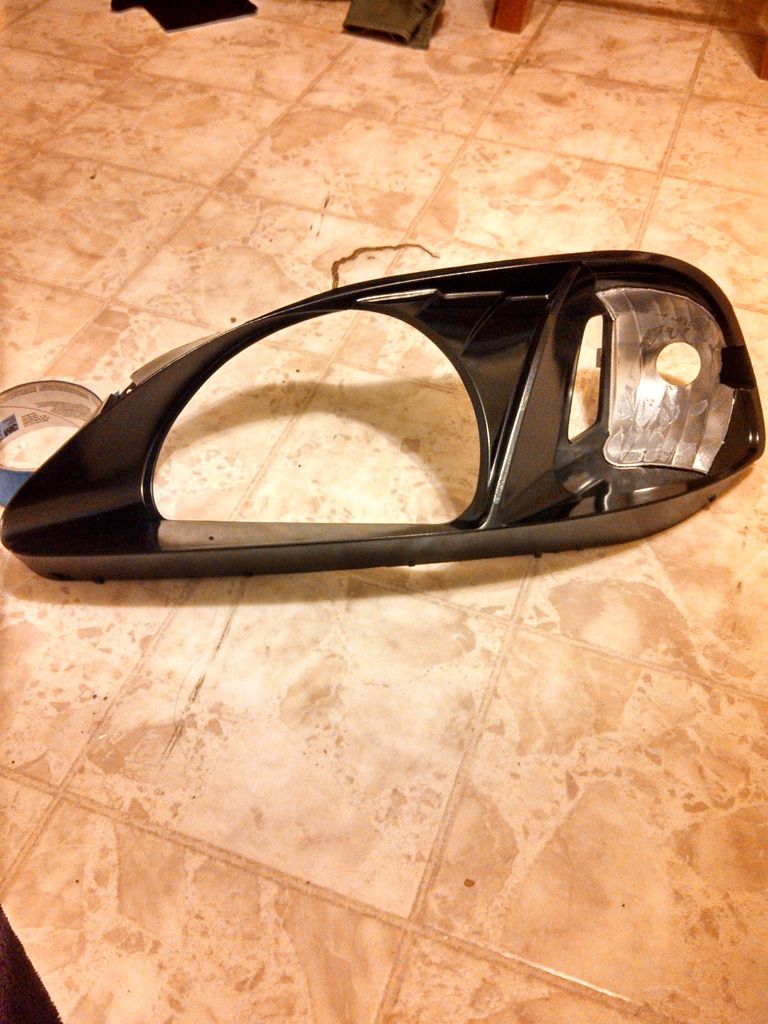
So at this point, I was decently happy with how it was looking, but it still looked basically like a stock Civic, lowered with wheels. I drove it around like that for a while, about the only other thing I did was paint-match the inside of the headlights, I thought it looked came out pretty good except that as it turns out, paint stripper gets EVERYTHING off, even the chrome for the turn signals.
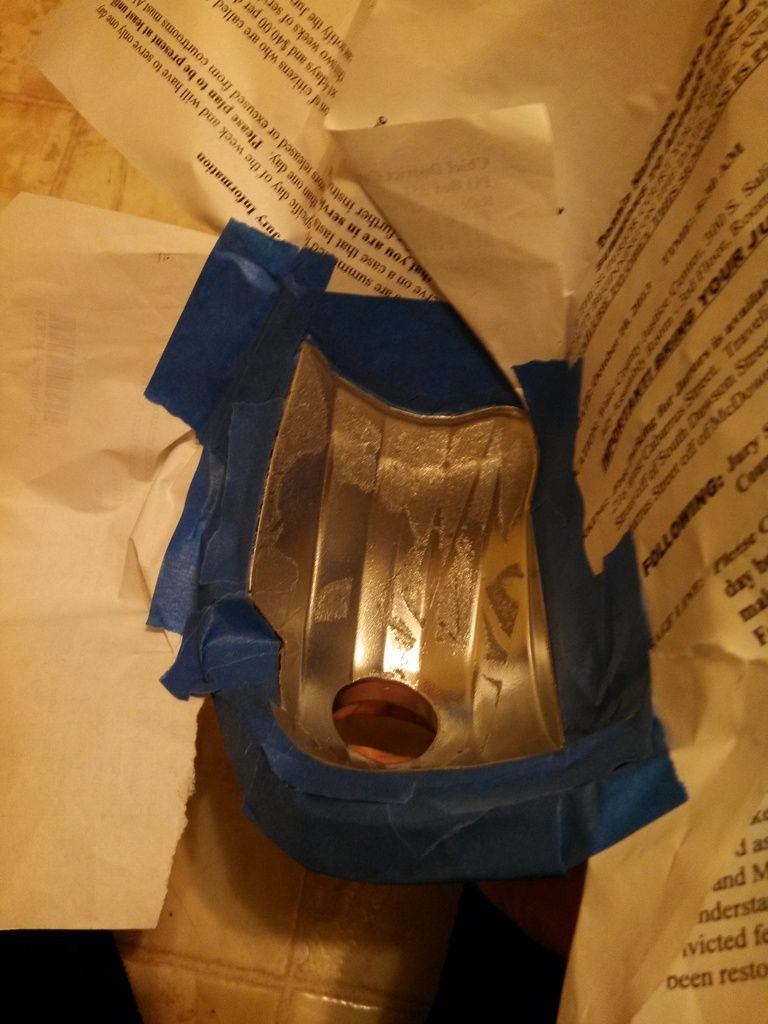
The only problem with this is that there is nothing commercially available in a spray or even in a foil that I could find that could replicate that chrome. So I painted them silver, which I wasn’t much happy with but I didn’t want to buy new headlights yet. And as you can see here, I fucked up in taping off the silver part.
Well it would just have to do until I bought new headlights, which I actually still haven’t done yet. I’m planning on buying a decent set of very lightly smoked ebay ones and retrofitting them with projector lenses and HID bulbs. We’ll see how that goes, lol.
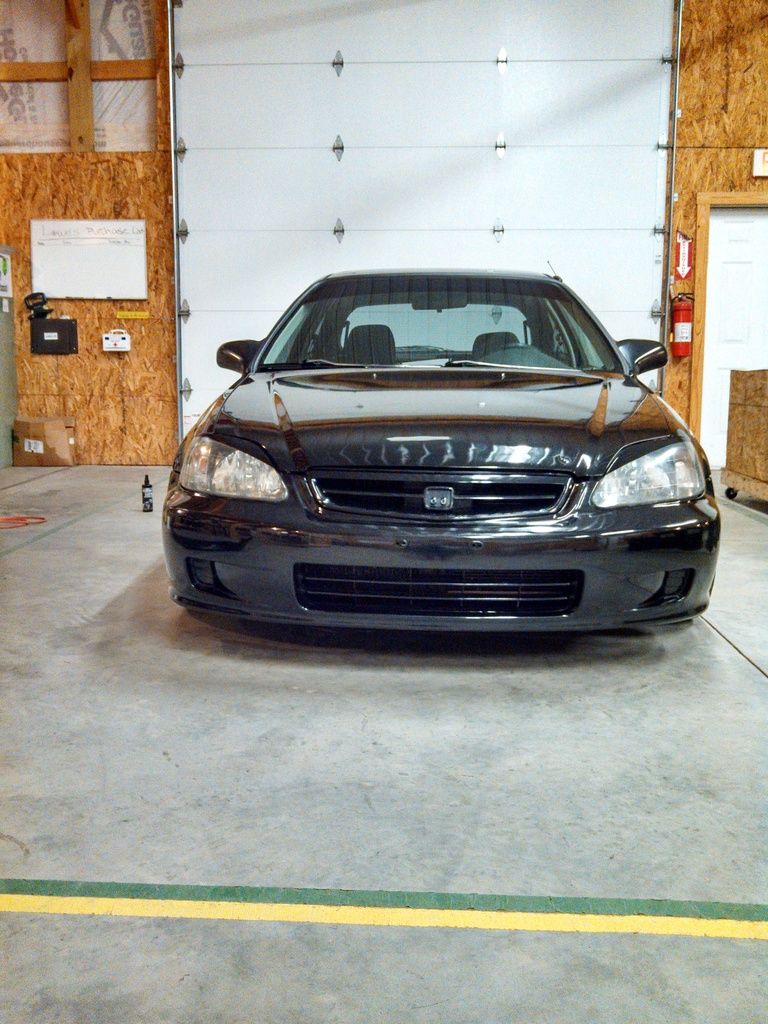
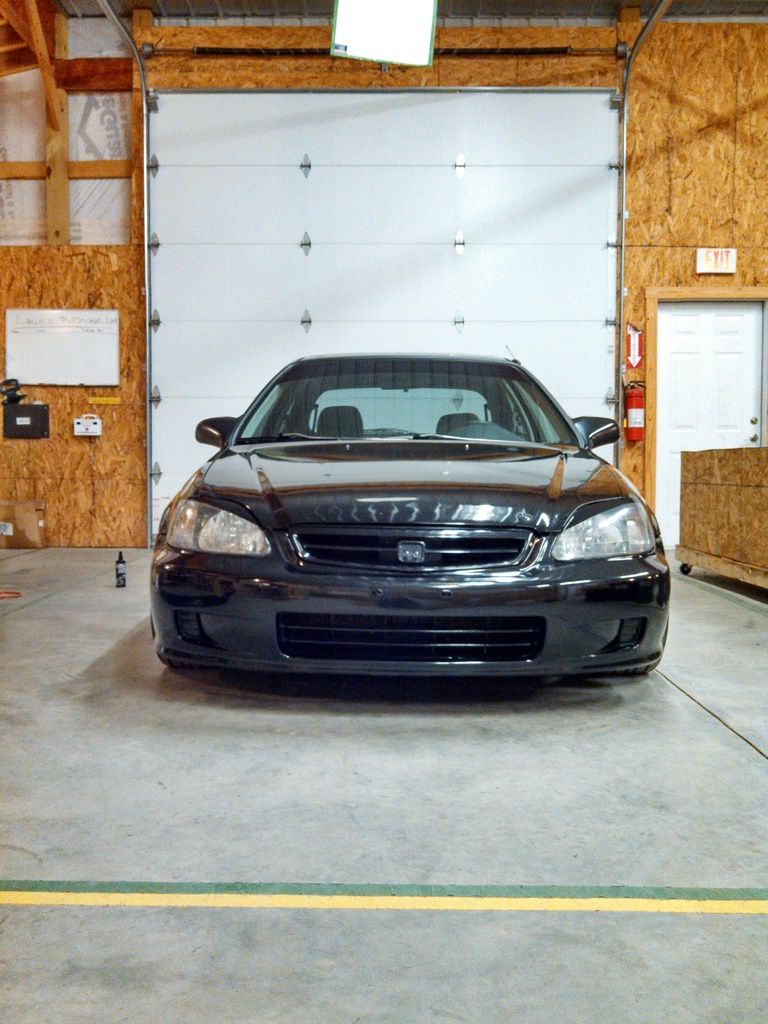
Here’s me at work.
After that, I did some littler stuff like getting a tint banner because I hated having the sun blinding me and I also don’t like using the visors. While I was at the tint shop, I asked the guy if he could line up some vinyl on the headlights because I was thinking about doing some eyelids. He did, and I had to have them right then and there, they make the car look mean as ****, lol.
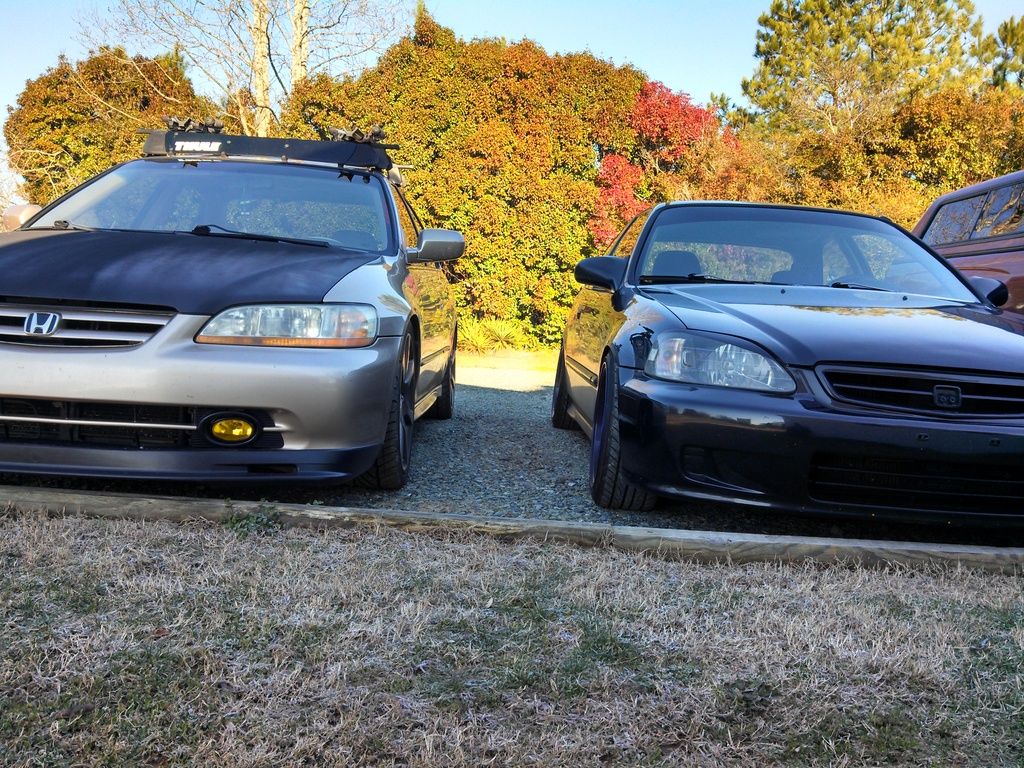
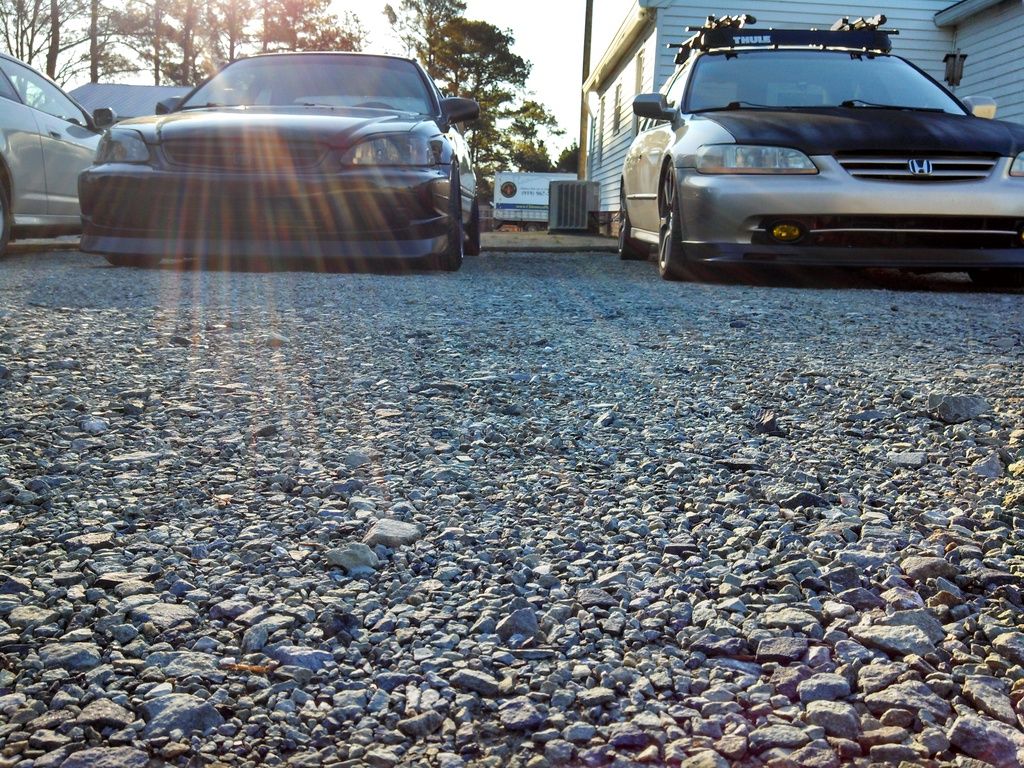
Here’s one of my buddy’s Accord and my civic parked at work.
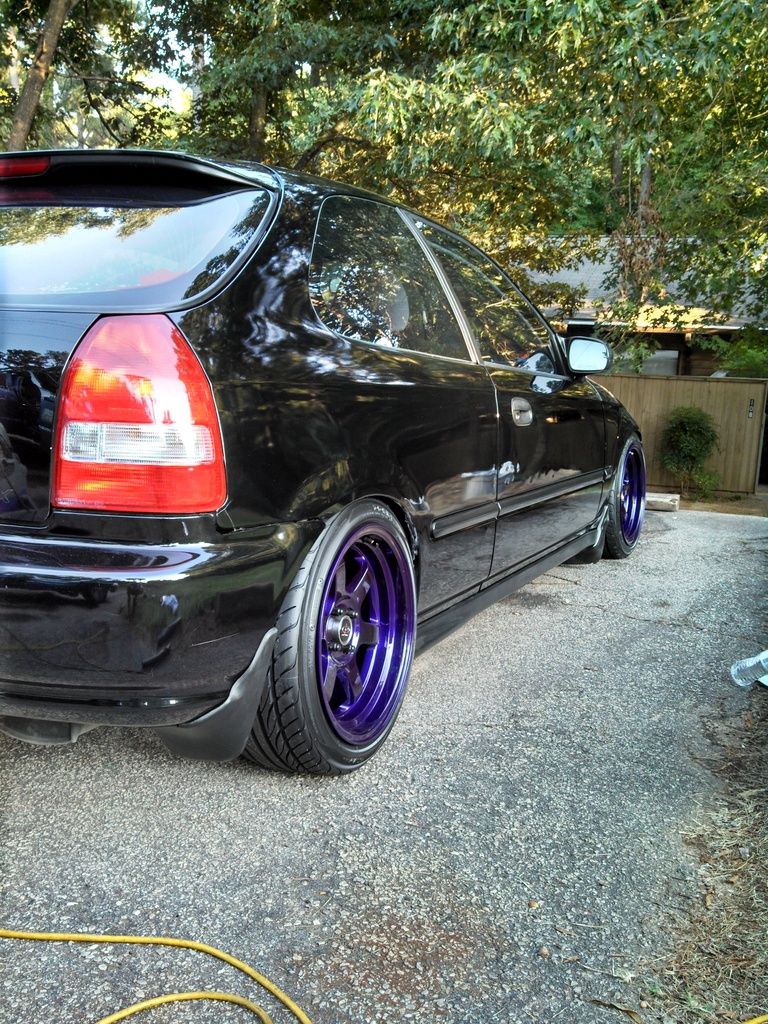
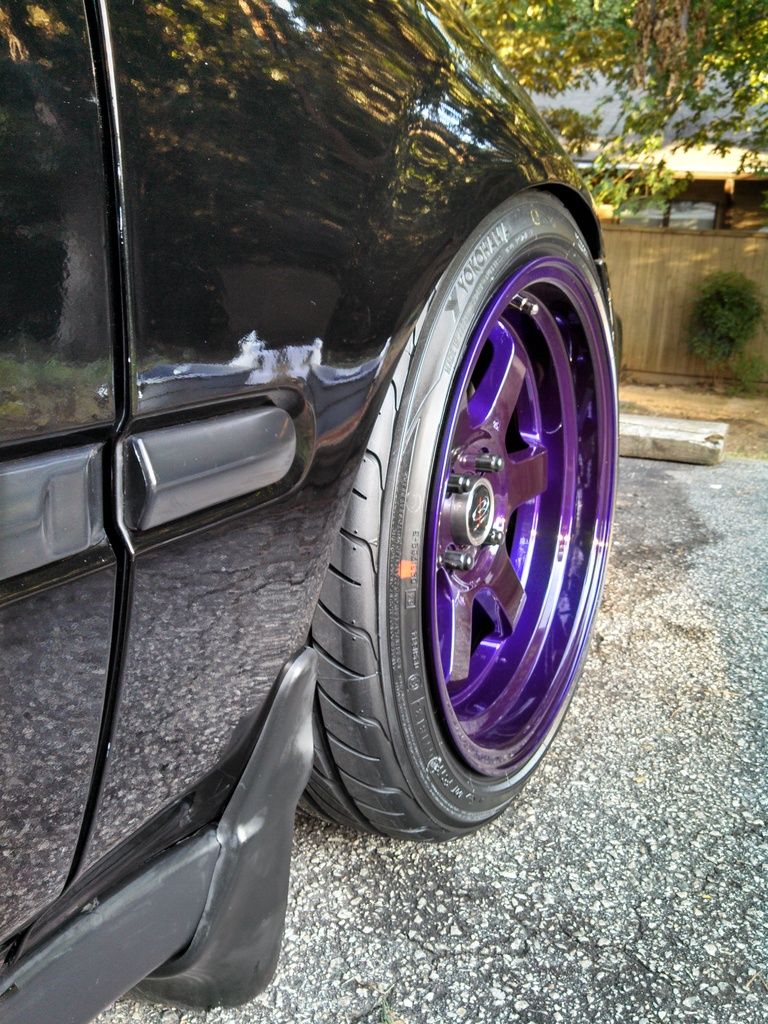
He got me thinking that the front needed a lip since I really couldn’t go much lower with the car or it would rub when I cornered hard, and I can’t have that. I call the look I have right now as the “FunctionFlush” look. So I started looking for a lip that I liked. I wanted one that was smooth, not ricey like I consider most lips to be, (extra holes for “airflow”? or something. I wasn’t a fan of his, anyway lol) and I ended up deciding on an SiR lip. The only problem with them was that every Tom, Dick, and Harry had an SiR or a Type R lip on their Civic and I wanted something that would stand out a little more, while still being classy. I finally settled on a Chargespeed lip replica. Yeah, I bought a replica! What’s it to you!! Haha actually I just couldn’t justify spending hundreds of dollars on something that was GOING to get scraped up. So I spent $60 on a replica and after some time with the heat gun and a razorblade trimming off here and there and then here again, and then just a *touch* over there, and then dammit, it’s STILL not right, ok more right here…etc. It turned out pretty good I think.
Before:
After:
Before:
After:
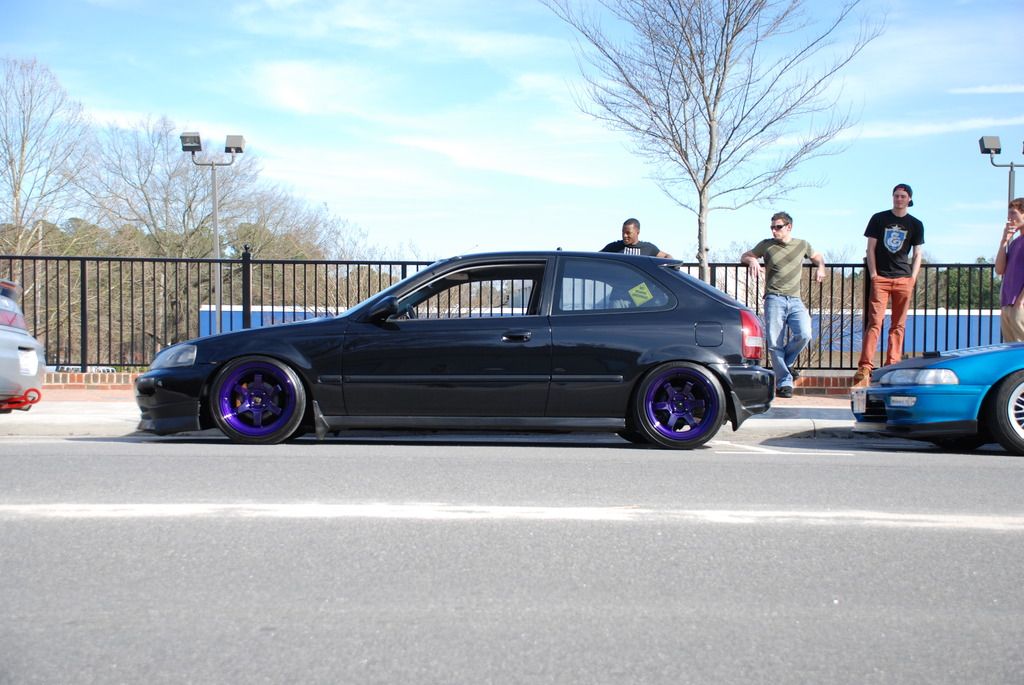
I’m pretty happy with how it came out. Don’t mind the “blue” wheels in these pictures, like I said, the purple rarely comes out in pictures.
Now we’re lip buddies! Wait, that doesn’t sound right…
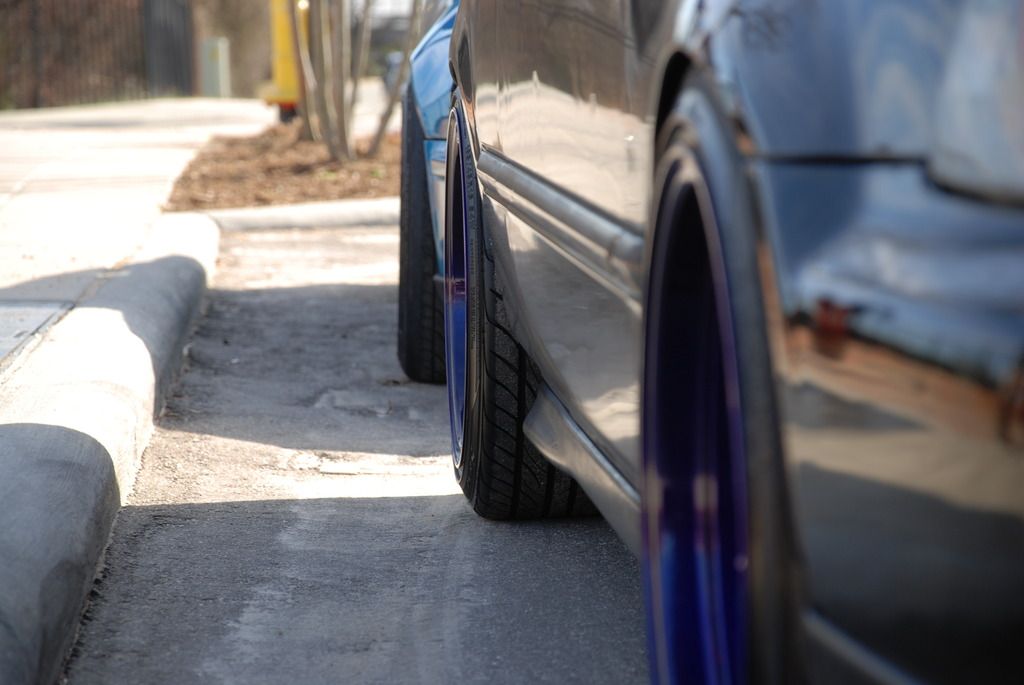
Here’s a few that a buddy took during a cruise. He has a really nice camera so he was able to get the purple to pop better.
Now that you’re probably thoroughly sick of an update that amounted to little more than “I got eyelids, tint banner, painted headlights, and lip, NOW LOOK AT ALL THESE PICTURES OF MY BABY!!!!!!”, I will stop here. But stay tuned, loyal readers, for the next update is a better one! I’m almost up to the point where the car is right now, but a big change is coming! Stay tuned for: “A Leaky Head Gasket: In which Sam gets frustrated as hell and decides to Do Something About It.
Re: The Misadventures of My 1999 Civic DX Hatchback Build
Love the progress so far.
The whole theft story reminds me of my last EK hatch, looked clean and beautiful until I dug into it.
Turned out the car had previously been totaled and the whole driver side frame had been cut out and replaced from the firewall forward.
Re: The Misadventures of My 1999 Civic DX Hatchback Build
Sorry it�s been a while since I updated last, I�ve been pretty busy with my mobile mechanic business, also I bought a 2002 Forester that needs head gaskets and timing belt and various seals replaced for a daily driver/work vehicle.
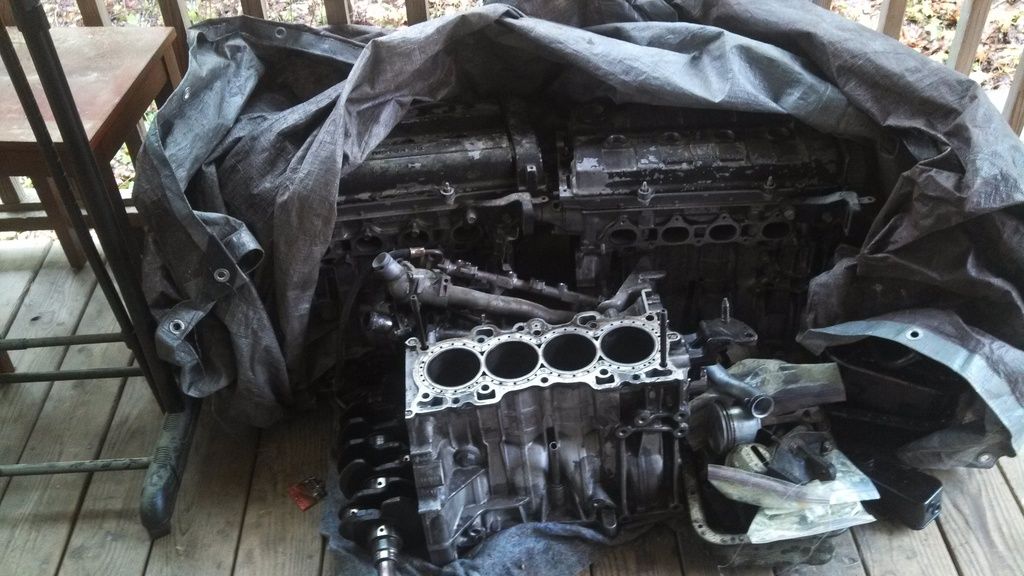
Anyway, onto the build: after all the work I did to the stock engine, I discovered the car would overheat occasionally, and would open the radiator to find that the coolant levels were low. It seems I have terrible luck with Hondas and head gaskets, I traded a civic that blew a head gasket for an Integra that also turned out to have a leaking head gasket, my old CR-X blew 2 head gaskets (second one was my fault for not decking the block) and now this. Well, at least I have practice in replacing them! I decided to take the plunge and swap it with a B-Series. Having owned a 1990 hatchback with a B16, I knew I didn�t want another zero-torque 1.6, so after extensive research, I settled on an LS-VTEC build. I�d never built an engine before, but I figured as long as I did my research and got all the clearances right, it *should* work. The car was detailed, parked, and covered with a car cover so it stayed pretty while I spent almost a year and a half saving up, buying parts, and assembling the LS-VTEC. I bought a bone-stock 1996 4-door civic (the one that ended up having a bad head gasket that I traded for a B20VTEC Integra) as a daily driver while I built the engine.
Here is the B20V Integra that I traded it for, it handled so well and solidified my need for more power! I had it dyno tuned at a local shop and since it had a stock b20 bottom end I limited it at 7000, but it made 174whp and 135tq so I was pretty happy with it. Still wanted more, but to me it felt pretty quick.
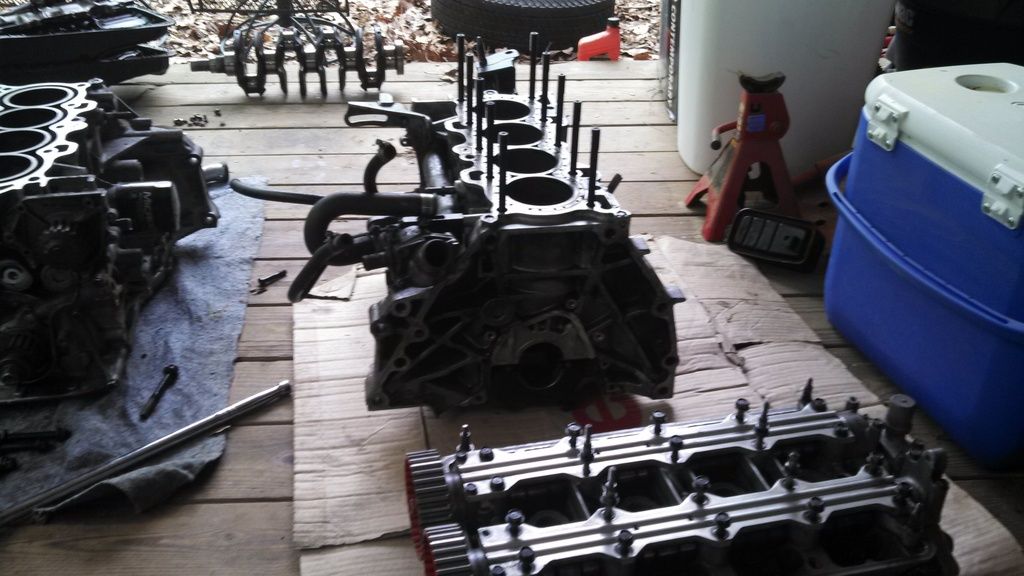
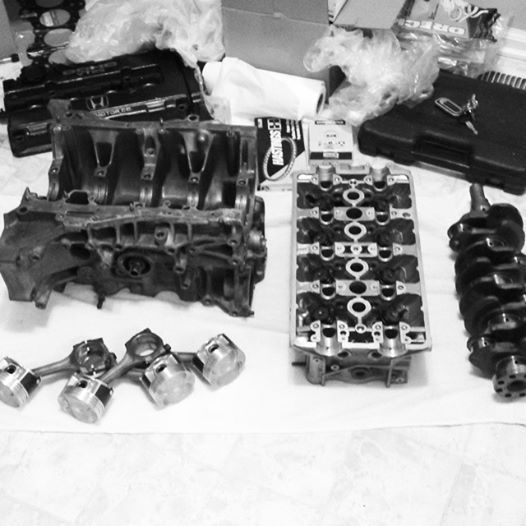
So since I was on a budget, I started scouring craigslist for blocks, full motors, heads, any B-Series parts I could find. I ended up with 3 blocks, 2 LS heads, 1 B16 head that ended up being fucked up, and finally 1 B16 head that was good enough to build. I bought and sold blocks and heads and parts, keeping the best stuff for myself and selling the rest for surprisingly almost what I paid for it, so I ended up getting the block and head and ARP head studs for around $300 total, if I recall correctly. The real money, of course, ended up being all the parts I had to buy new, and the machine shop work as well as the tuning. But I�m getting ahead of myself.
I picked the best block and sold the rest, keeping the ARP head studs that came with one of them.
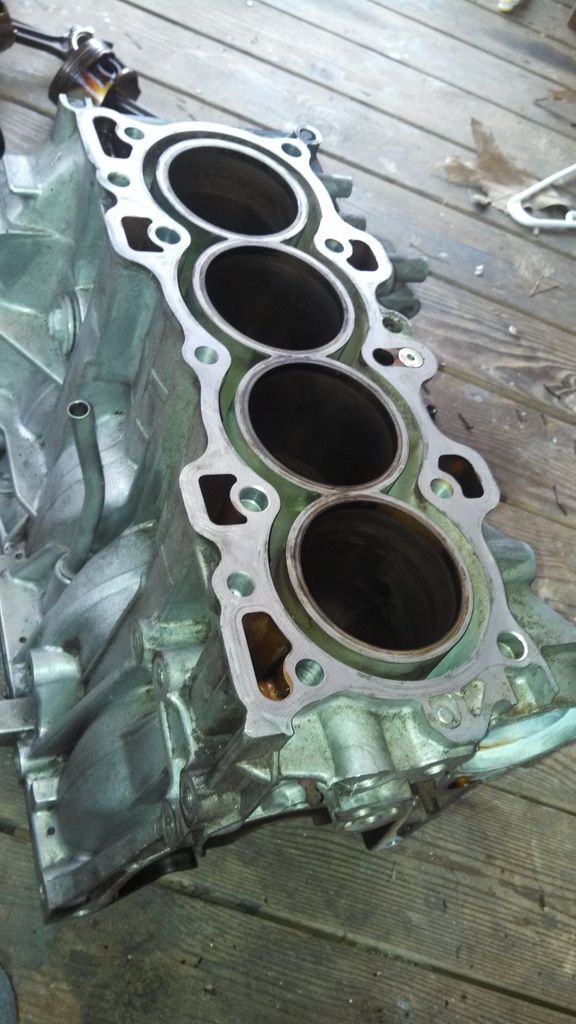
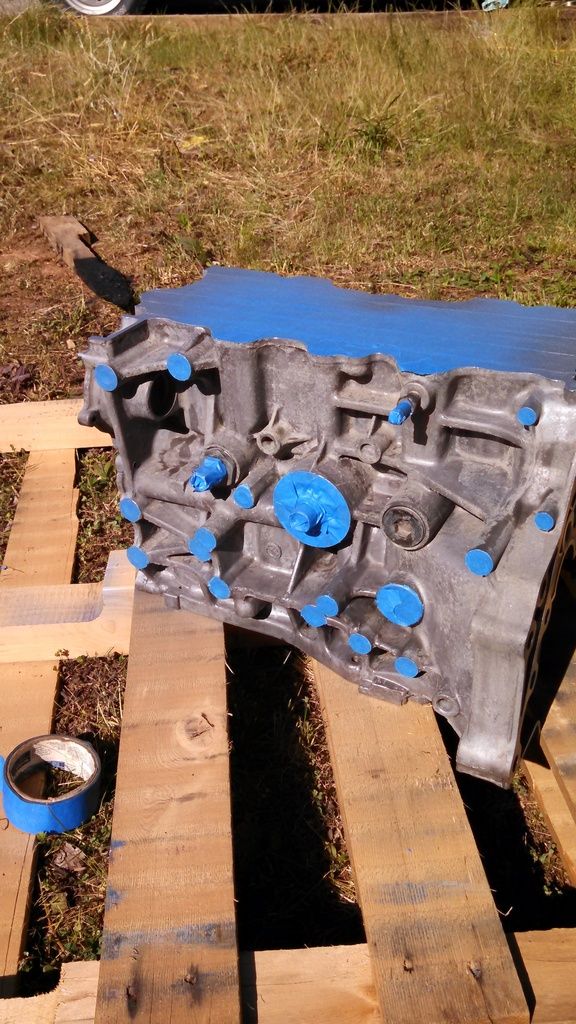
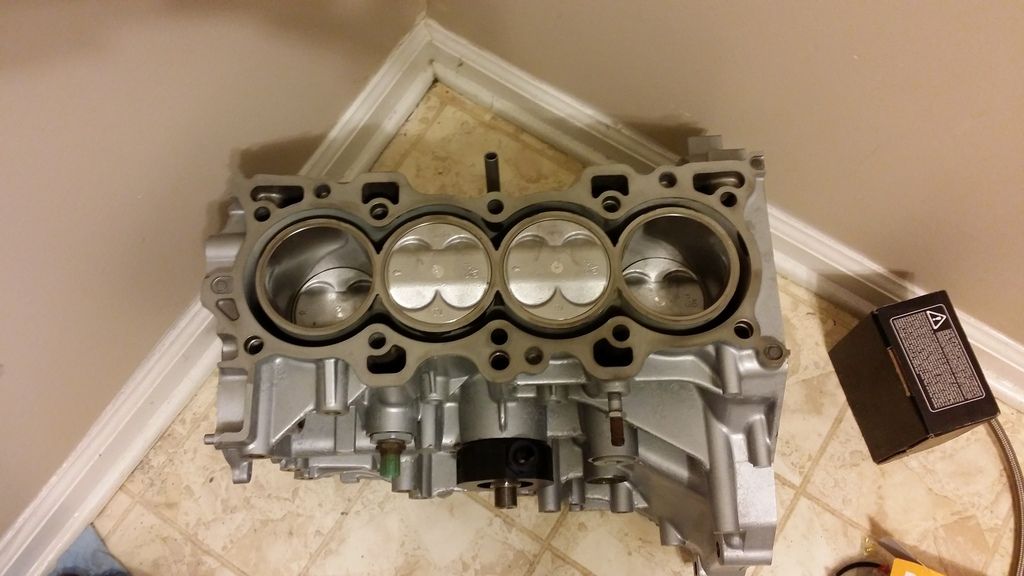
After a trip to the machine shop where I had it decked, cleaned, bored to 81.5mm, and honed, I took it home to freshen it up with some aluminum block paint. I was so tired of making little circles with tape at this point�
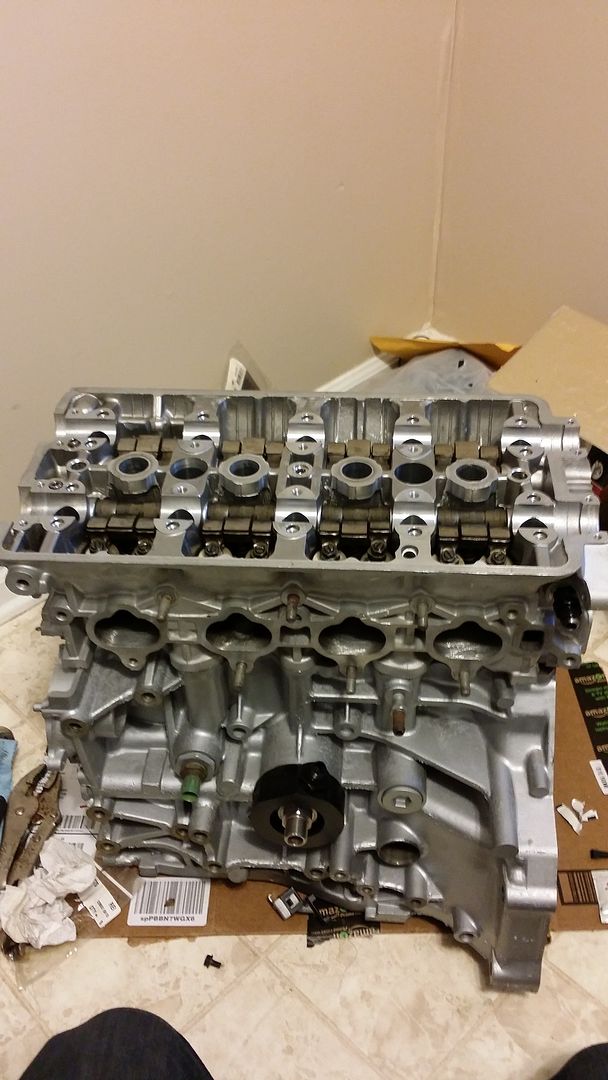
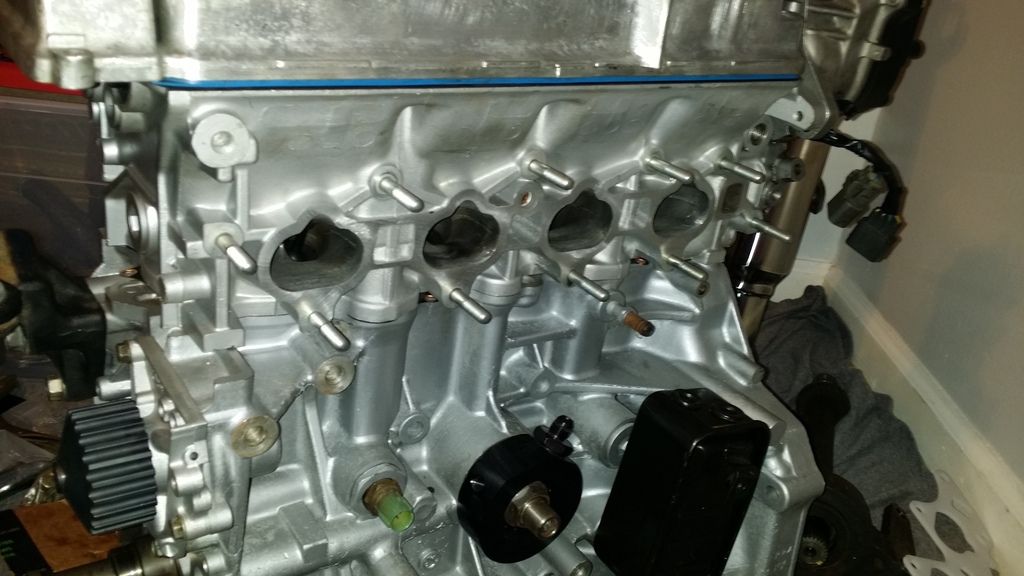
I had the head decked as well, along with new exhaust valve guides, a 3 angle performance valve job, and valve stem seals. It came with ITR dual valve springs on intake and exhaust, so that was a plus. It still needed paint at this point:
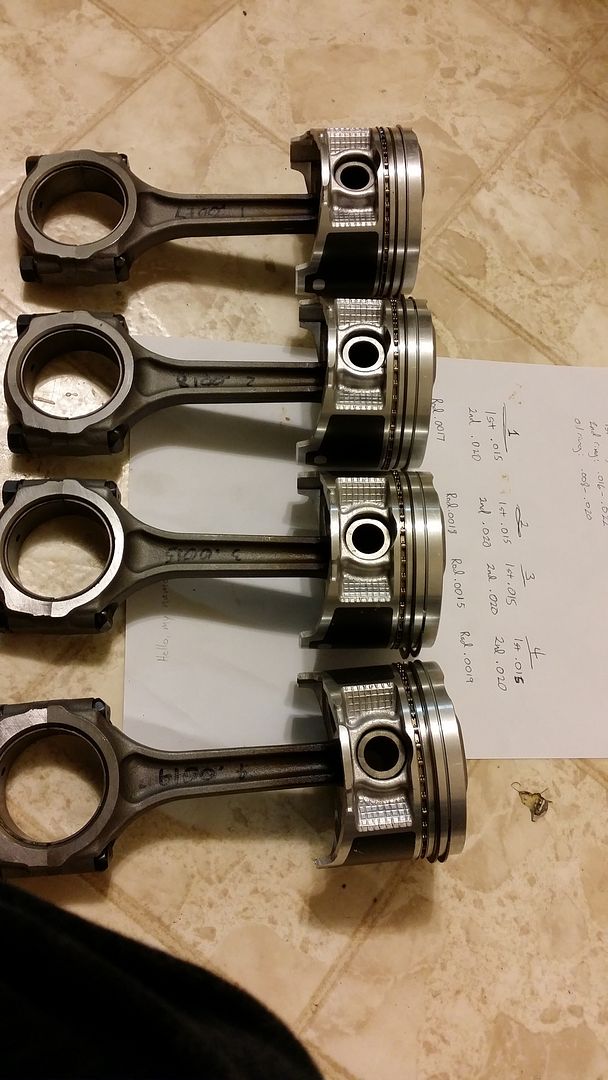
The machine shop bought the wrong pistons for my engine, after I SPECIFICALLY told the guy 3 times that I wanted 1999 UDSM ITR pistons, he bought LS pistons, and then tried to convince me to use them. No way was I going to go for 10:1 compression; I was shooting for 12:1. Anyhoo, I bought the pistons myself (NPR 81.5mm USDM ITR with Teflon skirts) and took everything to another shop who wouldn�t try to ruin my build to save themselves money. I had the rods reconditioned (I think that means shotpeening) and had ARP rod bolts installed and the big ends resized to accommodate them, as well has honed to fit the crank with the specs I had in mind, namely around 0.0015-0.0020 which from my research seemed to be the best overall specs. I�m using NPR rings that I filed to spec as well as ACL Race crank and rod bearings.
Finally starting assembly�it took me over a year to get to this point, half was because of money and the other half was because I was so scared of ******* it up that I kept putting it off.
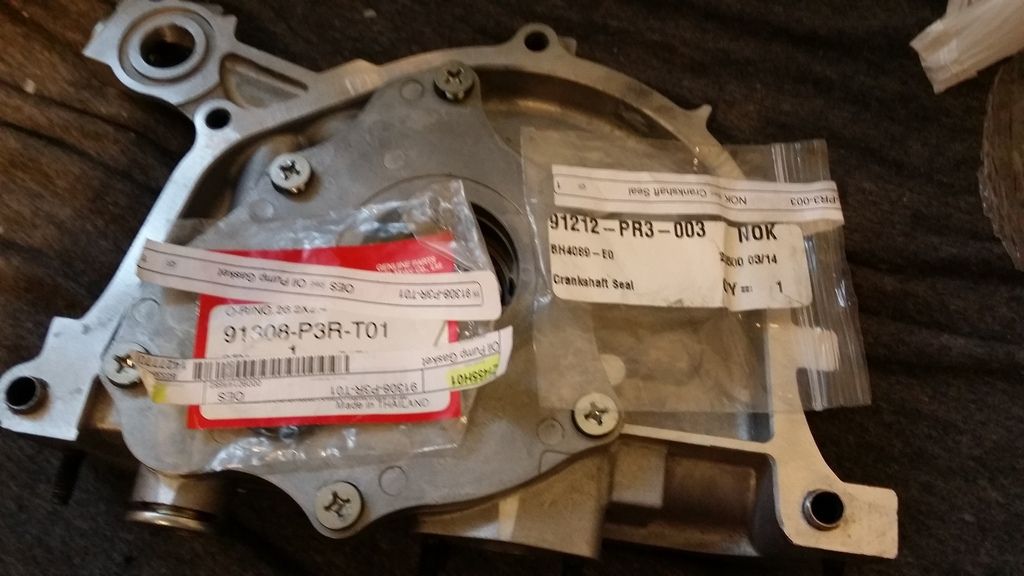
New oil pump, along with various seals.
I ported it anyway, because racecar.
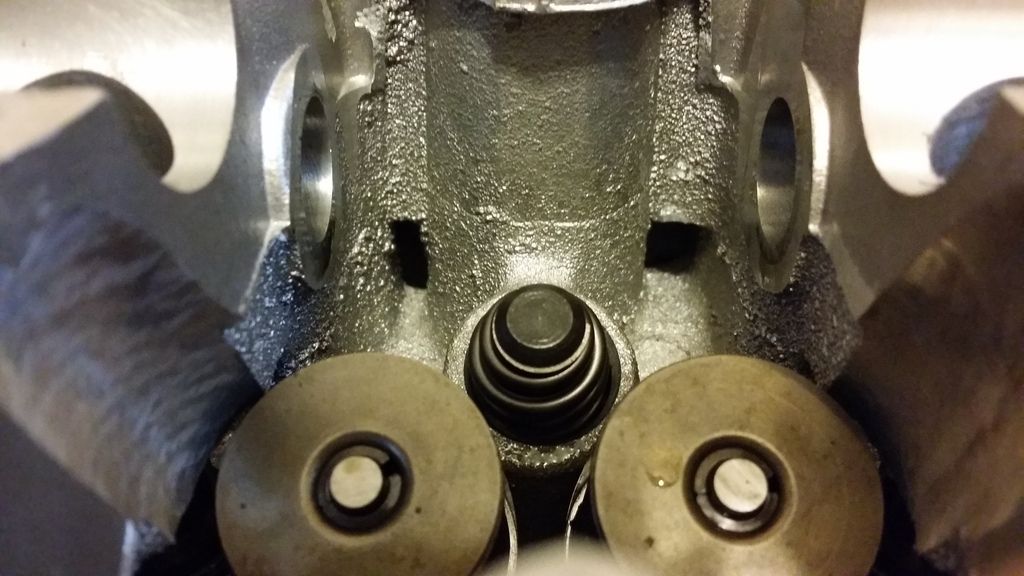
And shimmed it, which I guess is a D-Series thing, but it worked out in the end as I have around 10psi oil pressure at idle when the engine is fully warmed up and 80psi into VTEC.
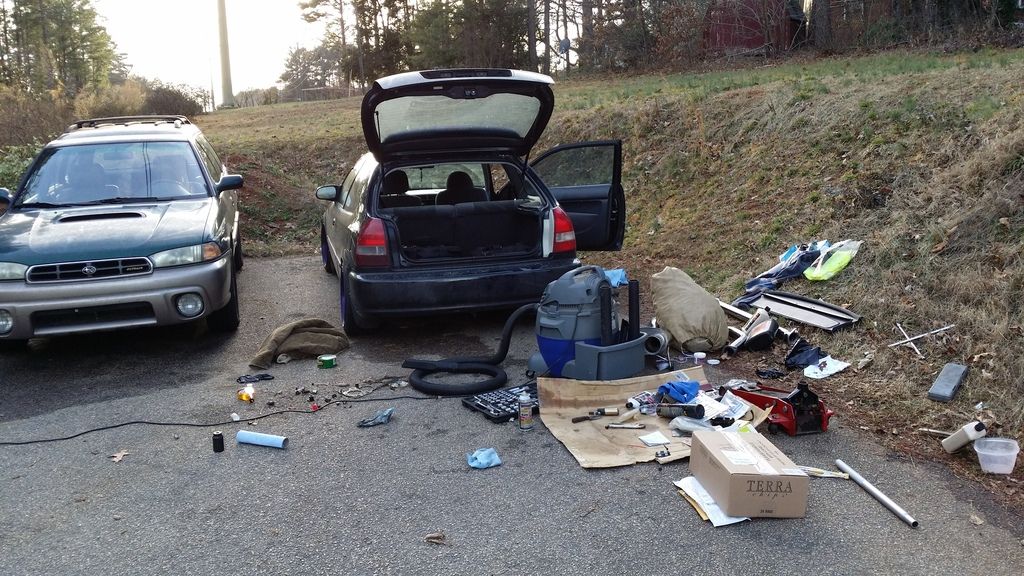
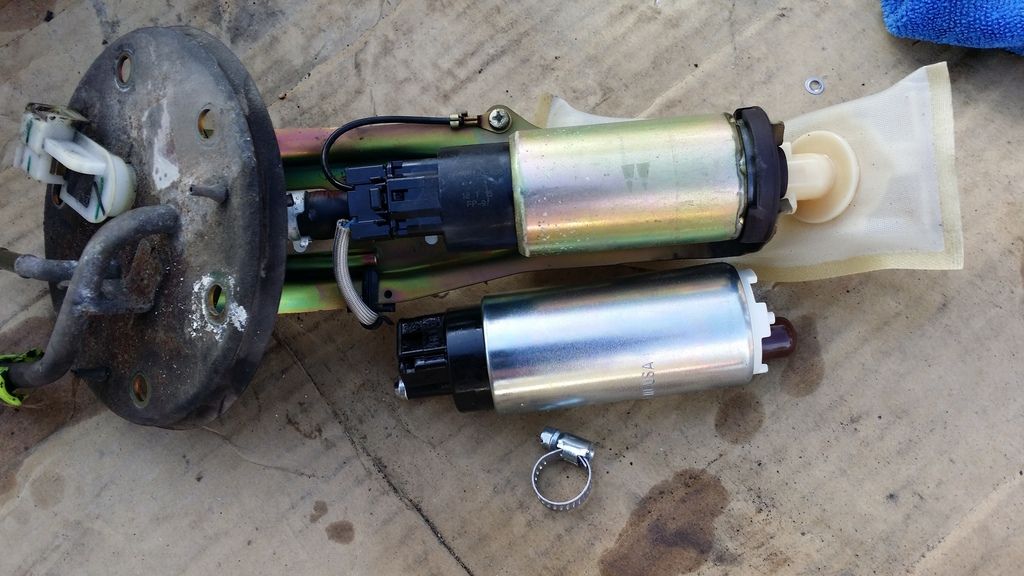
Also, I figured I needed to upgrade the fuel pump since I was going to go with DSM blue top 450cc injectors, so I upgraded to a Walbro 190lph pump. Which also meant I had to clean out the back of the Civic, lol. Also pictured is one of the cars I flipped and drove in the meantime, I love me some Subarus!
Old vs. New
Assembled short block.
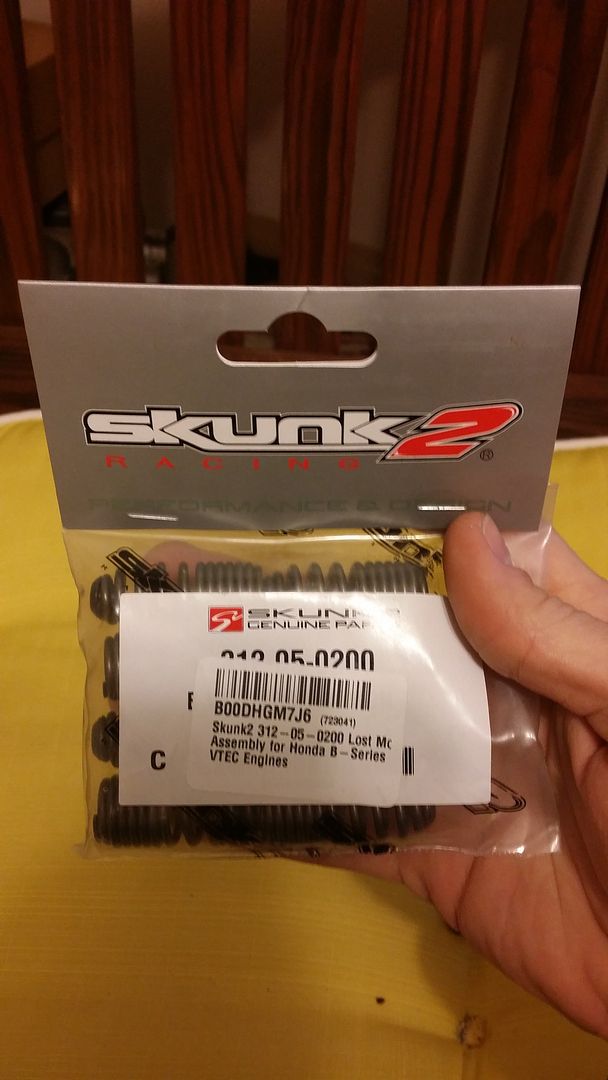
Skunk2 spring style LMAs
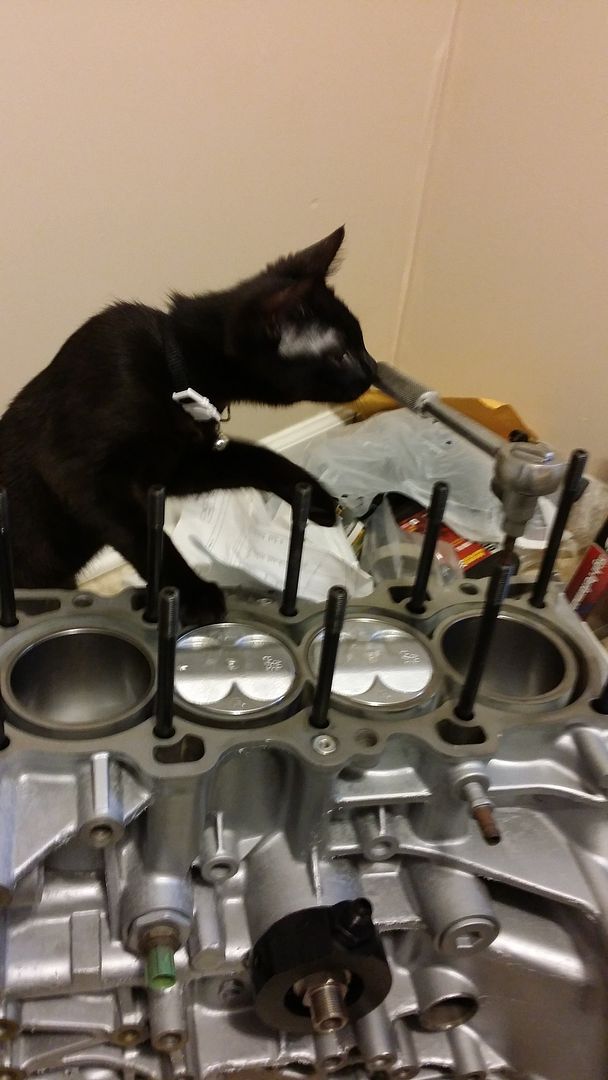
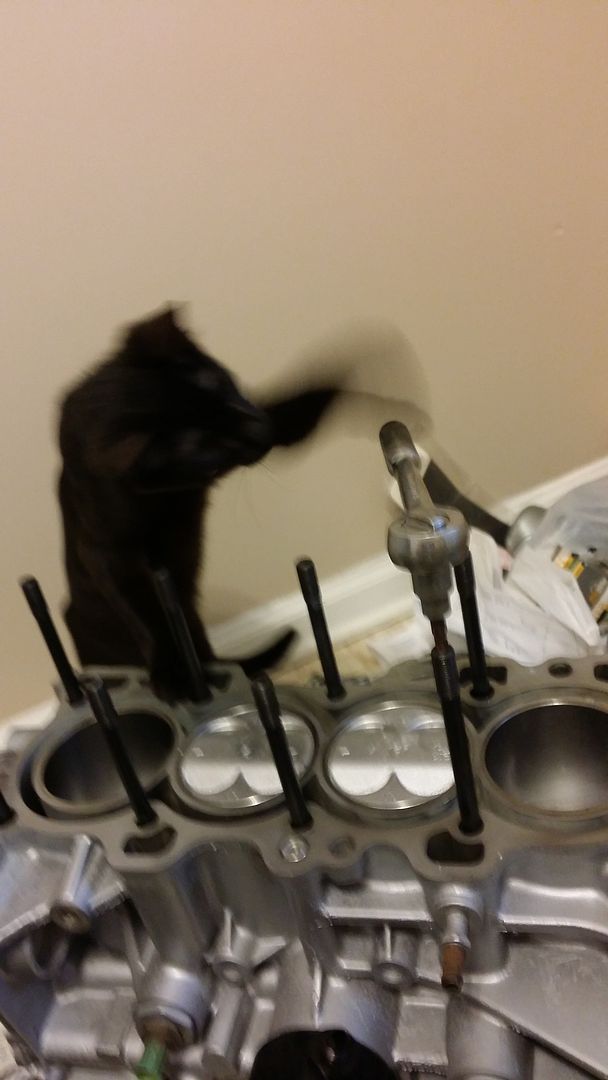
My cat, Loki, �helping� assemble the engine.
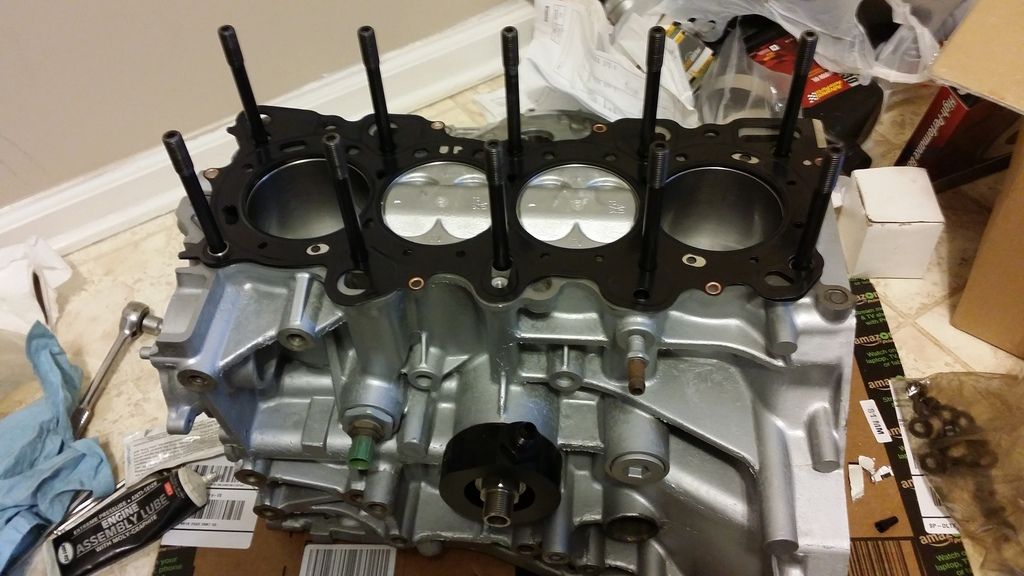
Used the OEM Honda head gasket customized by Golden Eagle to 81.5mm and stepped dowel pins.
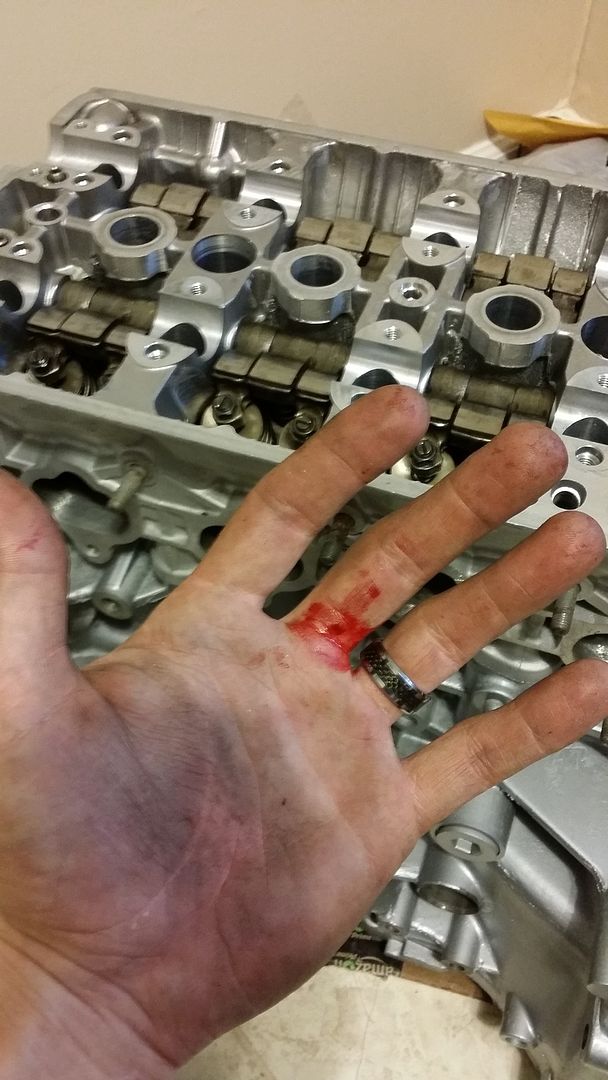
A little blood sacrifice to the Car Gods to help ensure a reliable engine.
Lots of assembly lube.
I was able to find some Crower 402-A cams locally for $230. I was originally nervous about using them with only OEM ITR valve springs, but I looked up the requirements for similar lift cams and it looked like they would work so I tried it out. I plan on upgrading the valvetrain and cams along with porting the head at some point in the distant future.
I also got a purple anodized valve cover dress up kit from Skunk2, I plan on doing the valve cover in Wrinkle Black at some point. Also got some Innovative solid mounts.
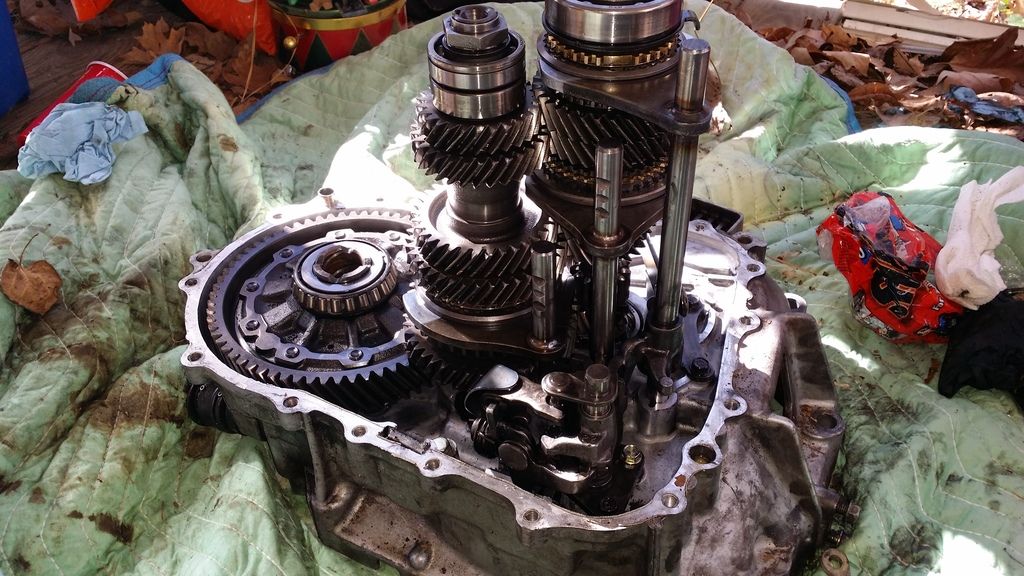
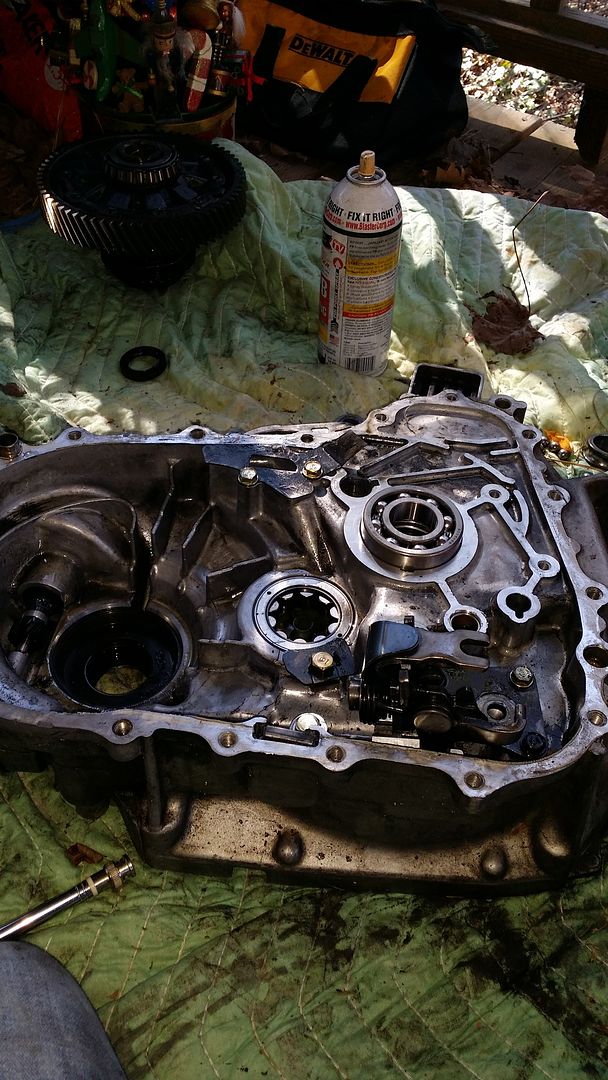
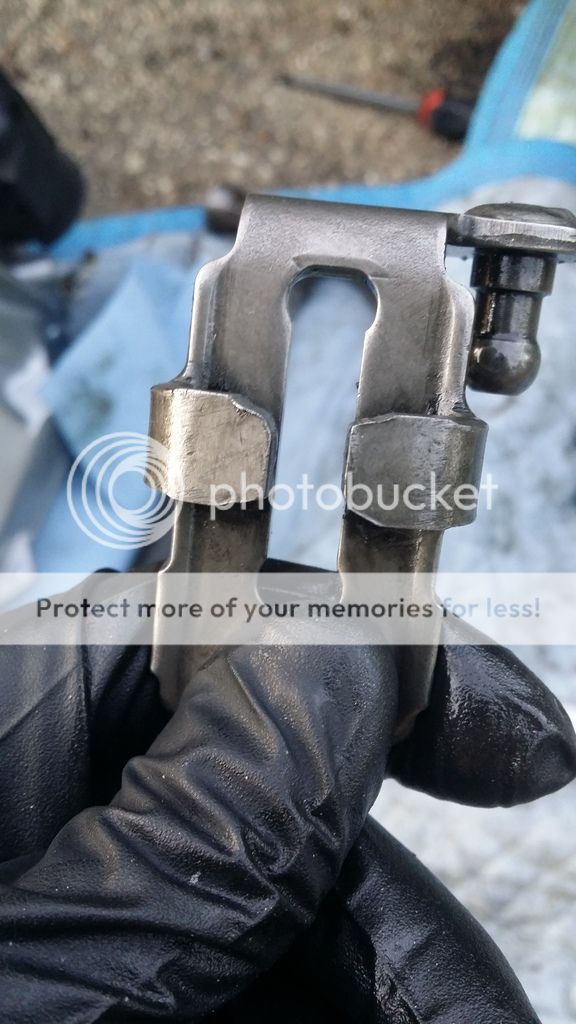
The �GSR� transmission I bought that ended up needing a new input shaft bearing. No problem, I�ve done this before�
Figured I�d replace all the seals and bearings while I was in there�
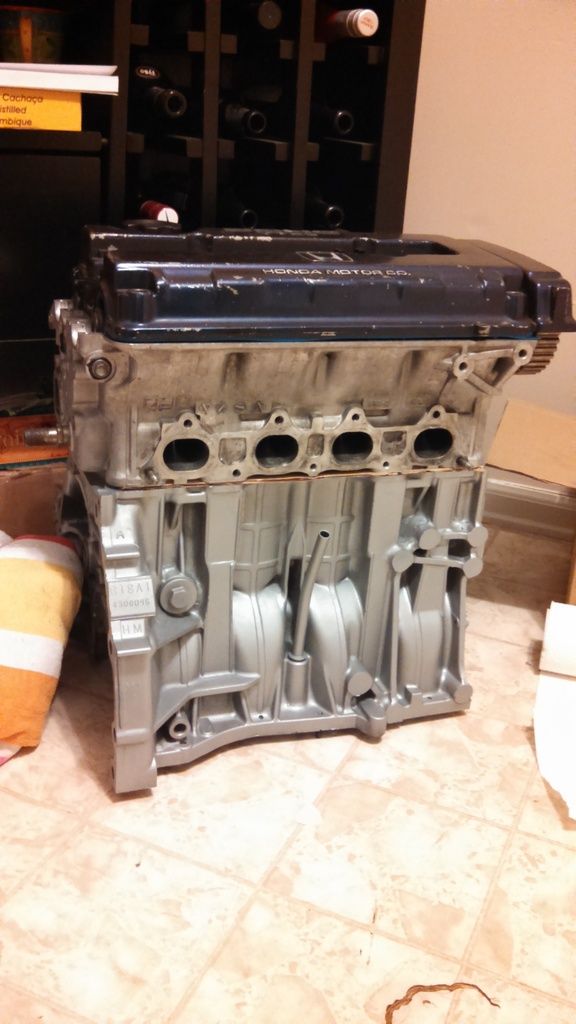
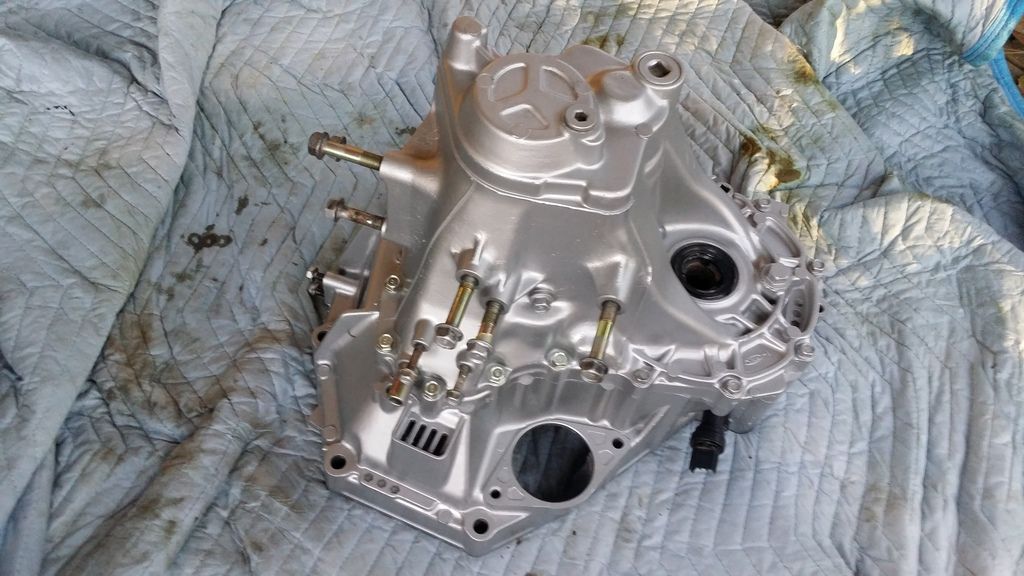
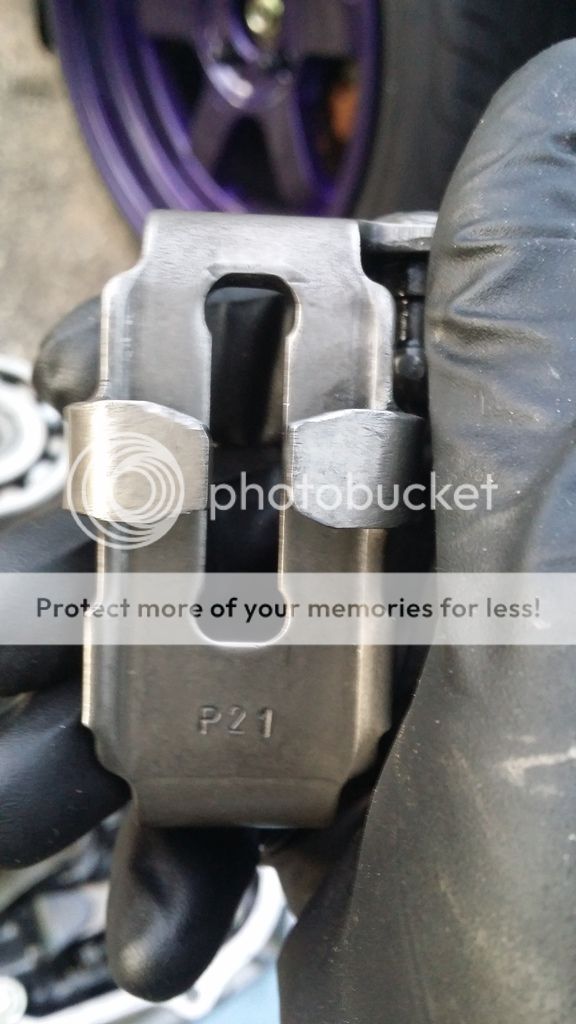
All back together again and painted to match the block and head! Looks sooo purdy!
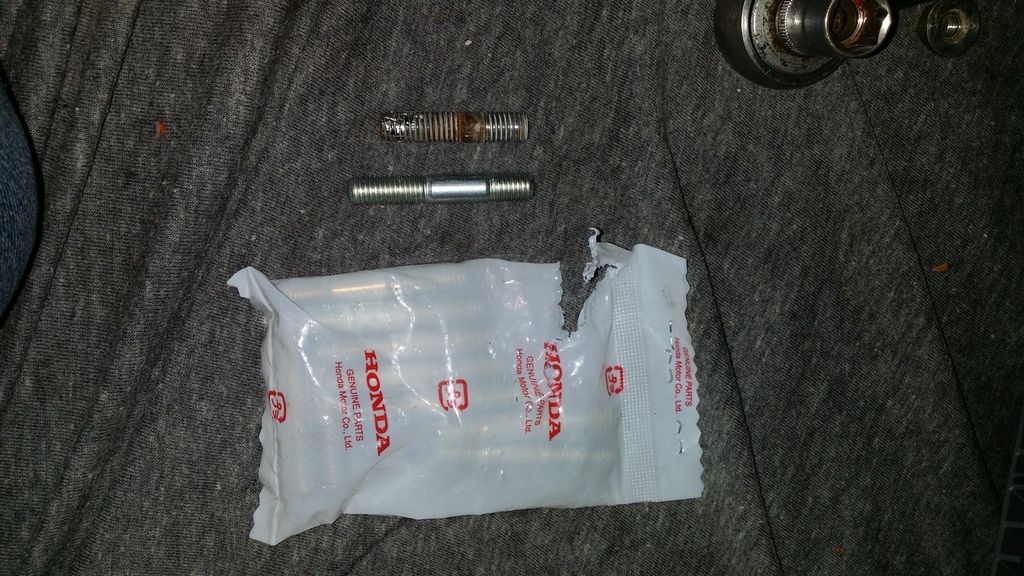
Back to the engine assembly, I bought a thermal gasket for the intake so I needed longer studs. Got these from a seller on ebay, they are OEM extended studs.
Looking good!
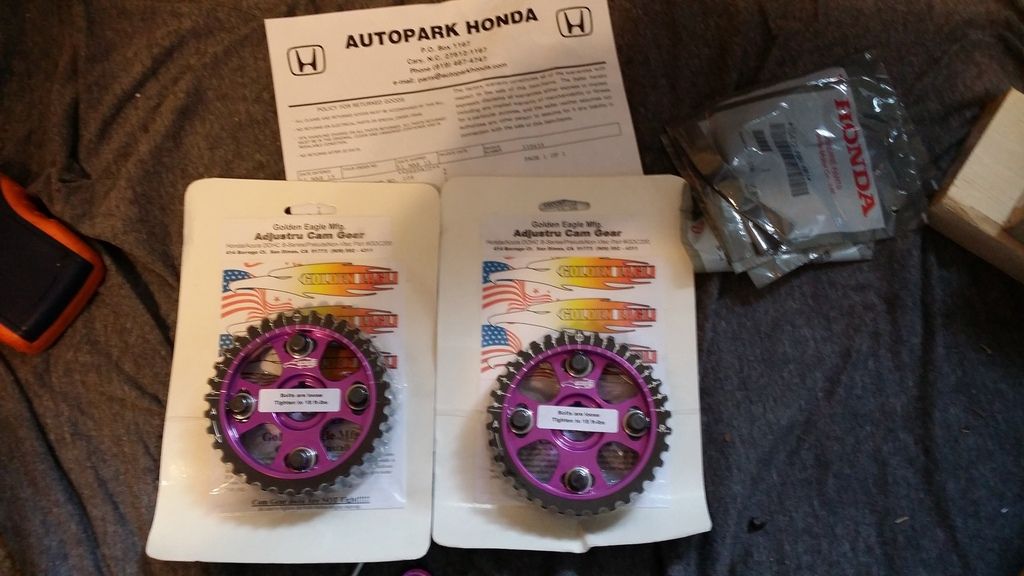
Adjustable cam gears from Golden Eagle as well, in purple of course!
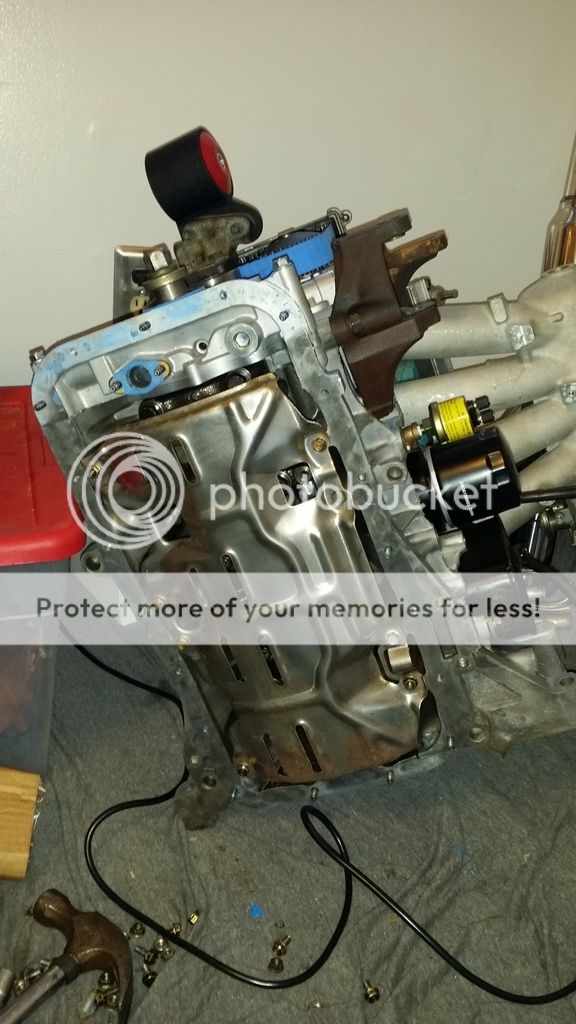
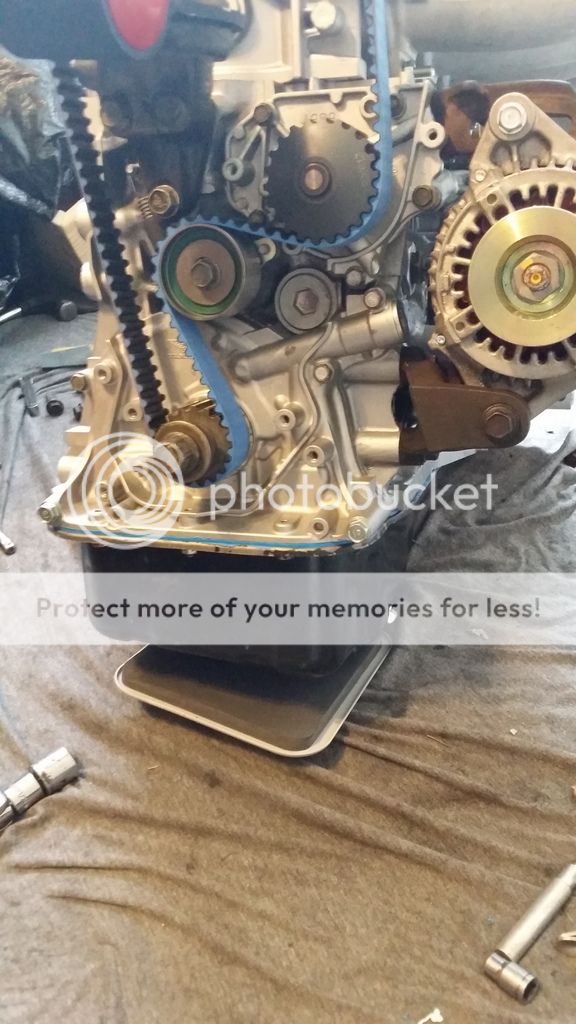
I cut the VC out for adjustment of the cam gears, this was just a test fit. I have since smoothed out the ragged edges you see here. Also you can see the Gates Racing Kevlar timing belt I used, also bought an OEM water pump and belt tensioner.
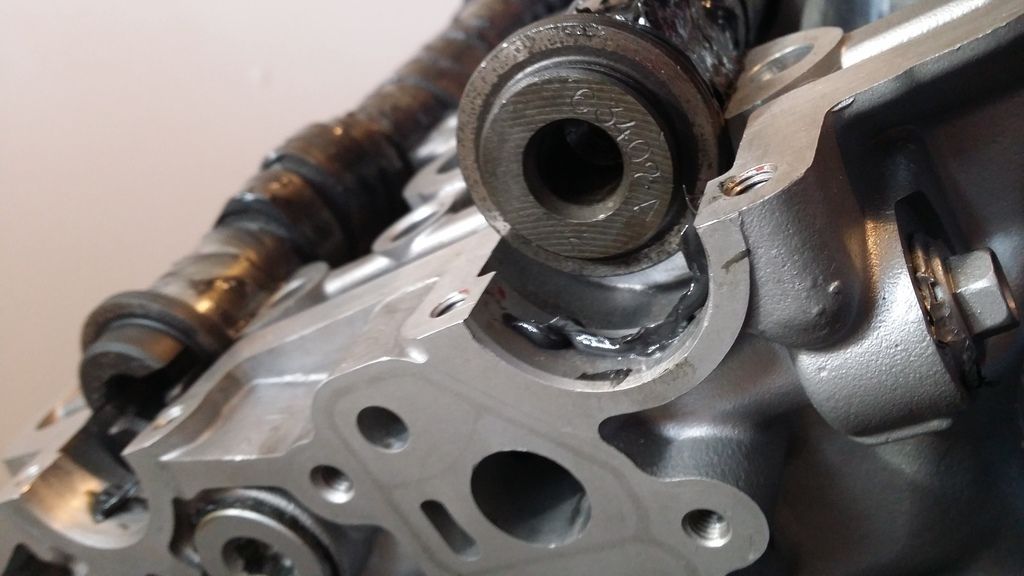
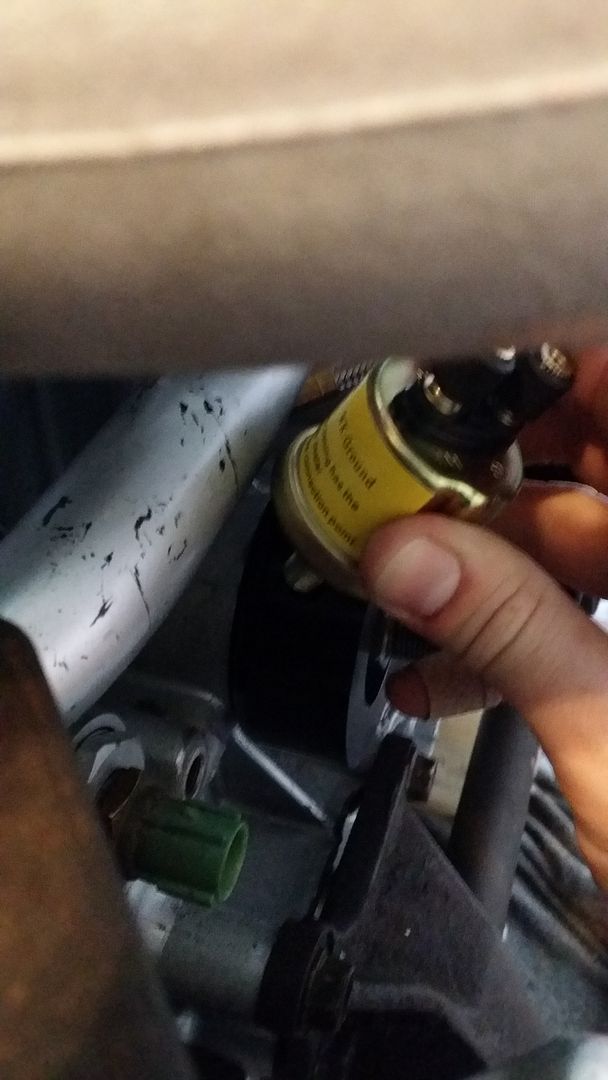
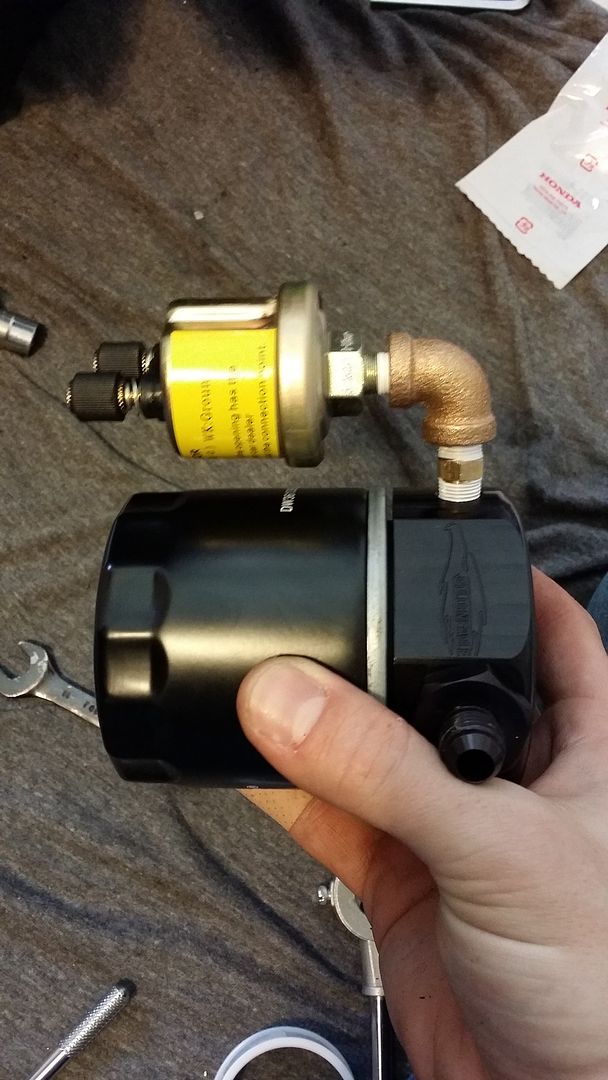
The ProSport oil pressure gauge�s sender didn�t fit on the GE oil filter sandwich plate�
Solution thanks to the local hardware store!
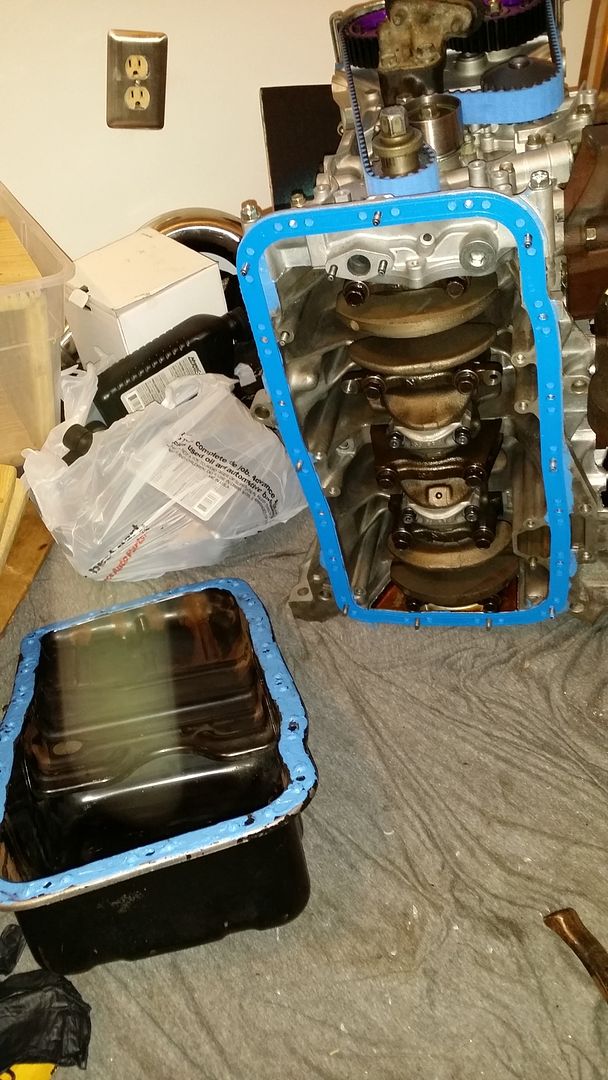
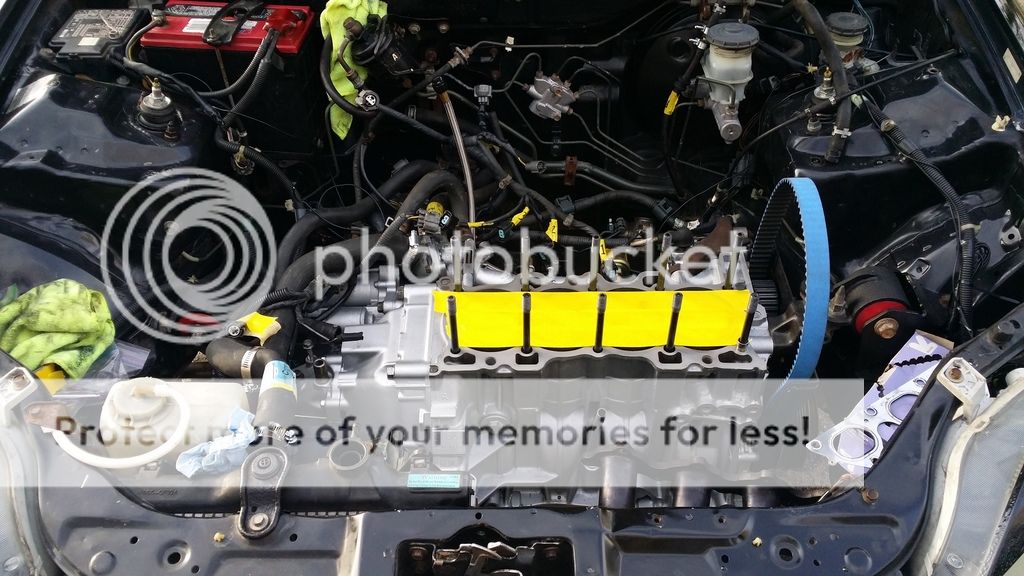
Here I am getting ready to put the oil pan on. +27 internet points if you can point out what I did wrong here. Hint: it�s pretty ******* obvious if you have ever seen the bottom of an engine.
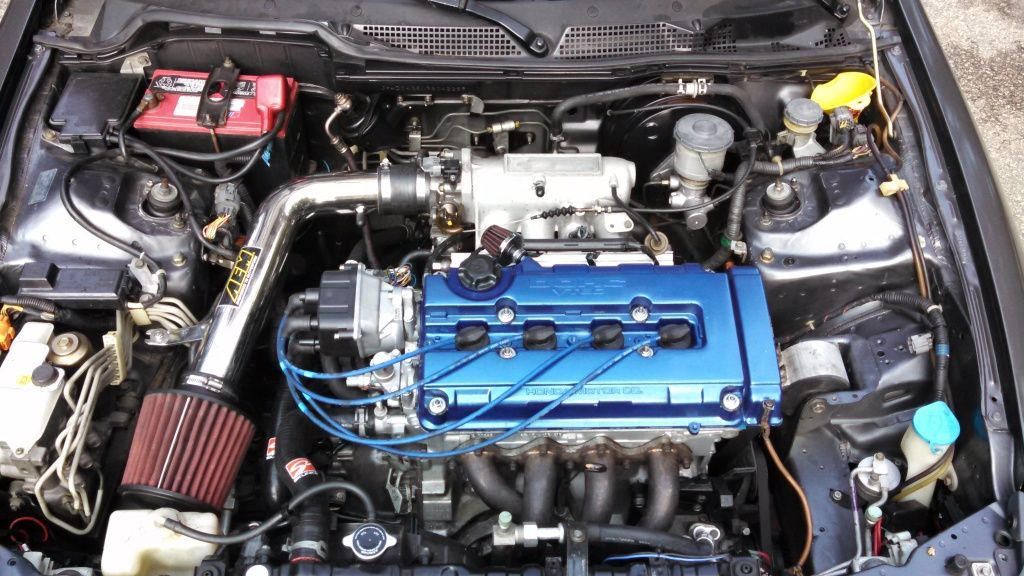
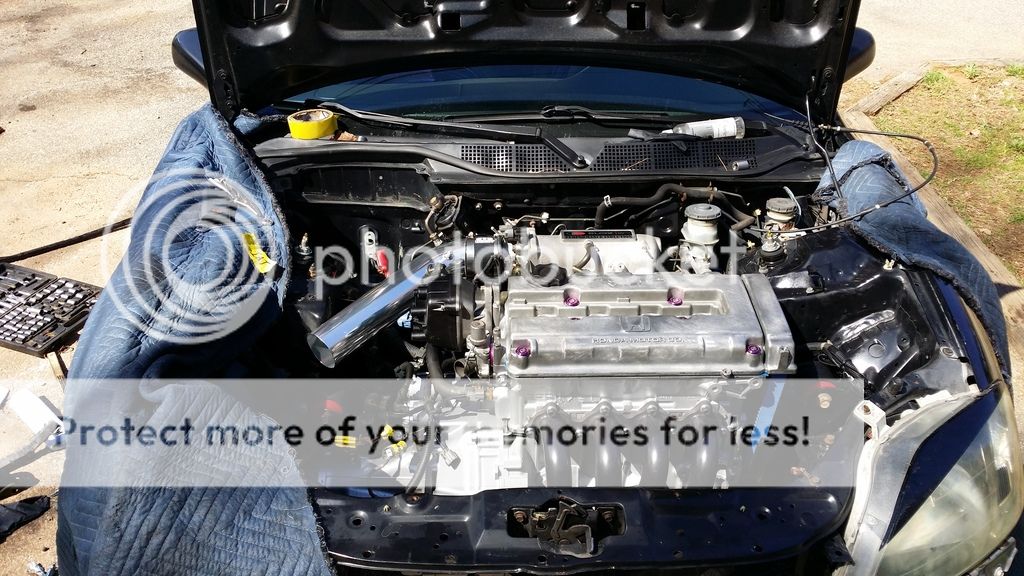
Here is the engine looking pretty much like an engine, complete with my Blox IM and Professional Products 68mm TB with thermal gasket there as well. Also the generic 3� intake piping that goes to the Blox velocity stack and filter. You can also see the Yonaka exhaust lurking in the background.
Well boys and girls, here is where I will leave you, to be continued another time. This actually takes quite a while compiling pictures, making sure they are in the right order, writing commentary to go along with them, etc. Hope you have enjoyed this installment of �The Misadventures of My 1999 Civic DX Hatchback Build! See you next time!
Re: The Misadventures of My 1999 Civic DX Hatchback Build
quick question, obviously you rolled/pulled your fenders for proper fitment of your rims, i have soe avid av11's that are 16x8 +20 offset... and thye stick out quite a bit. was wondeing how you made those wheels fit without camber kits?? nice build by the way. i like the color you chose for the rims.
Re: The Misadventures of My 1999 Civic DX Hatchback Build
Originally Posted by Purple_Hatch
quick question, obviously you rolled/pulled your fenders for proper fitment of your rims, i have soe avid av11's that are 16x8 +20 offset... and thye stick out quite a bit. was wondeing how you made those wheels fit without camber kits?? nice build by the way. i like the color you chose for the rims.
Thanks! I just, as you said, rolled and pulled the fenders a little. That, coupled with 195/40/16 tires and lowering enabled them to fit. Seems like your wheels are pretty much the same specs as mine, maybe your problem is your tires?
Re: The Misadventures of My 1999 Civic DX Hatchback Build
its kind of hard to tell from this pic, but my rims stick out quite a bit. maybe its just because my fenders havent been rolled or pulled that it looks that way. it just seems to me that yur rims sit so damn perfect! and its the exact look that i want on mine!
Re: The Misadventures of My 1999 Civic DX Hatchback Build
Originally Posted by Ryd2TheMax
Here I am getting ready to put the oil pan on. +27 internet points if you can point out what I did wrong here. Hint: it’s pretty ******* obvious if you have ever seen the bottom of an engine.
Re: The Misadventures of My 1999 Civic DX Hatchback Build
I should really update this more often so that instead of writing 4 pages of **** and 40+ pictures I can just make each post as I do new stuff. But I suck and like to do things the hard way. (Editors note: �Umm, phrasing��)
Anyhoosle, so I left off right before I put the new LSVTEC engine in the car, so we�ll begin there and I�ll try to bring you up to date.
Oooh look, I put the baffle on this time! 10 points to Gryffindor.
Old D coming out!
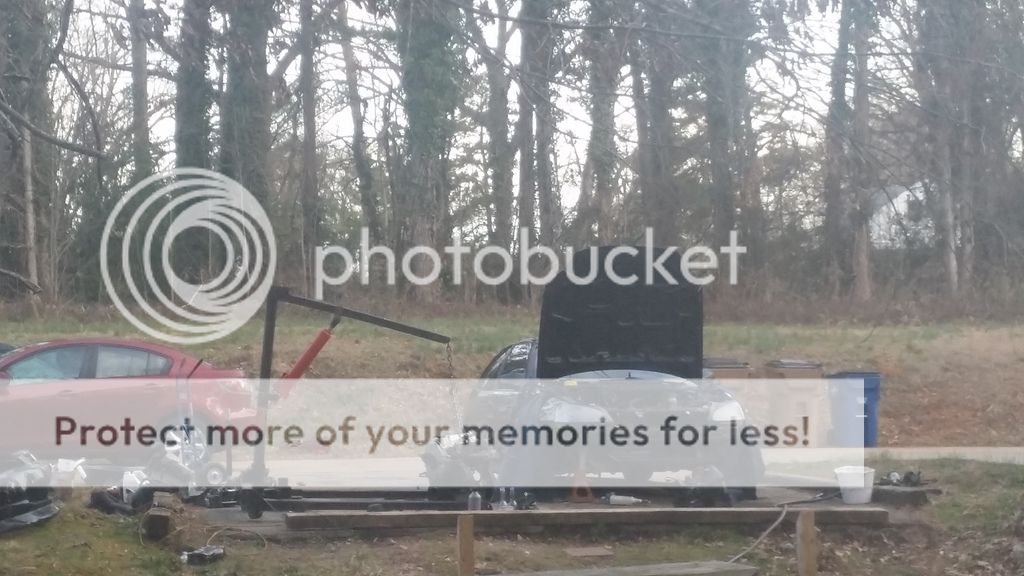
Starting in on the swap on a cold, foggy morning.
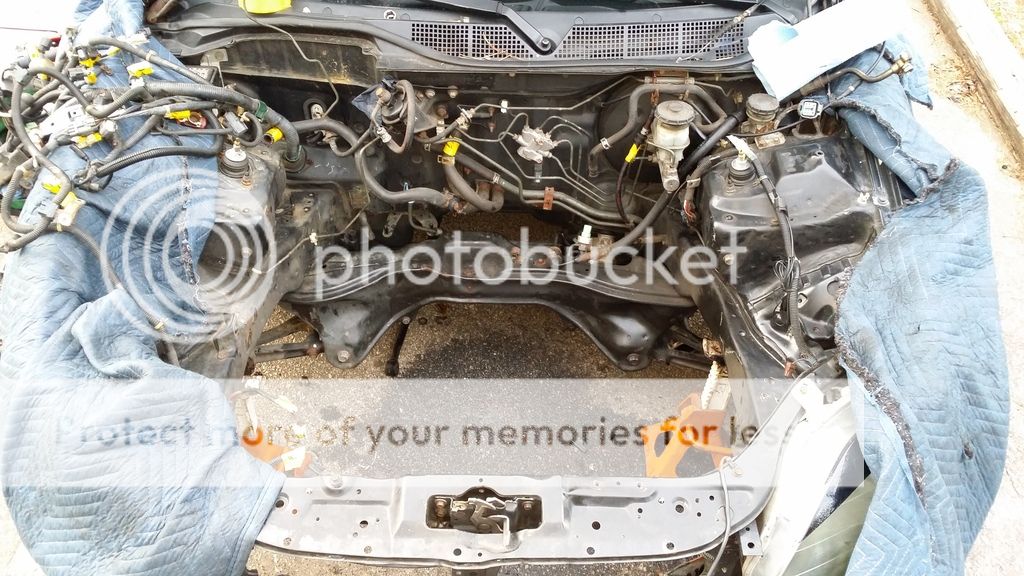
Ready for its new heart.
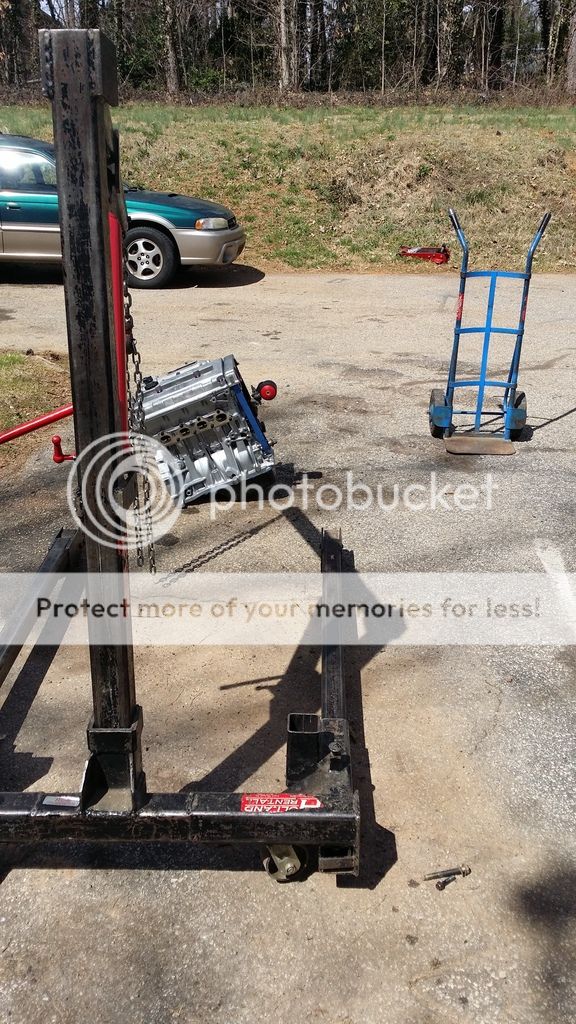
In order not to mess up my floors I put a furniture slider under the engine to get it out of the house, then used a dolly to get it up the hill to my car.
Exedy 8.8lb lightweight cromoly flywheel that I paired with a lightly used Exedy 3-puck sprung clutch, purchased as a package deal from the same friend who sold me the header. I think I paid $100 for it total. Held together really well, actually. New ACT flywheel bolts and Koyo bearing.
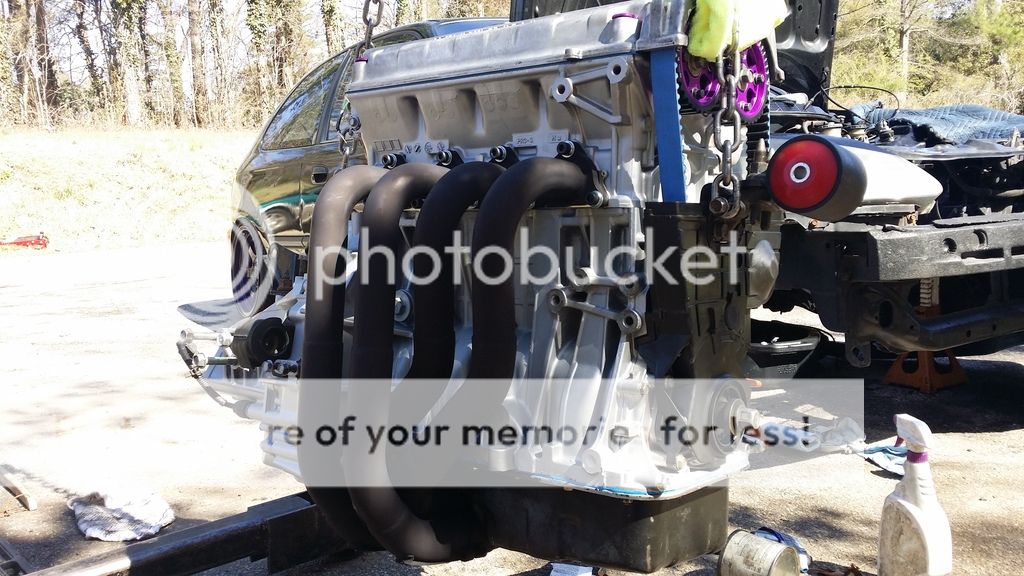
The new heart, along with the aforementioned dolly. I'm using an old SMSP (I think?) header I got from a friend for $50 that I wrapped with exhaust wrap to disguise the rusty nature of it. Still a good header, just no bling factor.
All ready to go in!
BTW, there is a lot of misinformation (at least that I read) about using the stock Civic shifter. It will NOT fit when swapping to a B-series engine, at least mine didn�t. You can see the difference here since I had to go buy a used Integra shifter locally at the last minute.
Of course, as soon as I started it up it was having problems running, in that it wouldn�t stay running unless you constantly blipped the throttle lightly. Give it steady gas and it died, give it no gas and it died. Also, I was getting massive amounts of coolant in the oil, like half a quart every time I test started it. I was also untuned and the engine wasn�t broken in, so I tried not to run it for more than a few seconds at a time to figure out what was wrong with it.
I removed the head and inspected the head gasket and everything seemed fine, but I replaced the Golden Eagle gasket I had with one from Cometic. Still massive coolant leak into the crankcase�turns out I�m an idiot and somehow routed a coolant line (which I thought was a vacuum line or PCV or something) into the crankcase. Wouldn�t you know it, that tends to put a lot of coolant into the crankcase. After switching the lines it still wouldn�t stay running but I was hoping that was all in the tune. I was running 440cc injectors and BC 402 cams off of an appropriately tuned basemap, but there were just too many factors to account for, I suppose.
With everything back together, it was off to the dyno to get broken in and tuned.
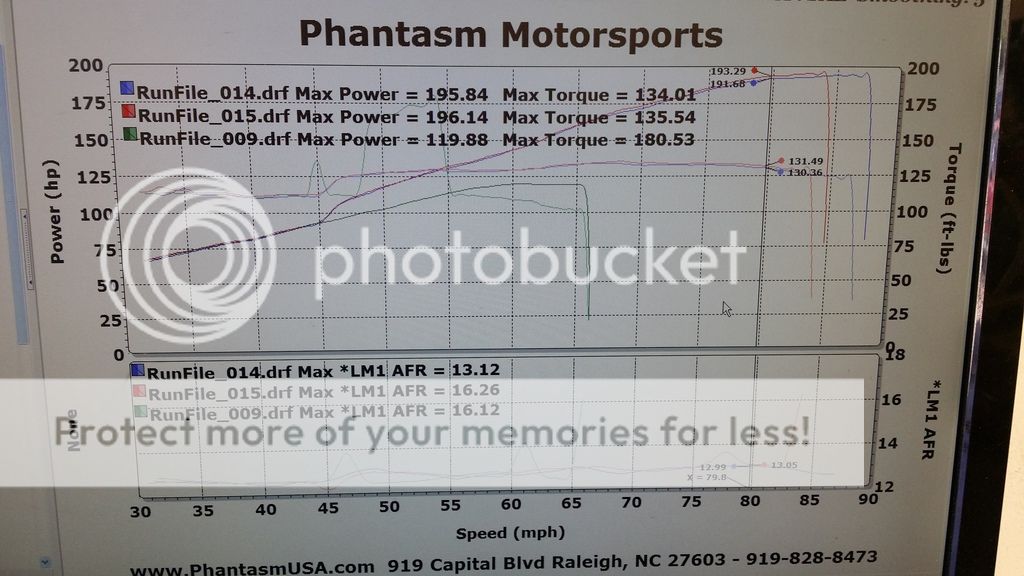
It made pretty much exactly what I built it for, 200whp. Of course, at this point in the timeline we are still about a year and a half behind. Now I�m itching for more power, but at the time I was just praying to the car gods that it wouldn�t blow up. This is from early in the tuning process, it eventually ended up with 199whp and 138ft/lbs tq.
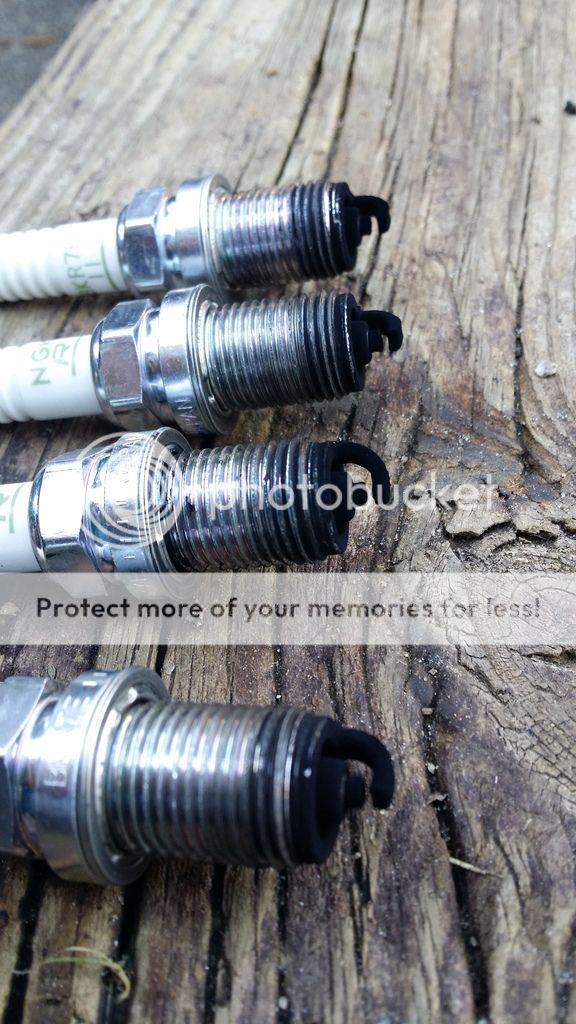
I drove it for probably a year or so before one day it just wouldn�t start. I had driven it around town that day, parked it, then needed to move it like 5 minutes later and all it would do is crank. After literally a full month of diagnosing every single thing I could think of: it had spark, fuel, mechanical timing, ignition timing, compression, swapped ecus, etc. Anyway, long *** story short, it ended up being the spark plugs getting fouled out because it was running rich as *****. New spark plugs and it fired right up, but that still didn�t fix the running rich issue. Remember, it had been tuned perfectly on the dyno. After purchasing and installing an AEM wideband sensor and gauge, it found that my AFRs only went above 10:1 on throttle lift, and 10:1 is the maximum richness the gauge will read, so who knows how much fuel it was dumping. Scared the **** out of me that I had been not only washing my rings and cylinder walls, but that the oil had become the consistency of almost water.
After going back to the tuner, he plugged his test ECU in with my chip and we took it for a drive. Perfect AFRs the entire time. Plugged my ECU up and BAM, back to 10:1. So apparently my ECU took a **** in only one very specific area, fuel management. Bought an ECU off a buddy, swapped my chip in, and�
So a drove it for another year or so, although to be honest, I rarely drove it except on the weekends, I think I have put about 5k miles on it in the last 2-3 years. This is due in large part because remember that GSR transmission I put in it? Yeah, that ended up being a B16 transmission, and I hated the high RPMs on the highway so I mostly just drove city and to meets and stuff. Definitely no long distance drives. 4000rpm at 70mph, meh.
I finally got the chance to take it to the drag strip to see what it would do.
Two buddies and their Integras as we head to the strip.
At the drag strip, on my first run I promptly blew out my 2nd gear synchro. Great. And then it rained. So when I got home, I started looking for a new transmission. I wanted to build it while the old transmission was still in the car, then swap them out. I figured this would be a good chance to get the GSR transmission I wanted in the first place, and after a lot of wheeling and dealing on Craigslist, I bought an EG hatchback with a B18 LS with an LS transmission. Why would I do that, you ask? Because I found someone else who had a GSR transmission who would trade me straight up for an LS transmission. So after pulling the LS trans, I started parting the EG out. It had lots of quality turbo parts and I ended up selling them and making about $1500 profit, as well as getting a GSR transmission essentially for free, along with some slicks mounted on Exospeed wheels that came with the EG.
When I got it:
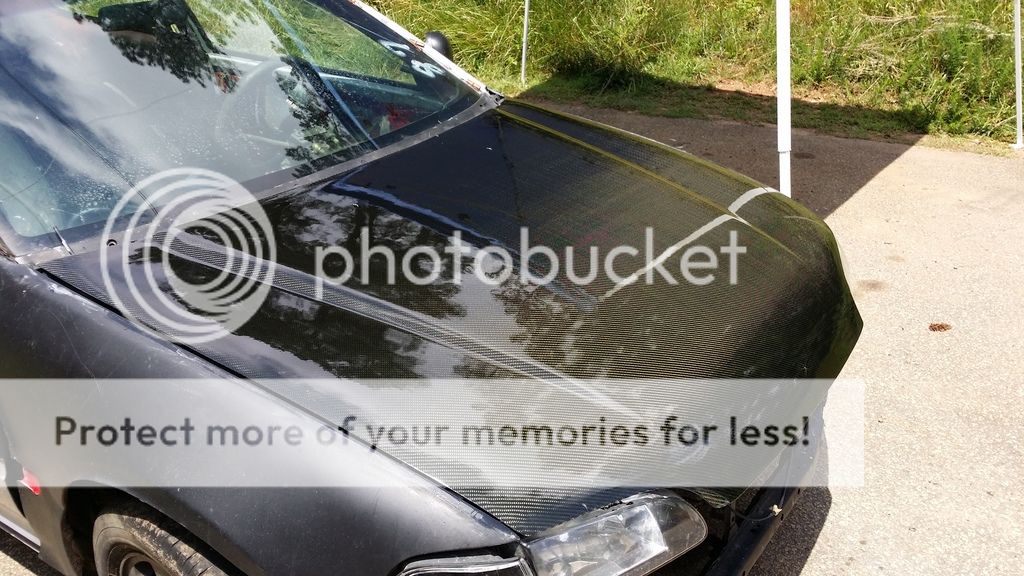
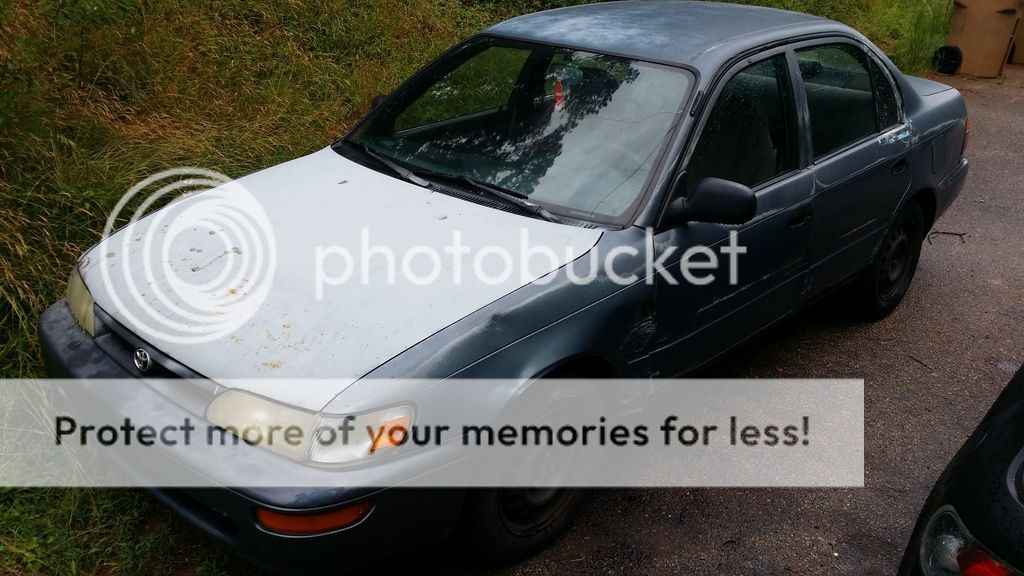
Redid the carbon hood and sold it, parted everything out to a bare shell and sold that too. Traded the engine for a beat-up to **** Corolla, then sold that in two days for $600.
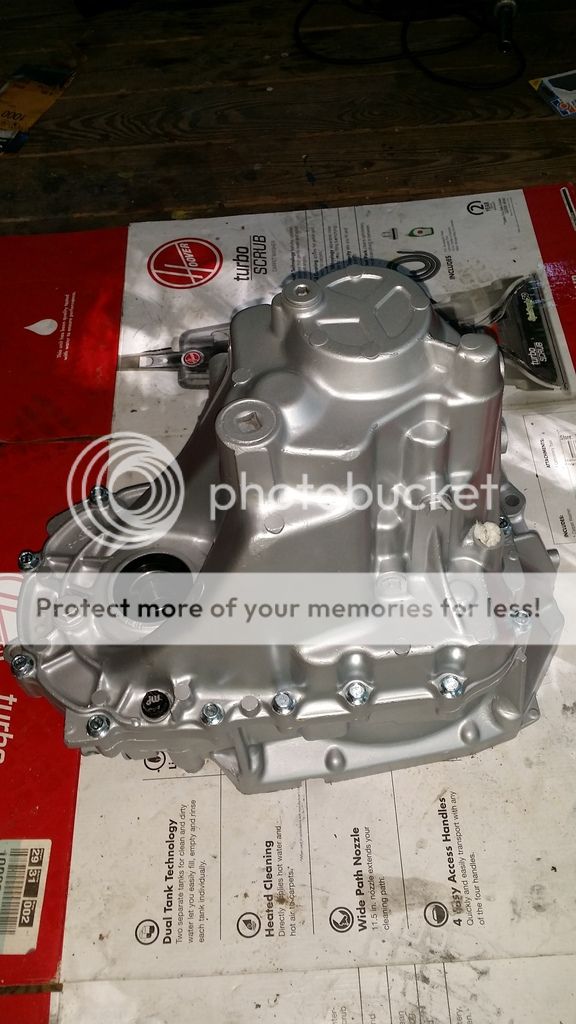
Traded the LS trans for a GSR trans (counted the teeth very carefully this time), and ordered some parts to make it mo� betta.
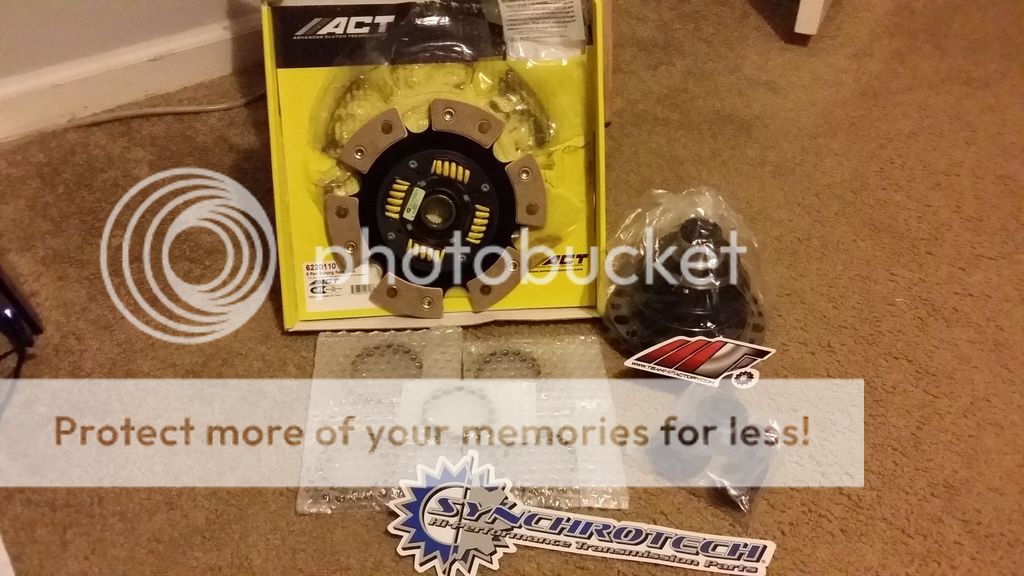
MFactory LSD, full 1st-5th carbon synchros from Syncrotech, MFactory shift bushings, and an ACT 6-puck clutch.
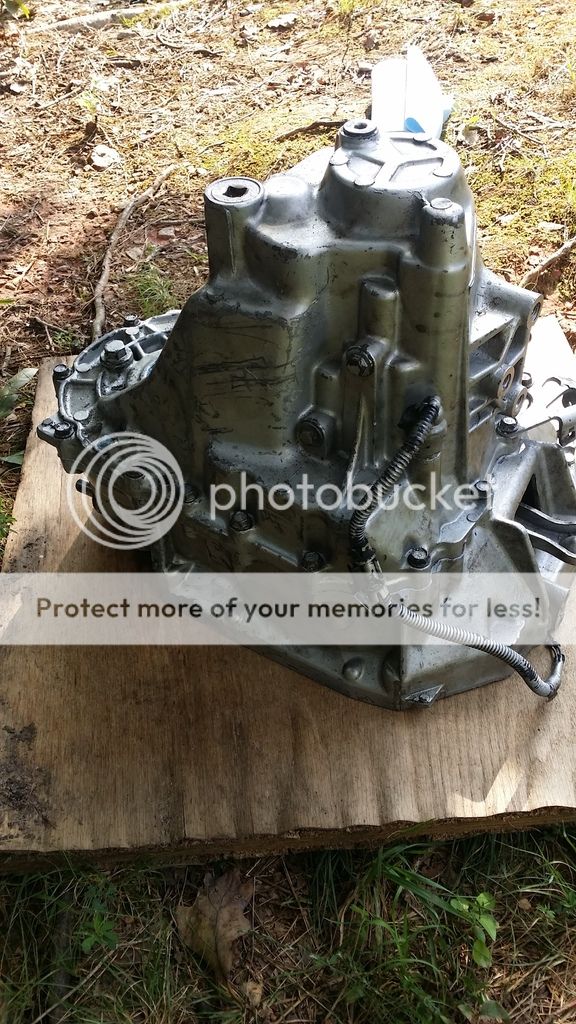
Old GSR:
The shift selector looked a little worn, I decided to try an experiment to see if I could make it work better by smoothing out the selector planes. I never drove it with it worn, but it seemed to work pretty well. I don�t know whether it would have been worse if I hadn�t messed with it or not, so I guess it�s actually a pretty bad �experiment� as science goes�
New hotness with all the goodies installed:
So I took it for a spin because I wanted to see how the LSD changed the handling. Guess what? Again, I suck. The MPH is off, my GPS said I�m going 70mph. Guess what transmission is at 4k rpm @ 70mph with my tire diameter? You got it�B16. Apparently I didn�t count the correct gear teeth. Well, I�m not changing another transmission until something breaks on this one, so **** it. Apparently the car gods want me to have a B16 transmission, so be it.
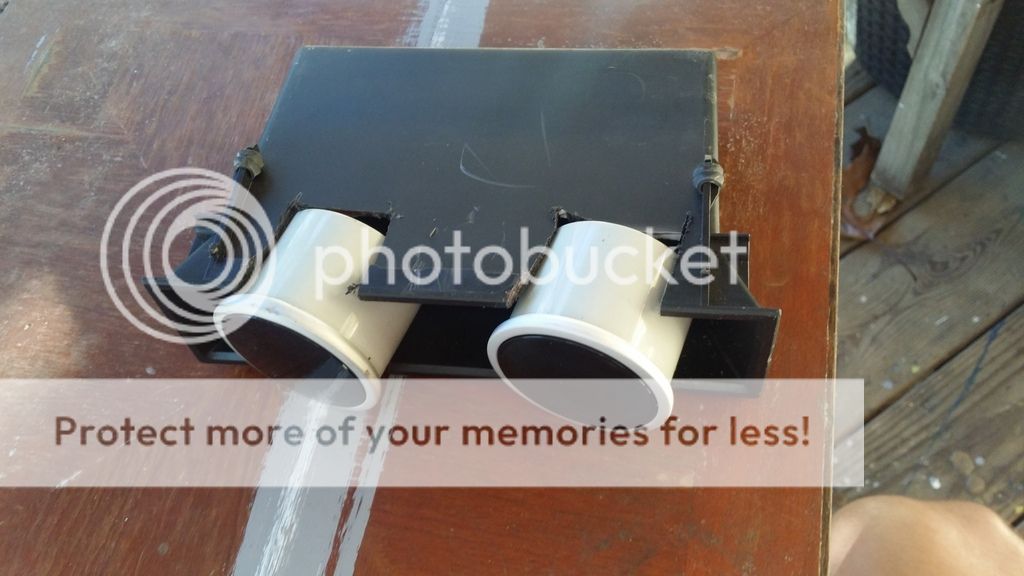
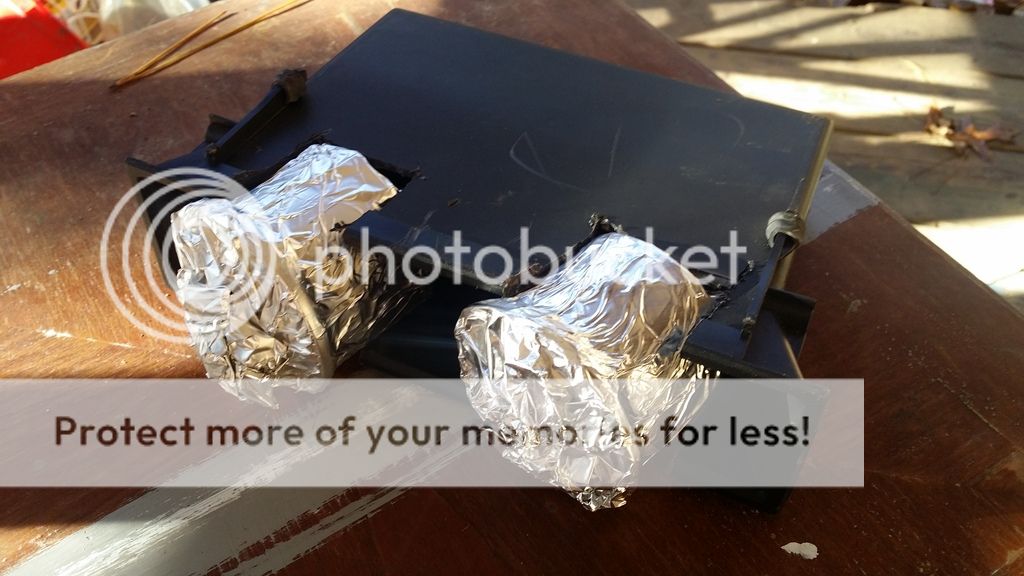
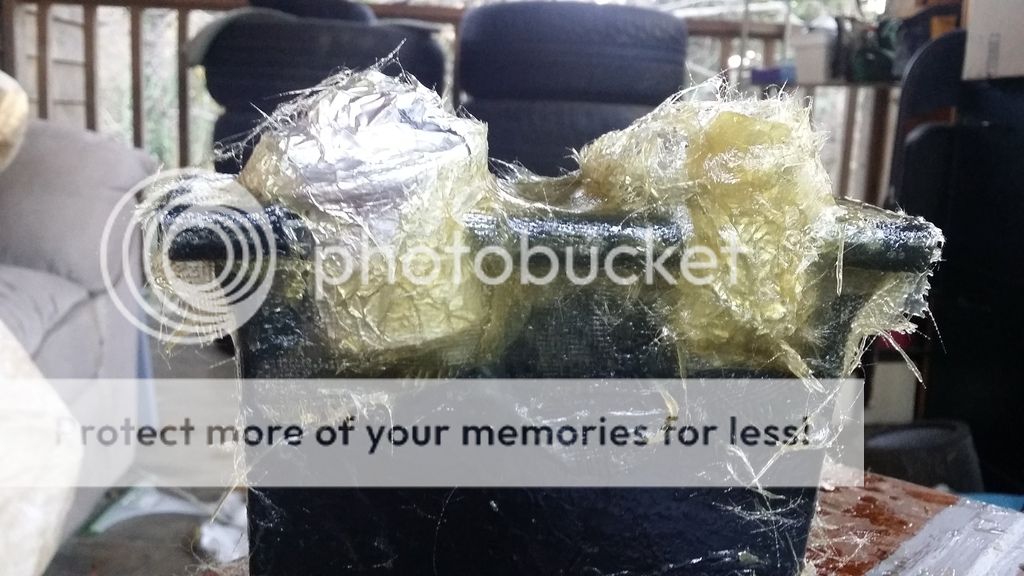
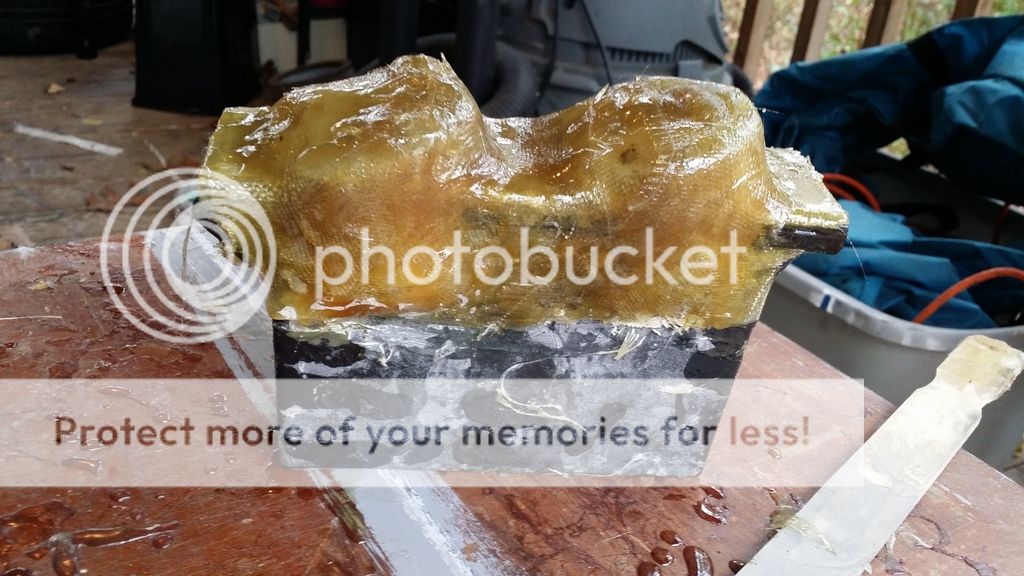
I needed a spot for my oil pressure and fuel pressure gauges, so I decided to make a custom single DIN pod for them.
You can see it installed in this picture.
Ok, that�s a lot of writing and picture sharing for right now, this brings us up to only about 3 or 4 projects ago on the car, lol. I�ll update more later!
Re: The Misadventures of My 1999 Civic DX Hatchback Build
inb4 94 Civic Si quotes the whole post
Great post.
You could do an LS 5th gear swap to bring the RPMs down for highway cruising. It'd be easier/cheaper than swapping the final drive or buying a new transmission. When I was researching my transmission build it seemed an overwhelming number of people recommended pairing the LS 5th with the 4.7x FD.
Re: The Misadventures of My 1999 Civic DX Hatchback Build
Originally Posted by CX-Adam
inb4 94 Civic Si quotes the whole post
Great post.
You could do an LS 5th gear swap to bring the RPMs down for highway cruising. It'd be easier/cheaper than swapping the final drive or buying a new transmission. When I was researching my transmission build it seemed an overwhelming number of people recommended pairing the LS 5th with the 4.7x FD.
PS nice AFR, doe.
Thanks! Honestly, I just don't want to take the transmission out/apart again unless I have to. However, after messing around with Zeal's transmission calculator, what I am now planning on doing is trying to stuff a set of 225/45/16 R888's under it. I'll have to raise the car some for sure, but I honestly don't mind a little more height. I almost tear off my bumper leaving my driveway every time, lol.
So basically what the larger size of tire will do is give me essentially GSR gearing. Check out the picture I'm including to see what I'm talking about.

 03-15-2015, 08:15 AM