
New lip... DIY painting baby!!!
 06-11-2006, 03:07 PM
#1
Honda-Tech Member
Thread Starter
Join Date: Oct 2004
Location: Antelope/Sacramento, CA
Posts: 659
Likes: 0
Received 0 Likes
on
0 Posts
Before the lip and paint
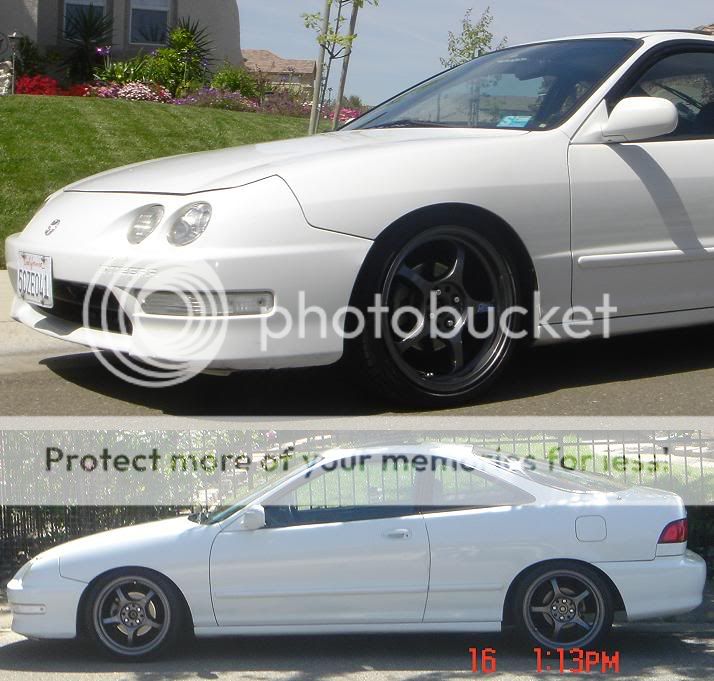
After a few hours, 1 can or duplicolor primer, 3 cans of duplicolor frost white paint, and a whole can of duplicolor clear coat and sanding between each phase.....
I think it came out pretty well. It might look a little off but that's because a freshly painted lip and a dirty car don't mix very well. <--- lazy Total cost for the paint was about $20.
More pics can be seen on page 2
Write Up:
Prep area first by sanding with 230 grit sand paper to give better texture for the primer to stick to. clean with damp rag followed by dry rag to remove all particals.
Good form of painting is to paint parallel to the part (parallel to part long ways) in a back to back motion.
Apply first coat of primer in a very light but wet coat. repeat with a medium coat, and last coat should be a little more heavier; the key to a good coat is to not get wet spots or have it running.

Sand the primer lightly with a 800 grit paper for a smooth surface. Key to painting is the prep work.
I used 3 cans of duplicolor paint for the actual color coating. Again, apply the first coat in a very light, but wet fashion. Then increase the coat thickness with each coat. Put as many coats as the cans will allow, i used up all the cans.

For the clearcoat, again use a very light first coat; then apply a nice heavy coat for the remaining. Try and use the whole can again, as it will give the best finish. Let the paint cure for about 2 days before mounting.

NOTE: this was done on an ABS plastic lip
EDIT: added short write up
EDIT: added more images
Modified by Freshazzburu at 12:01 AM 6/21/2006
After a few hours, 1 can or duplicolor primer, 3 cans of duplicolor frost white paint, and a whole can of duplicolor clear coat and sanding between each phase.....
I think it came out pretty well. It might look a little off but that's because a freshly painted lip and a dirty car don't mix very well.
<--- lazy Total cost for the paint was about $20.More pics can be seen on page 2
Write Up:
Prep area first by sanding with 230 grit sand paper to give better texture for the primer to stick to. clean with damp rag followed by dry rag to remove all particals.
Good form of painting is to paint parallel to the part (parallel to part long ways) in a back to back motion.
Apply first coat of primer in a very light but wet coat. repeat with a medium coat, and last coat should be a little more heavier; the key to a good coat is to not get wet spots or have it running.
Sand the primer lightly with a 800 grit paper for a smooth surface. Key to painting is the prep work.
I used 3 cans of duplicolor paint for the actual color coating. Again, apply the first coat in a very light, but wet fashion. Then increase the coat thickness with each coat. Put as many coats as the cans will allow, i used up all the cans.
For the clearcoat, again use a very light first coat; then apply a nice heavy coat for the remaining. Try and use the whole can again, as it will give the best finish. Let the paint cure for about 2 days before mounting.
NOTE: this was done on an ABS plastic lip
EDIT: added short write up
EDIT: added more images
Modified by Freshazzburu at 12:01 AM 6/21/2006
 06-11-2006, 03:10 PM
#3
Honda-Tech Member
Thread Starter
Join Date: Oct 2004
Location: Antelope/Sacramento, CA
Posts: 659
Likes: 0
Received 0 Likes
on
0 Posts
<TABLE WIDTH="90%" CELLSPACING=0 CELLPADDING=0 ALIGN=CENTER><TR><TD>Quote, originally posted by JDM-EJ1 »</TD></TR><TR><TD CLASS="quote">More pictures? Looks like it turned out pretty well.</TD></TR></TABLE>
will take more once my bumper caps come in for the license plate removal and when my lazy *** finally washes it!!! hehe
will take more once my bumper caps come in for the license plate removal and when my lazy *** finally washes it!!! hehe
06-11-2006, 03:13 PM
#6
Honda-Tech Member
Thread Starter
Join Date: Oct 2004
Location: Antelope/Sacramento, CA
Posts: 659
Likes: 0
Received 0 Likes
on
0 Posts
<TABLE WIDTH="90%" CELLSPACING=0 CELLPADDING=0 ALIGN=CENTER><TR><TD>Quote, originally posted by 95sihb »</TD></TR><TR><TD CLASS="quote">more details.....what grit sand paper did you use? anf before shots  </TD></TR></TABLE>
I'll make a short write up.... scroll up for edited first post
I'll post up a before shot, scroll up to first post... I just realized that i think you meant the lip before painting. Didn't take any before, but i'll put up a pic of one from an e-store
EDIT: added text
Modified by Freshazzburu at 4:26 PM 6/11/2006
</TD></TR></TABLE>I'll make a short write up.... scroll up for edited first post
I'll post up a before shot, scroll up to first post... I just realized that i think you meant the lip before painting. Didn't take any before, but i'll put up a pic of one from an e-store
EDIT: added text
Modified by Freshazzburu at 4:26 PM 6/11/2006
Trending Topics
06-11-2006, 03:26 PM
#8
Honda-Tech Member
Join Date: Sep 2002
Location: KIHEI, HAWAII, USA
Posts: 1,048
Likes: 0
Received 0 Likes
on
0 Posts
<TABLE WIDTH="90%" CELLSPACING=0 CELLPADDING=0 ALIGN=CENTER><TR><TD>Quote, originally posted by Freshazzburu »</TD></TR><TR><TD CLASS="quote">
EDIT: added text</TD></TR></TABLE>
That was fast. !
EDIT: added text</TD></TR></TABLE>
That was fast. !
06-11-2006, 03:32 PM
#9
Honda-Tech Member
Thread Starter
Join Date: Oct 2004
Location: Antelope/Sacramento, CA
Posts: 659
Likes: 0
Received 0 Likes
on
0 Posts
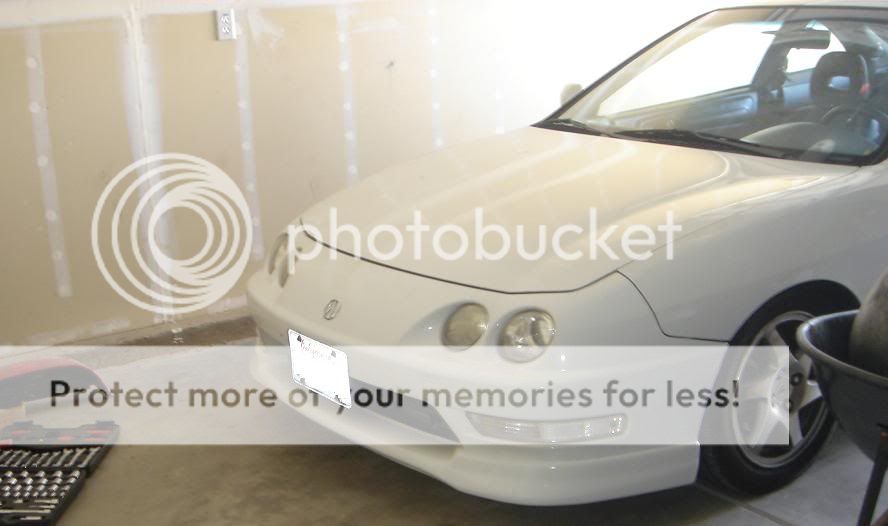
Here is a pic i borrowed from another thread comparing oem vs abs itr lip

Closest to a b4 shot i can get, i should have done a step by step write up with pics. the abs is on the left
Closest to a b4 shot i can get, i should have done a step by step write up with pics. the abs is on the left
06-11-2006, 03:41 PM
#11
Honda-Tech Member
Thread Starter
Join Date: Oct 2004
Location: Antelope/Sacramento, CA
Posts: 659
Likes: 0
Received 0 Likes
on
0 Posts
<TABLE WIDTH="90%" CELLSPACING=0 CELLPADDING=0 ALIGN=CENTER><TR><TD>Quote, originally posted by DxHatchback »</TD></TR><TR><TD CLASS="quote">usually not a fan of DIY color matched lips, or color matched lips in general, but it looks like yours turned out perfectly </TD></TR></TABLE>
Thanks for the compliments...my side skirts were diy with duplicolor also. The key is to have a lot of patience and prep it really well. I did the side skirts about a year and a half ago so they're holding up pretty well, although there are a couple rock chips on it from when i spun out into gravel
</TD></TR></TABLE>Thanks for the compliments...my side skirts were diy with duplicolor also. The key is to have a lot of patience and prep it really well. I did the side skirts about a year and a half ago so they're holding up pretty well, although there are a couple rock chips on it from when i spun out into gravel
 06-11-2006, 07:35 PM
#16
Honda-Tech Member
Thread Starter
Join Date: Oct 2004
Location: Antelope/Sacramento, CA
Posts: 659
Likes: 0
Received 0 Likes
on
0 Posts
<TABLE WIDTH="90%" CELLSPACING=0 CELLPADDING=0 ALIGN=CENTER><TR><TD>Quote, originally posted by MormonBoy »</TD></TR><TR><TD CLASS="quote">after you finished putting the COLOR coat on. did you sand it before putting on the clear? if so, what sand paper. </TD></TR></TABLE>
It's optional... if after the color coat you are not content with the smoothness, you can use a high grade sand paper (2000+) to lightly wet sand and proceed with the clear.
In my case, it was pretty smooth because of the light coats i put (no runs or wet spots) so i skipped that step. It's smooth to the touch as it sits now.
06-13-2006, 09:58 AM
#21
Honda-Tech Member
Thread Starter
Join Date: Oct 2004
Location: Antelope/Sacramento, CA
Posts: 659
Likes: 0
Received 0 Likes
on
0 Posts
<TABLE WIDTH="90%" CELLSPACING=0 CELLPADDING=0 ALIGN=CENTER><TR><TD>Quote, originally posted by undercoverdc2 »</TD></TR><TR><TD CLASS="quote">VERY nice job. definitely get some better pics of it.  </TD></TR></TABLE>
Will do...probably by the end of this week
<TABLE WIDTH="90%" CELLSPACING=0 CELLPADDING=0 ALIGN=CENTER><TR><TD>Quote, originally posted by chitownrida »</TD></TR><TR><TD CLASS="quote">looks great. where'd you get the lip at?</TD></TR></TABLE>
I bought the lip at a local tuner shop called Top Speed here in sac. It was the only one that not only could get that lip, but also had it in stock. Even a lot of the internet vendors are saying they won't be able to order the lip until 3 weeks.
Check this place out though, they are one that says it will take a couple weeks before they will have some available for order, but i've heard good things about them and its cheap, but don't quote me on that.
http://www.velocityshop.com
</TD></TR></TABLE>Will do...probably by the end of this week
<TABLE WIDTH="90%" CELLSPACING=0 CELLPADDING=0 ALIGN=CENTER><TR><TD>Quote, originally posted by chitownrida »</TD></TR><TR><TD CLASS="quote">looks great. where'd you get the lip at?</TD></TR></TABLE>
I bought the lip at a local tuner shop called Top Speed here in sac. It was the only one that not only could get that lip, but also had it in stock. Even a lot of the internet vendors are saying they won't be able to order the lip until 3 weeks.
Check this place out though, they are one that says it will take a couple weeks before they will have some available for order, but i've heard good things about them and its cheap, but don't quote me on that.
http://www.velocityshop.com
06-13-2006, 10:03 AM
#23
Honda-Tech Member
Join Date: Aug 2004
Location: sik three oh, IL, usa
Posts: 1,447
Likes: 0
Received 0 Likes
on
0 Posts
might go with velocity shop..
my boy got a huge *** scuff on his stock bumper.. we are trying to cover it up
how much of the stock bumper will it go over??
my boy got a huge *** scuff on his stock bumper.. we are trying to cover it up
how much of the stock bumper will it go over??
06-13-2006, 10:03 AM
#24
Honda-Tech Member

Join Date: Sep 2003
Location: Blitzburgh.
Posts: 8,774
Likes: 0
Received 0 Likes
on
0 Posts
<TABLE WIDTH="90%" CELLSPACING=0 CELLPADDING=0 ALIGN=CENTER><TR><TD>Quote, originally posted by 5 Skware »</TD></TR><TR><TD CLASS="quote">Looks really good from what I can see.....nice work </TD></TR></TABLE>
I agree, more pics would be key though
</TD></TR></TABLE>I agree, more pics would be key though