
Crazyjetsfan22’s “Ek” hatch build! Lots of pics!

 03-21-2013, 08:11 AM
#752
 03-21-2013, 01:19 PM
#753
Honda-Tech Member
iTrader: (11)

Join Date: Oct 2011
Location: NC
Posts: 1,494
Likes: 0
Received 0 Likes
on
0 Posts
The sticker on my Spoon Duracon came off too. I shifted and took my hand off the shifter and the sticker was in my hand haha.
03-26-2013, 07:36 PM
#755
Honda-Tech Member

Join Date: Jul 2008
Location: milwaukee, wi
Posts: 7
Likes: 0
Received 0 Likes
on
0 Posts
hey what are the fitting size and banjo you used on the brake master cylinder? i bought some and for some reason my banjo keep leaking fluid.
03-27-2013, 07:01 AM
#756
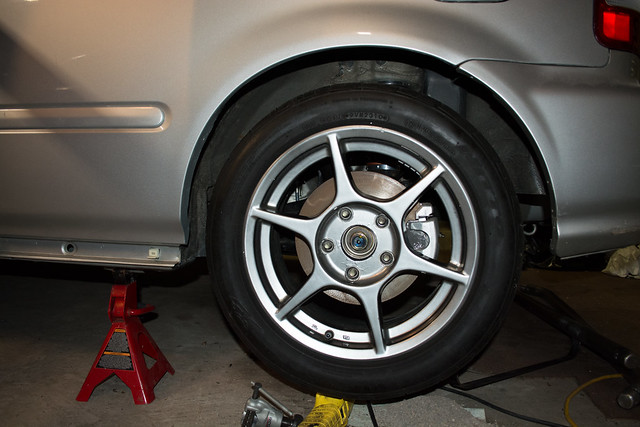
I'm going to move the grounds in the engine bay this weekend to eliminate that, and double check all the others inside to make sure they are good.
Did you put those washers on that they have you with it.
My 90 has a slight leak I think due to it hit on the master it's self
03-30-2013, 05:35 AM
#757
Honda-Tech Member
Join Date: Jul 2008
Location: milwaukee, wi
Posts: 7
Likes: 0
Received 0 Likes
on
0 Posts
yea i did put the washer on but only one side hold but the one that you have the 90 on is the one that leaks.
03-31-2013, 11:57 AM
#758
Here is a small update nothing great mix of cell phone pics and camera pics
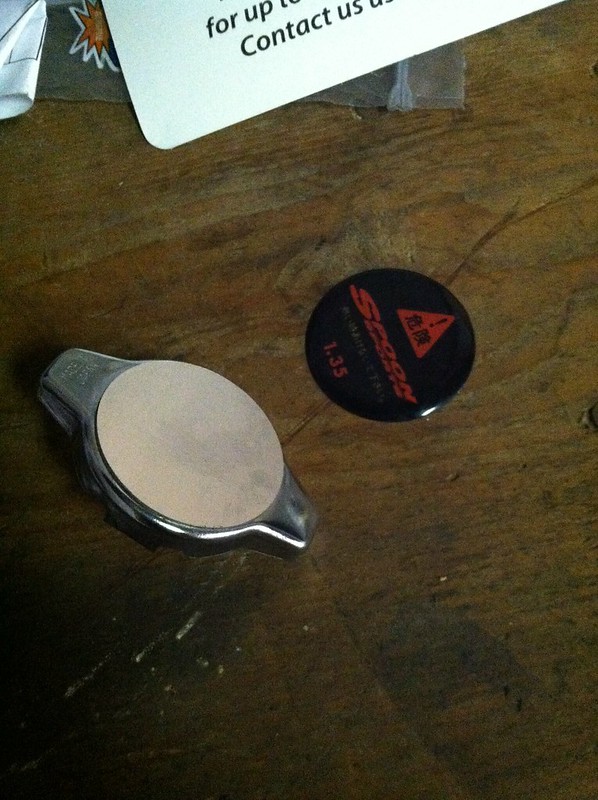
Took my spoon rad cap off so I could add some coolant and this is what I end up with
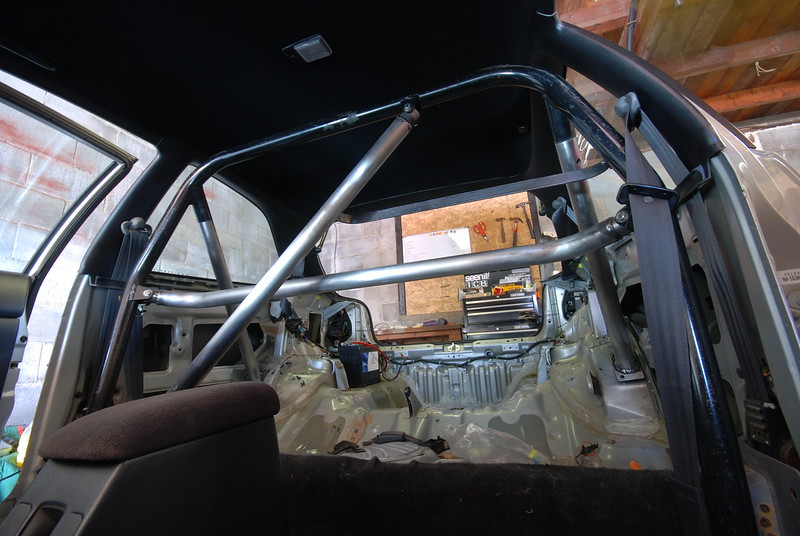
Some pics of the cage mocked up in the car.

Don’t mind my dumbass friend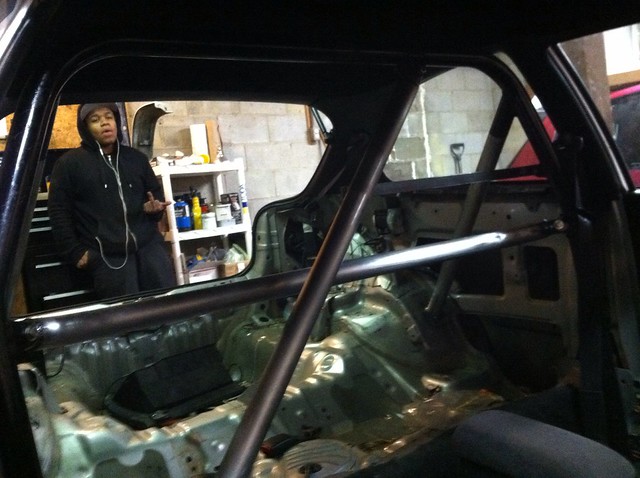
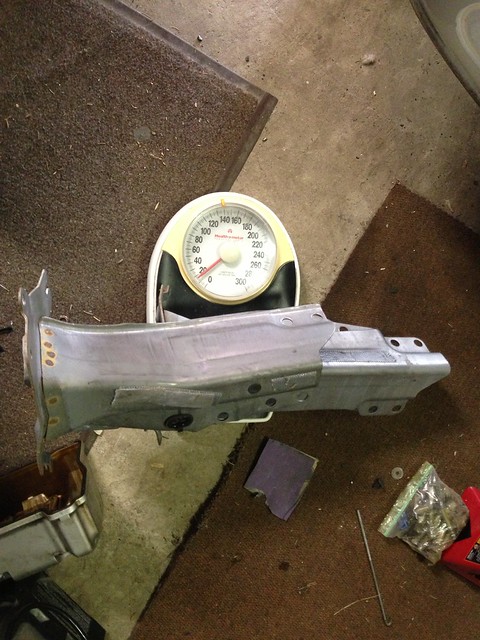
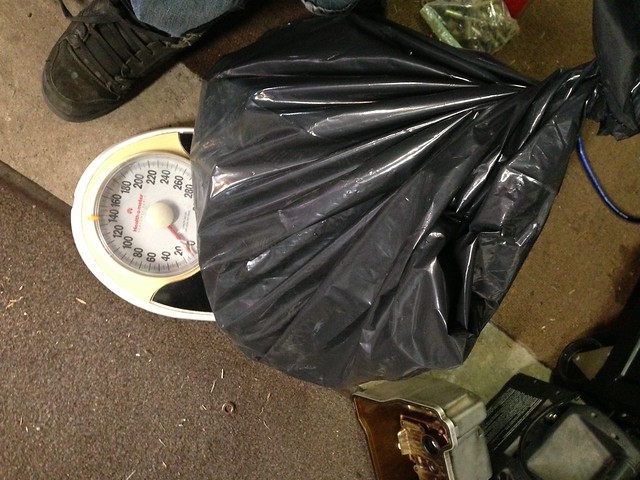
Had to take out the crash braces. Was curious to see what they weighed
Was about 17-18 lbs
Weighted all the sound deadening too
Was about 10lbs
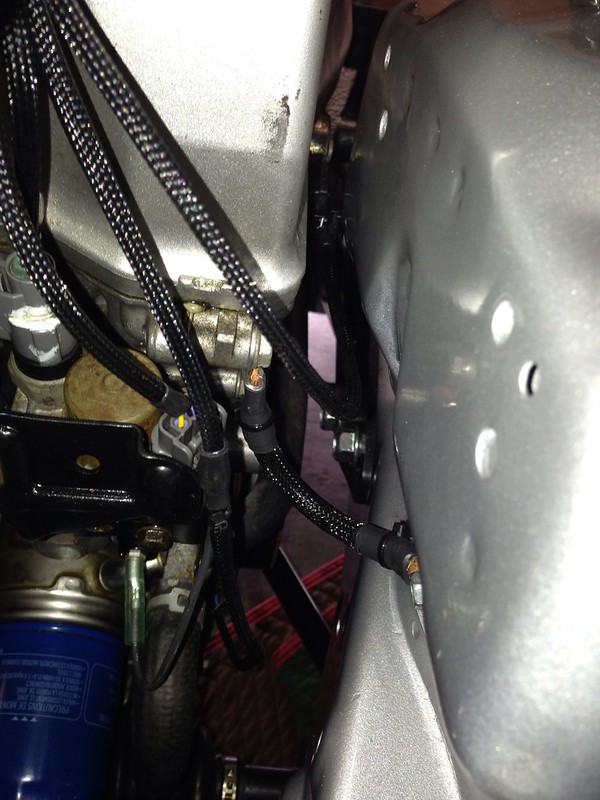
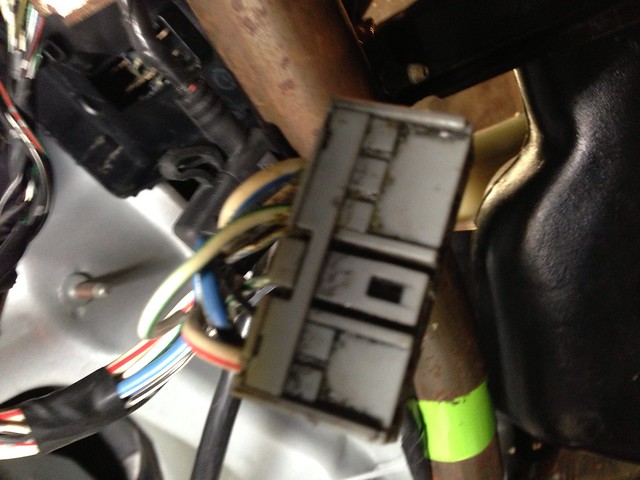
Re did all of my grounds so that they are hidden pretty well.
First ground goes from the trans to the driver side frame rail. Bolted it under the shifter cable bracket and routed under the mount and then to the frame rail

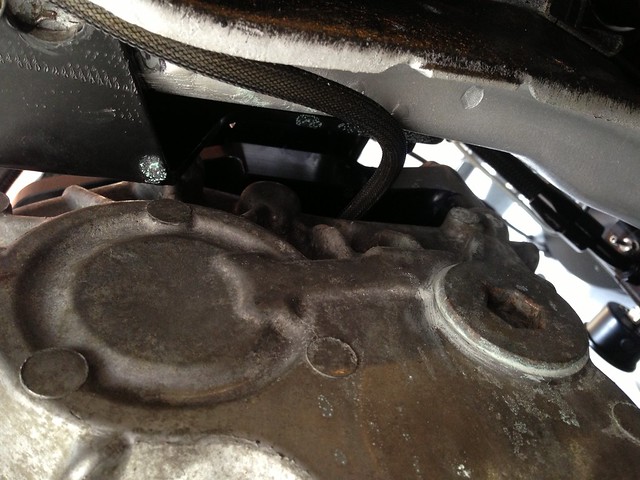
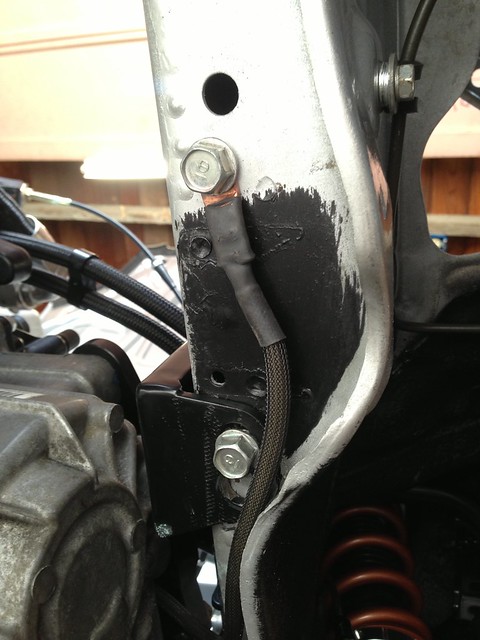
Second ground went from the lower timing chain cover to the passenger side frame rail

What you can see from above in the bay
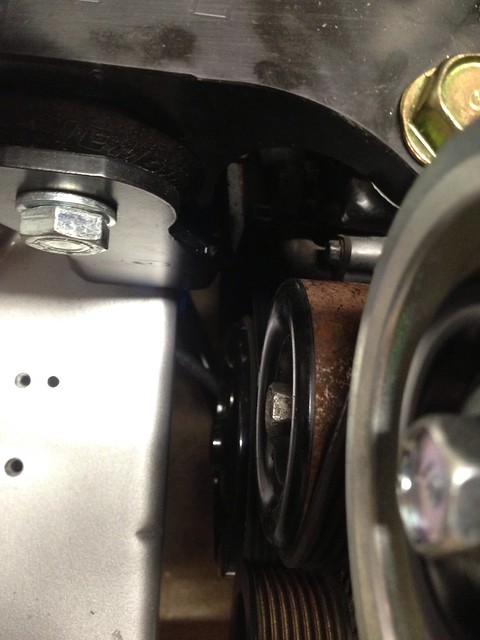
Last ground
This one went from upper chain cover to the shock tower
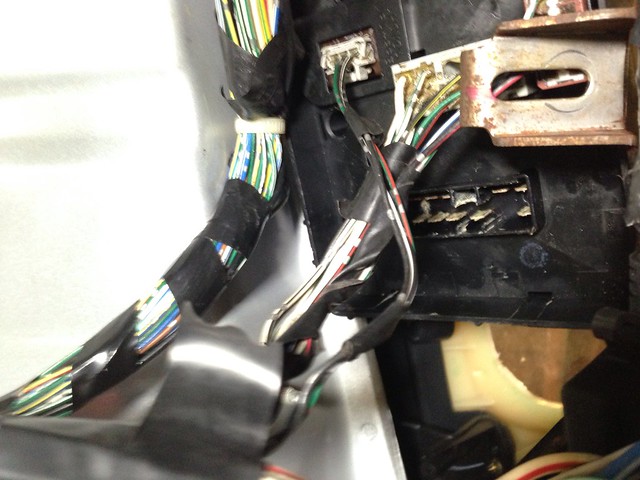
Well now it was time to figure out my issue with the draining of my battery.
First thing I did was re do a few wires to my power distribution block. Upgraded size from the power block to the fuse box and just moved it a bit neater. (no pics )
After all of that I was going to test a few fuses out and I realized with the key no in the car a ton of fuse have power at all times. My headlights would not turn on neither would my cluster or fuel pump. So I randomly checked to see if the grounds were good and come to find out the whole chassis and every ground said 3.6V. So I used the power probe to ground the chassis and lights worked and so did the fuel pump. So my guess is there is a bad ground or some sort of power wire touching the chassis.
I have the worst luck I swear!!
So started at my pass side fuse box and I unplugged this one clip and chassis was grounded now. So something connected to this clip is the cause I guess. I had to run out so didn’t get to finish so hopefully later I can.
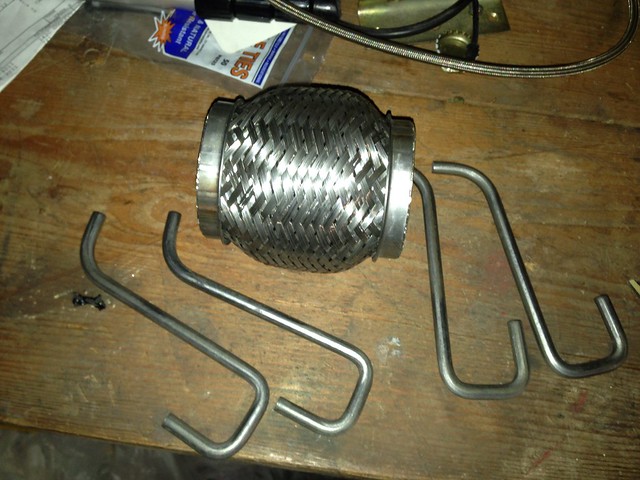
Oh finally got last few pieces for my exhaust. Once this thing can drive taking it to get the exhaust done
Took my spoon rad cap off so I could add some coolant and this is what I end up with
Some pics of the cage mocked up in the car.
Don’t mind my dumbass friend
Had to take out the crash braces. Was curious to see what they weighed
Was about 17-18 lbs
Weighted all the sound deadening too
Was about 10lbs
Re did all of my grounds so that they are hidden pretty well.
First ground goes from the trans to the driver side frame rail. Bolted it under the shifter cable bracket and routed under the mount and then to the frame rail
Second ground went from the lower timing chain cover to the passenger side frame rail
What you can see from above in the bay
Last ground
This one went from upper chain cover to the shock tower
Well now it was time to figure out my issue with the draining of my battery.
First thing I did was re do a few wires to my power distribution block. Upgraded size from the power block to the fuse box and just moved it a bit neater. (no pics )
After all of that I was going to test a few fuses out and I realized with the key no in the car a ton of fuse have power at all times. My headlights would not turn on neither would my cluster or fuel pump. So I randomly checked to see if the grounds were good and come to find out the whole chassis and every ground said 3.6V. So I used the power probe to ground the chassis and lights worked and so did the fuel pump. So my guess is there is a bad ground or some sort of power wire touching the chassis.
I have the worst luck I swear!!
So started at my pass side fuse box and I unplugged this one clip and chassis was grounded now. So something connected to this clip is the cause I guess. I had to run out so didn’t get to finish so hopefully later I can.
Oh finally got last few pieces for my exhaust. Once this thing can drive taking it to get the exhaust done
 04-01-2013, 07:50 AM
#761
Well pretty sure I solved my issue of the battery draining. I sanded a bunch of the paint under the grounds under the dash and the one off the battery and it was fine. Fuel pump turns on so do headlights and everything else. So that's one issue down now. I also got bored and wired up my horn on my steering wheel. Always hated when the quick release steering wheels had no horn.
Next issue I need to tackle is re doing the brake lines. There are a few that seem to leak no matter what. So think the flares were not done well from the person who did them for me first time around so now I have to cut and re flare all of the lines just to be safe.
Next issue I need to tackle is re doing the brake lines. There are a few that seem to leak no matter what. So think the flares were not done well from the person who did them for me first time around so now I have to cut and re flare all of the lines just to be safe.
04-01-2013, 11:11 AM
#762
Honda-Tech Member
iTrader: (1)
Join Date: Apr 2006
Location: NY/NH
Posts: 4,951
Likes: 0
Received 0 Likes
on
0 Posts
hahah me too! that was one thing i was most looking forward to with my rebuild, finally having a working horn again. Haven't had one since my stock steering wheel. I rememeber being so happy to be able to beep it again.
04-02-2013, 09:32 AM
#765
It's deff something I like to have working.
Thanks! Guess great minds think a like!
04-05-2013, 01:15 PM
#766
Well small updates as of today.
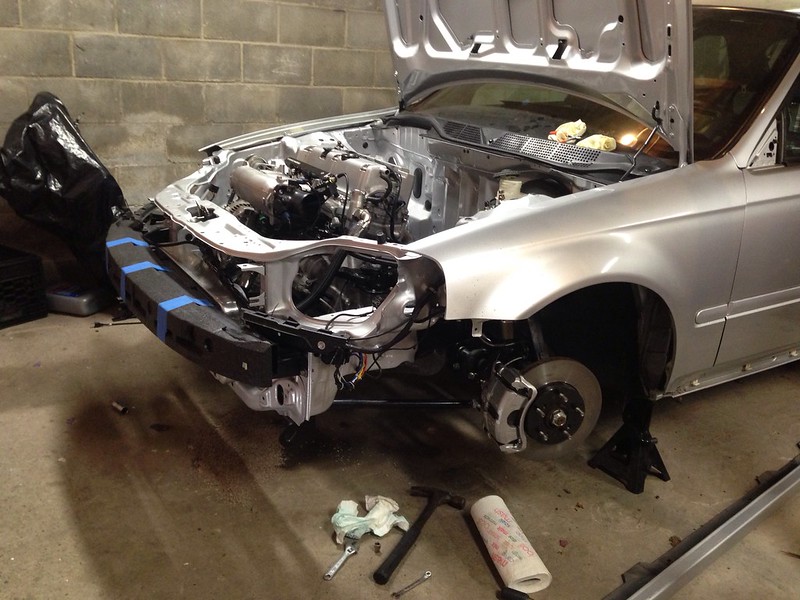
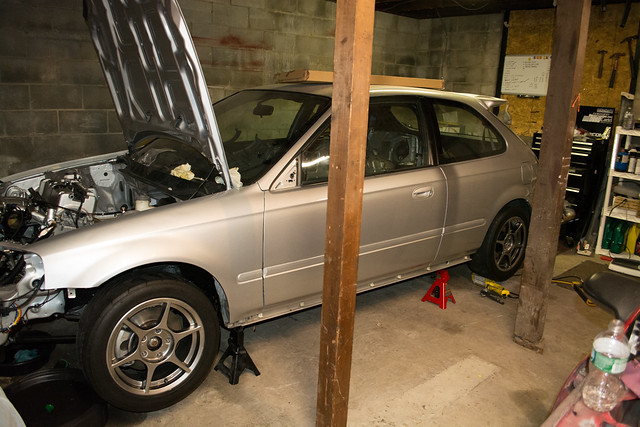
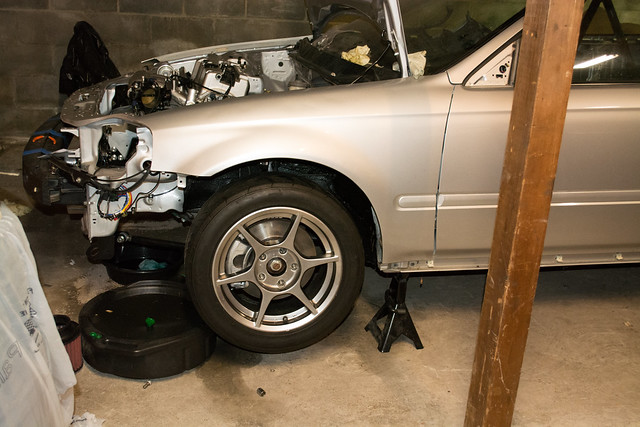
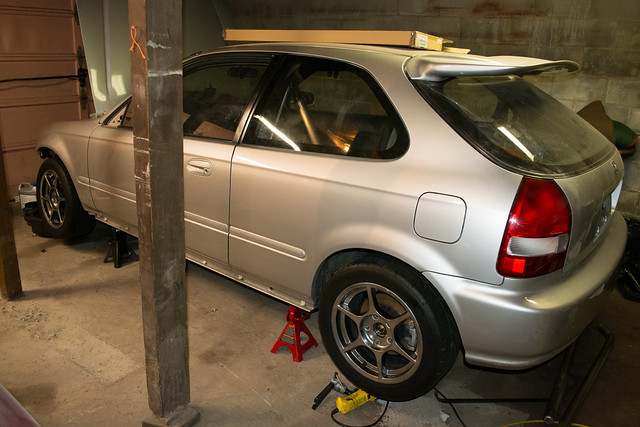
Taking apart the car to fix some stuff having issues with
Wish this was an old pic and not how it currently sits.
Decided to bleed some coolant on the car while it was nice day with garage doors open. And first I see the upper neck leaking yet again after I re sealed it for the easily the 3rd time. Let me just say I have spent way to much money on that blue Honda coolant. Sick and tired of this stupid upper neck
Next issue I came into was this check engine coming back again.
I previously changed the VTC sensor , vtec solenoid , and cleaned the front screen by the idler pulley.
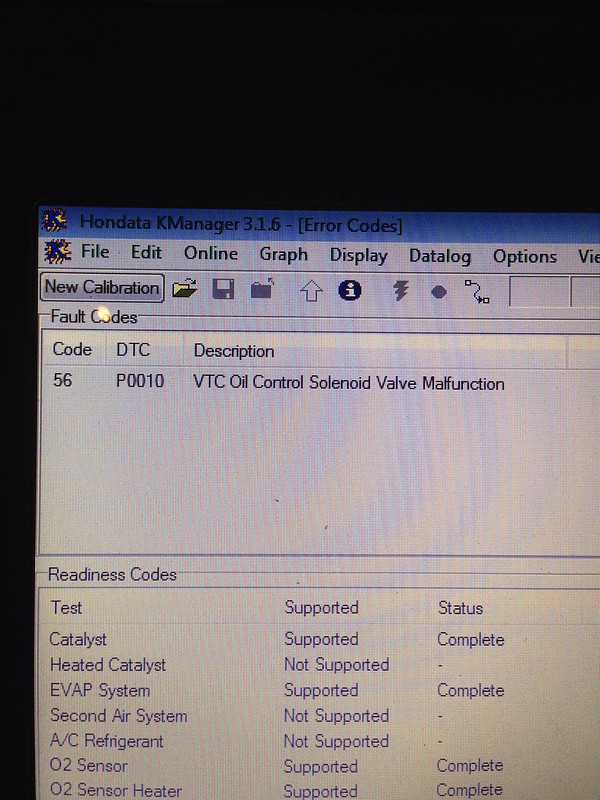
Anyone have suggestions on what to check or do let me know.
Taking apart the car to fix some stuff having issues with
Wish this was an old pic and not how it currently sits.
Decided to bleed some coolant on the car while it was nice day with garage doors open. And first I see the upper neck leaking yet again after I re sealed it for the easily the 3rd time. Let me just say I have spent way to much money on that blue Honda coolant. Sick and tired of this stupid upper neck
Next issue I came into was this check engine coming back again.
I previously changed the VTC sensor , vtec solenoid , and cleaned the front screen by the idler pulley.
Anyone have suggestions on what to check or do let me know.
04-23-2013, 08:06 PM
#767
Well no picture updates right now.
Car is still in pieces as always lol
Sent the engine harness back to wire -worx to have it checked for the VTC issue bc I am stumped right now. Harness checked out fine also had a little something added to it
Still want to try and oem harness just to be 1000%. Gotta grab my friend stock k20 harness.
Brake lines need to still be finished did one or two then had no motivation to continue
Need some motivation bc my logic right now is well its been down this long what's one more week lol
 06-10-2013, 06:41 AM
#769
Sorry for lack of updates have been taking care of some other stuff and lack of motivation to work on the car.
Have been messing with intake set ups lately.
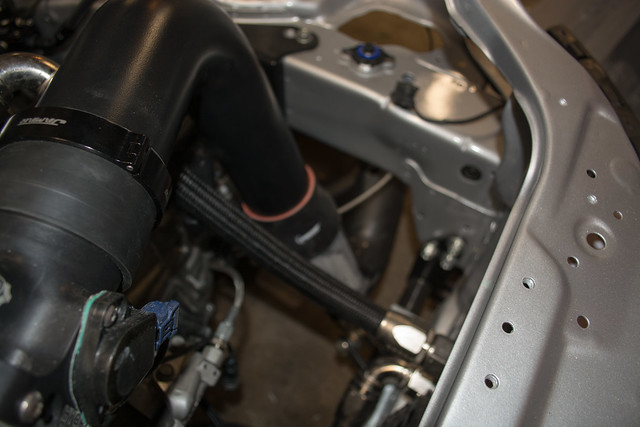
First I have the complete 3.5”
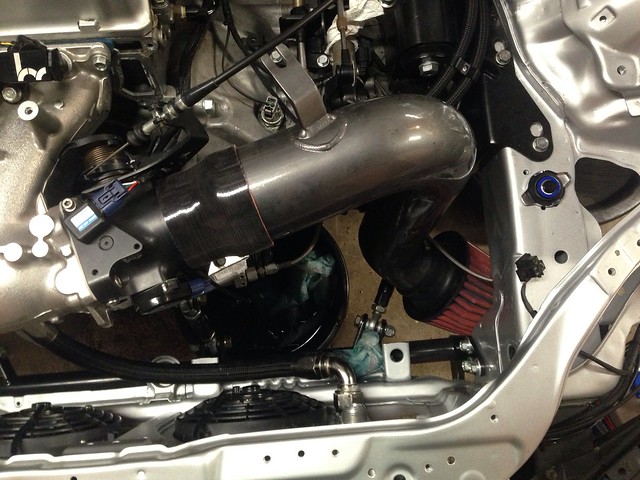
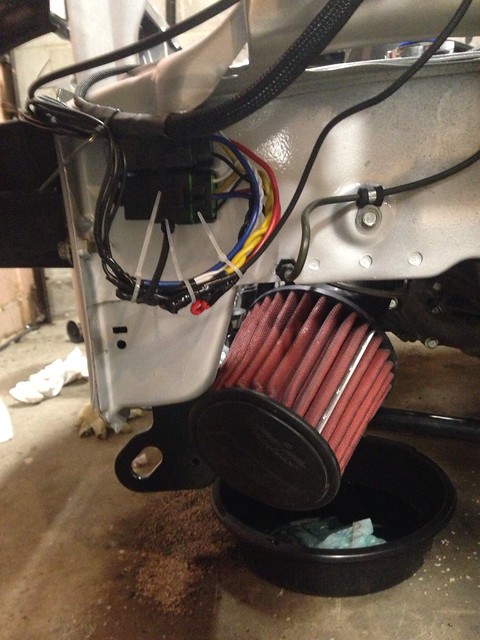
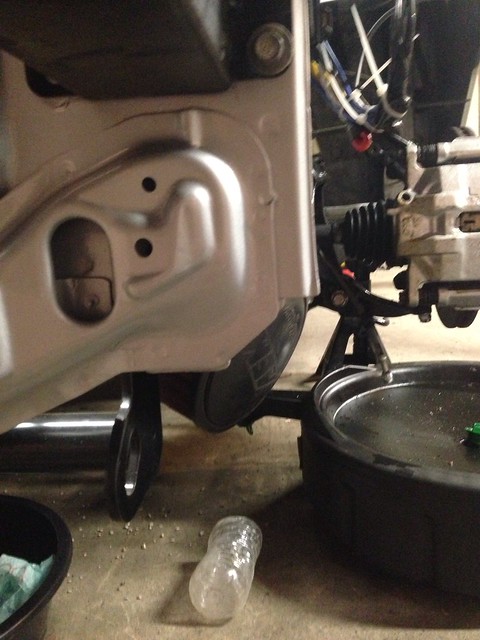
Then I tried to see if a steped intake would work. 3.5” in the fender well then 3” to throttle body

Little out of focus
Would prob cut it so the filter sticks out right into the fender well.
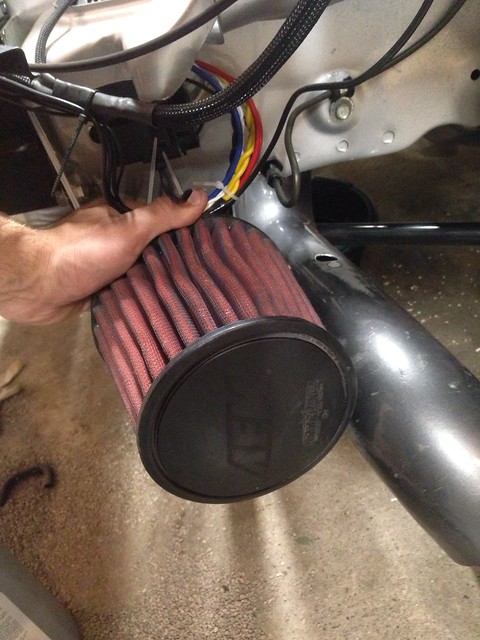
For the intakes the straight 3.5” I don’t think has the best positioning for air to get to.
The stepped intake has better positioning and I still get to use my BDL clamps which I love on the TB
Any suggestions would be great! Need to figure this out so I can drop the intake off to the powdercoater.
Picked up a set of kosie k1’s 15x7 +45 few weeks ago.
Going to use these are track wheels.
I cant decide what tire I should go with on these. Thinking about doing a 225/45 tire all around or doing a 205/50. (no selection of 215’s for 15” tires)
My 4.7 FD makes me think I should do a 225 just due to the high off set I think the tire could rub on the inside a bit which could be fixed with a 3” spacer if that’s the case.
Reason I would not do a 225 is bc think it could be over kill for my ability
Let me know what you guys think!
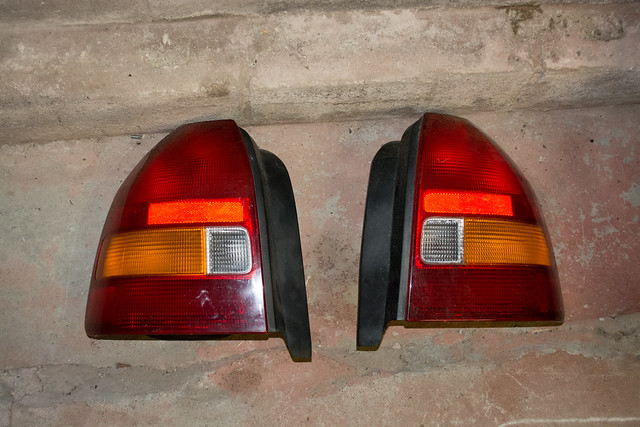
Got a spare set of tail lights for like $15 locally. I am going to put a kill switch in the pass side tail light for drag racing purposes. Also going to switch up and get an odyssey PC680 in the rear.
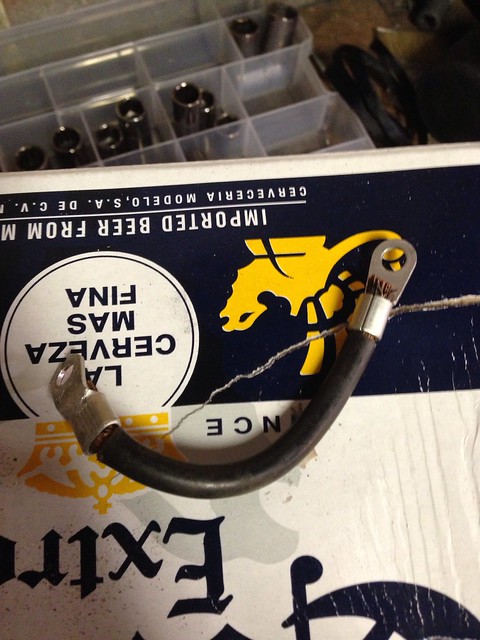
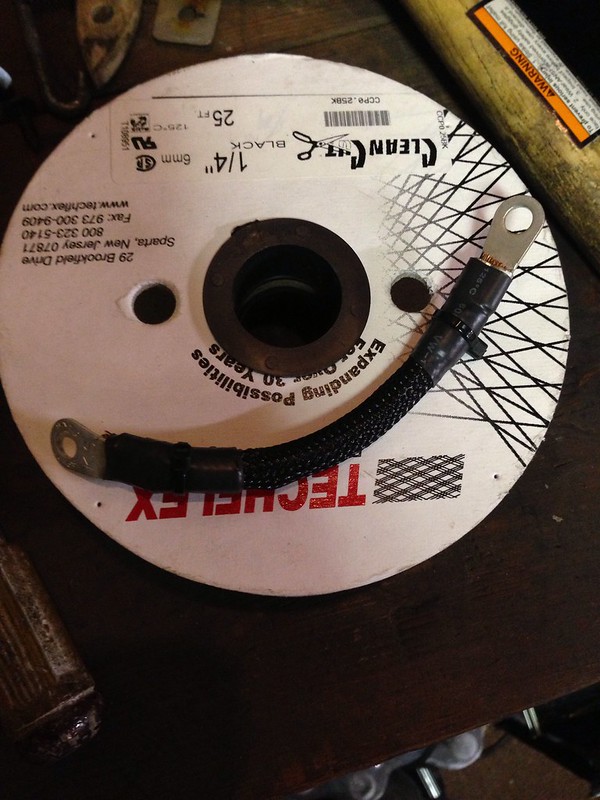
I am redoing the battery cable soon with better material and adding a 200Amp solid state relay with a disconnect so I can remove the tail light with the switch.
Dropping parts off to paint today and hope to drop off some at the powdercoater later in the week
This week i am figuring out the check engine and waiting on a brake line fitting to re do some leaking lines.
Have been messing with intake set ups lately.
First I have the complete 3.5”
Then I tried to see if a steped intake would work. 3.5” in the fender well then 3” to throttle body
Little out of focus
Would prob cut it so the filter sticks out right into the fender well.
For the intakes the straight 3.5” I don’t think has the best positioning for air to get to.
The stepped intake has better positioning and I still get to use my BDL clamps which I love on the TB
Any suggestions would be great! Need to figure this out so I can drop the intake off to the powdercoater.
Picked up a set of kosie k1’s 15x7 +45 few weeks ago.
Going to use these are track wheels.
I cant decide what tire I should go with on these. Thinking about doing a 225/45 tire all around or doing a 205/50. (no selection of 215’s for 15” tires)
My 4.7 FD makes me think I should do a 225 just due to the high off set I think the tire could rub on the inside a bit which could be fixed with a 3” spacer if that’s the case.
Reason I would not do a 225 is bc think it could be over kill for my ability
Let me know what you guys think!
Got a spare set of tail lights for like $15 locally. I am going to put a kill switch in the pass side tail light for drag racing purposes. Also going to switch up and get an odyssey PC680 in the rear.
I am redoing the battery cable soon with better material and adding a 200Amp solid state relay with a disconnect so I can remove the tail light with the switch.
Dropping parts off to paint today and hope to drop off some at the powdercoater later in the week
This week i am figuring out the check engine and waiting on a brake line fitting to re do some leaking lines.
06-10-2013, 09:01 AM
#770
Honda-Tech Member
In the second pic of your newest post you use that clamp to secure that line. Where are you getting those clamps I have been looking for those.
 06-10-2013, 09:13 AM
#772
Honda-Tech Member
iTrader: (1)
Join Date: Apr 2006
Location: NY/NH
Posts: 4,951
Likes: 0
Received 0 Likes
on
0 Posts
they sell them at most home improvement stores. home depot for sure. possibly auto parts stores too. i need to buy some more myself since i lost all the extras i had.
06-10-2013, 10:13 AM
#773
Honda-Tech Member
 06-10-2013, 12:54 PM
#775
Thanks!
Here is a link to them. Harbor freight sells assorted sizes which are nice
http://www.harborfreight.com/18-piec...ent-67657.html
Tell me about it! I am having motor issues right now. Need to swap the cam gear and re time the motor that should solve it.
Here is a link to them. Harbor freight sells assorted sizes which are nice
http://www.harborfreight.com/18-piec...ent-67657.html
Tell me about it! I am having motor issues right now. Need to swap the cam gear and re time the motor that should solve it.