
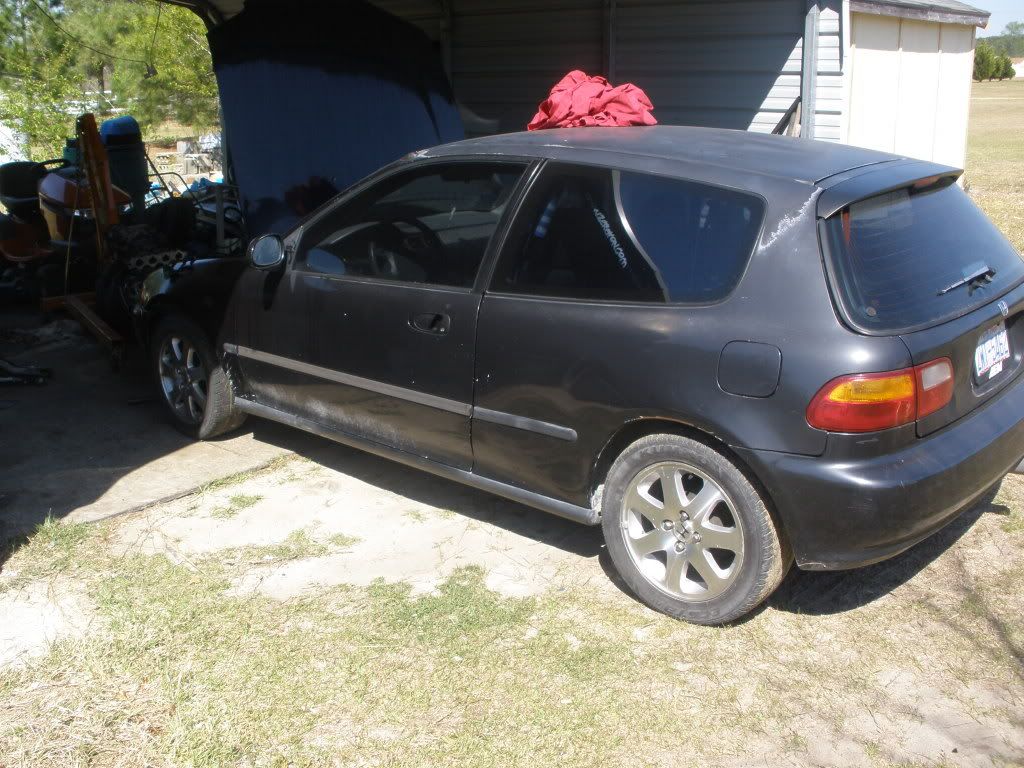
My Shitbox.
 04-19-2011, 04:47 PM
#1
Honda-Tech Member
Thread Starter
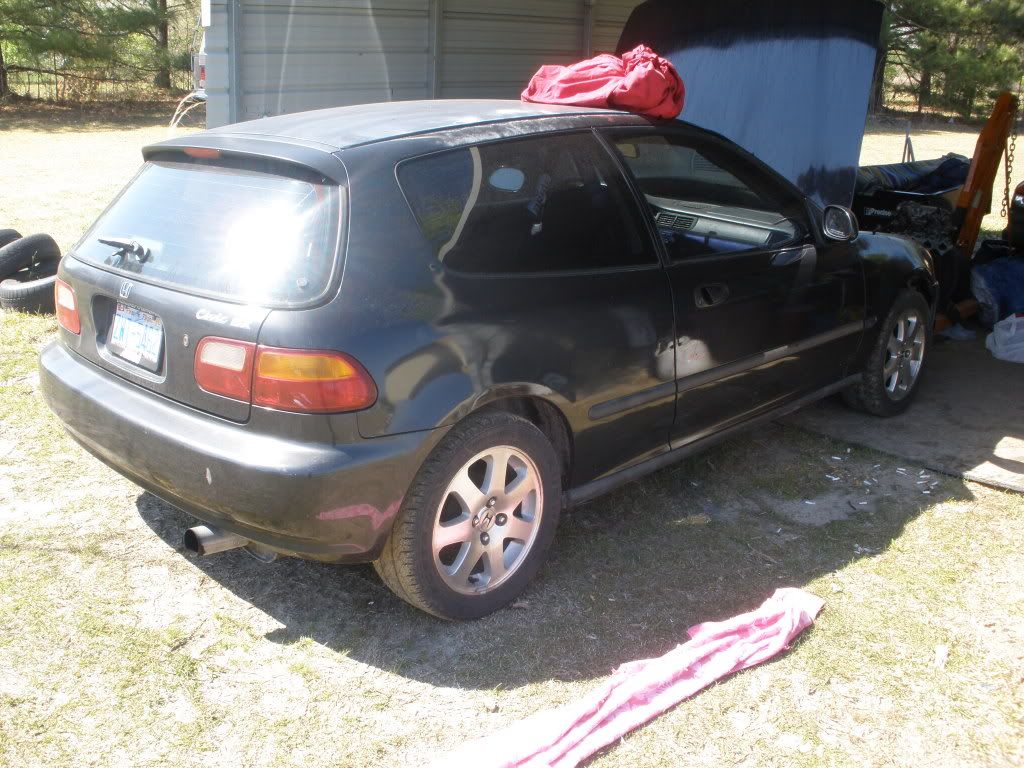
So I have owned quite a few Honda's along the way. Been a trade ***** and always selling them. Well, I recently started up a blog and a East Coast based Honda site and what better then to own a Honda. So I sold the Miata and began the hunt for a Site Car to start building.
Long story, got dicked on a EK Fronted B16a-T Del Sol.
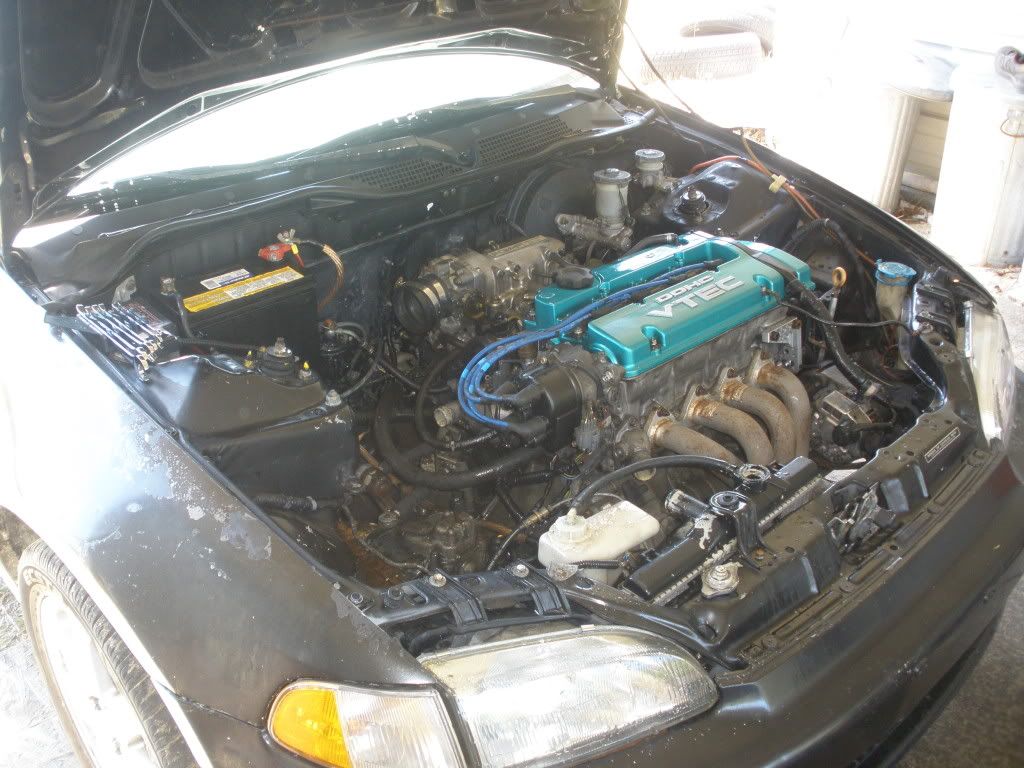
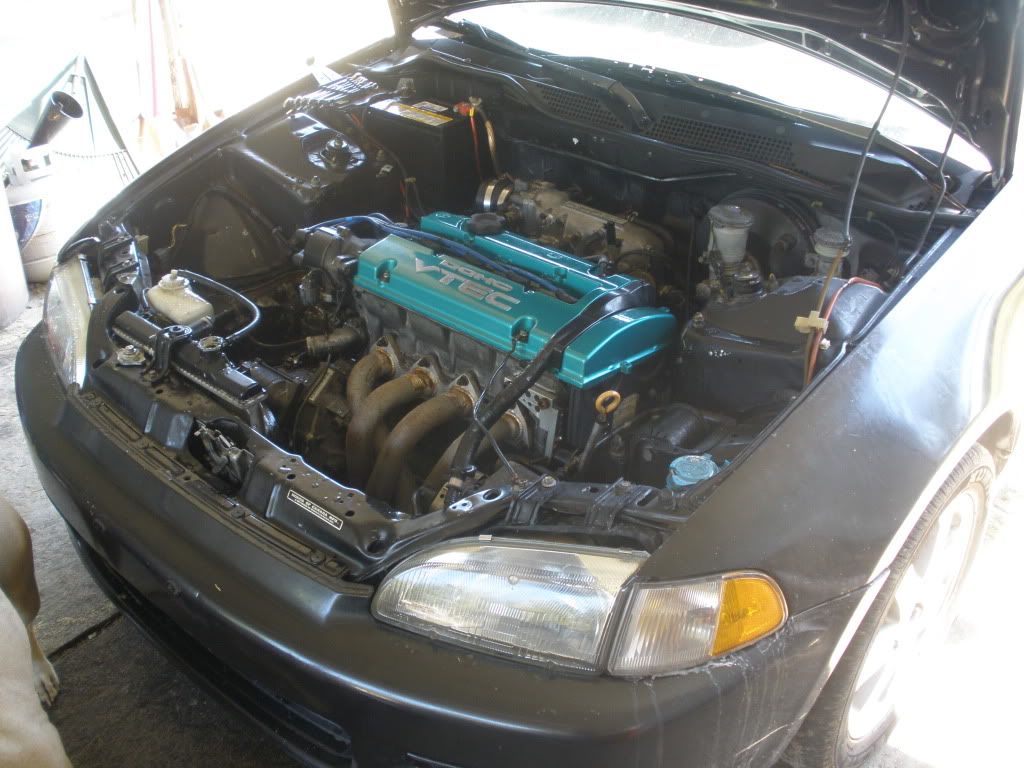
Stumbled upon this and bought it. Guy couldnt figure out why it was overheating and I knew exactly why after looking in the head with the VC off.
So without further ado:
Mods:
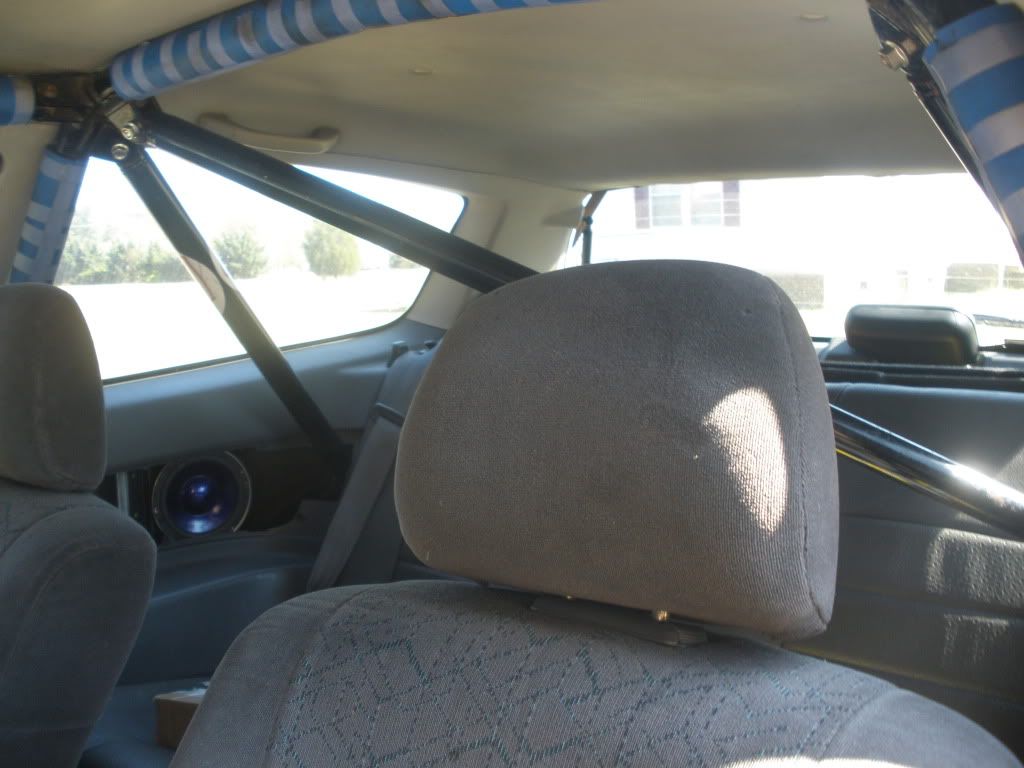
6 Pt. Cage
EK Seats
EG Arm Rest
Si Cluster
Si Wheels
Innovative Mounts
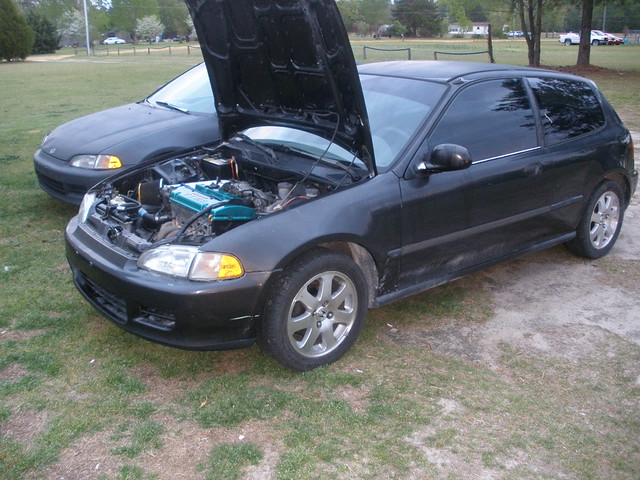
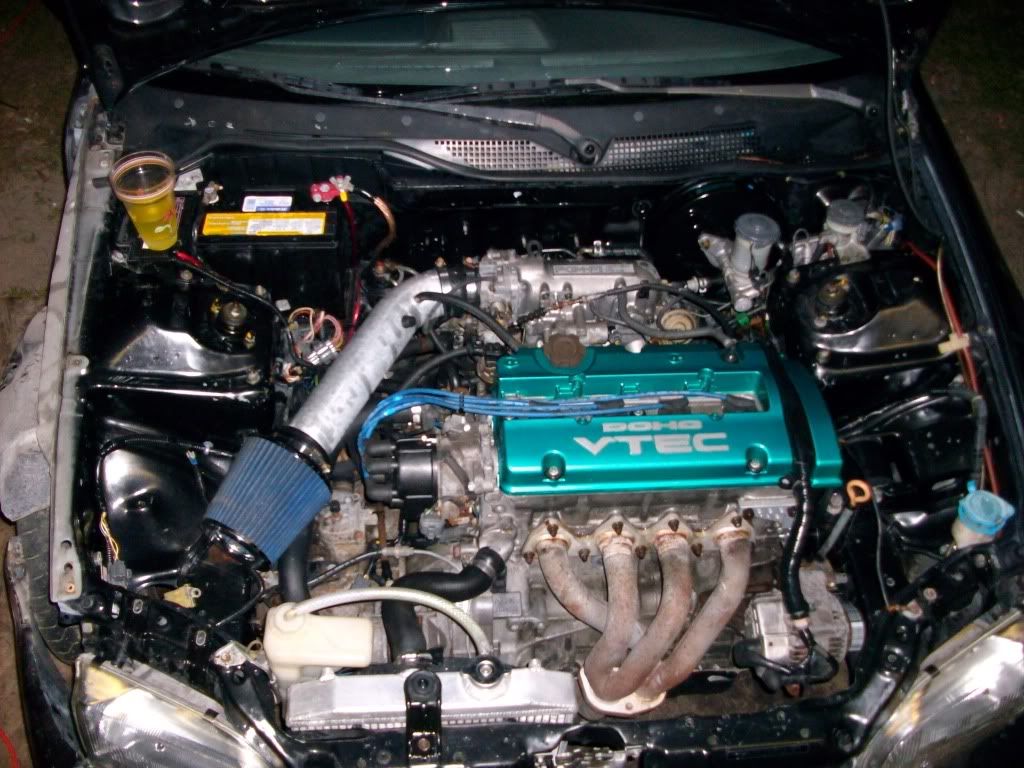
JDM H22a Swap
DC Sports Header
Hi Flow Cat
WS2 Exhaust
ARP Headstuds
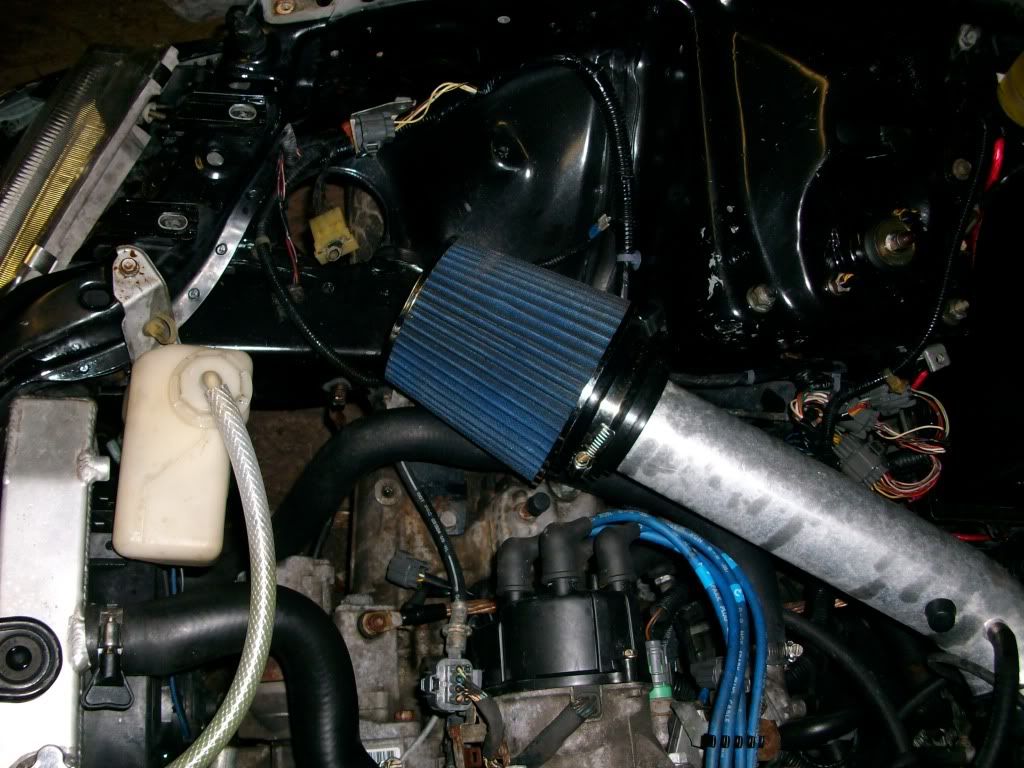
Intake
Cometic HG
Tuned on Crome
Had a blown HG.
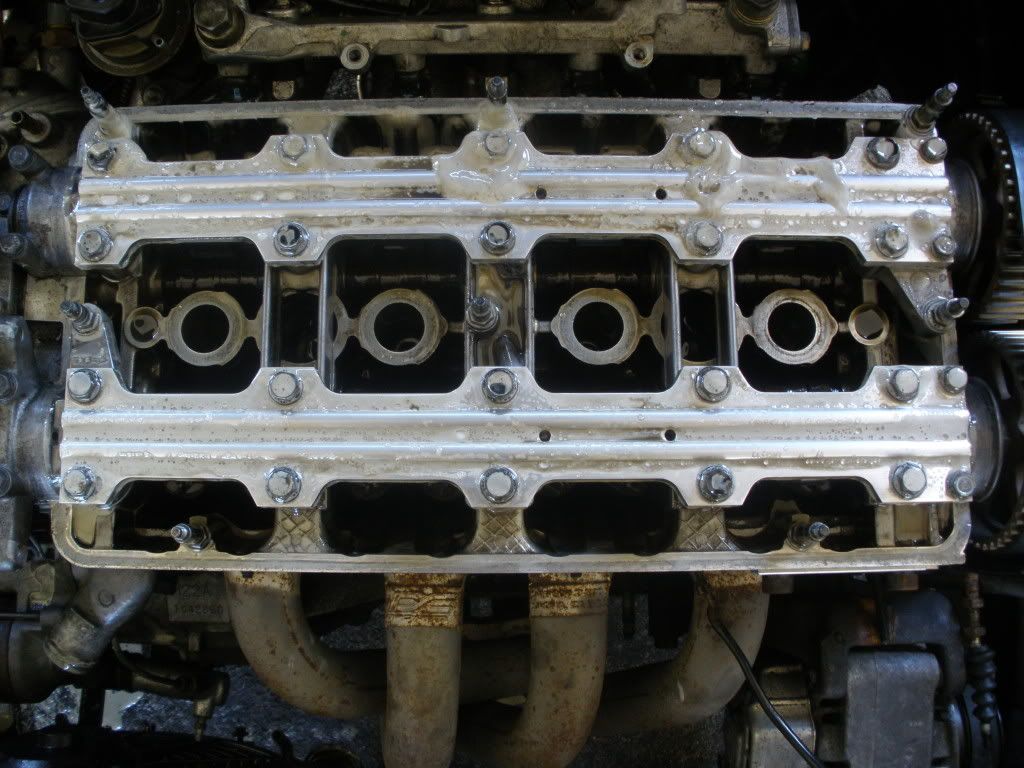
Started pulling the head today. Got the intake manifold off, and cam caps loose. Being that my tools and **** were stolen, all my specific sockets and wrenches are gone. Waiting on a 12pt 13mm To take the nuts off the head studs.
Machine shop tomorrow. Possibly back together tomorrow.
Wire tuck this weekend.
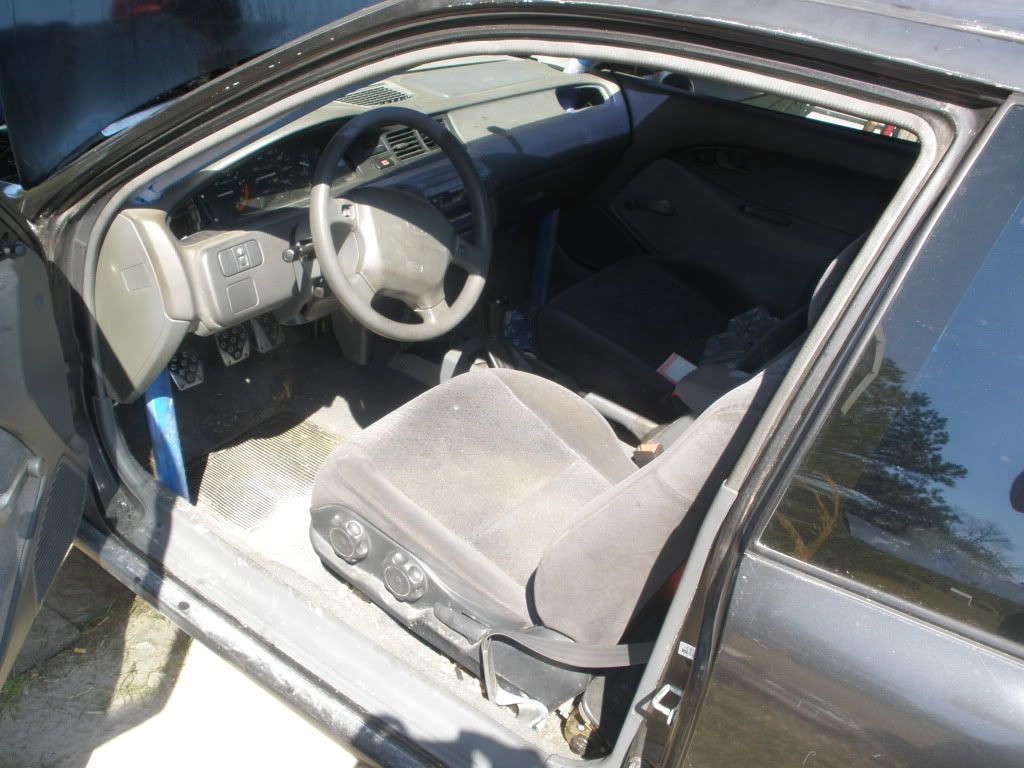
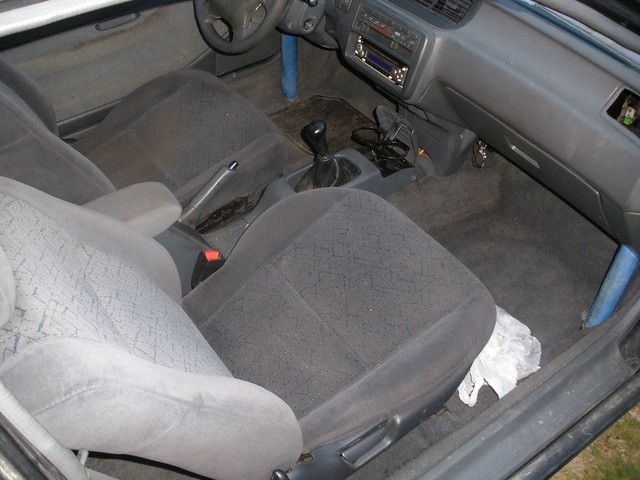
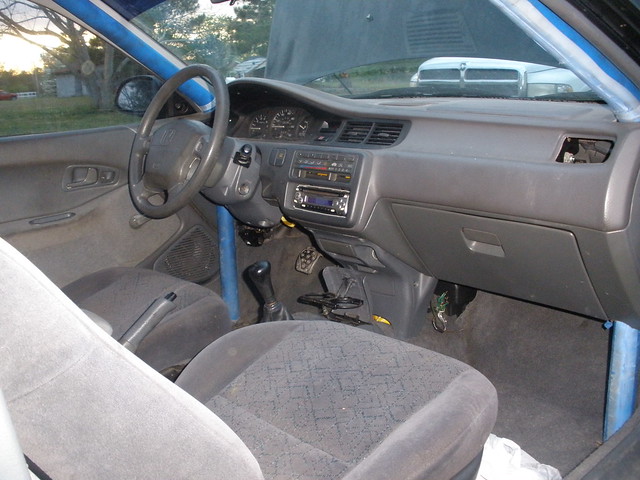
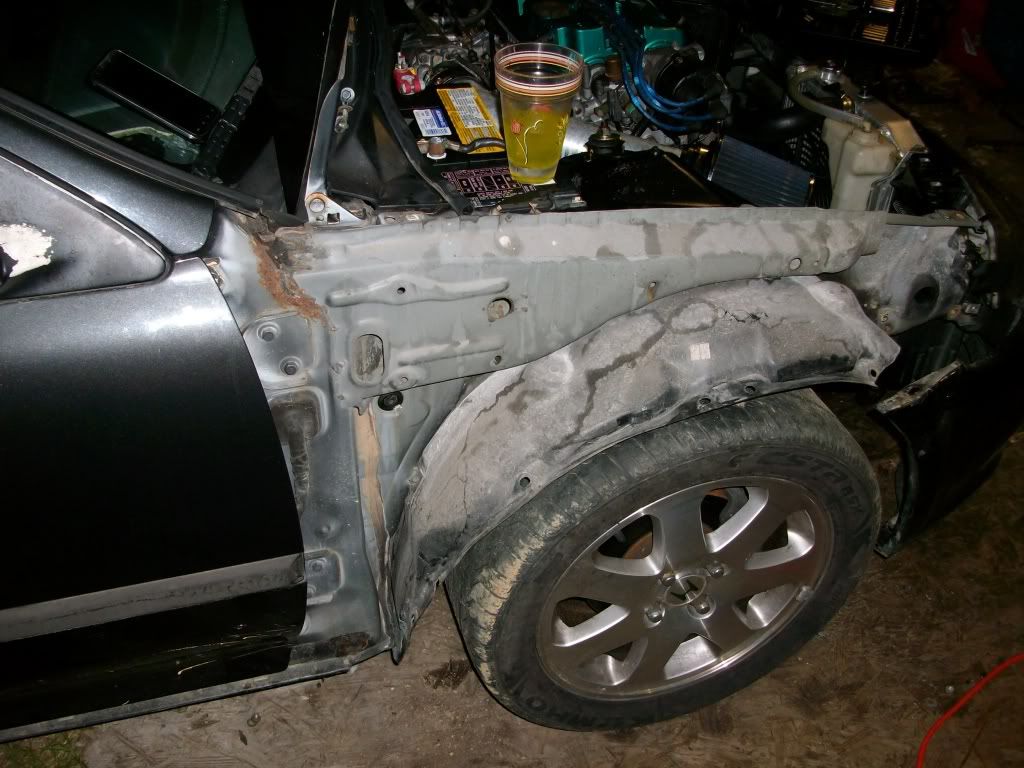
Its disgusting on the interior, so thatll be another project for the weekend. Also need to find a new dash and rear panels because the previous owner is a tard and hacked them to fit the cage.


Long story, got dicked on a EK Fronted B16a-T Del Sol.
Stumbled upon this and bought it. Guy couldnt figure out why it was overheating and I knew exactly why after looking in the head with the VC off.
So without further ado:
Mods:
6 Pt. Cage
EK Seats
EG Arm Rest
Si Cluster
Si Wheels
Innovative Mounts
JDM H22a Swap
DC Sports Header
Hi Flow Cat
WS2 Exhaust
ARP Headstuds
Intake
Cometic HG
Tuned on Crome
Had a blown HG.
Started pulling the head today. Got the intake manifold off, and cam caps loose. Being that my tools and **** were stolen, all my specific sockets and wrenches are gone. Waiting on a 12pt 13mm To take the nuts off the head studs.
Machine shop tomorrow. Possibly back together tomorrow.
Wire tuck this weekend.
Its disgusting on the interior, so thatll be another project for the weekend. Also need to find a new dash and rear panels because the previous owner is a tard and hacked them to fit the cage.
Originally Posted by 94EGCoopey
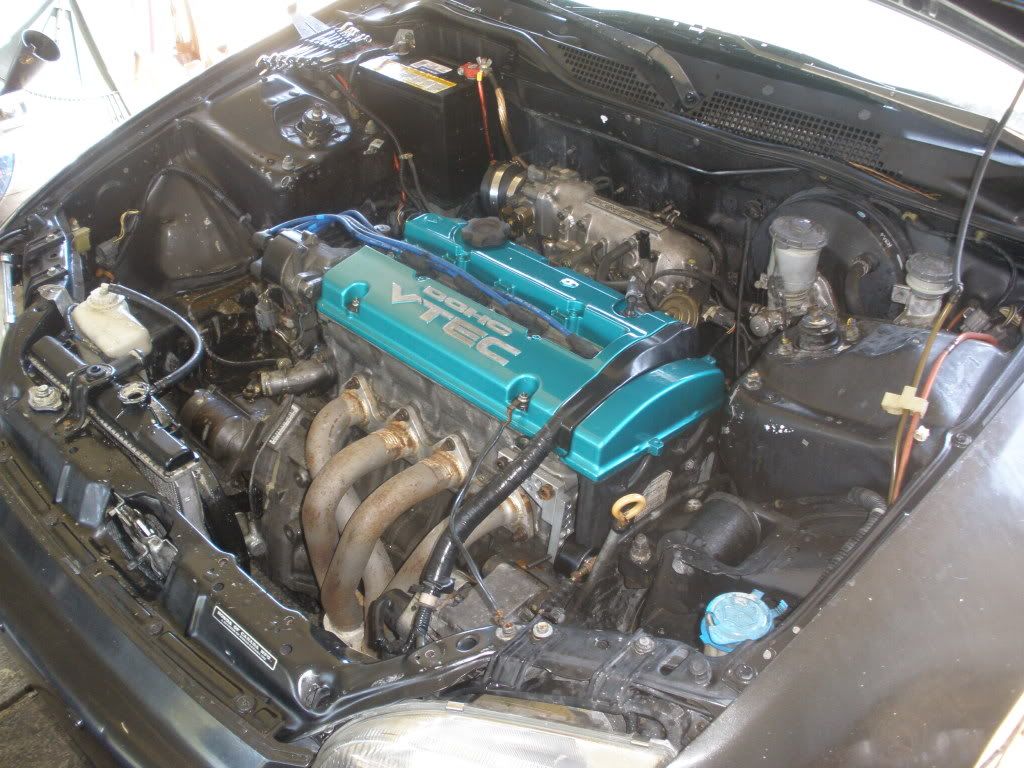
Well 5 days later, she is resurrected.
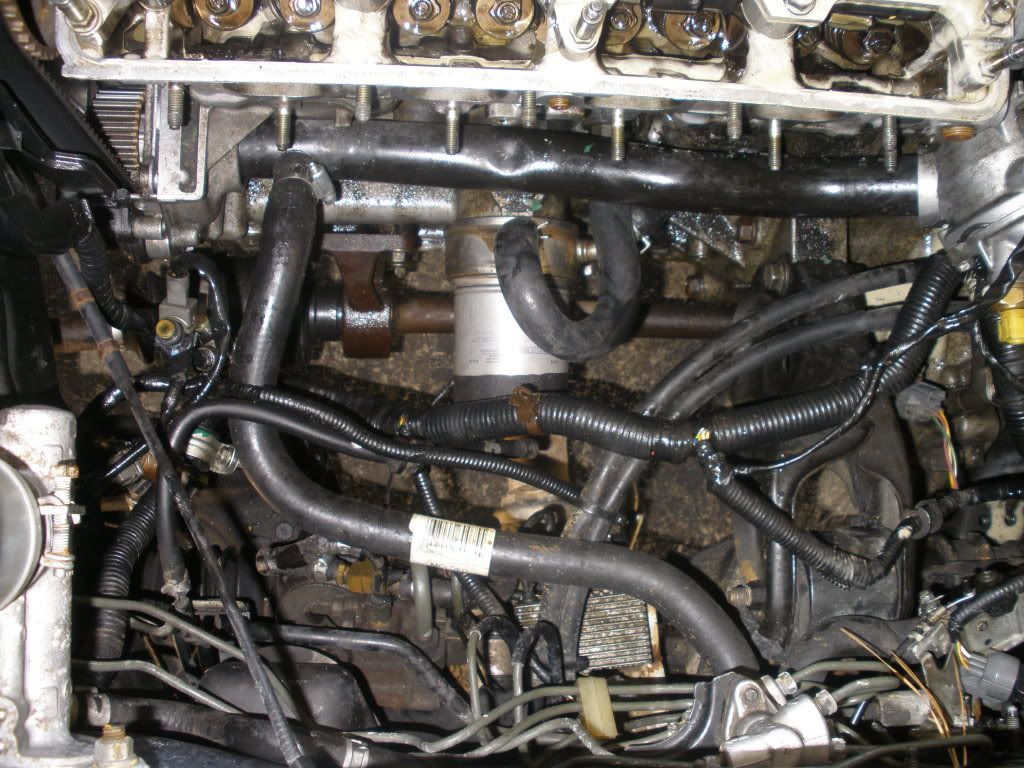
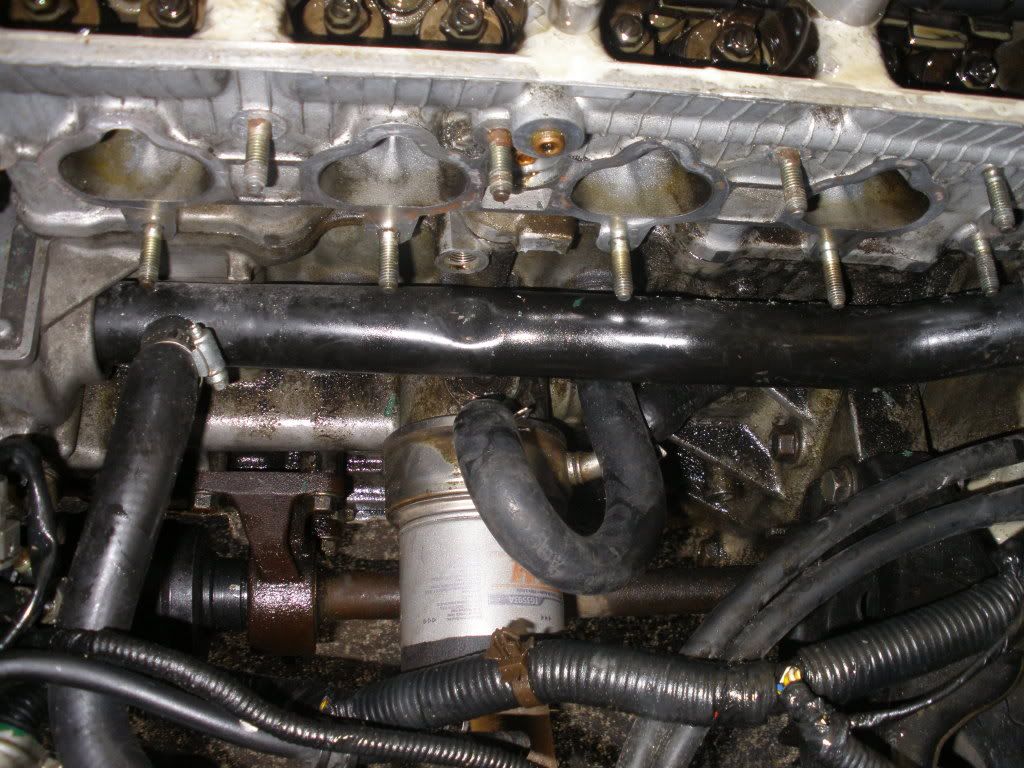
New Cometic Head Gasket, Improved ARP Head Studs, New Timing Belt, Fresh Fluids, and much cleaner interior.
Still need the following:
Black Dash
Black Dash Vents
Steering Column Cover Panel
Steering Wheel
Rear Hatch Strut Nuts
Front Bumper
Front Passenger Side Fender
and a few other nic nac's.
The wire tuck was put on hold due to a very stubborn crank bolt. Maybe this weekend she will go back under the knife. After all, it is pay week.
Pics in a bit.
Originally Posted by 94EGCoopey
Originally Posted by 94EGCoopey
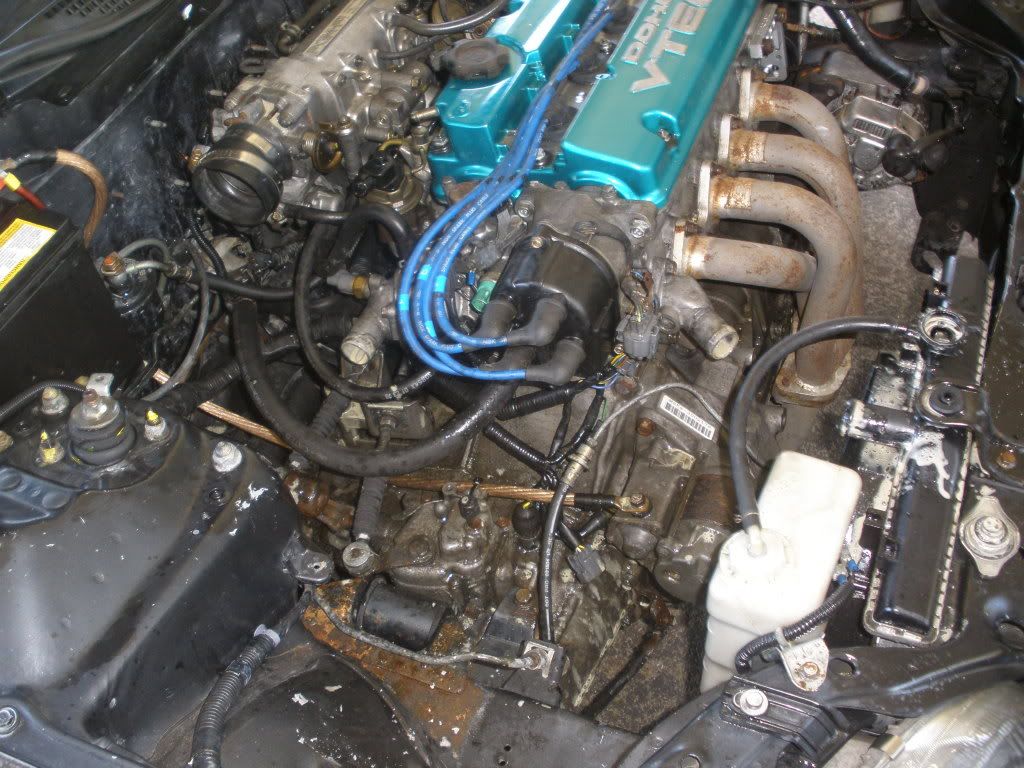
So I discovered a nice lil wire job by the shop who installed it.
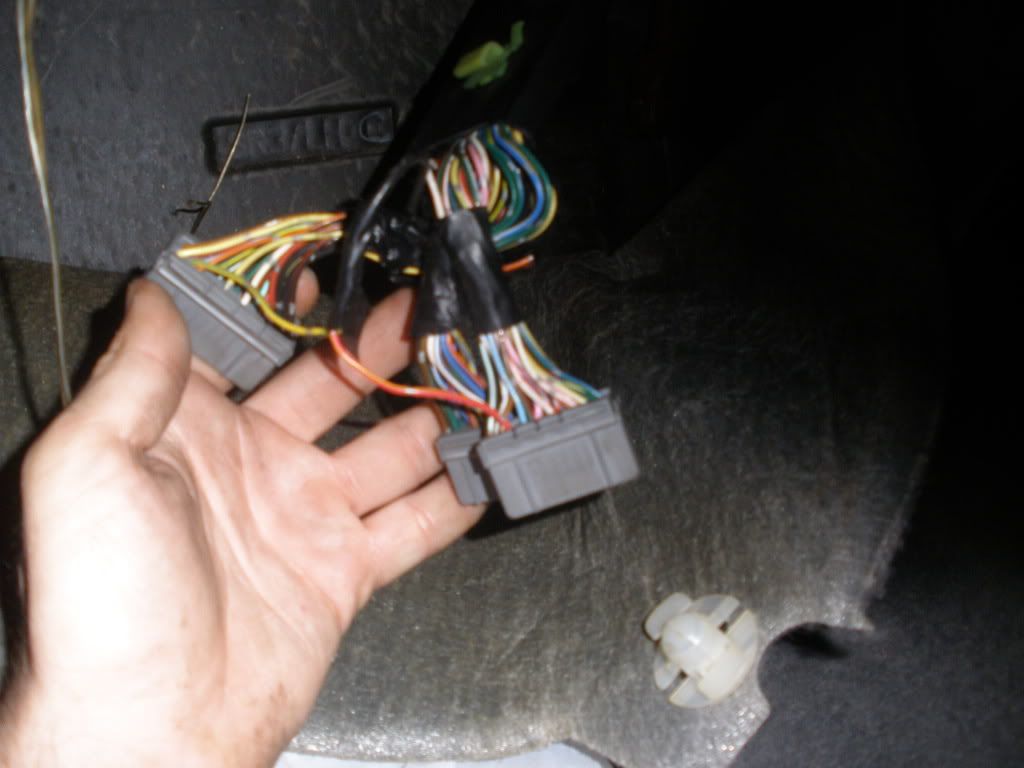
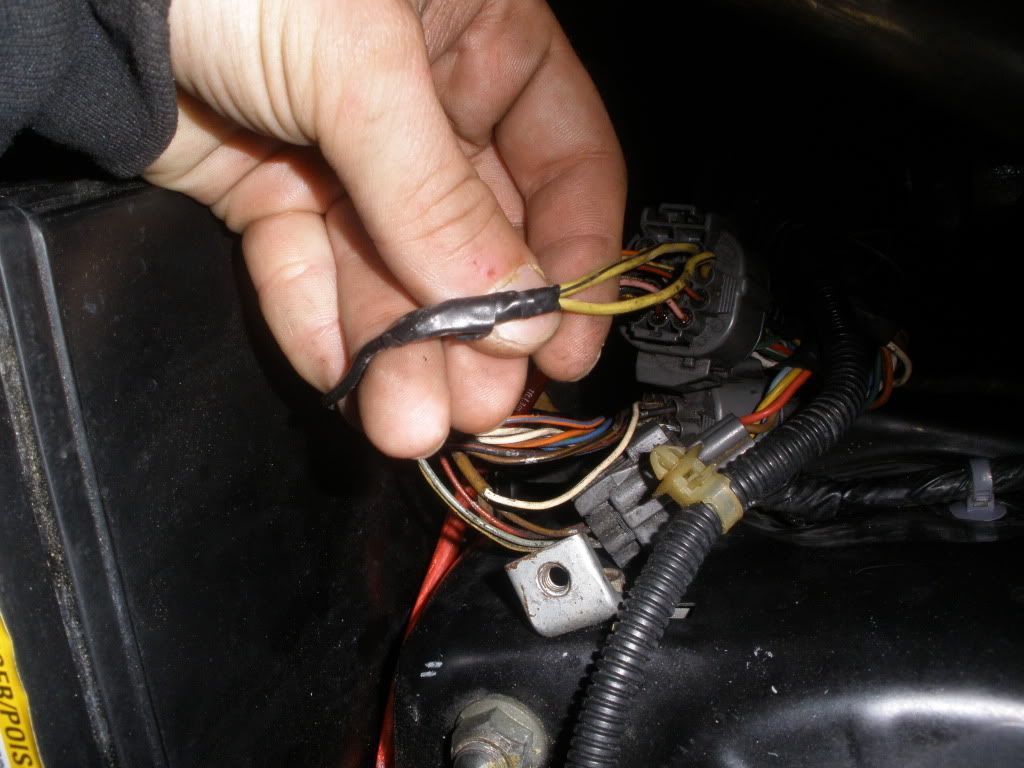
They wired vtec in on the shock tower harness.
1. They used the wrong color wires.
2. They tied the Vtec Pressure Switch AND Solenoid from the shock tower into one wire that ran through the firewall and bridges out to Clip "A" and Clip "D" at the ecu plugs.
The previous owner was talking about in high rpm's that a CEL came on. Well, this would be why lol.
Its fixed, soldered in, heatshrinked, and, working.
Prime reason I am the only one who works on my shizz.

 04-24-2011, 06:47 AM
#3
Honda-Tech Member
Thread Starter
Thanks Man. Started doing my tuck. I do them for side work so I figured to help the masses, I would do a mini write up. I am not finished but had some spare time to jot down some stuff.
There is a lack of a decent thread. So with my new hatch, I figured I would do one. So without further ado:
Tools Needed:
10mm 1/4" and 3/8" Drive
12mm 3/8's Drive
13mm (Depending on your Battery Connectors)
Phillips Screw Driver
Flathead Screw Driver
Small pair of Pliers
Wire Strippers
16-18g Heat Shrink
3/8's Loom
Soldering Iron
E-Tape
Coat Hanger
****s
Pick
How it started out:
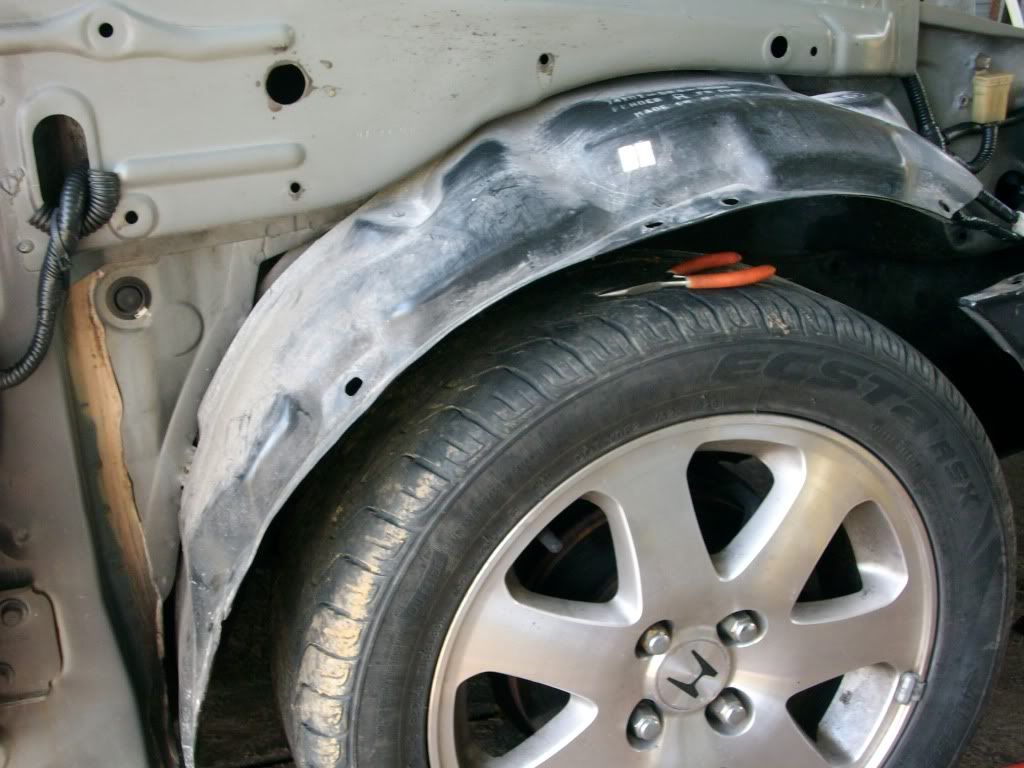
I didnt take pictures of the very first steps. I am sure most of you know how to take off your fender. If not, I will start out with those steps first:
1. Remove your fender.
- This requires a 10mm socket, 10mm Wrench, and, a Phillips screw driver (preferably a stubby one). Unbolt the bolts at the top of the fender. Remove the bolt behind the door near the mirror. Remove the bolt about 10" below that bolt.
- Now you need to remove your side skirt. You will need a Phillips screwdriver. Depending on how low you are will determine what size Phillips you use. Remove all the plastic screws. Now you may or may not have a few metal screws holding the inner fender cover to the sideskirt. Remove those. Then starting from the rear fender well, give the side skirt a nudge towards the front of the car. It will slide off the clips.
2. After you have the fender removed, I start unplugging and unfastening the harness. 10mm will be needed to undo the ground(s).
3. Next on the list is removing the battery and battery tray. You will need a medium sized extension and a deep 12mm socket.
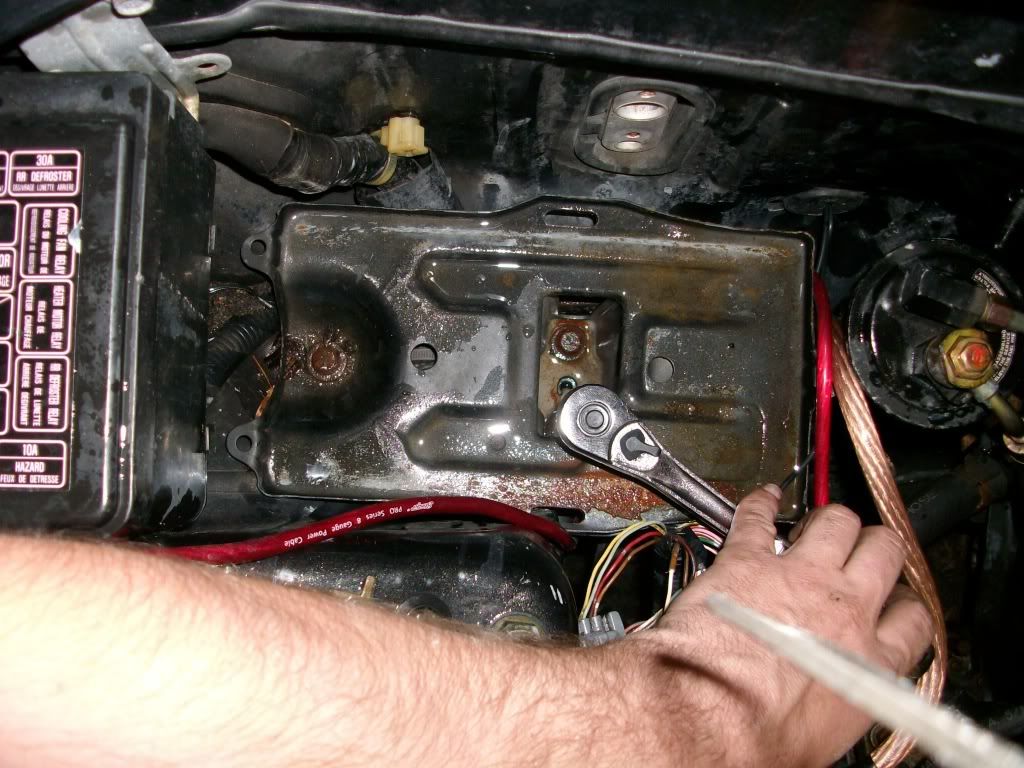
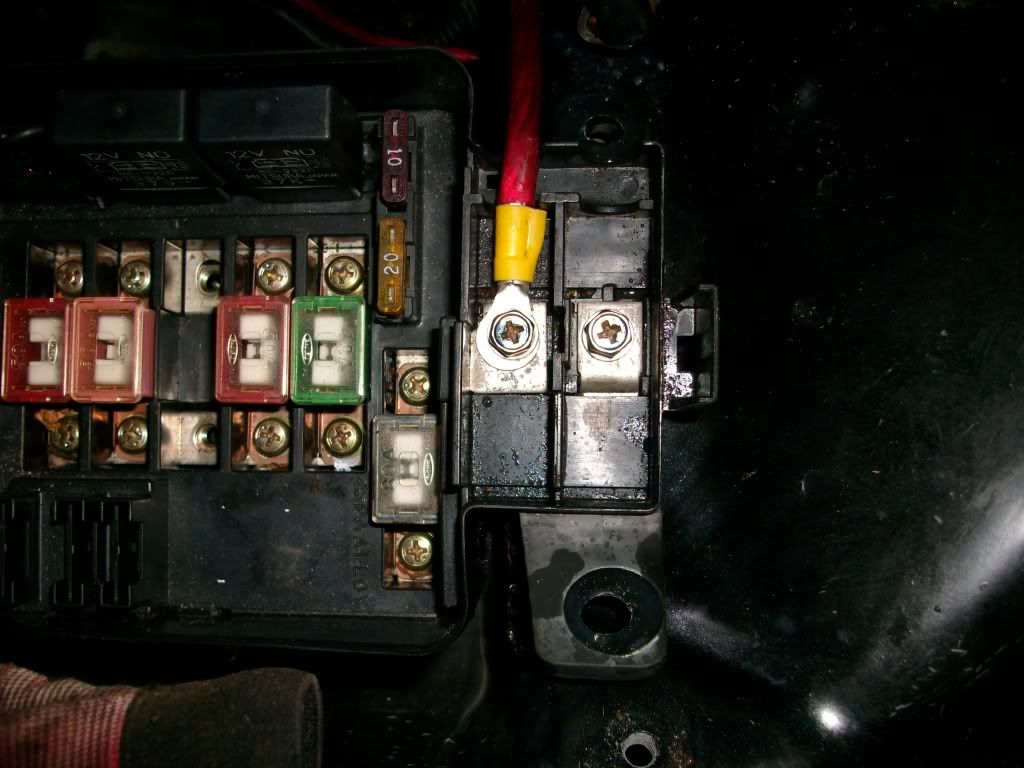
4. Then you will need an 8mm and a 10mm to unbolt the power to the fusebox and alternator wire so you can move the fusebox out of the corner.
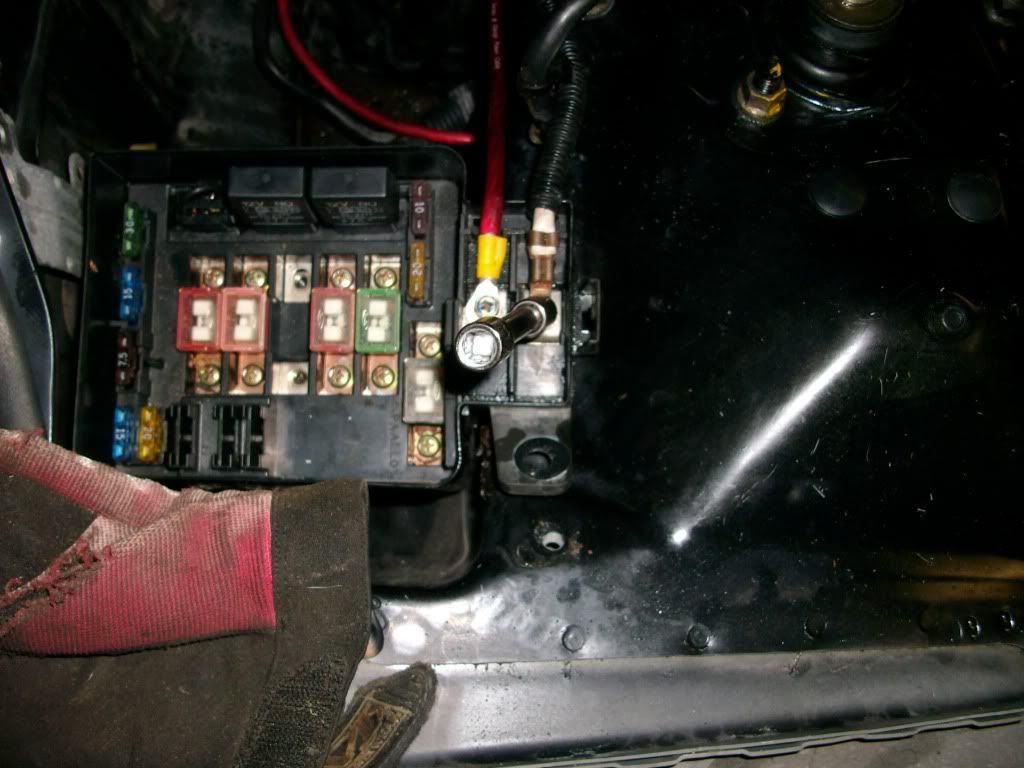
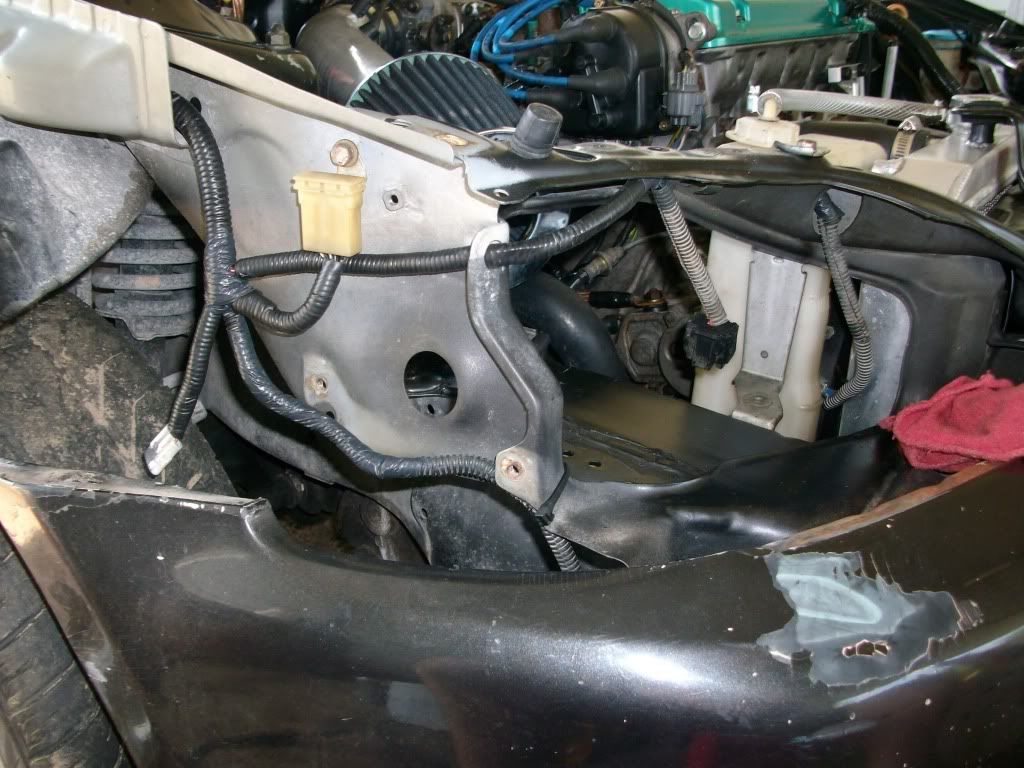
5. If you will notice in this picture:
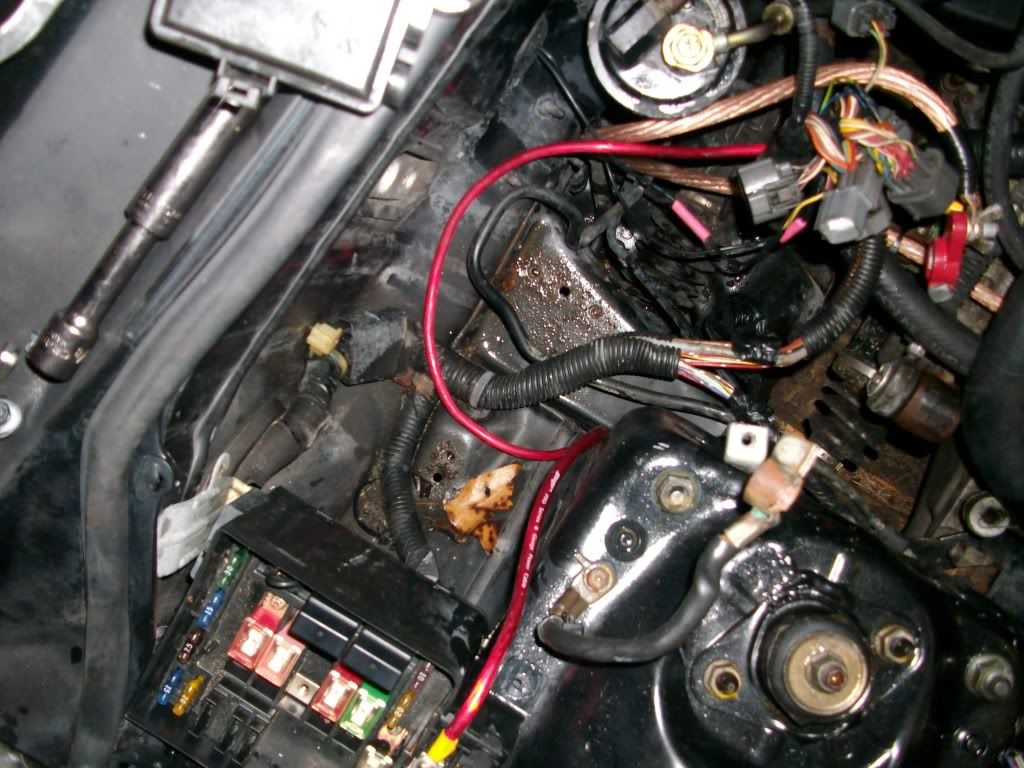
There is a gray harness strap that is holding the harness in place, I am not relocating the fuse box just yet, so I am going to pop the ziptie fastener free without damaging it so I can hold the harness in stock location. Not doing so causes some problems when putting the battery tray back. Here is the fender well and you can pop it back through with a small pair of pliers.
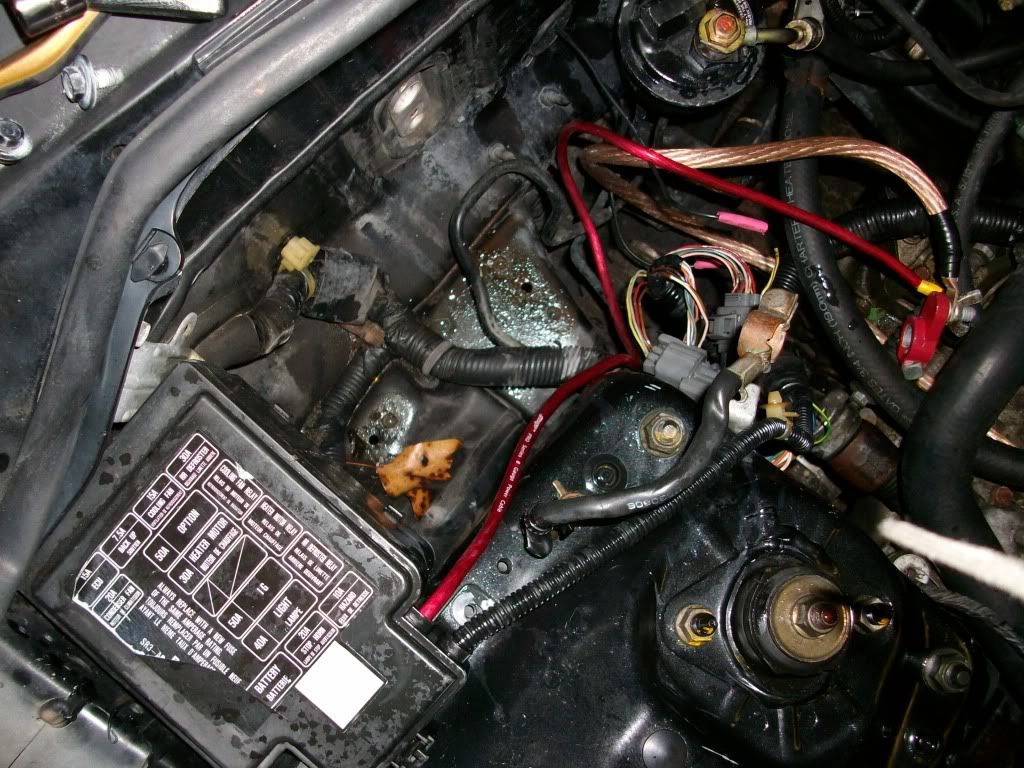
6. Now that the harness is unplugged and dangling, you can start to snip the plugs with pigtails. I usually start with the ground. It ultimately doesnt matter what ground goes where EXCEPT make sure the gauges in wire are correct. If you will notice, there is lines and colors signifying which ground goes where if you snip them.
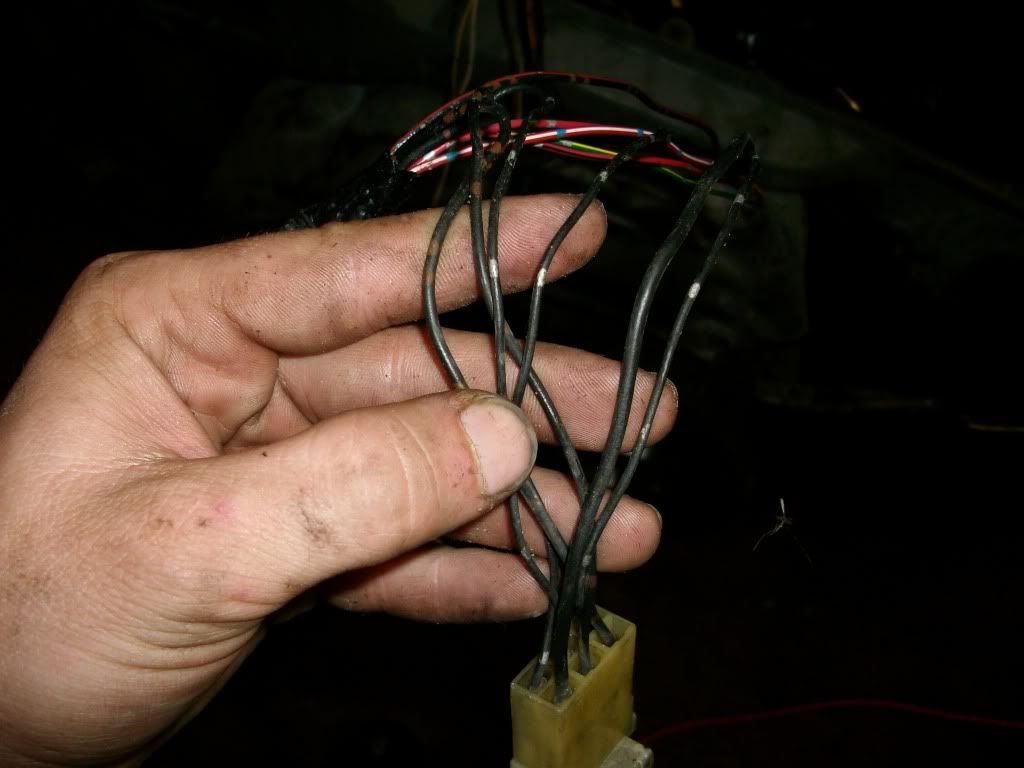
7. Of course some of your wires will not be the same length. If you have not done this before, you may want to make sure you know where all the wires go before cutting them. He is a portion of my harness with the connectors snipped off. I usually leave 3" MINIMUM of pigtail on the plug.
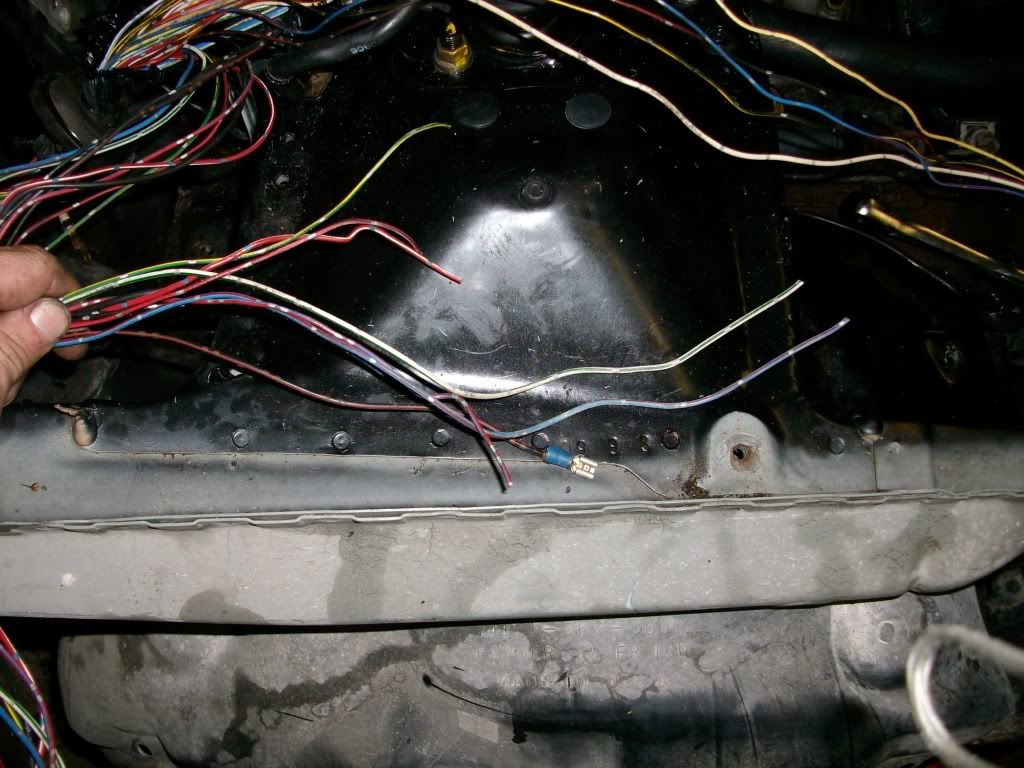
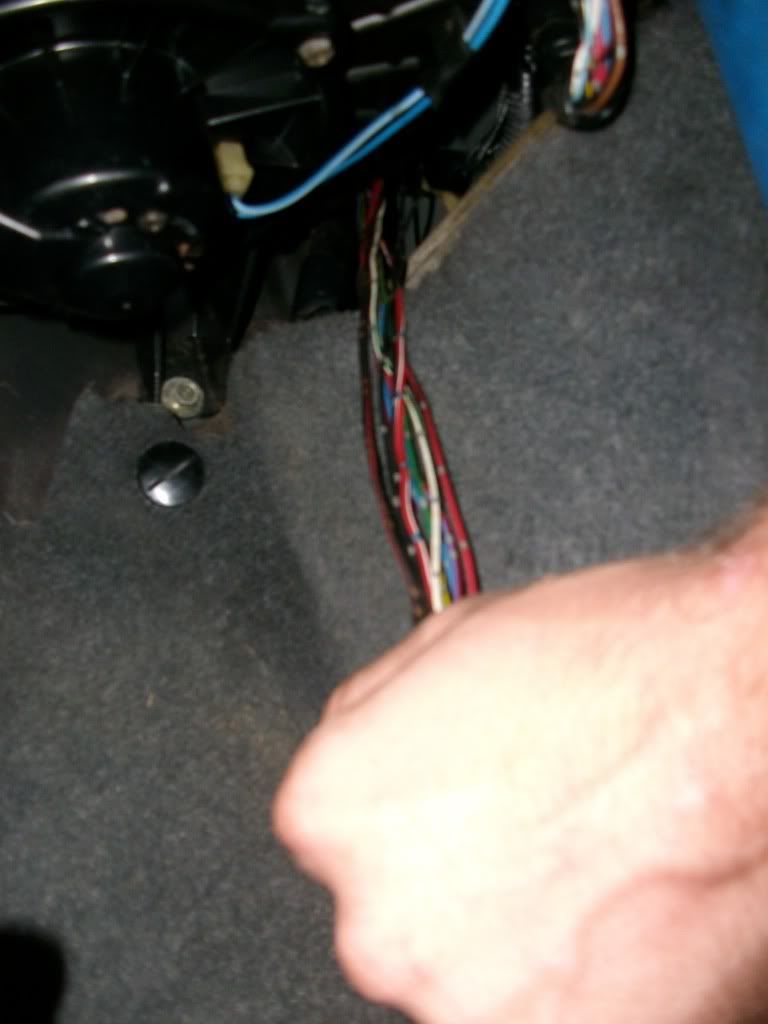
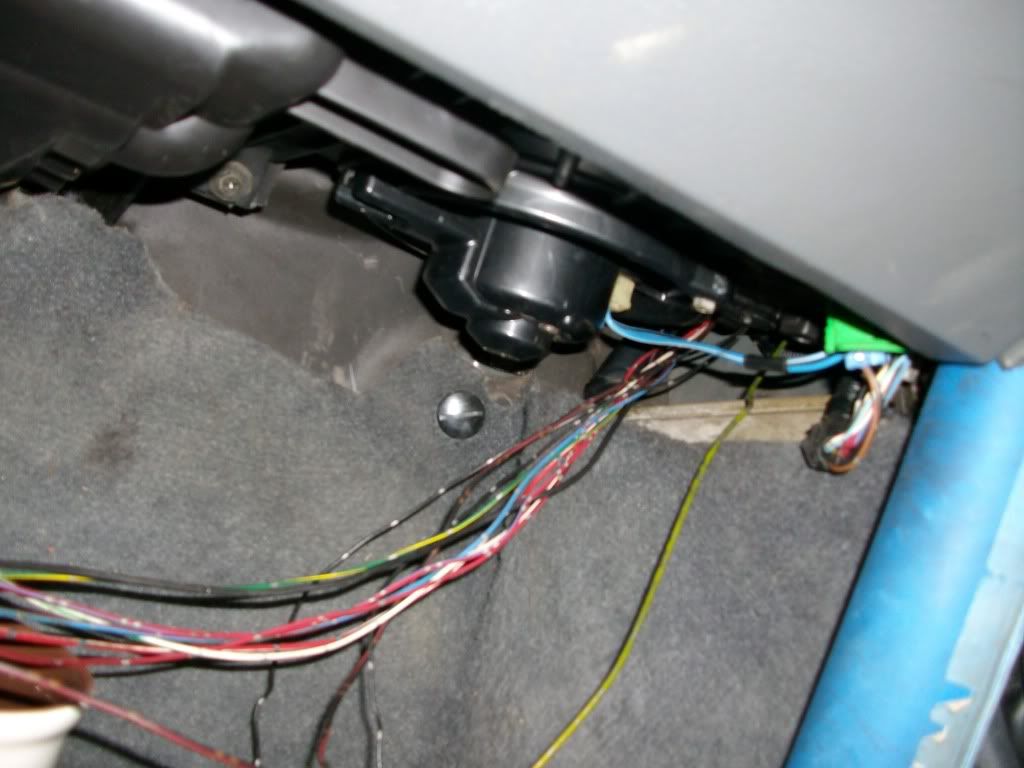
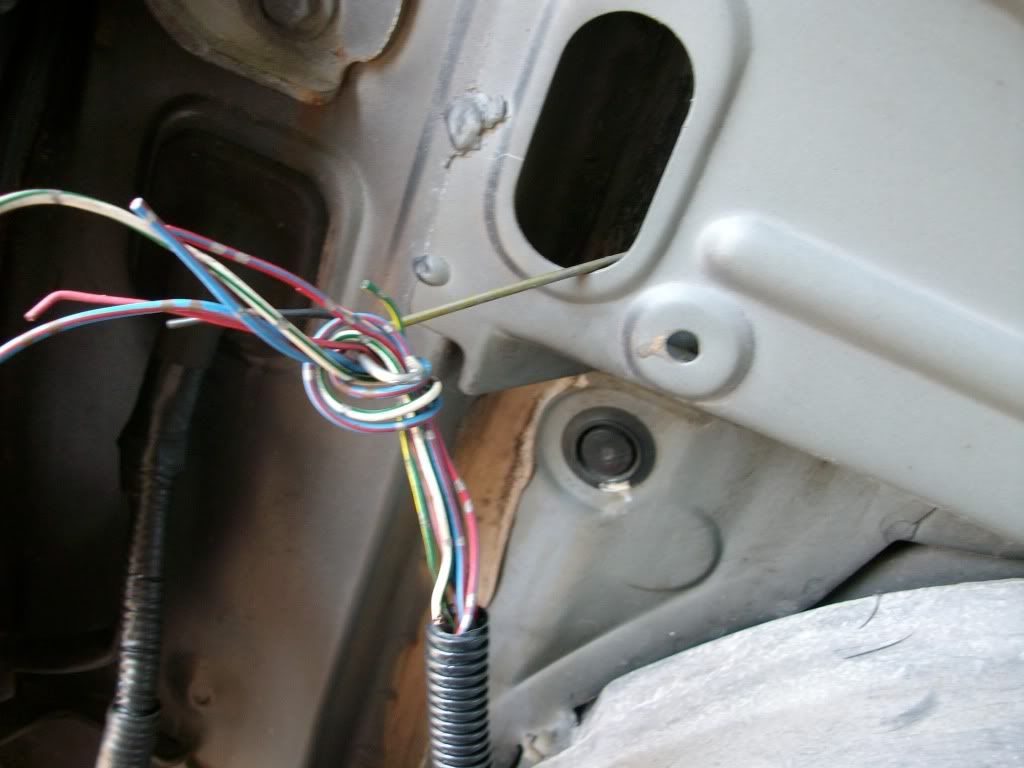
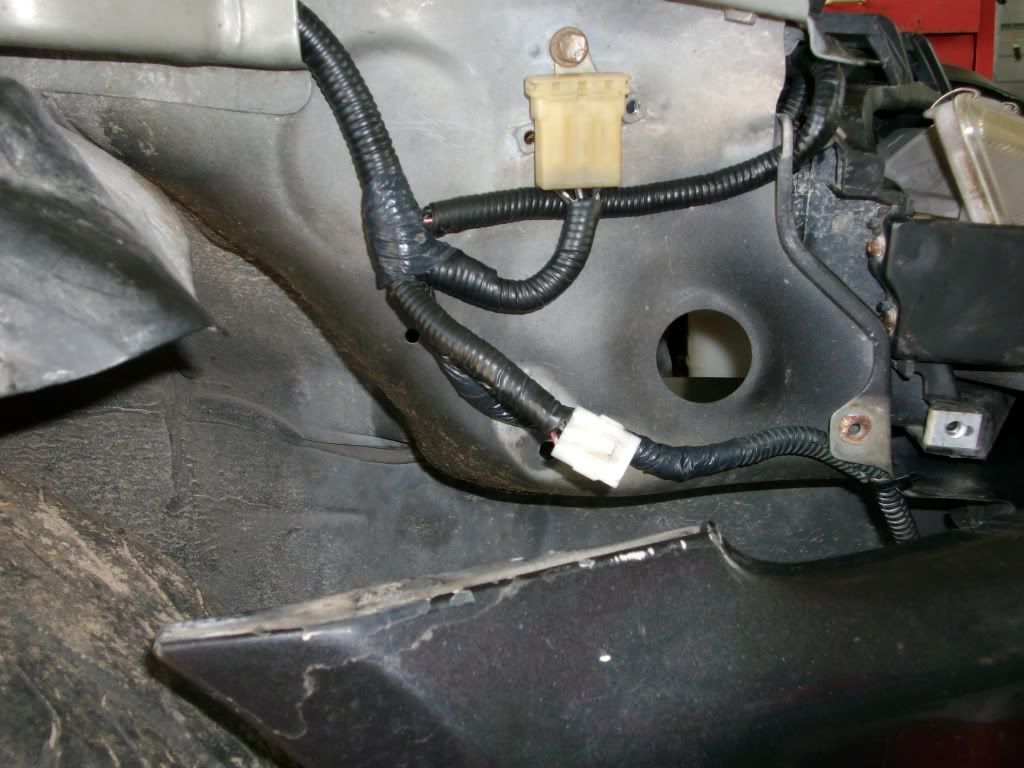
8. After you have clipped all your connectors off, you will need to pull the harness through the firewall grommet. As you can see here, I have pulled through all of my wires. Depending on year and trim, you may have more wires. You will have 3 wires you will need to thread through the grommet that do not run with the rest of the wires. As you can see from the picture:
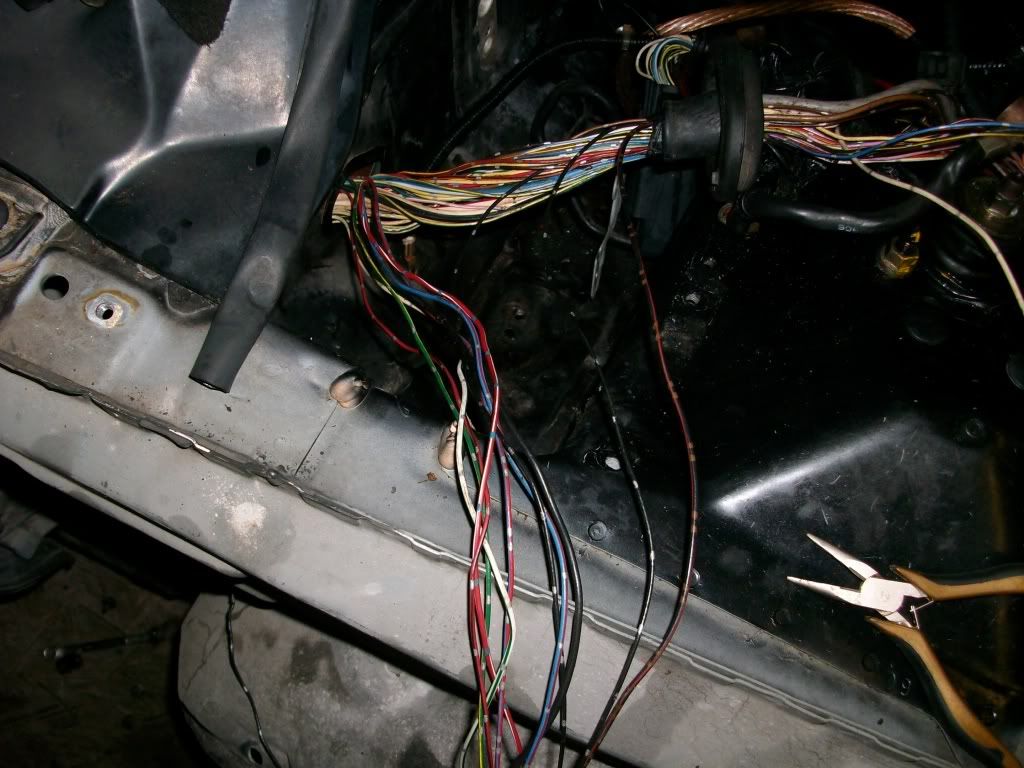
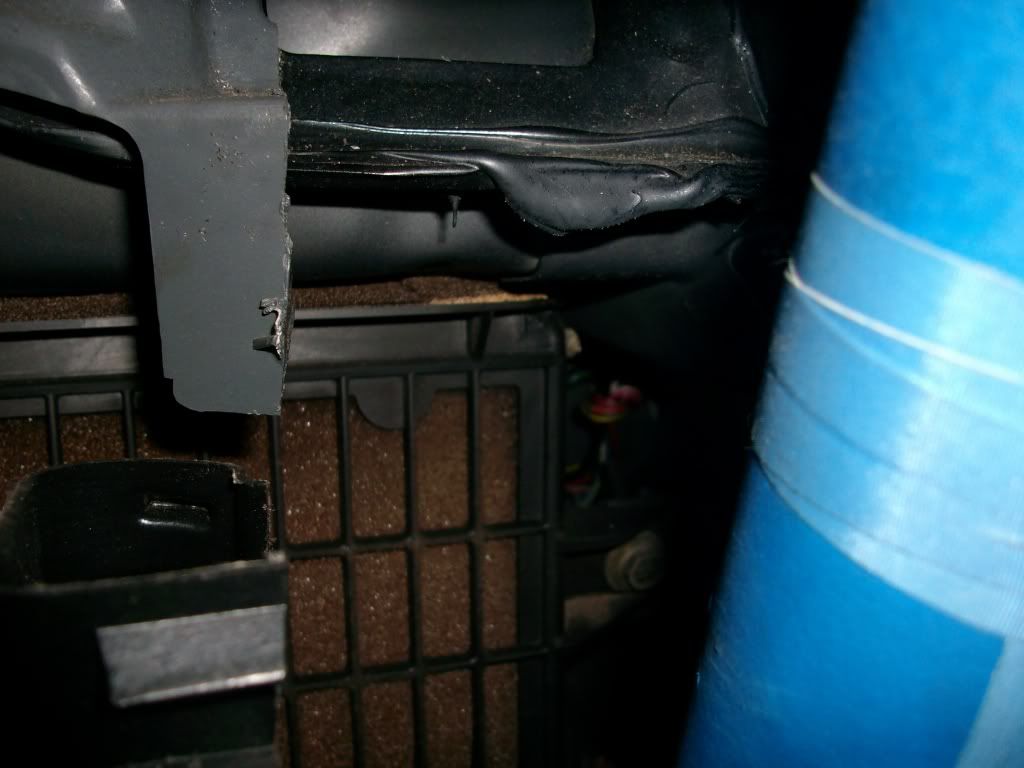
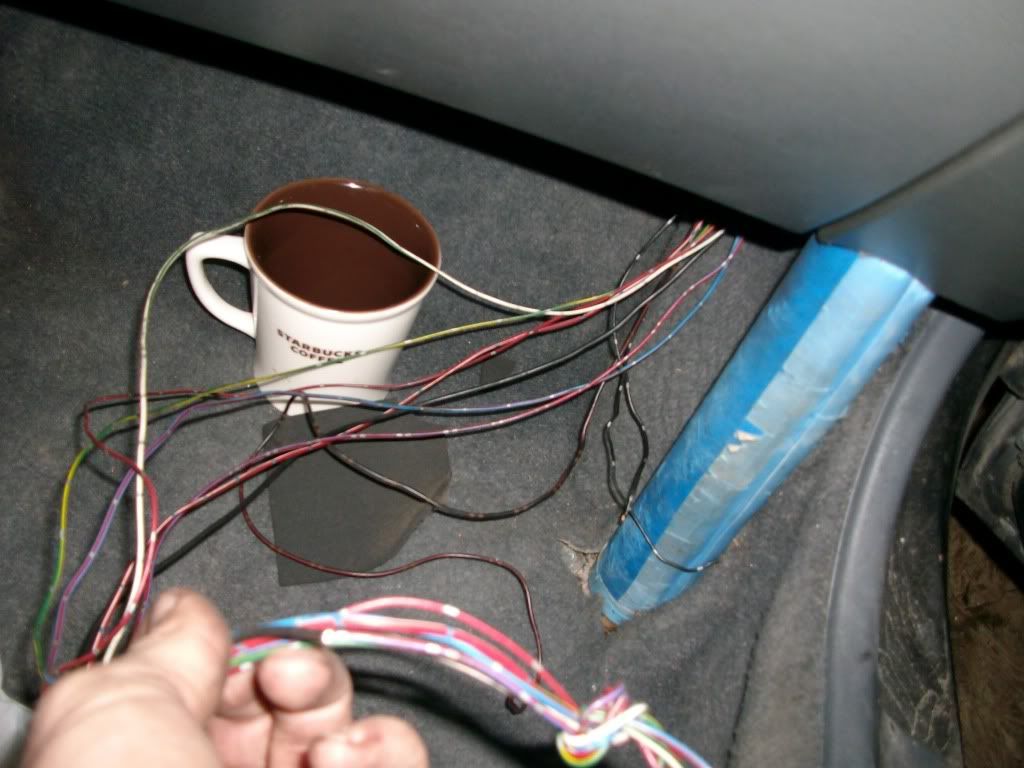
9. I usually take the remaining wires and tie them into a knot and then start rerouting them back through the firewall. I find a knot is easier to route then routing each individual wire. Also a great way to make sure they all stay together. Due to the previous owner being a tool, I know longer have vents in my dash do to a roll cage. But it works to you all an advantage. You can get an idea of where you will be fishing for wire after you run them back into the firewall. You will notice my knot in the picture.
10. After all the wires have been accounted for and fished through the HVAC stuff. I am very particular when it comes to wiring. I like all my wires to be together and untangled. You may want to make sure all your wires have taken the same path and not snagged or near sharp edges when pulling them back through the firewall.
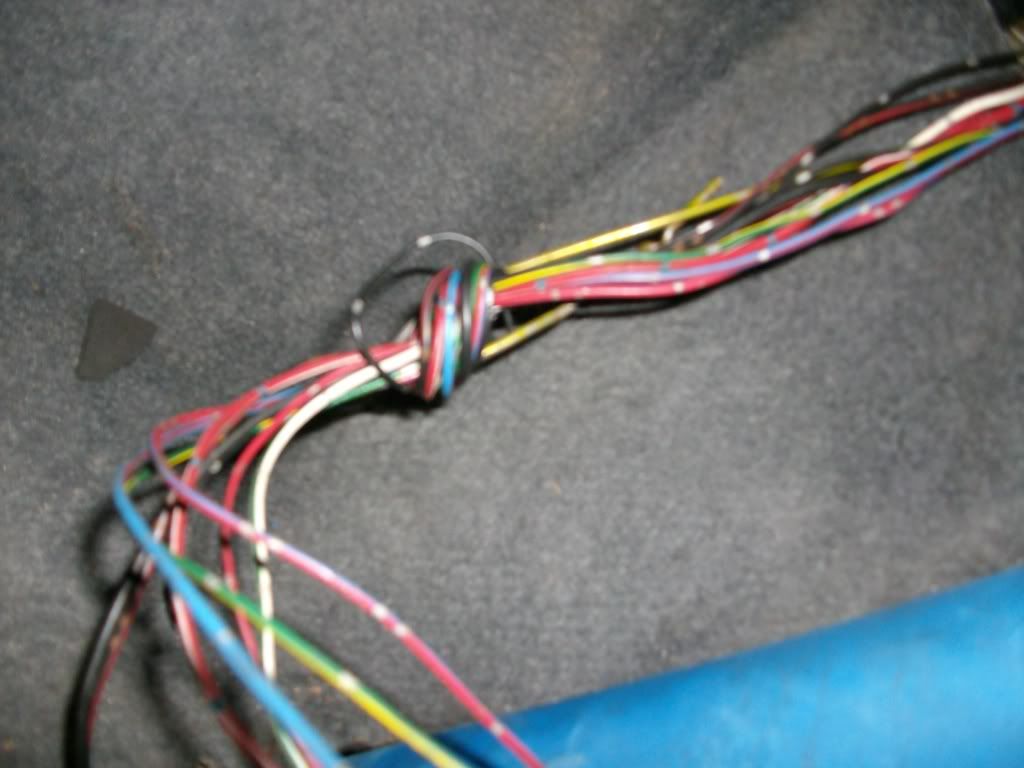
11. Once again I tie a knot and prepare the wires to run through the door harness grommet. This time using a metal wire coat hanger to be my guide in the dark:
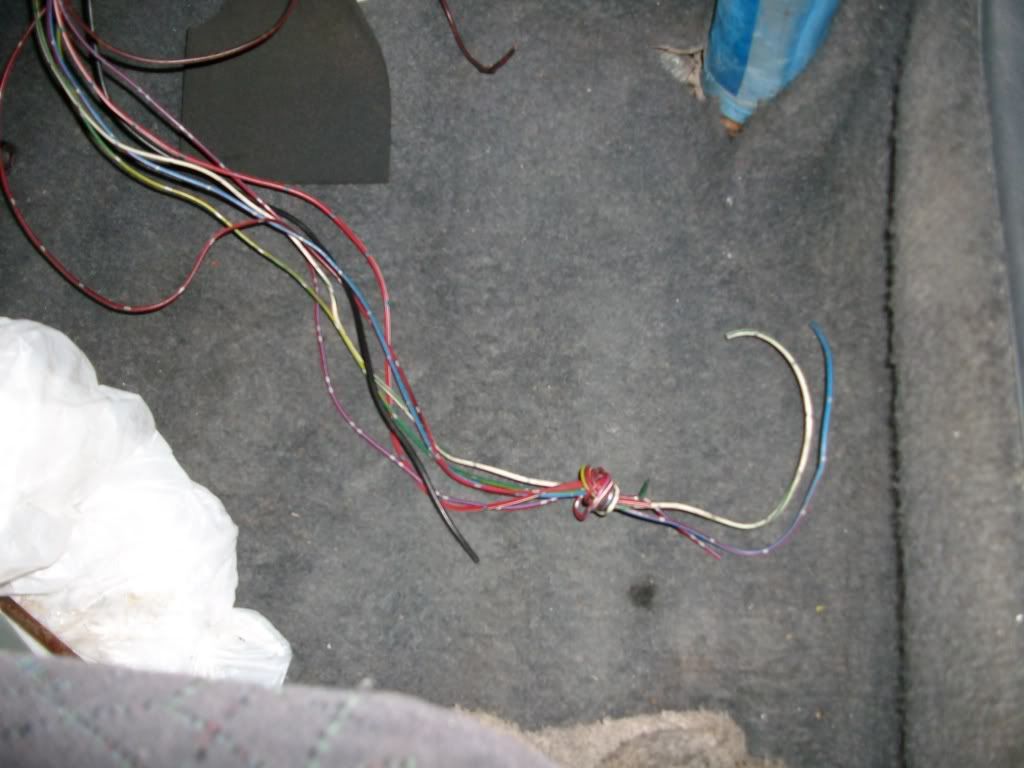
As you can see below, the knot is then hooked onto the coat hanger and ready to be pulled through.
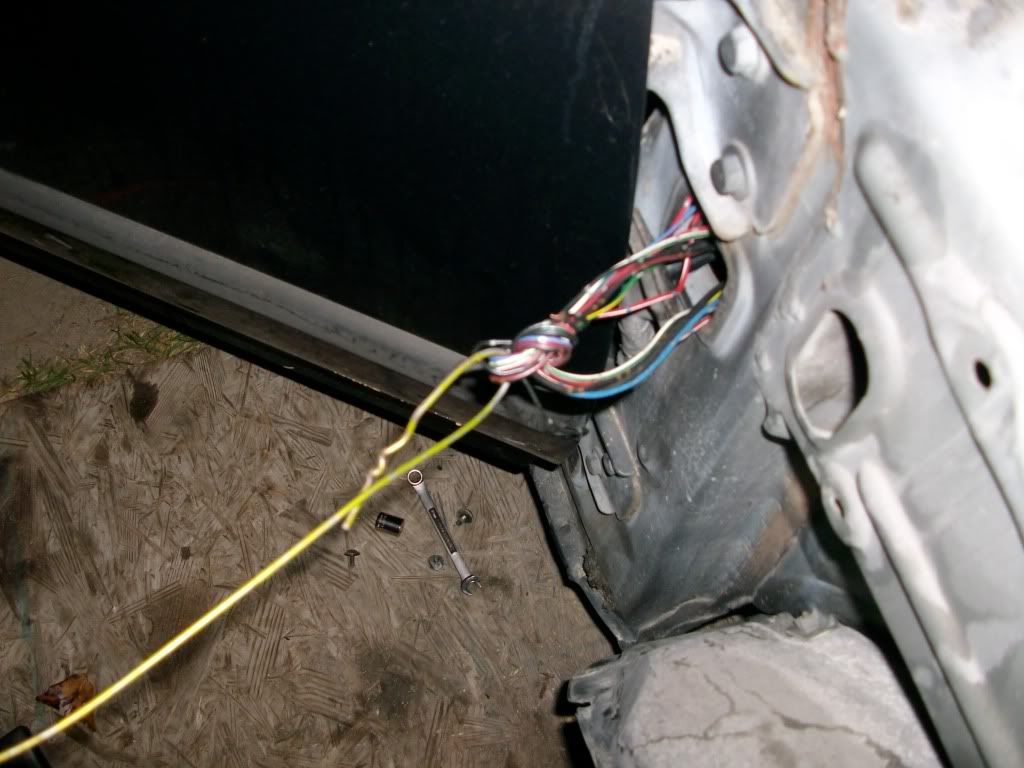
12. Then I like to send a 3-4" in length loom (3/8ths Diameter) over them where the run the path from the cabin to the door harness grommet. After I loom them, I then feed all the wires through the door harness grommet. So people prefer to cut the grommet and run them, I however prefer a neat and clean look. So I take the extra 5 mins and do it my way.
(Dont mind the surface rust. It will be wire wheeled at work this week and sealed. )
This is where I stopped for the evening as I ran out of solder and forgot to pick up some more....
As you can see, my engine bay is disgusting. I havent had time to clean it to my standards since I have purchased it...

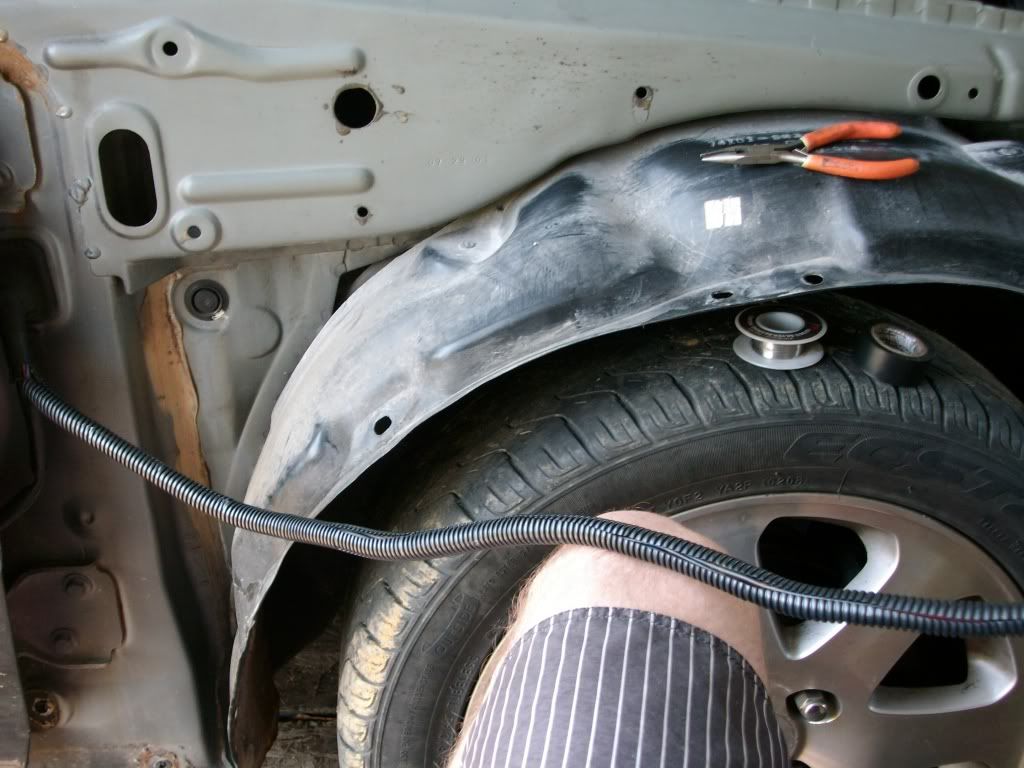
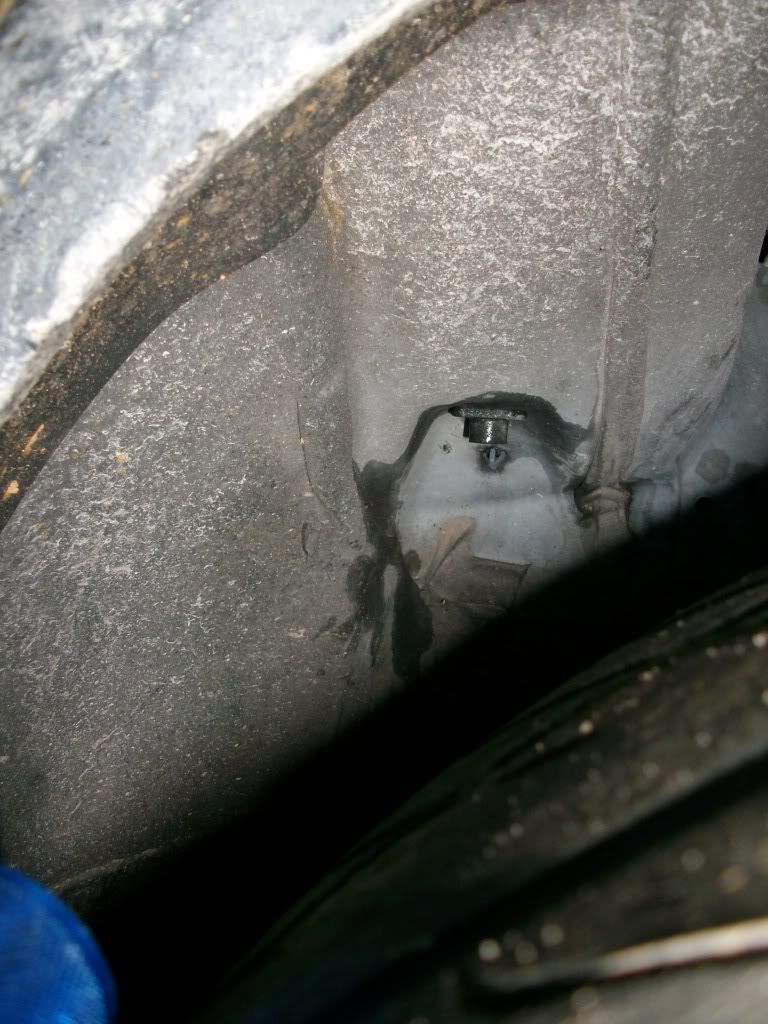
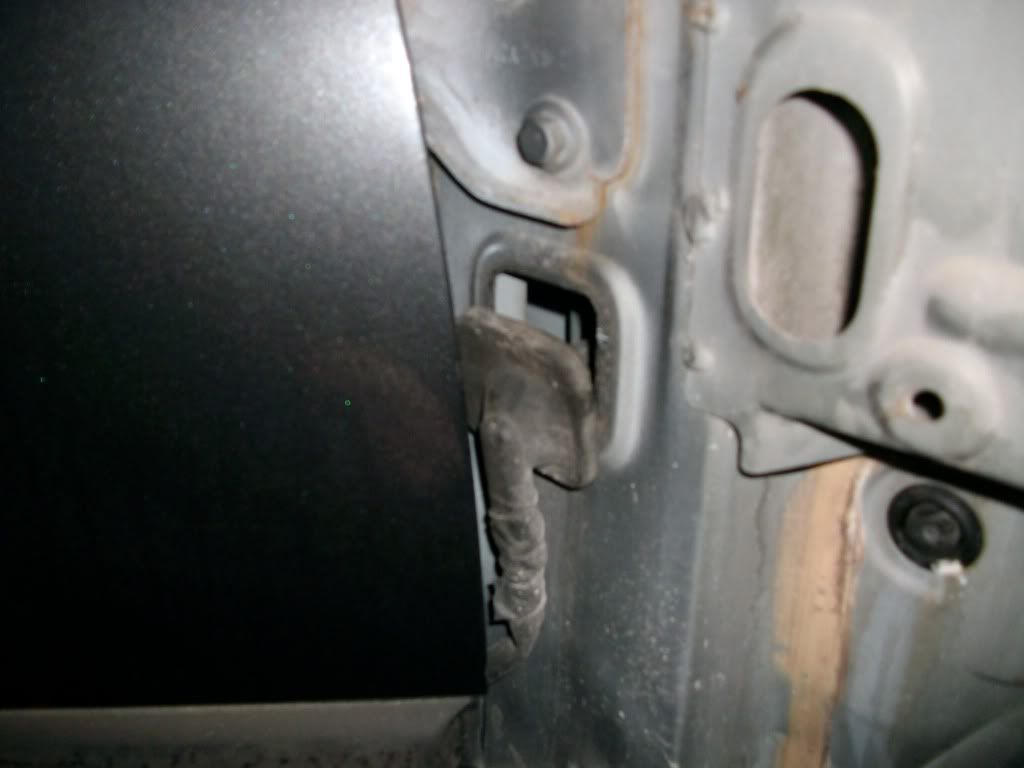
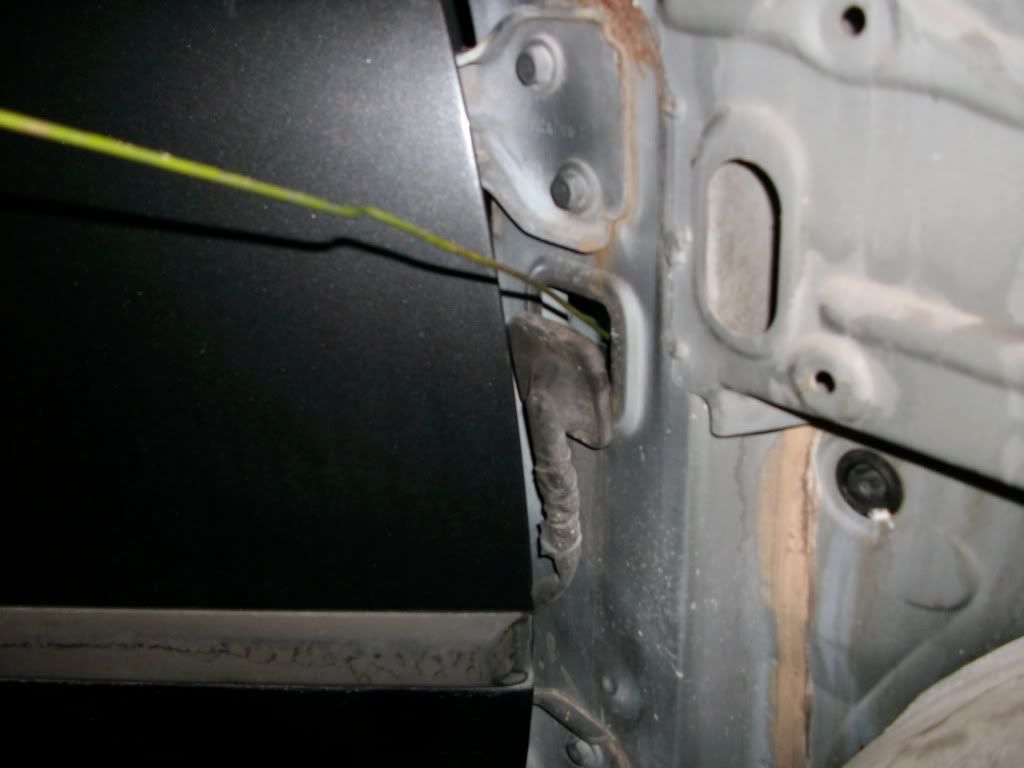
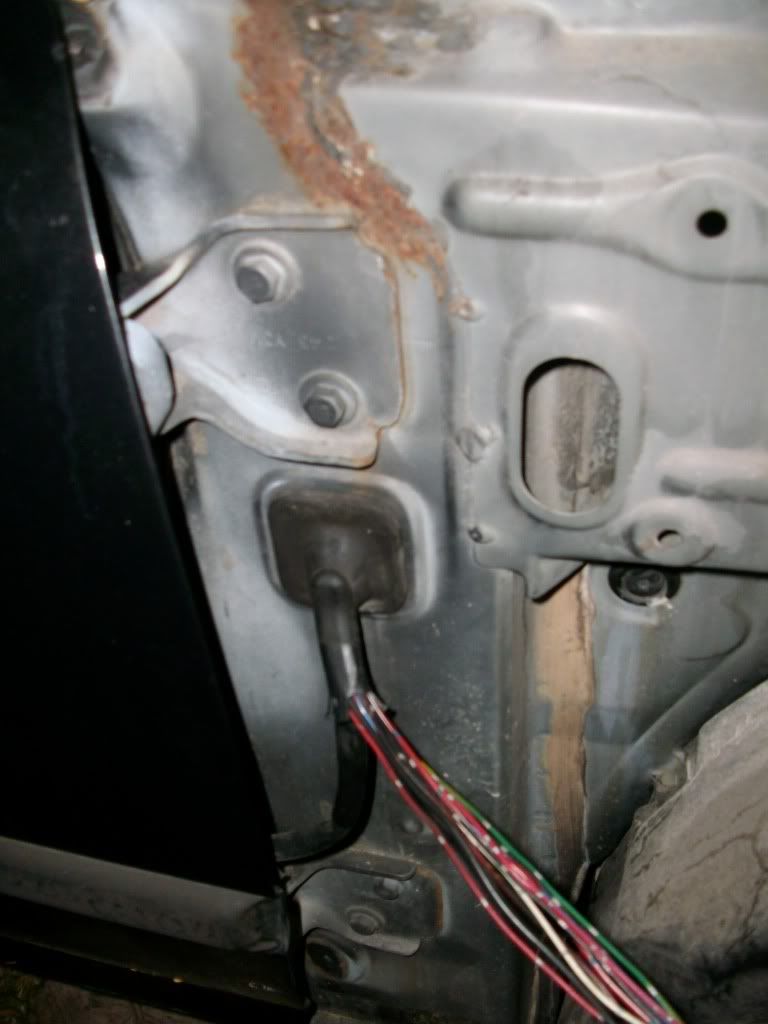
14. Next, pull out your coat hanger and thread it into the frame near the corner lense all the way back to the oval opening on the left side of the strut. Keep the coat hanger aimed down, if not, you will snag the tip on the crease inside the frame and will never see it come through the oval opening.
15. Like I mentioned, keep the coat hanger aimed down (from right to left), and pull the loomed harness back through the frame rail like so:
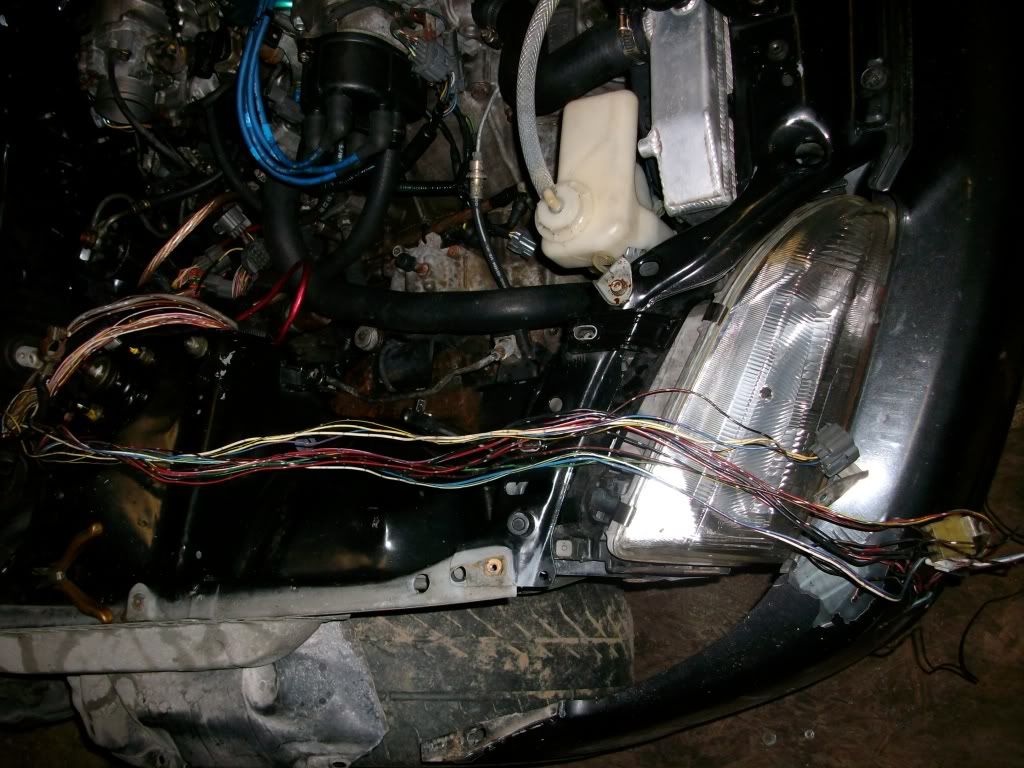
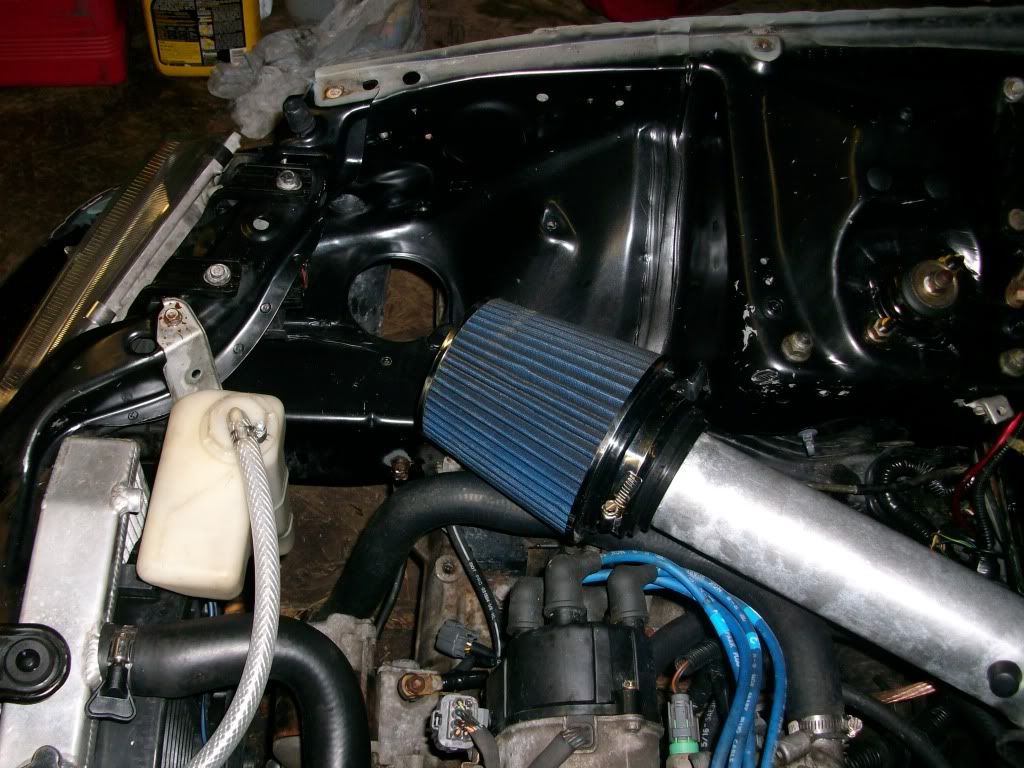
16. Here is my harness bolted up, ran how I prefer to run it and 90% finished looming. Mocked it up for pictures.
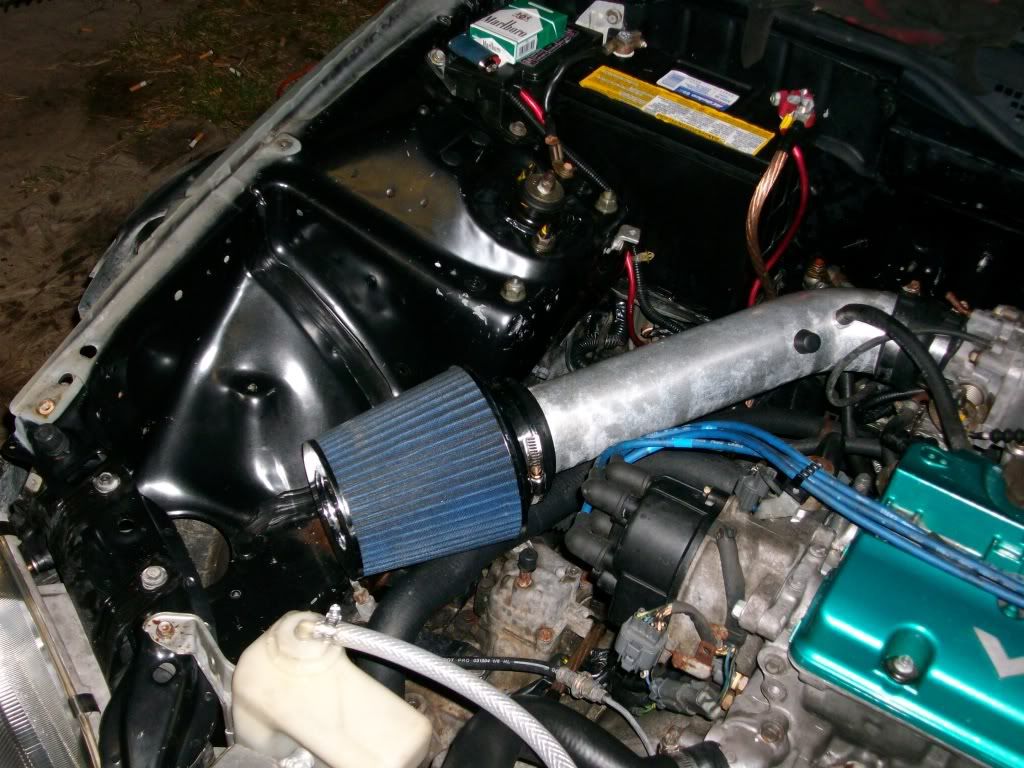
17. All put back together:
This is where I stopped for the evening as I ran out of solder and forgot to pick up some more....
As you can see, my engine bay is disgusting. I havent had time to clean it to my standards since I have purchased it...
Anyways, I put my bay back together while I was doing nothing. Just need to finish routing the wires, loom them up, solder them, heatshrink them, finish looming, put my fender back on, and then do the drivers side. I have about 2 1/2 hrs invested so far. Mind you I answered my phone a couple times, checked ECH, and replied to an email or two.
Tools Needed:
10mm 1/4" and 3/8" Drive
12mm 3/8's Drive
13mm (Depending on your Battery Connectors)
Phillips Screw Driver
Flathead Screw Driver
Small pair of Pliers
Wire Strippers
16-18g Heat Shrink
3/8's Loom
Soldering Iron
E-Tape
Coat Hanger
****s
Pick
How it started out:
I didnt take pictures of the very first steps. I am sure most of you know how to take off your fender. If not, I will start out with those steps first:
1. Remove your fender.
- This requires a 10mm socket, 10mm Wrench, and, a Phillips screw driver (preferably a stubby one). Unbolt the bolts at the top of the fender. Remove the bolt behind the door near the mirror. Remove the bolt about 10" below that bolt.
- Now you need to remove your side skirt. You will need a Phillips screwdriver. Depending on how low you are will determine what size Phillips you use. Remove all the plastic screws. Now you may or may not have a few metal screws holding the inner fender cover to the sideskirt. Remove those. Then starting from the rear fender well, give the side skirt a nudge towards the front of the car. It will slide off the clips.
2. After you have the fender removed, I start unplugging and unfastening the harness. 10mm will be needed to undo the ground(s).
3. Next on the list is removing the battery and battery tray. You will need a medium sized extension and a deep 12mm socket.
4. Then you will need an 8mm and a 10mm to unbolt the power to the fusebox and alternator wire so you can move the fusebox out of the corner.
5. If you will notice in this picture:
There is a gray harness strap that is holding the harness in place, I am not relocating the fuse box just yet, so I am going to pop the ziptie fastener free without damaging it so I can hold the harness in stock location. Not doing so causes some problems when putting the battery tray back. Here is the fender well and you can pop it back through with a small pair of pliers.
6. Now that the harness is unplugged and dangling, you can start to snip the plugs with pigtails. I usually start with the ground. It ultimately doesnt matter what ground goes where EXCEPT make sure the gauges in wire are correct. If you will notice, there is lines and colors signifying which ground goes where if you snip them.
7. Of course some of your wires will not be the same length. If you have not done this before, you may want to make sure you know where all the wires go before cutting them. He is a portion of my harness with the connectors snipped off. I usually leave 3" MINIMUM of pigtail on the plug.
8. After you have clipped all your connectors off, you will need to pull the harness through the firewall grommet. As you can see here, I have pulled through all of my wires. Depending on year and trim, you may have more wires. You will have 3 wires you will need to thread through the grommet that do not run with the rest of the wires. As you can see from the picture:
9. I usually take the remaining wires and tie them into a knot and then start rerouting them back through the firewall. I find a knot is easier to route then routing each individual wire. Also a great way to make sure they all stay together. Due to the previous owner being a tool, I know longer have vents in my dash do to a roll cage. But it works to you all an advantage. You can get an idea of where you will be fishing for wire after you run them back into the firewall. You will notice my knot in the picture.
10. After all the wires have been accounted for and fished through the HVAC stuff. I am very particular when it comes to wiring. I like all my wires to be together and untangled. You may want to make sure all your wires have taken the same path and not snagged or near sharp edges when pulling them back through the firewall.
11. Once again I tie a knot and prepare the wires to run through the door harness grommet. This time using a metal wire coat hanger to be my guide in the dark:
As you can see below, the knot is then hooked onto the coat hanger and ready to be pulled through.
12. Then I like to send a 3-4" in length loom (3/8ths Diameter) over them where the run the path from the cabin to the door harness grommet. After I loom them, I then feed all the wires through the door harness grommet. So people prefer to cut the grommet and run them, I however prefer a neat and clean look. So I take the extra 5 mins and do it my way.
(Dont mind the surface rust. It will be wire wheeled at work this week and sealed.
)This is where I stopped for the evening as I ran out of solder and forgot to pick up some more....
As you can see, my engine bay is disgusting. I havent had time to clean it to my standards since I have purchased it...
14. Next, pull out your coat hanger and thread it into the frame near the corner lense all the way back to the oval opening on the left side of the strut. Keep the coat hanger aimed down, if not, you will snag the tip on the crease inside the frame and will never see it come through the oval opening.
15. Like I mentioned, keep the coat hanger aimed down (from right to left), and pull the loomed harness back through the frame rail like so:
16. Here is my harness bolted up, ran how I prefer to run it and 90% finished looming. Mocked it up for pictures.
17. All put back together:
This is where I stopped for the evening as I ran out of solder and forgot to pick up some more....
As you can see, my engine bay is disgusting. I havent had time to clean it to my standards since I have purchased it...
Anyways, I put my bay back together while I was doing nothing. Just need to finish routing the wires, loom them up, solder them, heatshrink them, finish looming, put my fender back on, and then do the drivers side. I have about 2 1/2 hrs invested so far. Mind you I answered my phone a couple times, checked ECH, and replied to an email or two.
Last edited by 94EGCoopey; 05-19-2011 at 10:25 PM.
04-24-2011, 07:27 AM
#4
Honda-Tech Member
looks like you have a big job on your hands. be careful, or you'll end up like me. a headlight harness tuck turns into a battery tuck. that turns into a brake line tuck then an engine bay shave...and Im still going after two years. I really like the cage too.


Trending Topics

Thread
Thread Starter
Forum
Replies
Last Post
CH2iS*
Southern California (Sales)
7
01-24-2007 01:26 PM
sil-15
Vehicles for sale
24
11-03-2004 05:46 PM