
Five years and counting: my low budget Integra build
 12-15-2015, 08:28 PM
#551
Honda-Tech Member
Thread Starter
Oh, guys. You post here more than I do!
Something completely unexpected happened a couple weeks ago – Yasu Yamamoto made plans to attend SEMA but decided to take a pit stop in Chicago to hang out and visit Brandon from AMS. I had the distinct pleasure of meeting an idol of mine in the car industry. For those of you unfamiliar with Yasu by name, you may know him better by his shop: Opera Performance.

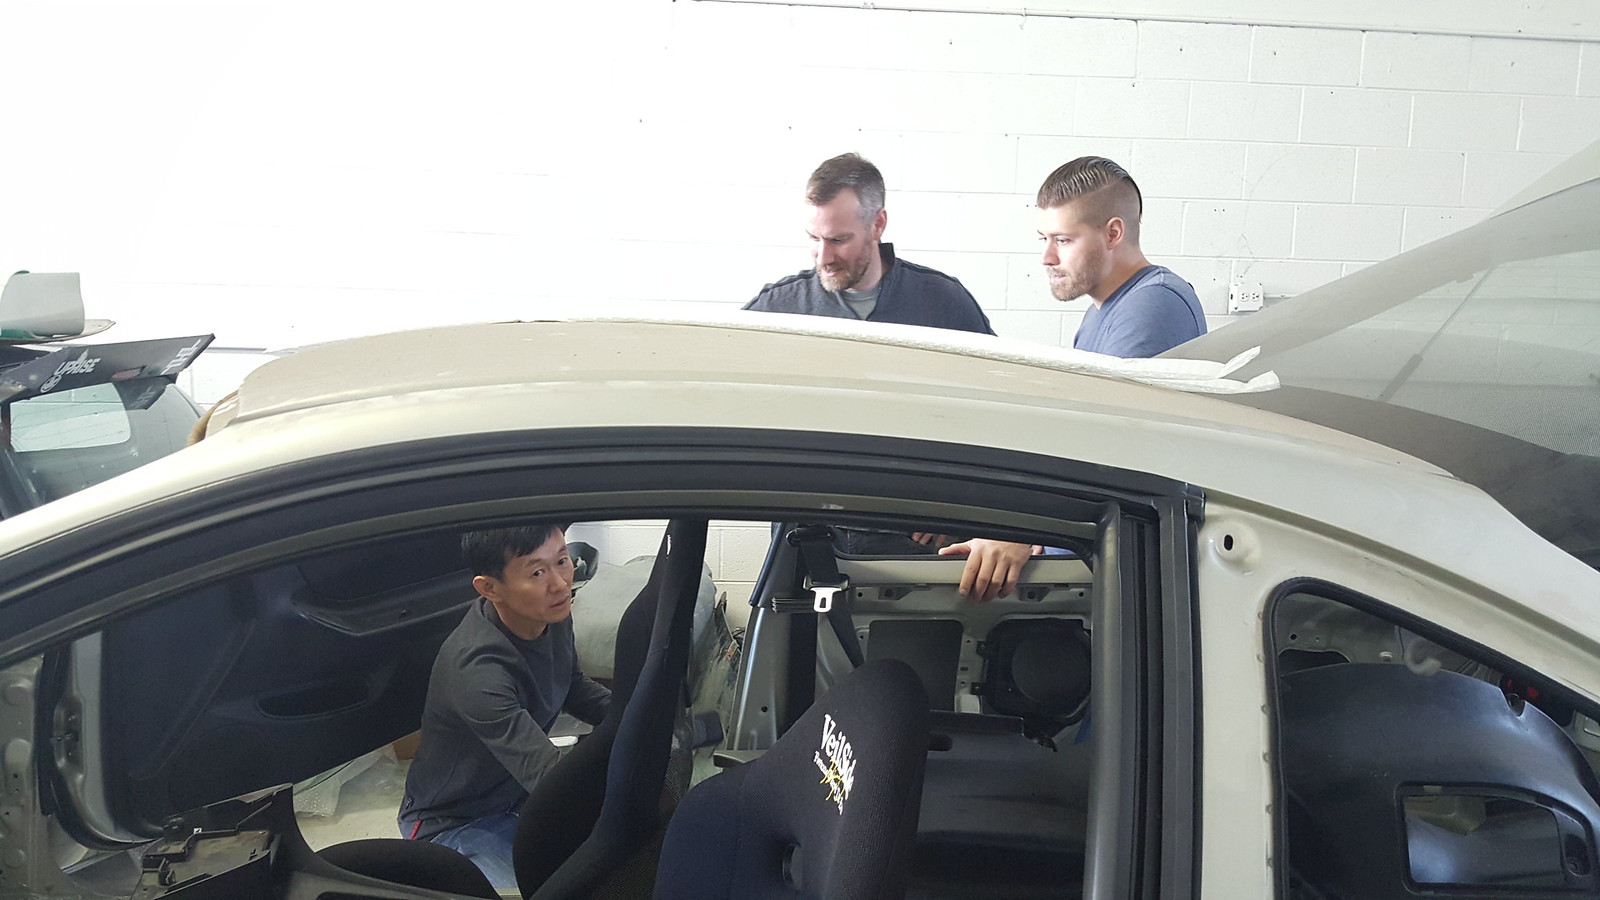
For some reason Brandon and Yasu had time and wanted to check out my garage to see what was happening. He took a keen interest in the EK since he built and raced Super Taikyu EK’s in the past. It was awesome to hear about the history and intricate nature of those cars. Unfortunately we spent more time talking about the Integra since it was much easier to see what was going on.
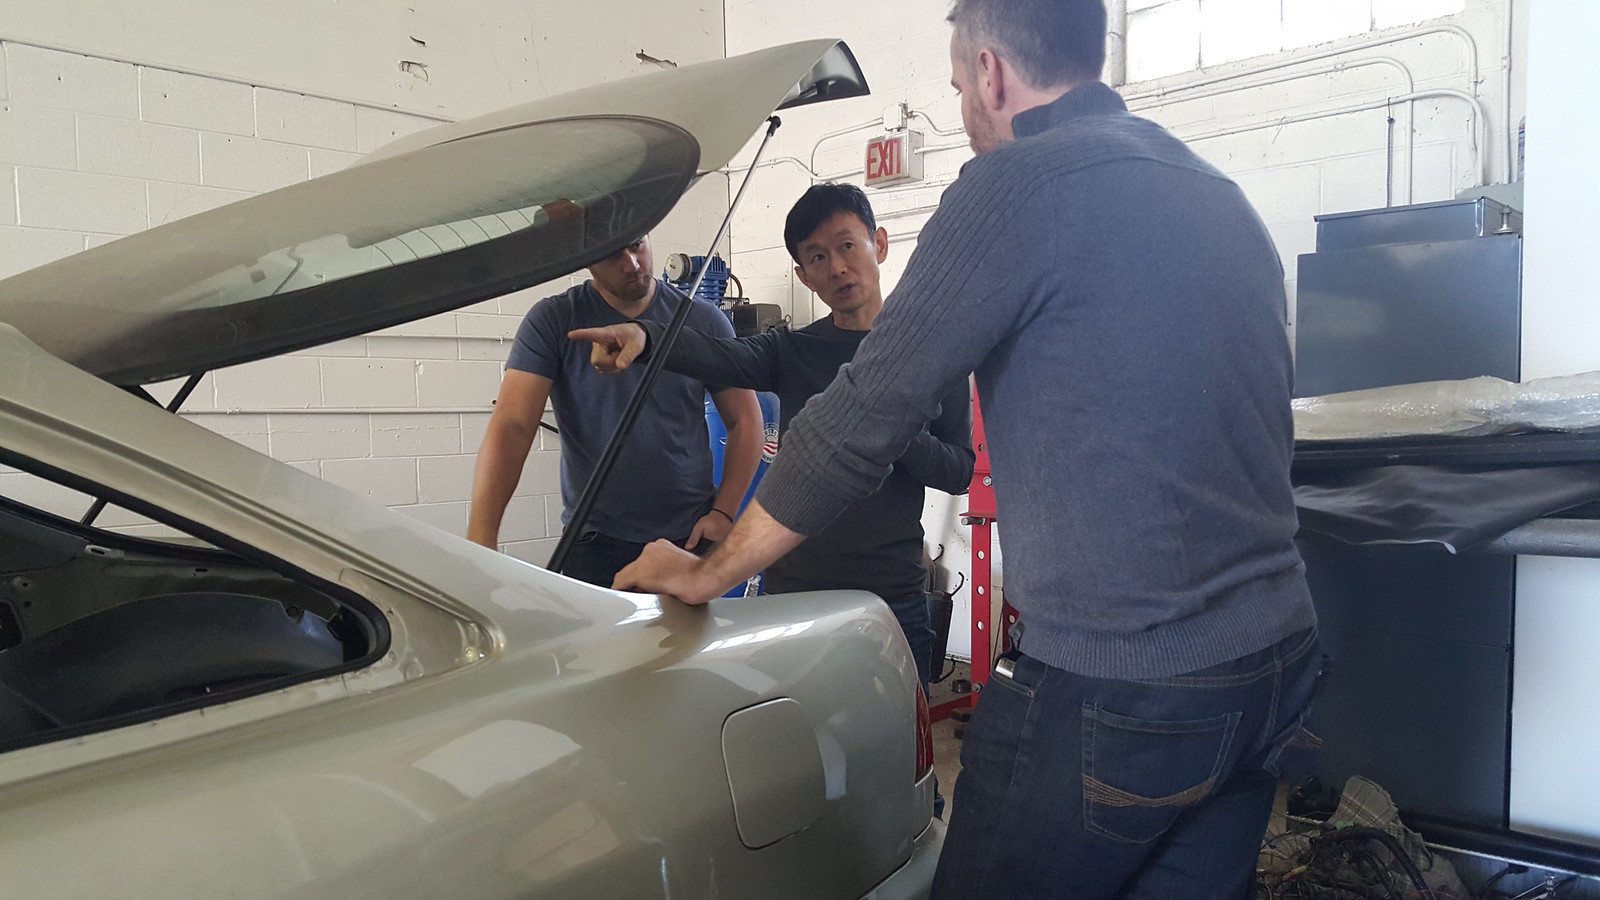
It was a surreal experience – and almost unnerving – having a world class driver and builder going over a half-finished project. Happily, he liked the style and the execution. He even coined the term “hai domo” as the personal style of the car. Since it’s his main area of focus, he enjoyed what we did to save weight – even on a street car.
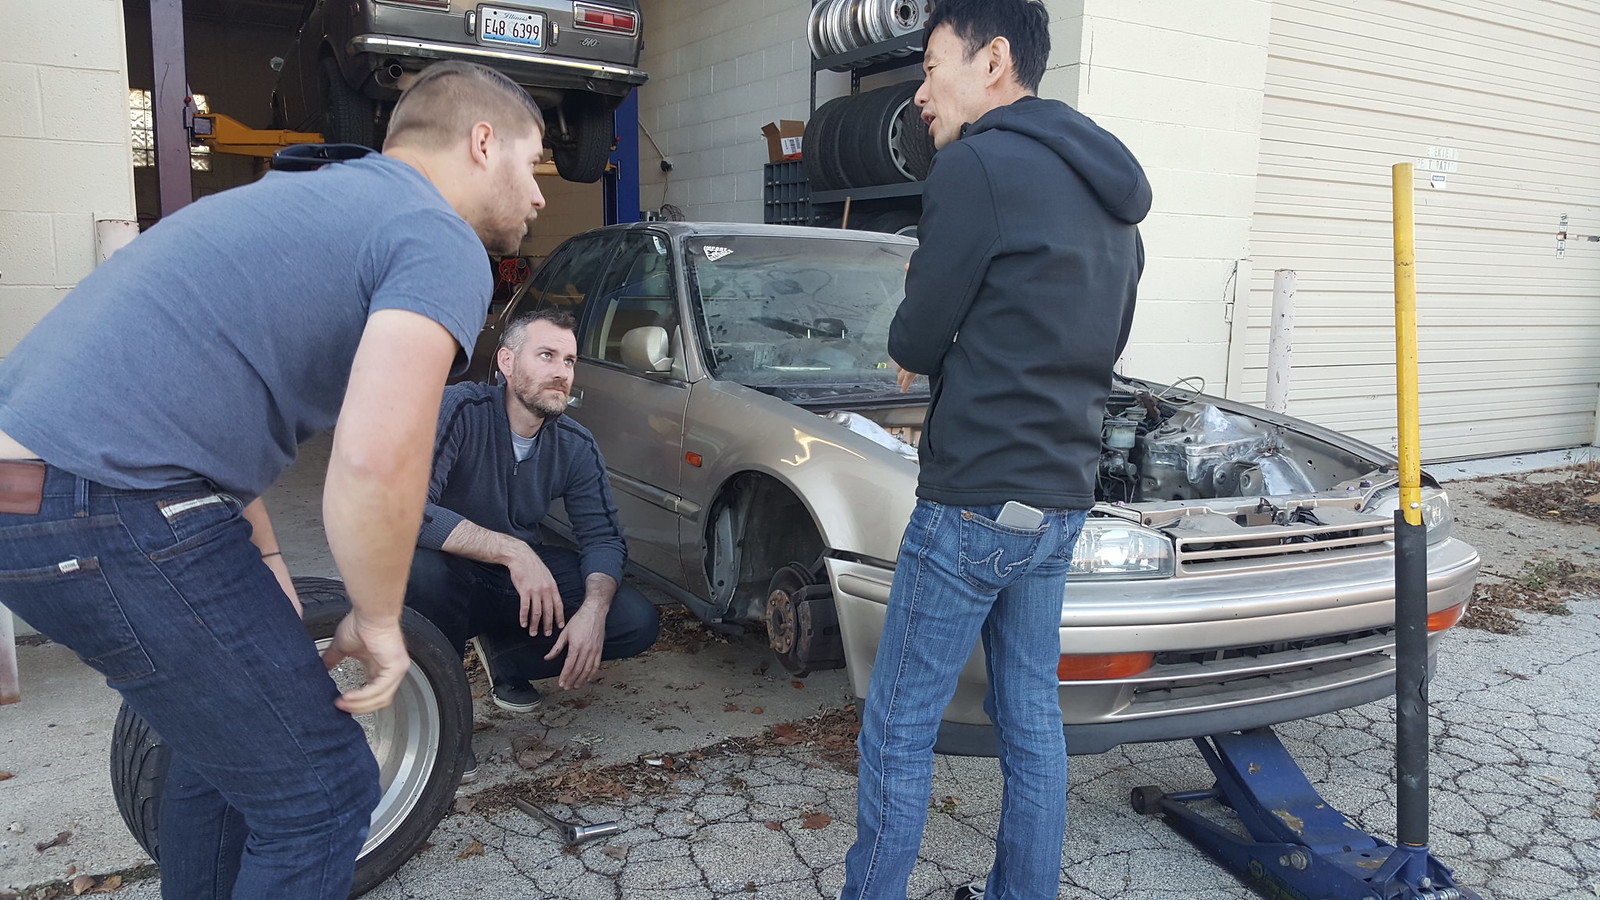
I drove down the 510 so I could swap places with the EK and Yasu told us (and showed us) that his dada used to race a 510 way back in the day. It was little more than an afterthought about the car until he asked what the next project was. Once I mentioned the 510 and told him a few key ideas he became much more interested and started throwing out ideas to Brandon and me. Again, it was surreal to have a personal idol take an interest in my crappy attempt at modifying cars. He made sure to convince Brandon that it needed the “full Opera treatment.” If we can even do half of what he is capable of and has done previously it’ll be one hell of a project. Sadly, when pulling (CRSphoto) Chris’s car back in under the 510 the lower control arm separated from the ball joint. The nut must have been held on by a single thread and when Brandon turned the wheel slightly it turned the nut causing it to come loose. Oh Lord, that’s a way to impress someone! A quick reassembly and then we closed up shop and went to dinner.
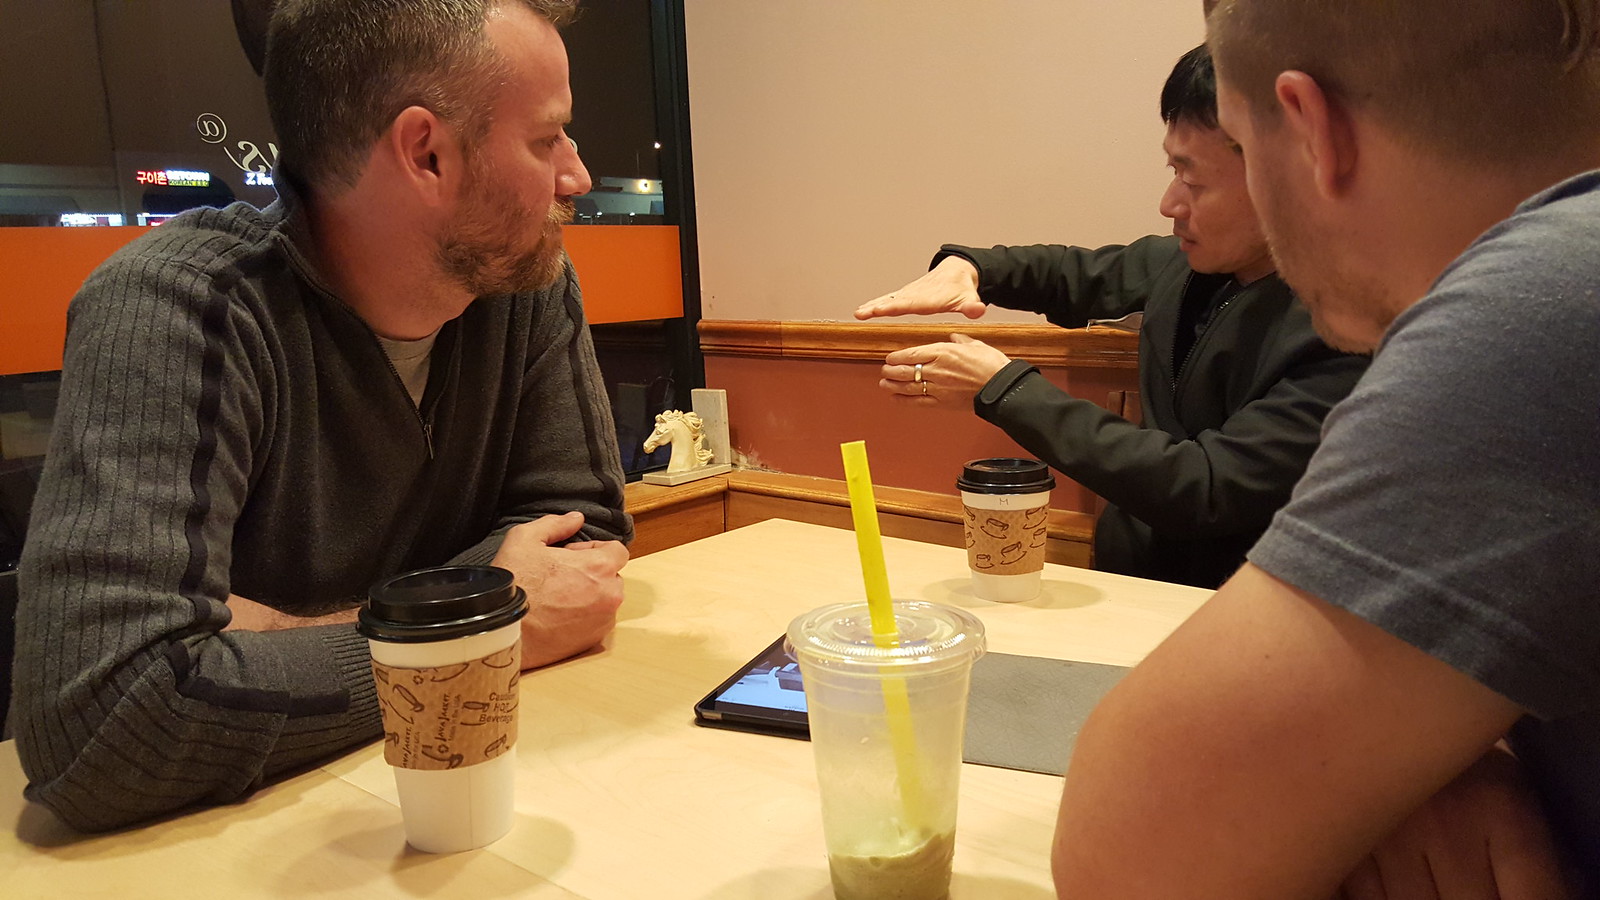
One of the more amazing aspects of Yasu is his willingness to share and teach. I had a million questions for him after following his builds for over a decade and he indulged every one. Nothing was secret. I lg]earned so much from talking with him and got a deeper understanding of how far you can truly go when you’re committed to a single philosophy. Even over coffee he made sure to share just about every picture from every build he had documented on his iPad to make sure we understood the “why” in his work. I was truly humbled.
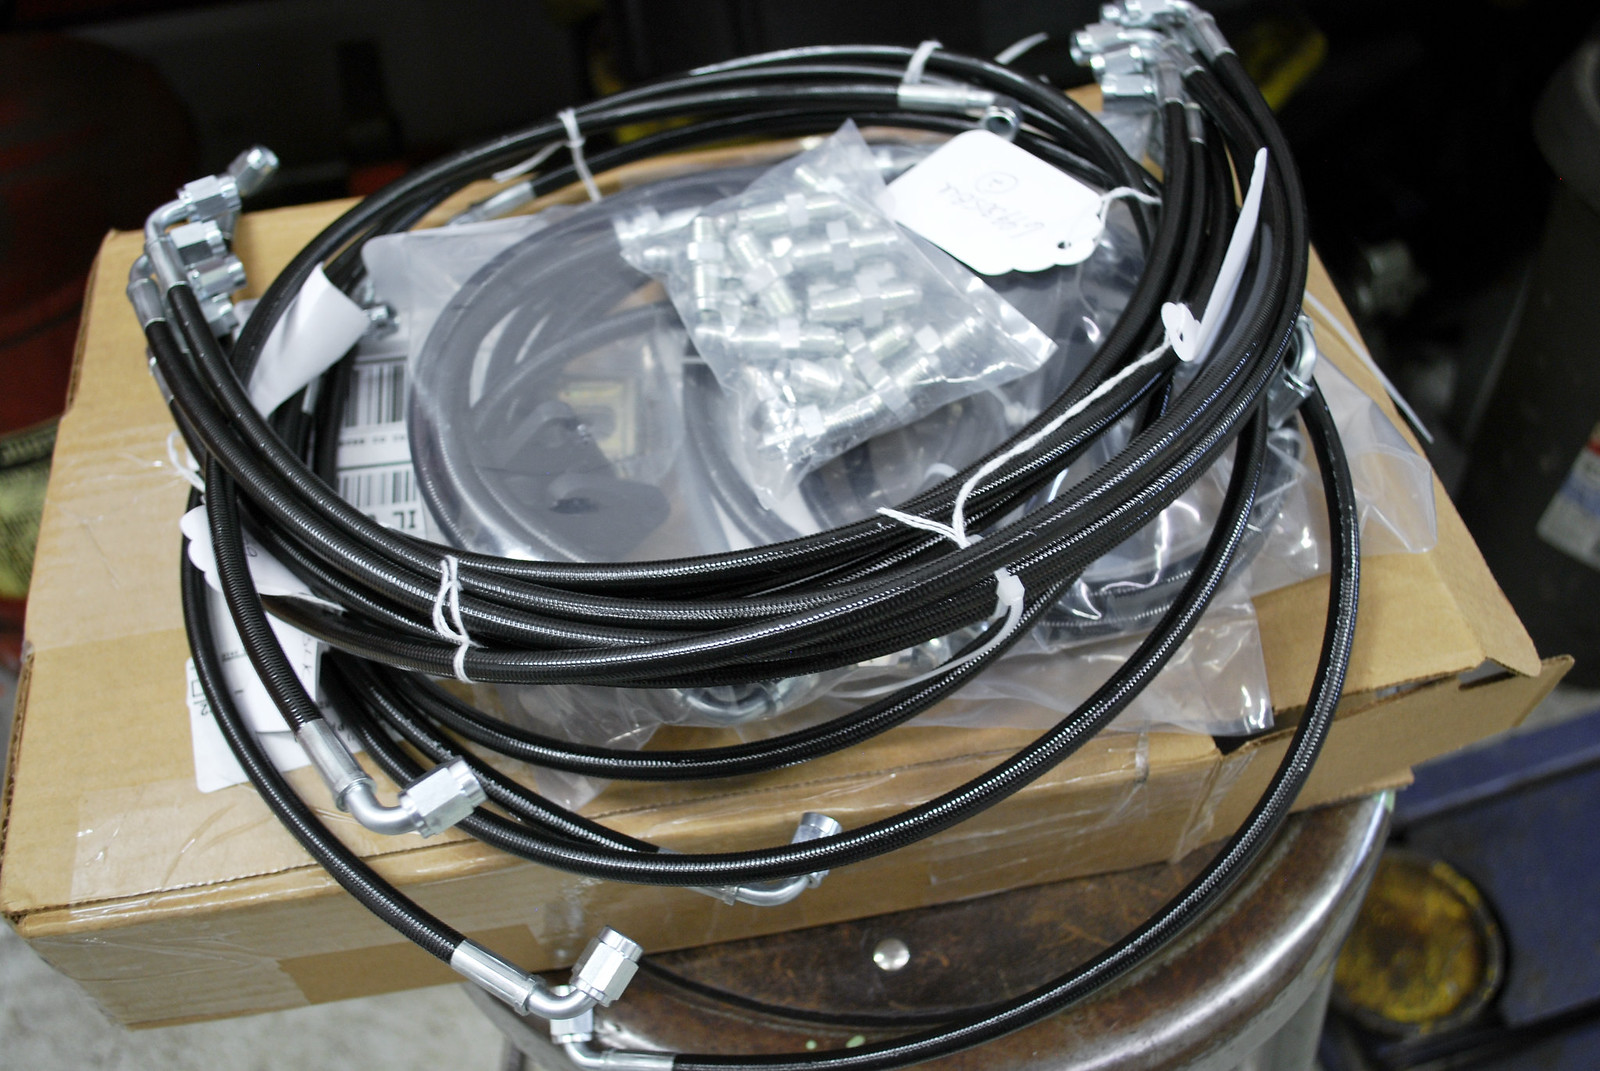
But after that “vacation” was over it was time to get back to the Integra – refreshed and reinvigorated. I received the brake lines during the past week and wanted to make sure I didn’t mess up too badly with the measurements.
The front was already in the air but I had to get the *** end up to address the rear lines.
There’s nothing nicer than new parts getting installed with other new parts. For those of you not in the Midwest or other salt-riddled States you may not know how badly the flare nuts on the rear brake lines seize. The original one was so badly worn that I had to replace the entire line. I didn’t want to deal with shortening, sectioning, or making my own. Given the price it was worth it to buy the correct one instead of spending the time to make one.
I love installing Techna-Fit lines. They always fit perfectly and the lower section accepts a 17mm wrench to hold everything still while tightening the brake fitting. Add a retaining clip and you’re done!
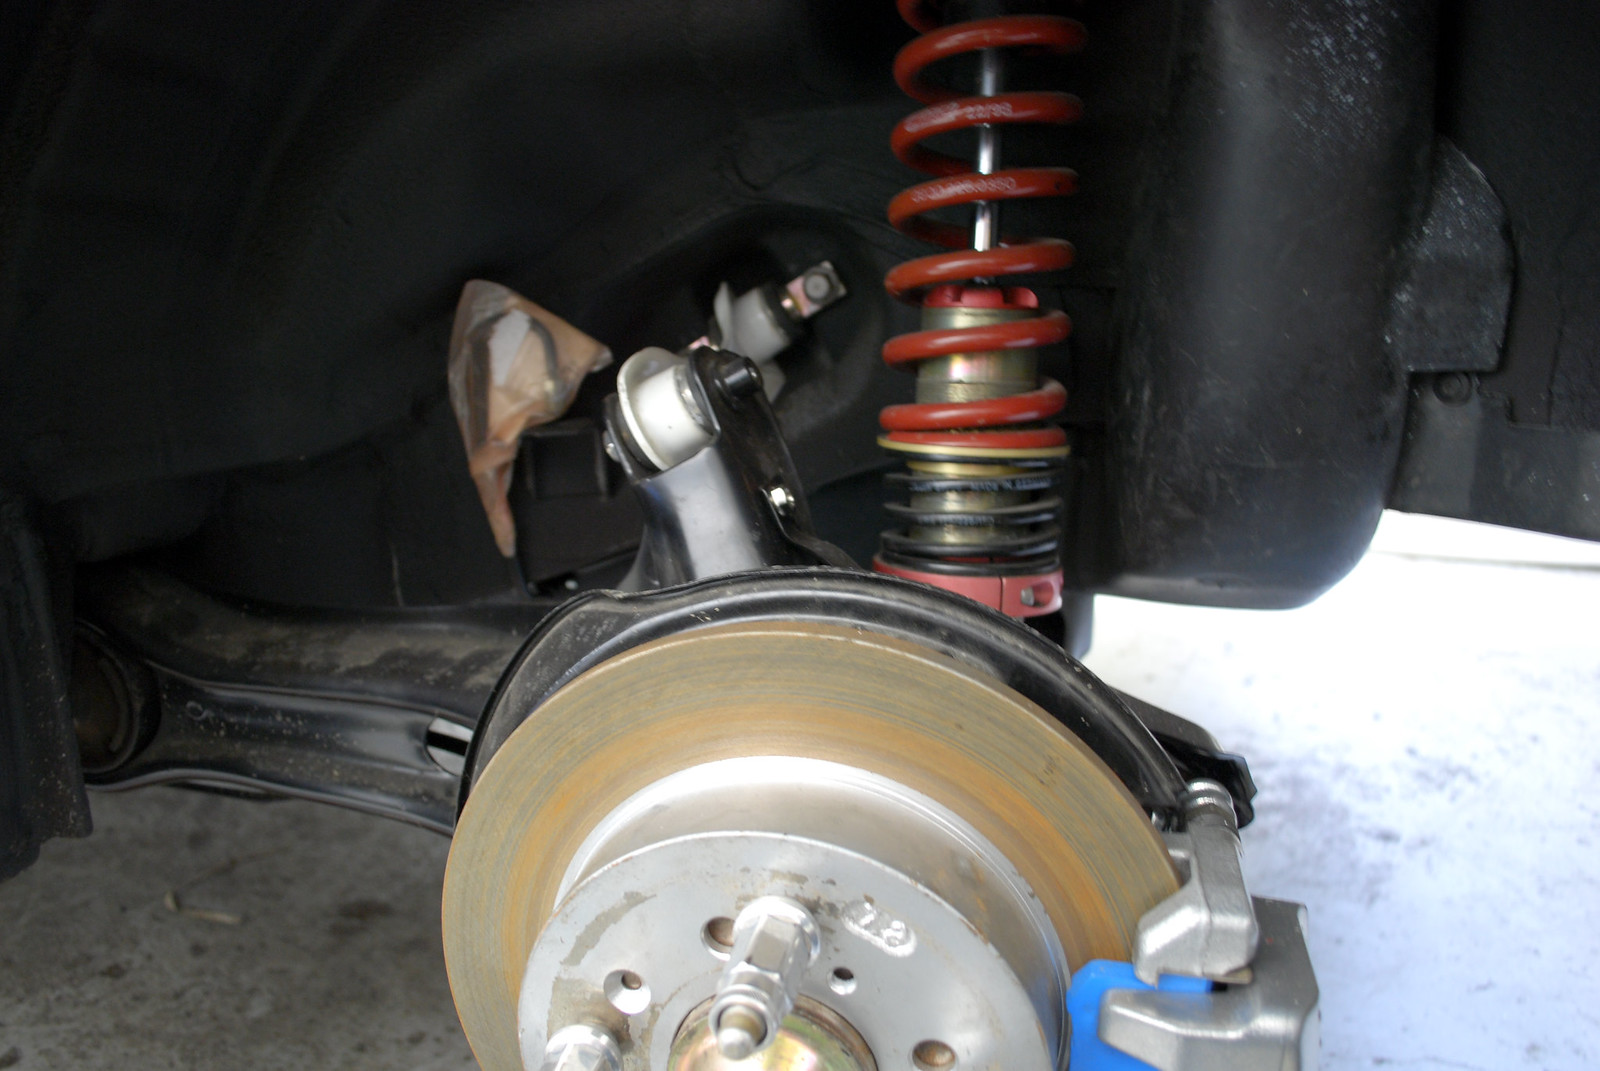
Luckily, the measurements for both the front and rear were good. The rears installed without an issue although I didn’t have the easiest time getting the banjo bolts to line up. A little concentration and a different angle made short work of them.
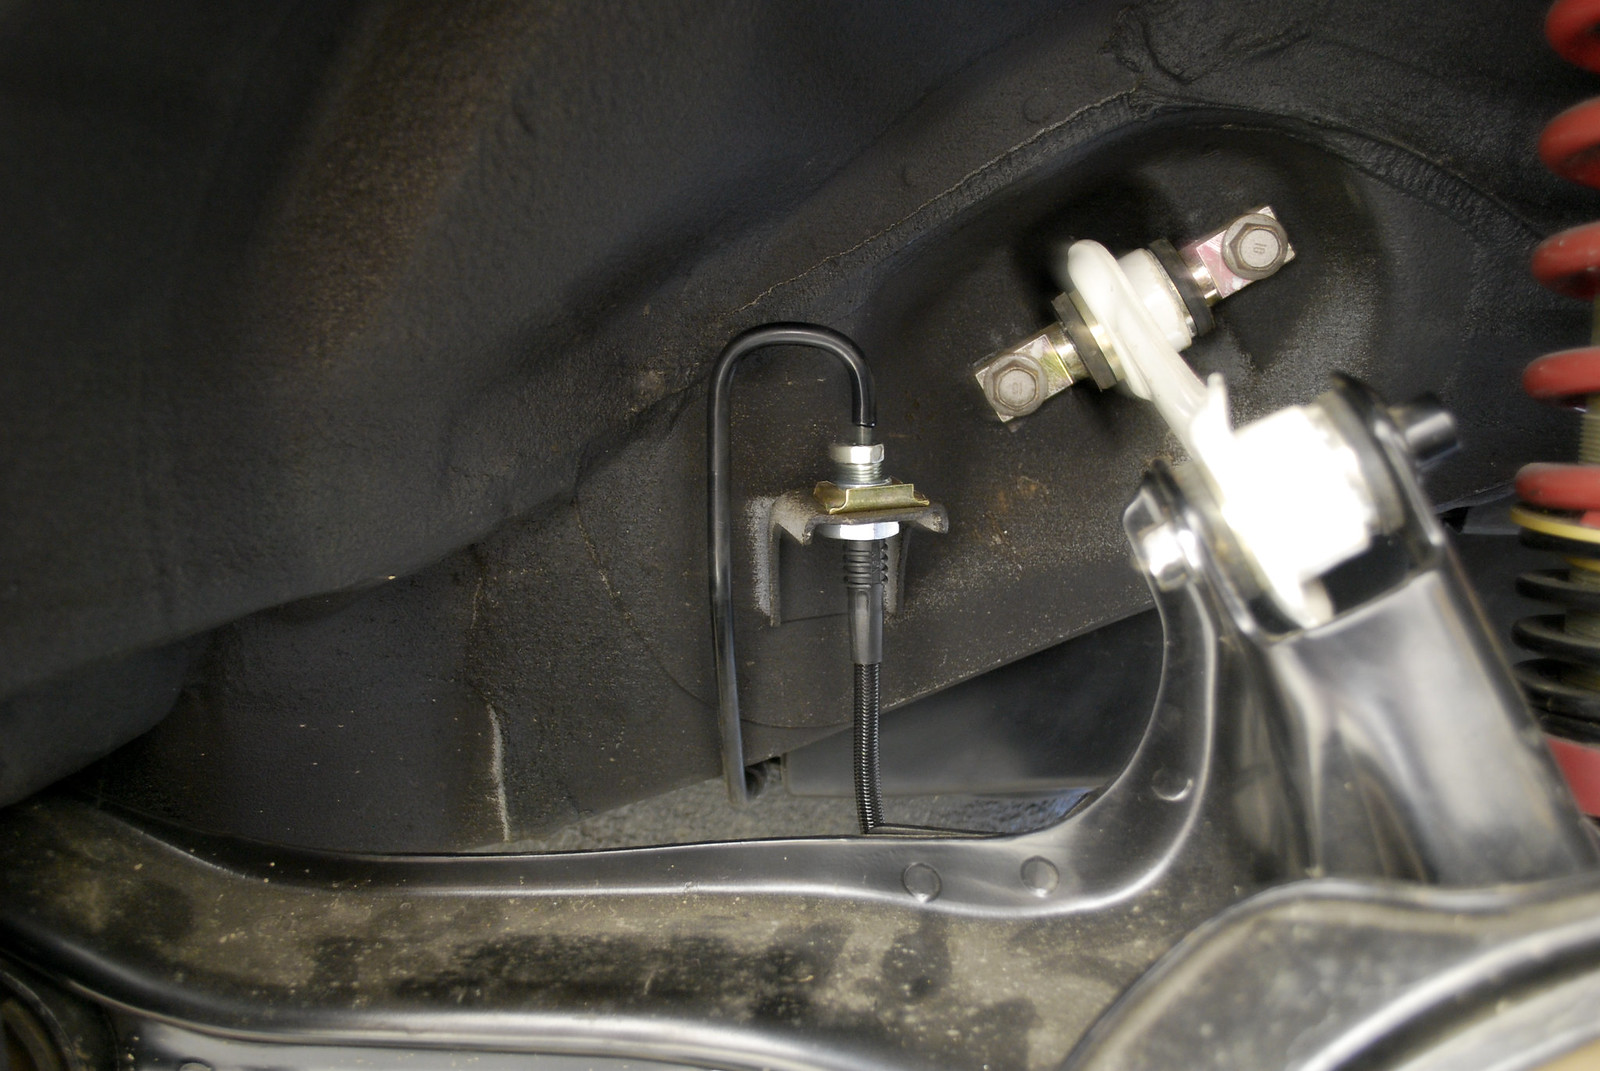
The fronts were also a non-issue. I ordered these hoses custom since the RL calipers from Advics don’t accept a standard banjo bolt. These use a 10mmx1 caliper (or proportioning valve) adapter and a standard -3 line. I know some people do brake tucks and add a short section of line between the firewall and the stand-off on the body then junction that to a stainless steel brake hose. For us, we order a custom length line with the right fittings and the retainers for the stand-offs. Less junctions mean less chance for leaks. Here you can see the line running through the bracket on the body and may be able to make out where the two-bolt bracket is bolted on to the knuckle. Simple, elegant and done.

With my work in the wheel wells done I installed the fender liners just so I could cross something off the list. I didn’t bring down the interior harness I needed to in order to test the headlights and signals so I hope I don’t have to bring the fender liners down to repair my wiring. If I do, the fender liners are the least of my worries.
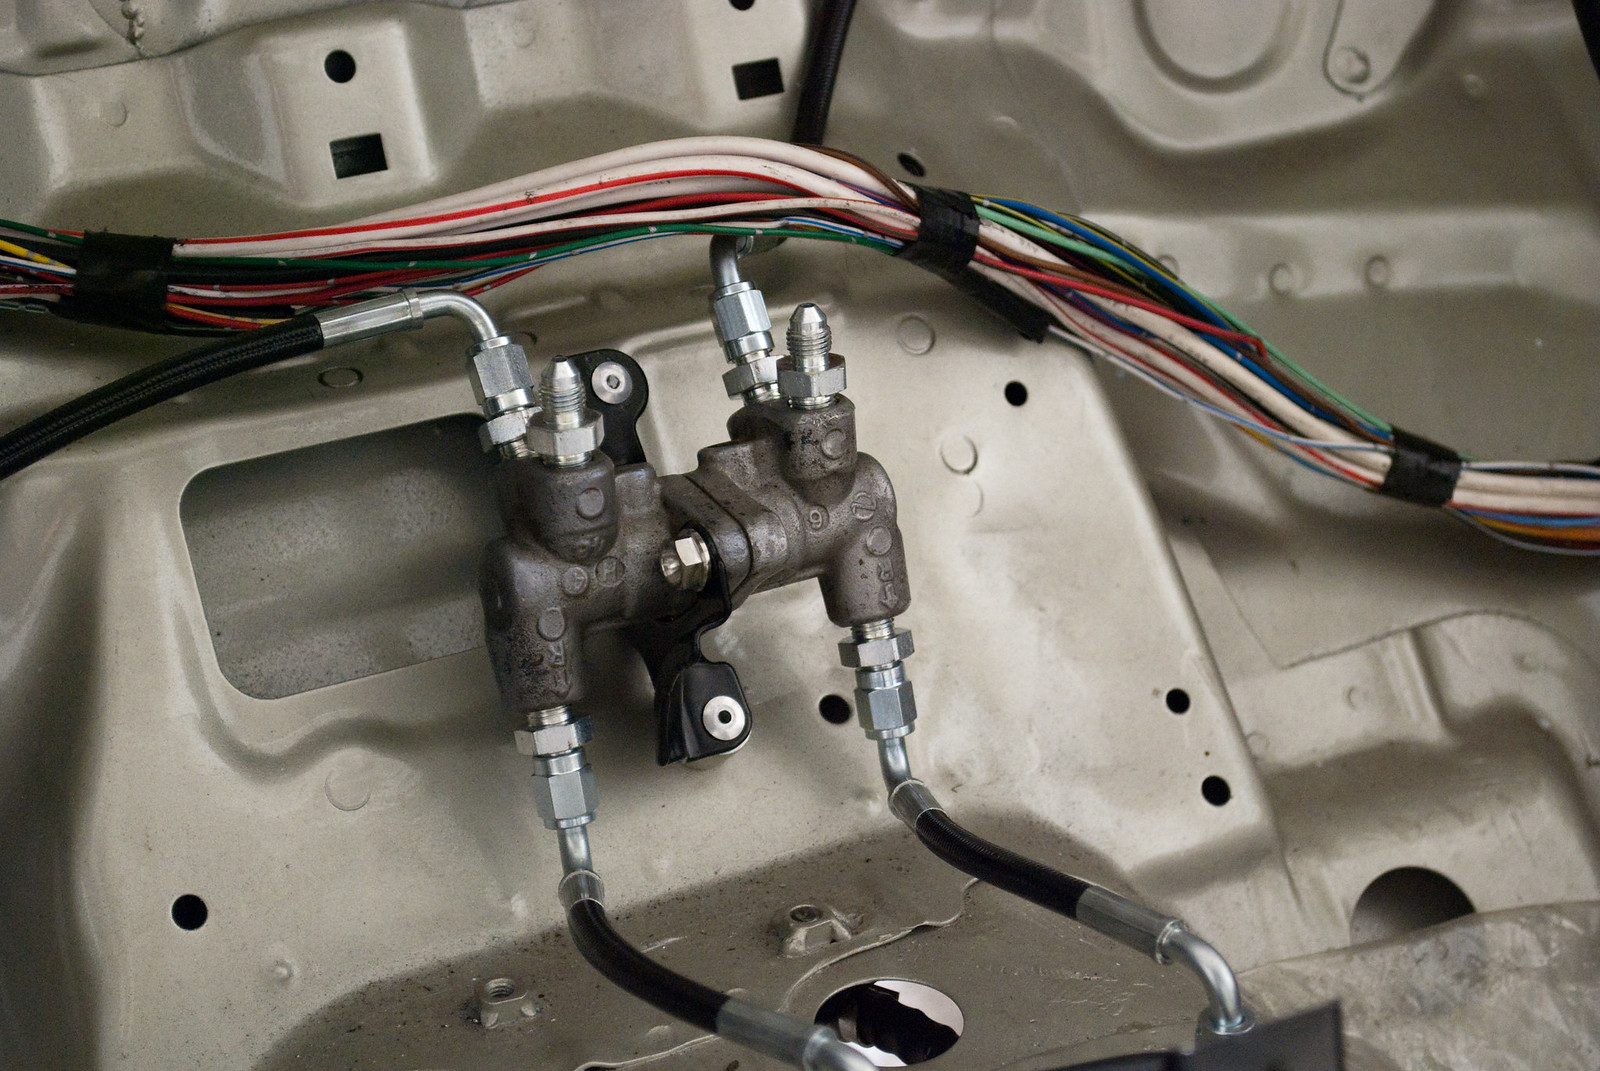
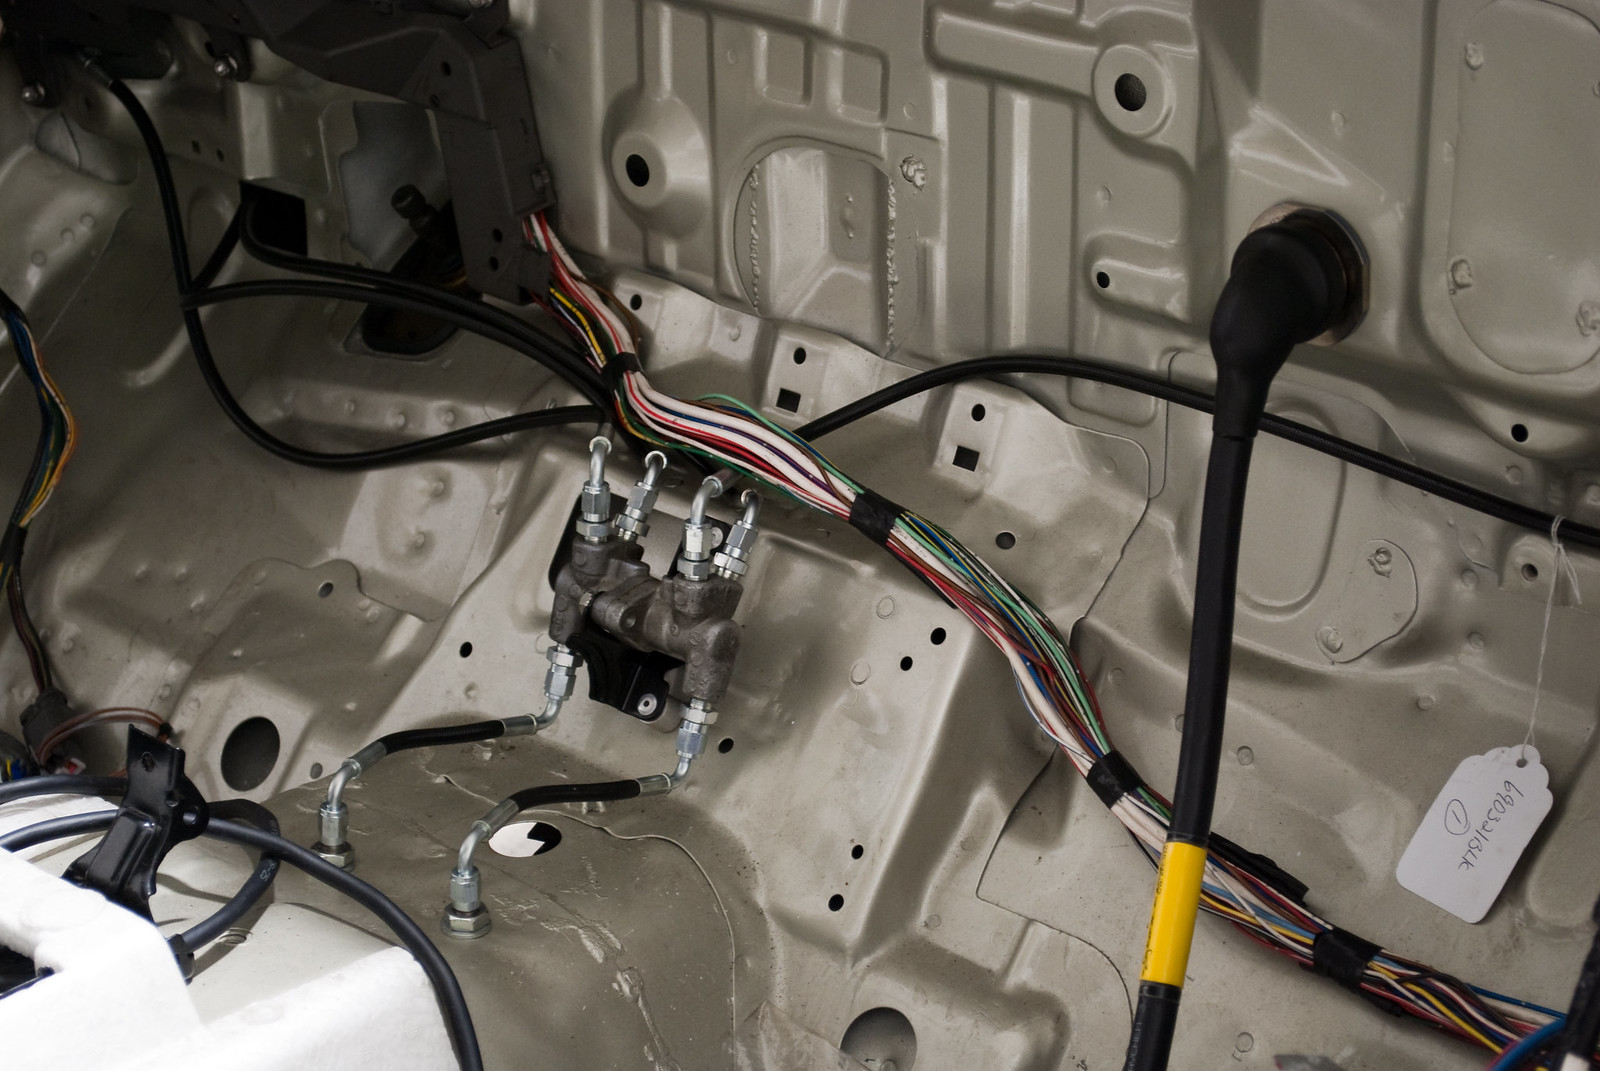
Fast forward a couple of weeks and I installed the proportioning valve under the heater core where the SRS brain box used to reside. I spaced the bracket off the body with some aluminum spacers TallKyle had made up a long time ago and riveted the valve bracket through the spacers into the body.
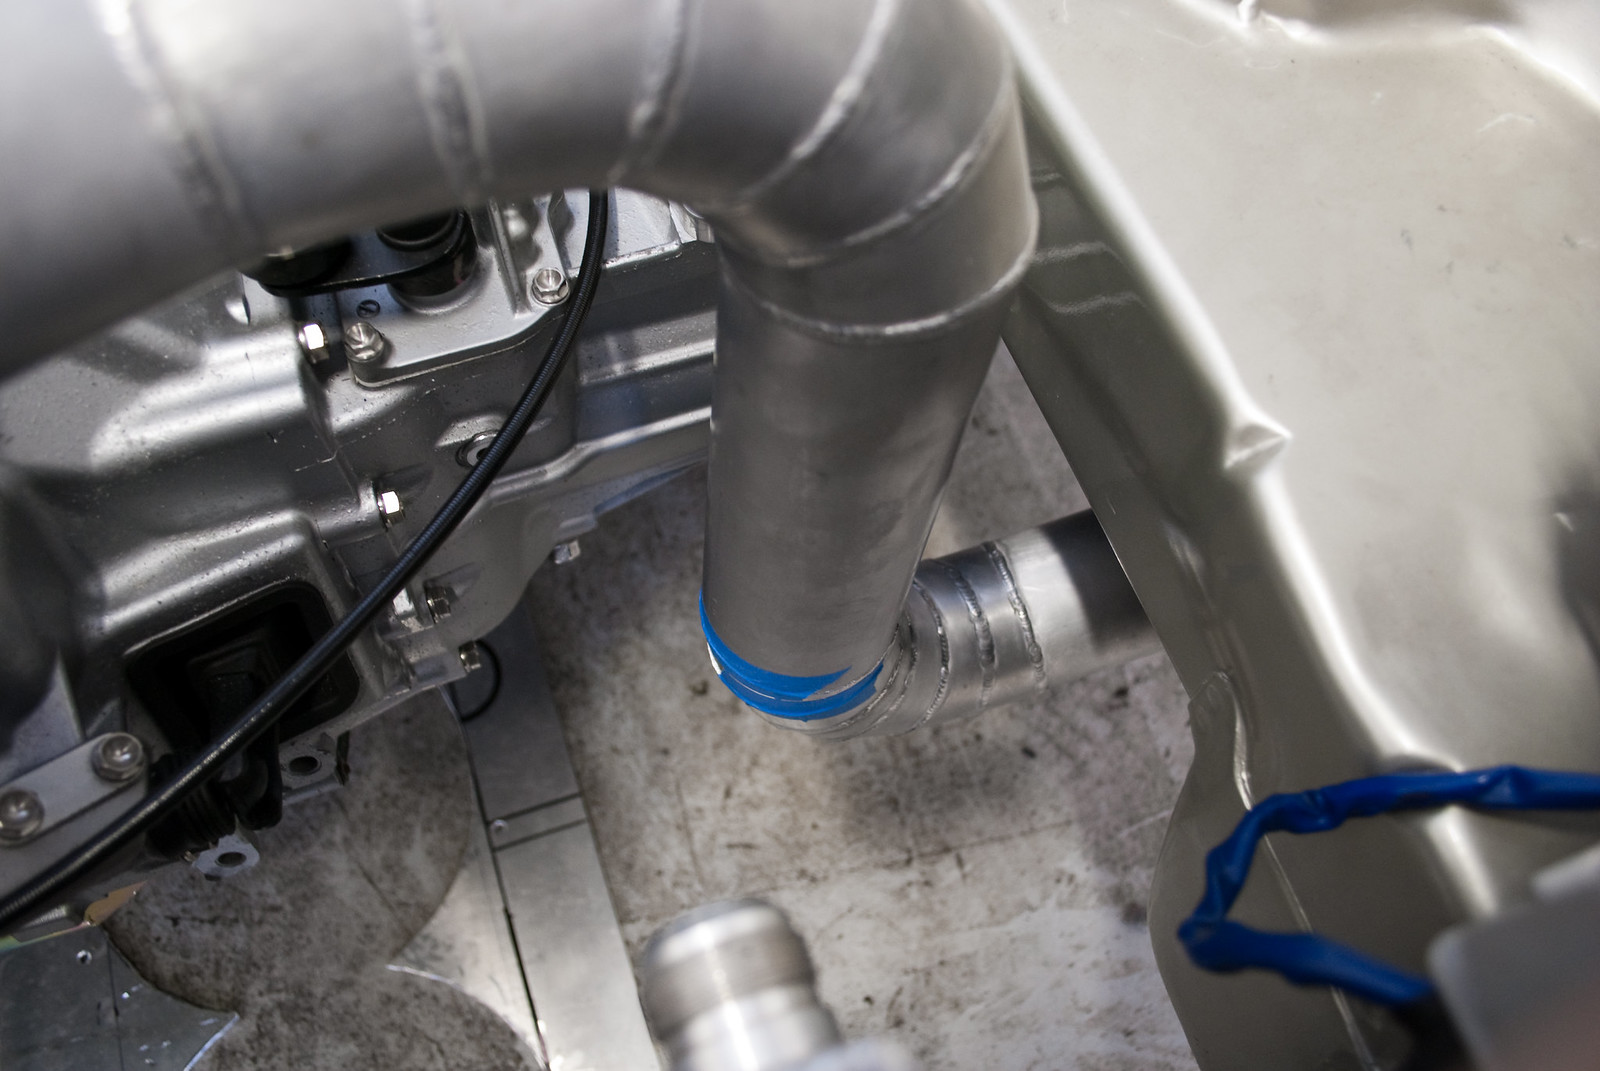
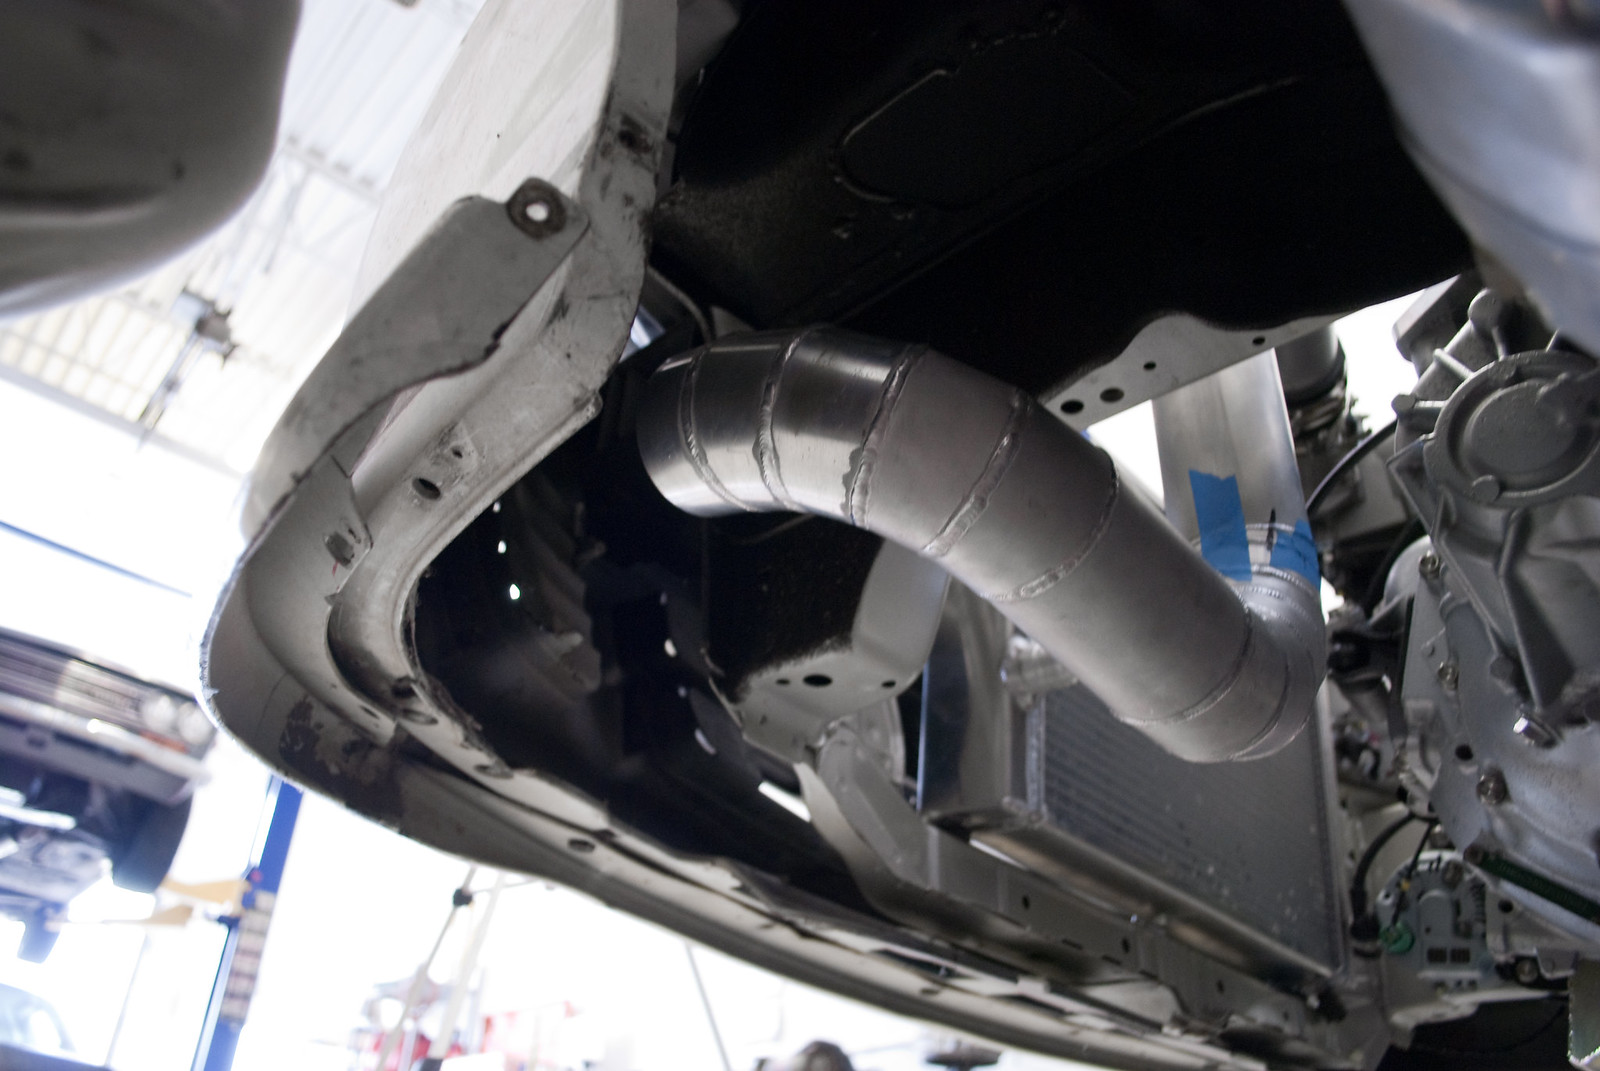
After previous consideration of the intake I wanted another pie-cut piece inserted in the lower 90* portion to give the filter a little more elevation. The first step was to chop the intake along one of the welds.
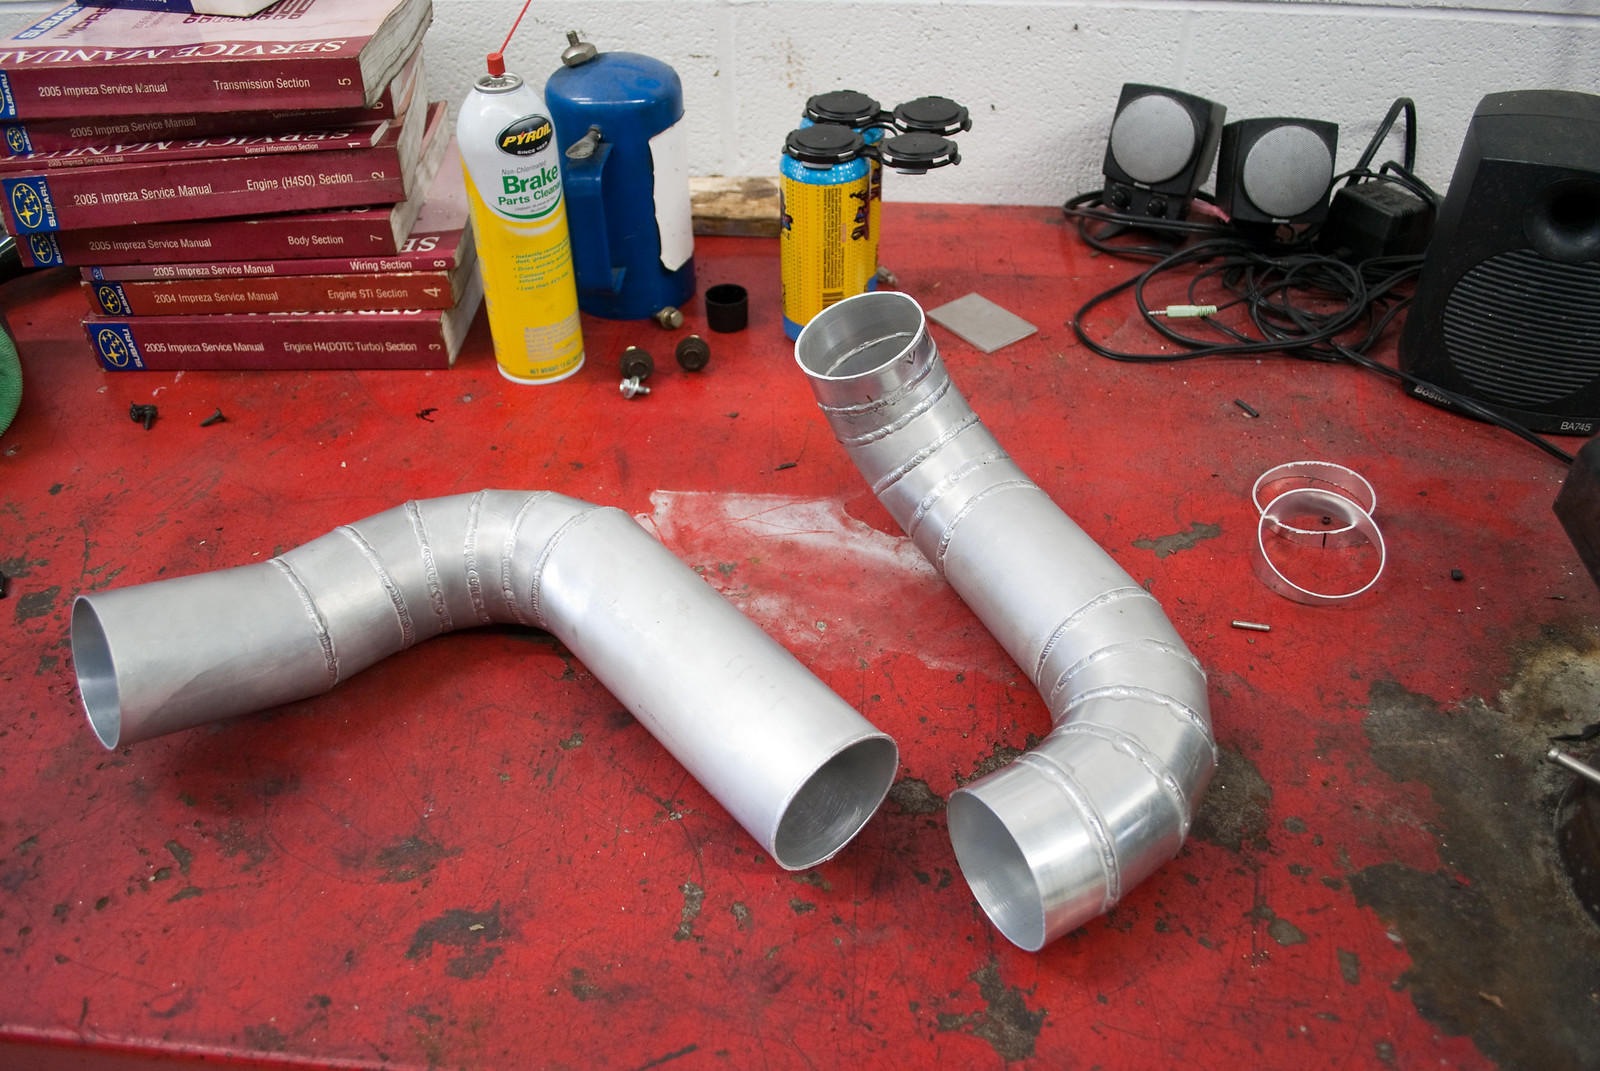
The extra pie cut piece will help the filter stay out of harms way as well as add some clearance against the fender liner. Although everything fit, now it will fit better and give more space (hence more airflow capabilities) around the filter.
Then I jumped back to the proportioning valve and installed all the brake lines. It seems like I was jumping around and I was for the most part. I needed to get the intake back to TallKyle so I had to stop the brake line installation and resume once he collected the intake from me. Once I get the lines routed safely around the steering column (yet to be installed) I can clamp them down and fill the brake system with fluid. Luckily I have some BNIB ATS Super Blue fluid still to use.
Sorry it’s been so long between updates but it’s been a busy life outside of this car. Yasu coming into town was a real treat as was attending the PRI show in Indianapolis with some close friends. Add to that helping out a friend on his K swap and suddenly there’s less time than you think! But thank you to anyone still following this thread. I hope to have a little more time invested before the new year.
Something completely unexpected happened a couple weeks ago – Yasu Yamamoto made plans to attend SEMA but decided to take a pit stop in Chicago to hang out and visit Brandon from AMS. I had the distinct pleasure of meeting an idol of mine in the car industry. For those of you unfamiliar with Yasu by name, you may know him better by his shop: Opera Performance.
For some reason Brandon and Yasu had time and wanted to check out my garage to see what was happening. He took a keen interest in the EK since he built and raced Super Taikyu EK’s in the past. It was awesome to hear about the history and intricate nature of those cars. Unfortunately we spent more time talking about the Integra since it was much easier to see what was going on.
It was a surreal experience – and almost unnerving – having a world class driver and builder going over a half-finished project. Happily, he liked the style and the execution. He even coined the term “hai domo” as the personal style of the car. Since it’s his main area of focus, he enjoyed what we did to save weight – even on a street car.
I drove down the 510 so I could swap places with the EK and Yasu told us (and showed us) that his dada used to race a 510 way back in the day. It was little more than an afterthought about the car until he asked what the next project was. Once I mentioned the 510 and told him a few key ideas he became much more interested and started throwing out ideas to Brandon and me. Again, it was surreal to have a personal idol take an interest in my crappy attempt at modifying cars. He made sure to convince Brandon that it needed the “full Opera treatment.” If we can even do half of what he is capable of and has done previously it’ll be one hell of a project. Sadly, when pulling (CRSphoto) Chris’s car back in under the 510 the lower control arm separated from the ball joint. The nut must have been held on by a single thread and when Brandon turned the wheel slightly it turned the nut causing it to come loose. Oh Lord, that’s a way to impress someone! A quick reassembly and then we closed up shop and went to dinner.
One of the more amazing aspects of Yasu is his willingness to share and teach. I had a million questions for him after following his builds for over a decade and he indulged every one. Nothing was secret. I lg]earned so much from talking with him and got a deeper understanding of how far you can truly go when you’re committed to a single philosophy. Even over coffee he made sure to share just about every picture from every build he had documented on his iPad to make sure we understood the “why” in his work. I was truly humbled.
But after that “vacation” was over it was time to get back to the Integra – refreshed and reinvigorated. I received the brake lines during the past week and wanted to make sure I didn’t mess up too badly with the measurements.
The front was already in the air but I had to get the *** end up to address the rear lines.
There’s nothing nicer than new parts getting installed with other new parts. For those of you not in the Midwest or other salt-riddled States you may not know how badly the flare nuts on the rear brake lines seize. The original one was so badly worn that I had to replace the entire line. I didn’t want to deal with shortening, sectioning, or making my own. Given the price it was worth it to buy the correct one instead of spending the time to make one.
I love installing Techna-Fit lines. They always fit perfectly and the lower section accepts a 17mm wrench to hold everything still while tightening the brake fitting. Add a retaining clip and you’re done!
Luckily, the measurements for both the front and rear were good. The rears installed without an issue although I didn’t have the easiest time getting the banjo bolts to line up. A little concentration and a different angle made short work of them.
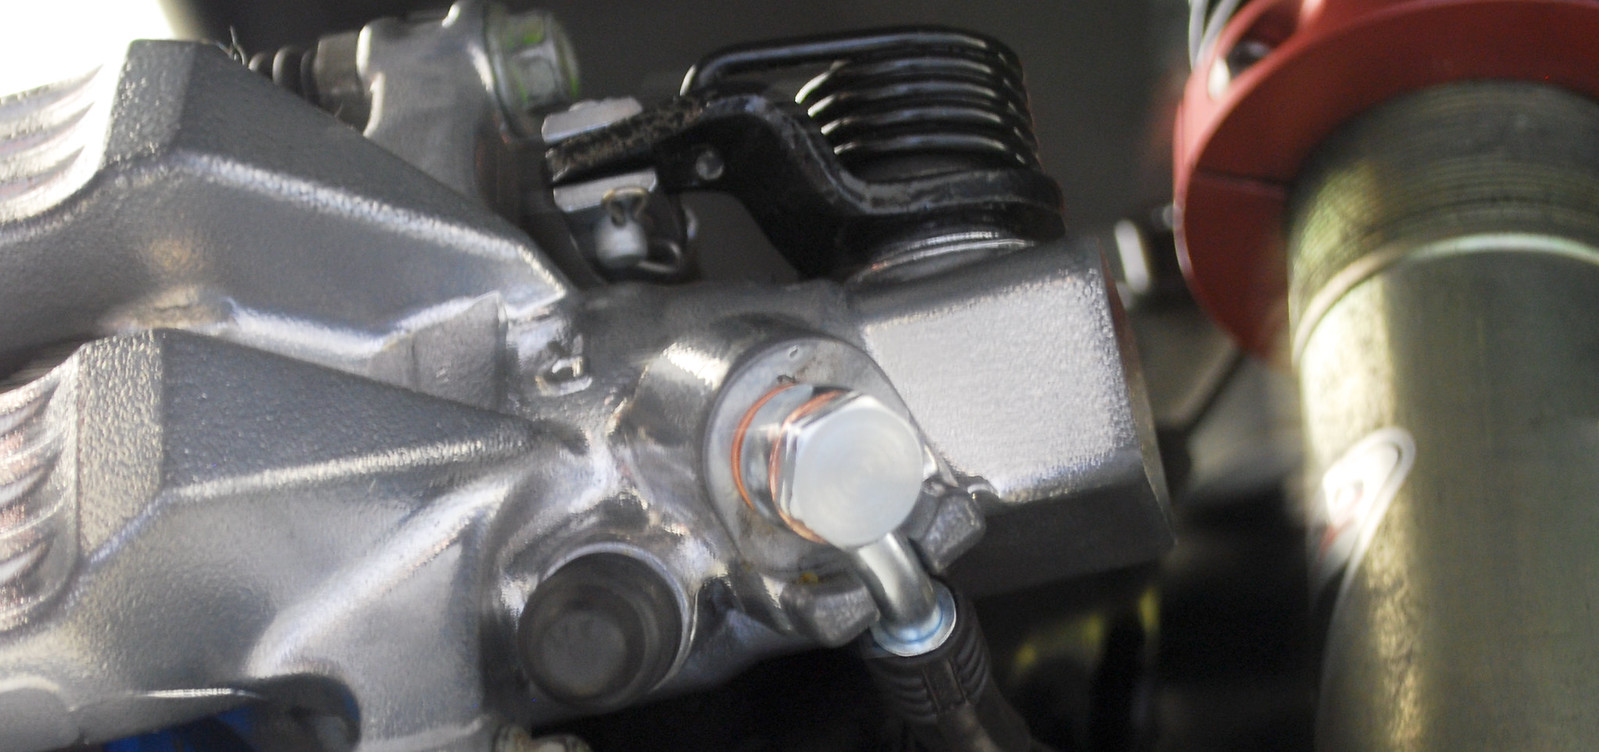
The fronts were also a non-issue. I ordered these hoses custom since the RL calipers from Advics don’t accept a standard banjo bolt. These use a 10mmx1 caliper (or proportioning valve) adapter and a standard -3 line. I know some people do brake tucks and add a short section of line between the firewall and the stand-off on the body then junction that to a stainless steel brake hose. For us, we order a custom length line with the right fittings and the retainers for the stand-offs. Less junctions mean less chance for leaks. Here you can see the line running through the bracket on the body and may be able to make out where the two-bolt bracket is bolted on to the knuckle. Simple, elegant and done.
With my work in the wheel wells done I installed the fender liners just so I could cross something off the list. I didn’t bring down the interior harness I needed to in order to test the headlights and signals so I hope I don’t have to bring the fender liners down to repair my wiring. If I do, the fender liners are the least of my worries.
Fast forward a couple of weeks and I installed the proportioning valve under the heater core where the SRS brain box used to reside. I spaced the bracket off the body with some aluminum spacers TallKyle had made up a long time ago and riveted the valve bracket through the spacers into the body.
After previous consideration of the intake I wanted another pie-cut piece inserted in the lower 90* portion to give the filter a little more elevation. The first step was to chop the intake along one of the welds.
The extra pie cut piece will help the filter stay out of harms way as well as add some clearance against the fender liner. Although everything fit, now it will fit better and give more space (hence more airflow capabilities) around the filter.
Then I jumped back to the proportioning valve and installed all the brake lines. It seems like I was jumping around and I was for the most part. I needed to get the intake back to TallKyle so I had to stop the brake line installation and resume once he collected the intake from me. Once I get the lines routed safely around the steering column (yet to be installed) I can clamp them down and fill the brake system with fluid. Luckily I have some BNIB ATS Super Blue fluid still to use.
Sorry it’s been so long between updates but it’s been a busy life outside of this car. Yasu coming into town was a real treat as was attending the PRI show in Indianapolis with some close friends. Add to that helping out a friend on his K swap and suddenly there’s less time than you think! But thank you to anyone still following this thread. I hope to have a little more time invested before the new year.


 12-16-2015, 09:43 PM
#557
Honda-Tech Member
iTrader: (19)
Join Date: Dec 2008
Location: NORCAL
Posts: 438
Likes: 0
Received 0 Likes
on
0 Posts
That's an awesome story and experience! And then followed up by another impressive update!
Favorite. Build. Ever.
Favorite. Build. Ever.
12-16-2015, 10:04 PM
#558
Honda-Tech Member
Im just in for the next episode....LOL
Freaking GORGEOUS Build....
I see ALOT of things I could have/should have done differently for 2point6's last build...
I didnt read all of the details...but did you ever estimate how much weight savings from all the drilled bolt heads?
Very inspiring!
Freaking GORGEOUS Build....
I see ALOT of things I could have/should have done differently for 2point6's last build...
I didnt read all of the details...but did you ever estimate how much weight savings from all the drilled bolt heads?
Very inspiring!
 12-22-2015, 09:08 PM
#560
Honda-Tech Member
Thread Starter
Thanks, Sammy!
Wow. That's humbling to hear . . . especially since I only installed some brake lines, lol.
Hahaha. Thanks, John!

Thanks, Brad. There was a lot to learn that can be put to use under US rules an regulation. I'd love to learn to weld and try some of the craziness that's floating through my head now.
Anytime! Thanks for reading and appreciating.
Im just in for the next episode....LOL
Freaking GORGEOUS Build....
I see ALOT of things I could have/should have done differently for 2point6's last build...
I didnt read all of the details...but did you ever estimate how much weight savings from all the drilled bolt heads?
Very inspiring!
Freaking GORGEOUS Build....
I see ALOT of things I could have/should have done differently for 2point6's last build...
I didnt read all of the details...but did you ever estimate how much weight savings from all the drilled bolt heads?
Very inspiring!
From what Chris tells me he's owned it for quite some time but it hasn't been on the road in a while. I couldn't say when the last time it was out of the garage.
12-22-2015, 09:09 PM
#561
Honda-Tech Member
Thread Starter
Enter again some of the low-budget nature of the project. I needed some way to mount the aluminum radiator further forward than traditional mounts would go. That means some custom work. That means TallKyle’s gonna be putting in work but first I have to make the mounts. I decided the best way to create cooling efficiency as well as give the radiator its secure (but not too secure) permanent mounts. This is where the low-budget comes in: I took someone’s (probably Duckman’s) old attempt at a radiator fan shroud and cut some plates out of it.
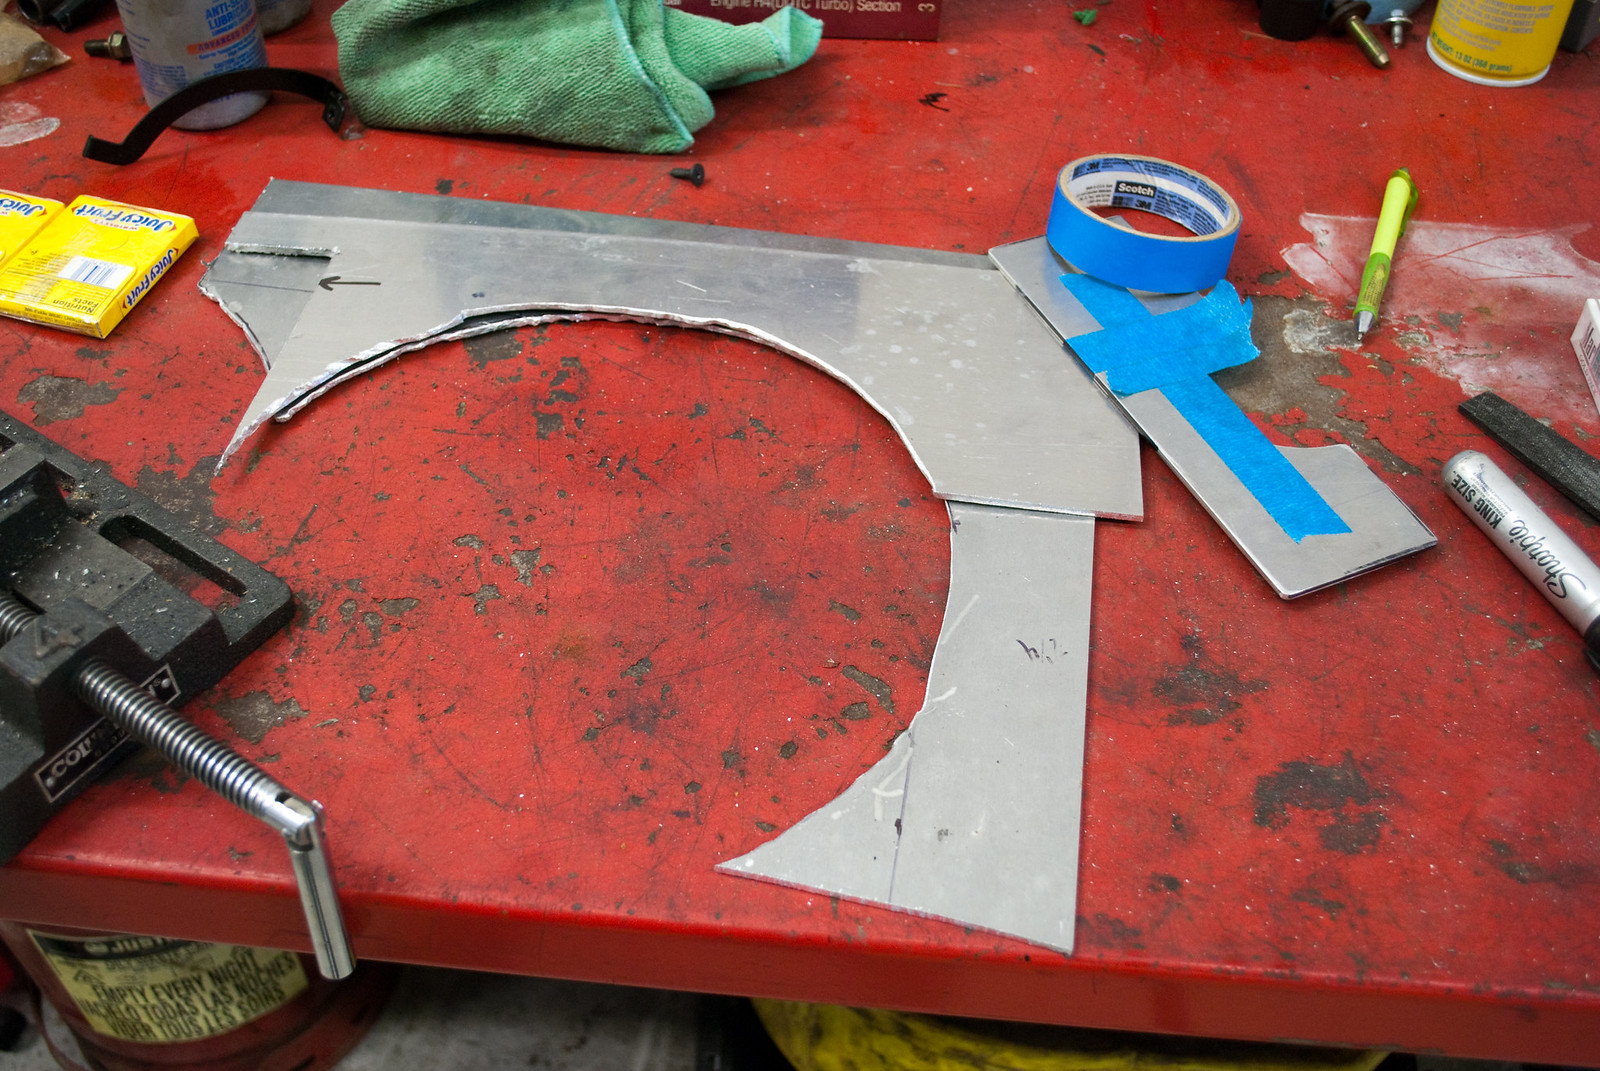
More proof it’s low budget? Check out my analog CNC machine:

This is the same sturdy file set that I’ve been using forever – its analog database has never been corrupted. I recall making the S2000 clutch master spacer for my EG (yes, the same spacer that founded a stupid and needless cottage industry) and directed people how to make their own if they had a RHD Honda and needed one for firewall clearance (its original purpose). People actually got offended claiming things like “Not everyone has access to a CNC machine like you!” Hell, I wouldn’t even know how to turn on a CNC machine, let alone program one. Anyways, I digress. I started out with a half-circle thanks to a holesaw bit and then opened it up into a more conventional “bathtub” shape thanks to my analog CNC machine. Total cost for materials, training classes and analog CNC machine? ‘bout tree-fiddy.
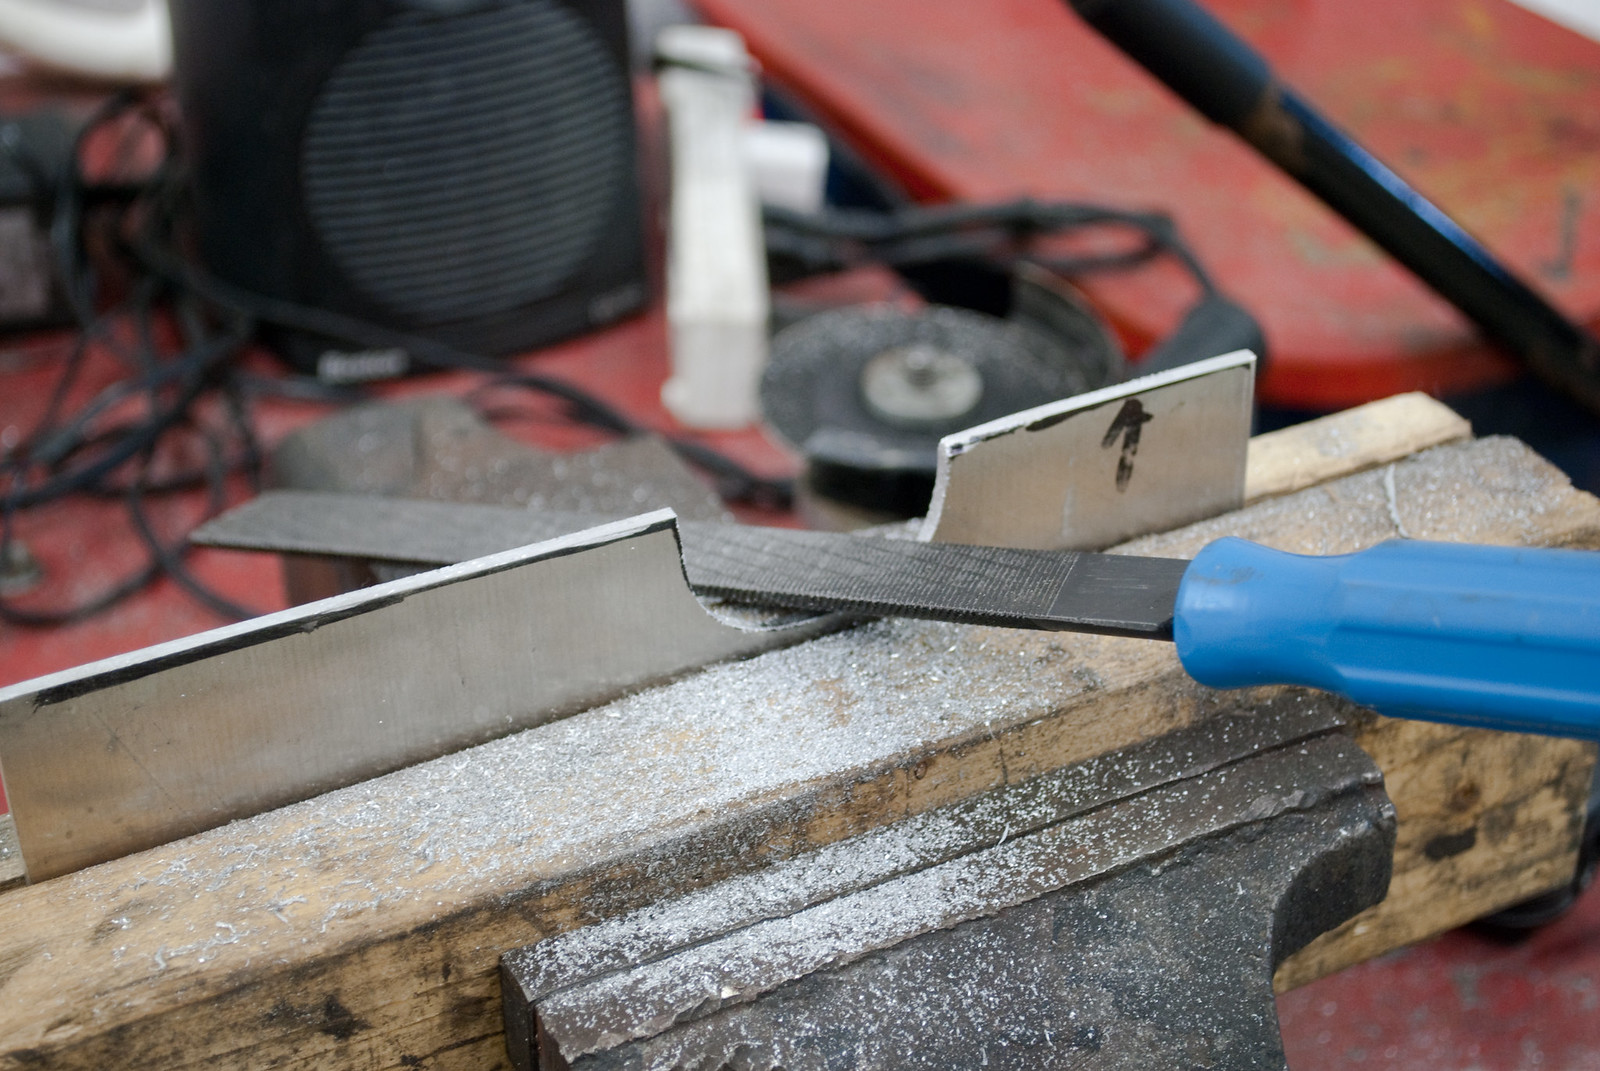
All this so I could clear the bulkhead for the charge harness up front. I wanted to not only clear the bulkhead itself but also give the wiring enough clearance for movement while the car is driving. The last thing I want is wiring rubbing on metal causing a short, fire, or crash.
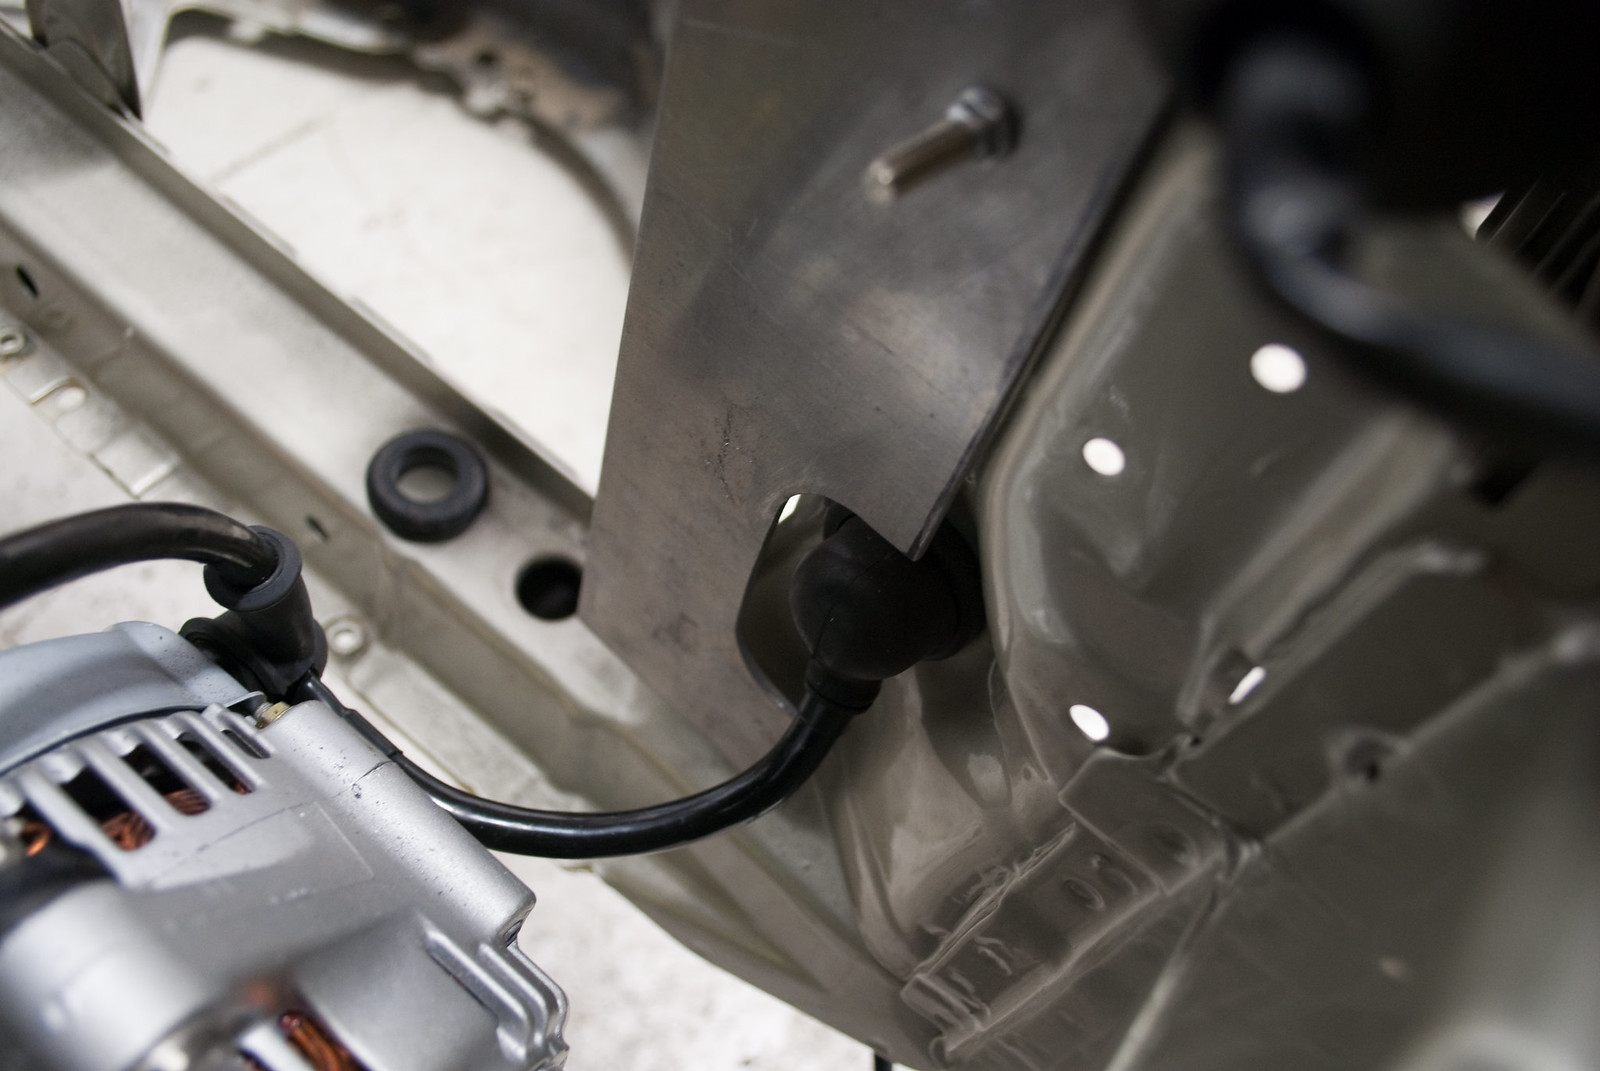
The other side didn’t need as much machine time since there’s nothing to clear. It’s just a rectangular plate with two holes drilled in it to mount it to the core support. These will NOT be welded to the radiator – hence the small gaps between the plates and radiator sides. In order to not stress the radiator itself I will hard-mount the plates and then use some aluminum round stock to locate the radiator to the plates. This will give some freedom of movement to resist strong vibrations but not so much that it’s not securely mounted. Think about your stock radiator upper mount – that rubber around the top post locates it and prevents it from falling all over the place but not in a manner that transmits all the road vibration to the fragile(ish) core.
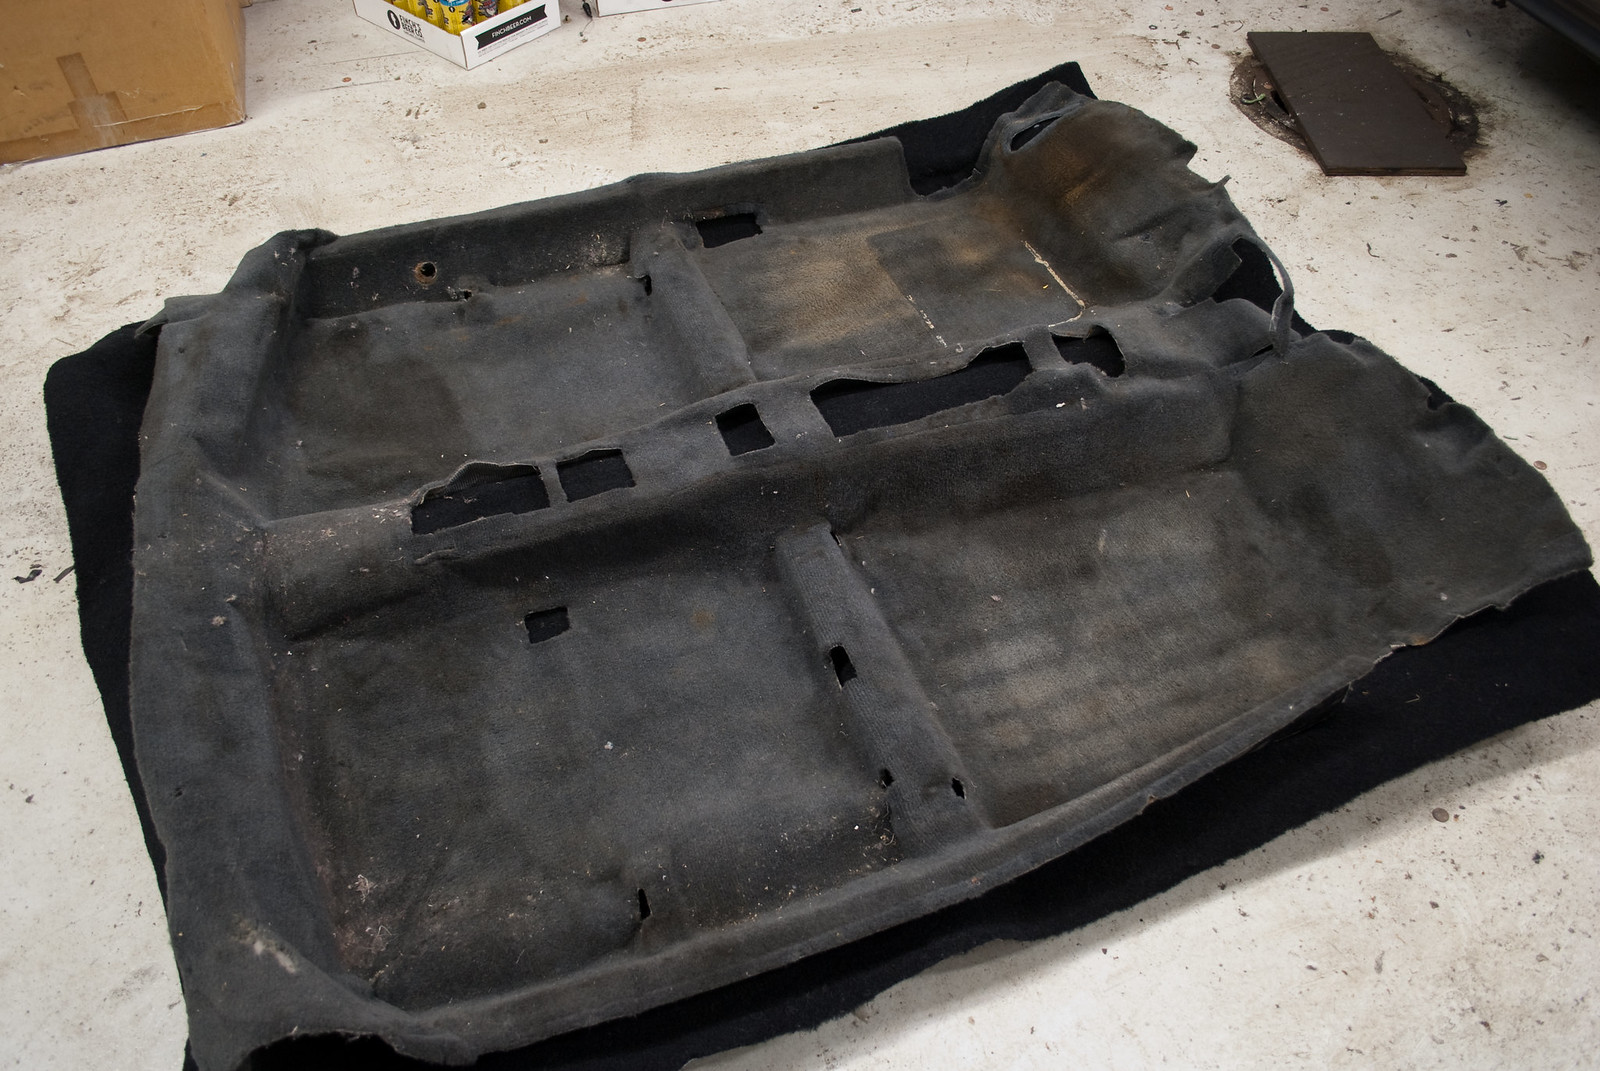
With that out of the way and worth stepping away from to make sure I like them next week or next month when I revisit them I moved on to the carpet. While I was storing it carefully (folded up and forgotten in a corner) a mouse helped itself to a few square inches of material rendering the stock carpet useless. I had to buy a new one and went with a molded black replacement from AutoCustomCarpets (accmats).
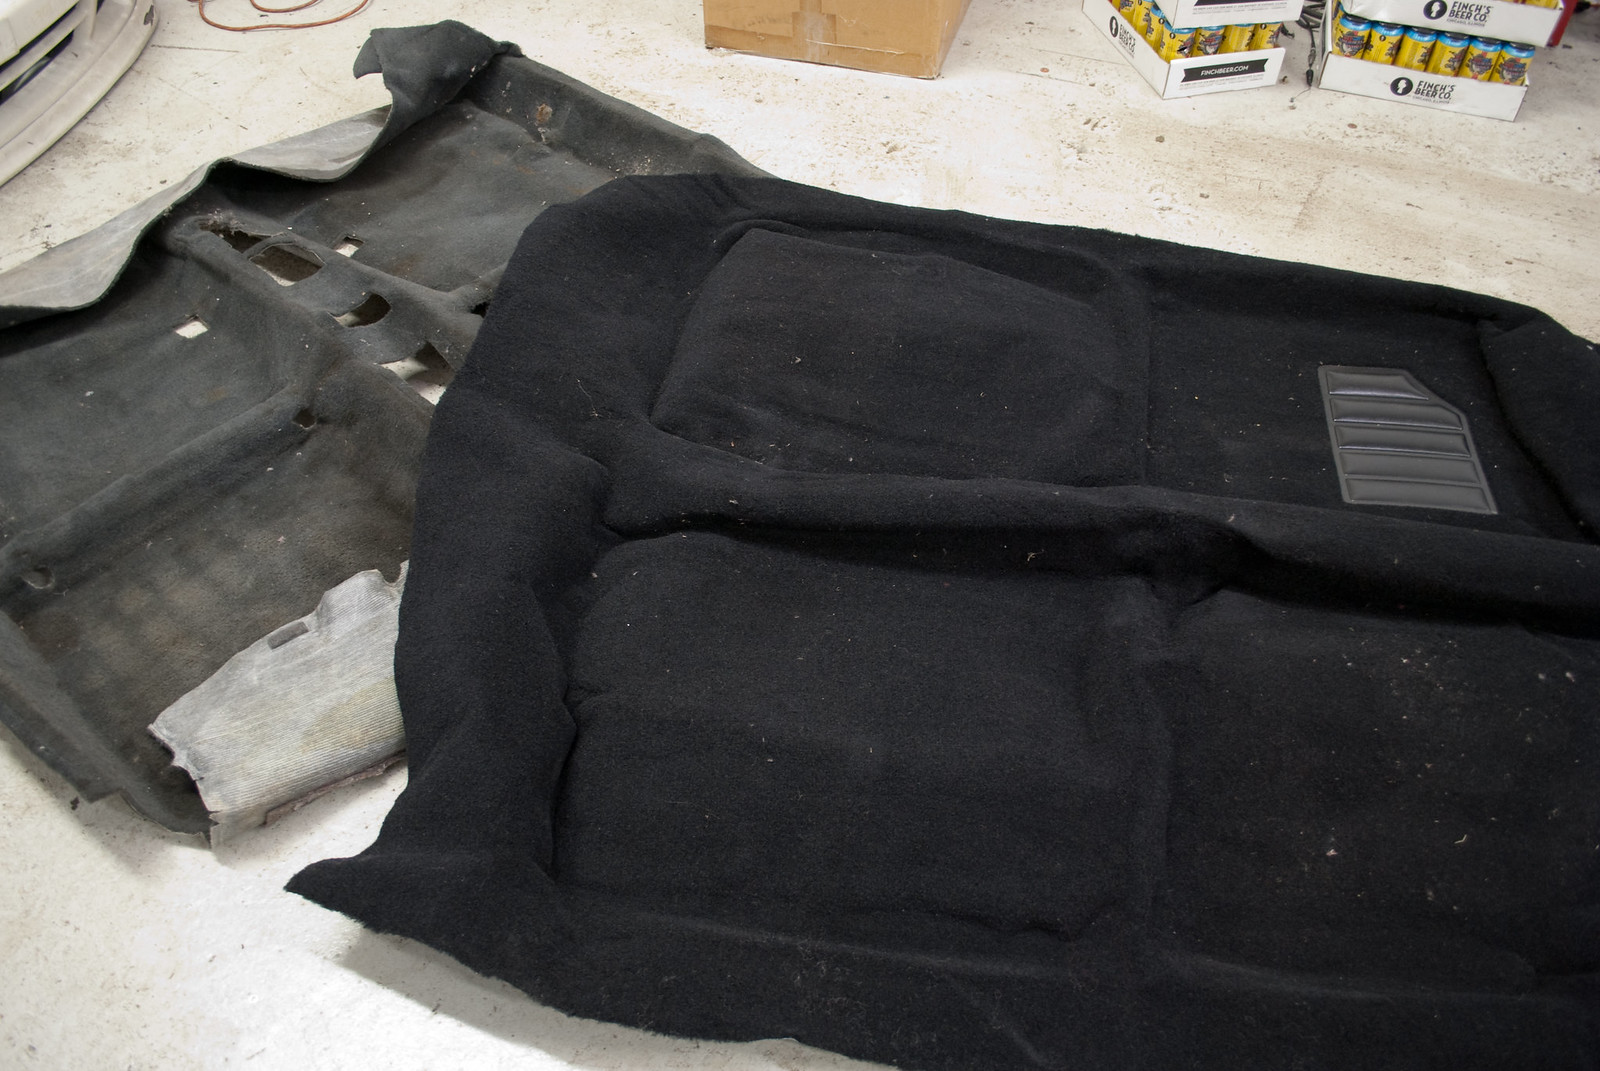
Once I overlaid the stock carpet onto the new one to use as a template for cutting I realized the stock carpet was in worse shape than I remembered. If that mouse hadn’t used some of the carpet for its bedding I probably would have spent days – if not weeks – trying to clean it only to give up later. Thank you, random mouse!
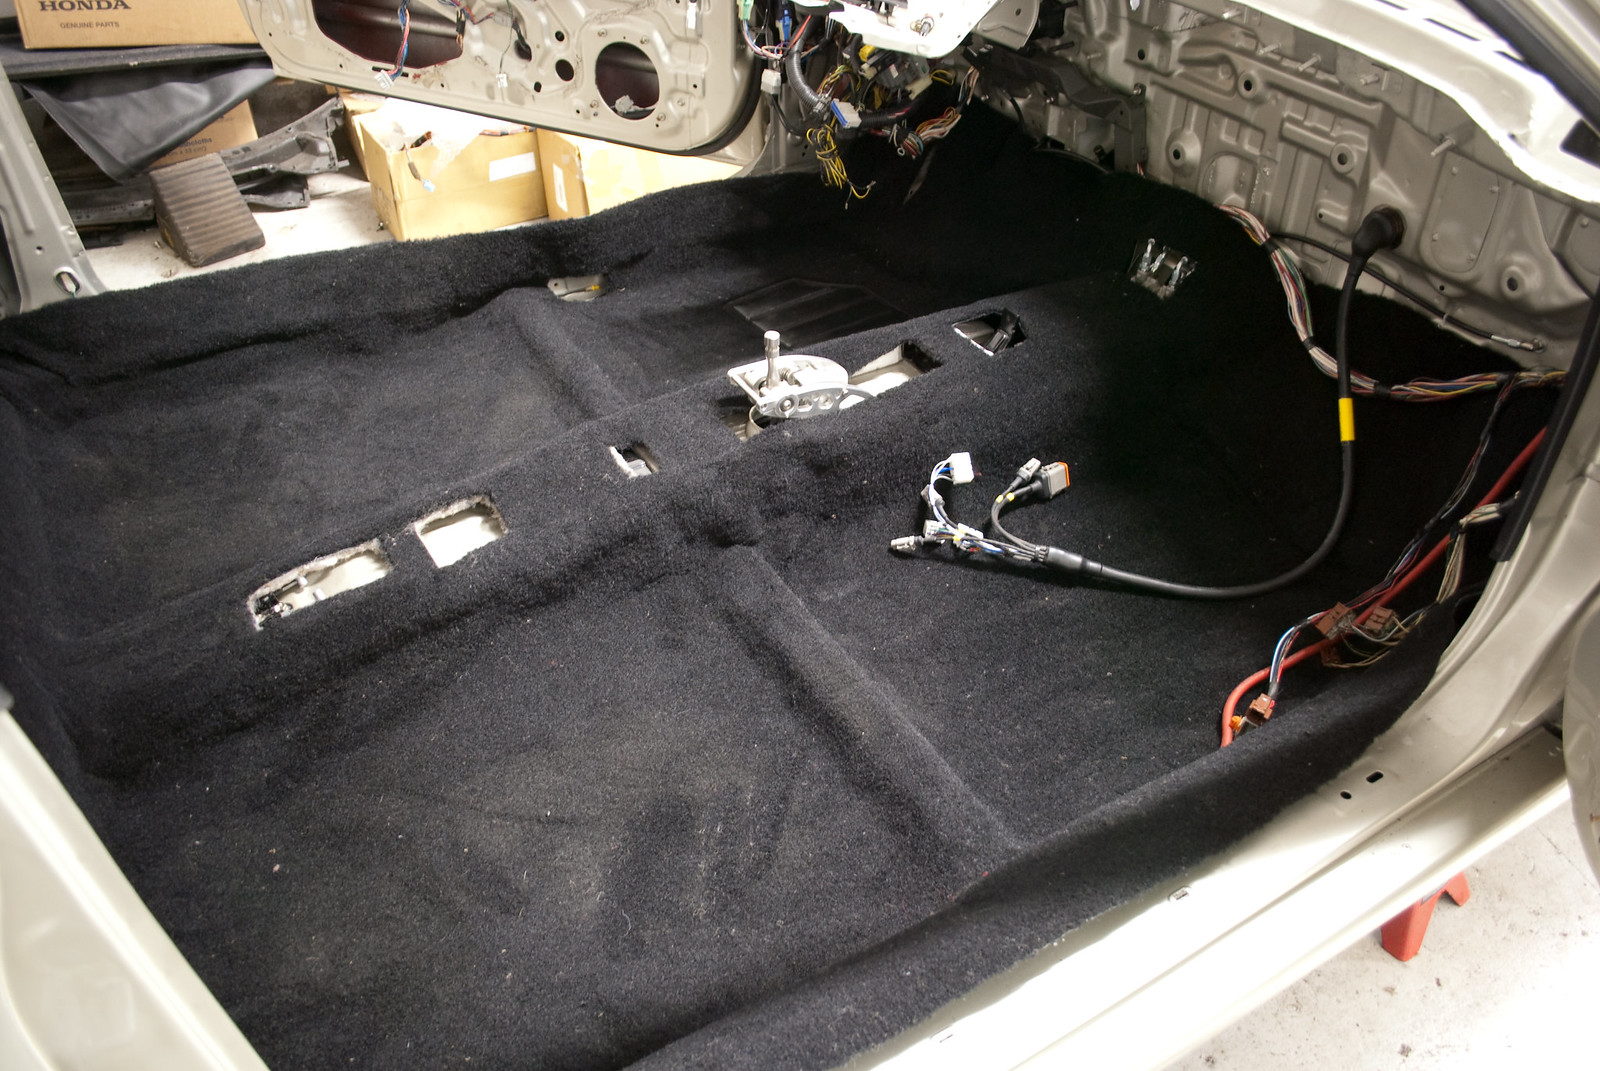
I cut out the center sections for the parking brake cables and lever, center console mount, shifter, lower dash mount, and brake proportioning valve. Then I went on to the fuel door release lever and stopped to check fitment inside the car. From this picture I then installed the HVAC boxes to see how far up the carpet went in relation to the firewall and what I would want to realistically trim down. You may be able to see where the carpet is “oversized” on all sides to give you some leeway.
While reviewing the HVAC boxes I remembered some aspects that I wanted to address. I will be keeping the A/C evaporator case and possibly using it to house the electric components for the A/C and heat but I won’t need certain OEM functions. Stuff like the A/C line outlets and drain-tube connect won’t be needed but I can’t leave them open. Air will still need to flow through there from the blower motor into the emptied heater-core housing without spilling out under the dash. That leads to some more low-budget eyeball engineering…
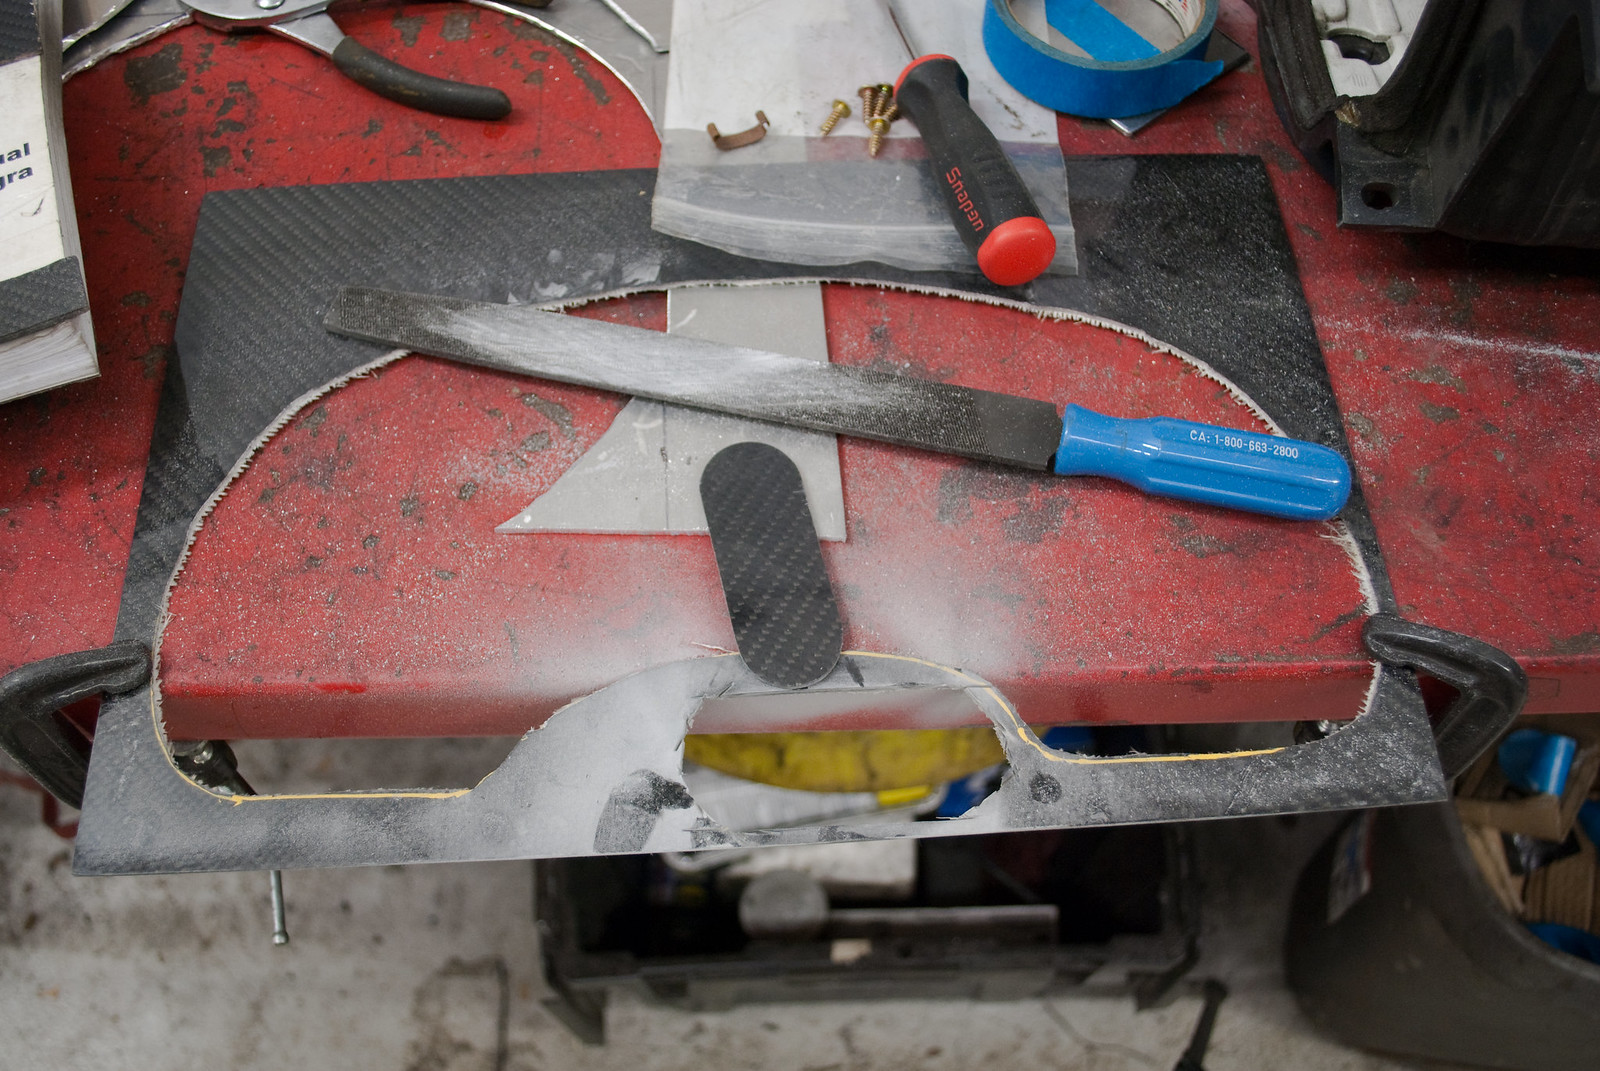
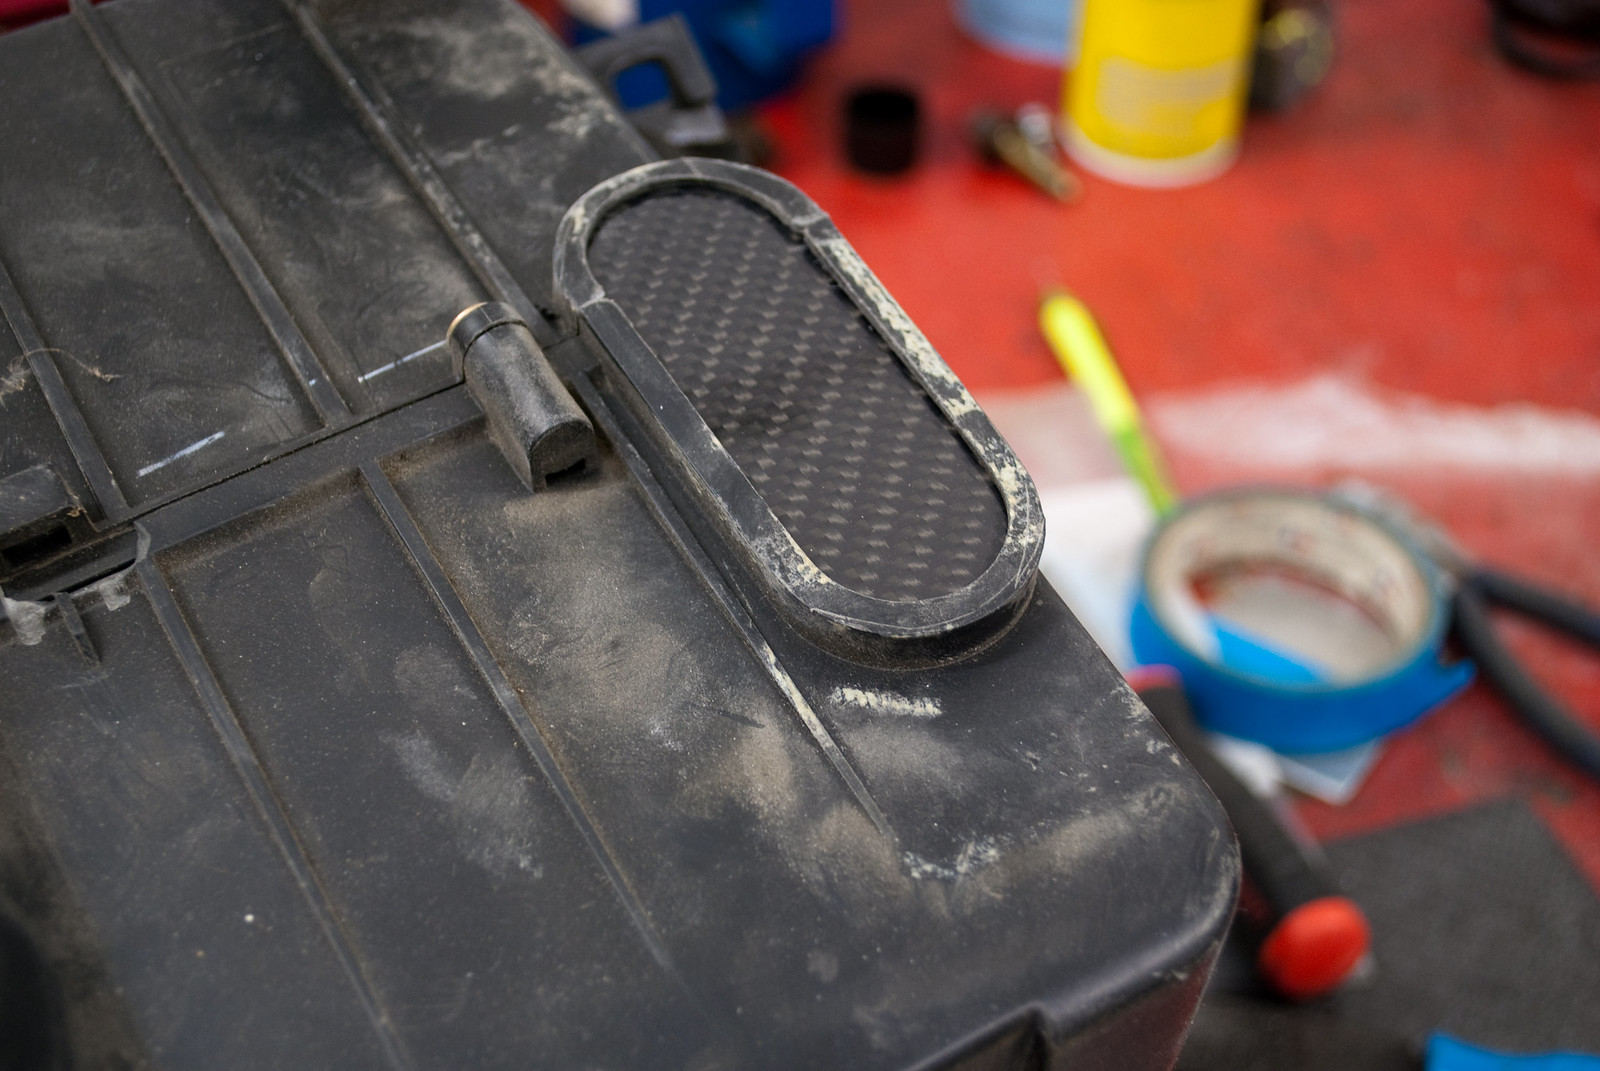
I can’t recall what this cluster bezel cut-out was for but I’d venture to say it was for PB’s CRX. I think Matt used it to make the mount for the custom AutoMeter setup that replaced the S2000 cluster when PB redid his CRX for the fourth or fifth time. I used a Dremel for the rough cut and then routed the sides into shape with my analog routing machine (another file). Once the guess-and-check work was done I had a perfect sealed fitment. This will certainly help direct air where it needs to go instead of escaping through this gaping hole.
Yeah, it doesn’t look like a lot of work was done but I feel accomplished. I worked all day filing on some of the smallest and dumbest updates yet but it’s the small FREE details that make me happy. I can either rush them to get on to the next step or take my time and be proud of the effort I put into them. Obviously I choose the effort. It’s just not as impressive to show such little progress for hours and hours spent filing, checking and fitting.
Thanks as always to anyone following. I hope some of this gives you guys ideas and/or motivation!
More proof it’s low budget? Check out my analog CNC machine:
This is the same sturdy file set that I’ve been using forever – its analog database has never been corrupted. I recall making the S2000 clutch master spacer for my EG (yes, the same spacer that founded a stupid and needless cottage industry) and directed people how to make their own if they had a RHD Honda and needed one for firewall clearance (its original purpose). People actually got offended claiming things like “Not everyone has access to a CNC machine like you!” Hell, I wouldn’t even know how to turn on a CNC machine, let alone program one. Anyways, I digress. I started out with a half-circle thanks to a holesaw bit and then opened it up into a more conventional “bathtub” shape thanks to my analog CNC machine. Total cost for materials, training classes and analog CNC machine? ‘bout tree-fiddy.
All this so I could clear the bulkhead for the charge harness up front. I wanted to not only clear the bulkhead itself but also give the wiring enough clearance for movement while the car is driving. The last thing I want is wiring rubbing on metal causing a short, fire, or crash.
The other side didn’t need as much machine time since there’s nothing to clear. It’s just a rectangular plate with two holes drilled in it to mount it to the core support. These will NOT be welded to the radiator – hence the small gaps between the plates and radiator sides. In order to not stress the radiator itself I will hard-mount the plates and then use some aluminum round stock to locate the radiator to the plates. This will give some freedom of movement to resist strong vibrations but not so much that it’s not securely mounted. Think about your stock radiator upper mount – that rubber around the top post locates it and prevents it from falling all over the place but not in a manner that transmits all the road vibration to the fragile(ish) core.
With that out of the way and worth stepping away from to make sure I like them next week or next month when I revisit them I moved on to the carpet. While I was storing it carefully (folded up and forgotten in a corner) a mouse helped itself to a few square inches of material rendering the stock carpet useless. I had to buy a new one and went with a molded black replacement from AutoCustomCarpets (accmats).
Once I overlaid the stock carpet onto the new one to use as a template for cutting I realized the stock carpet was in worse shape than I remembered. If that mouse hadn’t used some of the carpet for its bedding I probably would have spent days – if not weeks – trying to clean it only to give up later. Thank you, random mouse!
I cut out the center sections for the parking brake cables and lever, center console mount, shifter, lower dash mount, and brake proportioning valve. Then I went on to the fuel door release lever and stopped to check fitment inside the car. From this picture I then installed the HVAC boxes to see how far up the carpet went in relation to the firewall and what I would want to realistically trim down. You may be able to see where the carpet is “oversized” on all sides to give you some leeway.
While reviewing the HVAC boxes I remembered some aspects that I wanted to address. I will be keeping the A/C evaporator case and possibly using it to house the electric components for the A/C and heat but I won’t need certain OEM functions. Stuff like the A/C line outlets and drain-tube connect won’t be needed but I can’t leave them open. Air will still need to flow through there from the blower motor into the emptied heater-core housing without spilling out under the dash. That leads to some more low-budget eyeball engineering…
I can’t recall what this cluster bezel cut-out was for but I’d venture to say it was for PB’s CRX. I think Matt used it to make the mount for the custom AutoMeter setup that replaced the S2000 cluster when PB redid his CRX for the fourth or fifth time. I used a Dremel for the rough cut and then routed the sides into shape with my analog routing machine (another file). Once the guess-and-check work was done I had a perfect sealed fitment. This will certainly help direct air where it needs to go instead of escaping through this gaping hole.
Yeah, it doesn’t look like a lot of work was done but I feel accomplished. I worked all day filing on some of the smallest and dumbest updates yet but it’s the small FREE details that make me happy. I can either rush them to get on to the next step or take my time and be proud of the effort I put into them. Obviously I choose the effort. It’s just not as impressive to show such little progress for hours and hours spent filing, checking and fitting.
Thanks as always to anyone following. I hope some of this gives you guys ideas and/or motivation!
12-23-2015, 04:29 AM
#562
Steve at Heart
Really dig the panels you made for the harness and near the radiator. Will be interesting to see when the bumper is on. 
Solid work.
Solid work.
12-27-2015, 06:06 PM
#563
Honda-Tech Member
Join Date: Apr 2005
Location: chicago, il, us
Posts: 1,273
Likes: 0
Received 0 Likes
on
0 Posts
hey dude. sorry about my stupid *** car... HAHA
car is even more amazing up close.
EDIT: just spent several hours in this thread. not mad about it haha
car is even more amazing up close.
EDIT: just spent several hours in this thread. not mad about it haha
Last edited by J-specCb4; 12-27-2015 at 09:17 PM.
12-28-2015, 07:24 PM
#565
Honda-Tech Member
Thread Starter

Thanks, RoRo. I've been looking for updates on your EG build. Anything new coming?
12-28-2015, 08:18 PM
#566
Steve at Heart
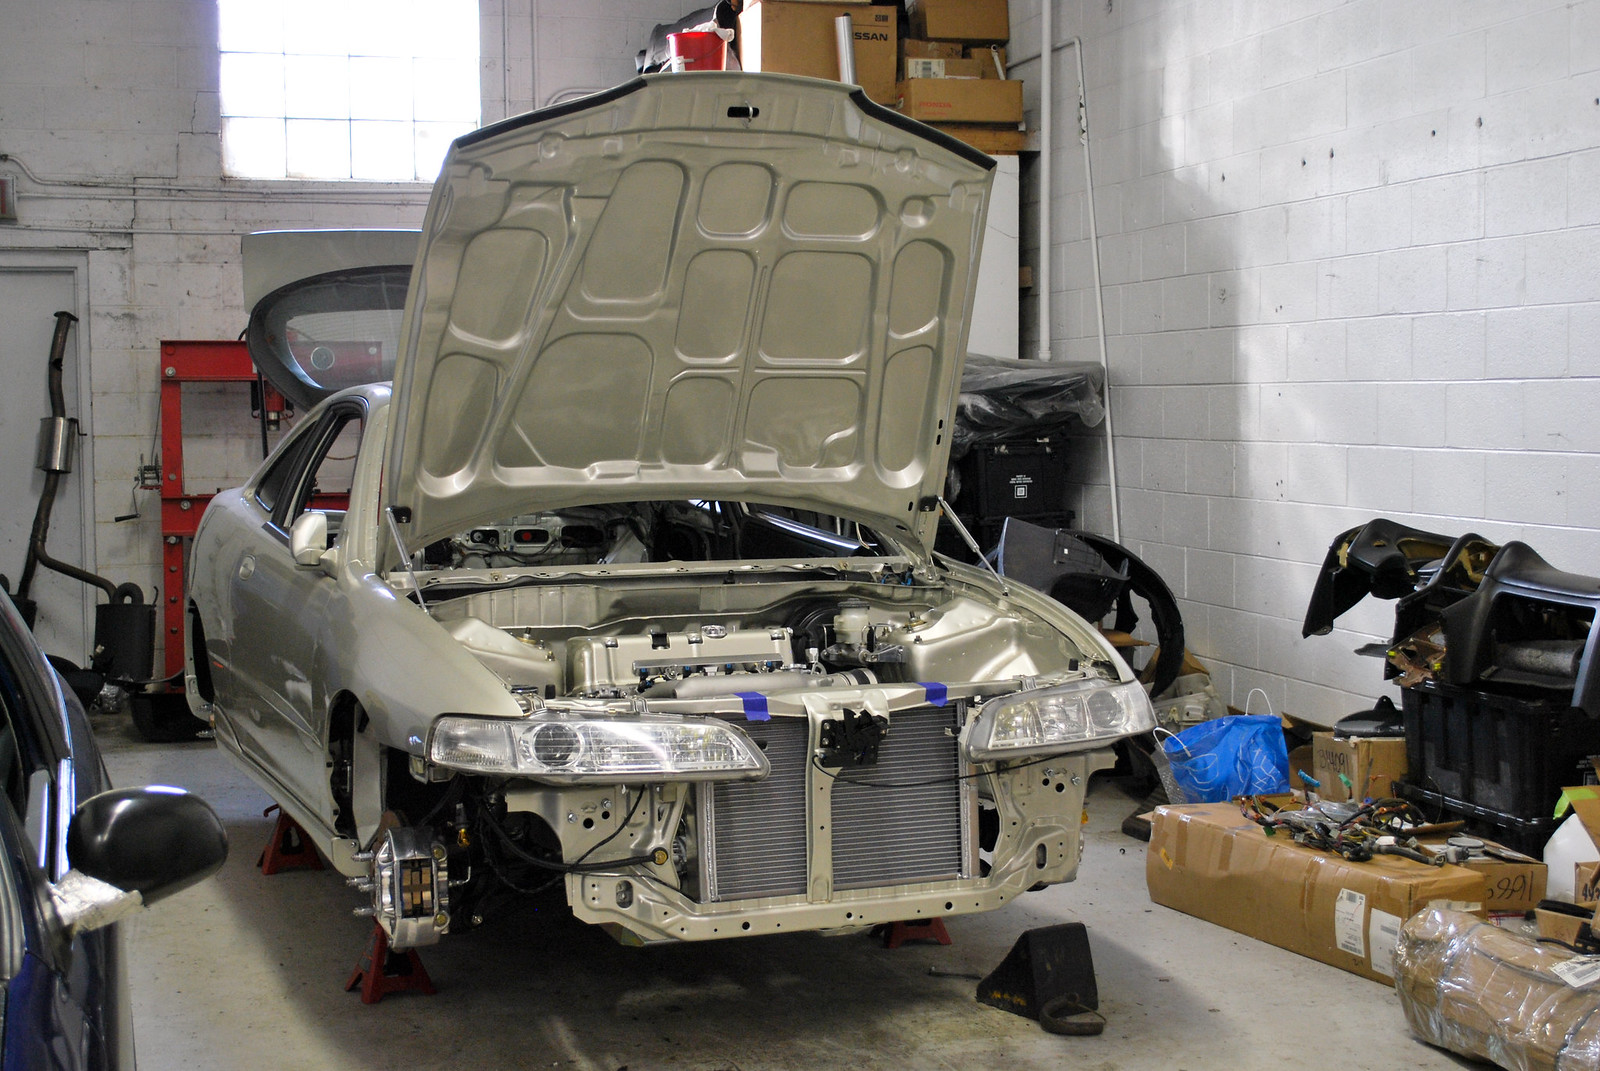
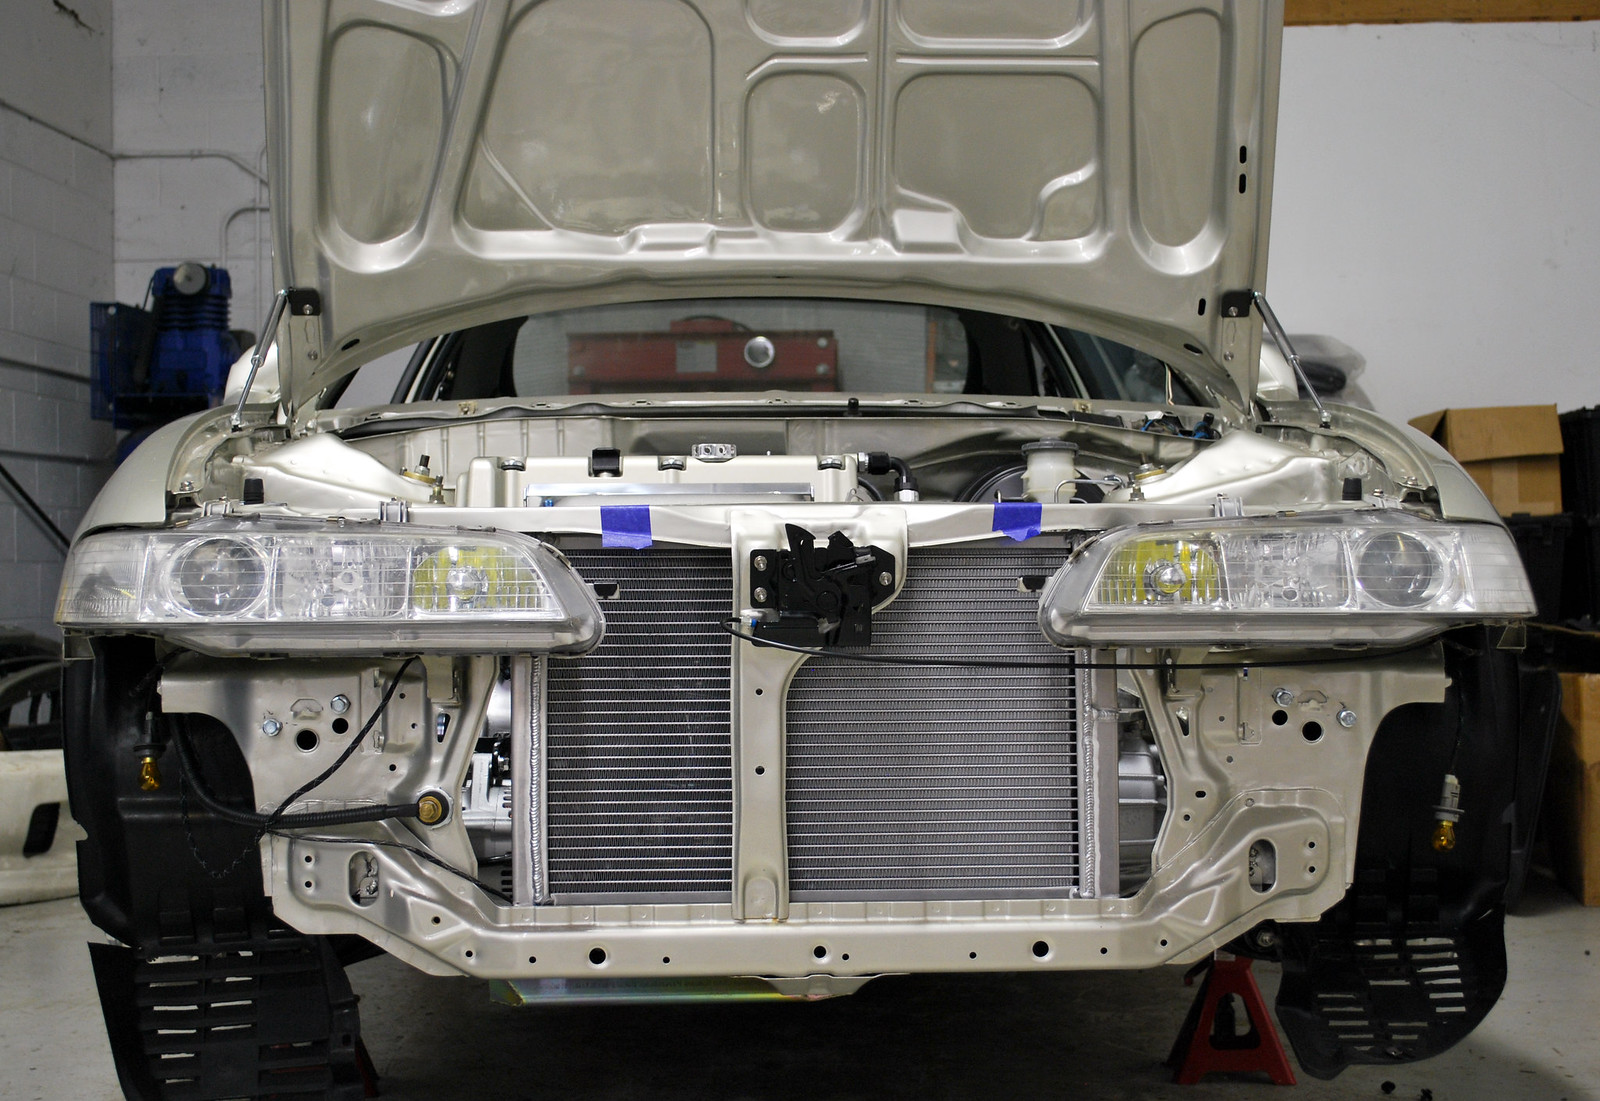
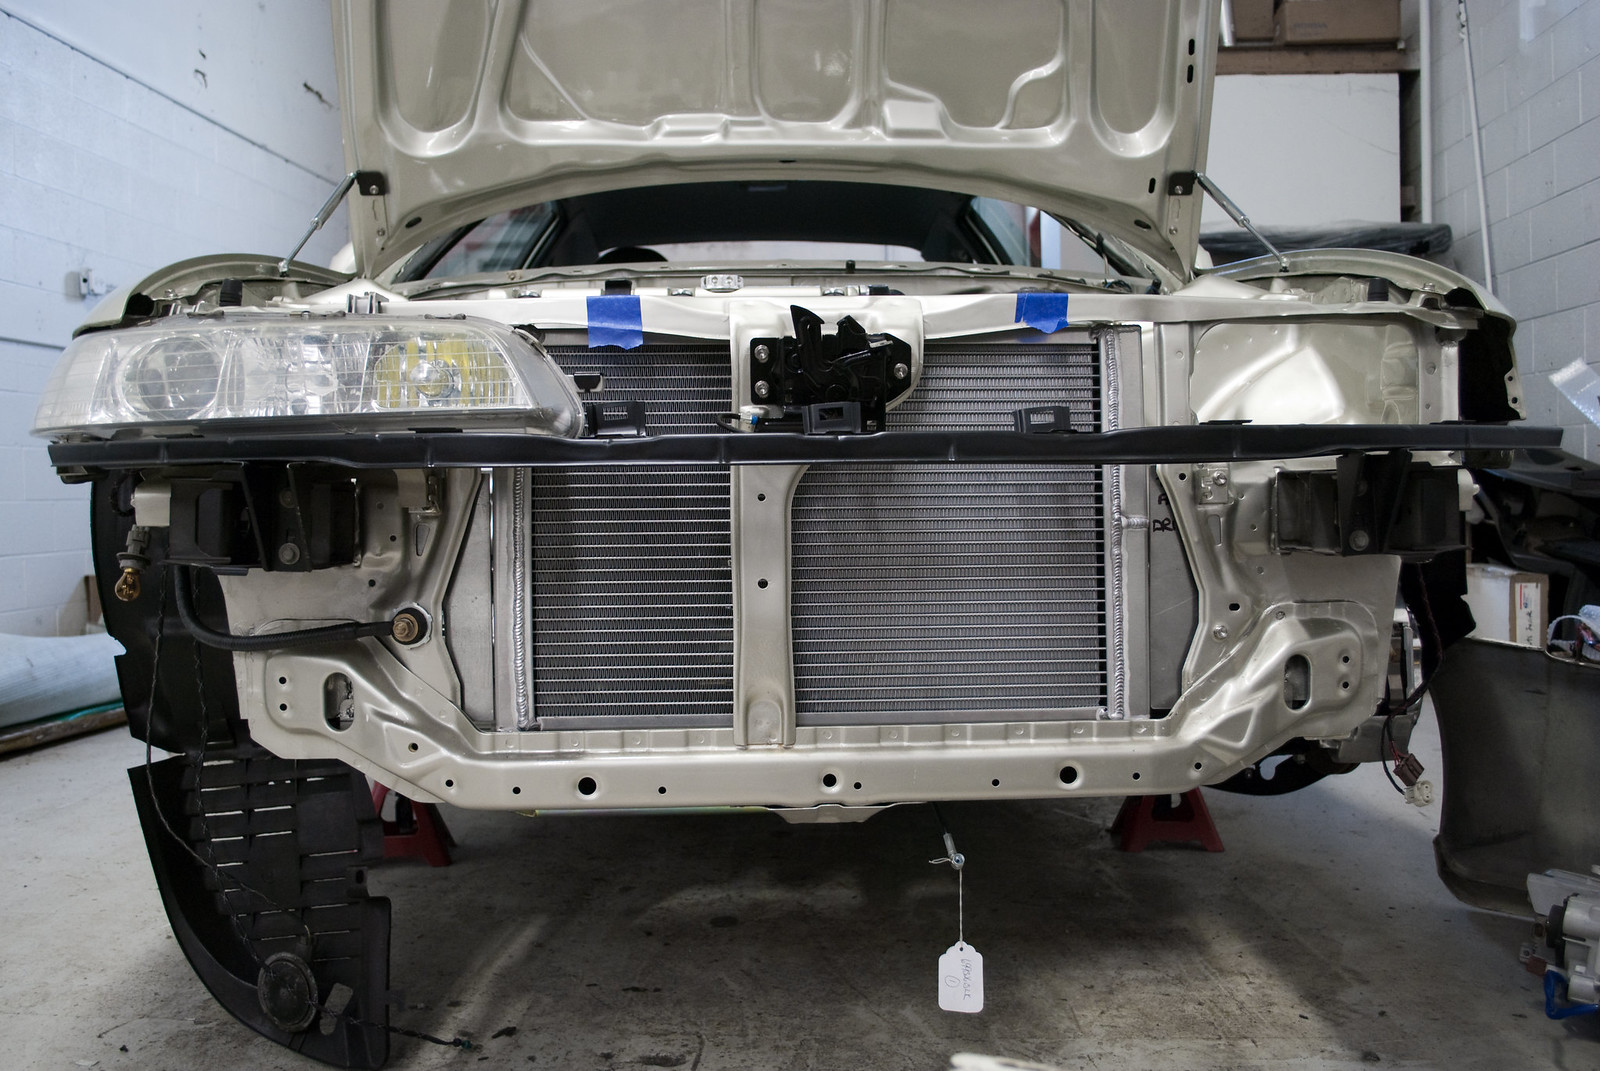
Thanks, Coop. It's a lot less interesting with the bumper on as you can't see anything. As with all good detail, they disappear unless you're looking for them. I stopped by Saturday after Christmas and threw the front end together to get this shot for you. Happily, it all lined up without any hardware or clips installed. Jesse got the gaps PERFECT. I hope I don't screw it up when I put it back together.
[img]https://farm6.staticflickr.com/5627/23409365494_31cf663902_h.jpg[img]
[img]https://farm6.staticflickr.com/5627/23409365494_31cf663902_h.jpg[img]
 12-31-2015, 01:30 AM
#569
Honda-Tech Member

Join Date: May 2014
Location: Swindon - UK
Posts: 165
Likes: 0
Received 0 Likes
on
0 Posts
Have literally spent the last two days at work going through this ..
By far one of the most impressive builds i've seen .. So much attention to detail its unreal. The amount of "touches" and custom parts/ideas/ingenuity used in this build is beyond impressive.
Massive kudos my friend ! Subscribed and will eagerly await updates!
By far one of the most impressive builds i've seen .. So much attention to detail its unreal. The amount of "touches" and custom parts/ideas/ingenuity used in this build is beyond impressive.
Massive kudos my friend ! Subscribed and will eagerly await updates!
12-31-2015, 04:29 AM
#570
something different
Join Date: Sep 2002
Location: grand rapids/chicago, usa
Posts: 6,995
Likes: 0
Received 1 Like
on
1 Post
just ridiculous. this is great motivation to get my hatchback out and about again. I really cant believe how much I love this car buddy...
for those reading...it looks stunning in pics...
but its better in real life. its literally better in real life. somehow.
for those reading...it looks stunning in pics...
but its better in real life. its literally better in real life. somehow.
01-05-2016, 02:35 PM
#571
Honda-Tech Member

Join Date: Sep 2002
Location: Alabama
Posts: 2,709
Likes: 0
Received 0 Likes
on
0 Posts
I came to the shop with Chris several weeks ago and got the opportunity to meet and talk to you. I am the guy from Alabama that got his Regas.
I read through every word of this thread.
Unbelievable work! You and Kyle and everyone else involved have done just unbelievable work.
I never thought I'd have the desire to work on another car after having the one my father and I spent over four years building together was stolen, even if it wasn't that nice of a car...it was sentimental and took all my motivation away when it was taken. After going to the track and making new friends a few months ago for Gridlife, I got a little bit of the bug again to work on a car. After meeting you and Kyle and seeing your work, I'm full blown hooked again. So thank you... I think? Haha.
I hope to see you again at the shop soon. I'm up there as much as I can giving Chris a hand with his car or at Kyle's "helping" haha
Last edited by -Justin-; 01-06-2016 at 04:16 AM.
02-04-2016, 07:33 PM
#573
Honda-Tech Member
Hey Brandon I finally found and caught back up on your build! I was watching your progress on jdmu (my username was SohcsR4feet) and am glad to see it looking like a car again! Keep up the progress my braddah!
02-20-2016, 07:55 AM
#574
Honda-Tech Member
Join Date: Jul 2010
Location: Alberta, Canada
Posts: 45
Likes: 0
Received 0 Likes
on
0 Posts

I don't think I can find words to convey how inspiring your build is. But it really is and thank you to taking the time and energy to share it.
Meeting Yasu must have been an incredible experience. I didn't know him really. I'm not a Honda person to be honest, just here to indulge myself looking at other people's work.
Keep it up !
p.s. Do you happen to have links to Yasu-san's builds ?
 02-20-2016, 09:50 AM
#575
^^Exactly like he said! I'm loving the attention to all the little details of this build. I've seen a lot of top notch builds in person that miss some of the little things (like having a $4K paint job, missing door trim), but not this one!
Keep the motivation coming please!
Keep the motivation coming please!