
Do-It-Yourself... NRG NSX Type-R Carbon Fiber Rear Diffuser
 03-23-2008, 07:37 PM
#1
Member
Thread Starter

Join Date: Feb 2002
Location: Tulsa, Oklahoma
Posts: 6,590
Likes: 0
Received 0 Likes
on
0 Posts

INSTALLATION REFERENCE GUIDE
Product: NRG NSX Type-R Carbon Fiber Rear Diffuser
Fitment: NSX, 2002-2005 or vehicles equipped with a 2002+ rear valence
Author: Synergy Autoworks
Last Revision: 3-19-2008
Please Note:
� For questions regarding the installation guide please contact: Synergyautoworks.rich@gmail.com
� This is procedure is intended as DIY. If adequate tools are not available professional installation may be required.
Bill of Materials:
Item # Qty Part Description
1 - 1 NRG Carbon Fiber NSX Type-R Rear Diffuser (NA2)
2 - 9 Pilot hole marking plastic tabs
3 - 9 Flat washers
4 - 9 Allen head 1.25� screws
5 - 9 Circular button foam pads
6 - 2 Foam strips
Tools Required:
� Supplied allen wrench
� Phillips screw-driver
� Masking tape or 3M blue painters tape
� Pencil
� 1/16� drill bit (pilot holes)
� 1/4� drill bit (finishing holes)
� Cordless drill
� Recommended:
� Jack stands and floor jack (raise vehicle)
� portable light
� Double-sided tape
� Chapman set (use instead of allen wrench for low profile area)
Instructions:
1. Wash and wax the vehicle valence prior to installation to eliminate and debris and to protect the
paint.
2. Validate all bill of material hardware is available to conduct the installation.
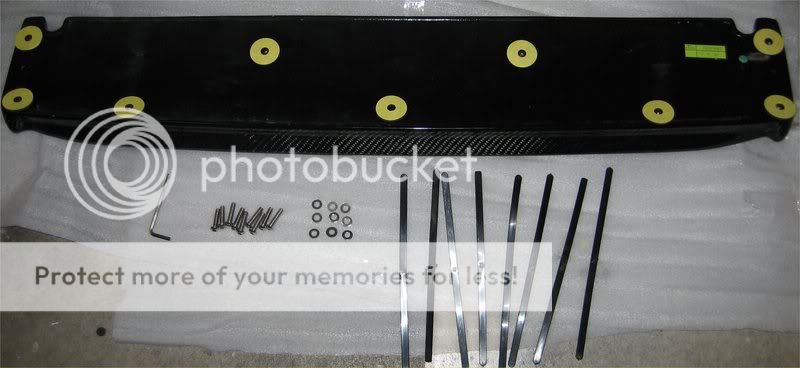
Figure 1: Installation parts
3. Obtain all necessary tools to conduct the installation
4. Raise vehicle on to four jack stands according to the Acura service manual procedures. This will allow the installer to adequately drill holes into the valence and tighten down the 9 allen head screws.
5. Careful raise the diffuser as is and match the contour of the valence to the diffuser. This is simply to gain and understanding of how the diffuser will mount and appear on the valence. One will notice that the diffuser will actually overhang the valence as it matches the contour as shown below.

Figure 2: Diffuser mock placement
In addition, notice that the valence support brackets Phillips head screws are still accessible when
test fitting the diffuser.

Figure 3: Valence mounting bracket Phillips head screw
6. The diffuser will match be centered side to side (defined as exhaust opening to exhaust opening) by the U shaped cutouts in the diffuser and valence. Front to back alignment is defined by a flush fitment of the diffuser trailing edge with the valence trailing edge.
Figure 4: Even mounting with the valence (inside photo)
7. Remove the diffuser. Centering of the diffuser in the next steps will be done exactly as was done defined in the above steps.
8. Apply double sided tape to the plastic pilot hole mounting tabs as shown. The pilot hole tube will be opposite of the double sided tape. This tube will be placed into the embedded nuts in the diffuser.
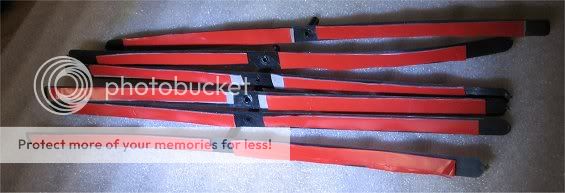
Figure 5: Double sided tape
9. Place the 9 plastic pilot hole mounting tabs into the diffuser as shown below. The tubes will be placed into the embedded nuts of the diffuser.

Figure 6: Double sided tape added to diffuser.
10. Remove backing to the double sided tape on all 9 plastic pilot hole mounting tabs. Be careful not to dirty the sticky surface. If so, new double sided tape will be required given that it will not adhere very well to the freshly waxed surface.
11. Raise the diffuser to the valence and carefully align it to the masked tape markings previously recorded. DO NOT slide the diffuser around. The objective here is to lift the diffuser perpendicular to the valence and press into place. Make sure to press the diffuser in all areas so that all 9 plastic pilot hole mounting tabs attach to the diffuser.
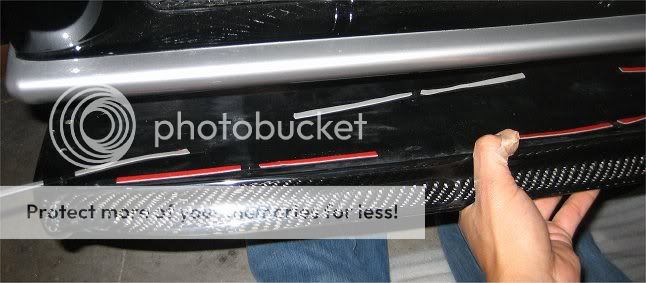
Figure 7: Attaching diffuser to valence.
12. When the diffuser is lowered in may be possible that one or more plastic pilot hole mounting tabs do not adhere. Lift the plastic wings as shown below so that they do attach. This will require bending the wings up and subsequently repositioning the diffuser using the already attached pilot holes as guides.
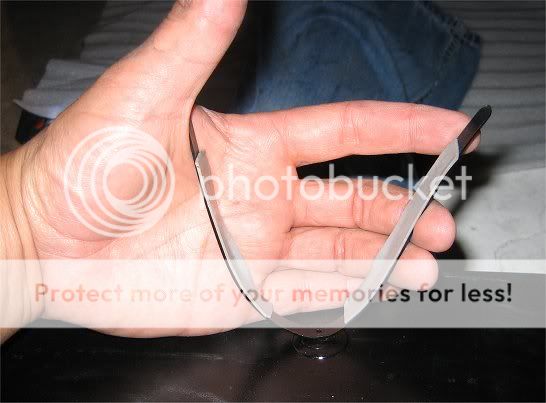
Figure 8: Lift tab wings if necessary
13. Carefully check the alignment of the diffuser with the plastic pilot hole mounting tabs in place. This will be important to have a properly aligned diffuser. If unhappy with the alignment the tabs can be removed and the procedure can be restarted. More double sided tape may be necessary.
Take your time with this step.

Figure 9: Check diffuser alignment to valence
14. Once the installer is happy with the alignment lower the diffuser. The mounting tabs will remain on the valence and the valence will be ready for drilling pilots.

Figure 10: Plastic pilot hole mounting tabs attached to valence
15. Using the 1/16� drill bit and cordless drill carefully drill all 9 pilot holes as shown below. Hold the plastic pilot hole mounting tabs to eliminate any potential movement while drilling.

Figure 11: Drill pilot holes

Figure 12: Insert drill into pilot holes
16. Once all 9 holes have been drilled remove the plastic pilot hole mounting tabs and wipe the access plastic away from the holes. Remove all masking tape used in the aligning process as well.
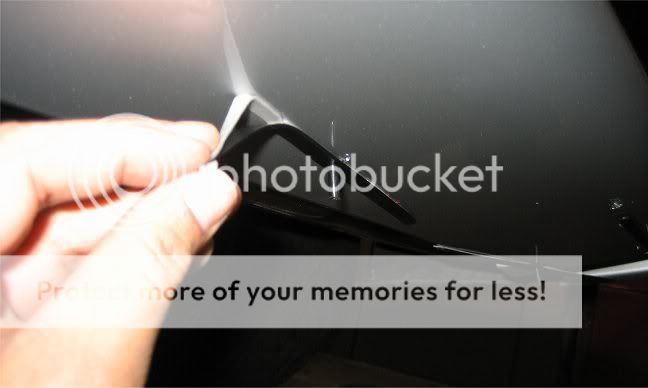
Figure 13: Remove plastic pilot mounting hole tabs and tape
17. Using the �� drill bit and cordless drill careful drill into the 9 pilot holes. Clean access plastic away. Do not drill to deep as to penetrate the other side of the valence.

Figure 14: Drill �� mounting holes
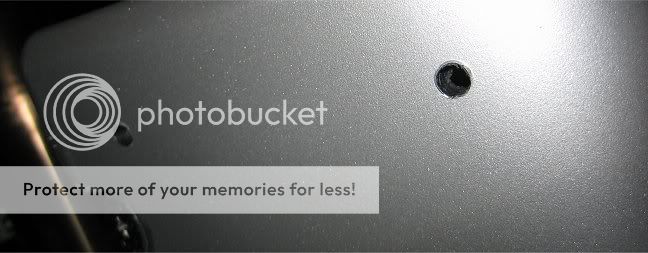
Figure 15: Final mounting holes
18. Place foam button tabs on the diffuser and foam strips around the edges of the diffuser.

Figure 16: Placement of foam pads and strips
19. Insert washer and screw into the valence. Place all 9 screws and washers as shown below.
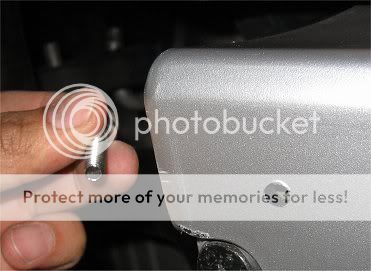
Figure 17: Insert screw and washer from the inside of the diffuser

Figure 18: Washer and allen head screw
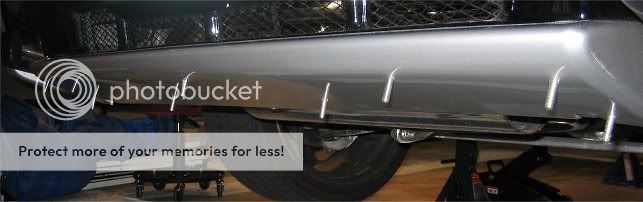
Figure 19: All 9 screws in place
20. Loosen the three Phillips head screws attaching the valence to the brackets. This will aid in installing the diffuser in the subsequent steps.

Figure 20: Loosen 3 phillips head screws to achieve more clearance
21. Raise the diffuser to the mounting screws and tighten down the diffuser using the supplier allen wrench. If a Chapman set is available this will greatly simplify the process.
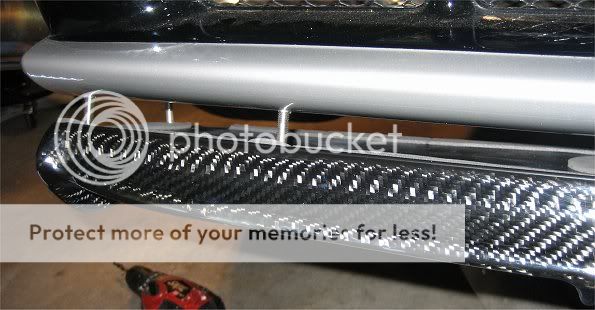
Figure 21: Attach diffuser to mounting screws.
22. Working from the inside of the diffuser screw down all 9 allen screws. It will be necessary to tighten them down evenly so that the diffuser is not torqued at an angle making cross threading possible.
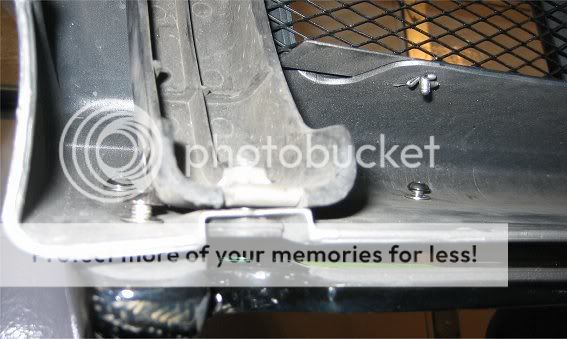
Figure 22: Screw down allen head screws into diffuser evenly.
23. Tighten the 3 Phillips head screws securing the valence to the bumper
24. Enjoy!


Trending Topics


Thread
Thread Starter
Forum
Replies
Last Post