
SSBP 98 DC Integra build k20a,tucked,HR LONGTERM
 01-17-2013, 10:16 PM
#1
Honda-Tech Member
Thread Starter
iTrader: (3)

Join Date: Nov 2010
Posts: 83
Likes: 0
Received 0 Likes
on
0 Posts
Hello honda-tech as some of you know my name is Isaac I am from North Carolina figured I'd go ahead and start a build thread as I just started a k series build for myself. In the past I have done quite a few b series builds turbo setups , tucks etc. but this k series stuff is all fairly new to me so bare with me and any advice suggestions etc would be greatly appreciated.
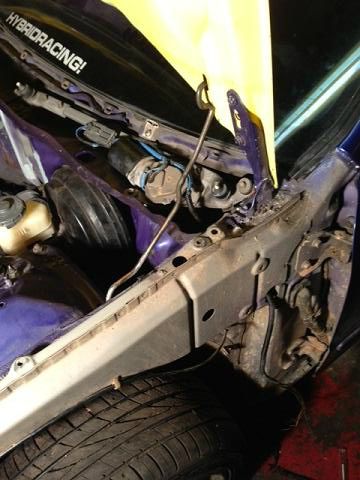
So I'll start off by saying this is all being done on a 98 ssbp integra I recently picked up with a gsr in it had radiator support damage but no frame issues whatsoever so wasn't too much trouble drove it home with no front end.
plans:
-jdm front finished up
-complete paint job (keeping original color)
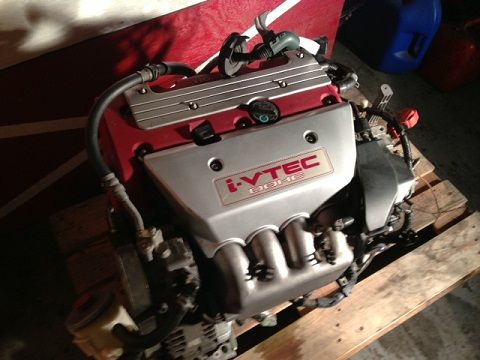
-k20a swap (which recently picked up from a guy on a forum still on shipping pallet)
-fully tucked super clean bay un-shaved not a fan of the shaved look to each his own.
-hopefully some day do an itb setup on it or jrsc only time will tell I absolutely refuse to turbo it though lol had my share of that and am well over it.
complete vehicle mod list as of 1/11/13:
koni/gc coilover setup
f7 rear control arms
apexi catback exhaust
spun supermesh wheels
jdm itr front end conversion
Hybrid racing shifter box
Hybrid racing shift cables
Hybrid racing motor mount kit
Hybrid racing clutch line
skunk 2 6spd shift ****
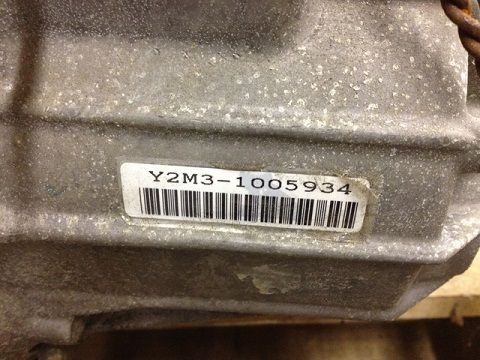
k20a complete swap w/factory 4.7 fd lsd trans
Enough with making you guys read stuff onto some progress pics.
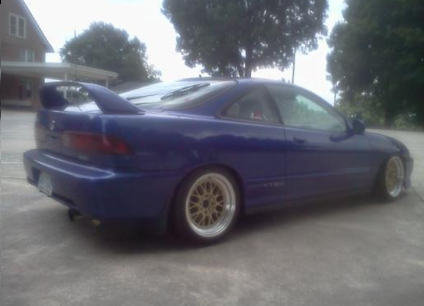
how she sat before the person I got it from wrecked it in the front:
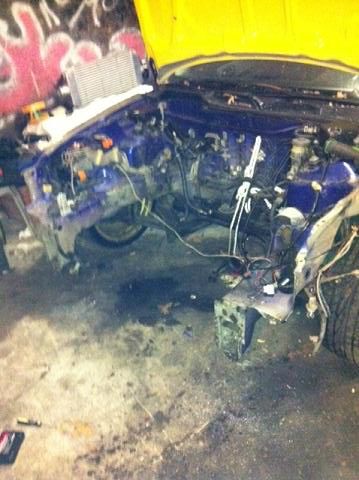
Pulled the gsr out of it and sold it and started on the front end drilled all spot welds off the radiator support.
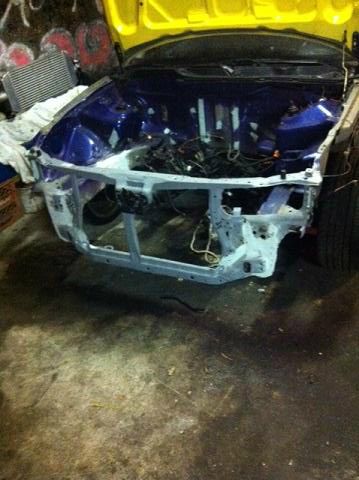
went ahead and bought a complete itr radiator support and support bar had a buddy come over and help me weld it on and start on the body work in the bay
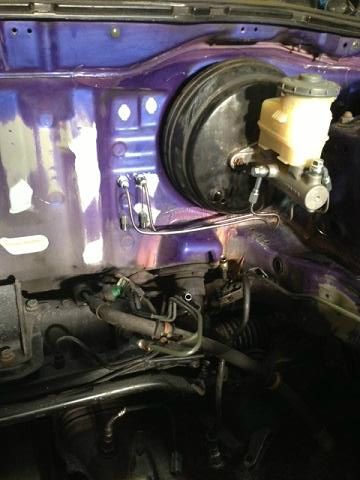
started on brake tuck dash out and evap core removed for milspec quick connect more pics to come of this drilled holes for master cylinder and rear lines and ran bulkheads through firewall not happy with how the lines turned out,they will be redone and will probably be selling this complete brake tuck kit as I'm going to be going with all anotuff black fittings and hardware
started tuck as well not much to look at as of now the wiper motor harness ran through frame rail
just went and picked this jewel up from a guy off a local forum never been off pallet ac ps setup everything although will be deleted on my application the parts will be sold they are in perfect shape
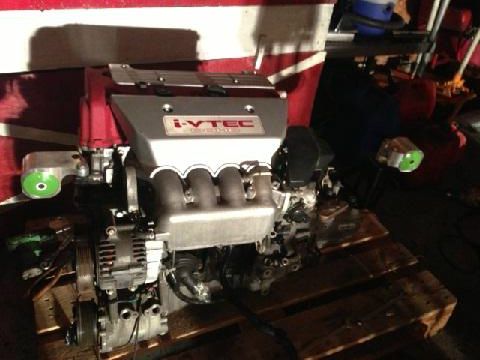
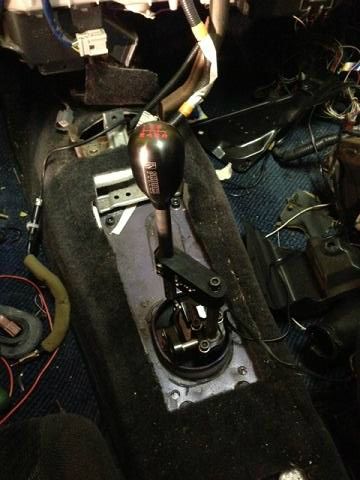
got a little work done yesterday not too much as I'm waiting on tons of fittings to come in from jegs backorder but mounts mocked up on engine also got mount drilled on frame rail (picture not included yet) and hybrid racing shifter box installed this is a very nice piece i recommend this thing to any and everybody doing this swap fitment was perfect and no cutting necessary dont ruin the chassis cutting the tunnel up!
1/17/2013 so got quite a bit done tonight actually ,did some plumbing work little rundown of what all i did i flared rear brake lines to convert to -3an to run stainless lines to bay,flared return line installed tube nut and sleeve -4 waiting on -4 to -6 male to male adapter to convert the line cut the feed line off where i can install my 5/16 compression fitting once it comes in also drilled wheel wells for front brake lines to tuck and made front brake hose to bulkhead lines just gotta do interior ones now. wish jegs would hurry up with stuff on backorder in bay going with all black earls anotuff fittings but the stuff that isn't visible gets not so blinged out fittings that i purchase at a local hydraulic store. onto pics.....
this is a couple pics of the return line flared along with cut off feed line waiting on compression -6 conversion fitting along with my eastwood flaring tool ;]
if you do quite a bit of the tucking stuff and flaring this thing is a must have if you have not seen/heard of it i suggest google searching it best thing in the world!
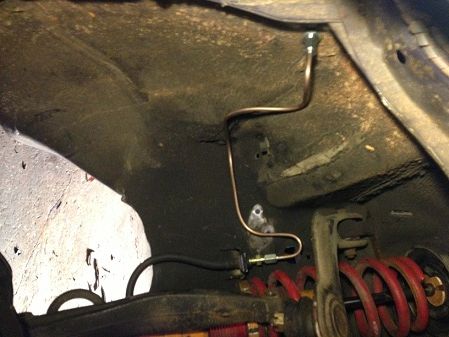
these are pics of how i flared rear lines which i did left on the car took the easy route and did a male to male -3 on them so i can run stainless ones up into the bay
ran out of stainless line to do both of them but got 1 complete and mocked up and waiting on the anotuff fittings to come in before i can flare the ones for the bay
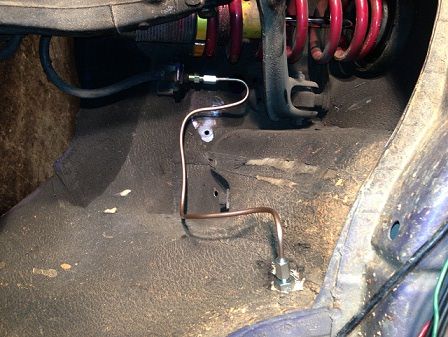
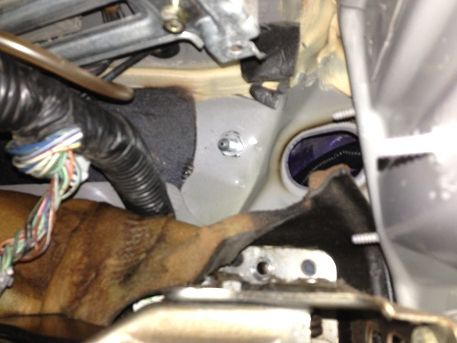
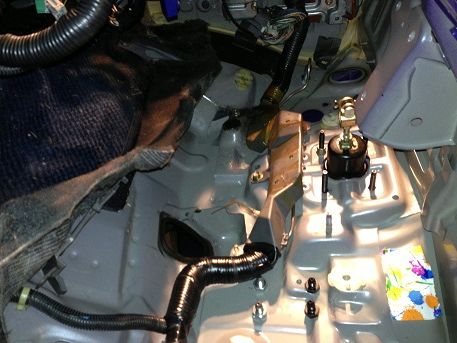
few pics of how i ran my front lines from wheel well to cabin
didn't snap a pic of inside passenger clearance because i installed heater box to make sure i had the room but there is certainly tons of room in this location.did however get a pic of driver side which has tons of room as well just had to pull harness back while drilling very easy routing for interior lines from these locations
tomorrow will have more pics as i'm going to get my flat style 4040 prop valve and gonna mount it and start interior lines as well as more stainless to make the other rear line.
update 1/17/13 pm
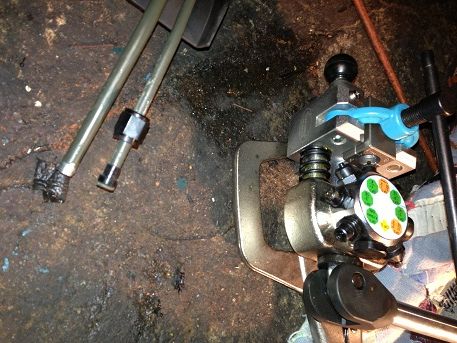
got a little done this evening ran the other line from rear line to the bay plugged off power steering fittings ran the lines from inside bulkheads from front brakes to prop valve tomorrow i plan to route the inner lines from bmc and rear line bulkheads to prop valve as well as securely mount the prop valve
power steering blockoff plugs i got from a local hydraulic store
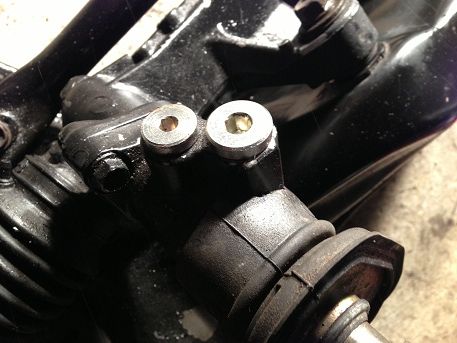
both rear lines mocked up waiting on jegs for my anotuff -3 tube nut and sleeve fittings and anotuff 90 degree bulkheads then i'll be able to flare them to complete
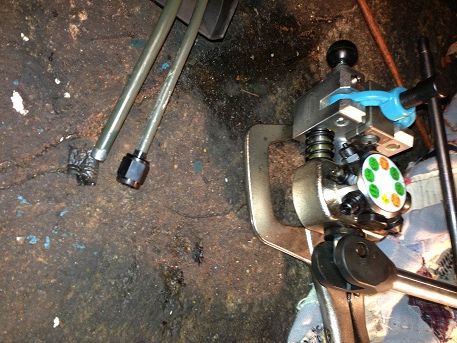
line bent and flared from passenger side caliper to prop valve
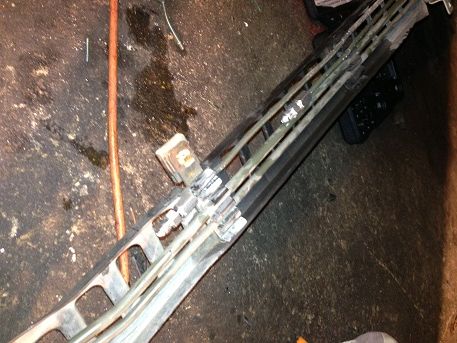
line bent and flared from driver front caliper to prop valve ran it behind the harness and bolted it down so it would be securely mounted to firewall also wound up having to cut a little bit of the plastic harness cover where i drilled for lower bulkheads so just threw some regular loom on it for protection

that is all for now more pics to come very soon as I spend almost all my free time tinkering on this thing all pics will be dated and uploaded on this original post to keep it nice and organized
thanks for viewing!
So I'll start off by saying this is all being done on a 98 ssbp integra I recently picked up with a gsr in it had radiator support damage but no frame issues whatsoever so wasn't too much trouble drove it home with no front end.
plans:
-jdm front finished up
-complete paint job (keeping original color)
-k20a swap (which recently picked up from a guy on a forum still on shipping pallet)
-fully tucked super clean bay un-shaved not a fan of the shaved look to each his own.
-hopefully some day do an itb setup on it or jrsc only time will tell I absolutely refuse to turbo it though lol had my share of that and am well over it.
complete vehicle mod list as of 1/11/13:
koni/gc coilover setup
f7 rear control arms
apexi catback exhaust
spun supermesh wheels
jdm itr front end conversion
Hybrid racing shifter box
Hybrid racing shift cables
Hybrid racing motor mount kit
Hybrid racing clutch line
skunk 2 6spd shift ****
k20a complete swap w/factory 4.7 fd lsd trans
Enough with making you guys read stuff onto some progress pics.
how she sat before the person I got it from wrecked it in the front:
Pulled the gsr out of it and sold it and started on the front end drilled all spot welds off the radiator support.
went ahead and bought a complete itr radiator support and support bar had a buddy come over and help me weld it on and start on the body work in the bay
started on brake tuck dash out and evap core removed for milspec quick connect more pics to come of this drilled holes for master cylinder and rear lines and ran bulkheads through firewall not happy with how the lines turned out,they will be redone and will probably be selling this complete brake tuck kit as I'm going to be going with all anotuff black fittings and hardware
started tuck as well not much to look at as of now the wiper motor harness ran through frame rail
just went and picked this jewel up from a guy off a local forum never been off pallet ac ps setup everything although will be deleted on my application the parts will be sold they are in perfect shape
got a little work done yesterday not too much as I'm waiting on tons of fittings to come in from jegs backorder but mounts mocked up on engine also got mount drilled on frame rail (picture not included yet) and hybrid racing shifter box installed this is a very nice piece i recommend this thing to any and everybody doing this swap fitment was perfect and no cutting necessary dont ruin the chassis cutting the tunnel up!
1/17/2013 so got quite a bit done tonight actually ,did some plumbing work little rundown of what all i did i flared rear brake lines to convert to -3an to run stainless lines to bay,flared return line installed tube nut and sleeve -4 waiting on -4 to -6 male to male adapter to convert the line cut the feed line off where i can install my 5/16 compression fitting once it comes in also drilled wheel wells for front brake lines to tuck and made front brake hose to bulkhead lines just gotta do interior ones now. wish jegs would hurry up with stuff on backorder in bay going with all black earls anotuff fittings but the stuff that isn't visible gets not so blinged out fittings that i purchase at a local hydraulic store. onto pics.....
this is a couple pics of the return line flared along with cut off feed line waiting on compression -6 conversion fitting along with my eastwood flaring tool ;]
if you do quite a bit of the tucking stuff and flaring this thing is a must have if you have not seen/heard of it i suggest google searching it best thing in the world!
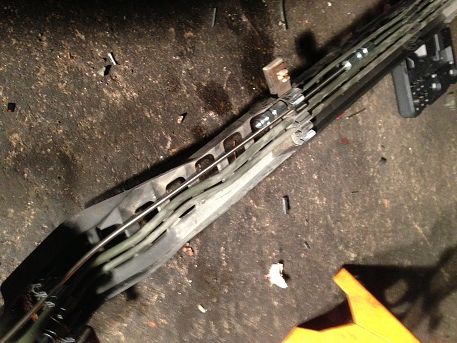
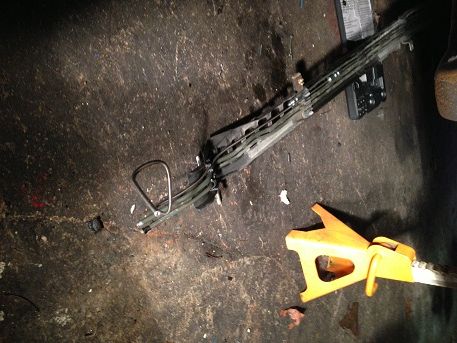
these are pics of how i flared rear lines which i did left on the car took the easy route and did a male to male -3 on them so i can run stainless ones up into the bay
ran out of stainless line to do both of them but got 1 complete and mocked up and waiting on the anotuff fittings to come in before i can flare the ones for the bay
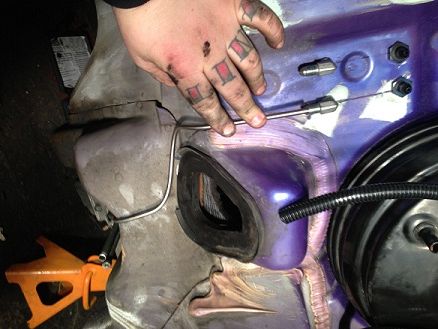
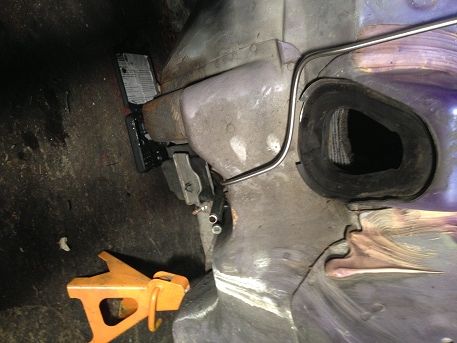
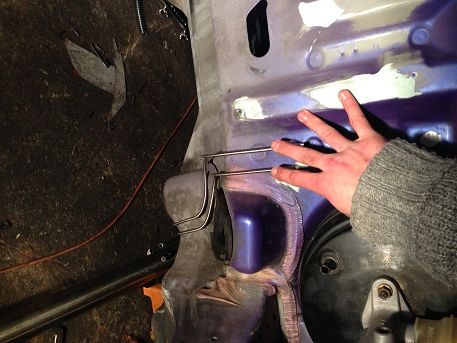
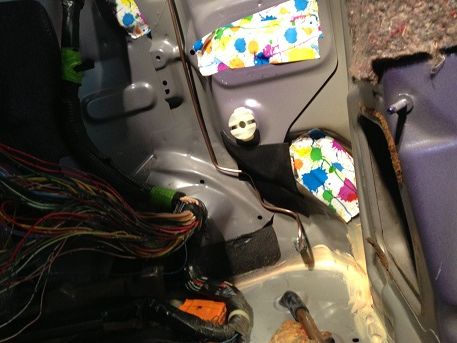
few pics of how i ran my front lines from wheel well to cabin
didn't snap a pic of inside passenger clearance because i installed heater box to make sure i had the room but there is certainly tons of room in this location.did however get a pic of driver side which has tons of room as well just had to pull harness back while drilling very easy routing for interior lines from these locations
tomorrow will have more pics as i'm going to get my flat style 4040 prop valve and gonna mount it and start interior lines as well as more stainless to make the other rear line.
update 1/17/13 pm
got a little done this evening ran the other line from rear line to the bay plugged off power steering fittings ran the lines from inside bulkheads from front brakes to prop valve tomorrow i plan to route the inner lines from bmc and rear line bulkheads to prop valve as well as securely mount the prop valve
power steering blockoff plugs i got from a local hydraulic store
both rear lines mocked up waiting on jegs for my anotuff -3 tube nut and sleeve fittings and anotuff 90 degree bulkheads then i'll be able to flare them to complete
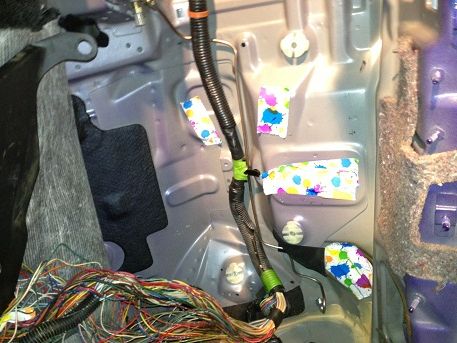
line bent and flared from passenger side caliper to prop valve
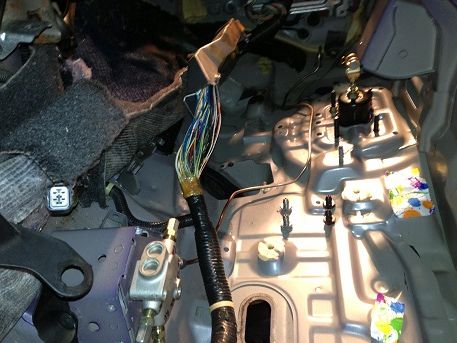
line bent and flared from driver front caliper to prop valve ran it behind the harness and bolted it down so it would be securely mounted to firewall also wound up having to cut a little bit of the plastic harness cover where i drilled for lower bulkheads so just threw some regular loom on it for protection
that is all for now more pics to come very soon as I spend almost all my free time tinkering on this thing all pics will be dated and uploaded on this original post to keep it nice and organized
thanks for viewing!


Thread
Thread Starter
Forum
Replies
Last Post