

Black housing diy HID retro (56k unfriendly)

Thread Starter
Honda-Tech Member
Joined: Nov 2004
Posts: 2,915
Likes: 4
From: Charlotte, NC
Here is my maxima (e55) bixenon's retrofitted into black housing eg headlights.
I am basically going to post up how i did everything etc.
First off this is a retrofit using e55 maxima projectors. The maxima projectors are a little more purplish than the bmw ones. I am using matsushita gen 1 ballasts also from a maxima. For headlights i went on ebay and purchased just some black housing headlights. For the harness right now it is set up just for xenon use, and it
was purchased from custom lightz (customlightz.com) <- very good people. Well.... here it goes.
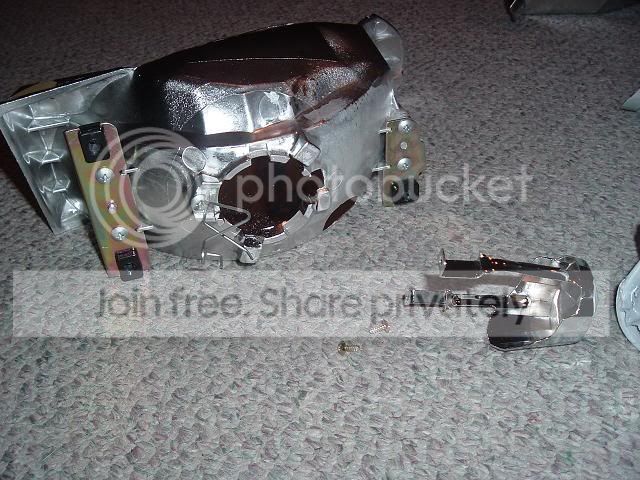
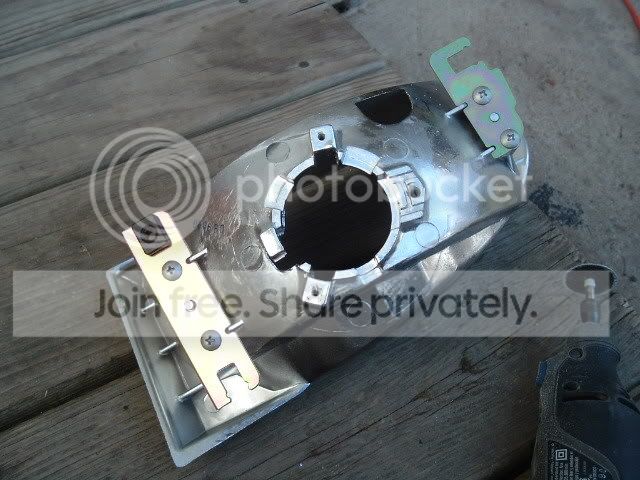
1st bake apart your headlights. If you don't know how to do this search... you will find out what you need to do. Once you bake your headlights you should have something like this...
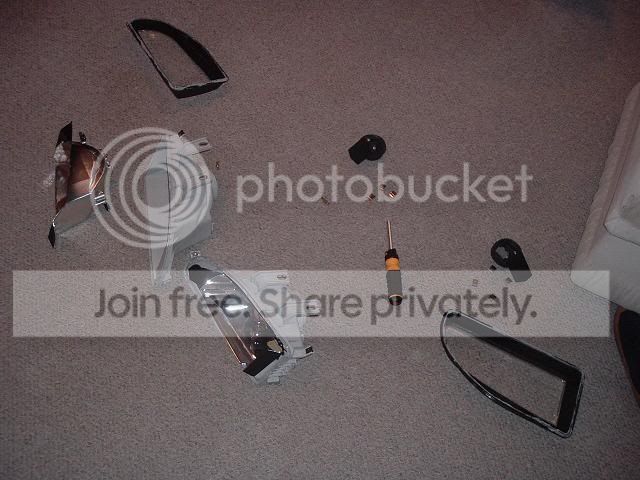
next seperate the housings and put the external housing away. You will not be needing to use this for a while.
pix of housings...
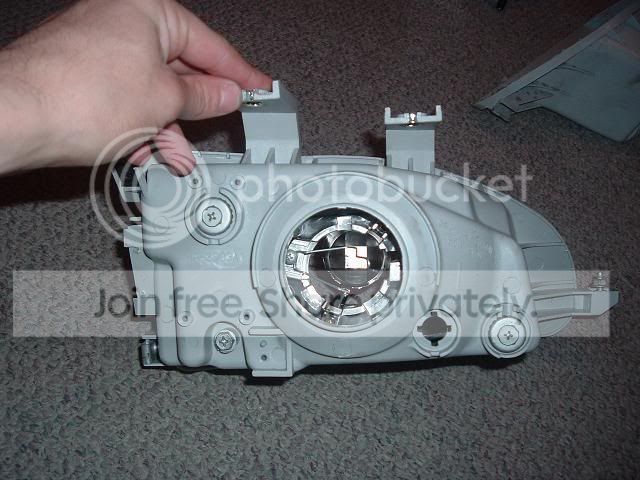
next remove the little inner plastic peice that blocks the bulb from blinding people.
I then took the inside housing, and projector and put them together to take measurements and test fitments.
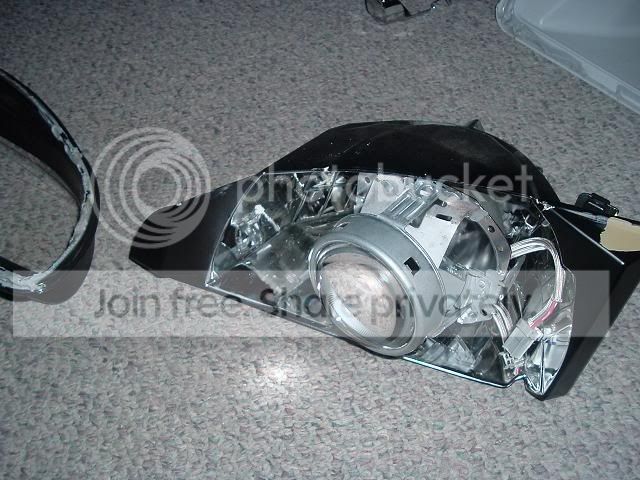
I compared the bulb holder to the hole of teh back of the inner housing and realized i needed to cut the hole bigger so i can fit the projector/ bulb holderr through it.
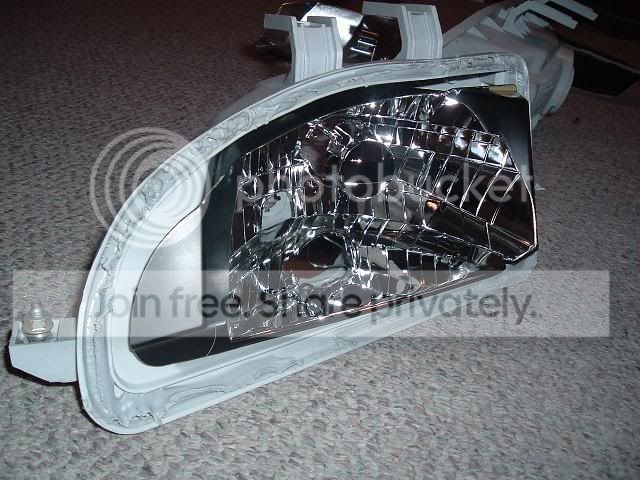
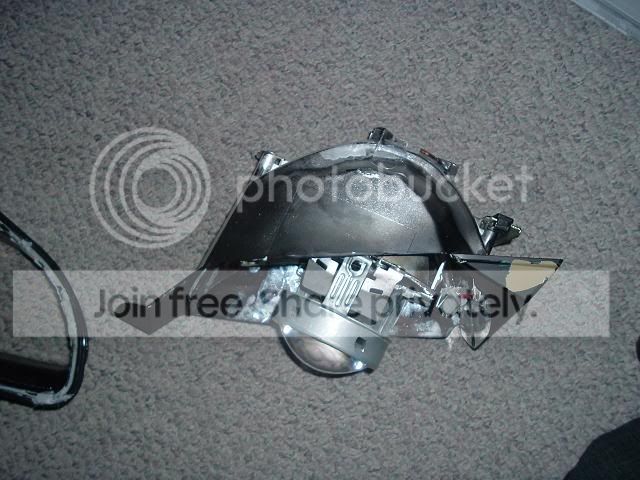
after this i realized my projector was a bit too tall for my housing, so i just cut the top off of it to fit the projector, and cut the hole bigger in the back to make it so that the projector could sit as far back in the housing as possible.

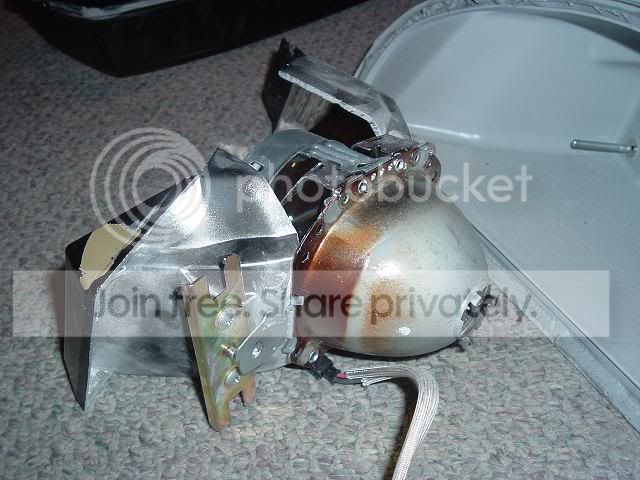
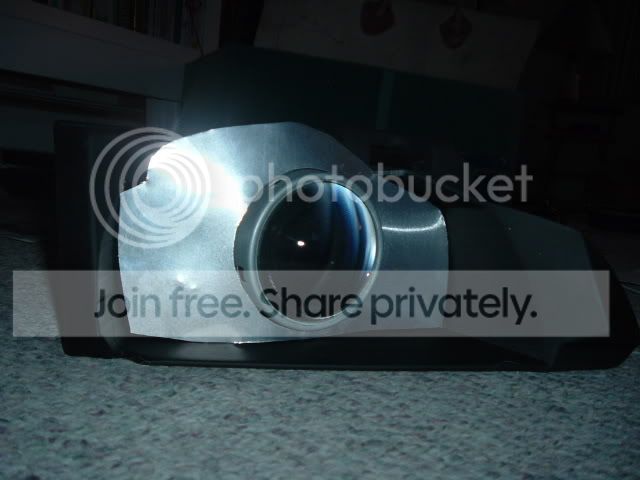
Once the fitment was perfecti went over everything again and tested to see how the light output would be with the projector resting in the place i want it in the housing...
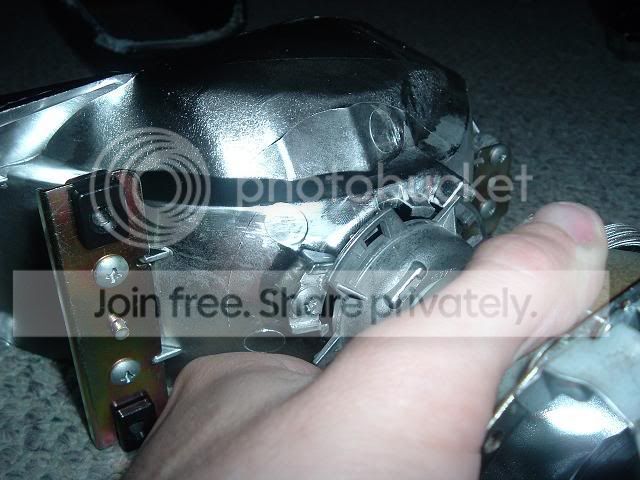
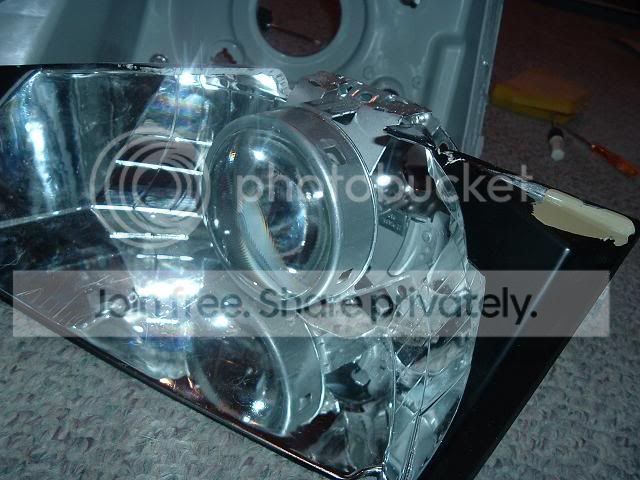
the cutoff seemed pretty straight... So i went onto securing it. I secured the projector into the housing using JB Kwik or whatever its called. Picked two packages up at Ace Hardware. Now what i used to make sure my cutoff would be straight is i made sure that the top of the projector was parrallel with the top of the mounting brackets on the inner housing... Hope this pic shows you what i mean.

When the jbweld dried and i tested out the light output and cutoff level, everything was perfect because i based my alignment on the top of those mounting brackets. Because in some places there wasnt enough jbweld or too big of a gap just use a peice of tape and lay it over the gap, then sand the edges of the material the jbweld is going to be sticking to and then lay jbweld from one side of a gap, over the tape to teh otehr side of the gap so all your doing is using the tape as a bridge. Custom Lightz told me this trick so thats where that info came from and its a great technique.
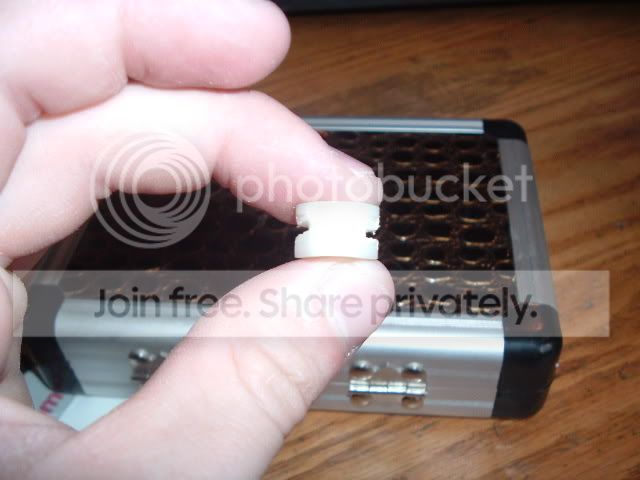
Now that my projectors were nicely fitted into the housing i moved along and addressed a problem that cam up earlier. One of my adjustment screw nuts that slides into the brackets of the inner housing stripped because it was plastic so i went to Ace, looking in their nylon nut bin and found the right size nut to custom fit to slide into the mountign bracket.
(white is new nylon bolt, black is the original nut)
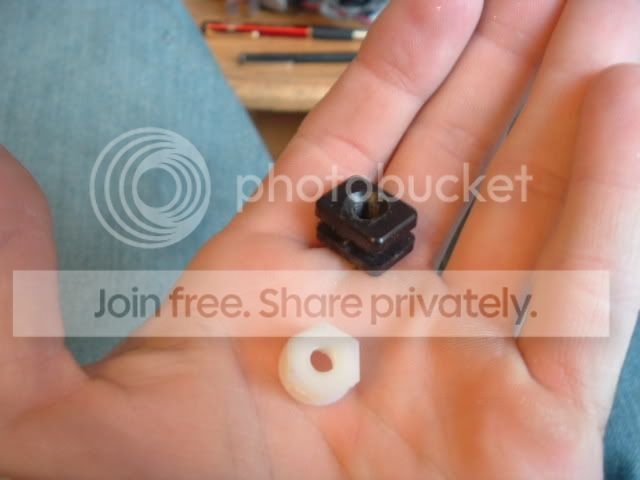
used a dremel to put slices into each side of the nuts so they could slide into the bracket like the original one.
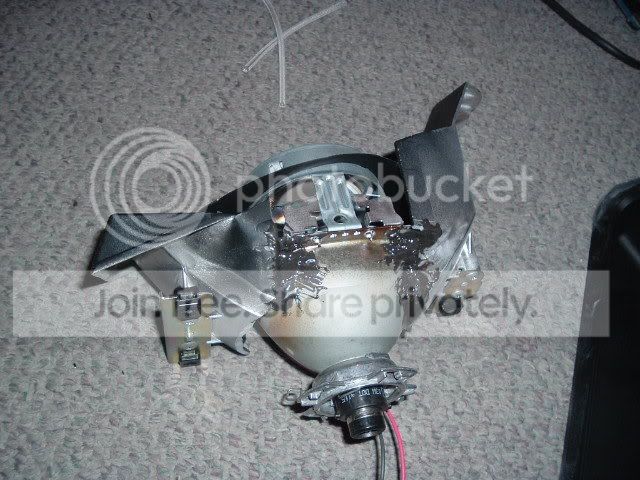
here is a projector jb welded in
I actually forgot to mention ealier that before i jbwelded the projector in i painted the entire inner and outer housing black
before
after

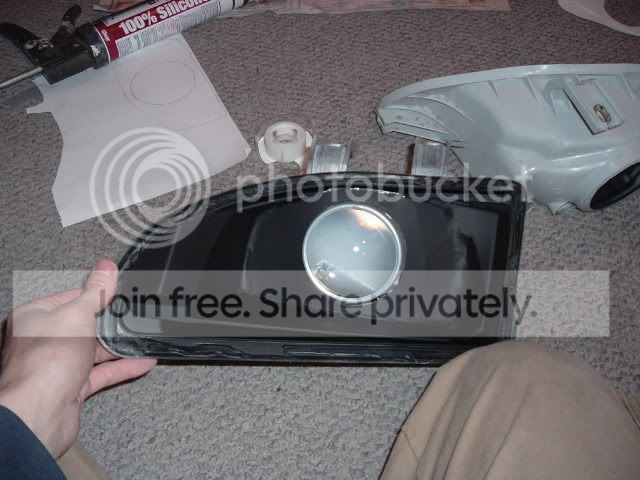
after the housing was black and the projector was secured, i took measurements, and drew on a peice of paper what i wanted my shroud to look like. I then went into my basement and pulled out some roof flashing to use as my shround, this is what i came up with
jb welded in

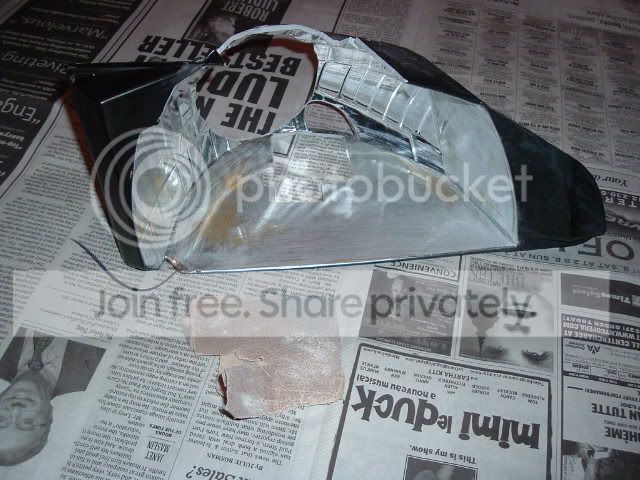
siliconed the entire edge/ gaps then masked off the projector and painted black again.
to make sure that you can adjust your headlights once your headlights are on, you will need to cut the hole in the outer housing bigger to allow for the bulb holder to move around.
before
after
My headlight came with a city light option. Since i did the retro and didnt need it anymore, i used the hole for the city light in the outer housing to feed my bixenon wires through. Once your done with all of that just attach all the peices back together and just clip the lense back on, dont silicone it. Then put the lights on your car and adjust and test them. Once they are fine tuned then take them back inside and seal them up with silicone.
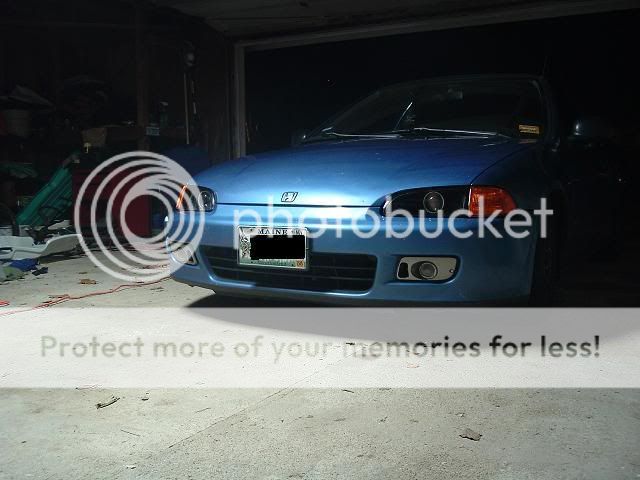
here arte pictures of the final result. Note this is just how i did it, this is my first time so i was experimenting. Overall i think it came out pretty nice considering it was my first time etc. I am happy with the results. I also decided not to use a bezel and they work fine without one. If anyone has any questions or notices i left a step out they want me to explain let me know. THIS WHOLE RETRO MAY BE FOR SALE because some funding issues came up that i need money for so if people are interested i may sell them even though i just put all this work into them and would hate to see them go. I'd say a good 35 hours have gone into this project easily.
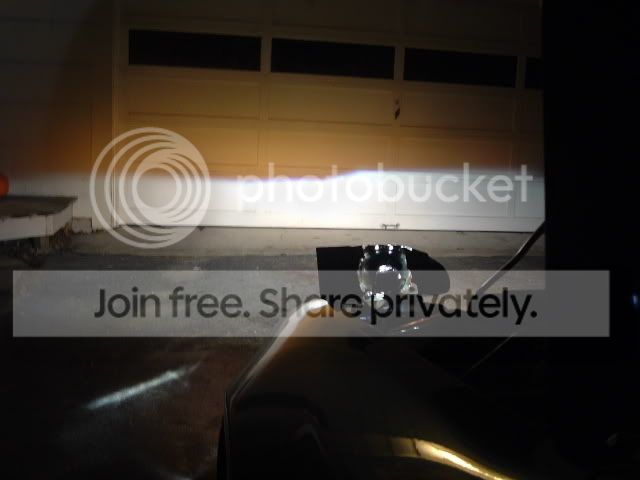
Heres pictures of the final results (still not sealed with silicone yet)
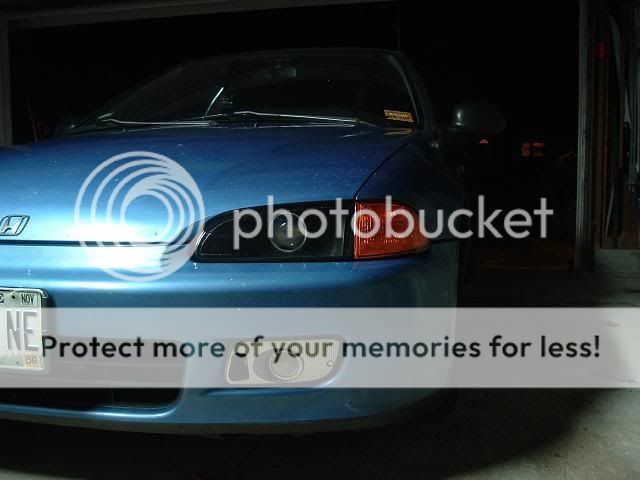
Note that the cutoff wasnt adjusted completely this was just a test run. Also i was on a hill which made it weird.
here is a picture of the cutoff... sorry but my camera sucks

Sorry if theres bad spelling and grammer etc, but its 12am, im tired, and i have to be up early to visit colleges tommorrow... High School is owning me
anyways like i said anyone wants me to cover anything else or answer questions just let me know.
-Ben
I am basically going to post up how i did everything etc.
First off this is a retrofit using e55 maxima projectors. The maxima projectors are a little more purplish than the bmw ones. I am using matsushita gen 1 ballasts also from a maxima. For headlights i went on ebay and purchased just some black housing headlights. For the harness right now it is set up just for xenon use, and it
was purchased from custom lightz (customlightz.com) <- very good people. Well.... here it goes.
1st bake apart your headlights. If you don't know how to do this search... you will find out what you need to do. Once you bake your headlights you should have something like this...
next seperate the housings and put the external housing away. You will not be needing to use this for a while.
pix of housings...
next remove the little inner plastic peice that blocks the bulb from blinding people.
I then took the inside housing, and projector and put them together to take measurements and test fitments.
I compared the bulb holder to the hole of teh back of the inner housing and realized i needed to cut the hole bigger so i can fit the projector/ bulb holderr through it.
after this i realized my projector was a bit too tall for my housing, so i just cut the top off of it to fit the projector, and cut the hole bigger in the back to make it so that the projector could sit as far back in the housing as possible.
Once the fitment was perfecti went over everything again and tested to see how the light output would be with the projector resting in the place i want it in the housing...
the cutoff seemed pretty straight... So i went onto securing it. I secured the projector into the housing using JB Kwik or whatever its called. Picked two packages up at Ace Hardware. Now what i used to make sure my cutoff would be straight is i made sure that the top of the projector was parrallel with the top of the mounting brackets on the inner housing... Hope this pic shows you what i mean.
When the jbweld dried and i tested out the light output and cutoff level, everything was perfect because i based my alignment on the top of those mounting brackets. Because in some places there wasnt enough jbweld or too big of a gap just use a peice of tape and lay it over the gap, then sand the edges of the material the jbweld is going to be sticking to and then lay jbweld from one side of a gap, over the tape to teh otehr side of the gap so all your doing is using the tape as a bridge. Custom Lightz told me this trick so thats where that info came from and its a great technique.
Now that my projectors were nicely fitted into the housing i moved along and addressed a problem that cam up earlier. One of my adjustment screw nuts that slides into the brackets of the inner housing stripped because it was plastic so i went to Ace, looking in their nylon nut bin and found the right size nut to custom fit to slide into the mountign bracket.
(white is new nylon bolt, black is the original nut)
used a dremel to put slices into each side of the nuts so they could slide into the bracket like the original one.
here is a projector jb welded in
I actually forgot to mention ealier that before i jbwelded the projector in i painted the entire inner and outer housing black
before
after
after the housing was black and the projector was secured, i took measurements, and drew on a peice of paper what i wanted my shroud to look like. I then went into my basement and pulled out some roof flashing to use as my shround, this is what i came up with
jb welded in
siliconed the entire edge/ gaps then masked off the projector and painted black again.
to make sure that you can adjust your headlights once your headlights are on, you will need to cut the hole in the outer housing bigger to allow for the bulb holder to move around.
before
after
My headlight came with a city light option. Since i did the retro and didnt need it anymore, i used the hole for the city light in the outer housing to feed my bixenon wires through. Once your done with all of that just attach all the peices back together and just clip the lense back on, dont silicone it. Then put the lights on your car and adjust and test them. Once they are fine tuned then take them back inside and seal them up with silicone.
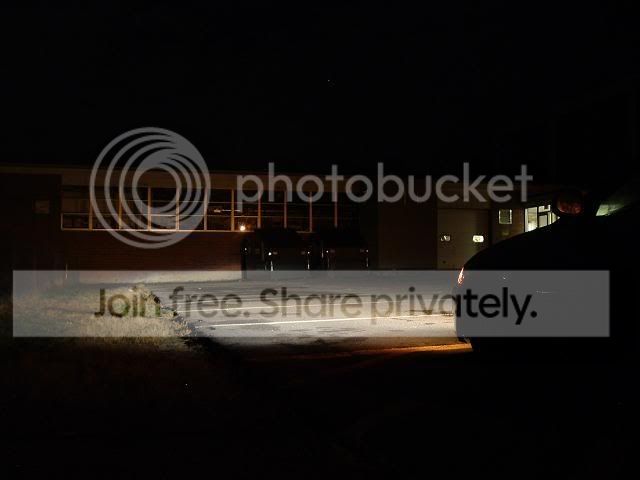
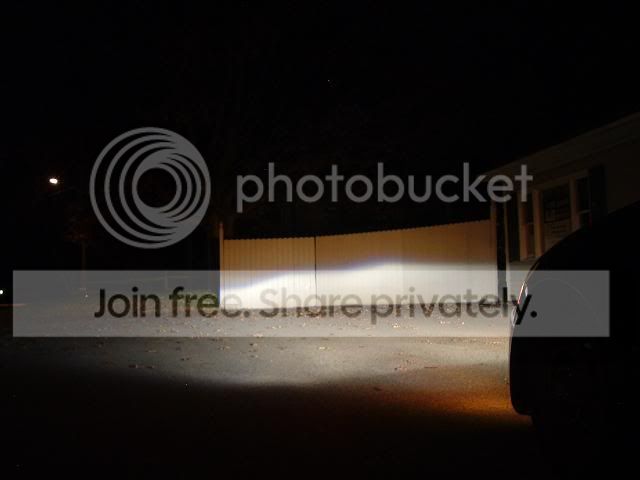
here arte pictures of the final result. Note this is just how i did it, this is my first time so i was experimenting. Overall i think it came out pretty nice considering it was my first time etc. I am happy with the results. I also decided not to use a bezel and they work fine without one. If anyone has any questions or notices i left a step out they want me to explain let me know. THIS WHOLE RETRO MAY BE FOR SALE because some funding issues came up that i need money for so if people are interested i may sell them even though i just put all this work into them and would hate to see them go. I'd say a good 35 hours have gone into this project easily.
Heres pictures of the final results (still not sealed with silicone yet)
Note that the cutoff wasnt adjusted completely this was just a test run. Also i was on a hill which made it weird.
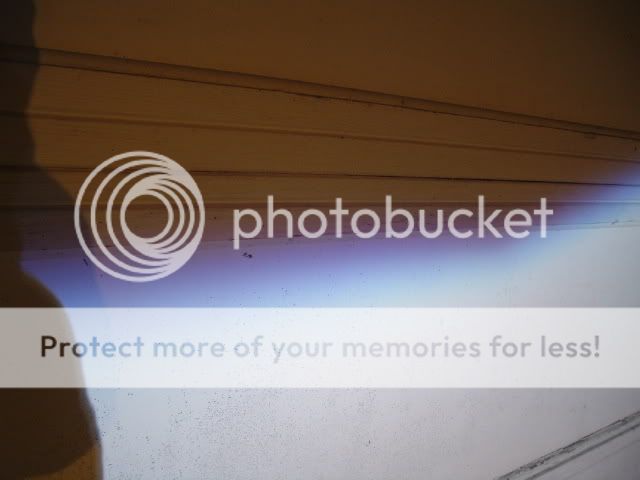
here is a picture of the cutoff... sorry but my camera sucks
Sorry if theres bad spelling and grammer etc, but its 12am, im tired, and i have to be up early to visit colleges tommorrow... High School is owning me
anyways like i said anyone wants me to cover anything else or answer questions just let me know.
-Ben


Trending Topics
Honda-Tech Member
Joined: Oct 2002
Posts: 10,095
Likes: 0
From: SIX 1 NINE
<TABLE WIDTH="90%" CELLSPACING=0 CELLPADDING=0 ALIGN=CENTER><TR><TD>Quote, originally posted by jdmsiR20 »</TD></TR><TR><TD CLASS="quote">personally would've done a couple things different, but the light output is great!
nice job man, captiva FTW too </TD></TR></TABLE>
nice job man, captiva FTW too
</TD></TR></TABLE>
Honda-Tech Member
Joined: Apr 2003
Posts: 977
Likes: 0
From: CA
Clean job. I have those same projectors retro'ed. I would not have blackhoused the headlight so much -- looks too EBay IMO. You didn't post a picture of the highbeam -- did you hook it up? That is the best attribute of these projectors...
Thread Starter
Honda-Tech Member
Joined: Nov 2004
Posts: 2,915
Likes: 4
From: Charlotte, NC
what would you have done differently? i know these are far from perfect but im nto too worried about it because i wanted to do these more for the learning experience, and when their on the car you cant even see the imperfections really. No, i didnt hook up the bixenon part, because customlightz sent me the wrong harness and i dont know how to hook this one up to use high beam. Also, i decided to black the entire housing because i wanted to eliminate any glare.

Thread
Thread Starter
Forum
Replies
Last Post
poison
Honda Civic / Del Sol (1992 - 2000)
35
Feb 20, 2003 06:22 PM