

How To: Relocate Your HVAC Knobs - 5th Gen

Thread Starter
Honda-Tech Member
Joined: Jan 2006
Posts: 986
Likes: 0
From: Southern MD
This is my first writeup and its kinda undetailed.. ask any questions without flaming and ill be happy to try to clear anything up for you.
A few people have been asking about this so i figured id just throw this out there.
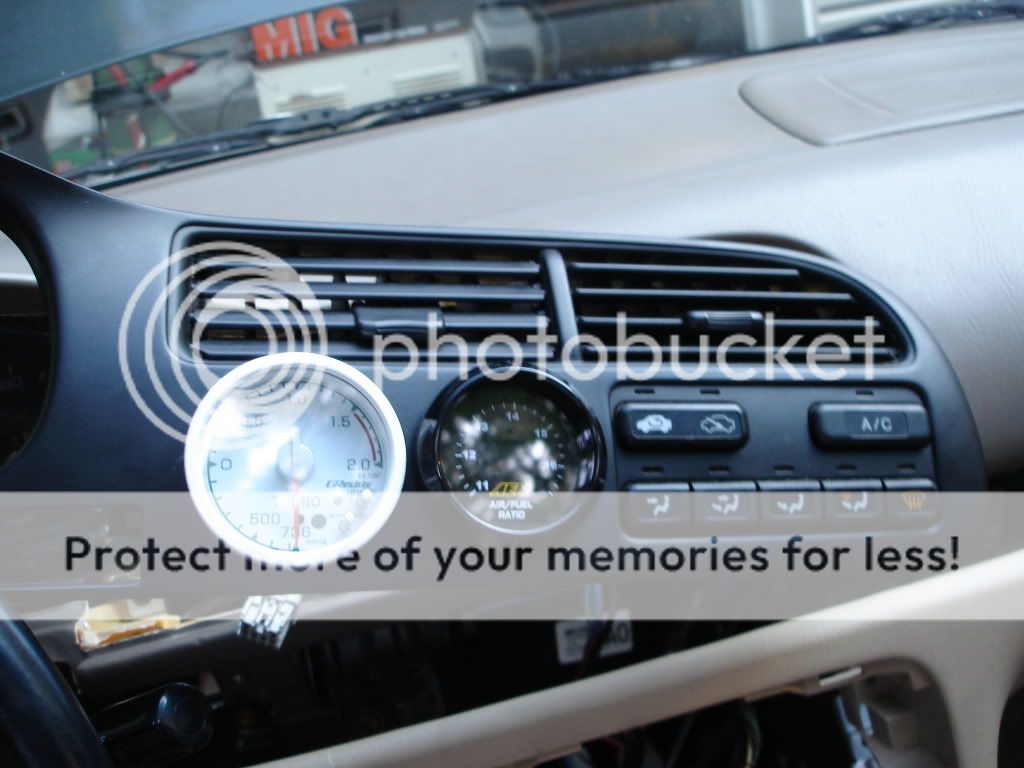
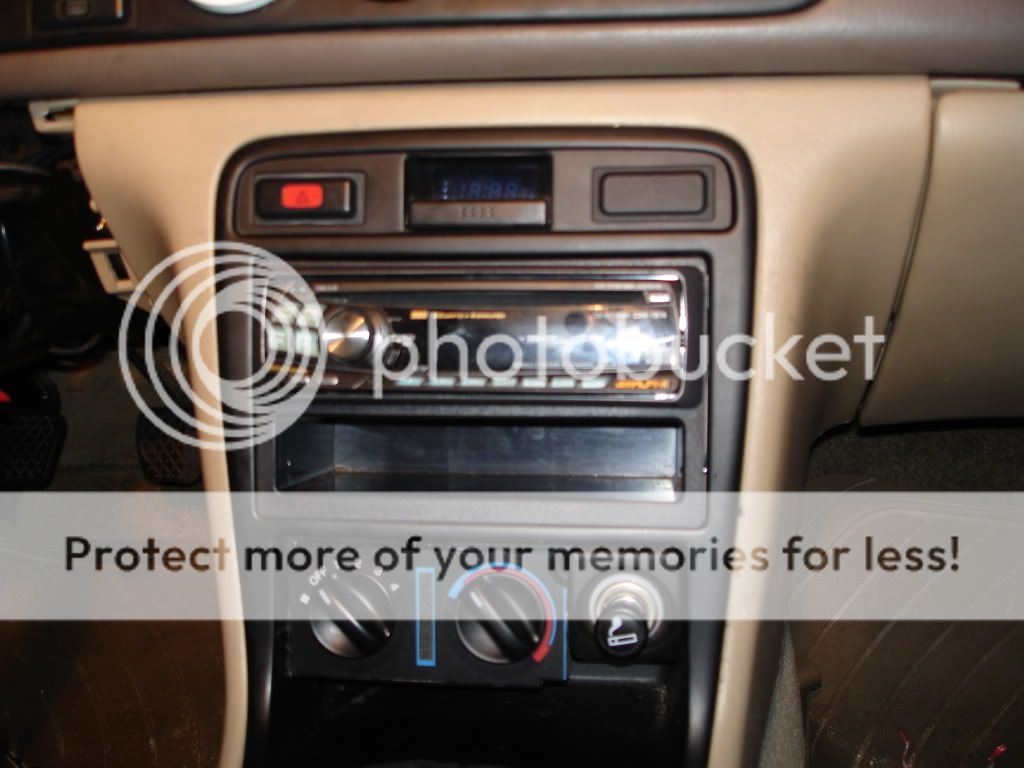
when you are done it should look something like this:

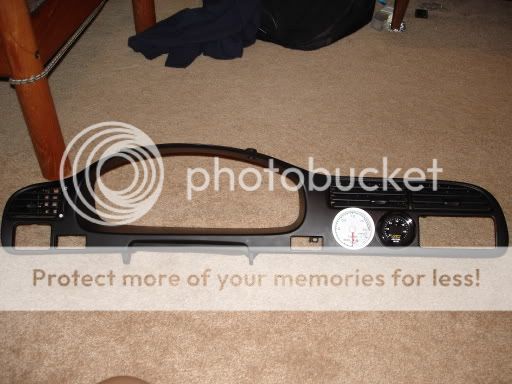
52mm gauges are an exact fit for the holes but i fit a 60mm in with a bit of modification (cutting the hole bigger with a drill) you can probably do it by just filing out the hole as well. a little dab of hot glue behind each gauge helps hold it in place also

1) take the dash out.
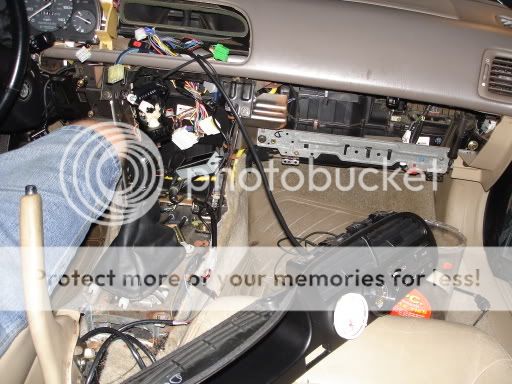
-Remove the plate from the bottom of the center console and remove the 2 screws.
-Remove the back of the center console.
-Remove the 2 (or 3) screws next to the shifter
-after these are out i believe the front of the center console pops out.
-unplug the clock, hazards, and rear window defrost buttons, radio, cigerette lighter, and anything else hindering you moving it out of the way. You can take off the shift boot and remove the front of the center console all the way out of the car.
-The black plastic thing isnt held in by any screws.. just things you need to pop out.
2) the hvac control unit
-the ***** are actually connected to the other set of buttons so you will need to unscrew the whole thing and cut the unit in half. there are no wires running through the middle of it so this wont damage anything.
-leave enough room for the gauges when you cut the box.
-screw the button box back into place
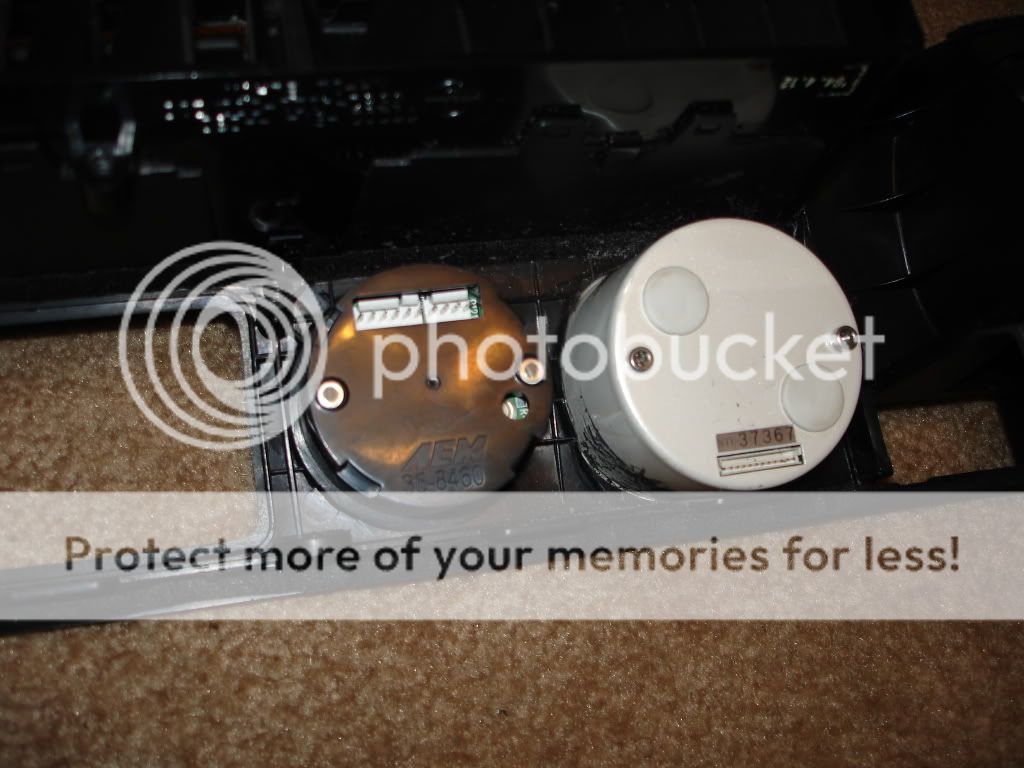

3) **** fitment
the ***** require some filing of the **** unit and you will need to cut the area behind the ashtray(?) that sits next to the cigerette lighter. you will no longer have this ashtray.
4) make it fit.
Honestly you can do this however you want.. i used hot glue to hold it in place.
5) wires
The wires for the ***** need to be extended. remove the tape from the wiring harness and pull them as far down as possible then cut and solder/butt connect as needed.
6) put it back together
what i said before.. in reverse

7) make it clean
i havent gotten to this step yet because i moved to atlanta for college. GT baby. anyway i have another one of these:
that i plan on cutting up to fit around the **** unit so it doesnt look as ugly. cutting and filing again.. self explanitory/ do what you like with it.
i thought it was a rare-ish DIY mod so...good luck.
A few people have been asking about this so i figured id just throw this out there.
when you are done it should look something like this:
52mm gauges are an exact fit for the holes but i fit a 60mm in with a bit of modification (cutting the hole bigger with a drill) you can probably do it by just filing out the hole as well. a little dab of hot glue behind each gauge helps hold it in place also
1) take the dash out.
-Remove the plate from the bottom of the center console and remove the 2 screws.
-Remove the back of the center console.
-Remove the 2 (or 3) screws next to the shifter
-after these are out i believe the front of the center console pops out.
-unplug the clock, hazards, and rear window defrost buttons, radio, cigerette lighter, and anything else hindering you moving it out of the way. You can take off the shift boot and remove the front of the center console all the way out of the car.
-The black plastic thing isnt held in by any screws.. just things you need to pop out.
2) the hvac control unit
-the ***** are actually connected to the other set of buttons so you will need to unscrew the whole thing and cut the unit in half. there are no wires running through the middle of it so this wont damage anything.
-leave enough room for the gauges when you cut the box.
-screw the button box back into place
3) **** fitment
the ***** require some filing of the **** unit and you will need to cut the area behind the ashtray(?) that sits next to the cigerette lighter. you will no longer have this ashtray.
4) make it fit.
Honestly you can do this however you want.. i used hot glue to hold it in place.
5) wires
The wires for the ***** need to be extended. remove the tape from the wiring harness and pull them as far down as possible then cut and solder/butt connect as needed.
6) put it back together
what i said before.. in reverse
7) make it clean
i havent gotten to this step yet because i moved to atlanta for college. GT baby. anyway i have another one of these:
that i plan on cutting up to fit around the **** unit so it doesnt look as ugly. cutting and filing again.. self explanitory/ do what you like with it.
i thought it was a rare-ish DIY mod so...good luck.

B*a*n*n*e*d
Joined: Jun 2002
Posts: 11,712
Likes: 3
From: Bouncing off of the city bus in Saigon
that just looks tacky...it is not well finished at all...ie it does not look professional.
Edit: Paint that white guage's outside ring black and it would look a lot better. I would try to make it flush. HVAC looks OK.........
Modified by YeuEmMaiMai at 2:41 AM 8/27/2006
Edit: Paint that white guage's outside ring black and it would look a lot better. I would try to make it flush. HVAC looks OK.........
Modified by YeuEmMaiMai at 2:41 AM 8/27/2006
Joined: Jul 2006
Posts: 908
Likes: 0
From: longisland/queens/nyc, nyc, usa
he stated that he still has to fab a peice for the bottom part of the console for the *****
+1 looks good might know what your going to do to finish it up
looks like it will have the same curve with the light part dont forgot to cut towards the right part of the dash bezel so it would stil flush under the lighter
since the climate control sits lower


Modified by nycludekid at 9:06 PM 8/26/2006
Modified by nycludekid at 9:07 PM 8/26/2006
+1 looks good might know what your going to do to finish it up
looks like it will have the same curve with the light part dont forgot to cut towards the right part of the dash bezel so it would stil flush under the lighter
since the climate control sits lower
Modified by nycludekid at 9:06 PM 8/26/2006
Modified by nycludekid at 9:07 PM 8/26/2006
Thread Starter
Honda-Tech Member
Joined: Jan 2006
Posts: 986
Likes: 0
From: Southern MD
yea definitely not professional.. i was more interested in getting the turbo running and fixing that later. time kinda ran out and im now 10 hours away at georgia tech so its not going anywhere fast.. but yes, nycludekid is correct, im planning on cutting a piece to clean it up because i agree it looks unfinished right now.
Modified by Andryzzle at 9:07 AM 8/27/2006
Modified by Andryzzle at 9:07 AM 8/27/2006
Junior Member
Joined: Dec 2003
Posts: 110
Likes: 0
From: omaha, ne, usa
Here is pictures of my install, i removed the whole control center and located them to my glove box. They all work as if they were factory


Sneek Preview: F22 w/ darton sleeve and closed deck by ERL Performance

Sneek Preview: F22 w/ darton sleeve and closed deck by ERL Performance
Trending Topics
H-T Order of Merit
Joined: Aug 2002
Posts: 9,172
Likes: 7
From: somewhere in MI
maybe less hassle but harder to see. I'm assuming he went this route because it's in a better location to see the guages. Correct me if I'm wrong but thats what I'm guessing.

Honda-Tech Member
Joined: Aug 2005
Posts: 891
Likes: 0
From: cedar park, tx, usa
<TABLE WIDTH="90%" CELLSPACING=0 CELLPADDING=0 ALIGN=CENTER><TR><TD>Quote, originally posted by JakeIsCool »</TD></TR><TR><TD CLASS="quote">yo hondaracer, take it easy on the armorall.</TD></TR></TABLE>
haha i knew that **** look freakishly shinny but clean as hell
haha i knew that **** look freakishly shinny but clean as hell
Honda-Tech Member
Joined: Jun 2003
Posts: 1,654
Likes: 0
From: sparks, nv, us
not really my style but creative way for sure
i had thought about this years ago when i happened to pop an autometer gauge in one of the **** holes and realized it fit perfectly...
but then i wouldnt want to relocate the climate controls..
i had thought about this years ago when i happened to pop an autometer gauge in one of the **** holes and realized it fit perfectly...
but then i wouldnt want to relocate the climate controls..

Junior Member
Joined: Mar 2008
Posts: 3
Likes: 0
From: Atlanta, GA, USA
that just looks tacky...it is not well finished at all...ie it does not look professional.
Edit: Paint that white guage's outside ring black and it would look a lot better. I would try to make it flush. HVAC looks OK.........
Modified by YeuEmMaiMai at 2:41 AM 8/27/2006
Edit: Paint that white guage's outside ring black and it would look a lot better. I would try to make it flush. HVAC looks OK.........
Modified by YeuEmMaiMai at 2:41 AM 8/27/2006
Jesus, dude! Ever heard of tact? At least our boy did a writeup.


Honda-Tech Member
Joined: Dec 2002
Posts: 1,559
Likes: 0
From: Boston City of Champions!
how did this ever turn out. i am thinking about doing this also but putting a tunerview2 where the push buttons so and building a new ****/button setup down the botton.

Trial User
Joined: Nov 2011
Posts: 1
Likes: 0
hey can you send me some pics of the hvac relocation please i am doing that so i can put my air gauges in for my air ride

Thread
Thread Starter
Forum
Replies
Last Post
shortlid
Honda Civic / Del Sol (1992 - 2000)
2
May 21, 2005 03:30 PM
SlowAssAccord
Honda Accord (1990 - 2002)
6
Apr 21, 2004 11:36 AM