

Tippyman's Swap and Project Thread

Thread Starter
Honda-Tech Member
Joined: Jul 2004
Posts: 9,846
Likes: 0
From: VA, USA
Page 6: Recent Photoshoot!
--------------------------------------------------------------------------------------------
Well, I've officially started modding my 91 Std. Civic Hatch!
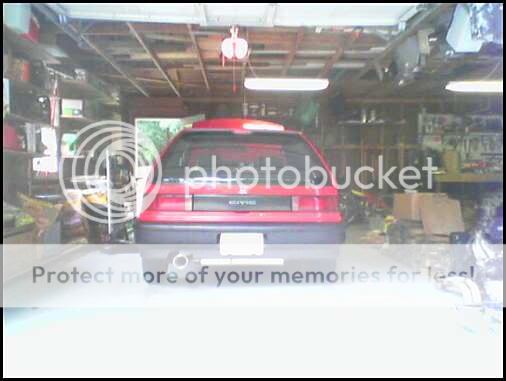
The first order of business was to get rid of that ridiculous 4x4 stance and those awful mudflaps! Some H&R Sport Springs took care of that!
<u>Before:</u>

<u>After:</u>

Much nicer! Now on to other issues...
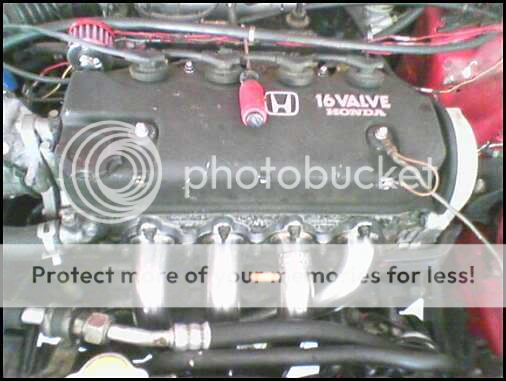
My engine as of now is pretty much screwed. It is only running on 3 cylinders. I think that the previous owner broke a timing belt, causing the valves to bend or break and rather than fixing it he sold it to me!
To top it all off, my distributor bearings are shot, which causes my distributor shaft to overheat. Which, in turn, caused my rotor to melt and eventually fried my TDC sensor. Without a TDC sensor, my ECU threw a code and my car consequently went into limp mode.
So, needless to say, I have decided to go ahead and try my hand at my first engine swap!
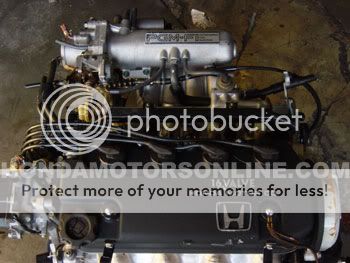
A SOHC ZC engine fresh from H Motors has already been ordered and is on the way!
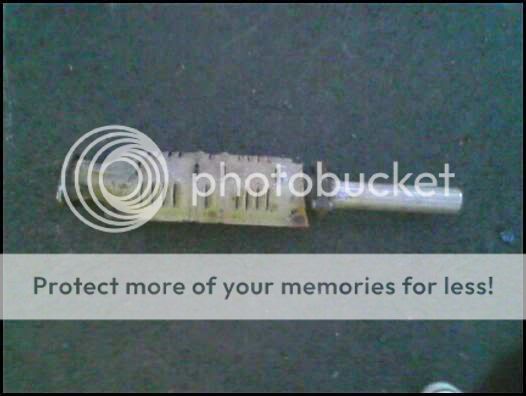
I've already started getting things ready for the swap. I picked up an Injector Resistor Box from a DA Integra LS I found at the junkyard, because my car is DPFI and the ZC is MPFI.
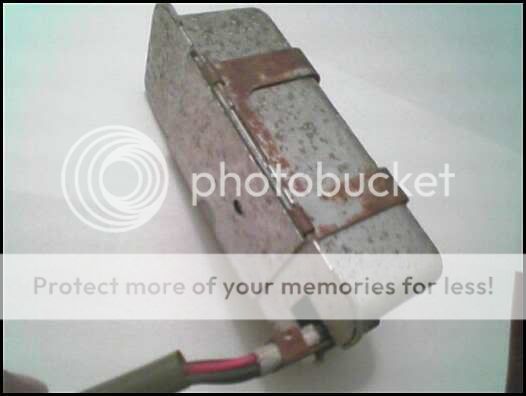
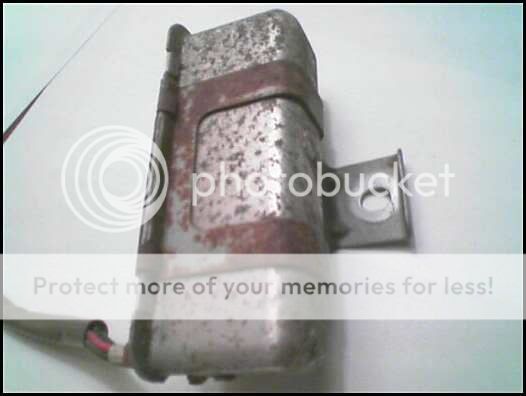
The resistor box, however, looked like ***. It was rusted, pitted, and looked like a twinkie .
So I thought I'd spruce it up a little.
<u>Mid-Polish</u>
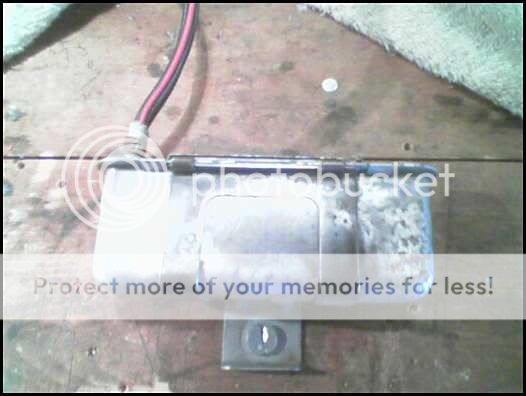
<u>Polished With Wire-Wheel</u>
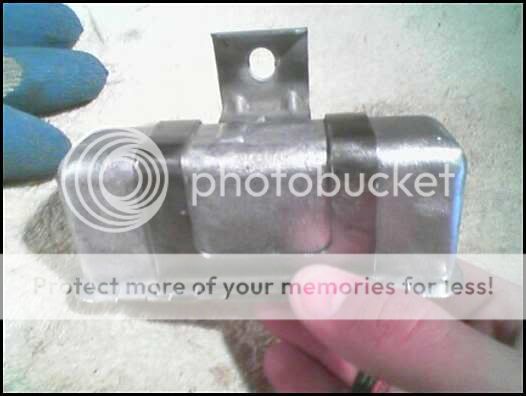
<u>Sanded With 150 Grit</u>
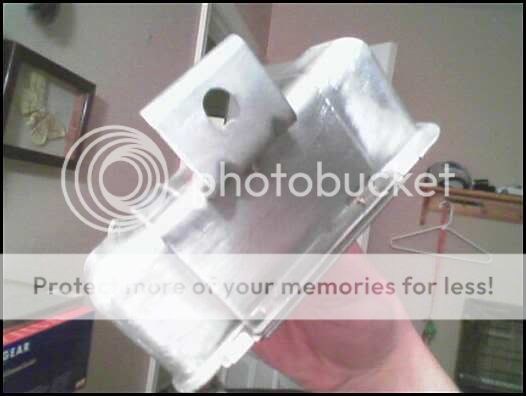
It looks much better now! (For a twinkie, that is...)
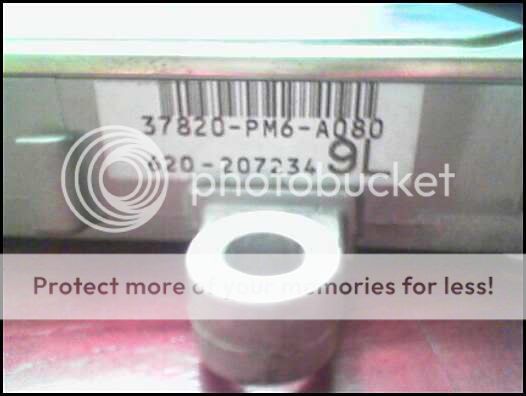
The new engine needed a new computer so I bought a PM6 ECU off of E-Bay. Because the SOHC ZC is essentially a D16A6, this computer will work nicely. Maybe down the road a little chipping will give it better fuel management.

And, just for the hell of it I got a shift **** off of that junkyard LS.

<u>***UPDATE 3/27/06***</u>
I de-pinned a few ECU plugs I picked up off of a '90 DX Civic. (https://honda-tech.com/zerothread?id=1573760)
I can now use these pins for any wiring I need to do at the ECU.
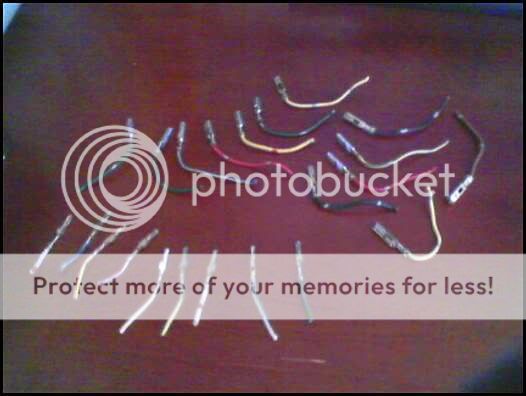
Also, be careful when De-pinning...

<u>***UPDATE 3/28/06***</u>
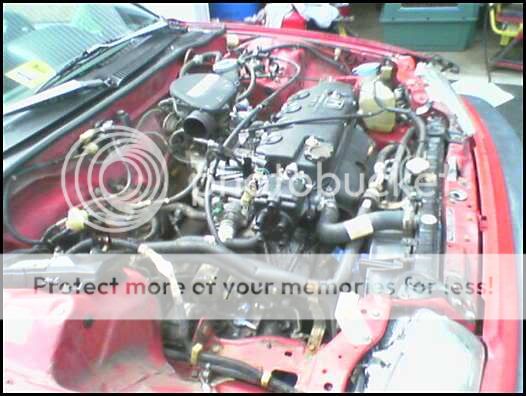
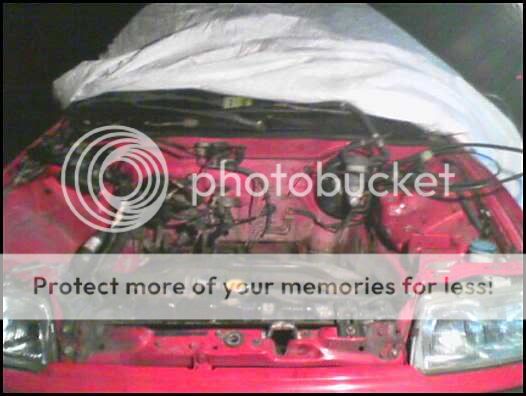
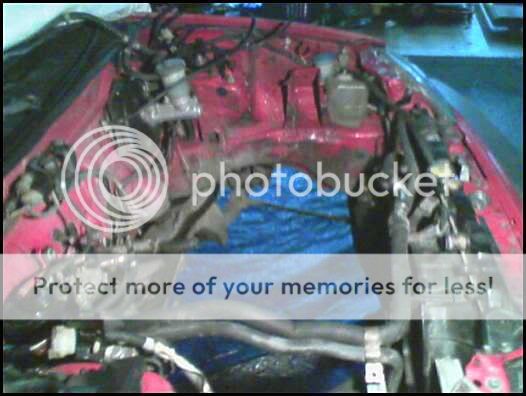
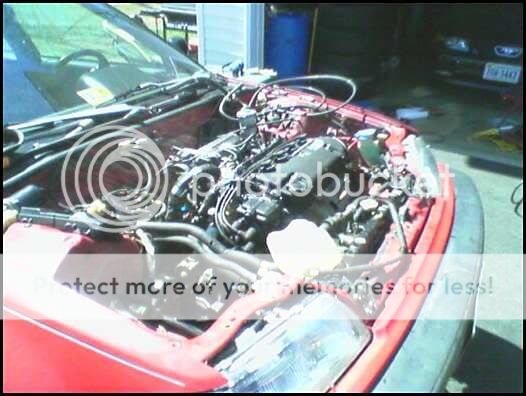
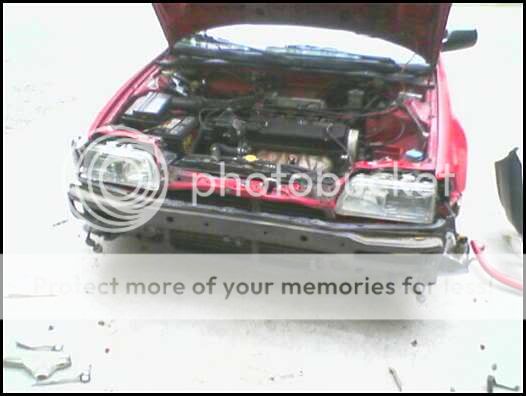
I "Gunked" my engine bay in preparation of the new engine. I figured, the less grease and mess, the better it will be to work on.
So, two cans of gunk and 30 min's later I had a (semi) clean engine bay!

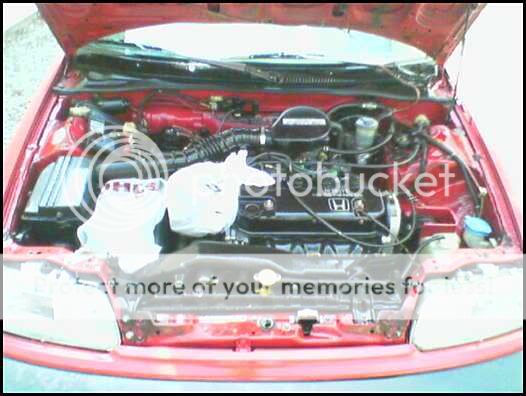
Notice the plastic bags covering the battery tray and the distributor.
<u>***ANOTHER UPDATE 3/28/06***</u>
I went around and got some more stuff I needed for the swap:
<u>NGK Plugs</u>
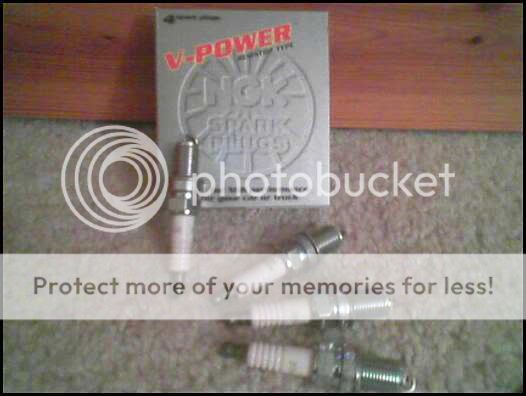
These plugs are top of the line...
<u>Distributor Cap and Rotor</u>
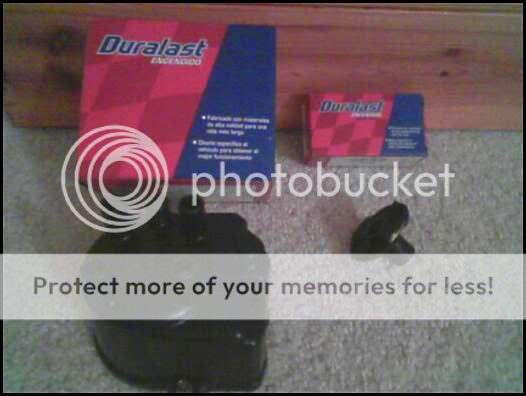
<u>Oil Filter</u>

<u>Spark Plug Wires</u>
<u>My Ricey Valve-Cover Breather</u>

<u>"1 Quart Suction Gun"</u>
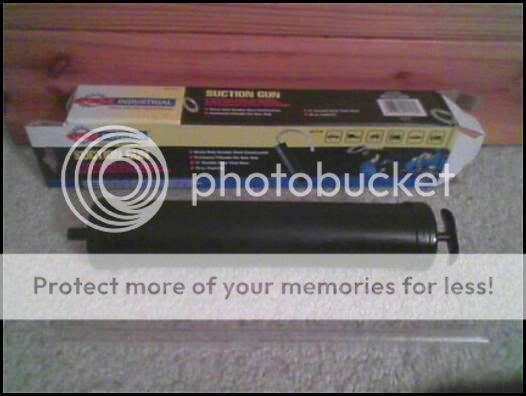
This is for filling my transmission with fluid once it's back on the car.
<u>Coolant</u>

I already got a bunch of 5W-30 Oil, but I still need to find some Penzoil Synchromesh Transmisison Fluid.
<u>***UPDATE 3/31/06***</u>
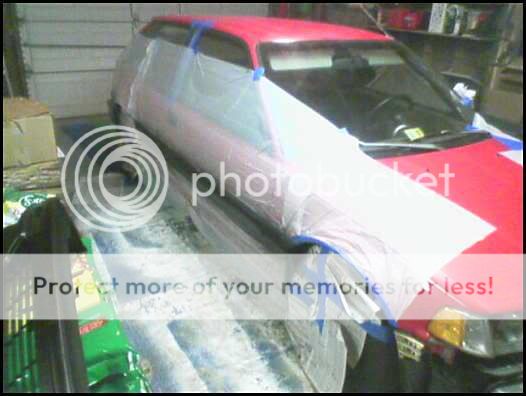
I picked up the engine today from HMO. Everything looks good from what I can see. It's all wrapped up in plastic and I'm not unwrapping it until I get it off the back of my Dad's truck.
I took the car over to my girlfriend's house and me and her little brother got it on jacks and ready to start working on tomorrow!


<u>***UPDATE 4/1/06***</u>
I've been working on the car this afternoon. I removed the hood and then I got the intake assembly out, battery tray out, cat, downpipe, splash sheilds, and I drained the oil and coolant.
The biggest part of the day was getting the engine outta the back of my dad's truck. The engine hoist was broken so we had to "fix" it. A lot of electrical tape and two hose clamps later, it worked well enough to use. So, I've got the engine pulling underway and the new engine sitting by ready to go in!


<u>***UPDATE 4/2/06***</u>
I got the entire wiring harness and all of the ground wires off of the motor. I also drained the tranny fluid and removed the throttle cable. She's getting closer to being removed!
<u>Wiring Harness:</u>

Notice the blue labels. I labelled all the connectors so it would be easier to transfer to the ZC motor.

<u>***UPDATE 4/5/06***</u>
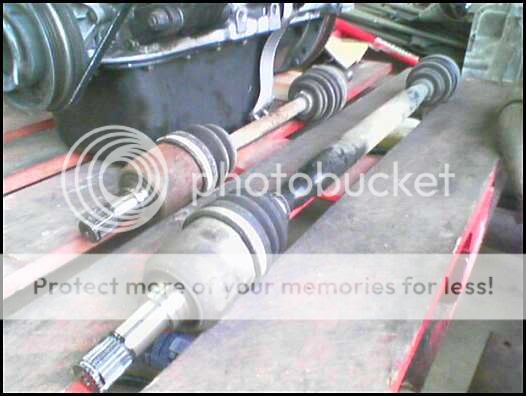
I got to work on the car a little today. I managed to pull the axles off and remove the shift linkage stabilizer bar. I also unwrapped the engine and checked it out. Everything looks great! I came with the whole wiring harness which I was worried about. Now I have the right plugs if I need them.
<u>Axles out of car:</u>
BTW: Some people seem to have problems with the ball joints. This link has a tutorial that works PERFECT and it is simple as hell: https://honda-tech.com/zerothread?id=887859 (I used a 26 mm box-end wrench instead of a 1/2 inch socket wrench. It doesn't really matter what you use, so long as it fits snug when the hub is jacked all the way up.)
<u>Engine:</u>
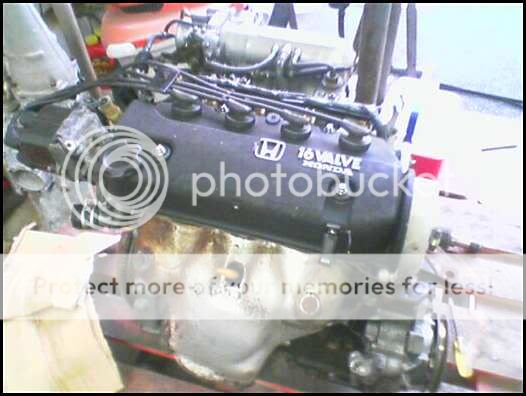
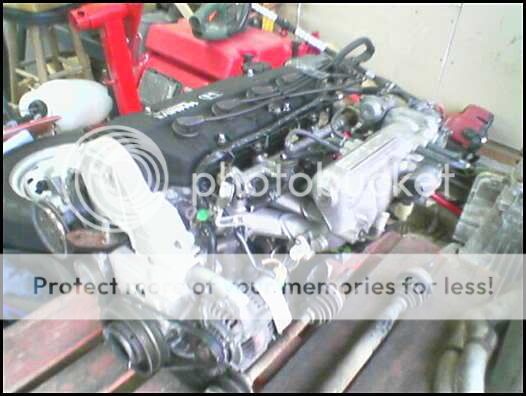

ZC Baby!
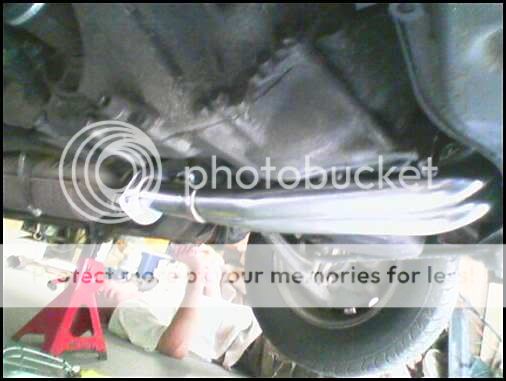
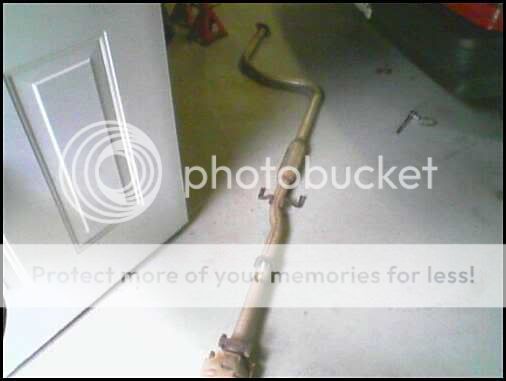
<u>Exhaust A-Pipe:</u>
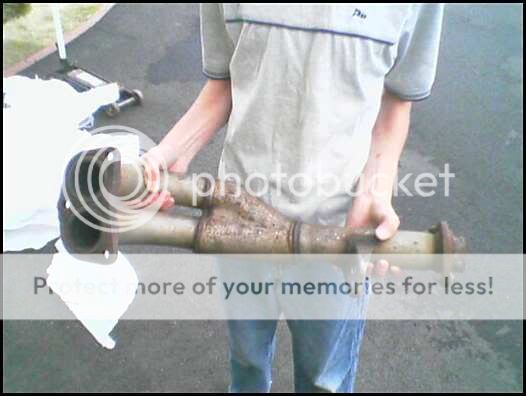
I requested that I be sent the entire exhaust manifold, and HMO came through! I checked, and it bolts right up to my cat! I am stoked that I can use the actual ZC header on the ZC motor instead of modding my nasty Std. one or going after market.
On Friday I am going to try to get that bitch pin out and take off all the radiator, coolant, and fuel hoses. Then I'll be ready to pull the engine and bolt the ZC in this weekend!
<u>***UPDATE 4/7/06***</u>
Well, today I really got some major progress done. The engine is finally out! What I thought was going to be a fairly simple pull turned out to be a bit of a headache. First problem was the bitch pin, which didn't wanna come out for anything.
So I decided to just unbolt it from the shifter. What I didn't realize is that it would hit the crossmember when we tried to pull the engine. So we had to lower the car, move the passenger side jackstand, and pull the linkage all the way to the side so it would clear. It finally did and we pulled the motor.
(The fact that the lift kept leaking fluid and we had to add more quickly or risk dropping the engine didn't help either...)
<u>Engine sitting on nothing but mounts and ready to get pulled out:</u>
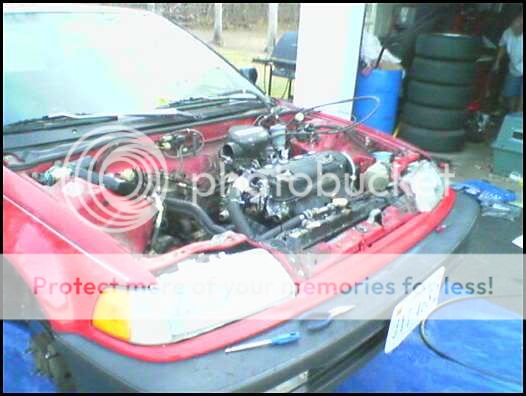
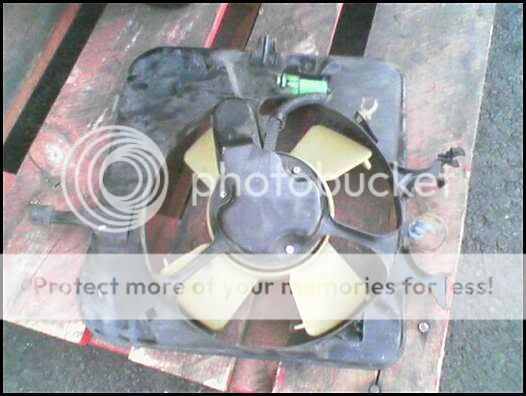
I found out the radiator fan had to go or the header would hit it on the way out. So off it came.
And once that was done, out it came! (Eventually )

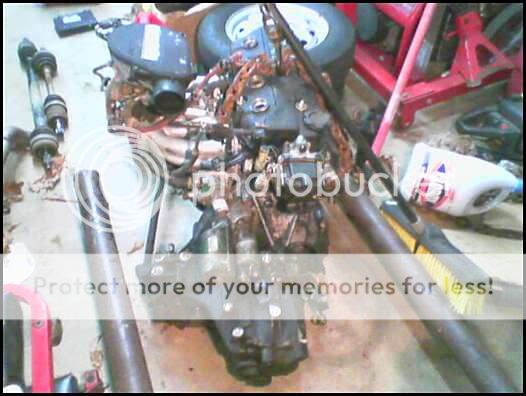
<u>The old, P.O.S. D15B1:</u>
Unfortunately, the weatherman is saying it will rain tomorrow so I covered the car and the new engine sitting near it, and called it a night. Hopefully I will at least be able to get some work done on it tomorrow...
<u>***UPDATE 4/8/06***</u>
Got a little bit of work done today. We managed to fix the lift. Replaced the hose and fittings, clamped it all down, and now it's good to go. (I hope). I started to put the stock wiring harness on the motor. Everything is going good except for the O2 sensor and one of the distributor sensors. I gotta figure those out.
The engine was out of an automatic car, so it still had the torque converter and flex plate attatched. Those were quickly removed.
<u>Torque Converter:</u>
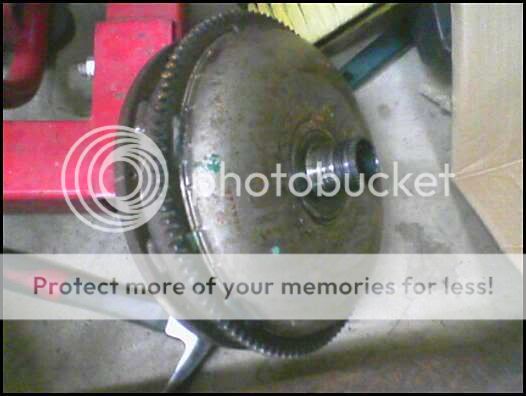
Because there was no clutch, the clutch input pilot bearing wasn't there. I picked up one of those (a nice roller one, not a crappy brass one). Tomorrow I will get the tranny off of the old engine and bolt it onto the new engine as well as get most of the wiring sorted out. I hate wiring already...
<u>***UPDATE 4/9/06***</u>
Well, the update that everyone has been waiting for is here! The new engine is in! All mounts have been bolted down, all coolant hoses, vacuum lines, fuel line, throttle cable, clutch cable and some wiring has been hooked up. Any vacuum lines not needed have been plugged. The tranny is in but I still need to connect the shift linkage and shift linkage stabilizer and put in the axles.
Tomorrow I'll be trying to finish the wiring and the other misc. stuff that needs to be done. If I can get the wiring done, then wish me luck cause I'm gonna try to fire it up!
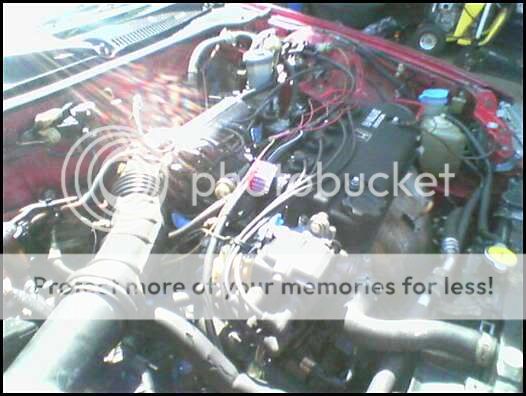
<u>Engine In! </u>
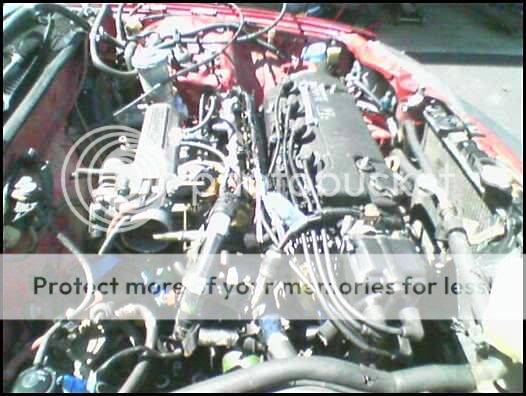
It's even got working AC hooked up!
The pics are obviously before I started hooking stuff up, but you get the idea.
Wish me luck for tomorrow!
<u>***UPDATE 4/10/06***</u>
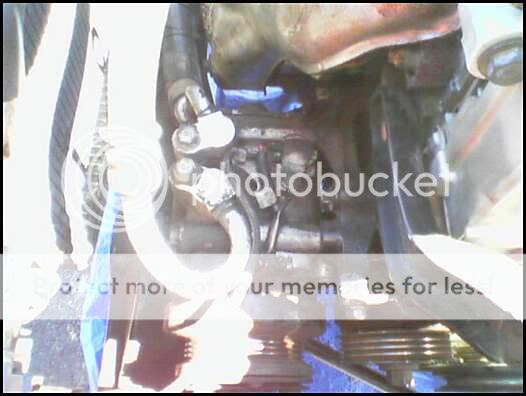
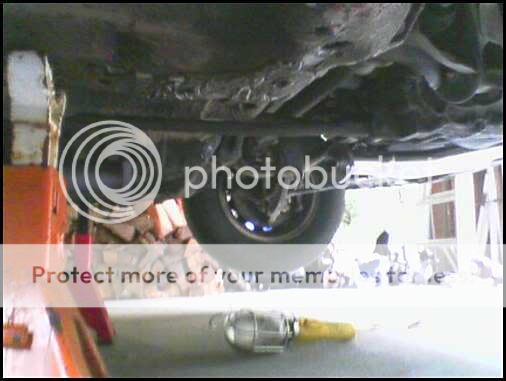
Today I managed to get some work done on the car. I figured out where the negative battery terminal wire went, and hooked that up. (Finally! I felt like such an idiot...) Then I got the axles back in and hooked up all the suspension parts. I got the header bolted onto engine, but then I ran into a problem. While the header may bolt up to the cat, it was about three inches away from it! Me and my girlfriend's dad came up with a solution. We cut the exhaust pipe about 6 inches after the cat on the straight section.
<u>Cut Catalytic Converter:</u>
I went to Advance Auto Parts and picked up a 1.75" to 1.75" coupler and an exhaust clamp.
<u>Coupler and Clamp:</u>
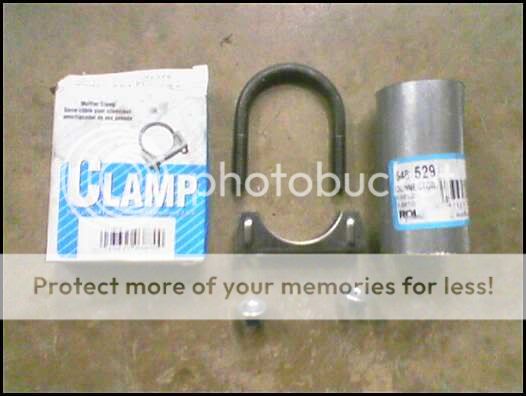
This should allow up to add the neccesary three inches onto the exhaust pipe but still allow me to slide the cat around to meet the header correctly. If I just welded it on, it would allow for no movement. in the end it will look like this:
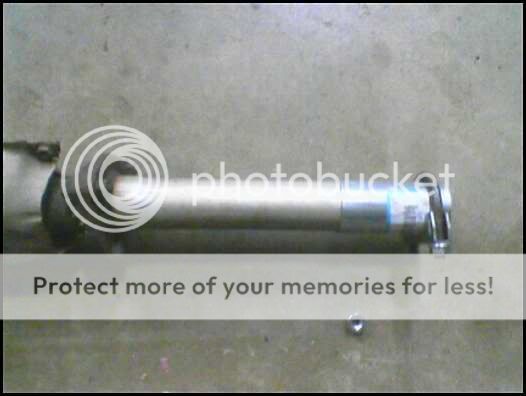
The part of the coupler against the cat side will be welded on, and the part of the coupler against the muffler side will be clamped after it is in the right position.
<u>***UPDATE 4/11/06***</u>
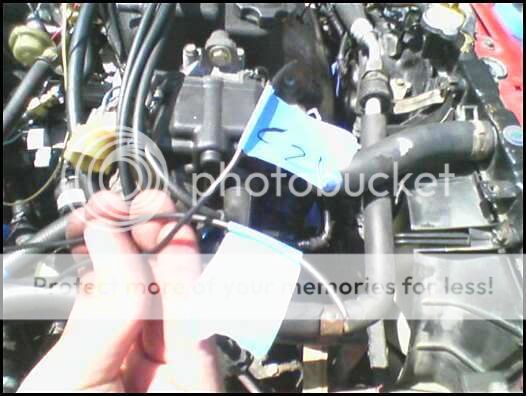
I managed to get all the wiring done today. After some difficulty with the distributor and TPS, that is. I had to get a little creative with the dizzy plug, lol. I also got the Injector Resistor Box mounted and wired in. Here's some pix of the car as it stands now:
<u>The ECU before I started hacking:</u>
<u>Injector Resistor Box Mounted:</u>
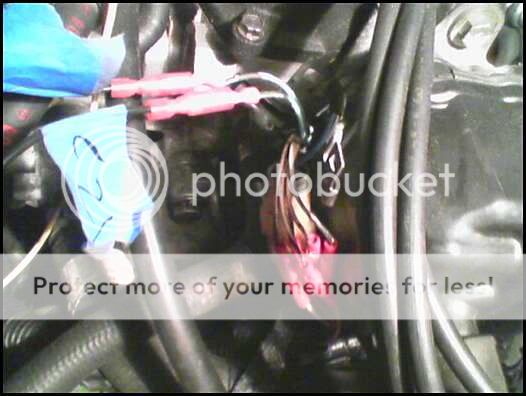
<u>Injectors wired up:</u>
<u>Always label your wires!</u>
<u>Air Intake On:</u>
It took a little creative surgery to get it to fit on the new Intake Manifold. Nothing a little sawzall action couldn't handle!
Exhaust is still waiting to be welded:

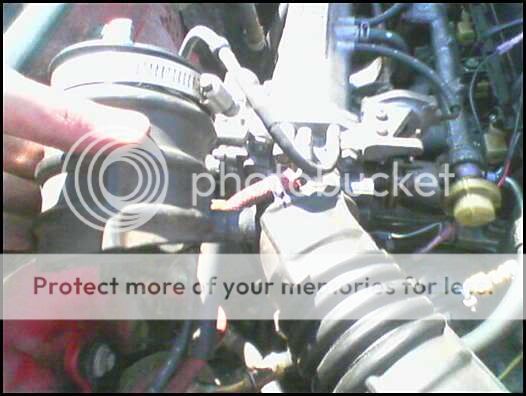
<u>My Creative Dizzy "Plug":</u>
I used crimp-on quick disconnects from Radio Shack so that if I needed to take the dizzy off I could. Usually people use an Si plug, but the junkyards around here are crap and had none. Who needs a plug?!
<u>***UPDATE 4/12/06***</u>
<FONT SIZE="5">CAR IS RUNNING!!!</FONT>
I filled the engine with oil and coolant, changed the filter, changed spark plug wires, plugs, distributor cap, rotor, and connected the shift linkage and shift linkage stabilizer.
I didn't have the exhaust welded up yet, so it was open header for now. I plugged in the new ECU and turned the key. It started up on the first crank! Man did that thing sound frickin' loud! I took it for a quick drive round the neighborhood just to let the neighbors know I finished the swap
I had a CEL for a code 10 for the IAT Sensor (Intake Air Temperature Sensor). I realized I had the wrong plug on it, so I lengthened the right plug and plugged it up! No more CEL! She runs like a dream now...
<u>***Another UPDATE 4/12/06*** </u>
Got the exhaust bolted up, she's not as loud as Normandy on D-day anymore...
<u>***UPDATE 4/19/06***</u>
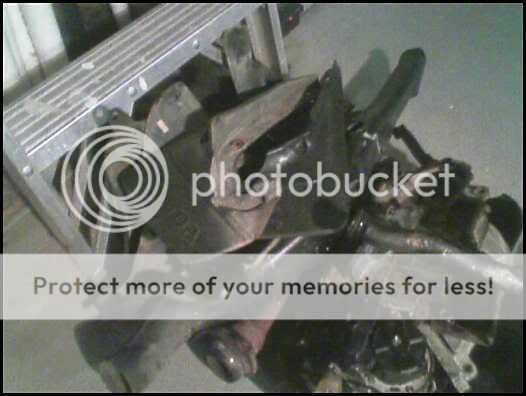
I started tearing down the old engine to part it out. (I'll be making a for sale thread soon, with inventory of everything I have, so watch out!)
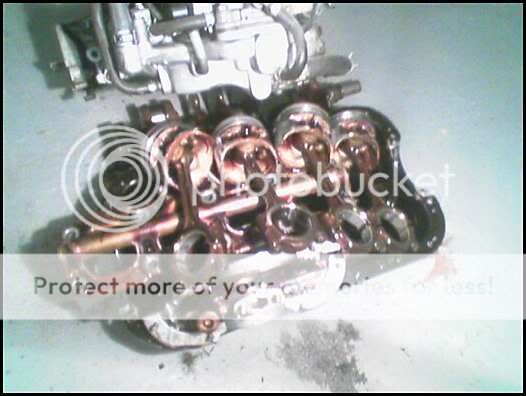
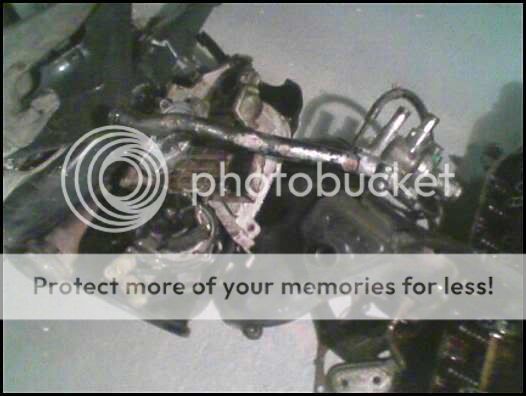
I got the exhaust manifold off, head off, crank pulley and tensioner and water pump off, T-belt covers off, etc. I'm gonna delve into the internals tomorrow or friday . So, if anyone needs some D series parts, the block, splash sheilds, those mudflaps I took off , bolts, etc., let me know! I'm parting out everything!
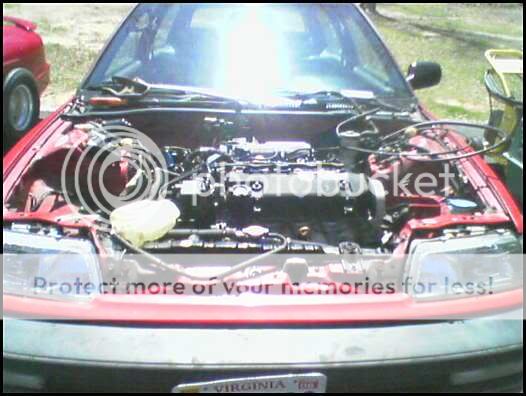
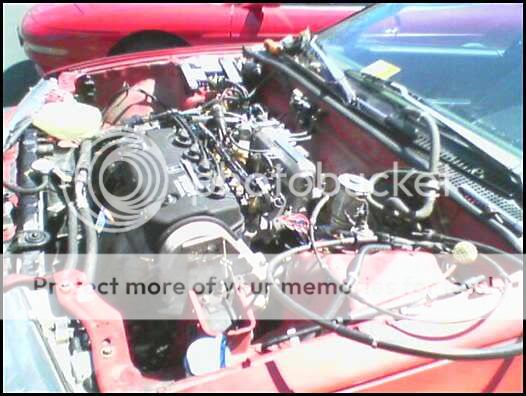
<u>Engine Before:</u>
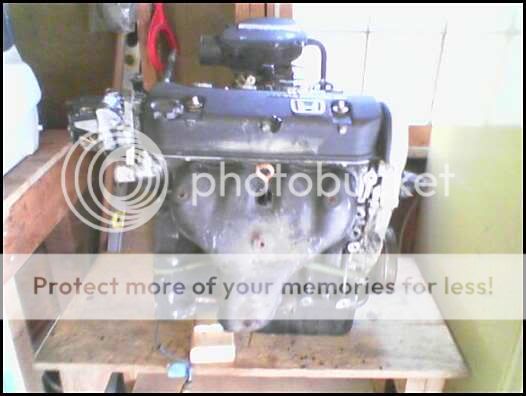
<u>Engine After:</u>
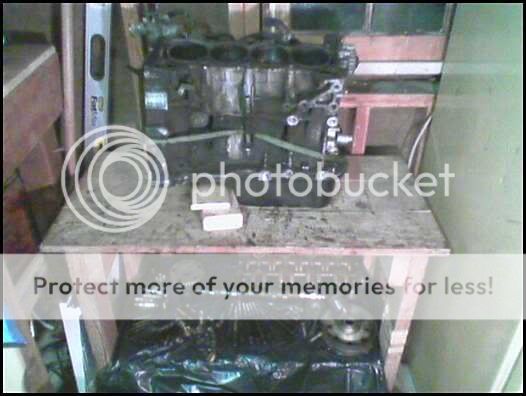
Notice the parts all neatly stacked underneath on top of plastic. Everything will be cleaned and re-cleaned before selling. So they look like new!
[<u>b]***Update 4/20/06***[/b]</u>
Engine Teardown Complete!

<U>***UPDATE 5/1/06***</U>
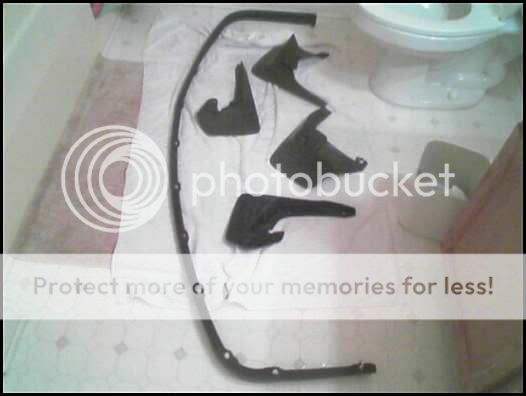
I went to the local pick and pull to get a lip for the Civic. I found a cool one from a V6 Acura Vigor or Legend or something. I held it up to an EF on the lot and it fit with minor trimming on the edges. Also, on the Civic I test fitted it on, there were a set of nice looking rear mudflaps! I had the set of fronts I removed sitting around and thought, hey, my car wouldn't look all that bad with a full set or flaps on it! So I picked those up.
The best part was, the whole set only cost me $0.70!!! That's right 70 CENTS!!!
Brought the whole set home and stuck them in the bathtub! Yes, that's my toilet in the pic.
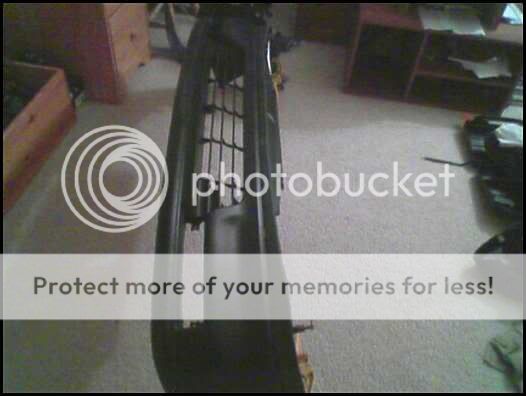
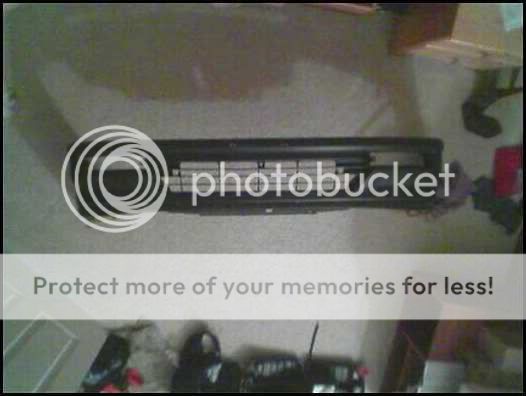
The lip is cool, it flares out wider at the end kinda like a mugen lip:

Tomorrow I'm taking off the bumpers and painting them along with the trim peices so that they aren't so faded.
<U>***UPDATE 5/2/06***</U>
Front bumper is off. I decided not to do that rear bumper, and just to mask it off. The front kinda needed to be removed though...
First I had to undo the headlights and turn signals. Then I removed that "filler" peice between the hood and the bumper. You can't get to the screws without doing this, so off it came:
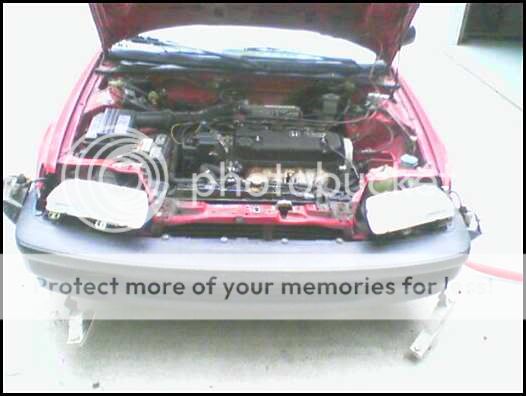
Then I finally could get to the screws that held on the bumper. And off it came!
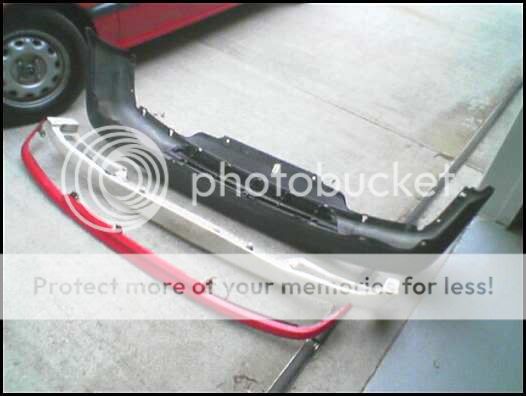
And then I bolted up the headlights and turn signals and I was good to go! It's gonna look good finally painted along with the rest of the trim.

<U>***UPDATE 5/3/06***</U>
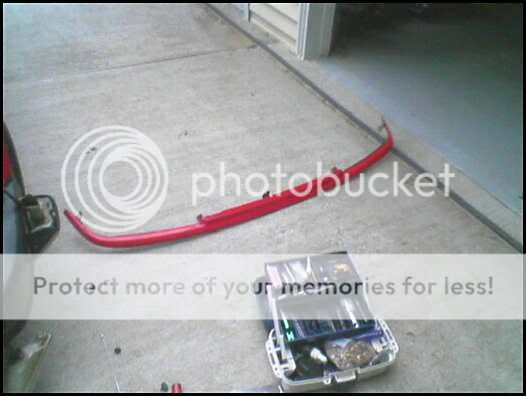
Got the lip installed and started painting! The lip needed a little modding to get it to fit. It was about 3 inches too wide, so I just forced it, clamped it, screwed it on and called it a day! Worked great! Clamping the corners in position first and then screwing it in really helped.
<U>Clamped on:</U>


I just forced the corners into place and then clamped it. Once the self-tapping screws and washers were on, I took off the clamps and voila! I got me a lip!
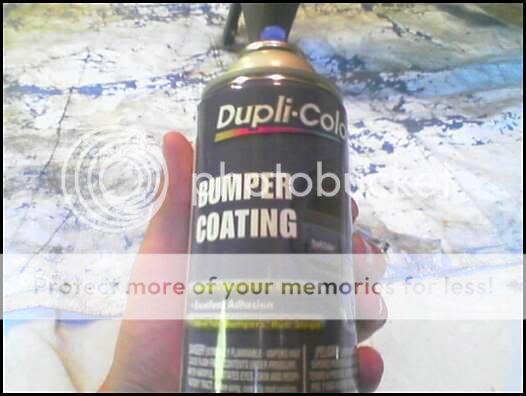
This is the paint I used. It works awesome!
<U>Fumes getting to me: </U>
</U>

<U>My high-tech paint booth: </U>

<U>After two coats and cutting excess lip off:</U>
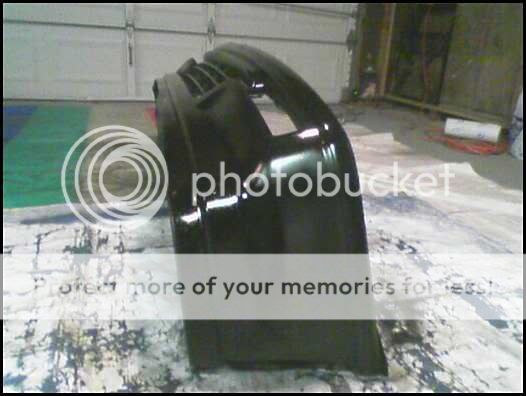
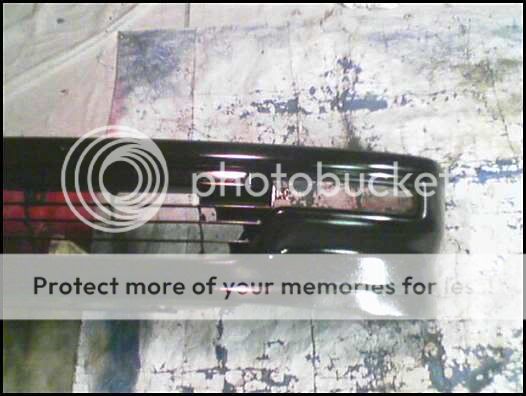
The paint is not glossy, it only looks like that because it is still wet. You can really see how good the lip came out in this pic!
<U>***UPDATE 5/4/06***</U> (Yes, I know the update is late... )
I masked off the entire car and finished painting the rest of the trim. It looks awesome! Maybe tomorrow I will get some shots with the real digi-cam after a nice wash. On with the pics!
<U>Masked off side trim and rear bumper:</U>
Let the painting begin!


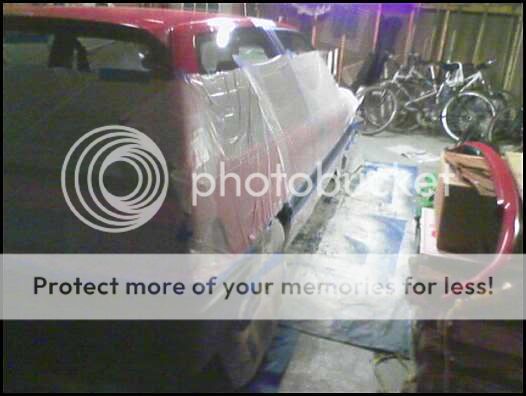

<U>Masked off the window trim after side trim dried:</U>

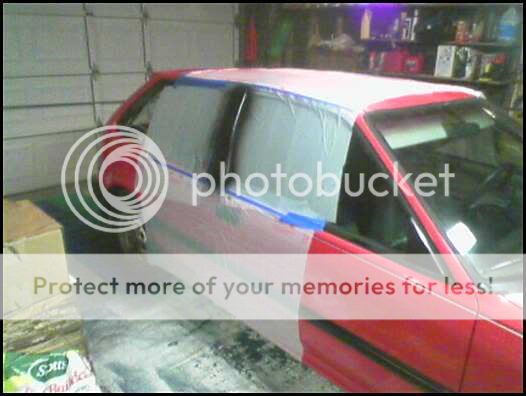
It looks sooo good after drying. This was all done at like 12:30 at night , so the following morning I removed the rest of the masking tape and plastic. I am so happy with how the lip turned out also. Looks amazing...
<U>***UPDATE 5/29/06***</U>
Not really an update, but I just wanted to show some "finished product" pics of the lip. Gave the car a nice wash n' wax, so here she is!


So, I need to borrow a digi-cam, I know, but I think she looks pretty damn good for a '91!
BTW: Look what the UPS man brought me!
Apexi WS II Exhaust! WOOT! I just gotta get my header and test pipe and it's all going on! Hehe, can't wait.
<U>***UPDATE 6/1/06***</U>
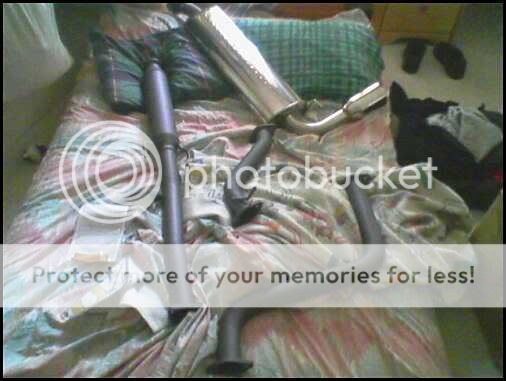
I went out and bought jdm_ef3's Si tranny, Centerforce Dual Friction Clutch, and Si Flywheel. The 4.250 final drive and five gears (Vs. my stock trannies four gears) should be really nice...
<U>Clutch w/ Flywheel attached:</U>
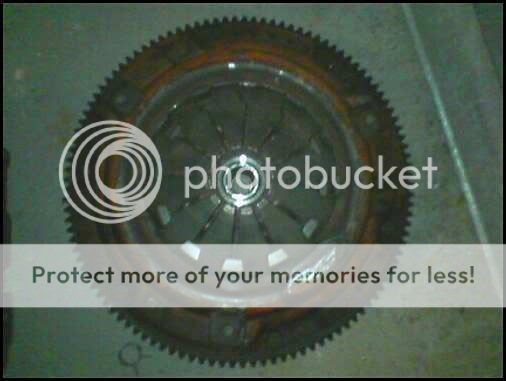
It's not rust, it's painted orange.
<U>Tranny:</U> (Shitty pix, I know...)

<U>Hardware:</U>
I gotta get a header and test pipe, and then EVERYTHING is going in at once. I should be able to feel quite a difference!
<U>***UPDATE 6/3/06***</U>
This was ordered last night off of RobearRacing.com:
<U>Megan Racing Header:</U>
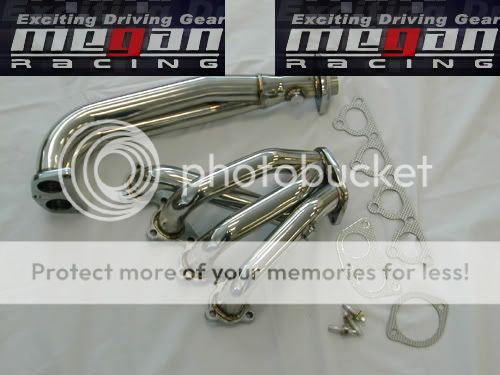

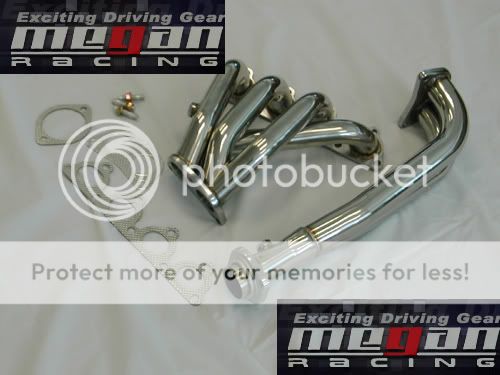
The stock header for the SOHC ZC is actually not that bad! It's a tubular header! However, the flange is a JDM one, (of course) and won't bolt up to my cat. (Correctly, that is. It's working now, but kinda crooked and with a MAJOR buzzing exhaust leak ) So, I am getting an Omni Power Test Pipe from DA-nteg so that when I am just normally riding around, I can have the performance I want, but when inspection time comes, the stock cat will bolt up to the header! It's perfect!
I'll probably lose a little power down low, but will gain up top where it counts!
<U>***UPDATE 6/19/06***</U>
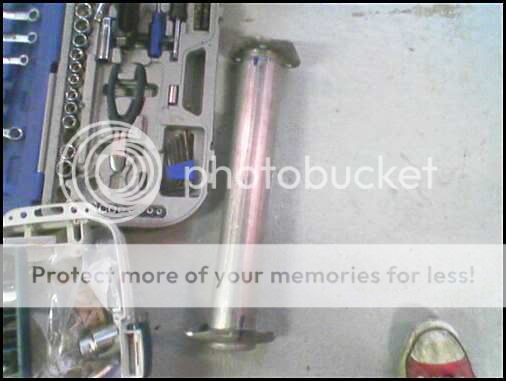
I went out and got some flange's for the test pipe that I now have to make! The Omni Power seller backed out, so I gotta fab up my own! I had a little trouble finding them, but got them at Napa! Who'da thunk it?
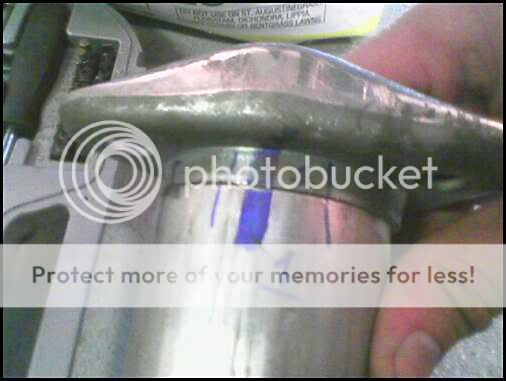
I immediately have a problem though. The donut gasket on the header (or whatever it's called) makes the flange stick out quite a bit!
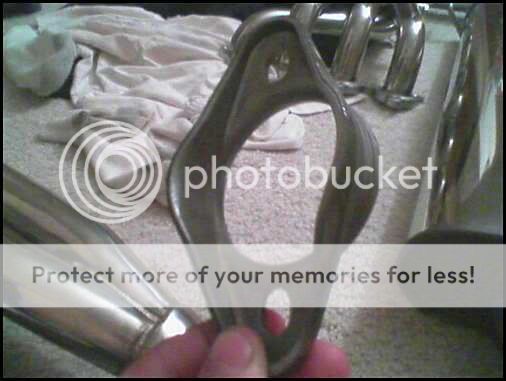
The Flange:
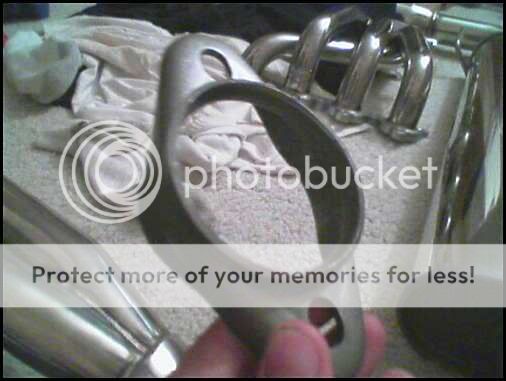
The Donut Gasket:
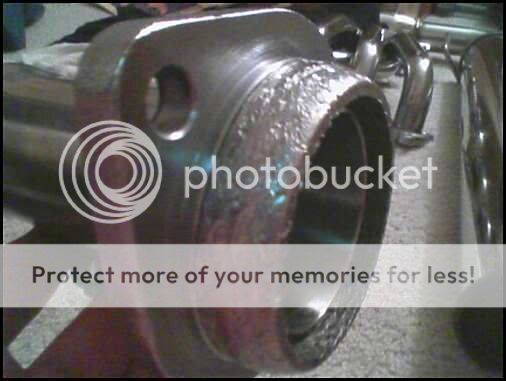
And, putting the two together:


I think that all it needs is to be tightened down REAL tight with the exhaust bolts. Wudya think?
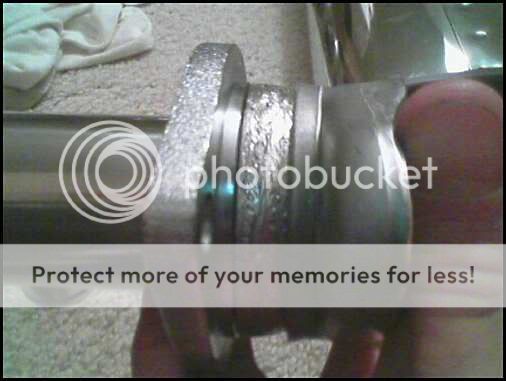
Here's a pic of the flange on the header without the donut gasket:

Fit's real flush!
The exhaust pipe flange actually fits awesome, thank God.

What should I do about the header flange?
<U>***UPDATE 6/27/06***</U>
I got the header and exhaust on! Due to the shitty rain, I doubt I'll be able to put the tranny on tomorrow.
But here's the pix for today!
First order of business was to get the old exhaust manifold off. That sucked! It's a good thing I never put it together correctly to begin with or it would have been really tough!
New header on:
Here's a real testament to Megan Racing. It bolted up PERFECTLY with the stock exhaust system and fit with NO problems. Here's to the nay-sayers
Perfect fit. Then I go and mess with it some more...
Then I had to pull off the stock exhaust.

Looks so puny compared to my new one! (1.75" vs. 2.36" )
New exhaust:
Bit of a gap there, we'll fix that later!
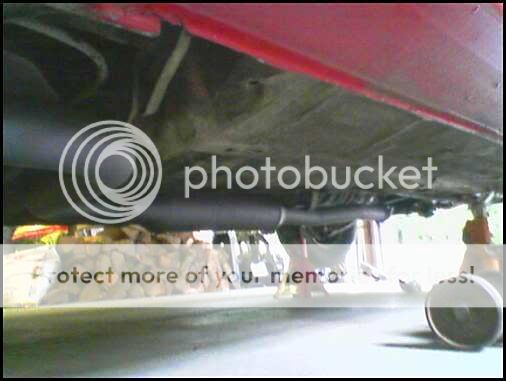

I was a bit concerned that due to the age of the exhaust hanger that the muffler would sit crooked like I've seen in so many pix, but it sits absolutely parrallel to the bumper. Looks great! I couldn't be happier!
Now to fill in that gap! I measured, measured, and measured one more time then broke out the saw-zall!
Here's the un-welded test pipe mocked up:
That last pic shows how I marked the correct clocking. Not only do you need the corect length, but you need the flanges to be rotated correctly in relation to each other.
So, as soon as the test pipe gets welded, I can bolt it all up and let her rip! I took her out on open header just for the hell of it, and wow, that was loud!
I will add updates on the swap progress and other misc. stuff as it comes!
Modified by Tippyman at 4:42 PM 6/27/2006
--------------------------------------------------------------------------------------------
Well, I've officially started modding my 91 Std. Civic Hatch!
The first order of business was to get rid of that ridiculous 4x4 stance and those awful mudflaps! Some H&R Sport Springs took care of that!
<u>Before:</u>
<u>After:</u>
Much nicer! Now on to other issues...
My engine as of now is pretty much screwed. It is only running on 3 cylinders. I think that the previous owner broke a timing belt, causing the valves to bend or break and rather than fixing it he sold it to me!
To top it all off, my distributor bearings are shot, which causes my distributor shaft to overheat. Which, in turn, caused my rotor to melt and eventually fried my TDC sensor. Without a TDC sensor, my ECU threw a code and my car consequently went into limp mode.
So, needless to say, I have decided to go ahead and try my hand at my first engine swap!
A SOHC ZC engine fresh from H Motors has already been ordered and is on the way!
I've already started getting things ready for the swap. I picked up an Injector Resistor Box from a DA Integra LS I found at the junkyard, because my car is DPFI and the ZC is MPFI.
The resistor box, however, looked like ***. It was rusted, pitted, and looked like a twinkie
.So I thought I'd spruce it up a little.
<u>Mid-Polish</u>
<u>Polished With Wire-Wheel</u>
<u>Sanded With 150 Grit</u>
It looks much better now! (For a twinkie, that is...)
The new engine needed a new computer so I bought a PM6 ECU off of E-Bay. Because the SOHC ZC is essentially a D16A6, this computer will work nicely. Maybe down the road a little chipping will give it better fuel management.
And, just for the hell of it I got a shift **** off of that junkyard LS.
<u>***UPDATE 3/27/06***</u>
I de-pinned a few ECU plugs I picked up off of a '90 DX Civic. (https://honda-tech.com/zerothread?id=1573760)
I can now use these pins for any wiring I need to do at the ECU.
Also, be careful when De-pinning...
<u>***UPDATE 3/28/06***</u>
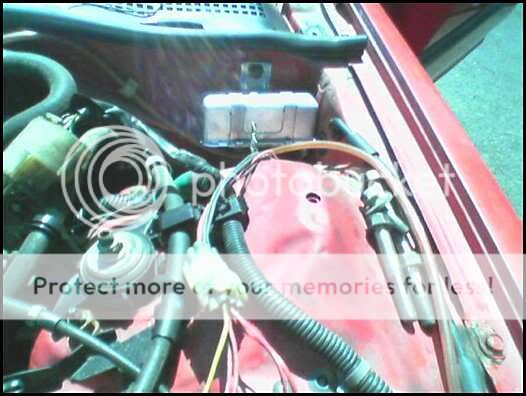
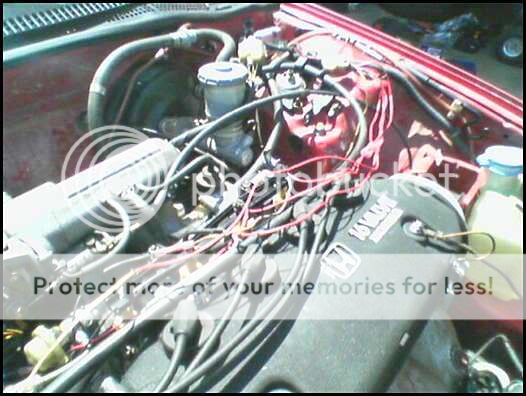
I "Gunked" my engine bay in preparation of the new engine. I figured, the less grease and mess, the better it will be to work on.
So, two cans of gunk and 30 min's later I had a (semi) clean engine bay!
Notice the plastic bags covering the battery tray and the distributor.
<u>***ANOTHER UPDATE 3/28/06***</u>
I went around and got some more stuff I needed for the swap:
<u>NGK Plugs</u>
These plugs are top of the line...
<u>Distributor Cap and Rotor</u>
<u>Oil Filter</u>
<u>Spark Plug Wires</u>
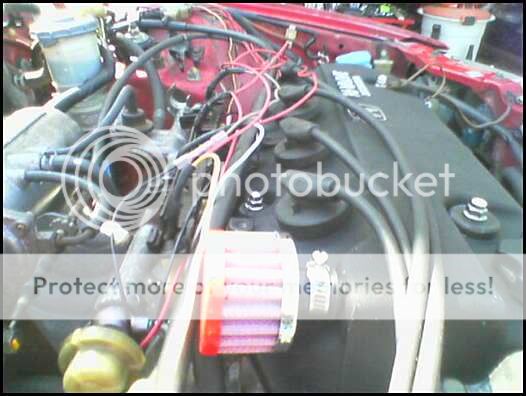
<u>My Ricey Valve-Cover Breather</u>
<u>"1 Quart Suction Gun"</u>
This is for filling my transmission with fluid once it's back on the car.
<u>Coolant</u>
I already got a bunch of 5W-30 Oil, but I still need to find some Penzoil Synchromesh Transmisison Fluid.
<u>***UPDATE 3/31/06***</u>
I picked up the engine today from HMO. Everything looks good from what I can see. It's all wrapped up in plastic and I'm not unwrapping it until I get it off the back of my Dad's truck.
I took the car over to my girlfriend's house and me and her little brother got it on jacks and ready to start working on tomorrow!
<u>***UPDATE 4/1/06***</u>
I've been working on the car this afternoon. I removed the hood and then I got the intake assembly out, battery tray out, cat, downpipe, splash sheilds, and I drained the oil and coolant.
The biggest part of the day was getting the engine outta the back of my dad's truck. The engine hoist was broken so we had to "fix" it. A lot of electrical tape and two hose clamps later, it worked well enough to use. So, I've got the engine pulling underway and the new engine sitting by ready to go in!
<u>***UPDATE 4/2/06***</u>
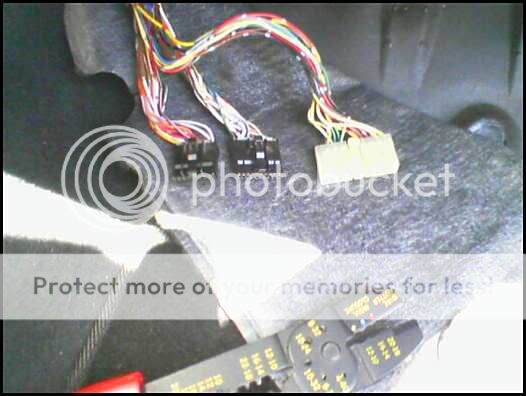
I got the entire wiring harness and all of the ground wires off of the motor. I also drained the tranny fluid and removed the throttle cable. She's getting closer to being removed!
<u>Wiring Harness:</u>
Notice the blue labels. I labelled all the connectors so it would be easier to transfer to the ZC motor.
<u>***UPDATE 4/5/06***</u>
I got to work on the car a little today. I managed to pull the axles off and remove the shift linkage stabilizer bar. I also unwrapped the engine and checked it out. Everything looks great! I came with the whole wiring harness which I was worried about. Now I have the right plugs if I need them.
<u>Axles out of car:</u>
BTW: Some people seem to have problems with the ball joints. This link has a tutorial that works PERFECT and it is simple as hell: https://honda-tech.com/zerothread?id=887859 (I used a 26 mm box-end wrench instead of a 1/2 inch socket wrench. It doesn't really matter what you use, so long as it fits snug when the hub is jacked all the way up.)
<u>Engine:</u>
ZC Baby!
<u>Exhaust A-Pipe:</u>
I requested that I be sent the entire exhaust manifold, and HMO came through! I checked, and it bolts right up to my cat! I am stoked that I can use the actual ZC header on the ZC motor instead of modding my nasty Std. one or going after market.
On Friday I am going to try to get that bitch pin out and take off all the radiator, coolant, and fuel hoses. Then I'll be ready to pull the engine and bolt the ZC in this weekend!
<u>***UPDATE 4/7/06***</u>
Well, today I really got some major progress done. The engine is finally out! What I thought was going to be a fairly simple pull turned out to be a bit of a headache. First problem was the bitch pin, which didn't wanna come out for anything.
So I decided to just unbolt it from the shifter. What I didn't realize is that it would hit the crossmember when we tried to pull the engine.
So we had to lower the car, move the passenger side jackstand, and pull the linkage all the way to the side so it would clear. It finally did and we pulled the motor. (The fact that the lift kept leaking fluid and we had to add more quickly or risk dropping the engine didn't help either...)
<u>Engine sitting on nothing but mounts and ready to get pulled out:</u>
I found out the radiator fan had to go or the header would hit it on the way out. So off it came.
And once that was done, out it came! (Eventually
)<u>The old, P.O.S. D15B1:</u>
Unfortunately, the weatherman is saying it will rain tomorrow so I covered the car and the new engine sitting near it, and called it a night. Hopefully I will at least be able to get some work done on it tomorrow...
<u>***UPDATE 4/8/06***</u>
Got a little bit of work done today. We managed to fix the lift. Replaced the hose and fittings, clamped it all down, and now it's good to go. (I hope). I started to put the stock wiring harness on the motor. Everything is going good except for the O2 sensor and one of the distributor sensors. I gotta figure those out.
The engine was out of an automatic car, so it still had the torque converter and flex plate attatched. Those were quickly removed.
<u>Torque Converter:</u>
Because there was no clutch, the clutch input pilot bearing wasn't there. I picked up one of those (a nice roller one, not a crappy brass one). Tomorrow I will get the tranny off of the old engine and bolt it onto the new engine as well as get most of the wiring sorted out. I hate wiring already...
<u>***UPDATE 4/9/06***</u>
Well, the update that everyone has been waiting for is here! The new engine is in! All mounts have been bolted down, all coolant hoses, vacuum lines, fuel line, throttle cable, clutch cable and some wiring has been hooked up. Any vacuum lines not needed have been plugged. The tranny is in but I still need to connect the shift linkage and shift linkage stabilizer and put in the axles.
Tomorrow I'll be trying to finish the wiring and the other misc. stuff that needs to be done. If I can get the wiring done, then wish me luck cause I'm gonna try to fire it up!
<u>Engine In! </u>
It's even got working AC hooked up!
The pics are obviously before I started hooking stuff up, but you get the idea.
Wish me luck for tomorrow!
<u>***UPDATE 4/10/06***</u>
Today I managed to get some work done on the car. I figured out where the negative battery terminal wire went, and hooked that up. (Finally! I felt like such an idiot...) Then I got the axles back in and hooked up all the suspension parts. I got the header bolted onto engine, but then I ran into a problem. While the header may bolt up to the cat, it was about three inches away from it! Me and my girlfriend's dad came up with a solution. We cut the exhaust pipe about 6 inches after the cat on the straight section.
<u>Cut Catalytic Converter:</u>
I went to Advance Auto Parts and picked up a 1.75" to 1.75" coupler and an exhaust clamp.
<u>Coupler and Clamp:</u>
This should allow up to add the neccesary three inches onto the exhaust pipe but still allow me to slide the cat around to meet the header correctly. If I just welded it on, it would allow for no movement. in the end it will look like this:
The part of the coupler against the cat side will be welded on, and the part of the coupler against the muffler side will be clamped after it is in the right position.
<u>***UPDATE 4/11/06***</u>
I managed to get all the wiring done today. After some difficulty with the distributor and TPS, that is. I had to get a little creative with the dizzy plug, lol. I also got the Injector Resistor Box mounted and wired in. Here's some pix of the car as it stands now:
<u>The ECU before I started hacking:</u>
<u>Injector Resistor Box Mounted:</u>
<u>Injectors wired up:</u>
<u>Always label your wires!</u>
<u>Air Intake On:</u>
It took a little creative surgery to get it to fit on the new Intake Manifold. Nothing a little sawzall action couldn't handle!
Exhaust is still waiting to be welded:
<u>My Creative Dizzy "Plug":</u>
I used crimp-on quick disconnects from Radio Shack so that if I needed to take the dizzy off I could. Usually people use an Si plug, but the junkyards around here are crap and had none. Who needs a plug?!
<u>***UPDATE 4/12/06***</u>
<FONT SIZE="5">CAR IS RUNNING!!!</FONT>
I filled the engine with oil and coolant, changed the filter, changed spark plug wires, plugs, distributor cap, rotor, and connected the shift linkage and shift linkage stabilizer.
I didn't have the exhaust welded up yet, so it was open header for now. I plugged in the new ECU and turned the key. It started up on the first crank! Man did that thing sound frickin' loud! I took it for a quick drive round the neighborhood just to let the neighbors know I finished the swap
I had a CEL for a code 10 for the IAT Sensor (Intake Air Temperature Sensor). I realized I had the wrong plug on it, so I lengthened the right plug and plugged it up! No more CEL! She runs like a dream now...
<u>***Another UPDATE 4/12/06*** </u>
Got the exhaust bolted up, she's not as loud as Normandy on D-day anymore...
<u>***UPDATE 4/19/06***</u>
I started tearing down the old engine to part it out. (I'll be making a for sale thread soon, with inventory of everything I have, so watch out!)
I got the exhaust manifold off, head off, crank pulley and tensioner and water pump off, T-belt covers off, etc. I'm gonna delve into the internals tomorrow or friday
. So, if anyone needs some D series parts, the block, splash sheilds, those mudflaps I took off , bolts, etc., let me know! I'm parting out everything!<u>Engine Before:</u>
<u>Engine After:</u>
Notice the parts all neatly stacked underneath on top of plastic. Everything will be cleaned and re-cleaned before selling. So they look like new!
[<u>b]***Update 4/20/06***[/b]</u>
Engine Teardown Complete!
<U>***UPDATE 5/1/06***</U>
I went to the local pick and pull to get a lip for the Civic. I found a cool one from a V6 Acura Vigor or Legend or something. I held it up to an EF on the lot and it fit with minor trimming on the edges. Also, on the Civic I test fitted it on, there were a set of nice looking rear mudflaps! I had the set of fronts I removed sitting around and thought, hey, my car wouldn't look all that bad with a full set or flaps on it! So I picked those up.
The best part was, the whole set only cost me $0.70!!! That's right 70 CENTS!!!
Brought the whole set home and stuck them in the bathtub! Yes, that's my toilet in the pic.
The lip is cool, it flares out wider at the end kinda like a mugen lip:
Tomorrow I'm taking off the bumpers and painting them along with the trim peices so that they aren't so faded.
<U>***UPDATE 5/2/06***</U>
Front bumper is off. I decided not to do that rear bumper, and just to mask it off. The front kinda needed to be removed though...
First I had to undo the headlights and turn signals. Then I removed that "filler" peice between the hood and the bumper. You can't get to the screws without doing this, so off it came:
Then I finally could get to the screws that held on the bumper. And off it came!
And then I bolted up the headlights and turn signals and I was good to go! It's gonna look good finally painted along with the rest of the trim.
<U>***UPDATE 5/3/06***</U>
Got the lip installed and started painting! The lip needed a little modding to get it to fit. It was about 3 inches too wide, so I just forced it, clamped it, screwed it on and called it a day! Worked great! Clamping the corners in position first and then screwing it in really helped.
<U>Clamped on:</U>
I just forced the corners into place and then clamped it. Once the self-tapping screws and washers were on, I took off the clamps and voila! I got me a lip!
This is the paint I used. It works awesome!
<U>Fumes getting to me:
</U><U>My high-tech paint booth:
</U><U>After two coats and cutting excess lip off:</U>
The paint is not glossy, it only looks like that because it is still wet. You can really see how good the lip came out in this pic!
<U>***UPDATE 5/4/06***</U> (Yes, I know the update is late...
)I masked off the entire car and finished painting the rest of the trim. It looks awesome! Maybe tomorrow I will get some shots with the real digi-cam after a nice wash.
On with the pics!<U>Masked off side trim and rear bumper:</U>
Let the painting begin!
<U>Masked off the window trim after side trim dried:</U>
It looks sooo good after drying. This was all done at like 12:30 at night
, so the following morning I removed the rest of the masking tape and plastic. I am so happy with how the lip turned out also. Looks amazing...<U>***UPDATE 5/29/06***</U>
Not really an update, but I just wanted to show some "finished product" pics of the lip. Gave the car a nice wash n' wax, so here she is!
So, I need to borrow a digi-cam, I know, but I think she looks pretty damn good for a '91!
BTW: Look what the UPS man brought me!
Apexi WS II Exhaust! WOOT! I just gotta get my header and test pipe and it's all going on! Hehe, can't wait.
<U>***UPDATE 6/1/06***</U>
I went out and bought jdm_ef3's Si tranny, Centerforce Dual Friction Clutch, and Si Flywheel. The 4.250 final drive and five gears (Vs. my stock trannies four gears) should be really nice...
<U>Clutch w/ Flywheel attached:</U>
It's not rust, it's painted orange.
<U>Tranny:</U> (Shitty pix, I know...)
<U>Hardware:</U>
I gotta get a header and test pipe, and then EVERYTHING is going in at once. I should be able to feel quite a difference!
<U>***UPDATE 6/3/06***</U>
This was ordered last night off of RobearRacing.com:
<U>Megan Racing Header:</U>
The stock header for the SOHC ZC is actually not that bad! It's a tubular header! However, the flange is a JDM one, (of course) and won't bolt up to my cat. (Correctly, that is. It's working now, but kinda crooked and with a MAJOR buzzing exhaust leak
) So, I am getting an Omni Power Test Pipe from DA-nteg so that when I am just normally riding around, I can have the performance I want, but when inspection time comes, the stock cat will bolt up to the header! It's perfect!I'll probably lose a little power down low, but will gain up top where it counts!
<U>***UPDATE 6/19/06***</U>
I went out and got some flange's for the test pipe that I now have to make! The Omni Power seller backed out, so I gotta fab up my own! I had a little trouble finding them, but got them at Napa! Who'da thunk it?
I immediately have a problem though. The donut gasket on the header (or whatever it's called) makes the flange stick out quite a bit!
The Flange:
The Donut Gasket:
And, putting the two together:
I think that all it needs is to be tightened down REAL tight with the exhaust bolts. Wudya think?
Here's a pic of the flange on the header without the donut gasket:
Fit's real flush!
The exhaust pipe flange actually fits awesome, thank God.
What should I do about the header flange?
<U>***UPDATE 6/27/06***</U>
I got the header and exhaust on! Due to the shitty rain, I doubt I'll be able to put the tranny on tomorrow.
But here's the pix for today!
First order of business was to get the old exhaust manifold off. That sucked! It's a good thing I never put it together correctly to begin with or it would have been really tough!
New header on:
Here's a real testament to Megan Racing. It bolted up PERFECTLY with the stock exhaust system and fit with NO problems. Here's to the nay-sayers
Perfect fit. Then I go and mess with it some more...
Then I had to pull off the stock exhaust.
Looks so puny compared to my new one! (1.75" vs. 2.36"
)New exhaust:
Bit of a gap there, we'll fix that later!
I was a bit concerned that due to the age of the exhaust hanger that the muffler would sit crooked like I've seen in so many pix, but it sits absolutely parrallel to the bumper. Looks great! I couldn't be happier!
Now to fill in that gap! I measured, measured, and measured one more time then broke out the saw-zall!
Here's the un-welded test pipe mocked up:
That last pic shows how I marked the correct clocking. Not only do you need the corect length, but you need the flanges to be rotated correctly in relation to each other.
So, as soon as the test pipe gets welded, I can bolt it all up and let her rip! I took her out on open header just for the hell of it, and wow, that was loud!
I will add updates on the swap progress and other misc. stuff as it comes!
Modified by Tippyman at 4:42 PM 6/27/2006


EFSS153
Joined: Oct 2004
Posts: 15,826
Likes: 1
From: Tornado Alley
<TABLE WIDTH="90%" CELLSPACING=0 CELLPADDING=0 ALIGN=CENTER><TR><TD>Quote, originally posted by DxHatchback »</TD></TR><TR><TD CLASS="quote">this is one long post
</TD></TR></TABLE>
No kidding.
nice work.
</TD></TR></TABLE>
No kidding.
nice work.

Honda-Tech Member
Joined: Dec 2003
Posts: 1,916
Likes: 0
From: Kingdom of Allah, VA; US
<TABLE WIDTH="90%" CELLSPACING=0 CELLPADDING=0 ALIGN=CENTER><TR><TD>Quote, originally posted by DxHatchback »</TD></TR><TR><TD CLASS="quote">this is one long post
looks good so far tho </TD></TR></TABLE>
looks good so far tho </TD></TR></TABLE>
Honda-Tech Member
Joined: Aug 2002
Posts: 12,100
Likes: 0
From: Stockton, CA. 209
nice project ive always wanted to that to my daily drivers but i have never been able to keep them long enough , either gettin stolen or somebody wrecking into me 
ive always wanted to that to my daily drivers but i have never been able to keep them long enough , either gettin stolen or somebody wrecking into me
Trending Topics
Honda-Tech Member
Joined: Jan 2002
Posts: 8,508
Likes: 2
From: everyone has their price, NJ, USA
<TABLE WIDTH="90%" CELLSPACING=0 CELLPADDING=0 ALIGN=CENTER><TR><TD>Quote, originally posted by scrEaMOdc2 »</TD></TR><TR><TD CLASS="quote">i just love it when people waste time with single cams and sport springs...
btw the mud flaps make the car look hot....</TD></TR></TABLE>
You're not a ****** or anything
btw the mud flaps make the car look hot....</TD></TR></TABLE>
You're not a ****** or anything
Honda-Tech Member
Joined: Aug 2002
Posts: 12,100
Likes: 0
From: Stockton, CA. 209
<TABLE WIDTH="90%" CELLSPACING=0 CELLPADDING=0 ALIGN=CENTER><TR><TD>Quote, originally posted by scrEaMOdc2 »</TD></TR><TR><TD CLASS="quote">i just love it when people waste time with single cams and sport springs...
btw the mud flaps make the car look hot....</TD></TR></TABLE>
lol wtf ?
btw the mud flaps make the car look hot....</TD></TR></TABLE>
lol wtf ?

Honda-Tech Member
Joined: Sep 2003
Posts: 8,774
Likes: 0
From: Blitzburgh.
<TABLE WIDTH="90%" CELLSPACING=0 CELLPADDING=0 ALIGN=CENTER><TR><TD>Quote, originally posted by scrEaMOdc2 »</TD></TR><TR><TD CLASS="quote">i just love it when people waste time with single cams and sport springs...
btw the mud flaps make the car look hot....</TD></TR></TABLE>
shut up sheep boy
good work with the project dude
btw the mud flaps make the car look hot....</TD></TR></TABLE>
shut up sheep boy
good work with the project dude
Thread Starter
Honda-Tech Member
Joined: Jul 2004
Posts: 9,846
Likes: 0
From: VA, USA
<TABLE WIDTH="90%" CELLSPACING=0 CELLPADDING=0 ALIGN=CENTER><TR><TD>Quote, originally posted by ekcivic9 »</TD></TR><TR><TD CLASS="quote">hey tippy, how much car knowledge / experience did you have before taking on this big project?</TD></TR></TABLE>
HAHA!!! DUDE!!! That's the most awesome thing. The only thing I had ever done on cars before this was change ******* oil!!! All I did was be on Honda-Tech for like 2 years. I learned alot online, and when my engine went I decided to go for it!
Everyone was so impressed (me mostly, lol ) that I managed to pull it off with no experience! (I'm only 18.)
I was SOOOO stoked when it started, you have no idea!
HAHA!!! DUDE!!! That's the most awesome thing. The only thing I had ever done on cars before this was change ******* oil!!! All I did was be on Honda-Tech for like 2 years. I learned alot online, and when my engine went I decided to go for it!
Everyone was so impressed (me mostly, lol
) that I managed to pull it off with no experience! (I'm only 18.)I was SOOOO stoked when it started, you have no idea!


Honda-Tech Member

Joined: Jul 2004
Posts: 2,325
Likes: 0
From: driving an uglyassshatch in ATL, Ga
<TABLE WIDTH="90%" CELLSPACING=0 CELLPADDING=0 ALIGN=CENTER><TR><TD>Quote, originally posted by 9civichatch3 »</TD></TR><TR><TD CLASS="quote">nice write up </TD></TR></TABLE>
</TD></TR></TABLE>
Honda-Tech Member
iTrader: (1)
Joined: Feb 2004
Posts: 10,587
Likes: 1
From: Land of the SkanKz Cali 562, Ca, USA
<TABLE WIDTH="90%" CELLSPACING=0 CELLPADDING=0 ALIGN=CENTER><TR><TD>Quote, originally posted by Falkien »</TD></TR><TR><TD CLASS="quote">good ****.</TD></TR></TABLE>
Honda-Tech Member
Joined: Jan 2002
Posts: 8,508
Likes: 2
From: everyone has their price, NJ, USA
Tippy I found a local ZC longblock for $350! Also you should get a Si tranny and really feel the difference