

How To Omni Full Coilover Install(56k Probally not)

Thread Starter
Honda-Tech Member
Joined: Jul 2001
Posts: 5,792
Likes: 0
From: OUT OF THE BASMENT, US
Well I originally had some crappy Aerospeed coil-over sleeves with stock shocks which sucked major *** so I figured I get some REAL coil-overs and get rid of the crappy ones with the stock blown shocks 
This is how I installed them not saying this is the proper way if installing it but I did it this way and it worked great.
First off here are a few before pics
It was a little too low for my liking and every time i hit a bump the car would completely go out of control. Or if im on the expressway it would dip into the grooves that the trucks make and it was very scary so anyways to the pics
Before pics
For all you thieves Previous owners plates


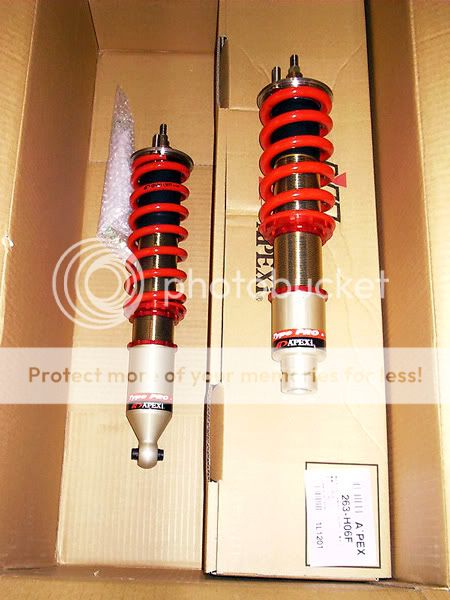
The new toys

First what i did cause the car is so low I had to drive on top of two 2"x4" so i could get the jack under the car.
I installed the two front first, and used 2 wheel chocks behind the rear wheels so the car wouldn't roll back and used two jack stands to support the front so the car doesn't fall on me and i die


So then I loosened and removed the bolt for the damper fork nut


Then I removed the bolt that holds the Fork onto the shock. After you remove that bolt you should be able to remove the fork off the shock by wiggling it a little and you should be left with this

Then Remove the 2 bolts holding the brake lines onto the shocks

You can probably discard of those two bolts cause most of the after-market shocks don't have a spot to bolt the brake lines up to so most people just zip tie the lines to the shocks
Next carefully remove the two nuts that hold the shock in under the hood
DO NOT REMOVE THE MIDDLE NUT

Be sure to hold the bottom of the shock while removing these two nuts because once you completely remove the two bolts the shock will fall to the ground.
Now its time to install the new coil-overs

Gotta love stock shocks with after-market springs
Now basically install in reverse of removal

When installing the new shocks I zip tied the brake lines like so


Now repeat the following for the other side

mmmm blown shocks

Now Jack up the rear and make sure the car is in gear and also make sure you put a brick or wheel chocks under the front tires so the car doesn't roll when you jack it up. Also make sure to put jack stands under the car.
First I removed the two bolts in the trunk holding the jack into place


Then remove the bolt on the bottom holding the shock into place

Once this bolt is remove it will require a little wiggling and possible hammering of the top of the shock to remove the shock.
Once the shock is removed you are ready to install the new one


As you will notice the rear stock shock are threaded on for the bottom nut. That means for the new shock it will require finding a new nut and washer for reassembly. I found two laying around that fit so I just used those.
When resembling be sure to torque everything down to spec.
Now repeat for the other side

Then the fun part comes to make sure the car is all level
This probably took longer than the whole install process
It requires measure the car from different points on a level ground and then jacking the car back up making sure all four corners are as equal as possible.
I still need to raise the car up a little bit cause its still a little too low for me but it started raining so I called it a day.
Finished product


ALSO WHAT I DID WHEN I INSTALLED ALL THE NEW BOLTS I APPLIED ANTI-SEIZE ON ALL THE BOLTS AND LUG NUTS TO PREVENT RUST
Overall the coil-overs are stiff and you do feel a lot of the small bumps but it handles great at high speeds.
The car definitely needs an alignment at minimum, and probably tires. The car is all over the road depending on how good the road is.
But i tested it out last night and took some turns at some quick speeds and the car had no body roll unlike the previous owners crappy setup
Open for all questions and comments
Enjoy
This is how I installed them not saying this is the proper way if installing it but I did it this way and it worked great.
First off here are a few before pics
It was a little too low for my liking and every time i hit a bump the car would completely go out of control. Or if im on the expressway it would dip into the grooves that the trucks make and it was very scary so anyways to the pics
Before pics
For all you thieves
Previous owners platesThe new toys
First what i did cause the car is so low I had to drive on top of two 2"x4" so i could get the jack under the car.
I installed the two front first, and used 2 wheel chocks behind the rear wheels so the car wouldn't roll back and used two jack stands to support the front so the car doesn't fall on me and i die
So then I loosened and removed the bolt for the damper fork nut
Then I removed the bolt that holds the Fork onto the shock. After you remove that bolt you should be able to remove the fork off the shock by wiggling it a little and you should be left with this
Then Remove the 2 bolts holding the brake lines onto the shocks
You can probably discard of those two bolts cause most of the after-market shocks don't have a spot to bolt the brake lines up to so most people just zip tie the lines to the shocks
Next carefully remove the two nuts that hold the shock in under the hood
DO NOT REMOVE THE MIDDLE NUT
Be sure to hold the bottom of the shock while removing these two nuts because once you completely remove the two bolts the shock will fall to the ground.
Now its time to install the new coil-overs
Gotta love stock shocks with after-market springs
Now basically install in reverse of removal
When installing the new shocks I zip tied the brake lines like so
Now repeat the following for the other side
mmmm blown shocks
Now Jack up the rear and make sure the car is in gear and also make sure you put a brick or wheel chocks under the front tires so the car doesn't roll when you jack it up. Also make sure to put jack stands under the car.
First I removed the two bolts in the trunk holding the jack into place
Then remove the bolt on the bottom holding the shock into place
Once this bolt is remove it will require a little wiggling and possible hammering of the top of the shock to remove the shock.
Once the shock is removed you are ready to install the new one
As you will notice the rear stock shock are threaded on for the bottom nut. That means for the new shock it will require finding a new nut and washer for reassembly. I found two laying around that fit so I just used those.
When resembling be sure to torque everything down to spec.
Now repeat for the other side
Then the fun part comes to make sure the car is all level
This probably took longer than the whole install process
It requires measure the car from different points on a level ground and then jacking the car back up making sure all four corners are as equal as possible.
I still need to raise the car up a little bit cause its still a little too low for me but it started raining so I called it a day.
Finished product
ALSO WHAT I DID WHEN I INSTALLED ALL THE NEW BOLTS I APPLIED ANTI-SEIZE ON ALL THE BOLTS AND LUG NUTS TO PREVENT RUST
Overall the coil-overs are stiff and you do feel a lot of the small bumps but it handles great at high speeds.
The car definitely needs an alignment at minimum, and probably tires. The car is all over the road depending on how good the road is.
But i tested it out last night and took some turns at some quick speeds and the car had no body roll unlike the previous owners crappy setup
Open for all questions and comments
Enjoy
Thread Starter
Honda-Tech Member
Joined: Jul 2001
Posts: 5,792
Likes: 0
From: OUT OF THE BASMENT, US
<TABLE WIDTH="90%" CELLSPACING=0 CELLPADDING=0 ALIGN=CENTER><TR><TD>Quote, originally posted by b cruz »</TD></TR><TR><TD CLASS="quote">you forgot to preload.</TD></TR></TABLE>
Woops I knew I forgot to mention something
thanks
Woops I knew I forgot to mention something
thanks
Honda-Tech Member
Joined: Aug 2003
Posts: 1,099
Likes: 0
From: Canada
<TABLE WIDTH="90%" CELLSPACING=0 CELLPADDING=0 ALIGN=CENTER><TR><TD>Quote, originally posted by b cruz »</TD></TR><TR><TD CLASS="quote">you forgot to preload</TD></TR></TABLE>
Whats preloading?
Whats preloading?
Honda-Tech Member
Joined: Nov 2001
Posts: 15,366
Likes: 0
From: CALIFORNIA
<TABLE WIDTH="90%" CELLSPACING=0 CELLPADDING=0 ALIGN=CENTER><TR><TD>Quote, originally posted by hondasport2000 »</TD></TR><TR><TD CLASS="quote">
Whats preloading?
</TD></TR></TABLE>
basically you loosen the top nut(that holds the springs and top hat in place), set car on the floor(so it weighs it down), then tighten the nut back up. It compresses the spring so there isn't any play. the top percehs are strictly for preloading. you adjust height by the lower perch.
Trending Topics
Joined: Mar 2004
Posts: 182
Likes: 0
From: texas, USA
<TABLE WIDTH="90%" CELLSPACING=0 CELLPADDING=0 ALIGN=CENTER><TR><TD>Quote, originally posted by hondasport2000 »</TD></TR><TR><TD CLASS="quote">Whats preloading?</TD></TR></TABLE>
i would like to know as well
i would like to know as well
Thread Starter
Honda-Tech Member
Joined: Jul 2001
Posts: 5,792
Likes: 0
From: OUT OF THE BASMENT, US
<TABLE WIDTH="90%" CELLSPACING=0 CELLPADDING=0 ALIGN=CENTER><TR><TD>Quote, originally posted by chronodyne28 »</TD></TR><TR><TD CLASS="quote">I've seen this writeup a few times before but this is best written one. Nice job man. </TD></TR></TABLE>
Thank you i tried my best not to forget any thing
-Brian
</TD></TR></TABLE>Thank you i tried my best not to forget any thing
-Brian
Thread Starter
Honda-Tech Member
Joined: Jul 2001
Posts: 5,792
Likes: 0
From: OUT OF THE BASMENT, US
<TABLE WIDTH="90%" CELLSPACING=0 CELLPADDING=0 ALIGN=CENTER><TR><TD>Quote, originally posted by RacerBoy »</TD></TR><TR><TD CLASS="quote">Awesome write up Brian...now you can actually try and keep up with my vw! LOL jk.</TD></TR></TABLE>
Once i get my new tires and get the car aligned your done
-Brian
Once i get my new tires and get the car aligned your done
-Brian
Honda-Tech Member
Joined: Mar 2003
Posts: 5,504
Likes: 2
From: Queens, NY, USA
As i said in other threads lets see how they hold up in the long run. I paid double the cost of those so lets see if they made 'em equal better or worse.
They look exactly like mine! on the inside may be a different story however
They look exactly like mine! on the inside may be a different story however
Thread Starter
Honda-Tech Member
Joined: Jul 2001
Posts: 5,792
Likes: 0
From: OUT OF THE BASMENT, US
those look really nice
<TABLE WIDTH="90%" CELLSPACING=0 CELLPADDING=0 ALIGN=CENTER><TR><TD>Quote, originally posted by Andres-eh2 »</TD></TR><TR><TD CLASS="quote">As i said in other threads lets see how they hold up in the long run. I paid double the cost of those so lets see if they made 'em equal better or worse.
They look exactly like mine! on the inside may be a different story however</TD></TR></TABLE>
<TABLE WIDTH="90%" CELLSPACING=0 CELLPADDING=0 ALIGN=CENTER><TR><TD>Quote, originally posted by Andres-eh2 »</TD></TR><TR><TD CLASS="quote">As i said in other threads lets see how they hold up in the long run. I paid double the cost of those so lets see if they made 'em equal better or worse.
They look exactly like mine! on the inside may be a different story however
</TD></TR></TABLE>

Thread Starter
Honda-Tech Member
Joined: Jul 2001
Posts: 5,792
Likes: 0
From: OUT OF THE BASMENT, US
<TABLE WIDTH="90%" CELLSPACING=0 CELLPADDING=0 ALIGN=CENTER><TR><TD>Quote, originally posted by yellowturbo »</TD></TR><TR><TD CLASS="quote">now how do you like them on the road or on a track ??? </TD></TR></TABLE>
Well I havent driven at the track with them and my car needs new tires so i will really have to keep you updated
Well I havent driven at the track with them and my car needs new tires so i will really have to keep you updated
Honda-Tech Member

Joined: Jun 2003
Posts: 3,031
Likes: 1
From: northwest, WA
i keep seeing posts about these.........
might be getting a set but how do they compare to the koni yellow / ground control setup......
nice write-up
might be getting a set but how do they compare to the koni yellow / ground control setup......
nice write-up
Thread Starter
Honda-Tech Member
Joined: Jul 2001
Posts: 5,792
Likes: 0
From: OUT OF THE BASMENT, US
<TABLE WIDTH="90%" CELLSPACING=0 CELLPADDING=0 ALIGN=CENTER><TR><TD>Quote, originally posted by QuickSilverEH2 »</TD></TR><TR><TD CLASS="quote">nice write up, i plan on buying these</TD></TR></TABLE>
best for the $$$$$
best for the $$$$$
Thread Starter
Honda-Tech Member
Joined: Jul 2001
Posts: 5,792
Likes: 0
From: OUT OF THE BASMENT, US
<TABLE WIDTH="90%" CELLSPACING=0 CELLPADDING=0 ALIGN=CENTER><TR><TD>Quote, originally posted by atc5 »</TD></TR><TR><TD CLASS="quote">GREAT writeup, thanks!
now if only mine would arrive :/</TD></TR></TABLE>
Id have to say that Camp1320 sent them very quick to me
thanks
now if only mine would arrive :/</TD></TR></TABLE>
Id have to say that Camp1320 sent them very quick to me
thanks