

The BB4 Rebirth

Thread Starter


Joined: Jun 2006
Posts: 2,721
Likes: 13
From: Vancouver Canada
Well guys/girls i've been a member on these boards for quiet some time. This was the first site I ever registered for after setting foot into a local performance shop and seeing the guy behind the counter sitting online. He suggested I sign up and the rest is history. I've been building this car for the last year and have it posted on preludepower.com but figured I'd throw it up on here for my fellow Honda-techians to see as well.
The story starts like this, last summer a week before Canada Day I got rid of my last prelude shell (was leaving my garage once the new one arrived) and was considering getting out of the Honda game completely and moving on to something else. These damn 4th gen's just keep pulling me back and I started looking for a half decent shell to start with. I actually searched the entire country telling myself if the shell is clean enough i'll catch flight and drive it back sight unseen. Being in Canada the majority of 4th gen preludes are rusted out due to winters, treated like crap, and most of them at this point in their lives have been abused by teenagers. It was no easy task but after a week of searching I found a prelude that met my criteria; black, manual, low km's, 94+, next to no rust, SRV (si trim in the US) leather/H22a1.
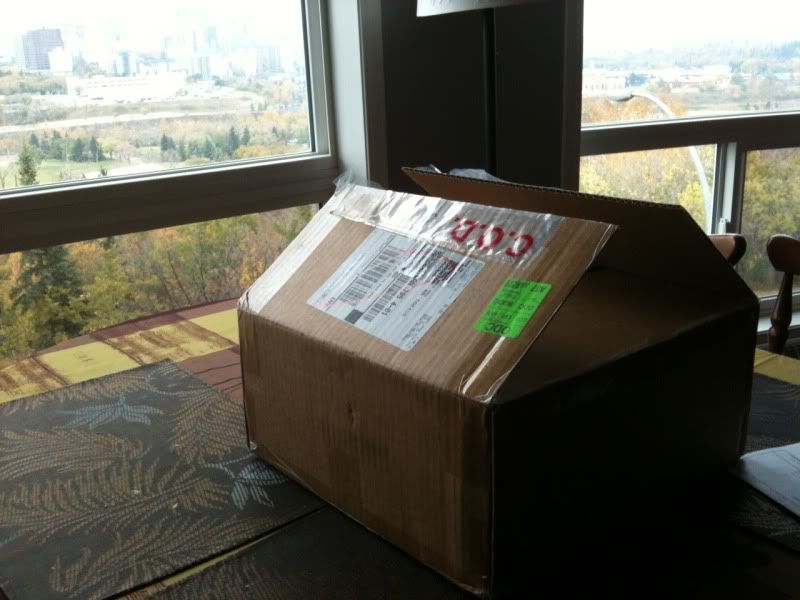
It just so happened this prelude was located in Hamilton Ontario a small city outside of Toronto. I called the owner and told him consider it sold, as long as he holds it for me i'll book a flight. He was skeptical and his Dad was skeptical as well having a hard time believing someone would actually fly across Canada to buy an older car like that. I am located in Edmonton Alberta, which is about 3500km away from Hamilton. But they held it and when I arrived in Hamilton on Canada Day I found the two of them Holding a cardboard sign with my name on it lol.
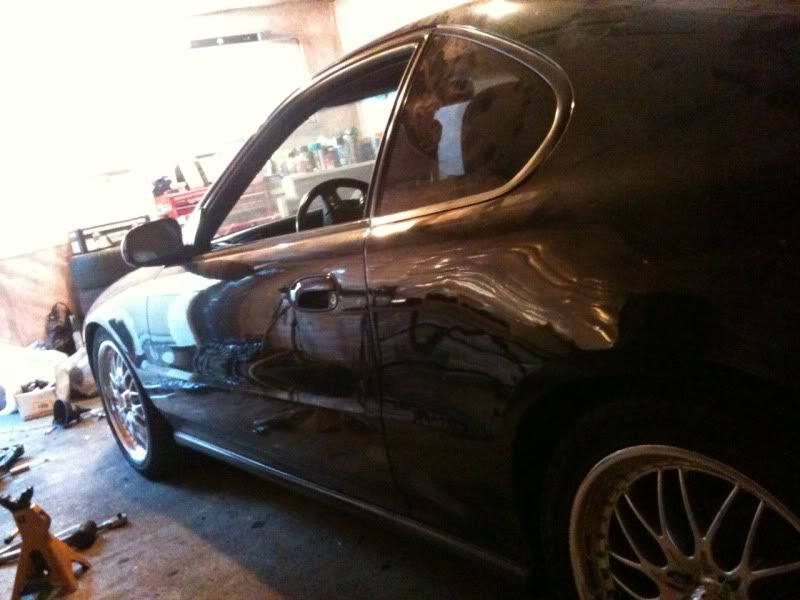
The first thing we did was check the car out. I gotta say, I was less than impressed upon arrival with the true condition of the car. I wasn't exactly given the correct information about the car. It burnt quiet a bit of oil which I found out later, the body was just painted, but the body work and paint work were pretty shotty and weld seams were showing, the leather seats were in rough condition and a rear quarter panel was punched in and poorly repaired. Regardless, it was the best I could find in Canada at the time.
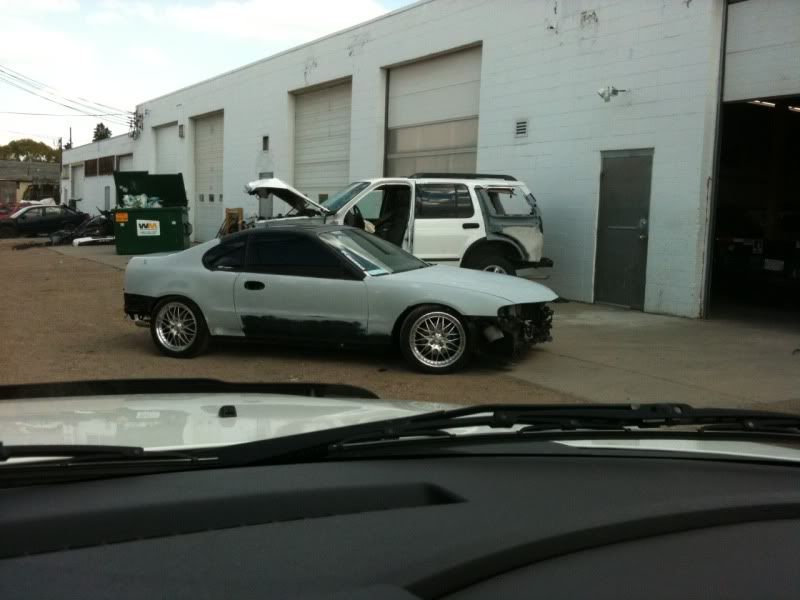
This was the picture I was sent
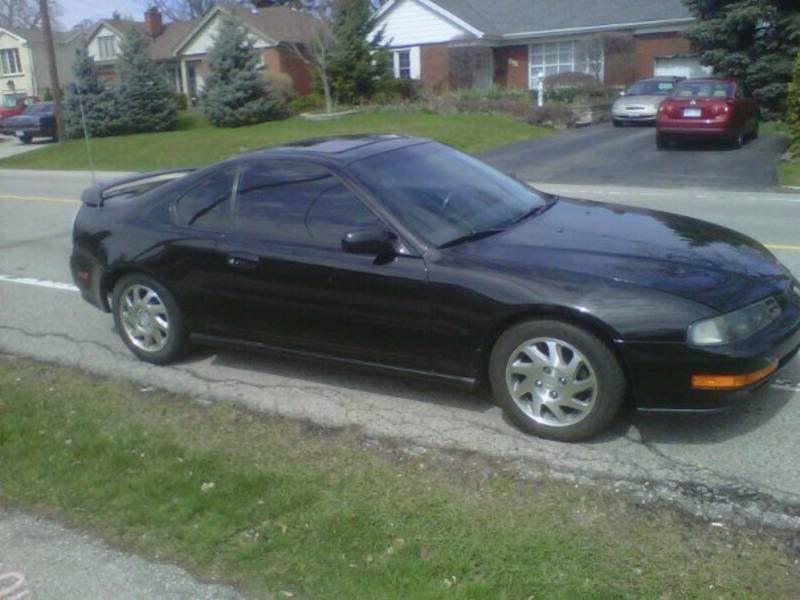
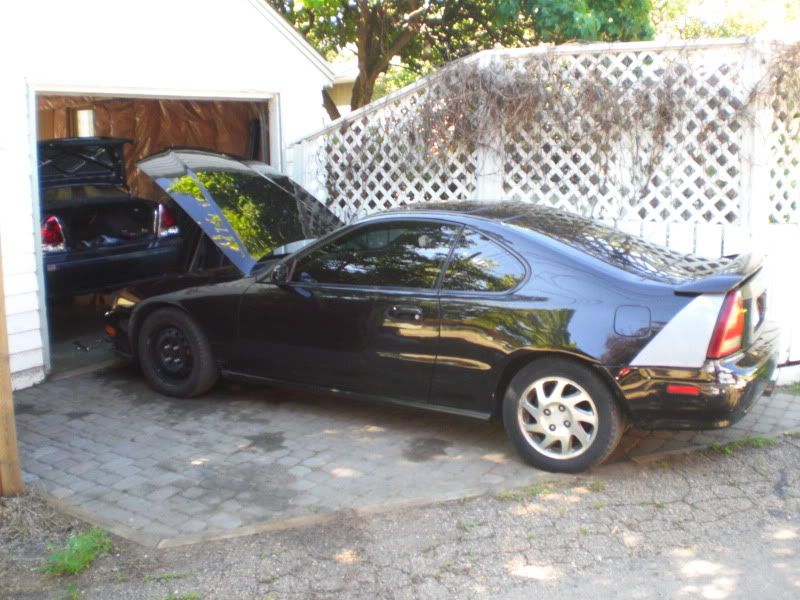
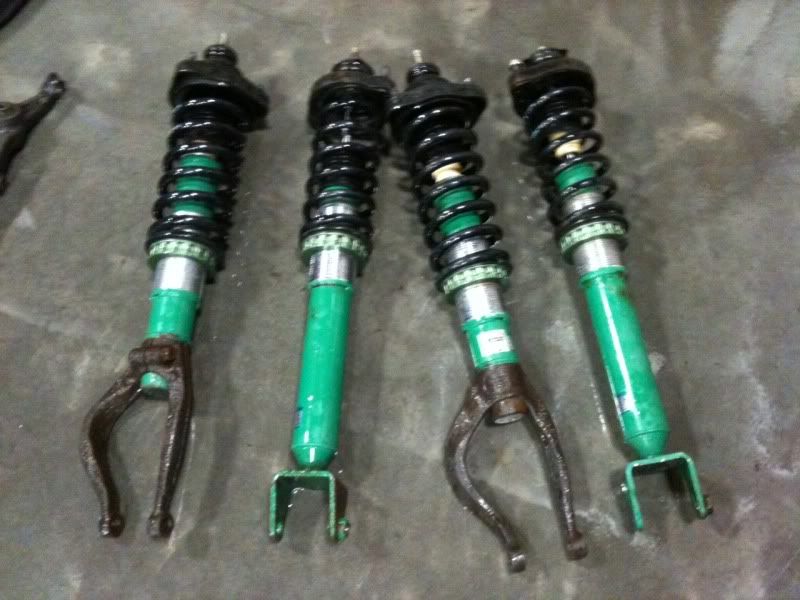
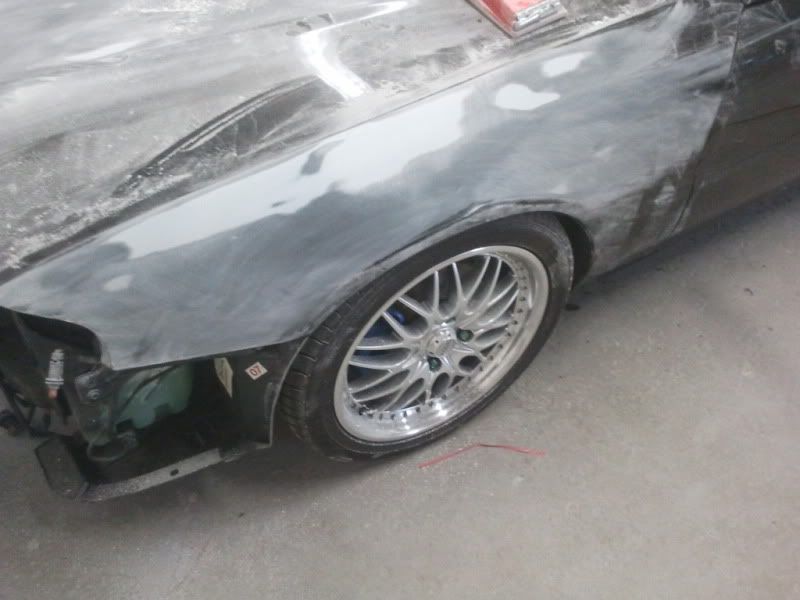
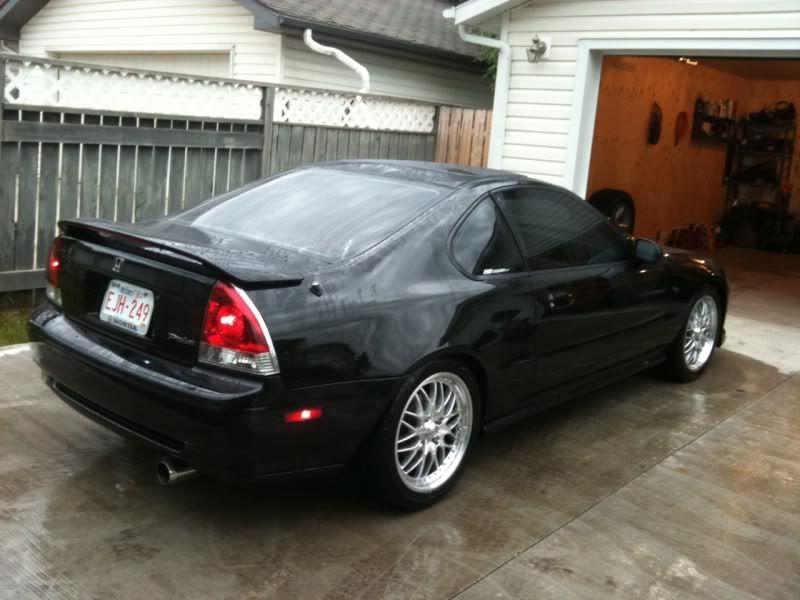
This is the reality I faced once I saw it in person(picture of when I made it back to Edmonton) Sadly I did not fly all the way to Ontario to come back empty handed. Rather than looking at all the negatives I simply looked at the positives. It had several items I had no clue were even on the car. For starters superstreet coilovers, a 5th gen glass sunroof, subs, a spoon strut bar, rear strut bar, keyless entry with an alarm and some jdm yellow fog lights. All of these items made up to be more than I paid for the car and I was planning on putting them on anyway. The car was $1900. Ricer taillights were quickly replaced to OEM.
The drive was amazing, but out of fear of turning the car off and it not starting again I drove 36 hours straight from Ontario to Edmonton only stopping for gas. My girlfriend and I switched seats a few times but for some reason I was never tired, I had a 1 hour nap and that was it. The reason I feared shutting it off was that I soon realized after driving it for 10 minutes that vtec did not work, there was a small misfire above 4500rpm and loved to drink oil. Once back in Edmonton I got it in my garage and the real work began.
The story starts like this, last summer a week before Canada Day I got rid of my last prelude shell (was leaving my garage once the new one arrived) and was considering getting out of the Honda game completely and moving on to something else. These damn 4th gen's just keep pulling me back and I started looking for a half decent shell to start with. I actually searched the entire country telling myself if the shell is clean enough i'll catch flight and drive it back sight unseen. Being in Canada the majority of 4th gen preludes are rusted out due to winters, treated like crap, and most of them at this point in their lives have been abused by teenagers. It was no easy task but after a week of searching I found a prelude that met my criteria; black, manual, low km's, 94+, next to no rust, SRV (si trim in the US) leather/H22a1.
It just so happened this prelude was located in Hamilton Ontario a small city outside of Toronto. I called the owner and told him consider it sold, as long as he holds it for me i'll book a flight. He was skeptical and his Dad was skeptical as well having a hard time believing someone would actually fly across Canada to buy an older car like that. I am located in Edmonton Alberta, which is about 3500km away from Hamilton. But they held it and when I arrived in Hamilton on Canada Day I found the two of them Holding a cardboard sign with my name on it lol.
The first thing we did was check the car out. I gotta say, I was less than impressed upon arrival with the true condition of the car. I wasn't exactly given the correct information about the car. It burnt quiet a bit of oil which I found out later, the body was just painted, but the body work and paint work were pretty shotty and weld seams were showing, the leather seats were in rough condition and a rear quarter panel was punched in and poorly repaired. Regardless, it was the best I could find in Canada at the time.
This was the picture I was sent
This is the reality I faced once I saw it in person(picture of when I made it back to Edmonton) Sadly I did not fly all the way to Ontario to come back empty handed. Rather than looking at all the negatives I simply looked at the positives. It had several items I had no clue were even on the car. For starters superstreet coilovers, a 5th gen glass sunroof, subs, a spoon strut bar, rear strut bar, keyless entry with an alarm and some jdm yellow fog lights. All of these items made up to be more than I paid for the car and I was planning on putting them on anyway. The car was $1900. Ricer taillights were quickly replaced to OEM.
The drive was amazing, but out of fear of turning the car off and it not starting again I drove 36 hours straight from Ontario to Edmonton only stopping for gas. My girlfriend and I switched seats a few times but for some reason I was never tired, I had a 1 hour nap and that was it. The reason I feared shutting it off was that I soon realized after driving it for 10 minutes that vtec did not work, there was a small misfire above 4500rpm and loved to drink oil. Once back in Edmonton I got it in my garage and the real work began.
Last edited by Prudz_lude; Jan 30, 2013 at 07:52 PM.
Thread Starter
Joined: Jun 2006
Posts: 2,721
Likes: 13
From: Vancouver Canada
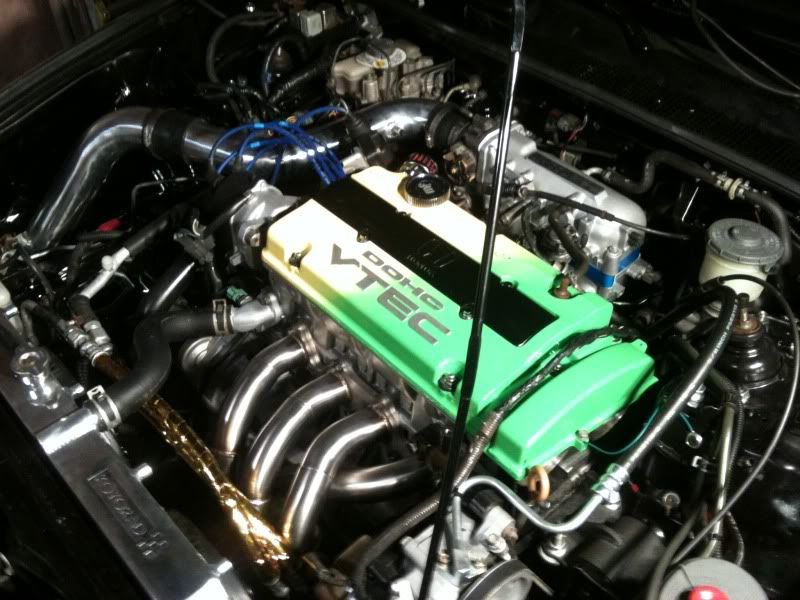
Now that I had the car in my garage I decided I would try and get it to run a bit smoother and hopefully figure out why it was drinking so much oil. I found out quickly that the misfire was caused by flood spark plugs drenched in oil, due to blown valve cover gaskets, an old dizzy, and old spark plugs. I swapped in some new ones and it ran smooth and stopped drinking so much oil. I decided to swap on my old yellow valve cover, put new plugs, wires, and a new OEM honda dizzy on along with a fresh gasket set.
All that oil came from the cylinder once I pulled the plug. I couldn't believe that much had settled on top of the spark plug. I probably should have changed them before I put the new cover on :p


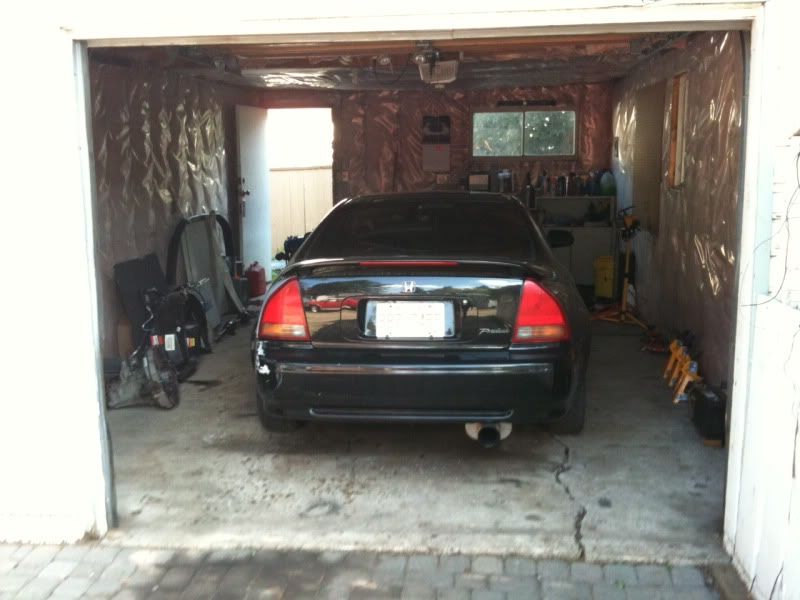
Tucked away and safe in its new home
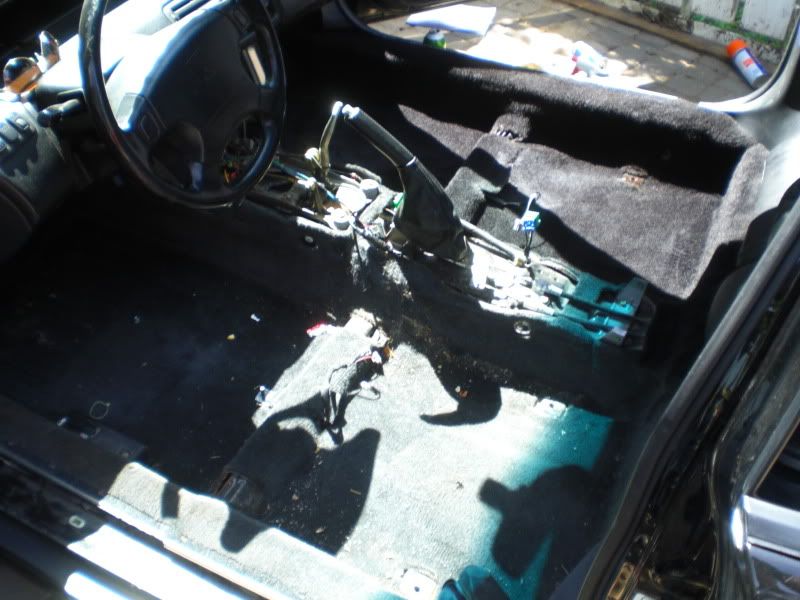
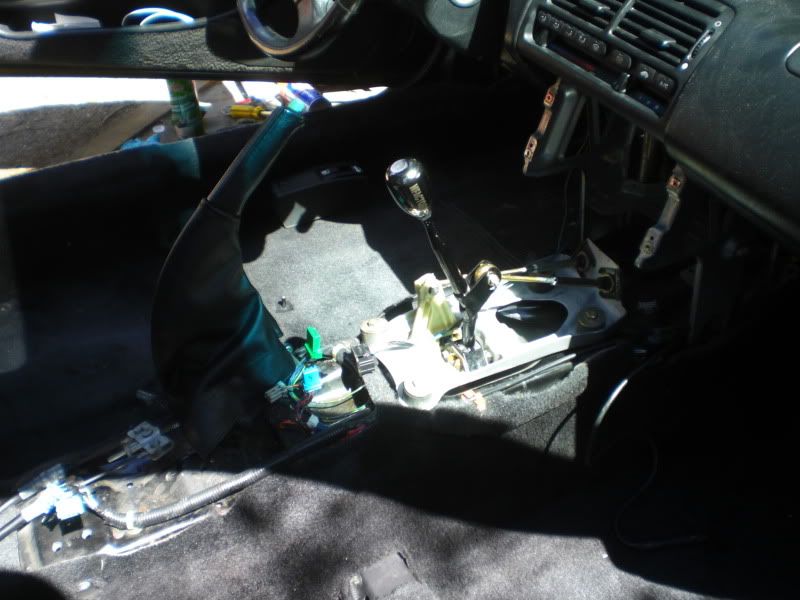
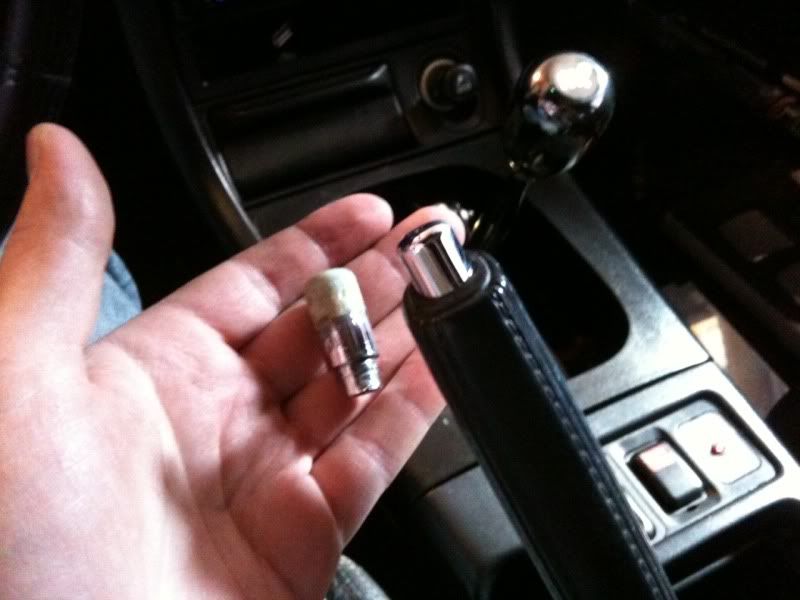
The next day I decided to start fixing up the interior. It was in pretty rough shape, had some bad odors like most old cars and just appeared to have been showed no love in a long time. The floor mats were trash, the arm rest was ripped up, the carpets stained and covered in ash and weed (haha, every prelude i've owned is covered in weed) and of course the panels covered in dirt.


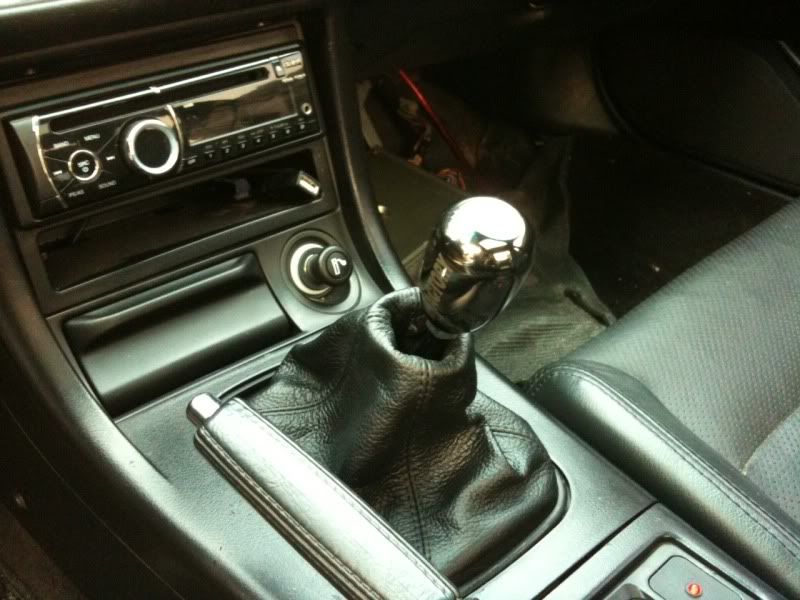
This is a 50/50 of cleaning the carpet. I re-dyed the carpet at the same time and installed my Forbidden Motor Sports short shifter and Mfactory weighted shift ****.
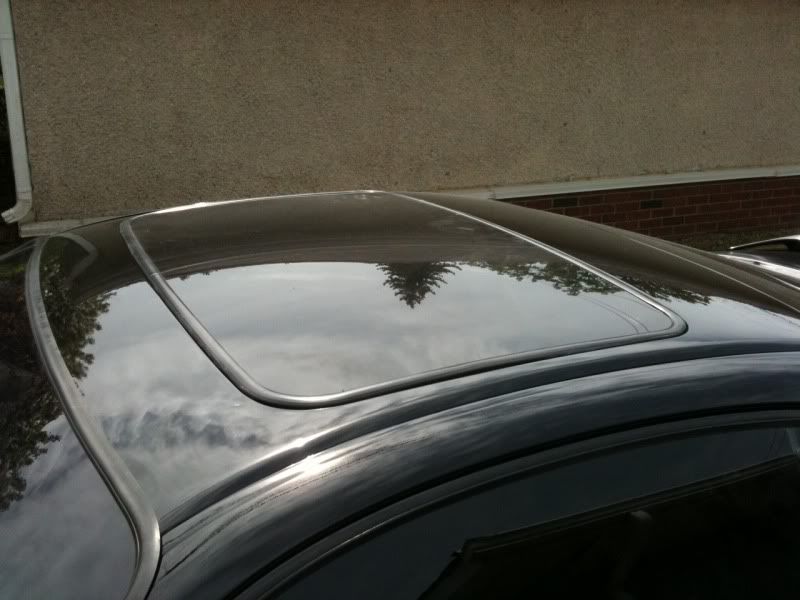
And a shot of the glass sunroof

All that oil came from the cylinder once I pulled the plug. I couldn't believe that much had settled on top of the spark plug. I probably should have changed them before I put the new cover on :p
Tucked away and safe in its new home
The next day I decided to start fixing up the interior. It was in pretty rough shape, had some bad odors like most old cars and just appeared to have been showed no love in a long time. The floor mats were trash, the arm rest was ripped up, the carpets stained and covered in ash and weed (haha, every prelude i've owned is covered in weed) and of course the panels covered in dirt.
This is a 50/50 of cleaning the carpet. I re-dyed the carpet at the same time and installed my Forbidden Motor Sports short shifter and Mfactory weighted shift ****.
And a shot of the glass sunroof
Thread Starter
Joined: Jun 2006
Posts: 2,721
Likes: 13
From: Vancouver Canada
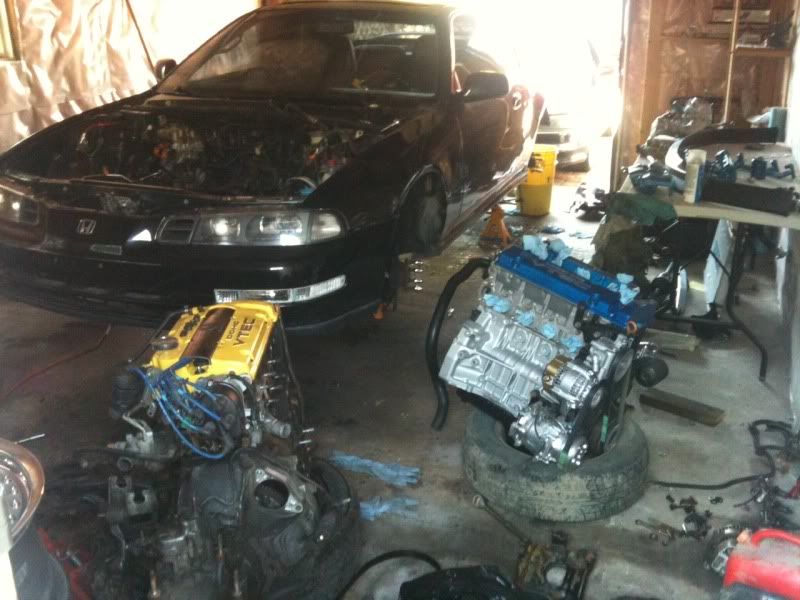
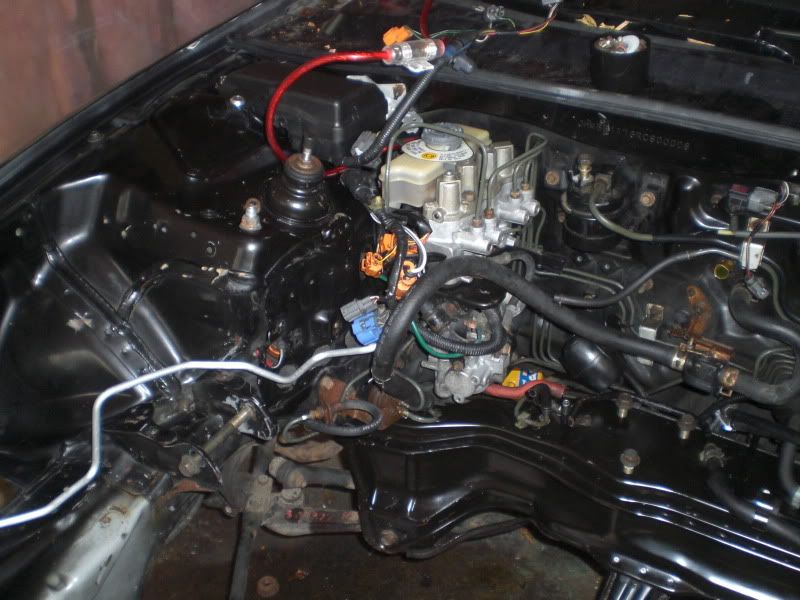
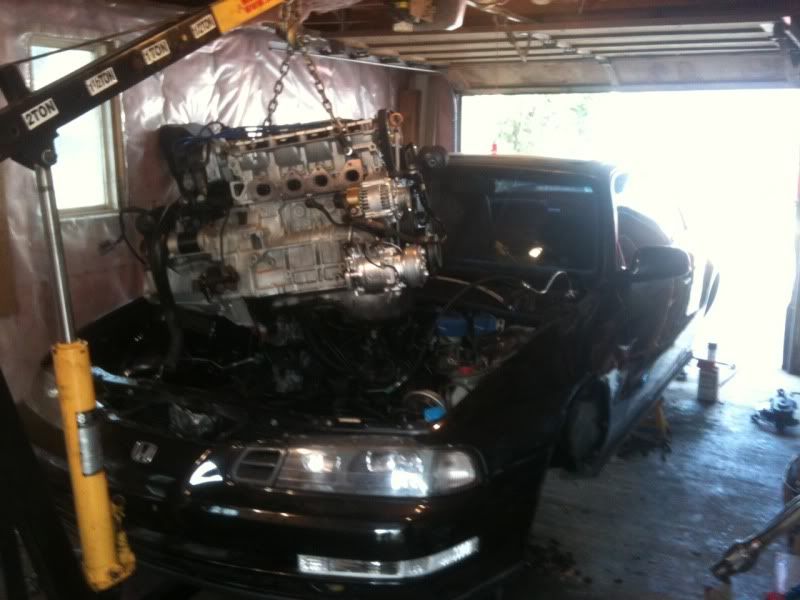
Once I got the interior clean enough for my liking it was on to the engine and suspension. I decided to pull the engine from the car the following week and began open heart surgery on the car. I had my old built engine from my last prelude and figured I would put it in this prelude. The motor in car had solid compression and a low km bottom end, but the top end had shot valve seals. I wanted to free up some funds for other mods so I sold the bottom end of my built motor and kept the top end which I would swap on to the new motor.
The old heart and the new heart
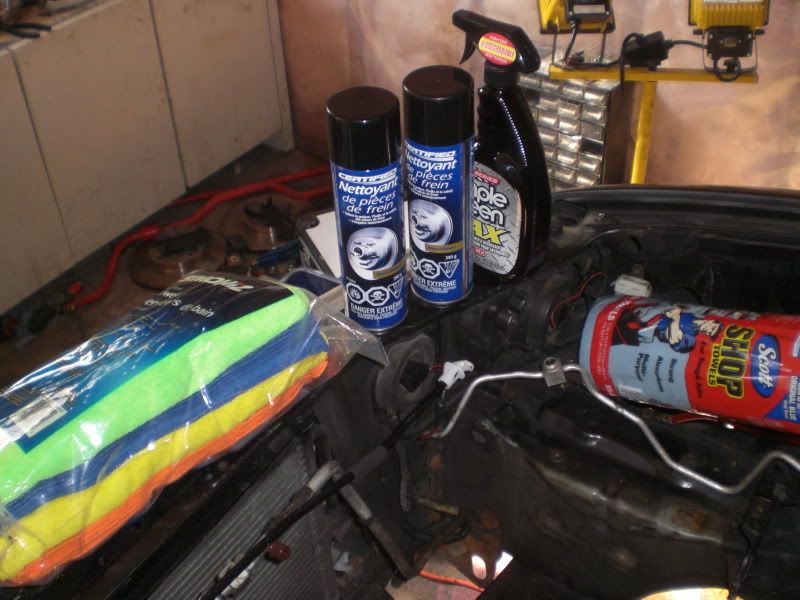
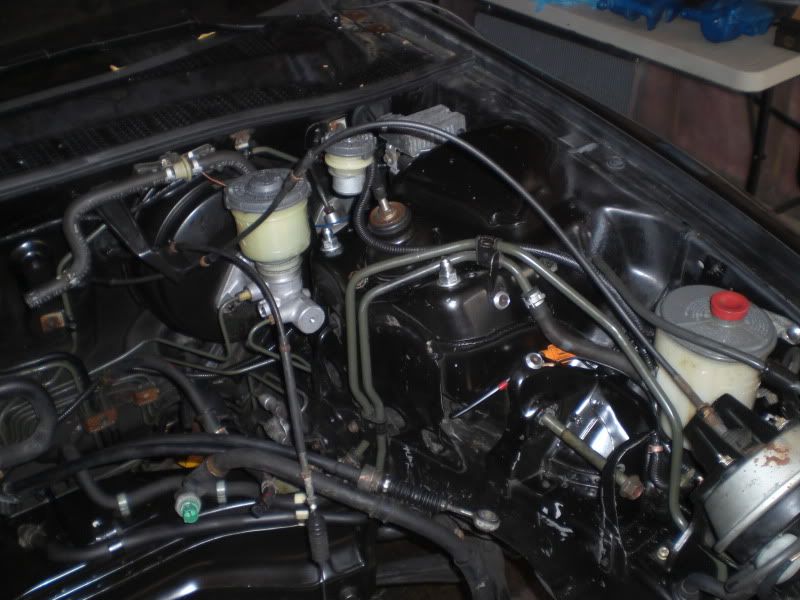
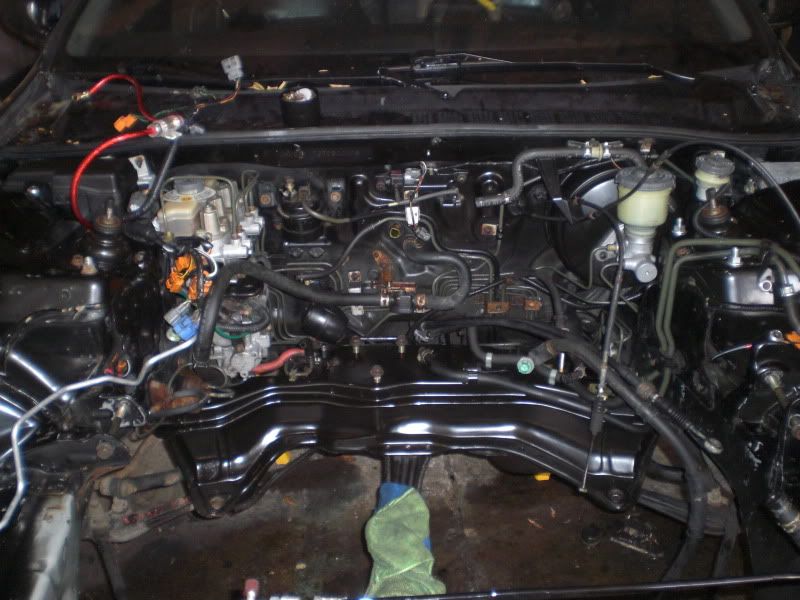
Empty engine bay
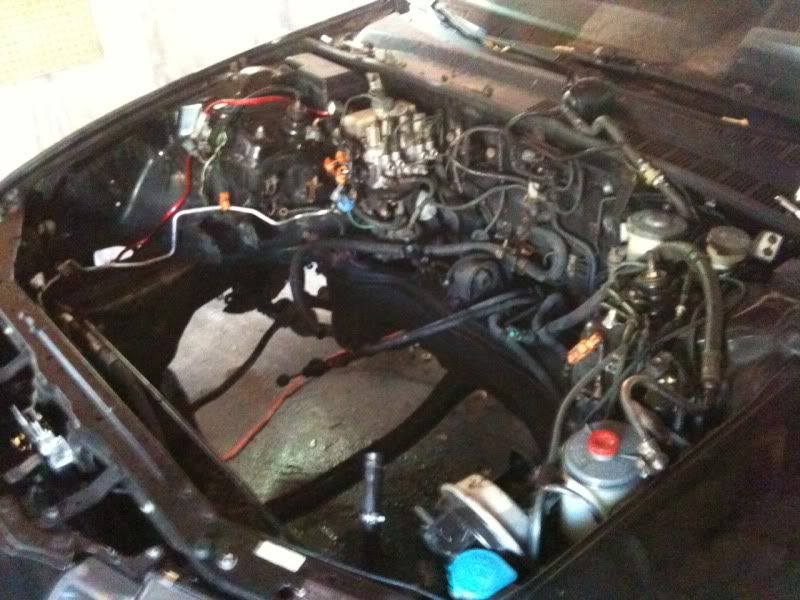
And out came the cleaning supplies. There must have been a solid inch thick of grime on almost everything in the engine bay.

The old heart and the new heart
Empty engine bay
And out came the cleaning supplies. There must have been a solid inch thick of grime on almost everything in the engine bay.
Thread Starter
Joined: Jun 2006
Posts: 2,721
Likes: 13
From: Vancouver Canada
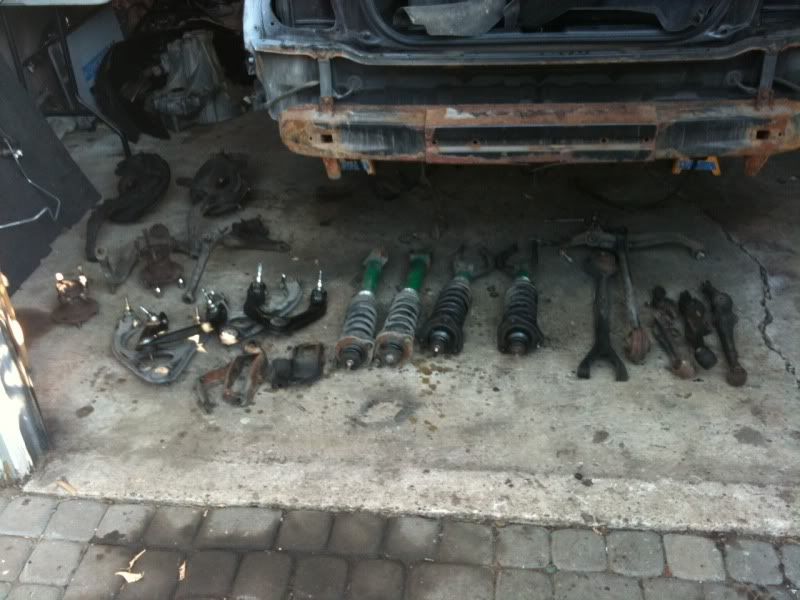
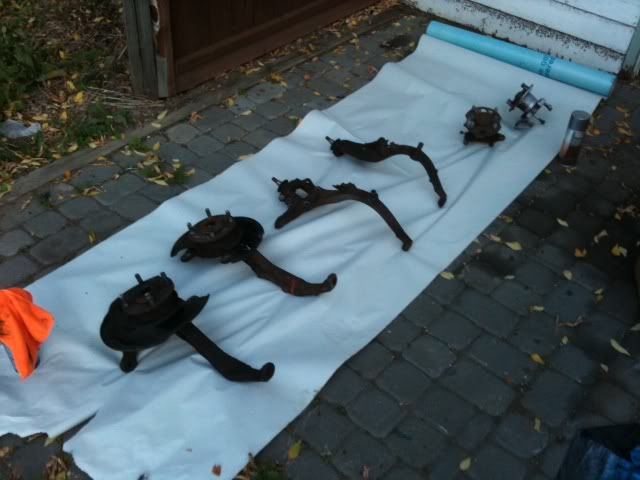
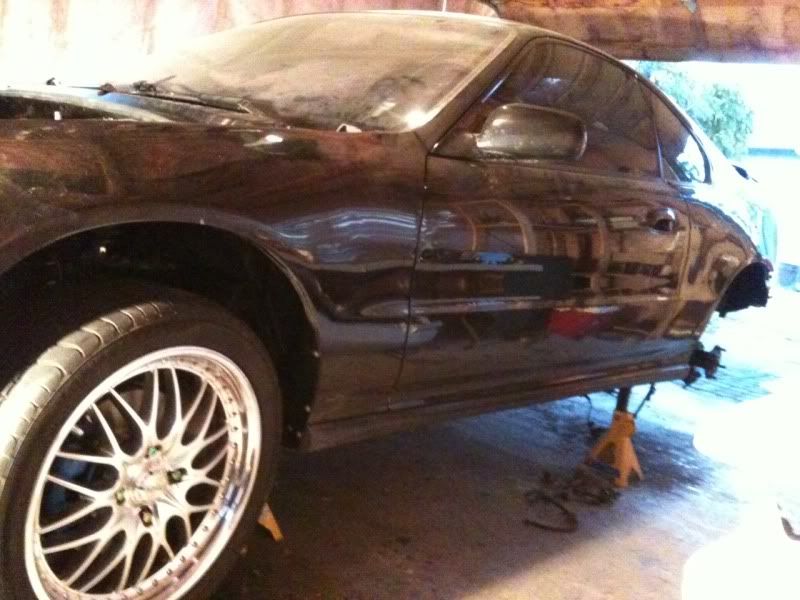
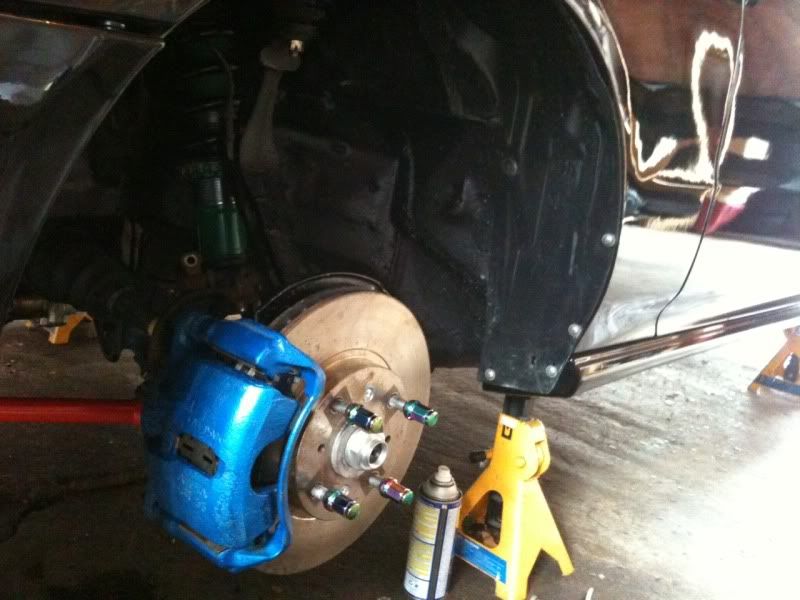
The next step was the suspension. I got the car on 4 jack stands and started tearing into it. When I pulled the front knuckle off the driver side axle I was left sitting there in amazement. The axles fell into about 20 pieces, literally both sides of the axle had both cv joints completely fall apart. I can't believe I drove 3500km across the country and right when I parked it the axle just fell apart like that. I felt pretty damn lucky at this point.
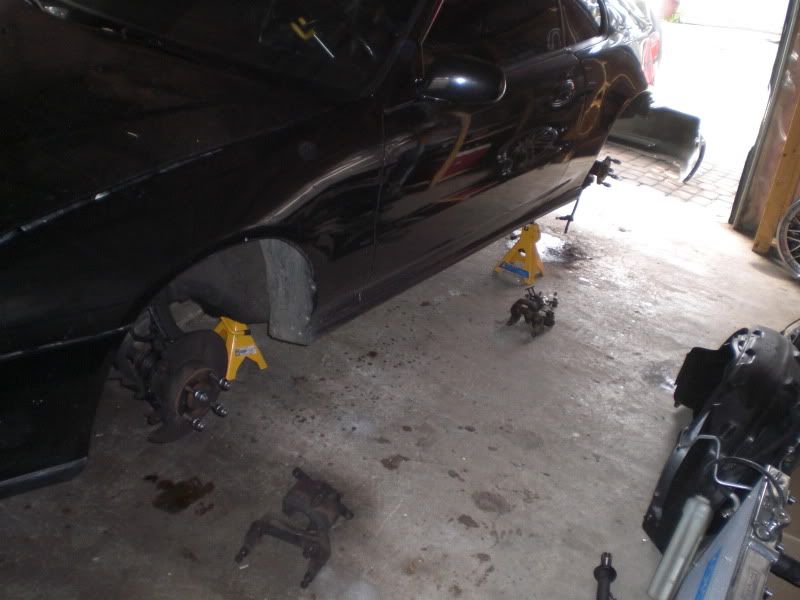

Every single bolt on this suspension was an ultimate bitch to get off. Being driven in winter and having the bolts rust the way they did made it a pain. Not only that all the ball joints had play in them and refused to work with me. The end links were no different, rotors as well.


Rotor bolts were all stripped, reverse drill bit to the rescue!

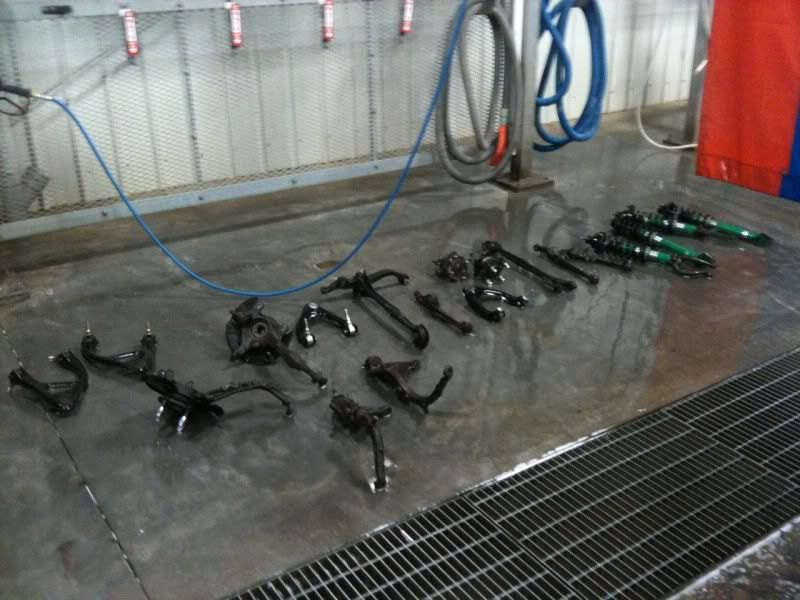
Once the suspension was off the car I took it down to a car wash and pressure washed it all getting it ready for fresh paint, clear, and rust preventative.
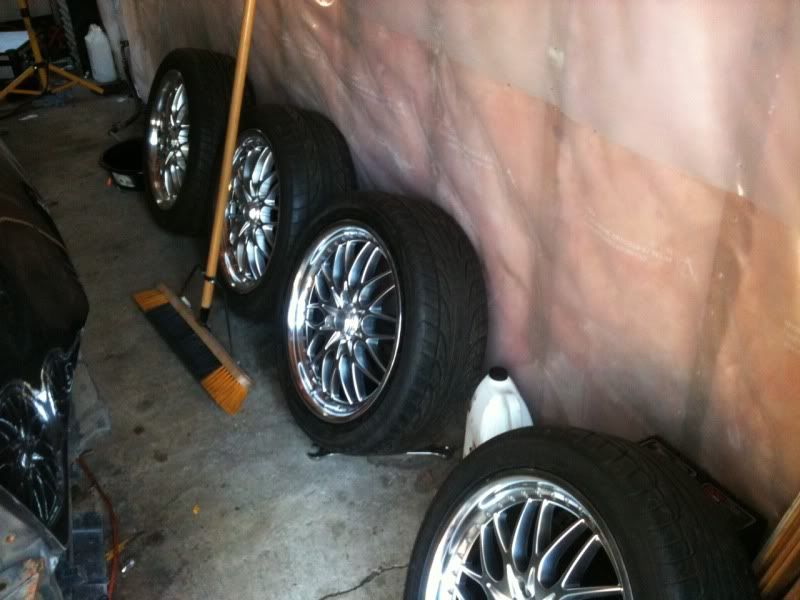
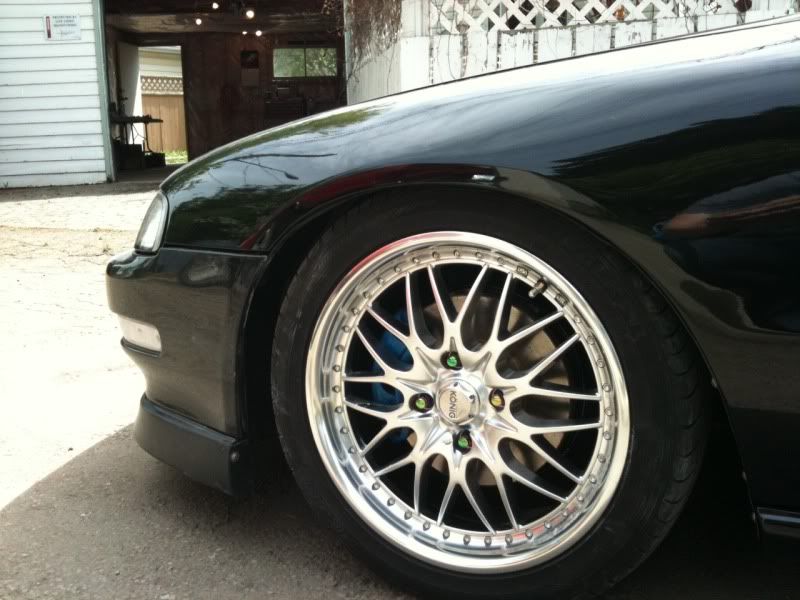
During this time I had my rims at a shop getting refinished. There is a neat back story to these specific rims and tires. In 2005 I bought my first prelude and when I bought it I purchased rims and tires the same summer. These rims were later stolen and I managed to recover them after setting up a sting operation with the police (took a lot of effort on my part). Once recovered I drove on them for another year before later selling them to a friend. He drove them for a year and by 2008 sold them to someone else. I regretted selling them but at the time I had my first car written off and had no need for them anymore. I spent the next couple years trying to find another pair in the right offset and size. In 2011 I was lucky enough to find a new set floating around on kijiji (Canadian craigslist).
I drove to the guys house to take a look at them. He had them listed for $350 for the set of 4 and 3 tires as one was blown. I couldn't believe what I saw when I arrived. They were my original rims I had bought in 2005. Confirmed by having 2 falken ziex tires and 2 yokohama avs es100 tires on, one being blown. I spoke to the owner and he had found the history of the rims before he bought them for his car. They had travelled through 4 other people since my buddy sold them off. I lowballed the guy since they were really rough and walked away with my OG rims and OG tires (that should have been replaced after i sold them 5 years prior lol) for $200.
I dropped them off the next day at a trusted wheel shop and they started work on them to restore 3 bends, brake dust stains, and 4 curbed rims.

Final product

New falken 452 tires mounted and balanced
Every single bolt on this suspension was an ultimate bitch to get off. Being driven in winter and having the bolts rust the way they did made it a pain. Not only that all the ball joints had play in them and refused to work with me. The end links were no different, rotors as well.
Rotor bolts were all stripped, reverse drill bit to the rescue!
Once the suspension was off the car I took it down to a car wash and pressure washed it all getting it ready for fresh paint, clear, and rust preventative.
During this time I had my rims at a shop getting refinished. There is a neat back story to these specific rims and tires. In 2005 I bought my first prelude and when I bought it I purchased rims and tires the same summer. These rims were later stolen and I managed to recover them after setting up a sting operation with the police (took a lot of effort on my part). Once recovered I drove on them for another year before later selling them to a friend. He drove them for a year and by 2008 sold them to someone else. I regretted selling them but at the time I had my first car written off and had no need for them anymore. I spent the next couple years trying to find another pair in the right offset and size. In 2011 I was lucky enough to find a new set floating around on kijiji (Canadian craigslist).
I drove to the guys house to take a look at them. He had them listed for $350 for the set of 4 and 3 tires as one was blown. I couldn't believe what I saw when I arrived. They were my original rims I had bought in 2005. Confirmed by having 2 falken ziex tires and 2 yokohama avs es100 tires on, one being blown. I spoke to the owner and he had found the history of the rims before he bought them for his car. They had travelled through 4 other people since my buddy sold them off. I lowballed the guy since they were really rough and walked away with my OG rims and OG tires (that should have been replaced after i sold them 5 years prior lol) for $200.
I dropped them off the next day at a trusted wheel shop and they started work on them to restore 3 bends, brake dust stains, and 4 curbed rims.
Final product
New falken 452 tires mounted and balanced
Thread Starter
Joined: Jun 2006
Posts: 2,721
Likes: 13
From: Vancouver Canada
Knowing this car was getting every piece of suspension replaced I began buying every part I would need to make it as fresh as possible. heading into winter I didn't bother taking many pictures of parts rolling in as I wasn't working on the car to much. I let it sit for winter as I didn't want to work in the cold. I ended up replacing the following and bought upgrades as well
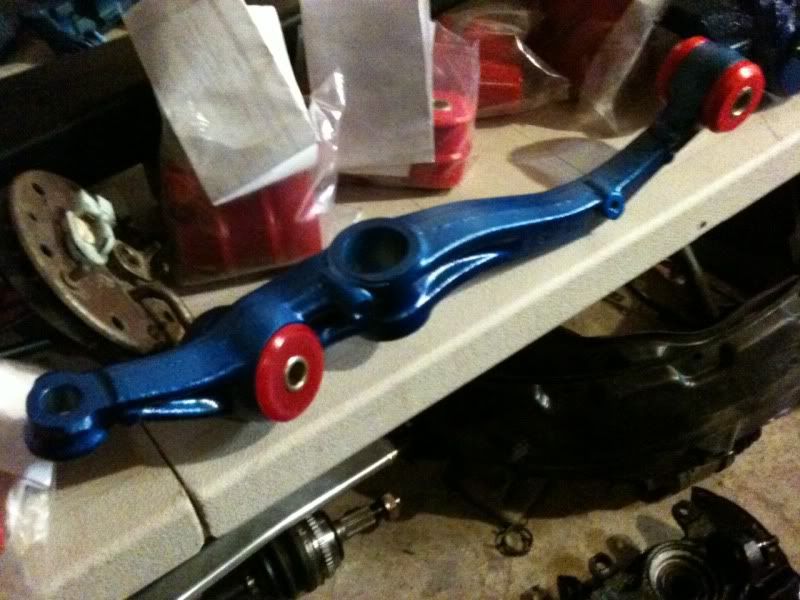
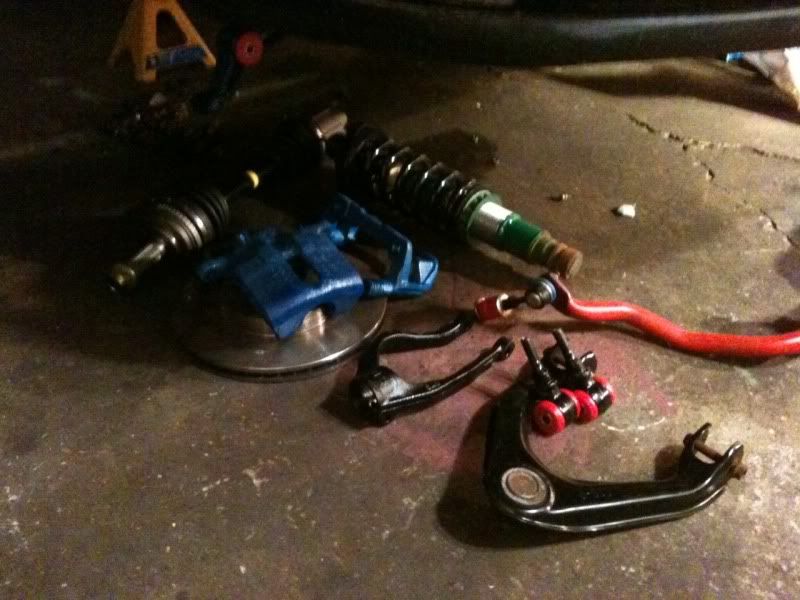
-Every bushing on the car (ES bushings/endlinks)
-Upper front control arms
-Front and rear wheel bearings
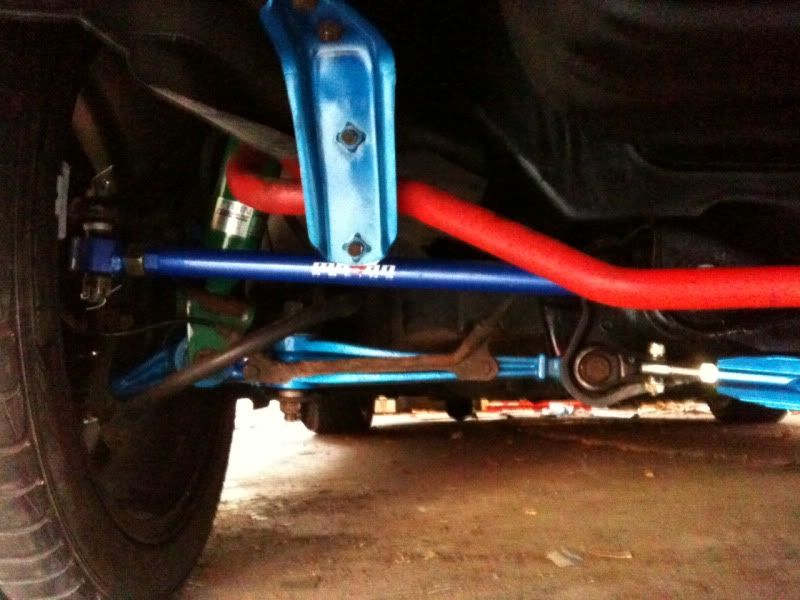
-Megan rear tie bar
-New front/rear calipers
-Front/rear pads
-Front/rear rotors (brembo blanks)
-Innovative traction bar
-New axles
-New OEM balljoints lower front/rear
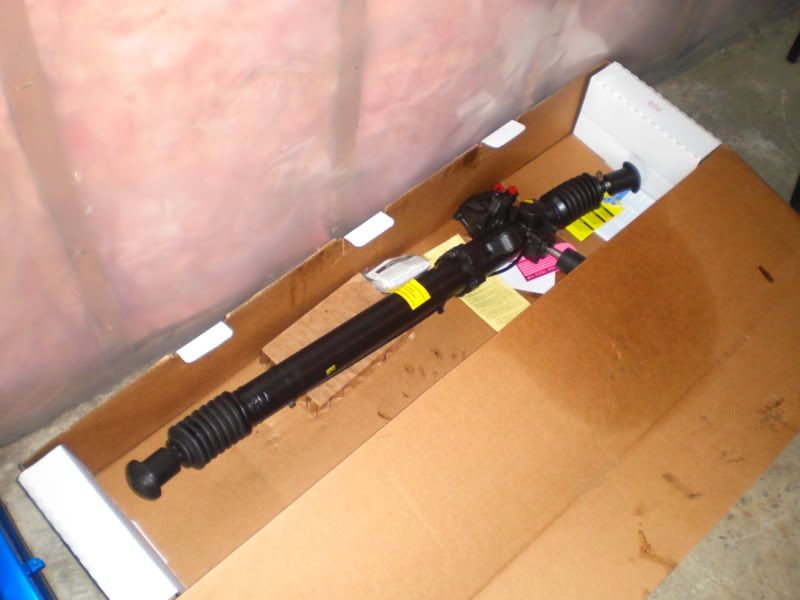
-New steering rack
-New outer tie rods
And a bunch of other stuff i'm sure I am missing
The rear bumper was trash as well, I ended up replacing it with a spare white one I had. All the clip holders on the black one that came with the car were damaged, and the bumper itself was punched in on a corner.

Some misc goodies
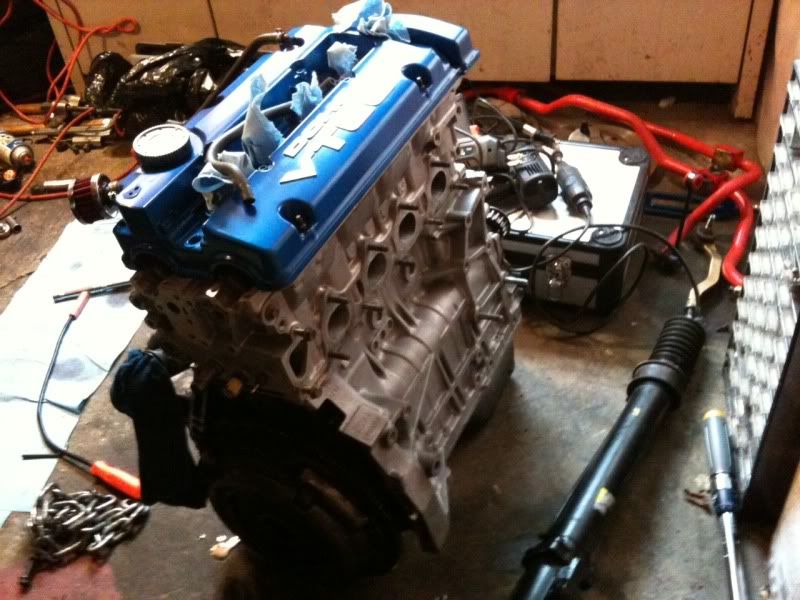
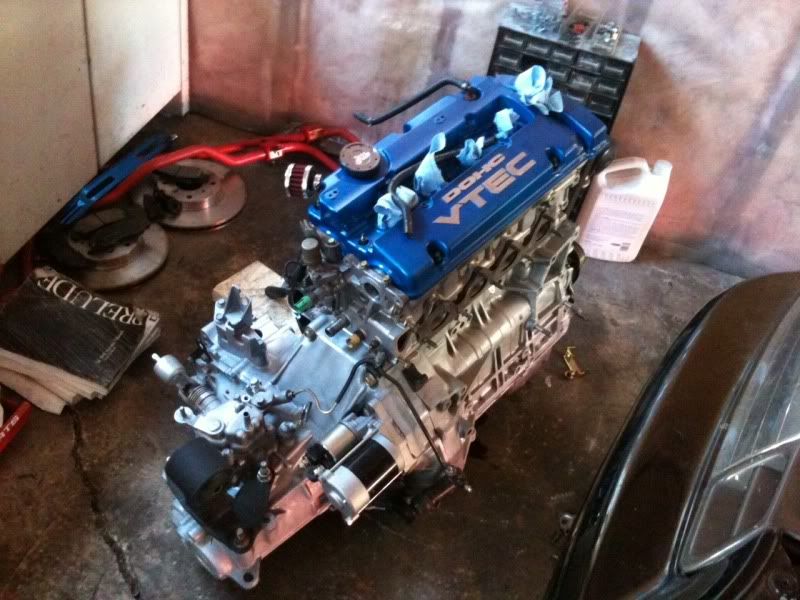
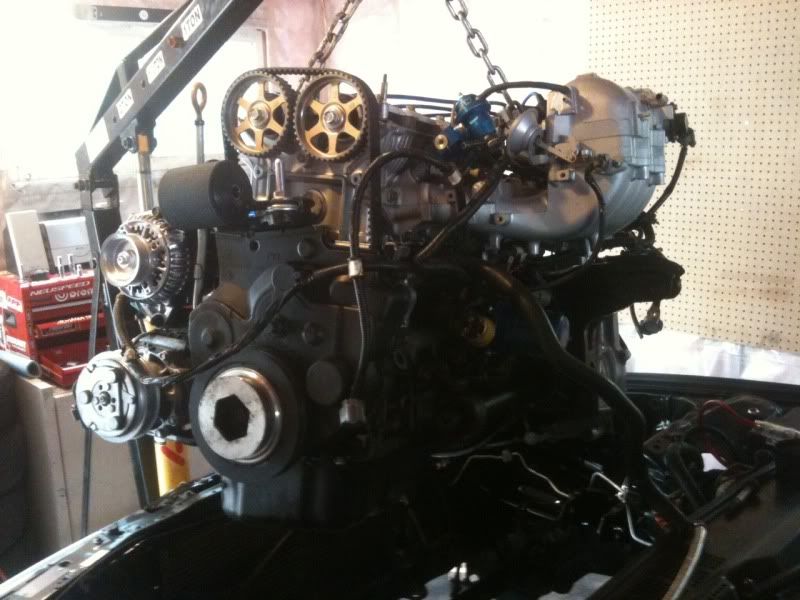
And for some odd reason I did not bother to take any pictures of me actually swapping the head on the motor. I think I was just all pictured out from when I actually built my first one. Photos of clearances, plastigauge etc just take to much time. At this point I was wanting it done and driving, sad part is those are some of the best pictures for a build thread For some reason (which would later bite me in the ***) I decided not to replace the rear main seal this time around. It looked fine on inspection, turned out it was but would not last 100km after that :p I also switched to a blue valve cover I had made.
Motor all finished and ready to be dropped in.
I'll explain what is all done to this motor for those wondering
Bottom end
-Stock 10:1 Compression
-New water pump
-New oil pan gasket
-Converted to 97-01 Aluminum oil pan
-New auto tensioner
-New Honda timing belt
-ARP headstuds
-New OEM headgasket
Head work
-Port and Polish (intake/exhaust)
-Deshrouded
-Supertech valve seals
-Supertech valve guides
-Supertech flat faced polished valves
-Jet washed
-3 angle valve job
It was given a fresh OEM rebuild more or less. I left the bottom end untouched as everything when inspected appeared to be in great running order. Bearings appeared good, walls on the cylinders clean, piston tops were cleaned of any residue and build up.
-Every bushing on the car (ES bushings/endlinks)
-Upper front control arms
-Front and rear wheel bearings
-Megan rear tie bar
-New front/rear calipers
-Front/rear pads
-Front/rear rotors (brembo blanks)
-Innovative traction bar
-New axles
-New OEM balljoints lower front/rear
-New steering rack
-New outer tie rods
And a bunch of other stuff i'm sure I am missing
The rear bumper was trash as well, I ended up replacing it with a spare white one I had. All the clip holders on the black one that came with the car were damaged, and the bumper itself was punched in on a corner.
Some misc goodies
And for some odd reason I did not bother to take any pictures of me actually swapping the head on the motor. I think I was just all pictured out from when I actually built my first one. Photos of clearances, plastigauge etc just take to much time. At this point I was wanting it done and driving, sad part is those are some of the best pictures for a build thread
For some reason (which would later bite me in the ***) I decided not to replace the rear main seal this time around. It looked fine on inspection, turned out it was but would not last 100km after that :p I also switched to a blue valve cover I had made.Motor all finished and ready to be dropped in.
I'll explain what is all done to this motor for those wondering
Bottom end
-Stock 10:1 Compression
-New water pump
-New oil pan gasket
-Converted to 97-01 Aluminum oil pan
-New auto tensioner
-New Honda timing belt
-ARP headstuds
-New OEM headgasket
Head work
-Port and Polish (intake/exhaust)
-Deshrouded
-Supertech valve seals
-Supertech valve guides
-Supertech flat faced polished valves
-Jet washed
-3 angle valve job
It was given a fresh OEM rebuild more or less. I left the bottom end untouched as everything when inspected appeared to be in great running order. Bearings appeared good, walls on the cylinders clean, piston tops were cleaned of any residue and build up.
Last edited by Prudz_lude; Jan 30, 2013 at 07:59 PM.
Thread Starter
Joined: Jun 2006
Posts: 2,721
Likes: 13
From: Vancouver Canada
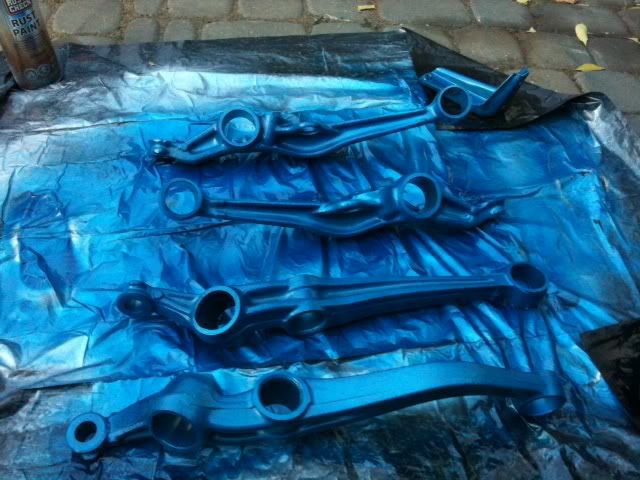
With the suspension off the car and parts starting to roll in I started stripping down the old rusted control arms and prepping them for rust proofing, paint and clear.
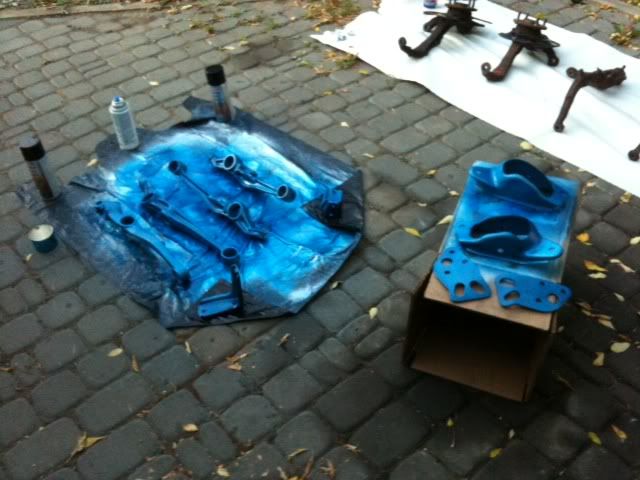


Calipers were painted blue
The timing was set during the same time this was going on and the motor got hooked up with the transmission and some fresh Innovative 75a poly motor mounts.


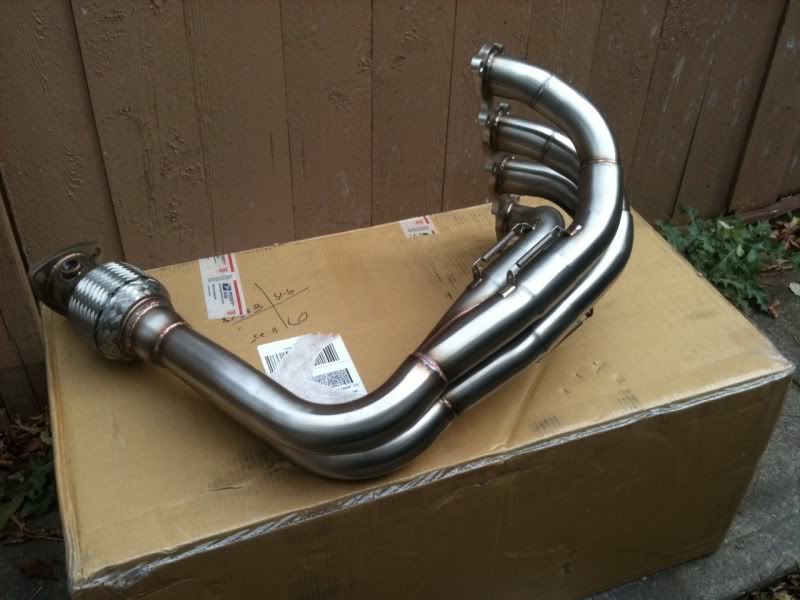
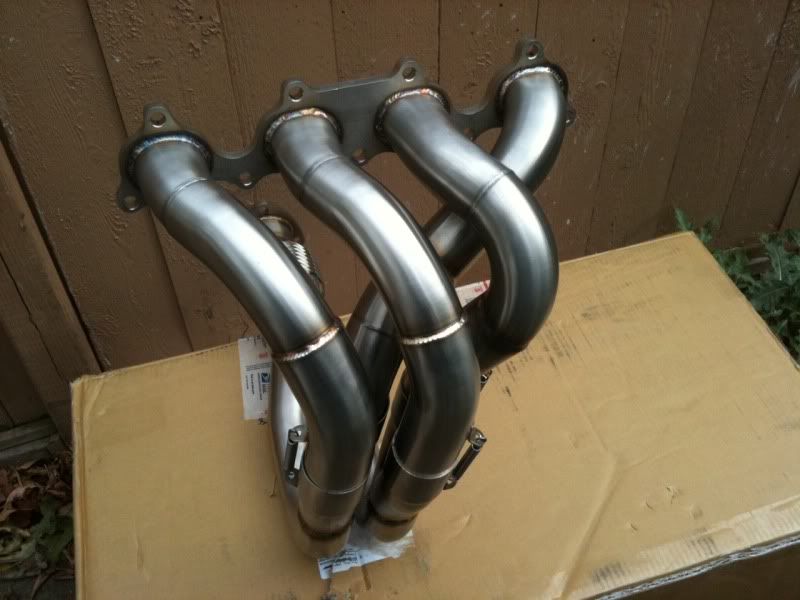
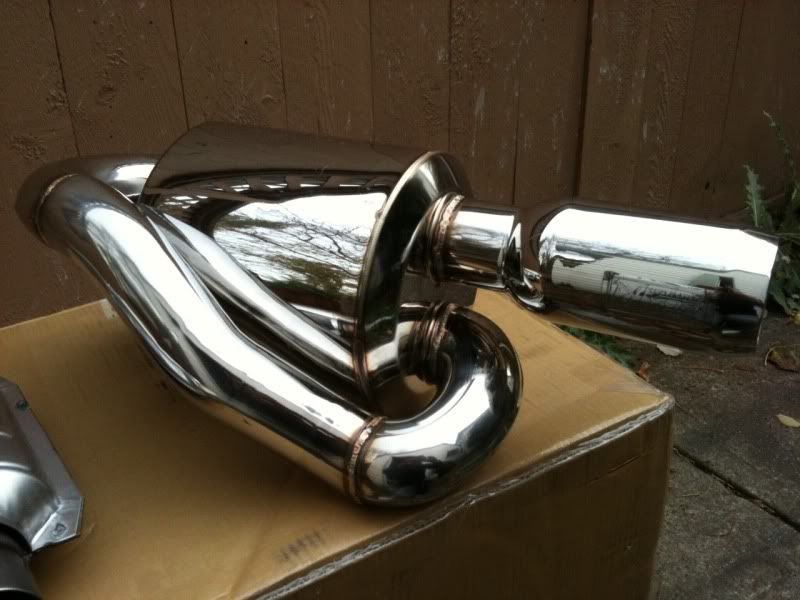
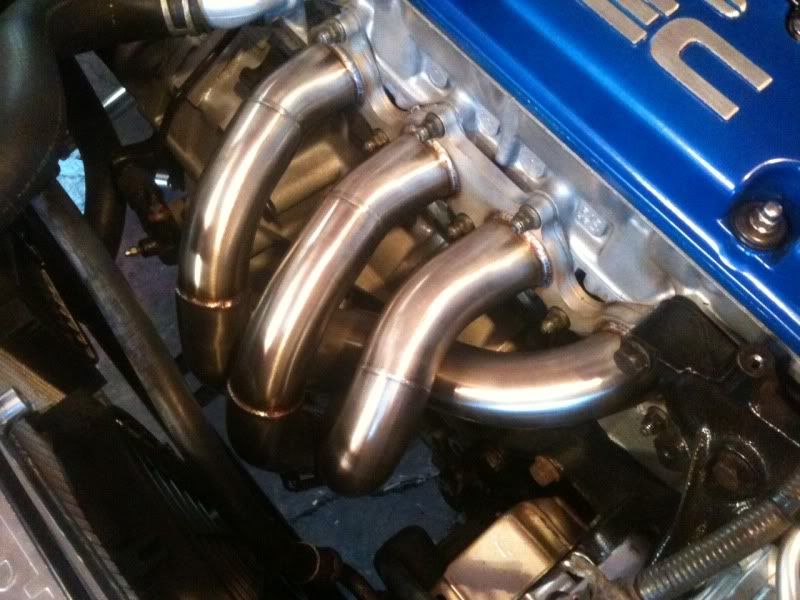
Then the exhaust stuff started showing up in the mail as well
Calipers were painted blue
The timing was set during the same time this was going on and the motor got hooked up with the transmission and some fresh Innovative 75a poly motor mounts.
Then the exhaust stuff started showing up in the mail as well
Trending Topics
Thread Starter
Joined: Jun 2006
Posts: 2,721
Likes: 13
From: Vancouver Canada
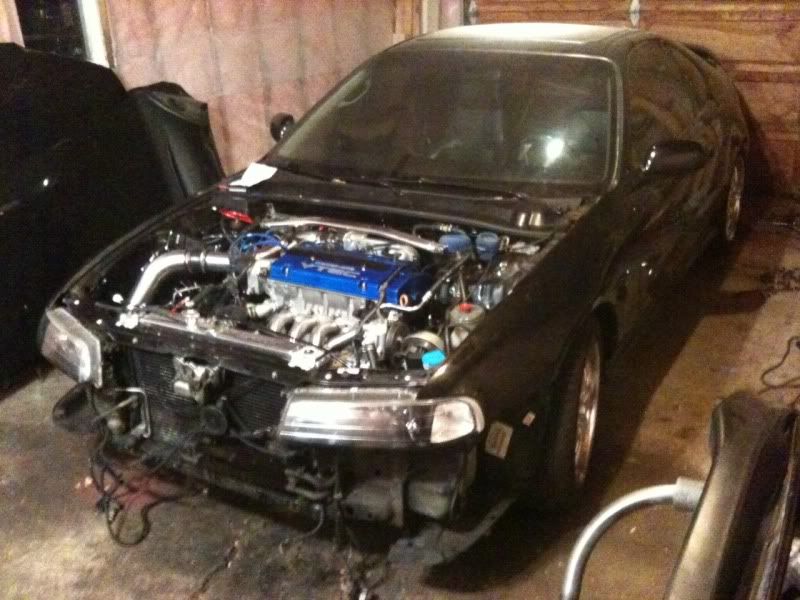
And back into the car she goes! Only this time with a fresh heart with a healthy beat.
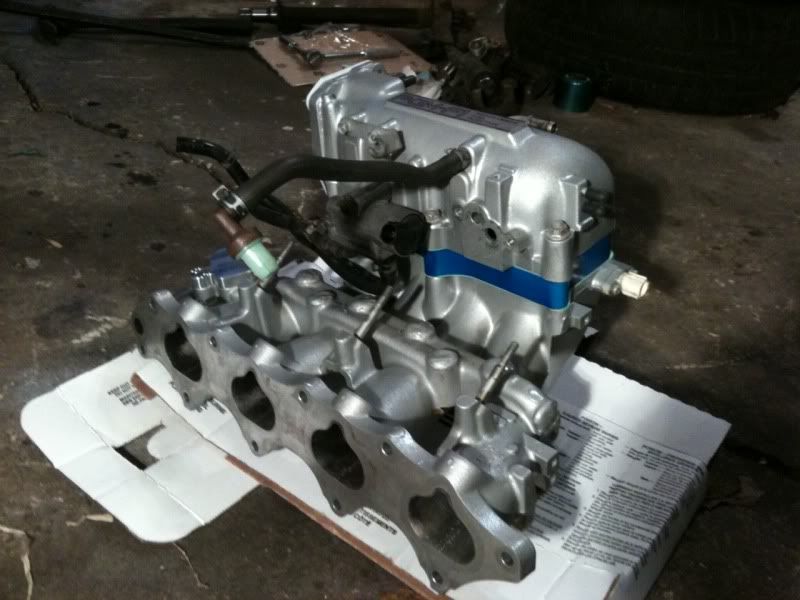
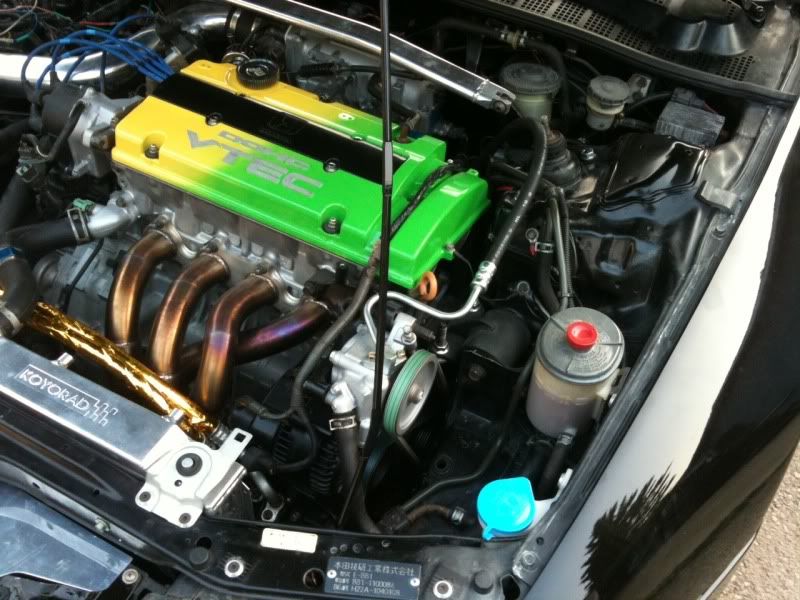
During this time I acquired a couple nice parts such as a Koyo rad, aem fuel rail/fpr, and some other engine bling. I also cleaned up the Spoon strut bar and got it looking pretty again. The intake manifold was scrubbed clean and painted as well. I would later sell the AEM fuel rail, only to realize I need it again (facepalm)


The motor all hooked up, slim fans etc

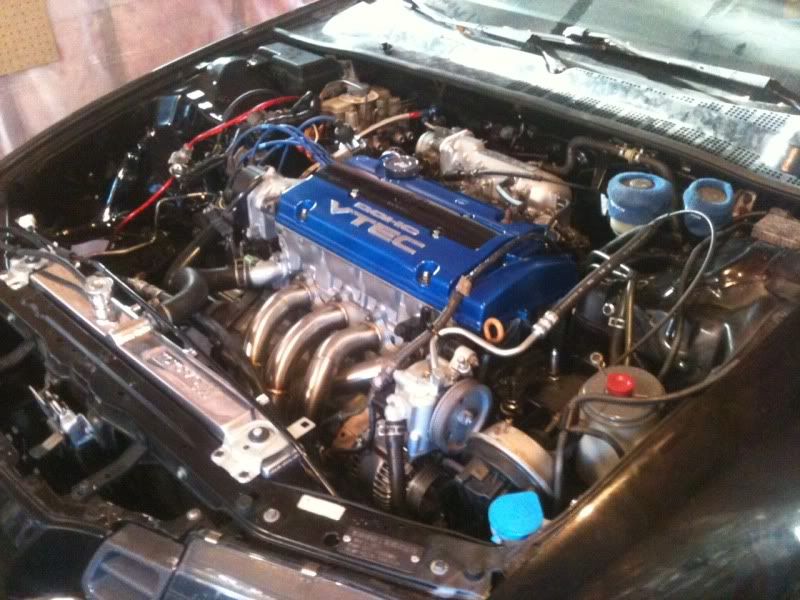
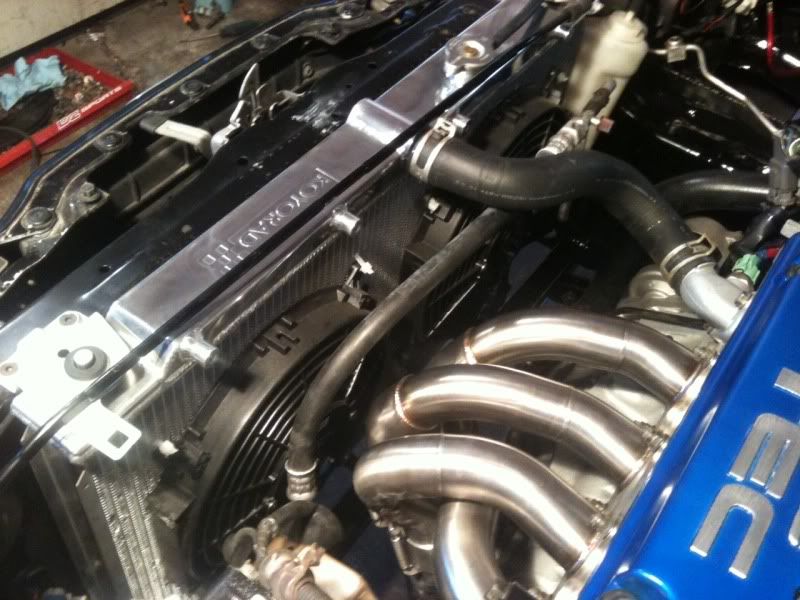


During this time I acquired a couple nice parts such as a Koyo rad, aem fuel rail/fpr, and some other engine bling. I also cleaned up the Spoon strut bar and got it looking pretty again. The intake manifold was scrubbed clean and painted as well. I would later sell the AEM fuel rail, only to realize I need it again (facepalm)
The motor all hooked up, slim fans etc
Thread Starter
Joined: Jun 2006
Posts: 2,721
Likes: 13
From: Vancouver Canada
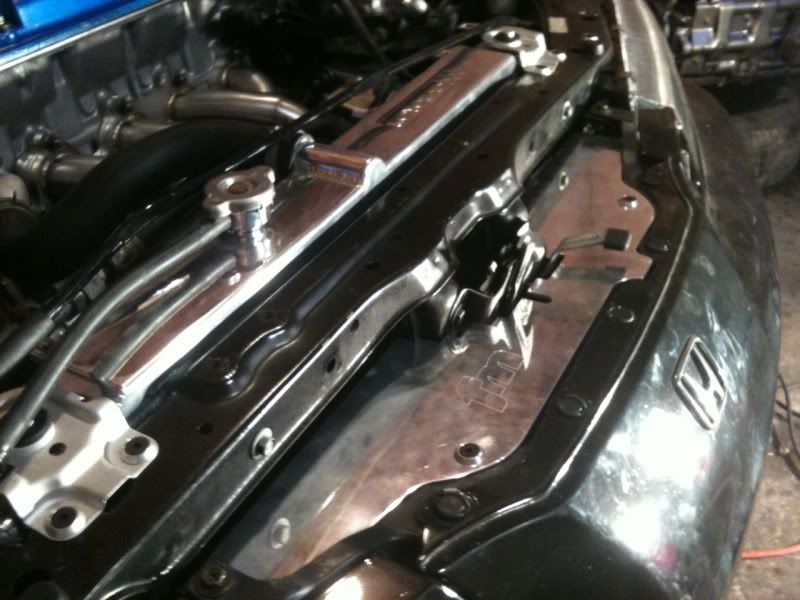
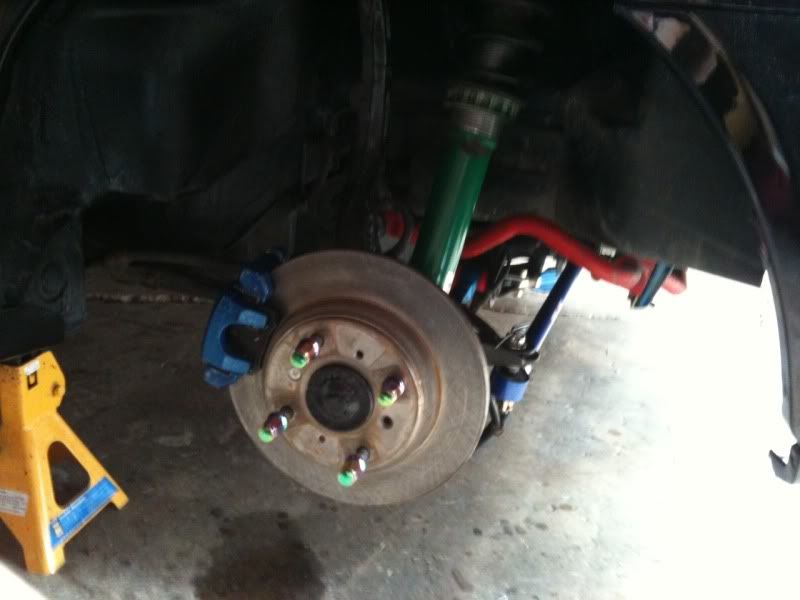
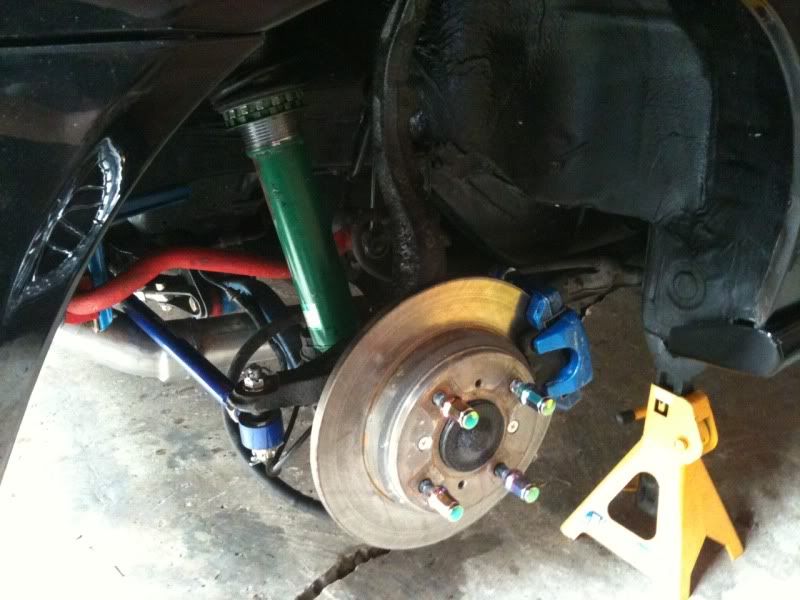
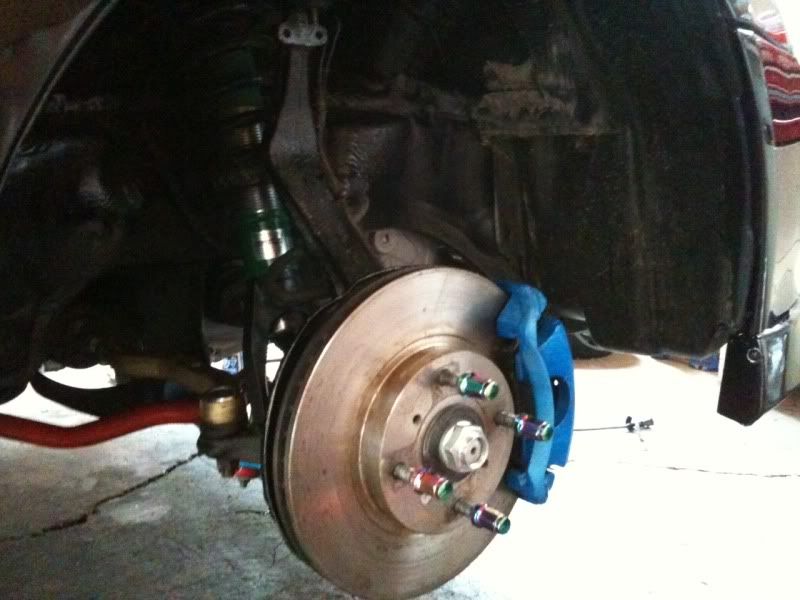
With the motor back in it was time to switch the focus back to the suspension and get this thing back on all four corners. I undercoated all 4 corners while the car had the suspension off along with the gas tank area.

I relocated the battery at the same time

And finally, the wheels are going on the car
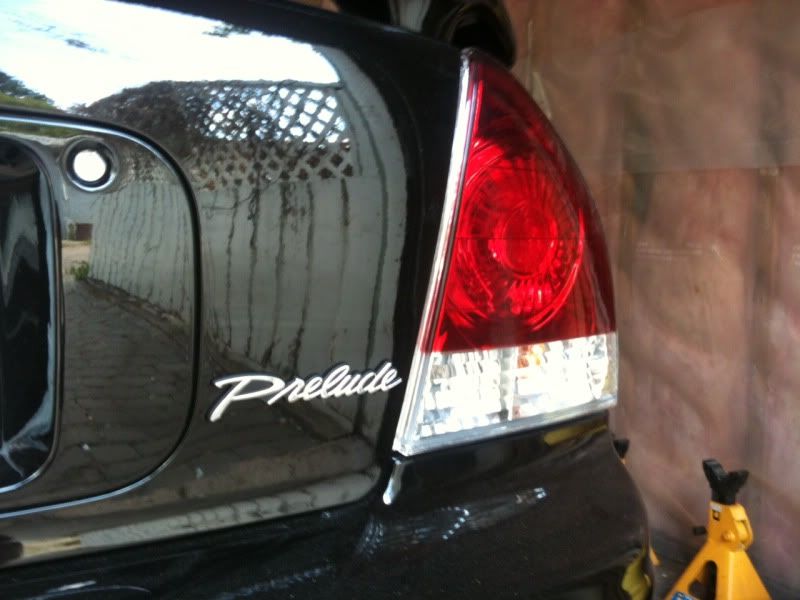
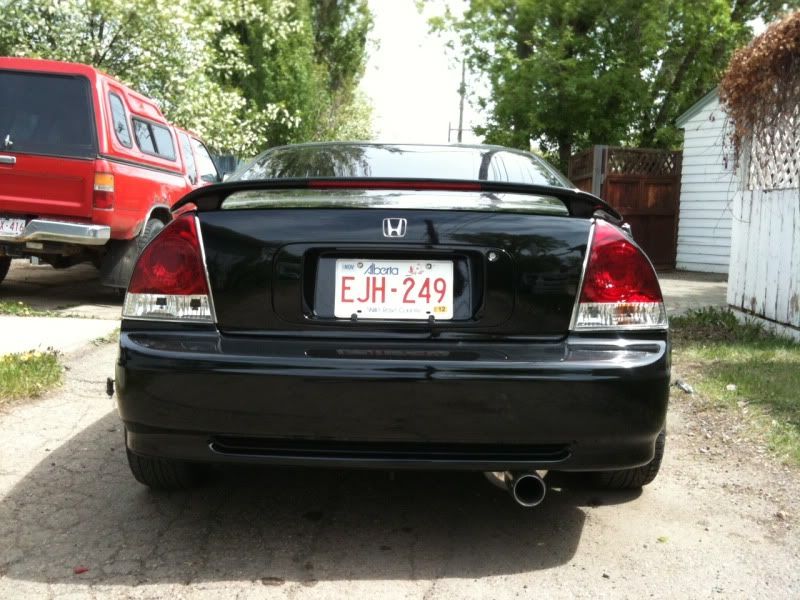
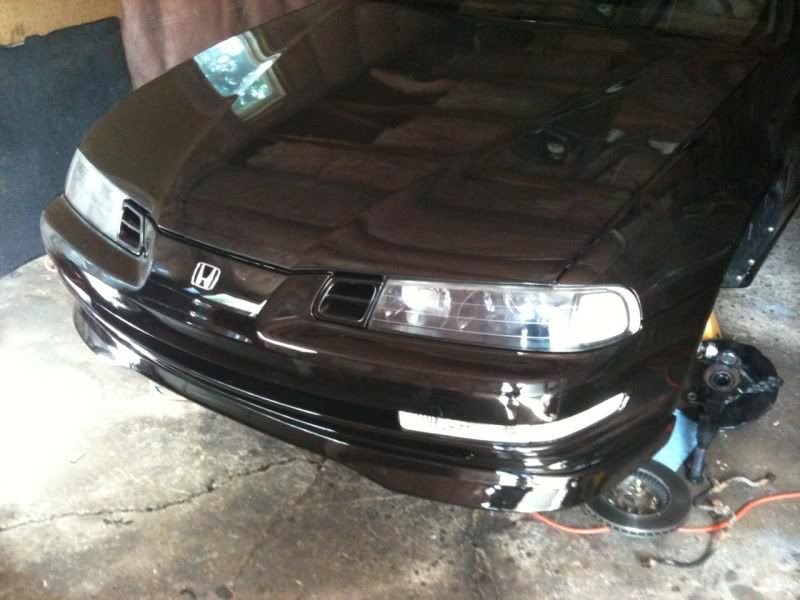
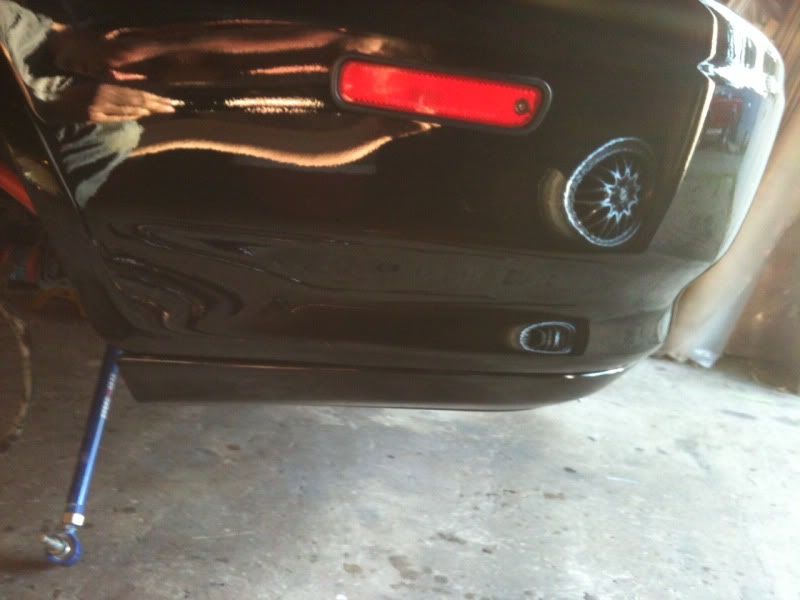
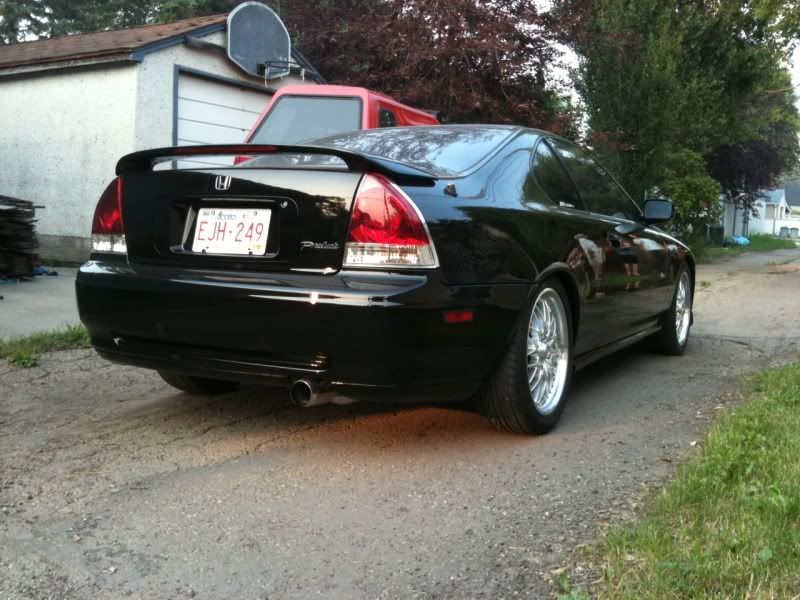
And back on the ground. You may have noticed different taillights, front signals, and a front lip were added during its time in the air.
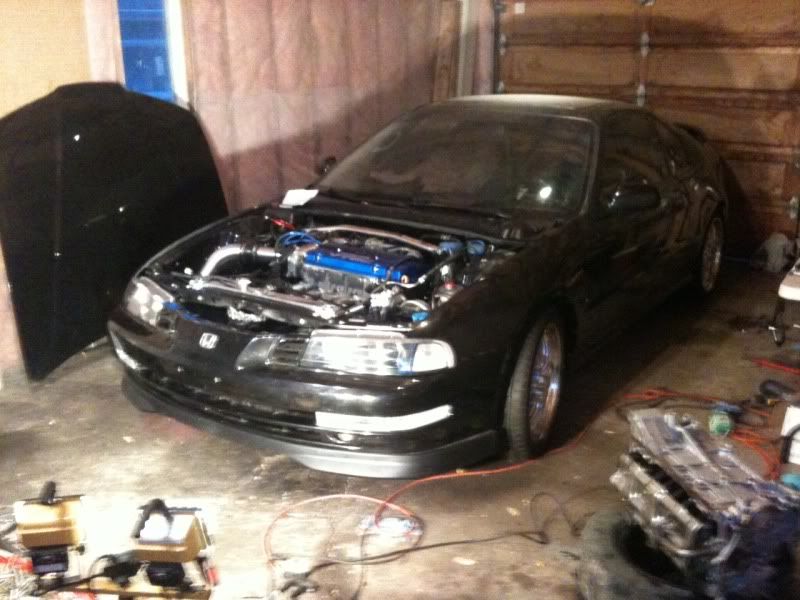

Another thing some may have noticed is I had a pair of spare JDM silver housing headlights. I actually took them apart, painted them black, and retrofitted projectors in them for HID's. I finally was able to install them and polish the lenses up.

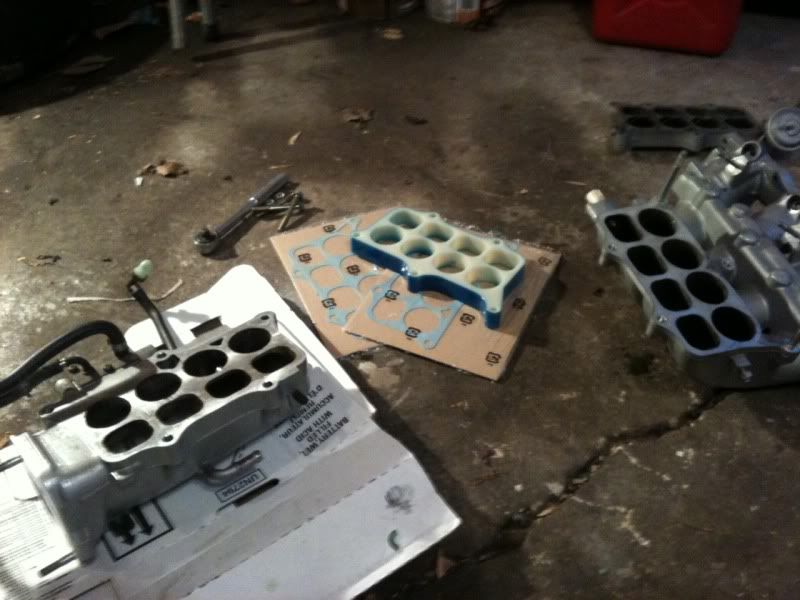
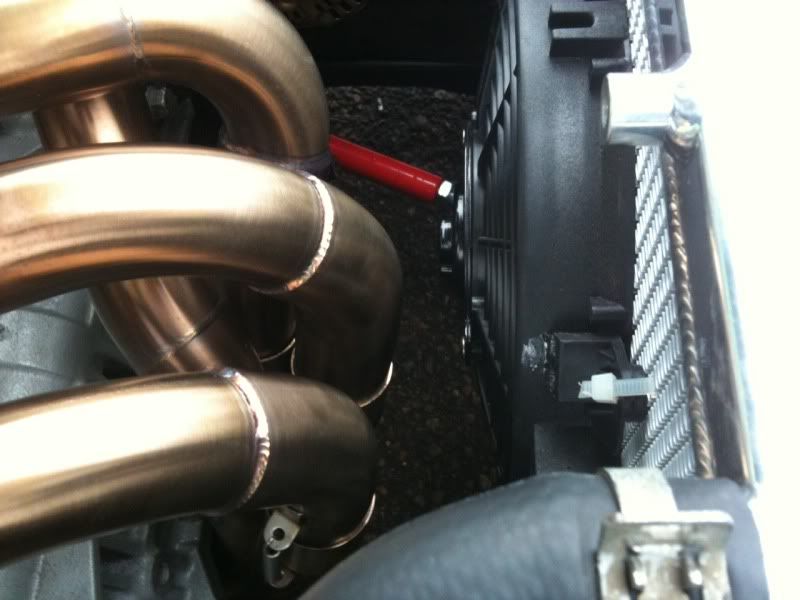
At this point of the build I had a few concerns and a few things I wish I had done while the motor was out. I wanted to delete the butterfly plates on the intake manifold and add a spacer in place, as well I needed to sort out an issue with the a/c hose being so close to the header. Problem solved on both ends.

I got the intake manifold off (i took it off a total of 11 times for various reasons, I am now a master at removing and can have it off in 30 min while the motors in the car)
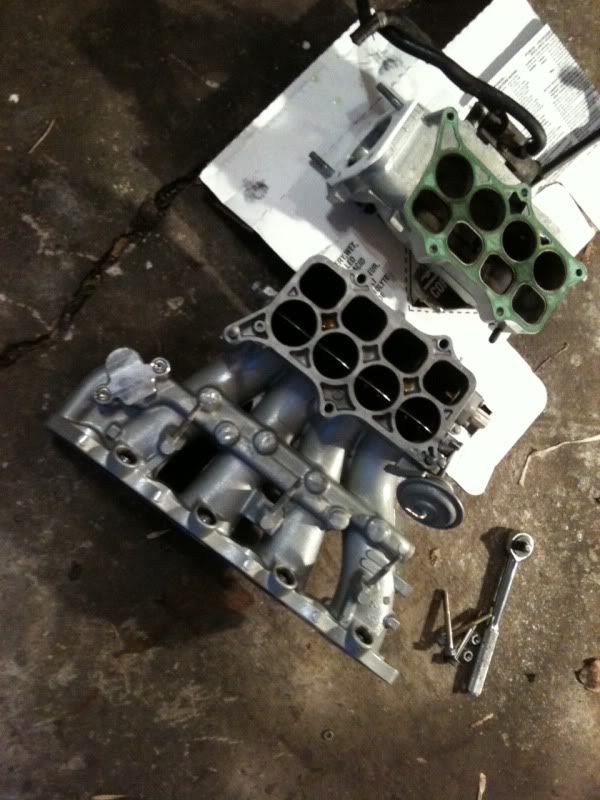
Fresh gaskets, spacer (painted blue)
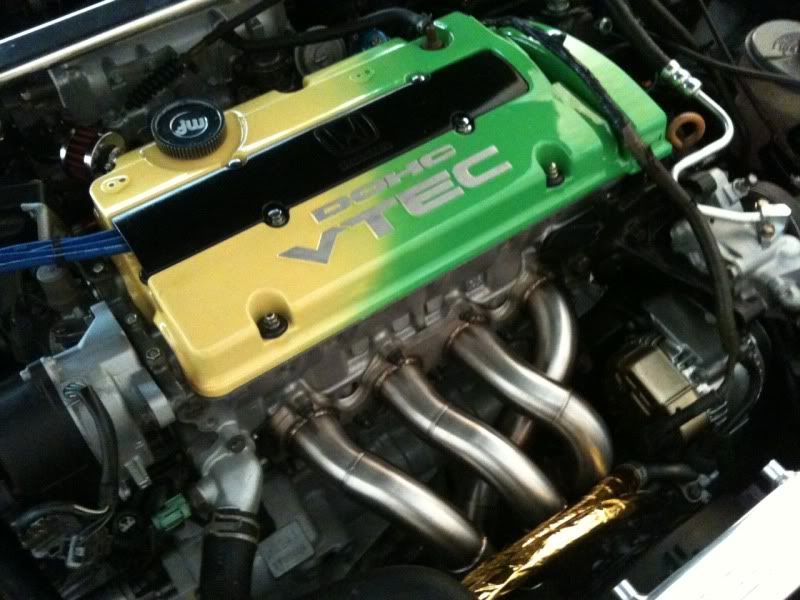
I also got around to making an even nicer valve cover


I relocated the battery at the same time
And finally, the wheels are going on the car
And back on the ground. You may have noticed different taillights, front signals, and a front lip were added during its time in the air.
Another thing some may have noticed is I had a pair of spare JDM silver housing headlights. I actually took them apart, painted them black, and retrofitted projectors in them for HID's. I finally was able to install them and polish the lenses up.
At this point of the build I had a few concerns and a few things I wish I had done while the motor was out. I wanted to delete the butterfly plates on the intake manifold and add a spacer in place, as well I needed to sort out an issue with the a/c hose being so close to the header. Problem solved on both ends.
I got the intake manifold off (i took it off a total of 11 times for various reasons, I am now a master at removing and can have it off in 30 min while the motors in the car)
Fresh gaskets, spacer (painted blue)
I also got around to making an even nicer valve cover
Thread Starter
Joined: Jun 2006
Posts: 2,721
Likes: 13
From: Vancouver Canada
Over the next month I addressed small issues that bugged me on the car. The trunk area had the start of small corrosion so i put a stop to it quickly.


The rear window trim was rusted to death (common issue) so it was replaced with a new OEM one

As was the ebrake button, torn to shreds over the years
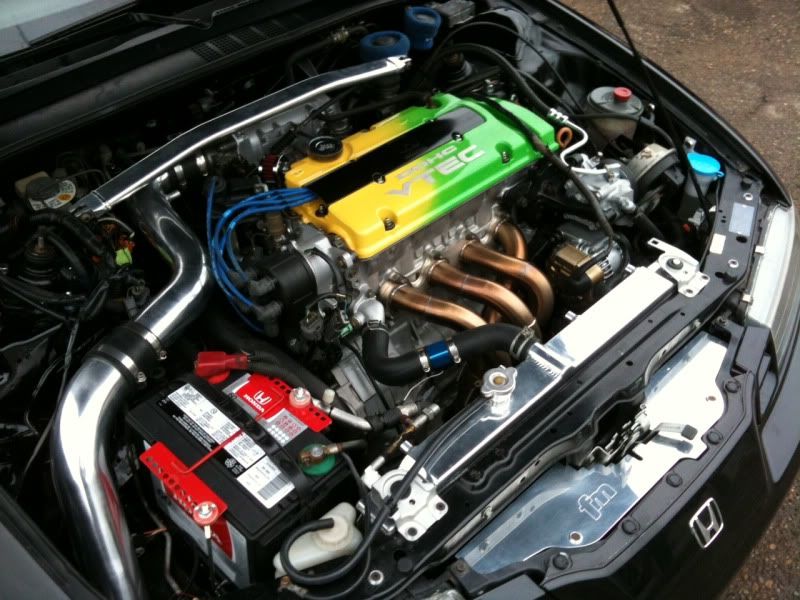
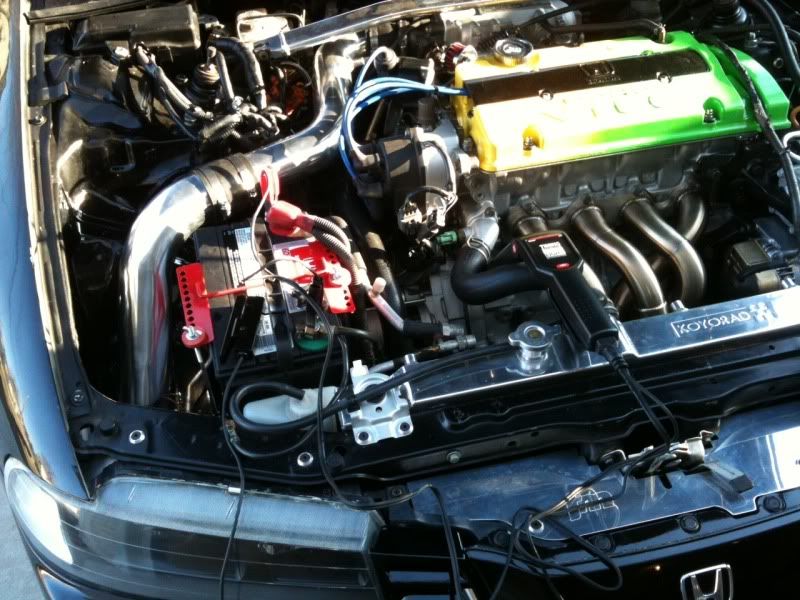
And the motor right before the first fire up. I would like to note every hose, was replaced with OEM parts, all the power steering lines were replaced (rusted from Ontario) along with the high pressure line.
success!

With the motor now working (at least to some extent) I adjusted the ride height to get it ready for its alignment.


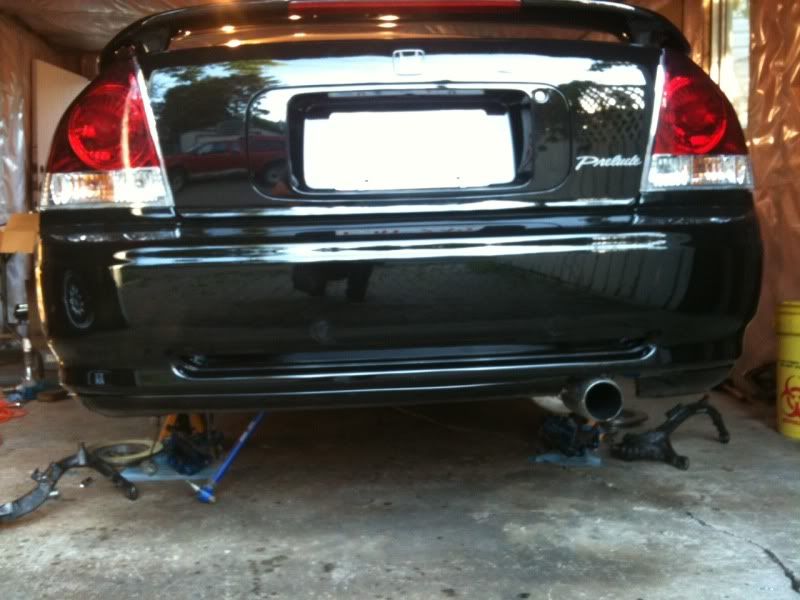
Before I could get it aligned though I would need to get my exhaust finished up. So I booked it in for welding and followed that up with alignment.
Battery relocate was giving me grief for a few weeks so I put it back in the front at this time. You may notice a fresh Honda battery, and the engine bay walls were actually resprayed grenada black pearl to clean it up.
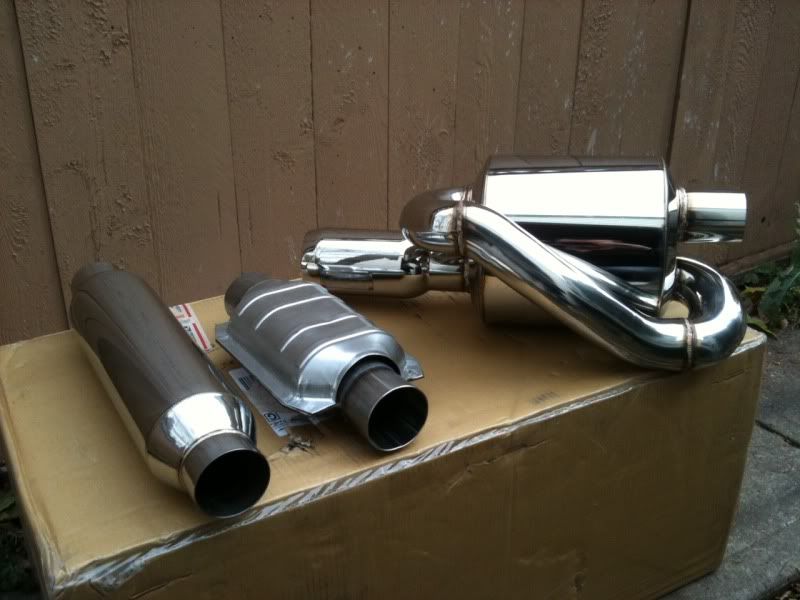
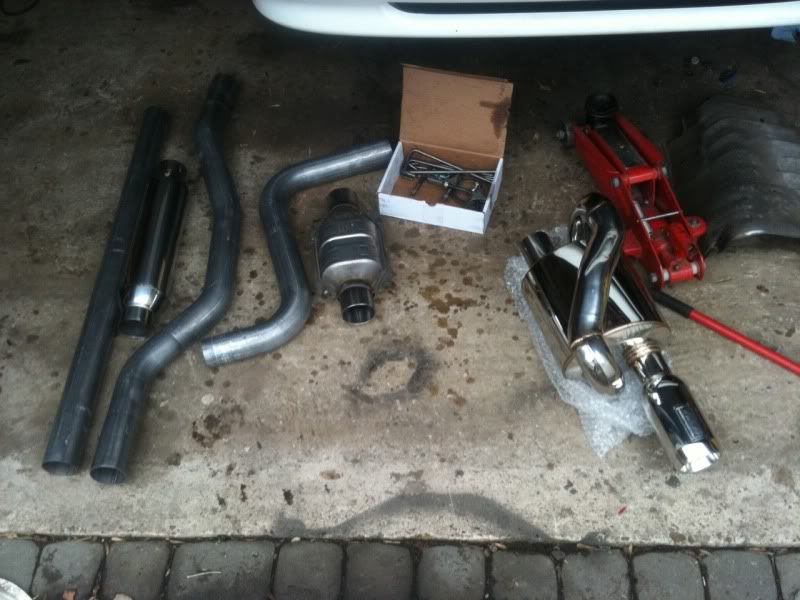
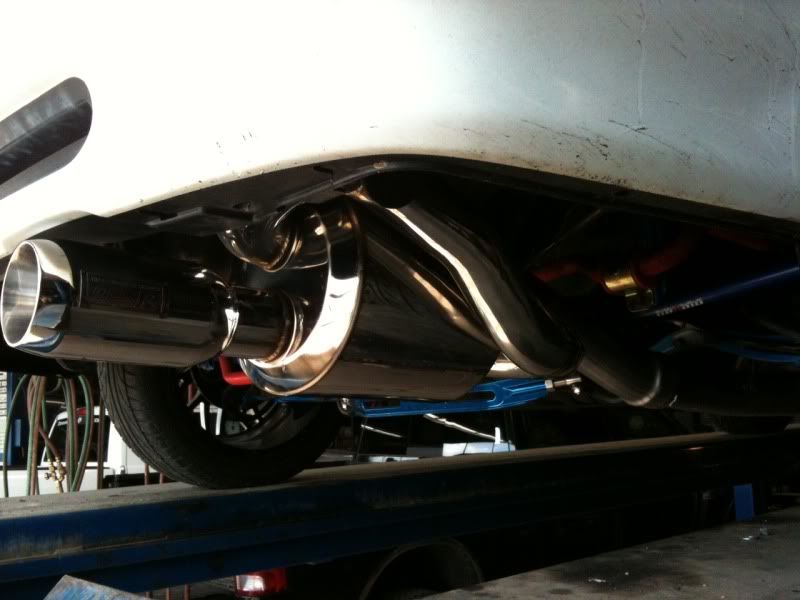
The exhaust is made up as follows
-Vibrant tri-y header
-Vibrant high flow cat
-Vibrant resonator
-OBX twin loop muffler
-2.5 Mandrel bend mild steel piping

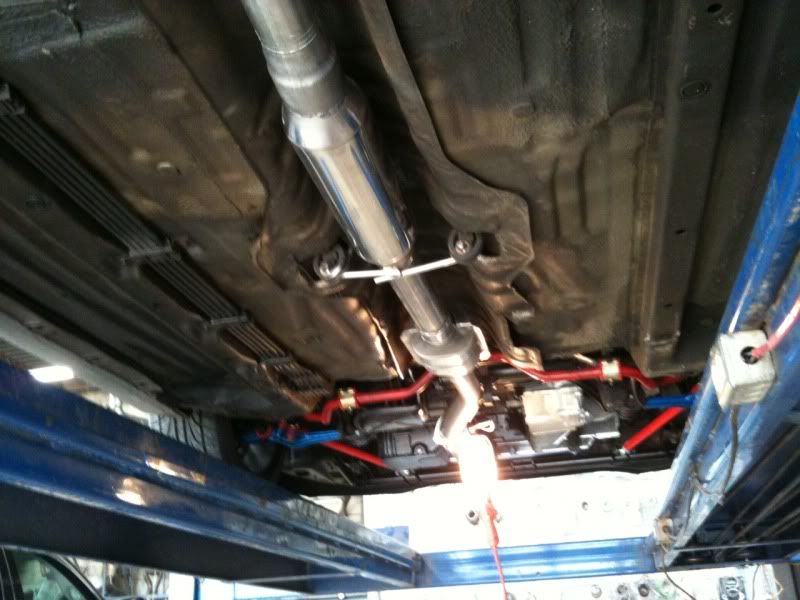

At this point I had my Wideband and EGT bungs welded in


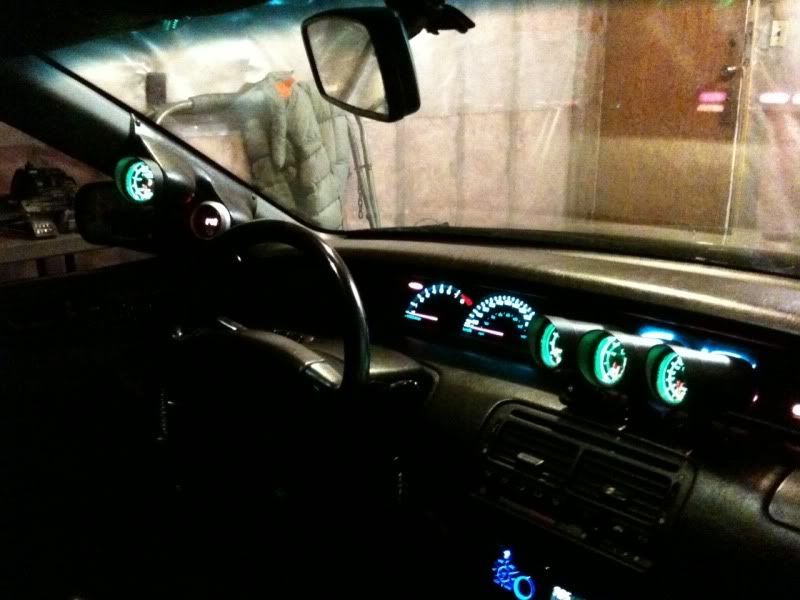
The days before the exhaust and alignment I had spent 10 hours doing a custom gauge harness along with making sure everything was tucked in the engine bay, labelled for any dummy working on the car in the future, and myself so I don't forget. Proper shrink wrapping, soldering, etc. It takes time when doing 5 gauges.
An interesting note, what you see on the carpet is the LAST CONFIRMED set of black OEM 4th gen floor mats. I bought these 2 years ago, maybe even 3 from a member on here. Sure enough Honda Canada and Honda USA had zero in stock after he placed his order for the last 3. I was lucky enough to have him sell me one of the sets. This is actually my favorite mod of the whole car. It makes the interior feel brand new.


And finished with the alignment shop

The rear window trim was rusted to death (common issue) so it was replaced with a new OEM one
As was the ebrake button, torn to shreds over the years
And the motor right before the first fire up. I would like to note every hose, was replaced with OEM parts, all the power steering lines were replaced (rusted from Ontario) along with the high pressure line.
success!
With the motor now working (at least to some extent) I adjusted the ride height to get it ready for its alignment.
Before I could get it aligned though I would need to get my exhaust finished up. So I booked it in for welding and followed that up with alignment.
Battery relocate was giving me grief for a few weeks so I put it back in the front at this time. You may notice a fresh Honda battery, and the engine bay walls were actually resprayed grenada black pearl to clean it up.
The exhaust is made up as follows
-Vibrant tri-y header
-Vibrant high flow cat
-Vibrant resonator
-OBX twin loop muffler
-2.5 Mandrel bend mild steel piping
At this point I had my Wideband and EGT bungs welded in
The days before the exhaust and alignment I had spent 10 hours doing a custom gauge harness along with making sure everything was tucked in the engine bay, labelled for any dummy working on the car in the future, and myself so I don't forget. Proper shrink wrapping, soldering, etc. It takes time when doing 5 gauges.
An interesting note, what you see on the carpet is the LAST CONFIRMED set of black OEM 4th gen floor mats. I bought these 2 years ago, maybe even 3 from a member on here. Sure enough Honda Canada and Honda USA had zero in stock after he placed his order for the last 3. I was lucky enough to have him sell me one of the sets. This is actually my favorite mod of the whole car. It makes the interior feel brand new.
And finished with the alignment shop
Thread Starter
Joined: Jun 2006
Posts: 2,721
Likes: 13
From: Vancouver Canada
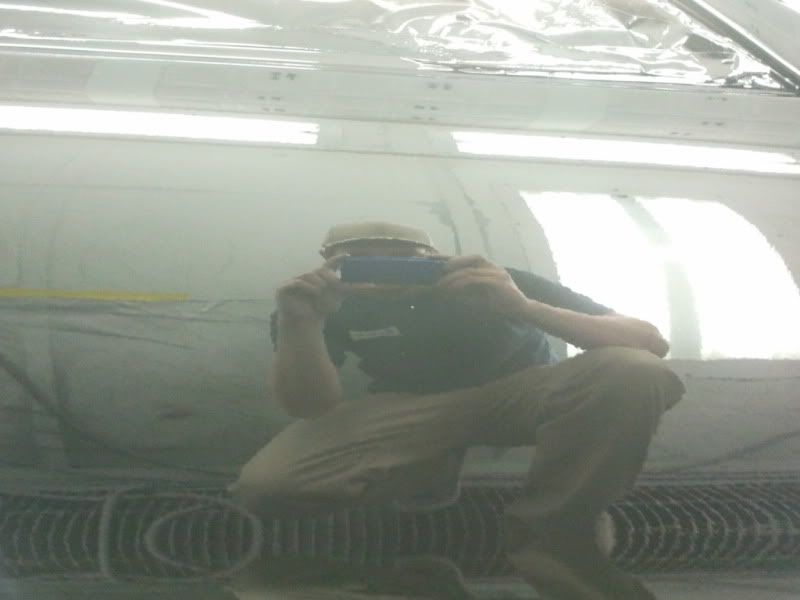
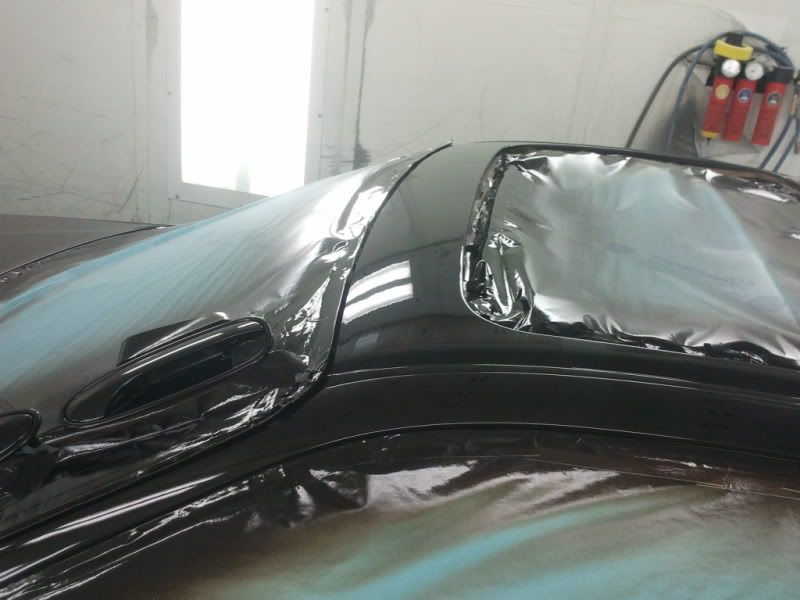
The next step was something I feared would cost me the most as I know good body work and paint work is not cheap. I lucked out as a friend of mine was looking for a track car. My girlfriend just so happened to be selling her miata, exactly what he was after. So cash on her end plus a free paint job and body work for me, my friend got himself a car. The bodywork and paint work done would have run me $5-6k. I got real lucky in my opinion. The amazing part is turn around was 3 days for everything. He worked extremely fast, but without skipping steps or doing a half assed job. He did 14 hours a day for 3 days. The final product, amazing as the last paint job he did for me.
The miata traded off


The first prelude we painted together


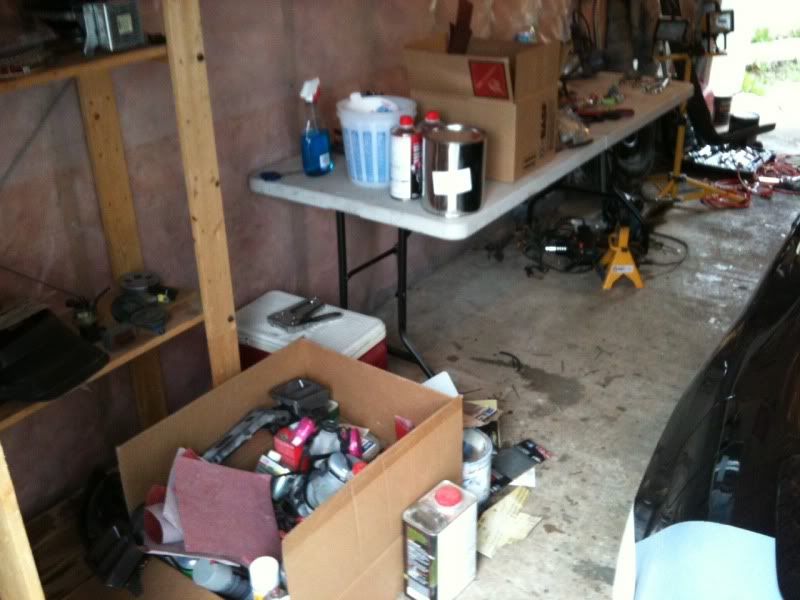
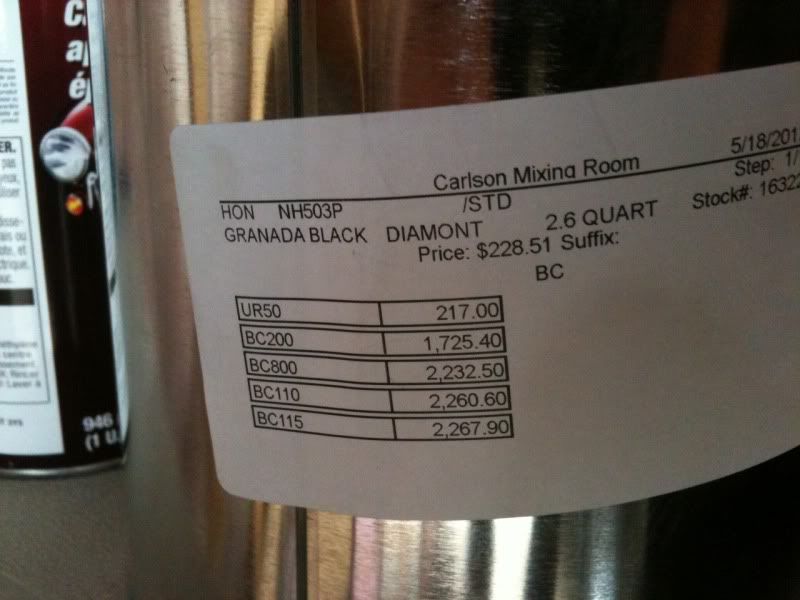
Materials
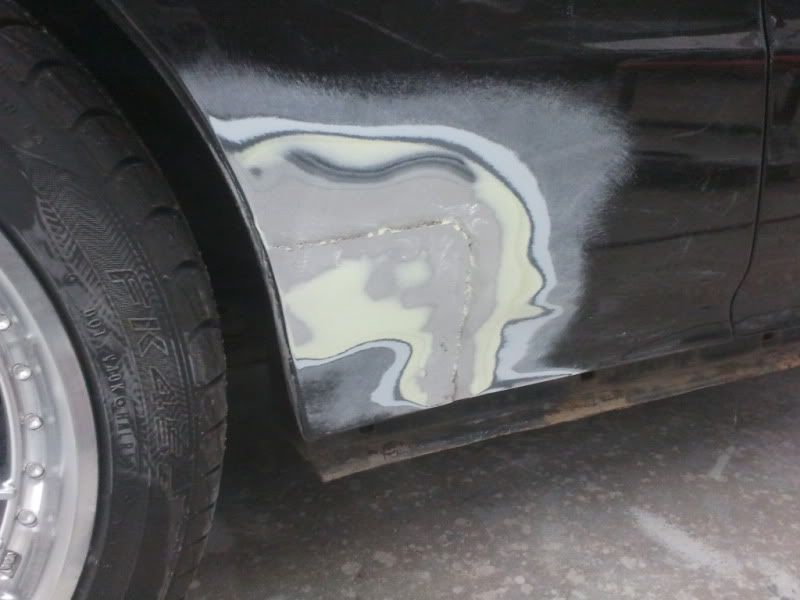
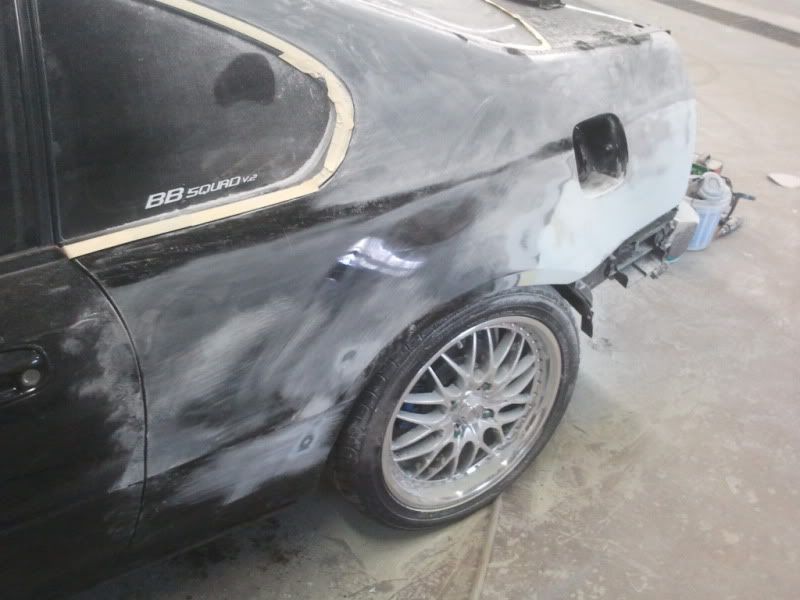
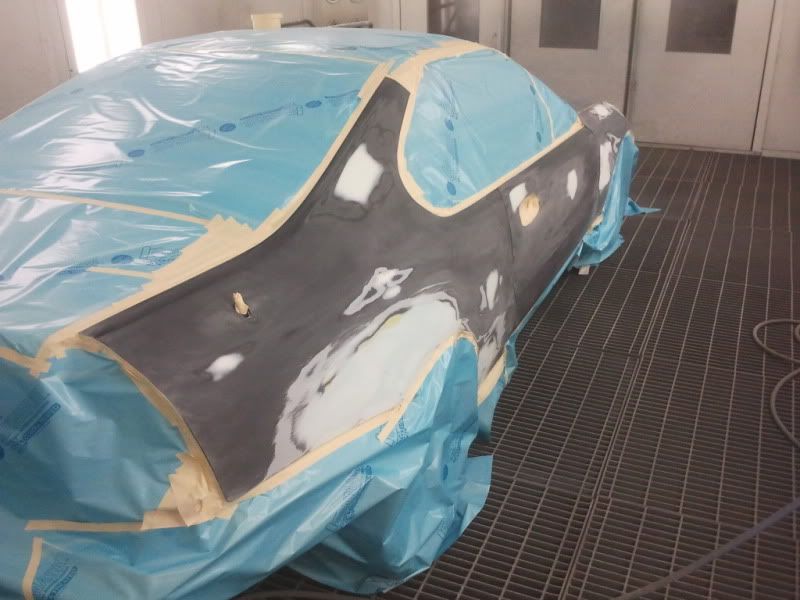
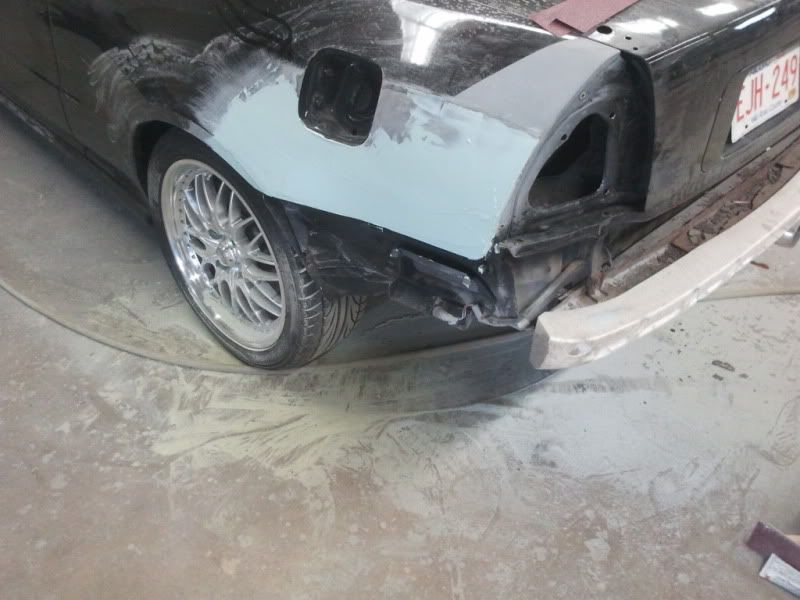
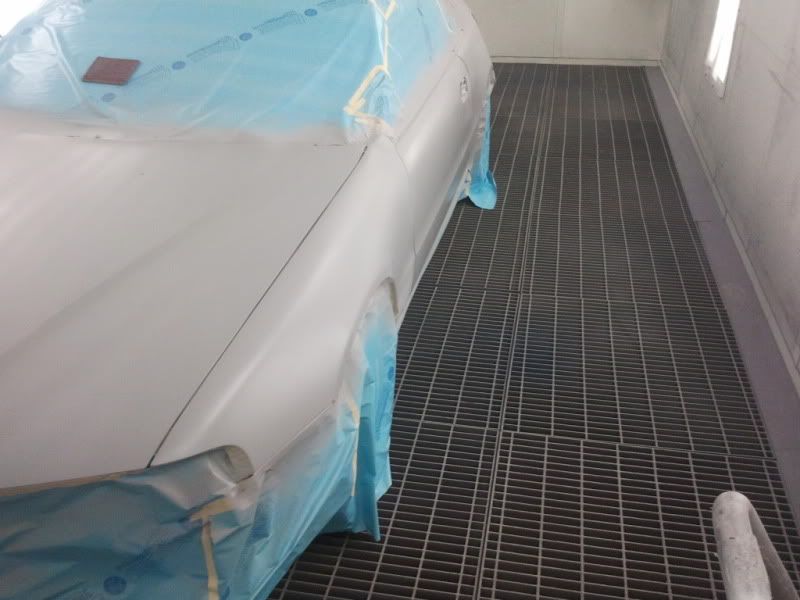
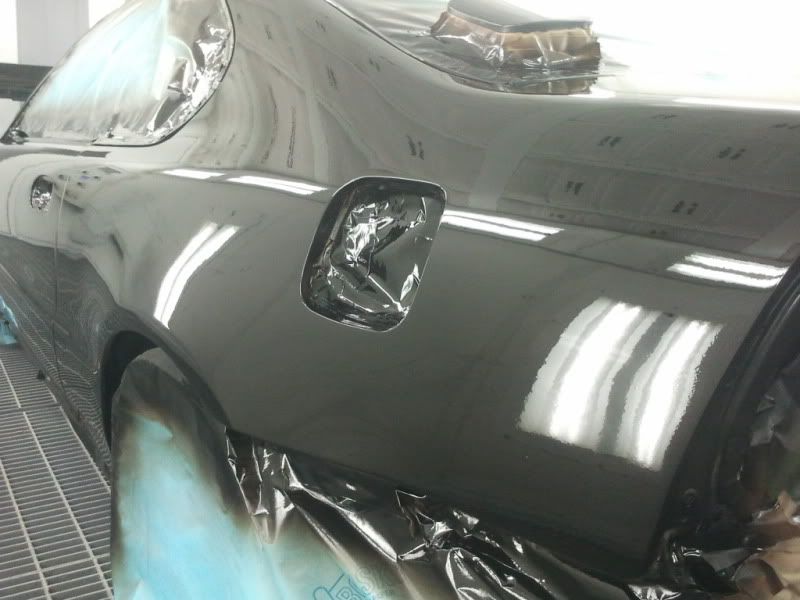
A run down of the body before body work. The car had been in a fender bender on the rear quarter. Nothing serious, but it did cause the drivers quarter to be punched in. Luckily it did not need to be replaced and was able to be popped back in place. The rear bumper as I said was replaced. What neither of us knew was the front passenger fender was made up of half bondo, half metal lol. It was covering a JDM signal marker (or where one us to be). The biggest issue for me was the fact the car looked wavey from the sides, the quarters not quiet round where it should have lots of curves, and the welds from a previous rust repair job were showing through the previous body work. We made sure to address all of this and more.
After sanding the damage was revealed

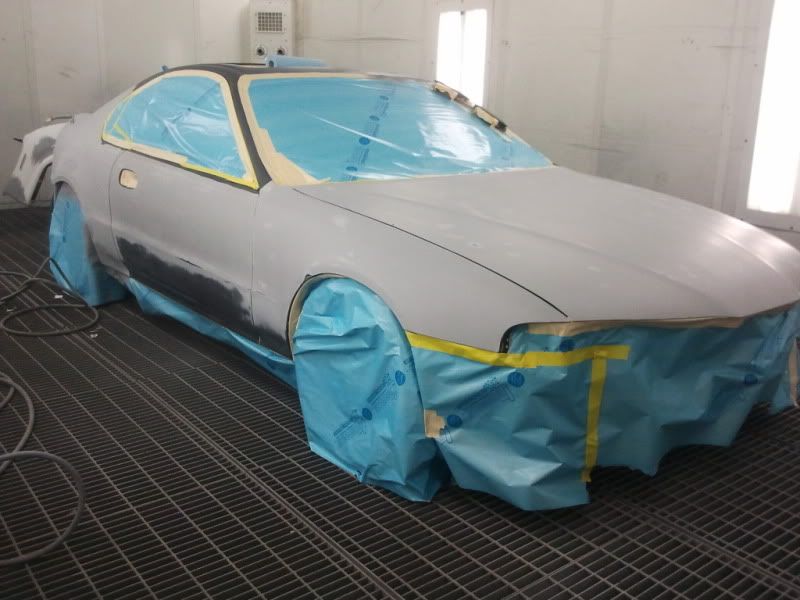
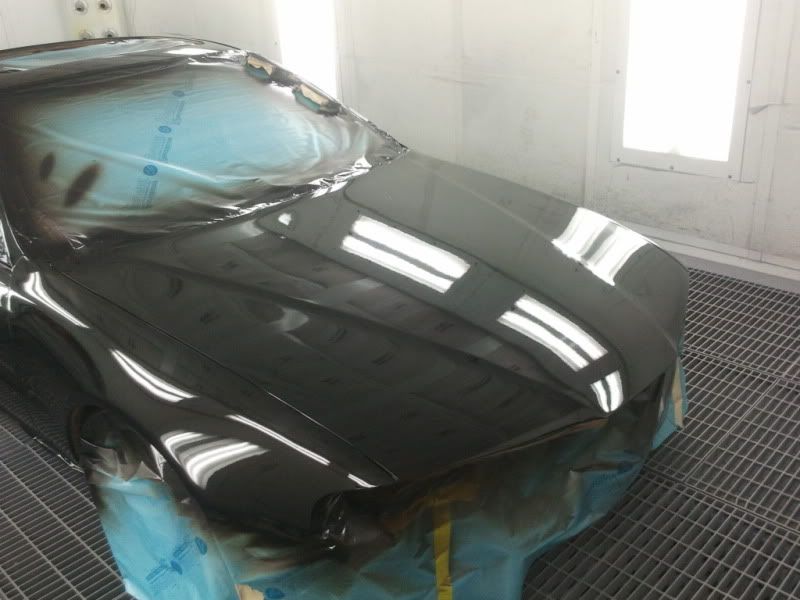
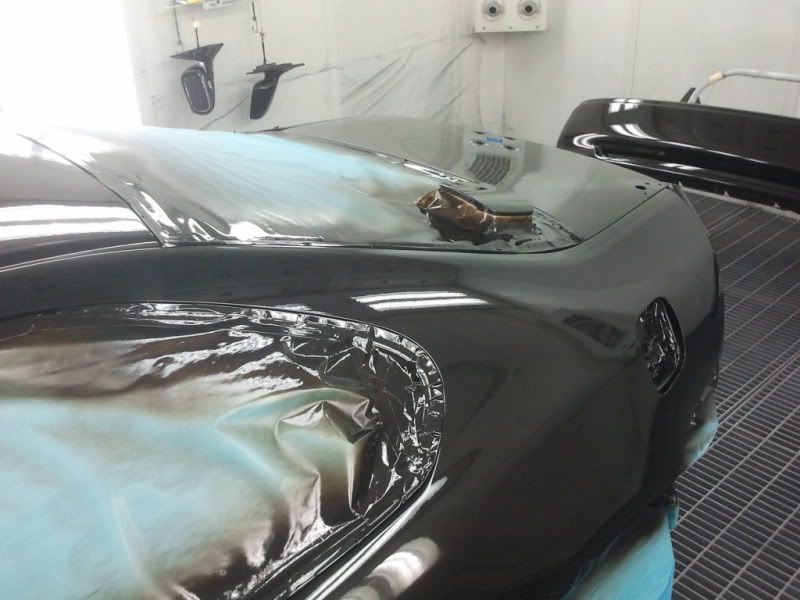
The hood needed to be blocked out as well. Actually, the whole car ended up getting blocked but the hood actually had the whole front end covered in filler. Neither of us can figure it out since the hood underneath was in fine condition. Oh well, bad body men I guess.
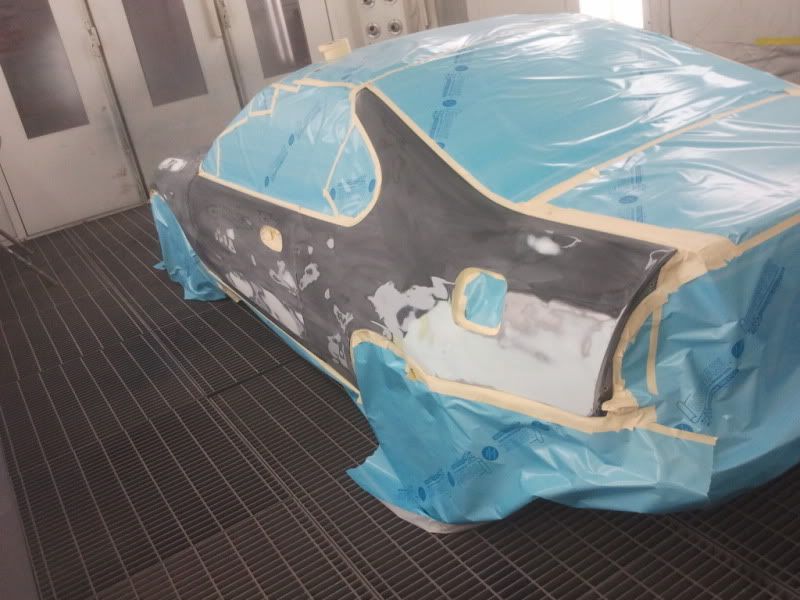
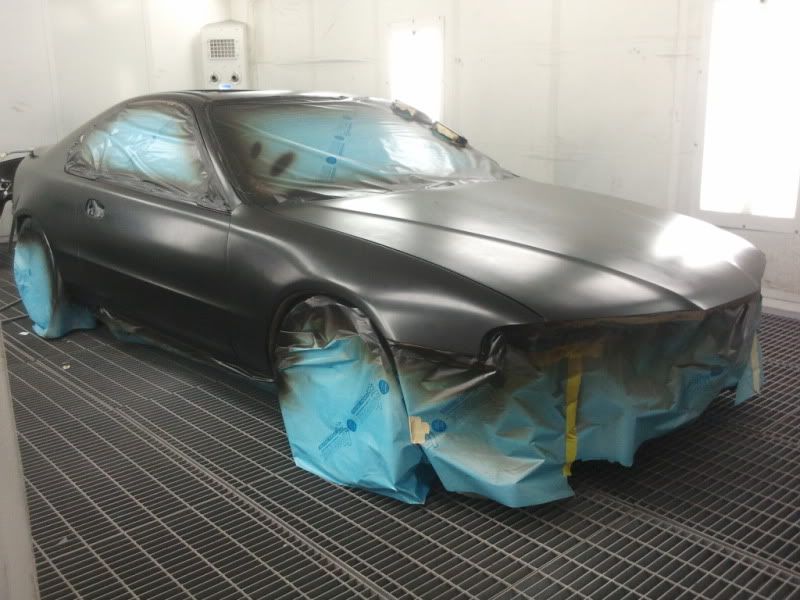
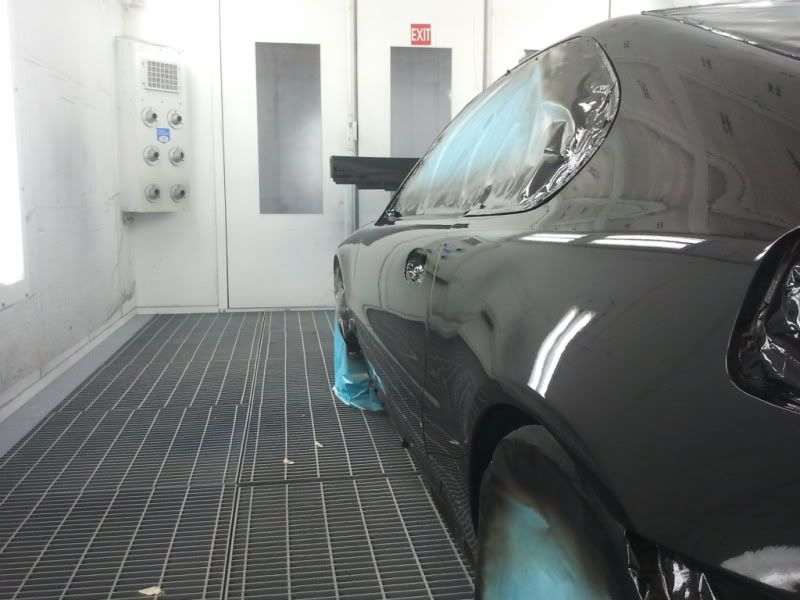
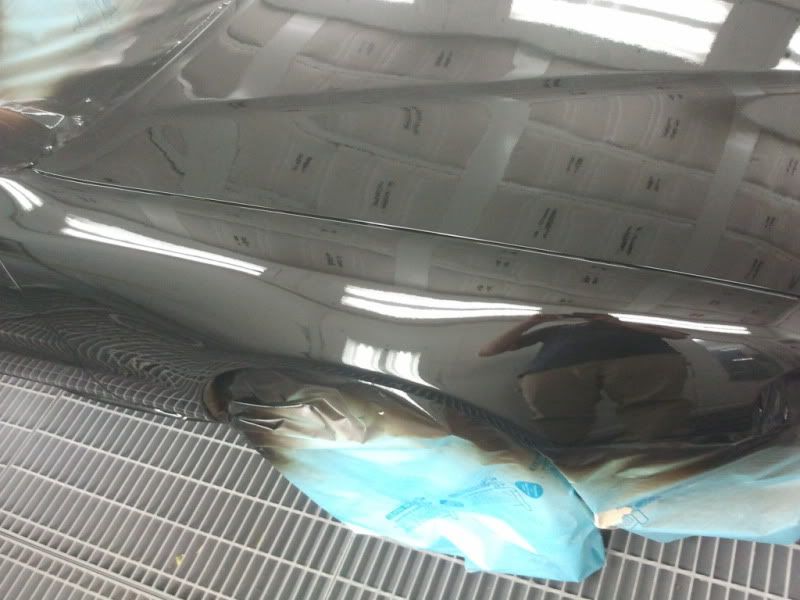
And going into primer
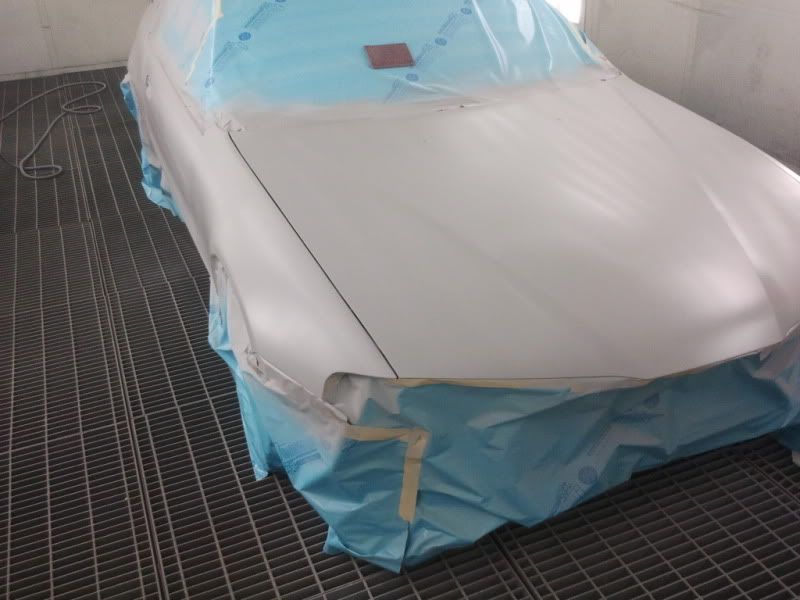
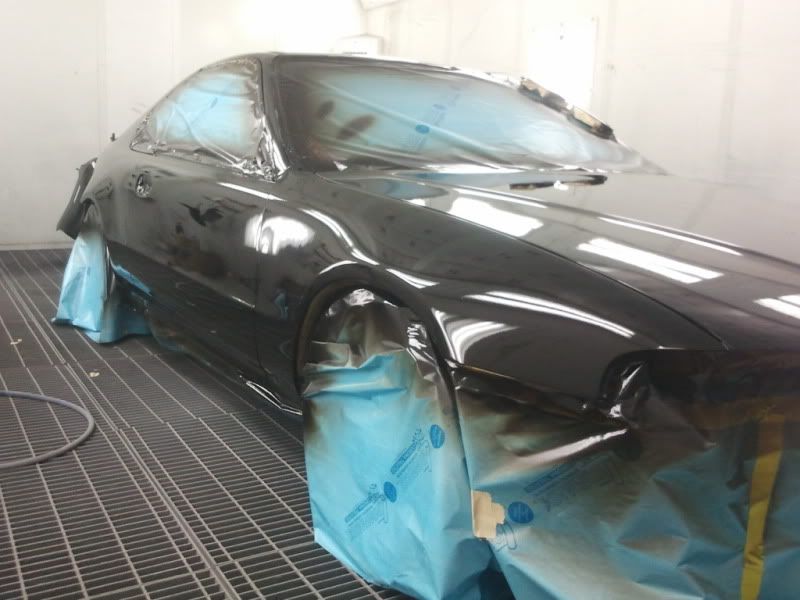
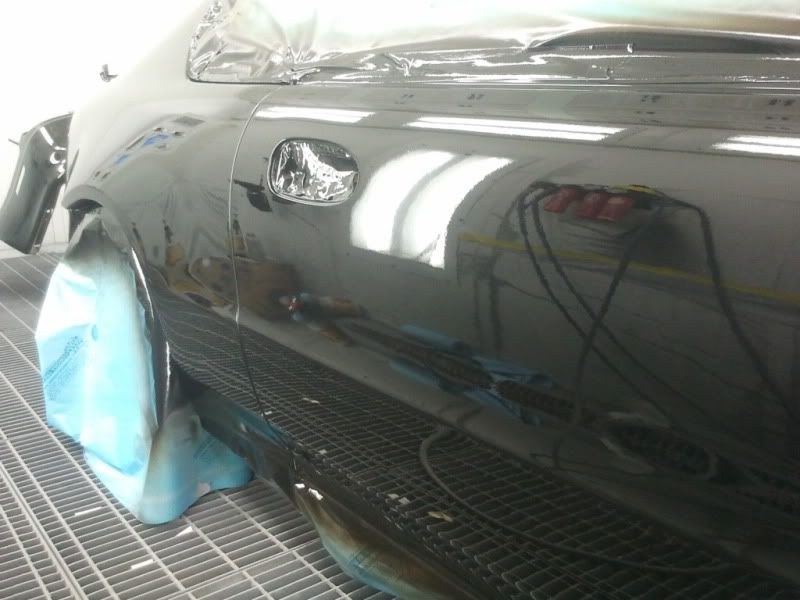
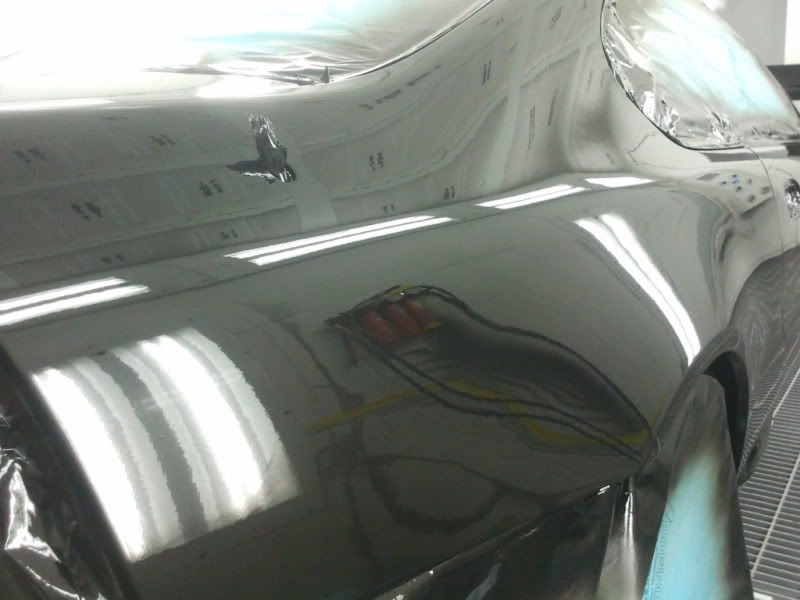
2 coats of base 3 coats of clear

The miata traded off
The first prelude we painted together
Materials
A run down of the body before body work. The car had been in a fender bender on the rear quarter. Nothing serious, but it did cause the drivers quarter to be punched in. Luckily it did not need to be replaced and was able to be popped back in place. The rear bumper as I said was replaced. What neither of us knew was the front passenger fender was made up of half bondo, half metal lol. It was covering a JDM signal marker (or where one us to be). The biggest issue for me was the fact the car looked wavey from the sides, the quarters not quiet round where it should have lots of curves, and the welds from a previous rust repair job were showing through the previous body work. We made sure to address all of this and more.
After sanding the damage was revealed
The hood needed to be blocked out as well. Actually, the whole car ended up getting blocked but the hood actually had the whole front end covered in filler. Neither of us can figure it out since the hood underneath was in fine condition. Oh well, bad body men I guess.
And going into primer
2 coats of base 3 coats of clear
Thread Starter
Joined: Jun 2006
Posts: 2,721
Likes: 13
From: Vancouver Canada
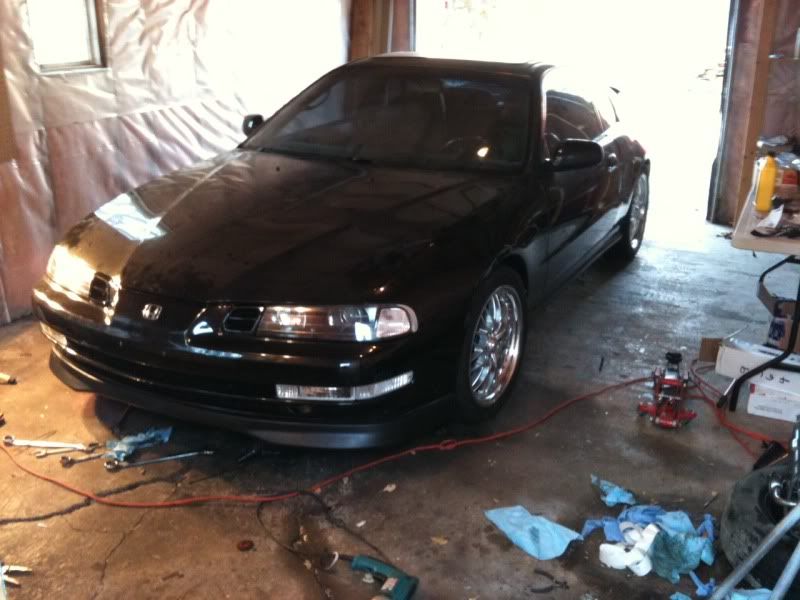
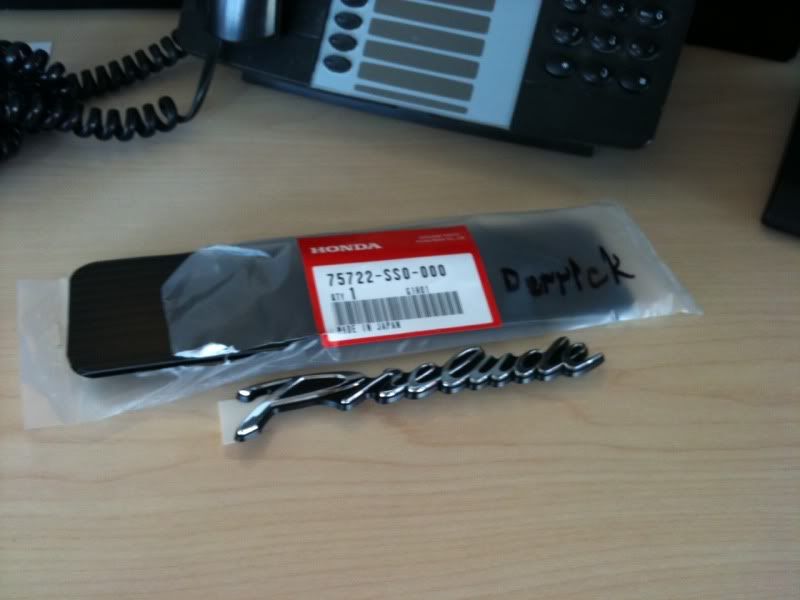
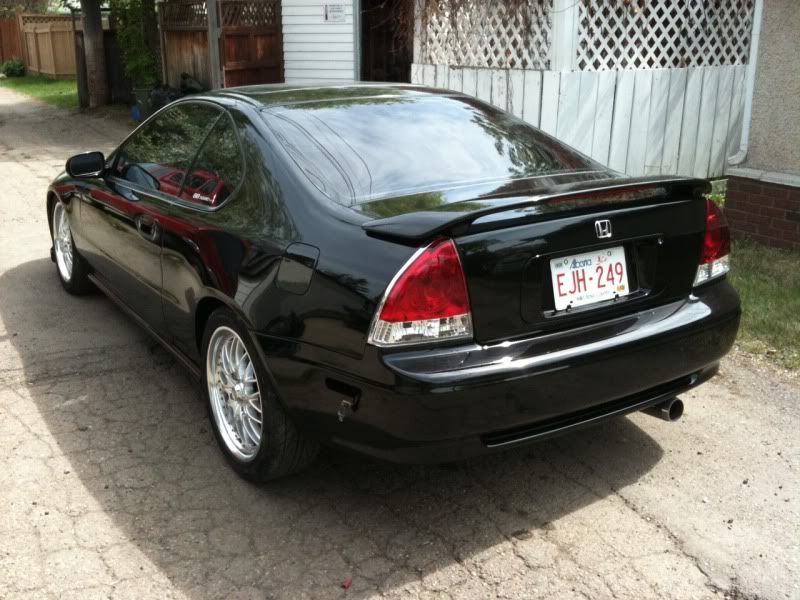
Putting the car back together did not take to long after that. I spent an afternoon lining everything up so it was perfectly straight. I also picked up a fresh Prelude badge for the trunk. I was originally going to shave it all but I figured the last 3 prelude i've had were shaved and I'm tired of people asking about "My civic"... figured this would clear that up.
We didn't finish the front bumper and front lip because I was waiting to finish making my custom rear lip. I did not have it ready in time for the painting so we held off for 2 weeks. I put the car together in the mean time anyway.
Bumper and lips painted
Custom Rear
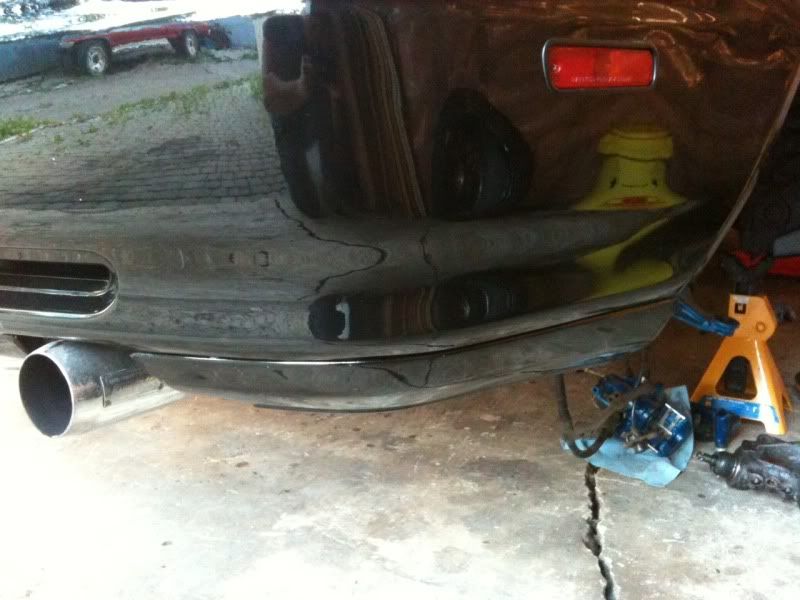
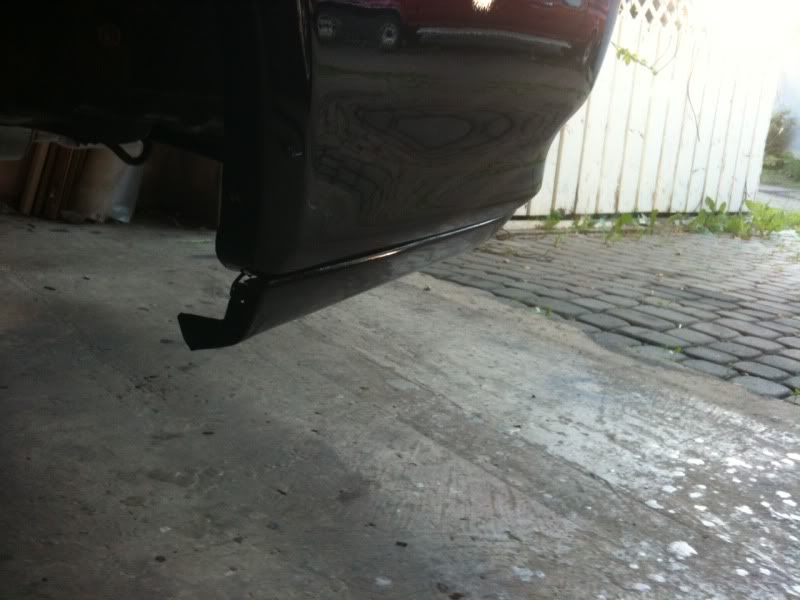
The car finally all in one piece getting ready for a bath


We didn't finish the front bumper and front lip because I was waiting to finish making my custom rear lip. I did not have it ready in time for the painting so we held off for 2 weeks. I put the car together in the mean time anyway.
Bumper and lips painted
Custom Rear
The car finally all in one piece getting ready for a bath
Thread Starter
Joined: Jun 2006
Posts: 2,721
Likes: 13
From: Vancouver Canada
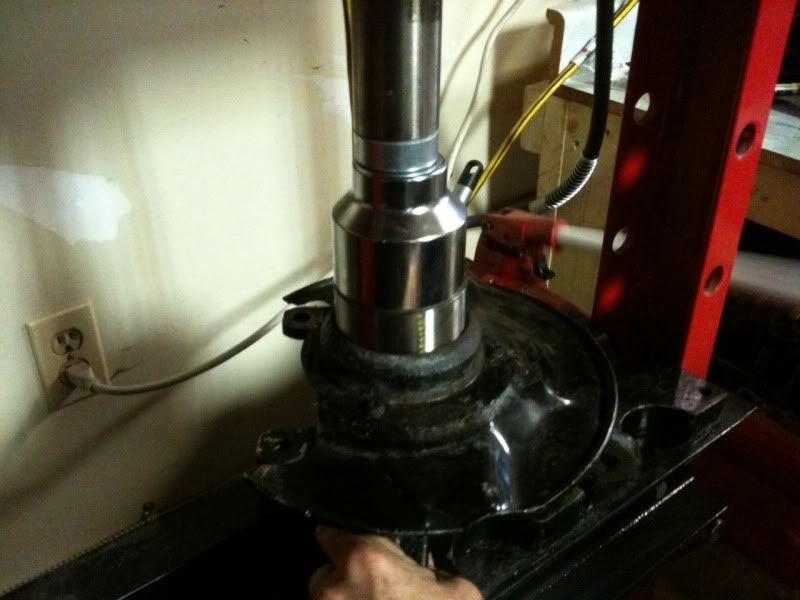
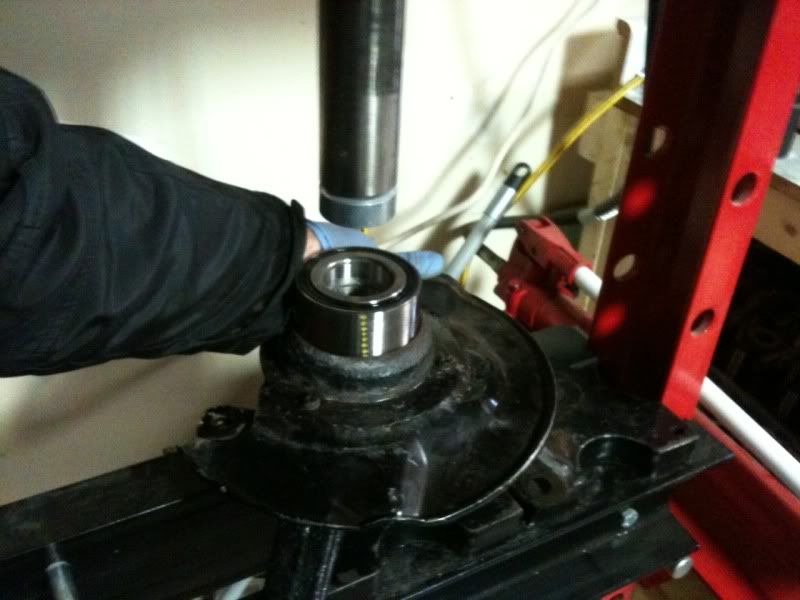
Some may notice the suspension was apart again. I had originally pressed aftermarket lower ball joints in the knuckles but after thinking about it I didn't want anything but OEM in there so I removed it again and pressed fresh OEM Honda ones in. For those wondering 5th gen balljoints are what was used, the part number fits 4th gens. This is also when the front wheel bearings were pressed in.

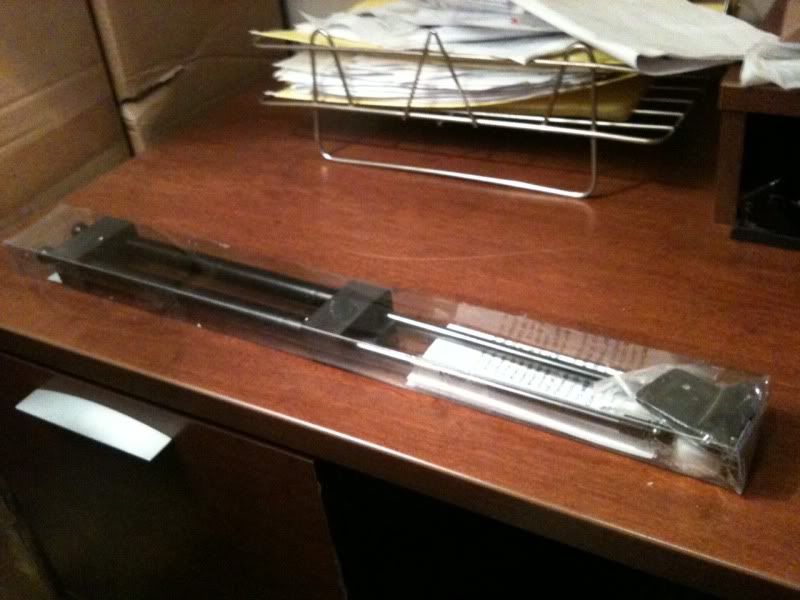
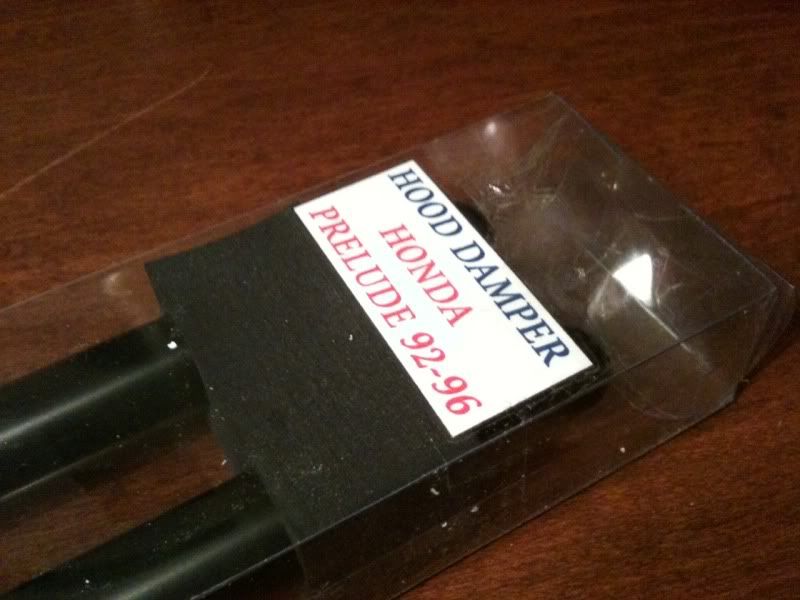
Cruise control was deleted to make way for this


The battery was relocated back to the trunk with the issue being solved


And these were added as well. LED prelude door sill lights


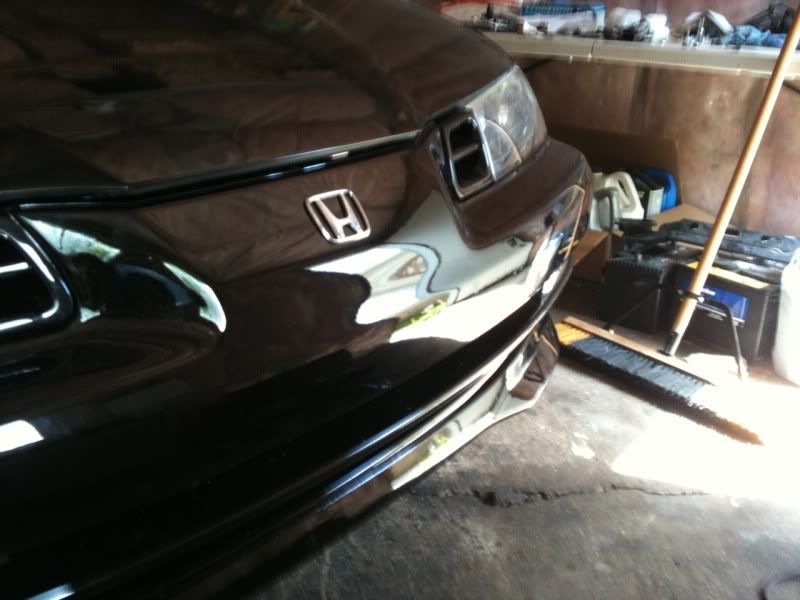
HID's were finally installed


New pigtails required


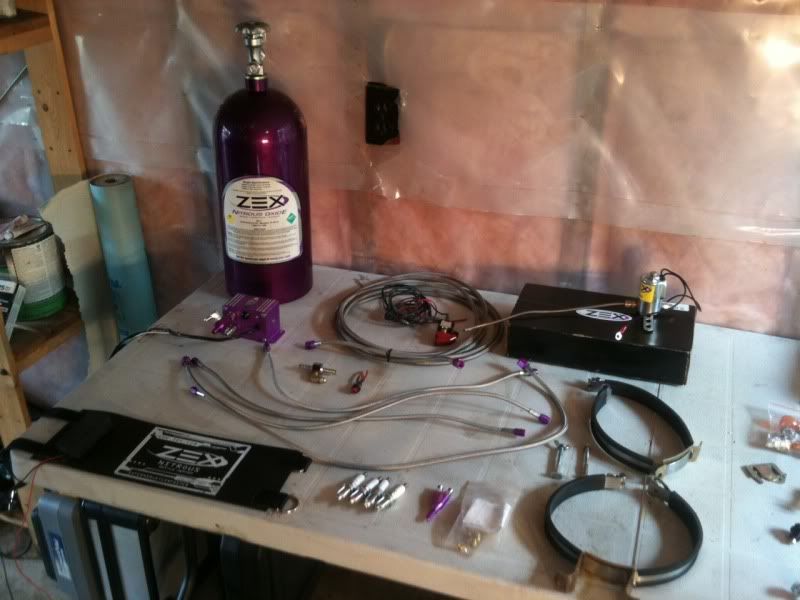
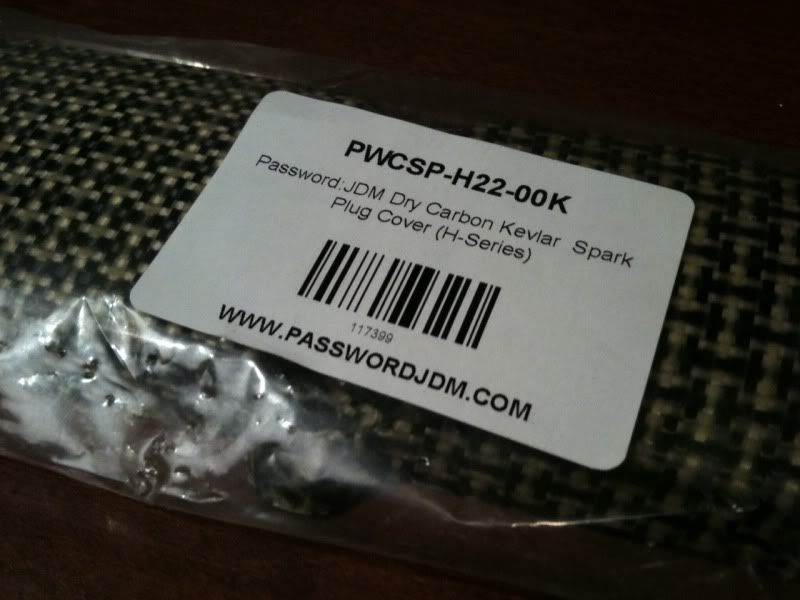
And this kit was picked up :D


Picked up a fresh plate cover

And gave it a rinse before it arrived at it's new home
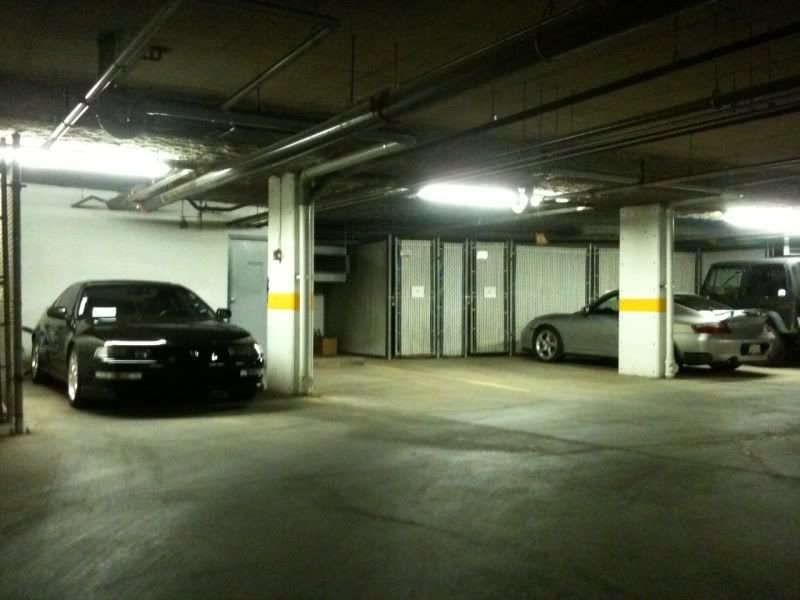
New home (new condo)
Used the flat surface and wall to set the projectors cut off

Cruise control was deleted to make way for this
The battery was relocated back to the trunk with the issue being solved
And these were added as well. LED prelude door sill lights
HID's were finally installed
New pigtails required
And this kit was picked up :D
Picked up a fresh plate cover
And gave it a rinse before it arrived at it's new home
New home (new condo)
Used the flat surface and wall to set the projectors cut off
Last edited by Prudz_lude; Jan 30, 2013 at 06:46 PM.
Thread Starter
Joined: Jun 2006
Posts: 2,721
Likes: 13
From: Vancouver Canada
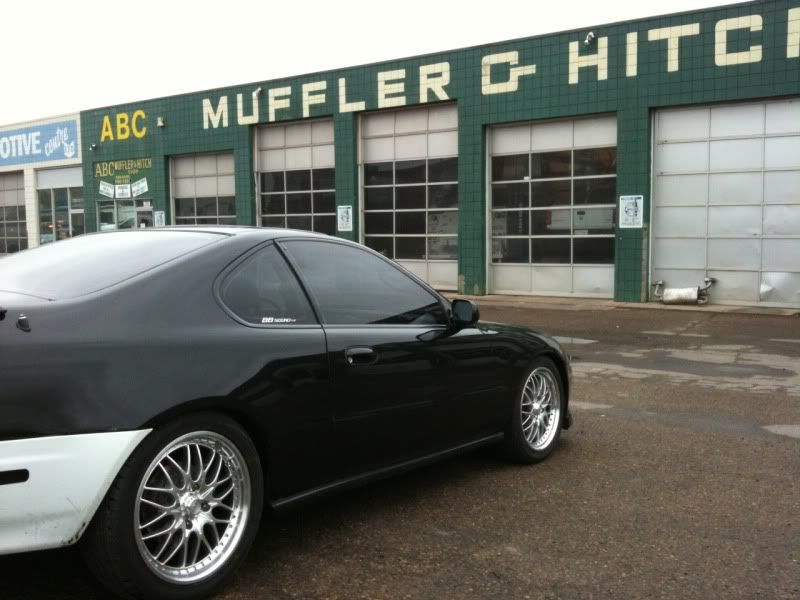
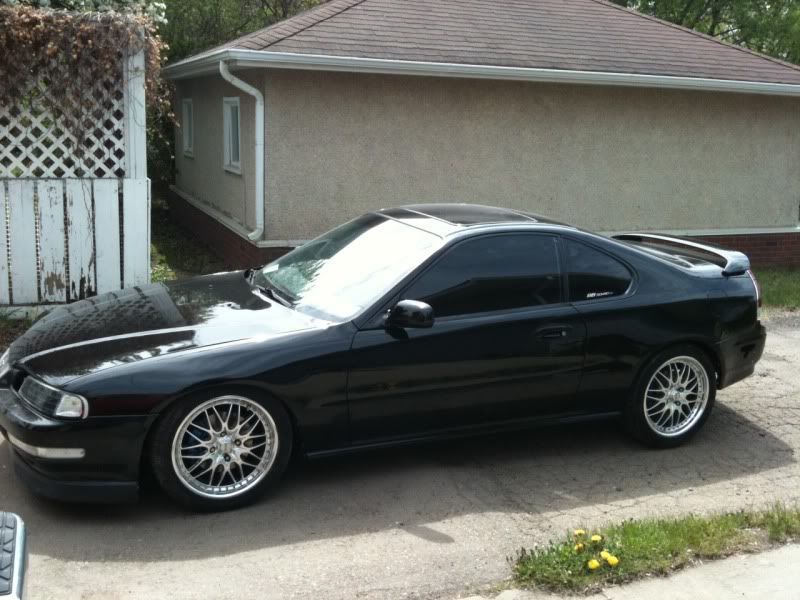
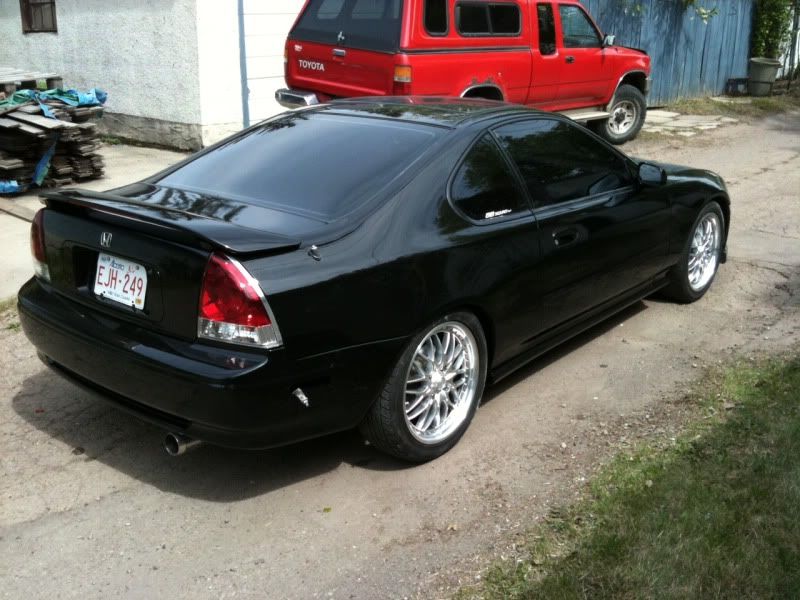
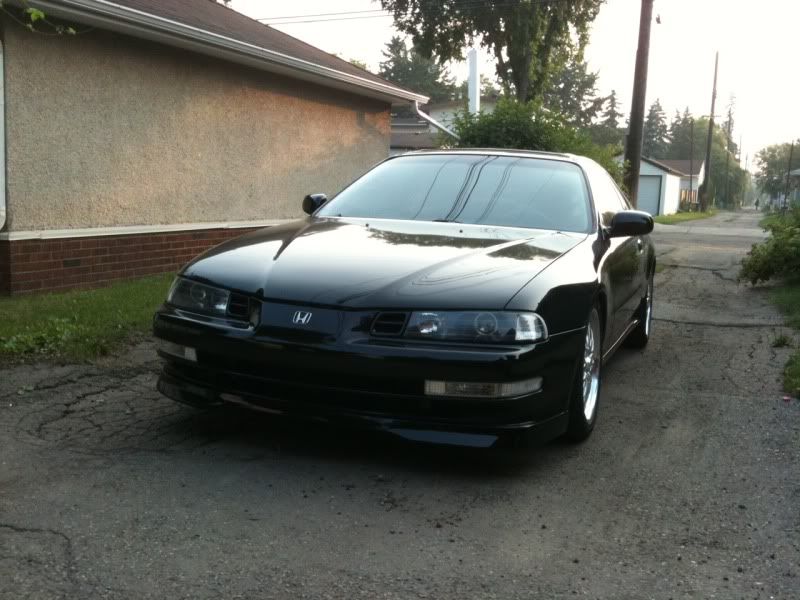
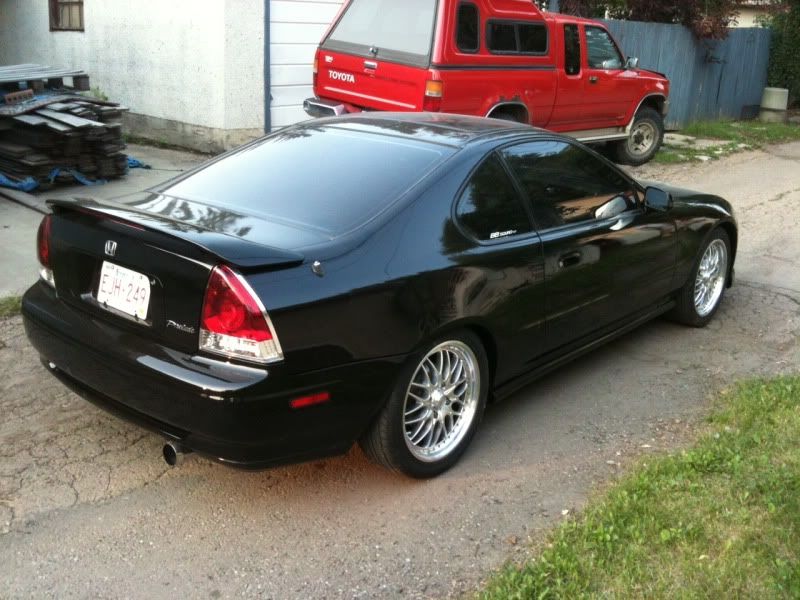
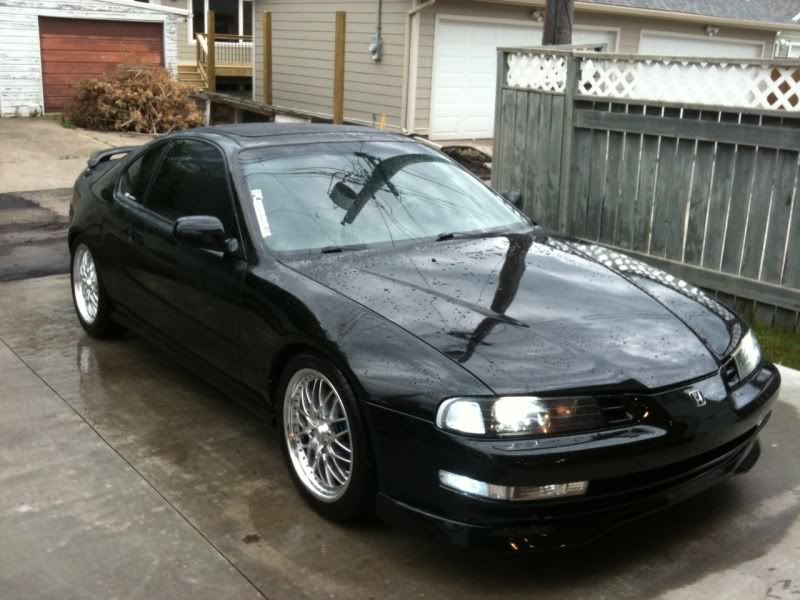
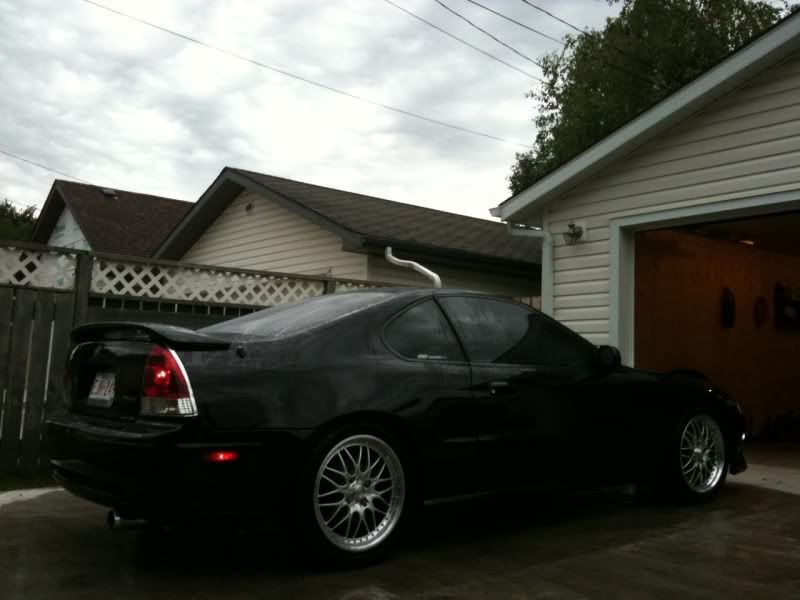
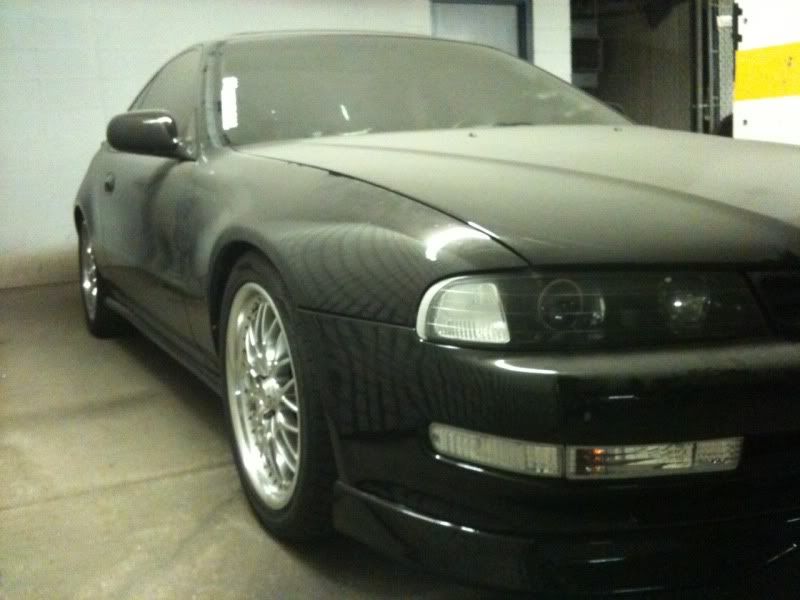
And a reference point of what it looked like July 1st 2011 to July 1st 2012
2011
2012
More to come tomorrow, i'm exhausted after building this thread. Fuuuuu some other sweet stuff to come.
2011
2012
More to come tomorrow, i'm exhausted after building this thread. Fuuuuu some other sweet stuff to come.
Last edited by Prudz_lude; Sep 6, 2012 at 02:02 PM.
Thread Starter
Joined: Jun 2006
Posts: 2,721
Likes: 13
From: Vancouver Canada
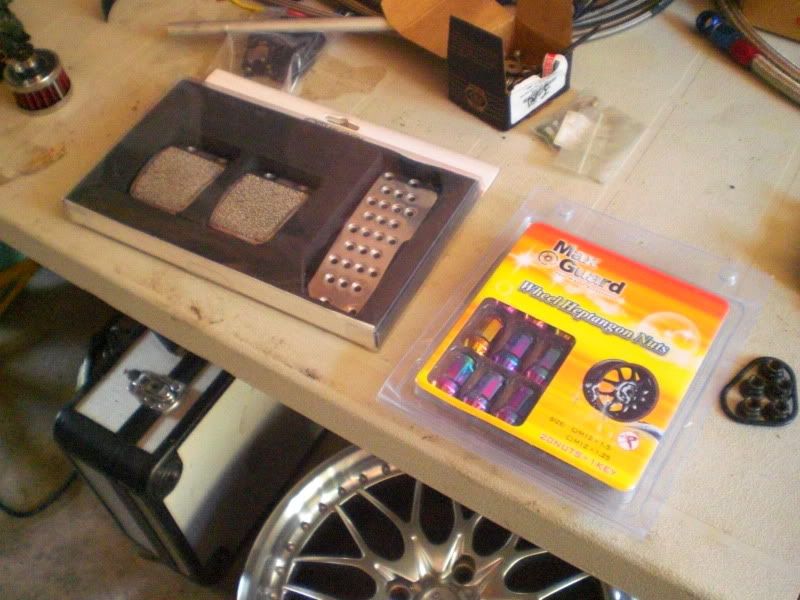
The interior was cleaned up a bit, a new shift boot, new ebrake boot, and a new arm rest cover were added. Mugen pedals were finally installed.


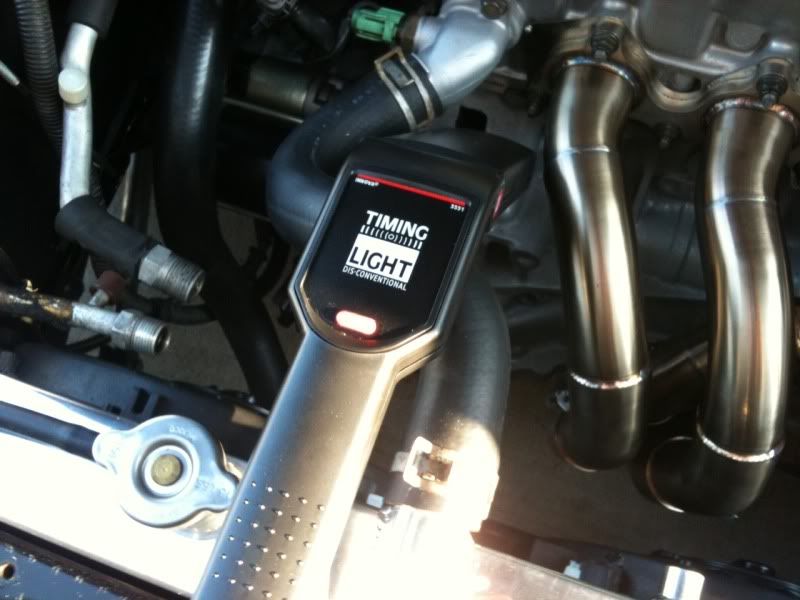
The car was also running very rich. A friend and I realized I had not set the timing on the dizzy. We decided to take care of that and do a compression test to make sure everything is doing alright.
The timing was extremely far retarded to the point there was a huge lack of power. We fixed that.
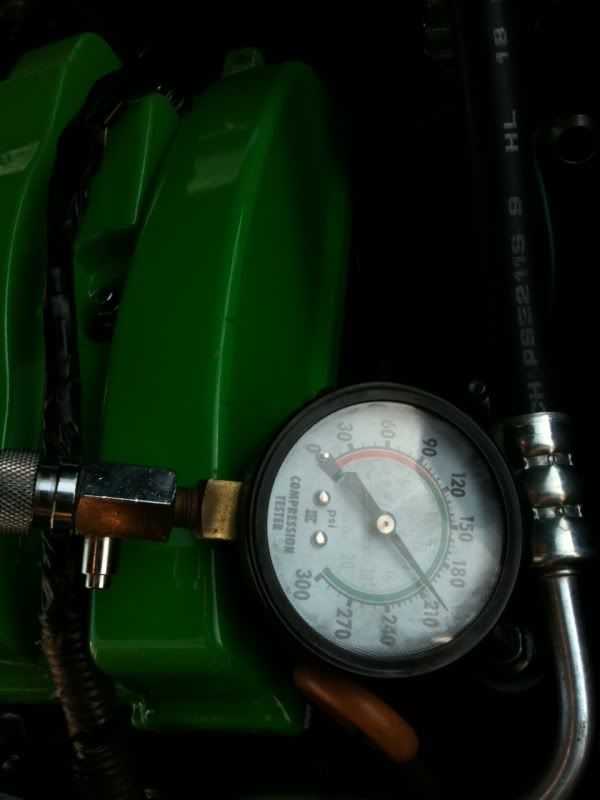
210 on all 4 cylinders! A healthy motor for sure. I'm so glad because even in Vtec the motor does not burn oil. This was the goal!
The next step was fixing TPS. The sensor was damaged and needed to be replaced. I picked up a new one and spend a few hours calibrating it to the proper setting. Not very fun :p


With everything all finished up I decided to give it the first real drive i've been able to have. Everything seemed alright until I tried to hit vtec. It would not engage and a check engine appeared. The solenoid was causing a code. We busted out the Helms manual and started diagnosing by doing voltage tests. The solenoid and pressure switch appeared to be fine. So we began tracing the harness. It turned out the engine harness was fine, but the main dash harness had a split some where in the wiring. I made an external wire, wired directly to the solenoid and the problem was fixed! Huston, we have VTEC!
The car was also running very rich. A friend and I realized I had not set the timing on the dizzy. We decided to take care of that and do a compression test to make sure everything is doing alright.
The timing was extremely far retarded to the point there was a huge lack of power. We fixed that.
210 on all 4 cylinders! A healthy motor for sure. I'm so glad because even in Vtec the motor does not burn oil. This was the goal!
The next step was fixing TPS. The sensor was damaged and needed to be replaced. I picked up a new one and spend a few hours calibrating it to the proper setting. Not very fun :p
With everything all finished up I decided to give it the first real drive i've been able to have. Everything seemed alright until I tried to hit vtec. It would not engage and a check engine appeared. The solenoid was causing a code. We busted out the Helms manual and started diagnosing by doing voltage tests. The solenoid and pressure switch appeared to be fine. So we began tracing the harness. It turned out the engine harness was fine, but the main dash harness had a split some where in the wiring. I made an external wire, wired directly to the solenoid and the problem was fixed! Huston, we have VTEC!
Last edited by Prudz_lude; Jan 30, 2013 at 08:35 PM.
Honda-Tech Member
Joined: Jun 2010
Posts: 484
Likes: 1
From: Toronto, Ontario

Thread Starter
Joined: Jun 2006
Posts: 2,721
Likes: 13
From: Vancouver Canada
Thanks, I'm a fan of them even though Konig is a ricer brand :p In the future i'll probably ball out and buy some BBS LM's or something legit. As for the tails, I wanted something that gave the car a more updated look. The OEM tails just look outdated and set the car back imo. In spring or sometime over this winter I'll pick up another set of JDM ITR 4x114.3 15 inch factory rims for the track. My city finally built a real race track so some ITR's and RE-11's should make for some fun.
Last edited by Prudz_lude; Jan 30, 2013 at 06:55 PM.
Thread Starter
Joined: Jun 2006
Posts: 2,721
Likes: 13
From: Vancouver Canada
So it's been a while since I put an update in here. Winter is cold, condo living isn't the same as having a garage It's been -30 degree Celsius the past couple days and of course Jan/Feb start to drive me crazy with the lack of summer. Also I ended up selling the Nitrous kit to a friend. He is going to throw it on his GSR swapped CRX next summer and I decided to go for boost next summer.
The plus of winter, parts collecting for spring haha. I've bought a ton of parts for spring. I also used a friends garage and we changed out a couple parts. We ended up changing out the oil pump, clutch, some seals and gaskets. It was a tiring two days (this was done a few months back). My tire guy wasn't able to mount my tires until late that Saturday afternoon. By the time they were mounted on the car it was almost 5 pm. So the night started very late and my friend Rhys and I wrenched away until 3:30am. At that point we were mostly done until a balance shaft decided to break. The nub that holds the gear on in the balance shaft pump snapped at only 10ft/lbs causing the entire timing, oil pump etc to have to come back off. I called another friend and he showed up with a fresh balance shaft in hand, which was very nice. I was kind of surprised he had one laying around. By 6pm the next night the car was finished, and I drove it home.
Most of you will be thinking the obvious, why weren't these issues taken care of the first time I had the motor out? Simple, I was rushing it, lack of funds due to moving to a new place and fully furnishing it blah blah blah. I should have spent the extra at the time but oh well. It all got addressed, that's the important part.
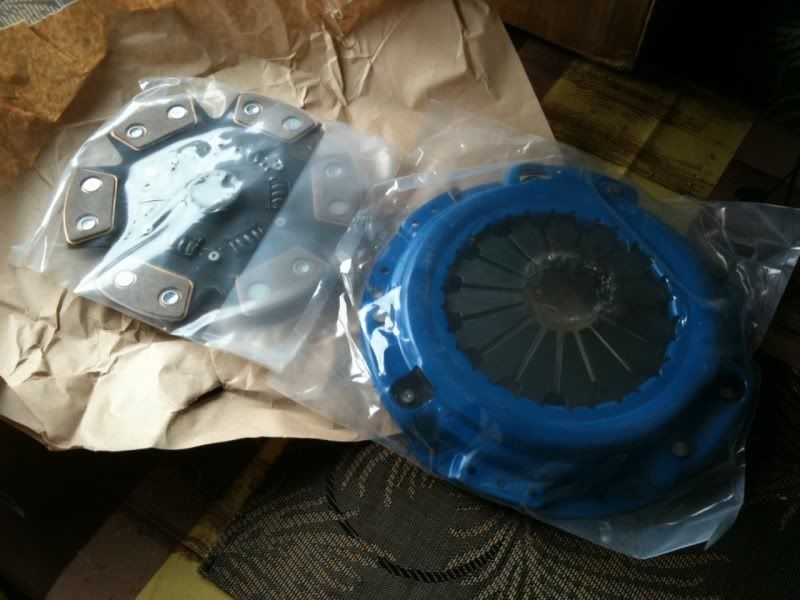
A few pictures of the parts being used. I ended up using a Koyo release bearing instead of the one provided.

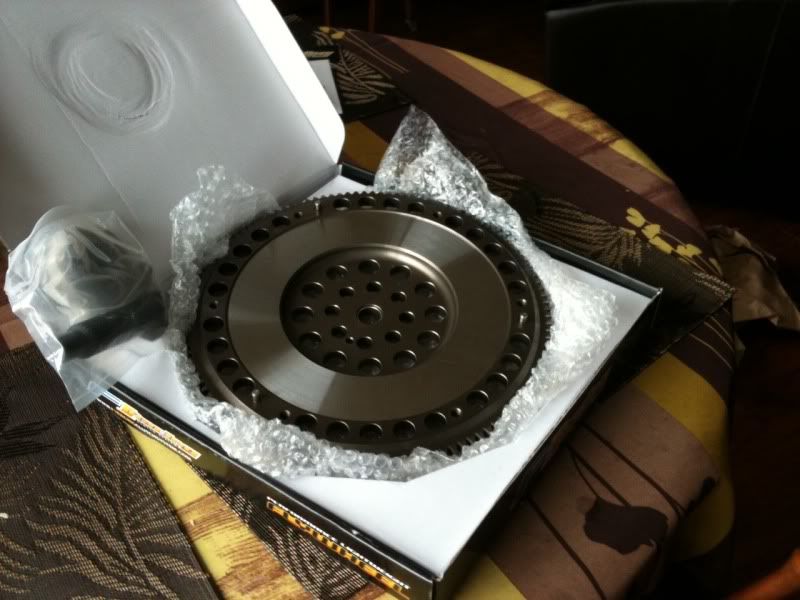
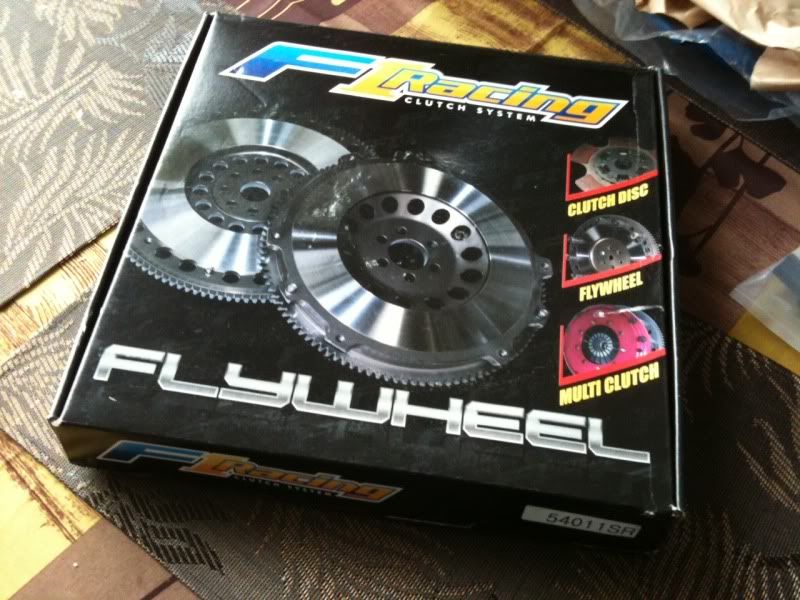
The flywheel is an 11lb flywheel. I found the 8lb ones drop a bit to quick in the revs and always cause the car to act as if it were going to stall. The 11lb eliminated that stall like drop, but allows it to rapidly drop and accelerate the perfect amount, imo anyway.
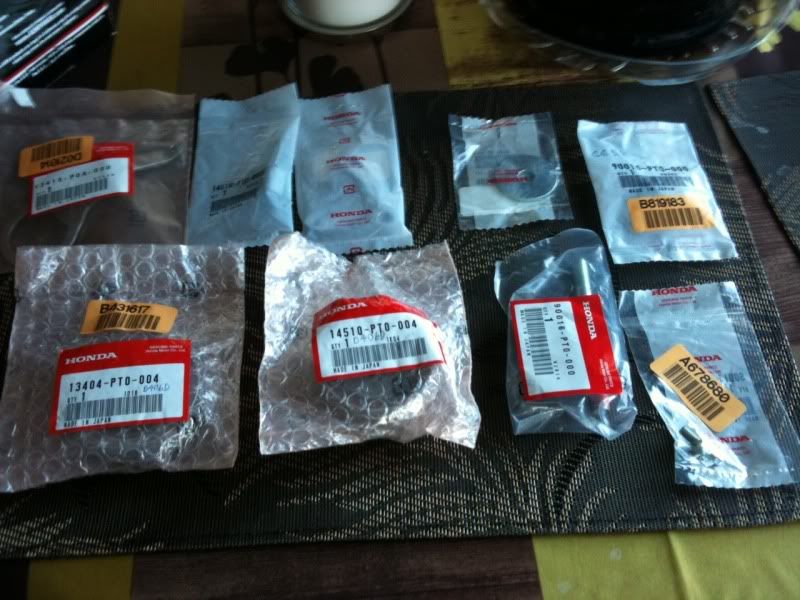
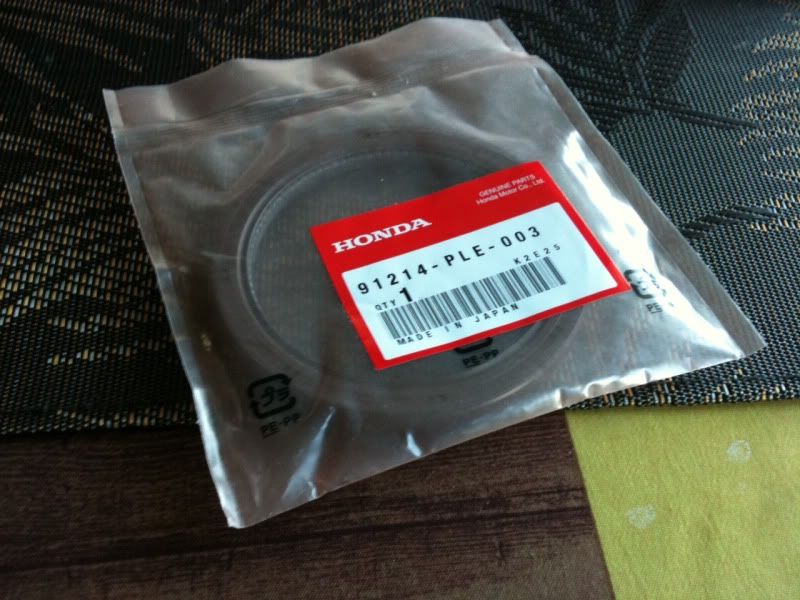
Fresh OEM goodies

First impressions of the flywheel and clutch, clutch is super grippy, pedal pressure is nice, flywheel is perfect. Didn't really bag it as my a/c system doesn't work and the window was super foggy, not to mention it is winter so I don't speed much on snow.
An all to common sight for this car...

It took less than an hour to have it out of the car


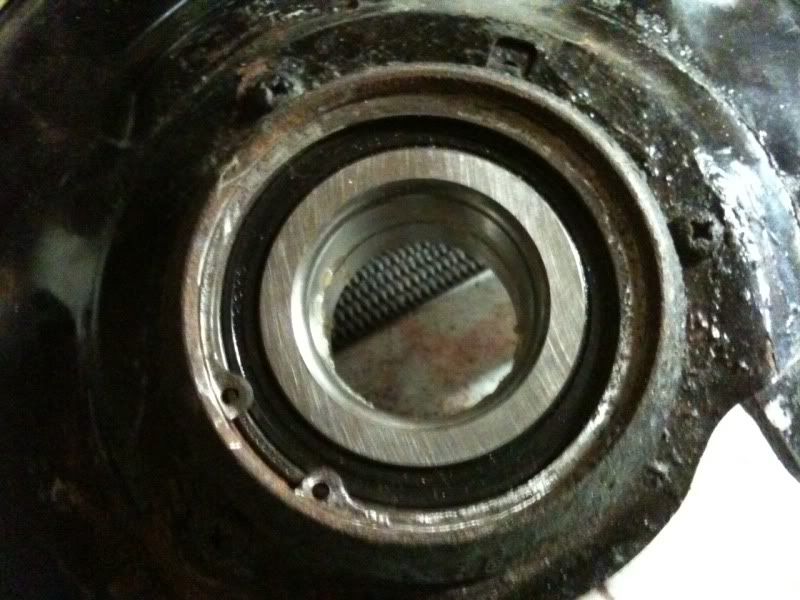
The reason it came out of the car was because the rear main seal was leaking, I suspected the oil pump was on its way out, the clutch install, and the oil pan was leaking a bit. I also wanted to replace the crank seals and balance shaft seal. Basically make sure this motor won't be giving me any **** for a long time. The timing assembly was switched to the H23 manual tensioner kit and I ditched the auto tensioner that is prone to failure.

Leaky rear main seal

New rear main

Gasket maker... yum

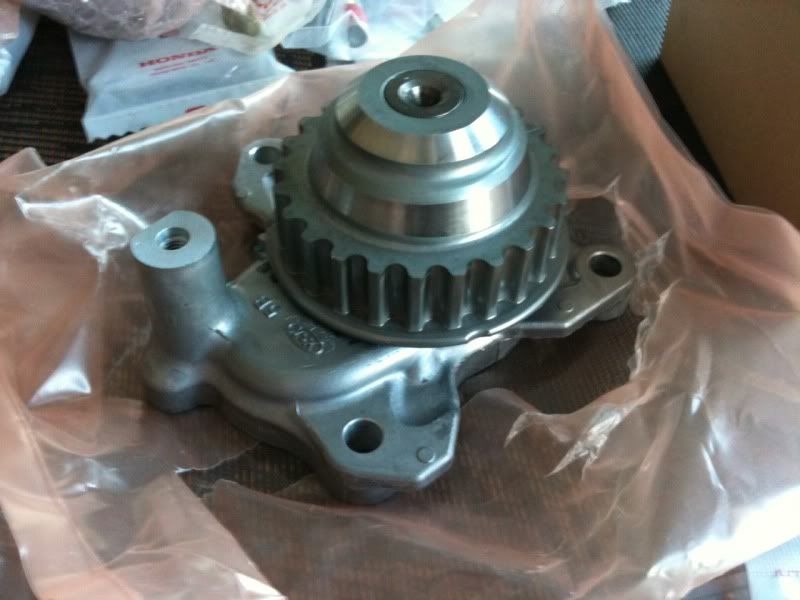
As I suspected the old pump was on it's way out. WAYYYYY out, the teeth on the pump gear were almost completely gone. I suspect another oil change and the motor would have failed.

And the new pump


After that was taken care of we did the clutch
Rear main installed

Flywheel


Getting there


And the motor going back in

Fluids added, finished.

It's been -30 degree Celsius the past couple days and of course Jan/Feb start to drive me crazy with the lack of summer. Also I ended up selling the Nitrous kit to a friend. He is going to throw it on his GSR swapped CRX next summer and I decided to go for boost next summer. The plus of winter, parts collecting for spring haha. I've bought a ton of parts for spring. I also used a friends garage and we changed out a couple parts. We ended up changing out the oil pump, clutch, some seals and gaskets. It was a tiring two days (this was done a few months back). My tire guy wasn't able to mount my tires until late that Saturday afternoon. By the time they were mounted on the car it was almost 5 pm. So the night started very late and my friend Rhys and I wrenched away until 3:30am. At that point we were mostly done until a balance shaft decided to break. The nub that holds the gear on in the balance shaft pump snapped at only 10ft/lbs causing the entire timing, oil pump etc to have to come back off. I called another friend and he showed up with a fresh balance shaft in hand, which was very nice. I was kind of surprised he had one laying around. By 6pm the next night the car was finished, and I drove it home.
Most of you will be thinking the obvious, why weren't these issues taken care of the first time I had the motor out? Simple, I was rushing it, lack of funds due to moving to a new place and fully furnishing it blah blah blah. I should have spent the extra at the time but oh well. It all got addressed, that's the important part.
A few pictures of the parts being used. I ended up using a Koyo release bearing instead of the one provided.
The flywheel is an 11lb flywheel. I found the 8lb ones drop a bit to quick in the revs and always cause the car to act as if it were going to stall. The 11lb eliminated that stall like drop, but allows it to rapidly drop and accelerate the perfect amount, imo anyway.
Fresh OEM goodies
First impressions of the flywheel and clutch, clutch is super grippy, pedal pressure is nice, flywheel is perfect. Didn't really bag it as my a/c system doesn't work and the window was super foggy, not to mention it is winter so I don't speed much on snow.
An all to common sight for this car...
It took less than an hour to have it out of the car
The reason it came out of the car was because the rear main seal was leaking, I suspected the oil pump was on its way out, the clutch install, and the oil pan was leaking a bit. I also wanted to replace the crank seals and balance shaft seal. Basically make sure this motor won't be giving me any **** for a long time. The timing assembly was switched to the H23 manual tensioner kit and I ditched the auto tensioner that is prone to failure.
Leaky rear main seal
New rear main
Gasket maker... yum
As I suspected the old pump was on it's way out. WAYYYYY out, the teeth on the pump gear were almost completely gone. I suspect another oil change and the motor would have failed.
And the new pump
After that was taken care of we did the clutch
Rear main installed
Flywheel
Getting there
And the motor going back in
Fluids added, finished.
Last edited by Prudz_lude; Jan 30, 2013 at 08:44 PM.
Thread Starter
Joined: Jun 2006
Posts: 2,721
Likes: 13
From: Vancouver Canada
Some may notice it is in winter mode. I raised the suspension to stock height, put the winter tires on the stock rims, put some rubber floor mats etc. Driving it from my condo to my friends garage I realized I did not want to destroy what I worked so hard on by trashing it in winter. So I am letting it collect dust now and creating a parts pile in my office.

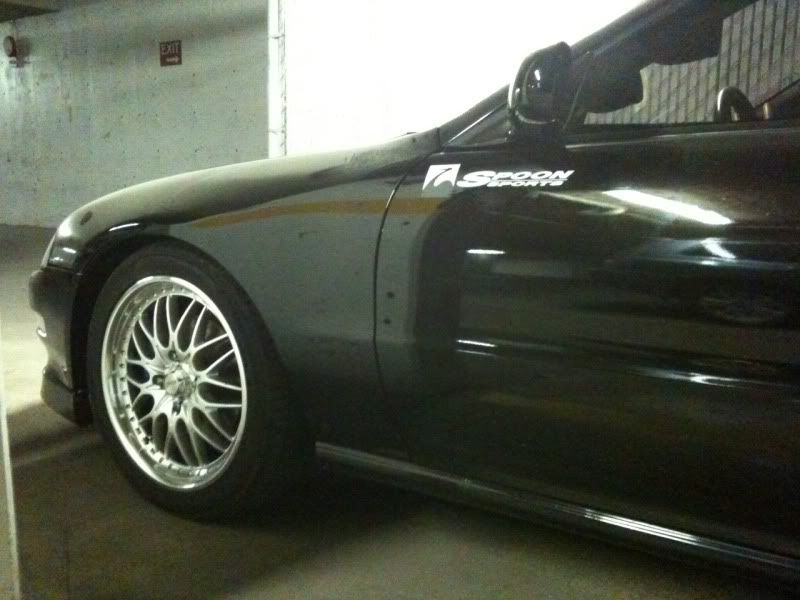
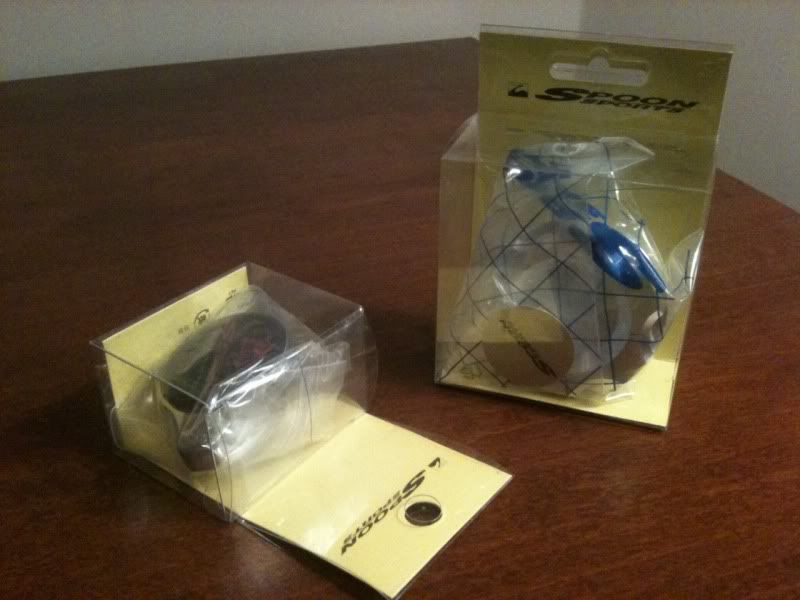
I also decided I am going to go with a Spoon Sports theme for the car. It's not everyday you see a 4th gen prelude with some spoon stuff. Truth is I really haven't seen any.
The first step was go buy some stickers like a ricer lol
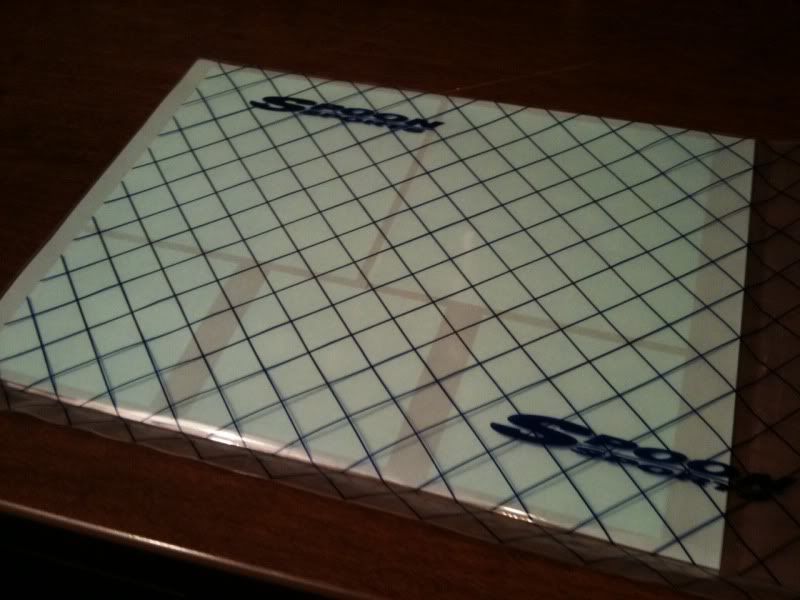


Finished

I also decided I am going to go with a Spoon Sports theme for the car. It's not everyday you see a 4th gen prelude with some spoon stuff. Truth is I really haven't seen any.
The first step was go buy some stickers like a ricer lol
Finished
Thread Starter
Joined: Jun 2006
Posts: 2,721
Likes: 13
From: Vancouver Canada
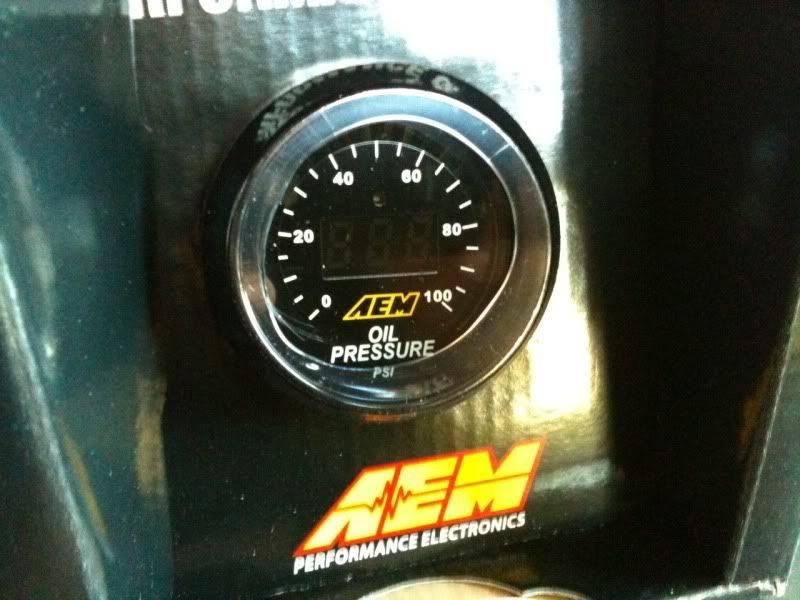
I also ditched my entire prosport gauge setup. the gauges created to much glare on the dash for my liking so I sold them all off and bought an AEM oil pressure gauge. I'm only going to be rocking the wideband and oil pressure gauge now. Of course that is only until I need a boost gauge 

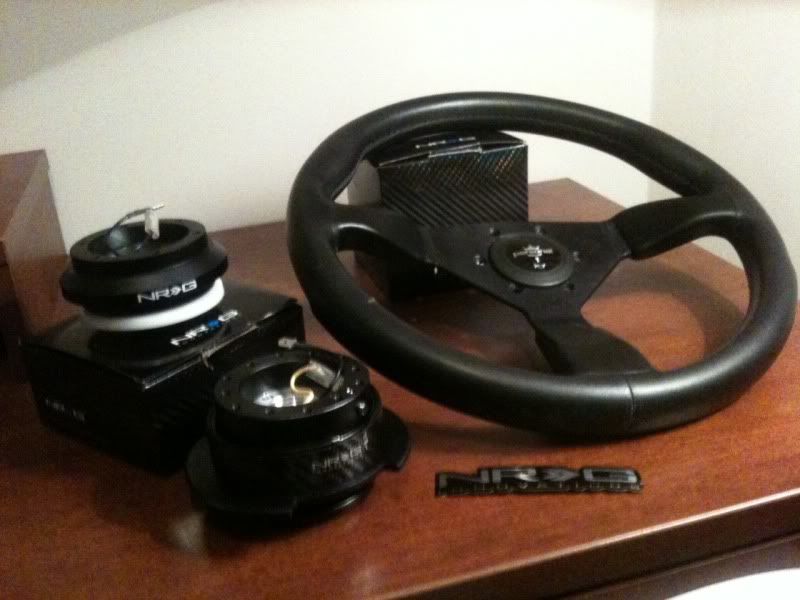
I also finally got the entire steering wheel setup finished. NRG hub, quick release, Personal wheel.

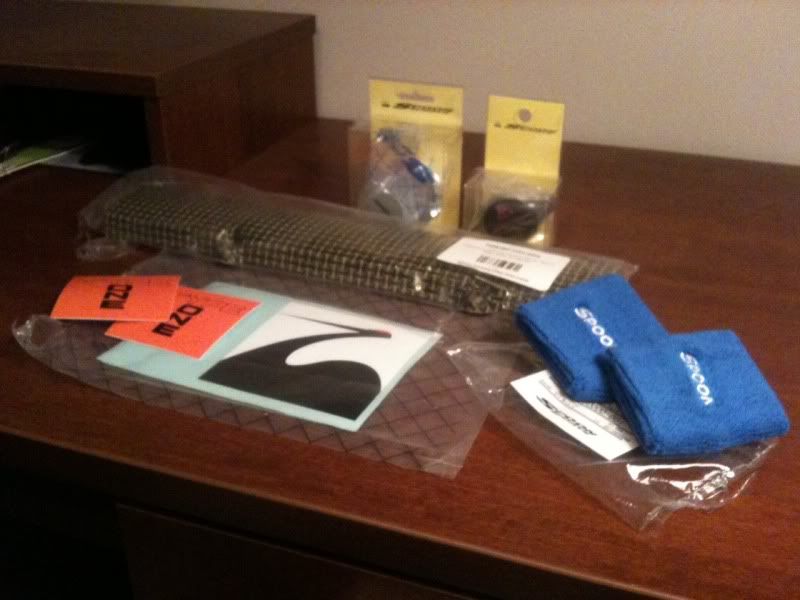
A couple goodies showing up (stickers already posted but w/e)
I was pretty chapped about the radiator cap. The seller told me it was real, turned out to be fake. The oil cap thankfully turned out to be real.
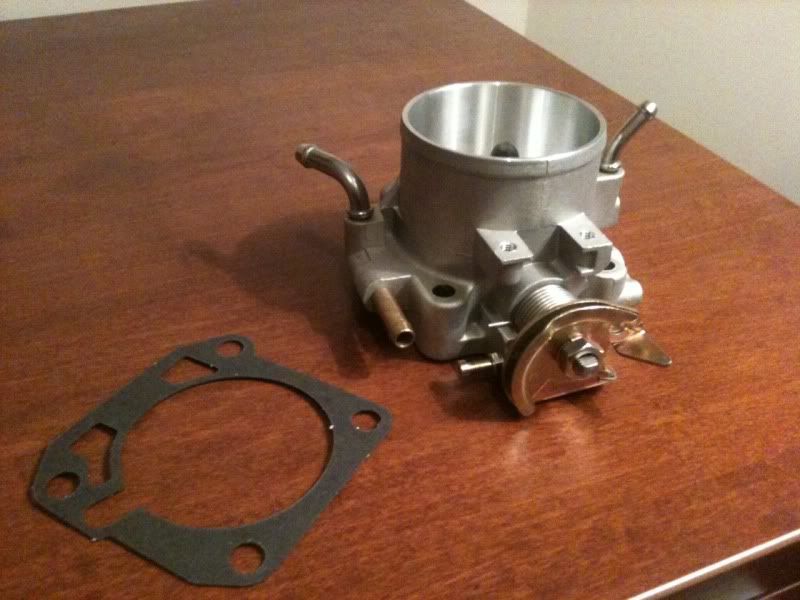
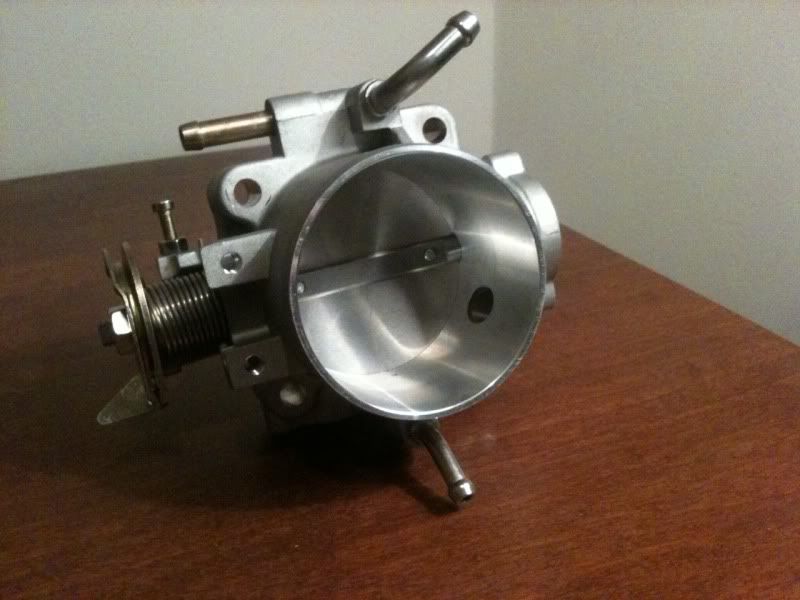
Omni 68mm TB
Seat brackets


Fuel rail washer (one went missing during my oil pump replacement)

Samco Rad hoses (took 3 months on back order to arrive)

I also finally got the entire steering wheel setup finished. NRG hub, quick release, Personal wheel.
A couple goodies showing up (stickers already posted but w/e)
I was pretty chapped about the radiator cap. The seller told me it was real, turned out to be fake. The oil cap thankfully turned out to be real.
Omni 68mm TB
Seat brackets
Fuel rail washer (one went missing during my oil pump replacement)
Samco Rad hoses (took 3 months on back order to arrive)
Thread Starter
Joined: Jun 2006
Posts: 2,721
Likes: 13
From: Vancouver Canada
I still had a small leak that I noticed while it has been sitting from the 97-01 oil pan so I caved and bought a new pan, gasket, and the proper flywheel cover from Honda. The oil pan just showed up today (have not taken a picture)

Oil pan gasket

And finally the last sensor required to have a completely cleared dash. No lights for me!

Got this for a steal from a buddy. Only $40! I've always hated the blind spot in the 4th gen ludes but this will fix it. The depth of view this mirror gives is unreal. I'm going to put an EK rear view mirror on my new windshield in spring and mount this to it since it doesn't fit the 4th gen rear view.


Oil pan gasket
And finally the last sensor required to have a completely cleared dash. No lights for me!
Got this for a steal from a buddy. Only $40! I've always hated the blind spot in the 4th gen ludes but this will fix it. The depth of view this mirror gives is unreal. I'm going to put an EK rear view mirror on my new windshield in spring and mount this to it since it doesn't fit the 4th gen rear view.
Last edited by Prudz_lude; Feb 21, 2013 at 07:26 PM.
Thread Starter
Joined: Jun 2006
Posts: 2,721
Likes: 13
From: Vancouver Canada
I finished up my valve cover last month. This was the biggest pain in my ***. I've painted tons of valve covers but the prep work I did on this one was so good I couldn't get the paint off lol. I tried aircraft stripped 3 times, normally it works 1st try and still nothing. I used a 0 degree pressure washer tip and nothing. I caved and had a friend bead blast it for me.
Round 1-3

Round 4 (pressure washer)

Finally caving


Lip chap works well for this


First coat

Scraping paint off the lettering

Looking pretty after 2 coats of paint, 2 coats of high heat clear.


Round 1-3
Round 4 (pressure washer)
Finally caving
Lip chap works well for this
First coat
Scraping paint off the lettering
Looking pretty after 2 coats of paint, 2 coats of high heat clear.